Télécharger Imprimer la page
Oregon Scientific BAR888RA Manuel De L'utilisateur

Oregon Scientific BAR888RA Manuel De L'utilisateur

Station météorologique sans fil avec horloge atomique à réglage automatique

Publicité

Les langues disponibles

Les langues disponibles

Liens rapides

All manuals and user guides at all-guides.com
Wireless Weather Forecaster with
Self-Setting Atomic Clock
Model: BAR888RA
User Manual
P/N: 086L003873-076 REV1
1/47

Publicité

loading

Sommaire des Matières pour Oregon Scientific BAR888RA

  • Page 1 All manuals and user guides at all-guides.com Wireless Weather Forecaster with Self-Setting Atomic Clock Model: BAR888RA User Manual P/N: 086L003873-076 REV1 1/47...
  • Page 2 Set Up Sensor - THR268 ........6 Clock ..............13 Set Up Sensor - THN122N ........6 Batteries ............... 13 Data Transmission ..........7 About Oregon Scientific ........13 Search for Sensor ..........7 FCC Statement ............14 Clock ................. 7 Declaration of Conformity ........15 Turn Atomic Clock ON / OFF .........
  • Page 3 Thank you for selecting the Oregon Scientific“ FRONT VIEW Wireless Weather Forecaster with Self-Setting Atomic Clock (BAR888RA). This device bundles precise time keeping, weather forecast, barmetric trend with altitude adjustment, and indoor and outdoor temperature features into a single tool you can use from the...
  • Page 4 All manuals and user guides at all-guides.com BACK VIEW REMOTE SENSOR (THR268) 1. Displays the current temperature monitored by the remote unit 2. LED indicator - flashes when the remote unit transmits a reading 1. °C/°F switch RESET 2. CHANNEL number °...
  • Page 5 All manuals and user guides at all-guides.com 1. Wall mount hole 2. RESET hole 3. CHANNEL number (1-3) 4. Battery compartment (Battery compartment cover not shown) Removable table Wall mount holder: stand: For standing Supports the remote the remote unit on a GETTING STARTED unit in wall mounting flat surface...
  • Page 6 All manuals and user guides at all-guides.com To mount the product on a wall, put the stand inside UNIT LOCATION the back of the unit and then place it on a wall, as shown Main Indoor Temperature Area below. Remote Outdoor Temperature Area CHANGE SETTINGS 1.
  • Page 7 All manuals and user guides at all-guides.com 4. Place the sensor near the main unit. Press RESET on the sensor. Then, press and hold MEMORY and CHANNEL on the main unit to initiate signal sending RESET RESET between the sensor and the main unit. The reception icon on the main unit will blink for approximately 3 minutes while it is searching for the sensor.
  • Page 8 All manuals and user guides at all-guides.com Place the sensor in a location with a clear view to SEARCH FOR SENSOR the sky, away from metallic or electronic objects. To search for a sensor, press and hold MEMORY and Position the sensor close to the main unit during CHANNEL for 2 seconds.
  • Page 9 All manuals and user guides at all-guides.com 2. Select the time zone, hour, minute, year, month, day, STRONG SIGNAL WEAK SIGNAL NO SIGNAL and language. Press to change the setting. Press MODE to confirm. NOTE The language options are (E) English, (F) French, (D) German, (I) Italian, and (S) Spanish.
  • Page 10 All manuals and user guides at all-guides.com ACTIVATE ALARM SET UNIT AND ALTITUDE Press to activate or deactivate the alarm. shows You can set the unit of measurement (mb/hPa or inHg) in the Clock / Alarm Area when the alarm is activated. and altitude.
  • Page 11 All manuals and user guides at all-guides.com To auto-scan between sensors, press and hold CHANNEL TEMPERATURE for 2 seconds. Each sensor s data will be displayed for 3 This product can display current, minimum, and seconds. To end auto-scan, press CHANNEL or maximum temperature information collected by the MEMORY.
  • Page 12 All manuals and user guides at all-guides.com Remove the batteries if storing this product for a RESET SYSTEM long period of time. The RESET button is located inside the main unit Do not scratch the LCD display. battery compartment. Press RESET when you change the batteries and whenever performance is not Do not make any changes or modifications to this behaving as expected (for example, unable to establish...
  • Page 13 All manuals and user guides at all-guides.com TROUBLESHOOTING SPECIFICATIONS Check here before contacting our customer service MAIN UNIT DIMENSIONS department. L x W x H 5.25 x 3.5 x 7.5 inches (133 x 89 x 191 mm) PROBLEM SYMPTOM REMEDY Calendar Strange date / Change language...
  • Page 14 ABOUT OREGON SCIENTIFIC REMOTE SENSORS Visit our website (www.oregonscientific.com) to learn RF frequency 433MHz more about Oregon Scientific products such as digital Range cameras; MP3 players; children s electronic learning THR268 98 feet (30 meters) products and games; projection clocks; health and fitness gear;...
  • Page 15 All manuals and user guides at all-guides.com For international inquiries, please visit: Reorient or relocate the receiving antenna. www2.oregonscientific.com/about/international.asp Increase the separation between the equipment and FCC STATEMENT receiver. Connect the equipment into an outlet on a circuit This device complies with Part 15 of the FCC Rules. different from that to which the receiver is connected.
  • Page 16 Please call our customer service number (listed on our website at www.oregonscientific.com), or on the warranty card for this product) for all inquiries instead. Name: Oregon Scientific, Inc. Address: 19861 SW 95th Ave., Tualatin, Oregon 97062 USA Telephone No.: 1-800-853-8883...
  • Page 17 Horloge ..............13 Transmission des données ........7 Piles ..............13 Recherche de capteur ..........7 À propos d’Oregon Scientific ......... 13 Horloge ..............7 Déclaration de la FCC ..........14 Activer/Désactiver l’horloge atomique ..... 8 Déclaration de conformité ........15 Régler l’horloge ............
  • Page 18 
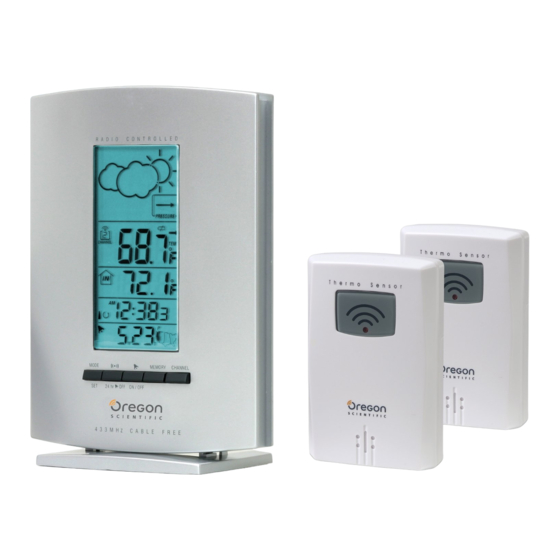
FACE AVANT Merci d’avoir choisi cette station météorologique sans fil avec horloge atomique à réglage automatique (modèle BAR888RA) d’Oregon Scientific™. Cet appareil combine les fonctions de chronométrage, de prévisions météorologiques, de variations barométriques, de réglage de l’altitude et de la tempéra- ture extérieure/intérieure en un seul outil pratique...
  • Page 19 All manuals and user guides at all-guides.com FACE ARRIÈRE CAPTEUR À DISTANCE (THR268) 1. Affiche la température actuelle relevée par l’appareil à distance 2. Indicateur DEL (clignote si l’appareil à distance transmet une donnée) 1. Bouton °C/°F 2. Bouton de chaînes (1 à 3) 1.
  • Page 20 All manuals and user guides at all-guides.com 1. Trou de fixation murale 2. Fente RESET (réinitialiser) 3. Bouton de chaînes (1 à 3) 4. Compartiment des piles (couvercle du compartiment non indiqué) Support de table Support de fixation amovible : permet de murale : permet de maintenir l’appareil AU COMMENCEMENT...
  • Page 21 All manuals and user guides at all-guides.com Pour fixer le produit sur un mur, repliez le support APPAREIL EMPLACEMENT à l’arrière de l’appareil puis fixez-le au mur comme Appareil principal Zone de température intérieure indiqué ci-dessous. Appareil à distance Zone de température extérieure CHANGEMENT DES RÉGLAGES 1.
  • Page 22 All manuals and user guides at all-guides.com 4. Placez le capteur à proximité de l’appareil principal. Appuyez sur RESET situé sur le capteur. Puis, appuyez et maintenez enfoncées les touches RESET RESET MEMORY et CHANNEL de l’appareil principal pour initier l’envoi du signal entre le capteur et l’appareil principal.
  • Page 23 All manuals and user guides at all-guides.com à l’appareil principal (intérieur), minimisant ainsi RECHERCHE DE CAPTEUR les obstructions comme les portes, les murs Pour rechercher un capteur, appuyez et maintenez ou les meubles. enfoncées les touches MEMORY et CHANNEL pendant •...
  • Page 24 All manuals and user guides at all-guides.com SIGNAL FORT SIGNAL FAIBLE PAS DE SIGNAL 1. Appuyez et maintenez enfoncée la touche MODE pendant deux secondes. La zone de l’horloge clignotera. 2. Sélectionnez le fuseau horaire, l’heure, les minutes, l’année, le jour, le mois et la langue. Appuyez sur Pour initier une recherche manuelle des signaux émis pour changer les réglages.
  • Page 25 All manuals and user guides at all-guides.com RÉGLER L’ALARME VARIATION BAROMÉTRIQUE 1. Appuyez sur (( • )) pour entrer dans l’affichage VARIATION DESCRIPTION de l’alarme. 2. Appuyez et maintenez une nouvelle fois enfoncée Augmentation la touche (( • )) pendant deux secondes. Les réglages de l’alarme clignoteront.
  • Page 26 All manuals and user guides at all-guides.com SÉLECTIONNER LE NUMÉRO DES CHAÎNES PRÉVISION MÉTÉO Appuyez sur CHANNEL pour alterner entre les Ce produit prévoit les conditions météorologiques pour capteurs 1 à 3. les 12 à 24 heures à venir, dans un périmètre de 30 à...
  • Page 27 All manuals and user guides at all-guides.com REMARQUE Si vous appuyez sur RESET, tous les CYCLE LUNAIRE réglages reviendront aux valeurs par défaut et vous Cette fonction sera disponible si vous réglez le calendrier. perdrez toutes les données enregistrées. Appuyez sur pour visualiser le cycle lunaire des jours précédents ou des jours suivants.
  • Page 28 All manuals and user guides at all-guides.com Ne pas modifier ou vouloir effectuer des changements CARACTÉRISTIQUES au produit. Les changements non autorisés annuleront votre droit d’utilisation. Les caractéristiques techniques DIMENSIONS DE L’APPAREIL PRINCIPAL de ce produit et le contenu de ce manuel peuvent être Long.
  • Page 29 En consultant notre site internet (www.oregonscientific.fr), vous pourrez obtenir des informations sur les produits Numéro des chaînes 1 à 3 Oregon Scientific : photo numérique; lecteurs MP3; produits et jeux électroniques éducatifs; réveils; sport et HORLOGE bien-être; stations météo; téléphonie. Le site indique...
  • Page 30 REMARQUE Cet équipement a été testé et se dont vous avez besoin sur notre site, néanmoins, si vous conforme aux limites d’un appareil numérique de souhaitez contacter le service client Oregon Scientific catégorie B, conformément à la partie 15 des règles directement, allez sur le site : de la FCC.
  • Page 31 Adresse : 19861 SW 95th Ave., Tualatin, Oregon 97062 USA No de téléphone : 1-800-853-8883 déclarons que le produit Numéro du produit : BAR888RA Nom du produit : Prévisionniste météorologique sans fil avec baromètre et thermomètre à distance Fabricant :...
  • Page 32 Reloj ..............13 Configuración del sensor-THN122N ...... 6 Encendido ............13 Transmisión de datos ..........7 Acerca de Oregon Scientific ......... 13 Buscar sensor ............7 Declaración de la FCC ........... 14 Reloj ................7 Declaración de conformidad ........ 15 ENCENDIDO/APAGADO del reloj atómico ....
  • Page 33 INTRODUCCION DESCRIPCION GENERAL DEL PRODUCTO VISTA FRONTAL Gracias por elegir el pronosticador meteorológico inalámbrico Oregon Scientific™ con reloj atómico de configuración automática (BAR888RA). Este dispositivo ofrece mantenimiento de hora exacta, pronóstico del tiempo, tendencia barométrica con ajuste de altitud y funciones de temperatura exterior e interior en una única herramienta que puede usar desde la...
  • Page 34 All manuals and user guides at all-guides.com VISTA POSTERIOR SENSOR REMOTO (THR268) 1. Muestra la temperatura actual registrada por la unidad remota 2. Indicador LED - Parpadea cuando la unidad remota transmite un registro 1. Interruptor ºC / ºF RESET 2.
  • Page 35 All manuals and user guides at all-guides.com 1. Orificio para montaje en la pared 2. Orificio RESTABLECER 3. Número de canal (1-3) 4. Compartimiento de las baterías (La cubierta del compartimiento de las baterías no se muestra) Soporte para montaje Soporte de mesa enpared: Permite montar extraíble:Para colocar...
  • Page 36 All manuals and user guides at all-guides.com colóquela en una pared, como se muestra a UNIDAD UBICACION continuación. Principal Area de temperatura interior Remota Area de temperatura exterior CAMBIAR CONFIGURACION 1. Presione y mantenga presionado MODO durante 2 segundos para ingresar al modo de configuración. 2.
  • Page 37 All manuals and user guides at all-guides.com 3. Configure el canal. El interruptor está ubicado en el compartimiento de las baterías. RESET RESET 4. Coloque el sensor cerca de la unidad principal. Presione RESTABLECER en el sensor. A continuación, presione y mantenga presionado MEMORIA y CANAL en la unidad principal para iniciar el envío de señales entre el sensor y la unidad principal.
  • Page 38 All manuals and user guides at all-guides.com • Coloque el sensor de modo que esté frente a la BUSCAR SENSOR unidad principal (interior) de modo que se minimicen Para buscar un sensor, presione y mantenga obstrucciones como puertas, muros y muebles. presionado MEMORIA y CANAL durante 2 segundos.
  • Page 39 All manuals and user guides at all-guides.com 1. Presione MODO durante 2 segundos. El área de SEÑAL FUERTE SEÑAL DEBIL SIN SEÑAL reloj parpadeará. 2. Seleccione la zona horaria, la hora, los minutos, el año, el mes,el día y el idioma. Presione para cambiar la configuración.
  • Page 40 All manuals and user guides at all-guides.com ACTIVACION DE LA ALARMA CONFIGURACION DE LA UNIDAD Y LA ALTITUD Presione para activar o desactivar la alarma. Puede configurar la unidad de medida (mb o inHg) y aparece en el área del reloj/alarma cuando la alarma altitud.
  • Page 41 All manuals and user guides at all-guides.com Para explorar automáticamente los sensores, presione y TEMPERATURA mantenga presionado CANAL durante 2 segundos. Los datos Este producto puede mostrar la temperatura actual, de cada sensor se mostrarán durante 3 segundos. Para máxima y mínima obtenida por los sensores remotos y finalizar la exploración automática, presione CANAL la unidad principal (interior).
  • Page 42 All manuals and user guides at all-guides.com • No toque los componentes internos. RESTABLECER SISTEMA • No mezcle pilas nuevas con usadas. No mezcle El botón RESTABLECER se encuentra detrás del panel pilas alcalinas, estándar (carbón-cinc), o frontal de botones para la unidad principal. Presione recargables (níquel-cadmio).
  • Page 43 All manuals and user guides at all-guides.com ESPECIFICACIONES SOLUCION DE PROBLEMAS Verifique aquí antes de comunicarse con nuestro departamento DIMENSIONES DE LA UNIDAD PRINCIPAL de atención al cliente (consulte la sección Acerca de Oregon L x A x H 5.25 x 3.5 x 7.5 pulg. Scientific para obtener detalles de contacto).
  • Page 44 SENSORS REMOTO Visite nuestro sitio web (www.oregonscientific.com) Frecuencia de RF 433MHz para obtener más información sobre los productos de Oregon Scientific, tales como cámaras digitales, Rango reproductores de MP3, productos y juegos de THR268 98 pies (30 metros) aprendizaje electrónicos para niños; relojes de...
  • Page 45 All manuals and user guides at all-guides.com stante, no se garantiza que no se producirán Llame al 1-800-853-8883. interferencias en una instalación en particular. Si este equipo provoca interferencia perjudicial en la recepción Para consultas internacionales, visite: de señales de radio o televisión, hecho que puede www2.oregonscientific.com/about/international.asp determinarse al encender o apagar el equipo, se recomienda que el usuario intente corregir la...
  • Page 46 Oregon Scientific, Inc. Dirección: 19861 SW 95th Ave., Tualatin, Oregon 97062 Estados Unidos Número de teléfono: 1-800-853-8883 declaramos que el producto Número de producto: BAR888RA Nombre del producto: Barómetro con termómetro remoto Fabricante: IDT Technology Limited Dirección: Block C, 9/F, Kaiser Estate, Phase 1, 41 Man Yue St.,...
  • Page 47 All manuals and user guides at all-guides.com © 2006 Oregon Scientific. All rights reserved. 086L003873-076 P/N: 086L003873-076 REV1 47/47...