Télécharger Imprimer la page

Publicité

Les langues disponibles

Les langues disponibles

Liens rapides

U PUTE ZA UGRADNJU I UPORABU
SADRŽAJ
UVOD
SIGURNOSNE NAPOMENE
UGRADNJA (NA ZID/VANJSKA VENTILACIJA)
UGRADNJA (UNUTARNJA VENTILACIJA)
OPIS DIJELOVA
RUKOVANJE
ČIŠĆENJE I ODRŽAVANJE
UKLANJANJE MANJIH PROBLEMA U RADU
TEHNIČKI PODACI
SUKLADNOST S DIREKTIVAMA
ZAŠTITA OKOLIŠA
1
All manuals and user guides at all-guides.com
2
2
5
9
10
11
10
11
12
12
12

Publicité

loading

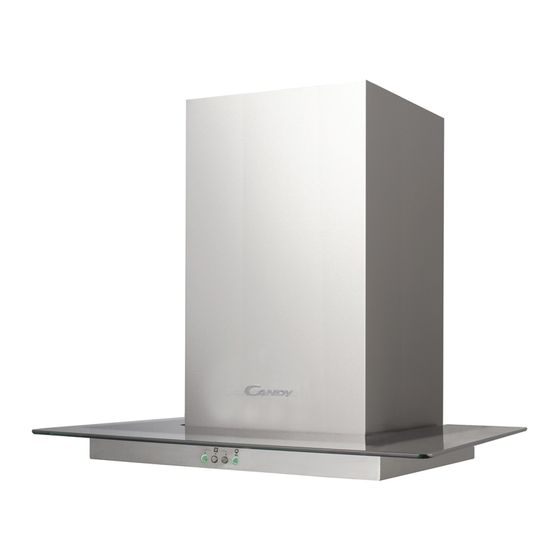
Sommaire des Matières pour Candy CVM670LX

  • Page 1 All manuals and user guides at all-guides.com U PUTE ZA UGRADNJU I UPORABU SADRŽAJ UVOD SIGURNOSNE NAPOMENE UGRADNJA (NA ZID/VANJSKA VENTILACIJA) UGRADNJA (UNUTARNJA VENTILACIJA) OPIS DIJELOVA RUKOVANJE ČIŠĆENJE I ODRŽAVANJE UKLANJANJE MANJIH PROBLEMA U RADU TEHNIČKI PODACI SUKLADNOST S DIREKTIVAMA ZAŠTITA OKOLIŠA...
  • Page 2 All manuals and user guides at all-guides.com UVOD Zahvaljujemo na odabiru Candy kuhinjske nape. Ovaj priručnik osmišljen je kako bi Vam bile pružene sve potrebne upute koje se odnose na ugradnju, uporabu i održavanje ureñaja. Da ureñaj koristite ispravno i sigurno, prije ugradnje i uporabe pažljivo pročitajte ove upute.
  • Page 3 All manuals and user guides at all-guides.com UPOZORENJE: opasnost od električnog udara Kuhinjska napa mora biti spojena na ispravno uzemljenu  električnu instalaciju. Ako niste sigurni u ispravnost uzemljenja, potražite savjet kvalificiranog stručnjaka.  Nepoštivanje ovih uputa može razultirati smrću, električnim udarom ili požarom.
  • Page 4 All manuals and user guides at all-guides.com Standardni dijelovi za ugradnju opis slika kom. tijelo nape vanjski plašt 500mm unutarnji plašt 500mm nosač plašteva element za spajanje plašteva nosač nape "tiple" Ø 8x60 bijele boje vijci 4.0×30 mm vijci 4.0×8 mm...
  • Page 5 All manuals and user guides at all-guides.com UGRADNJA (ugradnja na zid/vanjska ventilacija) Ako imate osiguran odvod prema van, kuhinjsku napu možete spojiti kako je prikazano na donjoj slici i to pomoću ispušne cijevi (emajlirane, aluminijske, savitljive ili od drugog nezapaljivog materijala) unutarnjeg promjera od 150 mm. Prije ugradnje, isključite ureñaj i odspojite iz električne mreže.
  • Page 6 All manuals and user guides at all-guides.com Podignite napu i objesite je na zidni nosač pomoću kuke. kuka zidni nosač Učvrstite nepovratni ventil na otvor za izlaz zraka na napi. Zatim, spojite ispušnu cijev na nepovratni ventil kako je prikazano na donjoj slici.
  • Page 7 All manuals and user guides at all-guides.com Postavite stakleni dio u odgovarajući položaj u podnožju kuhinjske nape. Učvrstite s 4 vijka i brtvama. Da se izbjegne pucanje stakla, ne stežite vijke previše čvrsto. Postavite unutarnji plašt nape u vanjski plašt nape. Zatim klizno povucite unutarnji plašt prema gore i podesite na potrebnu visinu.
  • Page 8 All manuals and user guides at all-guides.com Izbušite u zidu dvije rupice od 8mm za nosač plašteva. Učvrstite nosač plašteva na zid pomoću isporučenih "tipli" i vijaka. ii. Postavite plašteve na napu i učvrstite ih na bočne strane nosača pomoću dva isporučena vijka. nosač...
  • Page 9 All manuals and user guides at all-guides.com UGRADNJA (UNUTARNJA VENTILACIJA) Ako nemate osiguran odvod prema van, ispušna cijev nije potrebna a ugradnja nape je slična kao u poglavlju “UGRADNJA (ugradnja na zid/vanjska ventilacija)”. Razlika je samo u filteru. Pri unutarnjoj ventilaciji, za filtriranje dima i para koristi se aktivni ugljeni filter. Prije ugradnje aktivnog ugljenog filtera, prvo uklonite filter za masnoću.
  • Page 10 All manuals and user guides at all-guides.com OPIS DIJELOVA KUHINJSKE NAPE RADNE TIPKE Tipka za malu brzinu Koristi se za ventilaciju kuhinje. Mala brzina nape pogodna je kada se hrana pirja i za kuhanje pri kojem se ne stvara previše pare. Tipka za srednju brzinu Protok zraka srednjom brzinom idealan je za uobičajene vrste kuhanja.
  • Page 11 All manuals and user guides at all-guides.com ČIŠĆENJE I ODRŽAVANJE Prije čišćenja, isključite ureñaj i odspojite ga iz električne mreže.. I. Uobičajeno čišćenje Za uobičajeno čišćenje nape koristite mekanu krpu/spužvu, mlaku vodu i kućni detrdžent. Za čišćenje nape nikada nemojte koristiti žičane spužve ili četke, jaka kemijska sredstva, abrazivna sredstva (vim) ili sredstva na bazi otapala.
  • Page 12 All manuals and user guides at all-guides.com kao i originalne. Ponovno spojite žičane vodove. Ponovno namjestite stakleni dio i učvrstite ga vijcima. Pazite da su vijci potpuno zavinuti. UKLANJANJE MANJIH PROBLEMA U RADU PROBLEM UZROK RJEŠENJE Svjetlo je Lopatica ventilatora je Isključite ureñaj i obratite se uključeno ali zaglavljena.
  • Page 13 All manuals and user guides at all-guides.com Vrlo je važno da u kontaktu sa ovlaštenim servisom navedete serijski broj vašeg ureñaja (to je broj od 16 znakova koji počinje s brojem 3) a možete ga pronaći na naljepnici/pločici s tehničkim podacima koja se nalazi na ureñaju.
  • Page 14 All manuals and user guides at all-guides.com NÁVOD K POUŽITÍ A INSTALACI Obsah Úvod. Bezpečnostní upozornění Seznam standardního instalačního příslušenství Instalace (montáž na stěnu) Instalace (verze s cirkulací vzduchu) Obsluha Údržba Odstranění možných problémů Servis Sériové číslo výrobku. Kde jej najdu?
  • Page 15 All manuals and user guides at all-guides.com Úvod Děkujeme za volbu tohoto odsavače. Tento návod k použití je navržený pro poskytnutí všech potřebných pokynů k instalaci, použití a údržbě spotřebiče. Pro správnou a bezpečnou obsluhu spotřebiče si přečtěte tyto pokyny před instalací a použitím.
  • Page 16 All manuals and user guides at all-guides.com pokud nejsou pod dohledem nebo nebyly poučené o použití osobou odpovědnou za jejich bezpečnost. Nedovolte dětem hrát si se spotřebičem. Pod odsavačem neflambujte. Odsavač není určený pro instalaci nad varnou desku s více než čtyři hořáky.
  • Page 17 All manuals and user guides at all-guides.com Seznam standardního instalačního příslušenství Popis Obrázek Množství. Kryt Horní kryt komínu 500 Spodní kryt komínu Držák spodního krytu Držák horního krytu Závěsný držák φ8 hmoždinky φ8×φ6 bílé Šrouby ST4.0×30 φ7.2 šrouby ST4.0×8...
  • Page 18 All manuals and user guides at all-guides.com Instalace (montáž na stěnu) Pokud máte vývod venku, odsavač můžete připojit podle obrázku níže pomocí odtahového potrubí (smalt, hliník, flexibilní hadice nebo nehořlavý materiál s vnitřním průměrem 150 mm). 1. Před instalací odsavač vypněte a odpojte od síťové zásuvky. Odsavač...
  • Page 19 All manuals and user guides at all-guides.com 4. Pověste odsavač na držák na stěně...
  • Page 20 All manuals and user guides at all-guides.com 5. Připevněte jednocestný ventil k výstupu vzduchu odsavače. Poté Umístěte sklo do příslušné pozice na horní stranu odsavače. ii. Připevněte 4 šrouby a podložkami. Abyste zabránili prasknutí skla, neutahujte šrouby příliš. te na i.
  • Page 21 All manuals and user guides at all-guides.com 6. požadovanou výšku ii. Vysunutím krytu nastavte výšku odsavače. Po dosažení požadované výšky připevněte upevňovací otvor šrouby podle obrázku.
  • Page 22 All manuals and user guides at all-guides.com i. Vyvrtejte 2 x 8 mm otvory pro upevnění držáku II. Našroubujte a utáhněte držák II na stěnu pomocí dvou dodaných šroubů. ii. Nasaďte sestavený kryt komínu na jednotku a upevněte 2 šrouby.
  • Page 23 All manuals and user guides at all-guides.com Instalace (verze s cirkulací vzduchu) Pokud nemáte výstup vzduchu do exteriéru, není nutné odtahové potrubí a instalace je podobná jako v části „Instalace (instalace na stěnu)“. K zachycení výparů se používá uhlíkový filtr. K instalaci aktivního uhlíkového filtru musíte nejdříve vyjmout tukový...
  • Page 24 All manuals and user guides at all-guides.com Popis komponentů Obsluha Tlačítko nízkého výkonu Slouží k větrání kuchyně. Vhodný pro mírné vaření s malým množstvím páry. tlačítko středního výkonu Ideální odsávání vzduchu pro standardní vaření. Tlačítko vysokého výkonu V případě vysoké intenzity páry zvolte tento výkon pro nejvyšší účinek odsavače.
  • Page 25 All manuals and user guides at all-guides.com II. Měsíční čištění tukových filtrů DŮLEŽITÉ: čistěním filtrů každý měsíc zabráníte riziku vzniku požáru.Filtr zachycuje tuk, kouř a prach…... proto filtr přímo ovlivňuje efektivnost odsavače. Pokud jej nevyčistíte, zbytky tuku (hořlavé) se zachytí na filtru. Vyčistěte jej běžným mycím prostředkem na nádobí. III.
  • Page 26 All manuals and user guides at all-guides.com Odstranění možných problémů Servis Pokud nemůžete zjistit příčinu závady, spotřebič vypněte a ontaktujte servisní středisko. Sériové číslo výrobku. Kde jej najdu? Je důležité sdělit servisnímu středisku kód výrobku a sériové číslo (16 znakový kód začínající číslicí 3); můžete jej najít na záručním listě...
  • Page 27 All manuals and user guides at all-guides.com Informace pro uživatele k likvidaci elektrických a elektronických zařízení (domácnosti) Tento symbol na produktech anebo v průvodních dokumentech znamená, že použité elektrické a elektronické výrobky nesmí být přidány do běžného komunálního odpadu.Ke správné likvidaci, obnově...
  • Page 28 All manuals and user guides at all-guides.com INSTALLATION AND USER’S MANUAL CONTENT INTRODUCTION SAFETY PRECAUTION SPECIFICATION INSTALLATION (VENT OUTSIDE) INSTALLATION (VENT INSIDE) DESCRIPTION OF COMPONENTS OPERATION MAINTENANCE TROBULESHOOTING CONFORMITY WITH DIRECTIVES ENVIRONMENTAL PROTECTION...
  • Page 29 All manuals and user guides at all-guides.com INTRODUCTION Thank you for choosing this cooker hood. This instruction manual is designed to provide you with all required instructions related to the installation, use and maintenance of the appliance. In order to operate the unit correctly and safety, please read this instruction manual carefully before installation and usage.
  • Page 30 All manuals and user guides at all-guides.com Electrical Shock Hazard Only plug this unit into a properly earthed outlet. If in doubt seek  advice from a suitably qualified engineer.  Failure to follow these instructions can result in death, fire, or electrical shock.
  • Page 31 All manuals and user guides at all-guides.com Standard Installation Accessories List Spec. Illustration Picture Casing Upper Chimney 500mm Lower Chimney 500mm Lower chimney bracket Upper chimney bracket Hanging Board φ8 rawl plugs φ8×φ6 white color Screws ST4.0×30 φ7.2screws ST4.0×8...
  • Page 32 All manuals and user guides at all-guides.com INSTALLATION ( ( ( ( wall mounting) ) ) ) If you have an outlet to the outside, your cooker hood can be connected as below picture by means of an extraction duct (enamel, aluminum, flexible pipe or inflammable material with an interior diameter of 150mm) Before installation, turn the unit off and unplug it from the outlet.
  • Page 33 All manuals and user guides at all-guides.com Leave up the cooker hood and hang onto the wall bracket hook. Cooker hook Wall bracket Fix the one-way-valve to the air outlet of the cooker hood. Then, attached the exhaust pipe onto the one-way-valve as shown below. Exhaust pipe Cooker hood...
  • Page 34 All manuals and user guides at all-guides.com Place the glass in appropriate position on the top the cooker hood. Fix with 4 screws and washer. In order to avoid the glass cracking, please do not tighten the screws too strongly. By Put the inner chimney into outer chimney .Then pulling out the inner chimney upwards.
  • Page 35 All manuals and user guides at all-guides.com Drill 2 x 8mm holes to accommodate the plate II. Screw and tighten the plate II onto the wall with 2 screws provided. Assembly the chimney onto the unit and fix it with 2 screws. Plate II Screw 4mm x 8mm...
  • Page 36 All manuals and user guides at all-guides.com INSTALLATION (VENT INSIDE) If you do not have an outlet to the outside, exhaust pipe is not required and the installation is similar to the one show in section “INSTALLATION (VENT OUTSIDE)”. Activated carbon filter can be used to trap odors. In order to install the activated carbon filter, the grease filter should be detached first.
  • Page 37 All manuals and user guides at all-guides.com DESCRIPTION OF COMPONENTS OPERATION Low Speed button It’s used for Ventilation on the kitchen. It is suitable for simmering and cooking which do not make much steam. Medium Speed button Airflow speed is ideally for ventilation in standard cooking operation. High Speed button When high density of smoke or steam produced, press high-speed button for highest effective ventilation.
  • Page 38 All manuals and user guides at all-guides.com MAINTENANCE Before cleaning switch the unit off and pull out the plug. I. Regular Cleaning Use a soft cloth moistened with hand-warm mildly soapy water or household cleaning detergent. Never use metal pads, chemical, abrasive material or stiff brush to clean the unit.
  • Page 39 All manuals and user guides at all-guides.com Refit the hood glass and fasten the glass screws. Make sure the screws are fully tightened. TROBULESHOOTING Fault Cause Solution Light on, but The fan blade is Switch off the unit and repair by fan does not jammed.
  • Page 40 All manuals and user guides at all-guides.com ENVIRONMENTAL PROTECTION Waste electrical products should not be disposed of with household waste. Please recycle where facilities exist. Check with your Local Authority or retailer for recycling advice. This appliance is marked according to the European directive 2002/96/EC on Waste Electrical and Electronic Equipment (WEEE).
  • Page 41 All manuals and user guides at all-guides.com NOTICE D’INSTALLATION ET D’UTILISATION Sommaire INTRODUCTION Conseils pour la sécurité Cahier des charges Installation (Evacuation) Installation (Recyclage) Description des composants Fonctionnement Entretien Dépannage Service après ventes Protection de l’environnement...
  • Page 42 All manuals and user guides at all-guides.com Introduction Merci d‘avoir choisi cette hotte. Ce manuel d'instructions est conçu pour vous fournir toutes les instructions requises relatives à l'installation, l'utilisation et l'entretien de l'appareil. Afin de faire fonctionner l'appareil correctement et en toute sécurité, merci de lire attentivement ce manuel avant l'installation et l'utilisation.
  • Page 43 All manuals and user guides at all-guides.com • Les enfants doivent être surveillés pour s'assurer qu'ils ne jouent pas avec l'appareil. • Ne pas faire flamber sous la hotte • La hotte n'est pas destinée à être installé au-dessus d’une plaque de cuisson ayant plus de quatre foyers de cuisson Risque de choc électrique •...
  • Page 44 All manuals and user guides at all-guides.com Liste d’accessoires pour l’installation Caractérisriques Visuels Base Cheminée haute Cheminée basse Support de la cheminée basse Support de la cheminée haute Fixation murale φ8 chevilles φ8×φ6 blanches ST4.0×30 φ7.2 Vis ST4.0×8...
  • Page 45 All manuals and user guides at all-guides.com Installation (évacuation externe) Si vous avez une évacuation vers l’extérieur, la hotte pourra être installée comme suit au moyen d’un conduit d’extraction (émail, aluminium, tuyau flexible et non inflammable avec un diamètre intérieur de 150mm). 1.
  • Page 46 All manuals and user guides at all-guides.com 4. Soulever la hotte et fixer la sur la fixation murale Hotte Fixationl mural 5. Fixer le clapet anti-retour pour la sortie d'air de la hotte. Puis, le tuyau d'échappement est à fixer sur le clapet anti retour comme indiqué ci-dessous Tuyau d’évacuation Hotte...
  • Page 47 All manuals and user guides at all-guides.com i Placer correctement le verre sur le dessus de la hotte ii Fixer les 4 vis avec la rondelle. Afin d'éviter que le verre se fissure, il est recommandé de ne pas serrer les vis trop fortement. i Mettre la cheminée intérieur dans la cheminée extérieur.
  • Page 48 All manuals and user guides at all-guides.com 1.Percez deux trous de 8mm pour fixer le support n°2. Vissez et maintenez le support sur le mur à l’aide de deux visses adaptées. 2. Assemblez la hotte sur le support et fixez-la avec deux visses. Support II Visse 4mm x 8mm...
  • Page 49 All manuals and user guides at all-guides.com Installation (En recyclage) Installation (En recyclage) Si vous n’avez pas de sortie vers l’extérieur, le tuyau d’évacuation n’est pas nécessaire et l’installation est identique à celle expliquée dans la section « Installation en évacuation externe » Les filtres à...
  • Page 50 All manuals and user guides at all-guides.com NOTE : Assurez-vous que le filtre est correctement enclenché. Autrement, il pourrait tomber, ce qui est dangereux. Quand le filtre à charbon actif est enclenché, la force d’aspiration baisse. Description du bandeau de commande Utilisation Bouton vitesse minimale Utilisée pour la ventilation de la cuisine.
  • Page 51 All manuals and user guides at all-guides.com Maintenance Avant de nettoyer votre hotte, débranchez la prise de courant. 1.Nettoyage régulier Utilisez un chiffon doux humide avec un produit nettoyant. N’utilisez jamais d’éponge du côté grattant, de produit chimique ou n’importe quel autre matériel abrasif pour nettoyer votre hotte.
  • Page 52 All manuals and user guides at all-guides.com et le câble en même temps. (Leds : G4, Max 1,5W) Replacez les ampoules et les douilles de façon identique. Puis reconnectez le câble d’alimentation de la lumière. Remettez la plaque en verre en place et vissez-la. Assurez-vous que les visses sont bien serrées.
  • Page 53 All manuals and user guides at all-guides.com Service consommateur Si vous ne pouvez pas identifier la cause de la panne, éteignez votre appareil et contactez le service consommateur. Numéro de série de l’appareil : où le trouver ? Il est important d’informer le service consommateurs de la référence de votre produit ainsi que du numéro de série (à...
  • Page 54 All manuals and user guides at all-guides.com BEDIENUNGS- & INSTALLATIONSANLEITUNG INHALT EINLEITUNG SICHERHEITSVORKEHRUNGEN SPEZIFIKATIONEN INSTALLATION (Abzug außen) INSTALLATION (Luftauslass innen) BESCHREIBUNG DER FUNKTIONEN BEDIENUNG WARTUNG FEHLERBEHEBUNG KUNDENDIENST UMWELTSCHUTZ...
  • Page 55 All manuals and user guides at all-guides.com Einleitung Wir bedanken uns das Sie sich für eine Candy Dunstabzugshaube entschieden haben Diese Bedienungsanleitung soll Ihnen alle erforderlichen Anweisungen im Zusammenhang mit der Installation, des Gebrauchs und der Wartung des Gerätes bieten.