
Manuels Connexes pour Axor Starck 10942 1 Serie


Sommaire des Matières pour Axor Starck 10942 1 Serie
- Page 1 EN Installation / User Instructions / Warranty AXOR Starck FR Instructions de montage / Mode d'emploi / Garantie 10942xx1 ES Instrucciones de montaje / Manejo / Garantía I N S T A L L A T I O N...
-
Page 2: Technical Information
E N G L I S H F R A N A I S D ONNÉ ES TEC HN IQUE S T EC HN IC A L I N F ORMAT IO N Water pressure Pression d’eau Recommended 15 - 75 PSI (0.1 - 0.5 MPa) recommandée 15 - 75 PSI (0.1 - 0.5 MPa) Maximum... -
Page 3: Datos Tecnicos
E S P A Ñ O L DATOS TEC N ICO S TOOLS REQUIRED / OUTILS RE QUIS / HERRA MIENTA S ÚTIL ES Presión en servicio recomendada 15 - 75 PSI (0.1 - 0.5 MPa) max. 145 PSI (1 MPa) ⅜"... - Page 4 AXOR Starck 10942xx1 Installation with 10941181 9½" page 8 Installation avec 10941181 4¾" 4¾" Instalación con 10941181 Installation without rough max. 16.5 lb page 13 10941181 (7.5 Kg) Installation sans pièce interieure 10941181 Instalación sin pieza interior 2⁷⁄₁₆" 4⁹⁄₁₆" 2⁷⁄₁₆"...
- Page 5 I N S TA L L AT I O N S U G G E S T I O N S / S U G G E S T I O N S D ' I N S TA L L AT I O N / S U G E R E N C I A S PA R A L A I N S TA L A C I Ó...
- Page 6 I N S TA L L AT I O N S U G G E S T I O N S / S U G G E S T I O N S D ' I N S TA L L AT I O N / S U G E R E N C I A S PA R A L A I N S TA L A C I Ó...
- Page 7 10925xx1 10921181 10971181 ¾" 10971181 10754181 ¾" 10650181 10972xx1 10972xx1 ¾" 10755xx1 ¾" 10651xx1 10941181 ¾" cold froid frío chaud caliente 10942xx1...
- Page 8 I N S T A L L A T I O N W I T H R O U G H 1 0 9 4 11 8 1 / I N S T A L L A T I O N A V E C P I È C E I N T E R I E U R E 1 0 9 4 11 8 1 / I N S T A L A C I Ó...
- Page 9 Install the template. Install the mounting piece Installez le gabarit et le raccord de montage. Instale la plantilla y el niple de montaje. Make sure that the template is level. Mark the positions of the screw holes. Remove the mounting piece and the template. Assurez-vous qu’il est de niveau.
- Page 10 Drill the holes using a ⅜" (8 mm) bit. Percez les trous à l’aide d’une mèche de 8 mm. ⅜ " Perfore los orificios con una broca de 8 mm. Measure the distance from the edge of the plaster shield to the brass part of the rough (X).
- Page 11 Cut the mounting nipple so that it is X+ ⅞" long. ⅞ " Coupez le raccord de montage de façon à ce qu’il mesure « X » + ⅞ po (23 mm) de long. Corte el niple de montaje para que tenga X + ⅞” de largo.
- Page 12 The mounting piece should extend ³⁄₁₆" – ⁵⁄₁₆" outside the surface of the finished wall. Le raccord devrait dépasser de ³⁄₁₆ à ⁵⁄₁₆ po (5 mm à 8mm) de la surface du mur fini. La pieza de montaje debe extenderse de ³⁄₁₆” a ⁵⁄₁₆” de la superficie de la pared terminada.
- Page 13 I N S T A L L A T I O N W I T H O U T R O U G H 1 0 9 4 11 8 1 / I N S T A L L A T I O N S A N S P I È C E I N T E R I E U R E 1 0 9 4 11 8 1 / I N S T A L A C I Ó...
- Page 14 Drill the holes using an ⅜” (8 mm) bit. Percez les trous à l’aide d’une mèche de 8 mm. Perfore los orificios con una broca de 8 mm. Wrap the threads on the nipple using plumbers’ tape. Install the adapter. The adapter should extend ³⁄₁₆”...
- Page 15 I N S T A L L A T I O N / I N S T A L L A T I O N / I N S T A L A C I Ó N Disassemble the spout using a 2.5 mm Allen wrench. Démontez le bec à...
- Page 16 Make sure that the mounting frame is level. Use a 2 mm Allen wrench to raise or lower the leveling screws. 2 mm Assurez-vous que le cadre de montage est de niveau. Servez-vous d’une clé hexagonale de 2 mm pour relever ou abaisser les vis de calage.
- Page 17 Install the spray former. Make sure that the spray former is level. Installez le diffuseur. Assurez-vous que celui-ci est de niveau. Instale la base de rociado. Asegúrese de que la base de rociado quede nivelada. Install the top spout housing. Installez le logement du dessus du bec.
- Page 18 If using in a manifold installation, make sure that the spout is centered between the other two components. 13 mm 7 mm Si vous utilisez un collecteur, vérifiez que le bec est bien centré entre les deux autres composants. 10 mm 10 mm Si se está...
- Page 19 Install the base plate. Tighten the screws using a 2.5 mm Allen wrench. Installez la plaque du fond. Serrez les vis à l’aide d’une clé Allen de 2.5 mm. Instale la placa de base. Apriete los tornillos con una llave Allen de 2.5 mm.
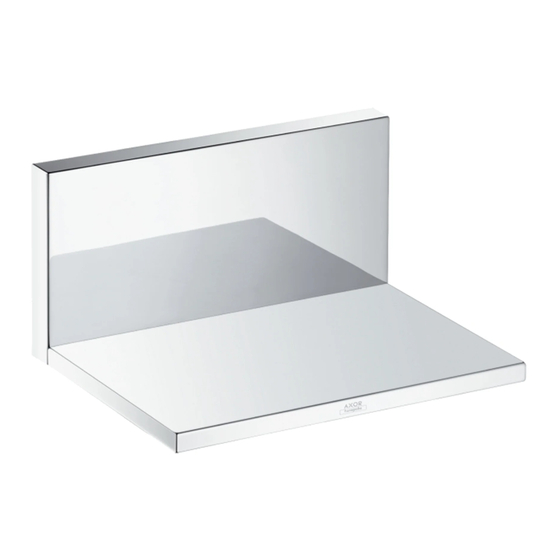
- Page 20 R E P L A C E M E N T P A R T S / P I È C E S D É T A C H É E S / R E P U E S T O S AXOR Starck...
- Page 21 C L E A N I N G / N E T T O Y A G E / L I M P I E Z A QUICK CLEAN...
- Page 22 CL EA N TH E S ED IM E NT F ILTER / N E TTOY E Z L E FI LTRE À SÉ DIME NTS / LIMPIE E L FILTRO D E S E DI M E N TO 2.5 mm...
- Page 23 C L E A N I N G R E C O M M E N D A T I O N F O R H A N S G R O H E P R O D U C T S Modern bathroom faucets, kitchen faucets and shower products are made from different materials to comply with the needs of the market with regard to design and functionality.
- Page 24 I MP O RTA N T ⁄ Les residus de produits pour le corps comme les savons liquides, shampooings, gels de douche, teintures pour cheveux, parfums, apres-rasage et vernis a ongles peuvent causer des deteriorations. Rincez le produit avec de l’eau propre après chaque utilisation.
- Page 25 Hansgrohe, Inc. (ii) a limited warranty on our hansgrohe and AXOR branded products. any hansgrohe or AXOR product sold for display purposes or (iii) hans- ® ® grohe or AXOR products purchased from unauthorized sellers.
- Page 26 PRODUCT INSTRUCTIONS AND QUESTIONS OR REPAIR, INCLUDING THE USE OF ABRASIVE OR CAUSTIC CLEANING AGENTS OR “NO-RINSE” CLEANING PRODUCTS. Upon purchase or prior to installation, please carefully inspect your prod- NOTICE TO RESIDENTS OF THE STATE OF NEW JERSEY: uct for any damage or visible defect. Prior to installing, always carefully The provisions of this warranty, including its limitations, are intended to study the enclosed instructions on the proper installation and the care apply to the fullest extent permitted by the laws of the State of New...
- Page 28 AXOR ⁄ Hansgrohe, Inc. 1490 Bluegrass Lakes Parkway Alpharetta, GA 30004 Tel. 800-334-0455 Fax 770-889-1783 axor-design.com...