Table des Matières
Publicité
Les langues disponibles
Les langues disponibles
Liens rapides
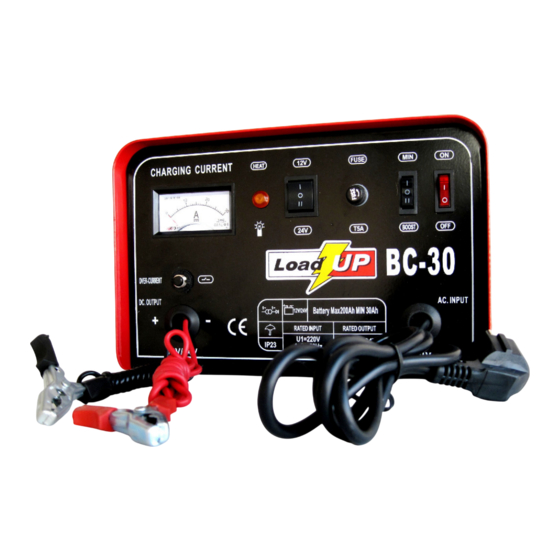
LOAD UP
BATTERY CHARGERS
ACCULADERS
LADEGERÄTE
PROSTOWNIKI
CHARGEURS DE BATTERIE
77001-1 77002-1 77004-1 77005-1 77006-1 77008
Instruction manual
'Original manual instruction'
Handleiding
'Originele instructies'
Gebrauchsanleitung
'Ursprünglichen manuellen'
Manuel d'instructions
'Instructions originales'
Instrukcja obsługi
'Oryginalna instrukcja obsługi'
1
Publicité
Table des Matières

Sommaire des Matières pour Airpress LoadUp BC-10
- Page 1 LOAD UP BATTERY CHARGERS ACCULADERS LADEGERÄTE PROSTOWNIKI CHARGEURS DE BATTERIE 77001-1 77002-1 77004-1 77005-1 77006-1 77008 Instruction manual ‘Original manual instruction’ Handleiding ‘Originele instructies’ Gebrauchsanleitung ‘Ursprünglichen manuellen’ Manuel d’instructions ‘Instructions originales’ Instrukcja obsługi ‘Oryginalna instrukcja obsługi’...
- Page 2 S'adresser aux autorités locales compétentes ou à un revendeur agréé pour se renseigner à propos des procédés de collecte et de traitement. Importeur Airpress Holland, Junokade 1, Postbus 585, 8938 AB Leeuwarden, Holland www.airpress.nl...
-
Page 3: Table Des Matières
LOAD UP ENGLISH TABLE OF CONTENTS 1.0 General page 3 2.0 Description page 3 3.0 Safety regulations page 4 4.0 General warnings and mode of employment page 5 5.0 Duration of the charging process page 5 6.0 Adjustment of the charging current page 6 7.0 Thermal protection page 7... -
Page 4: Safety Regulations
LOAD UP However, the initial current can also be higher (see the table in paragraph 2.1 and the paragraphs 5.0 "Duration of the charging process" and 6.0 "Adjustment of the charging current"). Battery charger LOAD UP 77008 and 77005-1 with starter: The battery charger with starter is a device capable of supplying a strong current, which is necessary to start the vehicle. -
Page 5: Duration Of The Charging Process
LOAD UP 4.0 GENERAL WARNINGS AND MODE OF EMPLOYMENT In order not to damage either the battery or the battery charger, it is necessary to observe the following operating instructions and warnings: • After removing the machine from its box, make sure that it is complete in all of its parts. -
Page 6: Adjustment Of The Charging Current
LOAD UP At the beginning of the charging process, the current acquires a high value which slowly and gradually decreases until it becomes very low as the battery is being charged. When the battery is under charge, it may be noticed that the liquid held inside it begins to boil. -
Page 7: Thermal Protection
LOAD UP 7.0 THERMAL PROTECTION All the LOAD UP model battery chargers are equipped with an amperometric protection against overloads (battery anomaly or incorrect connection) short circuit (direct contact of the charging pliers) and polarity inversion. ♦ Models LOAD UP 77001-1 77002-1 77004-1 77006-1 are preset for the charging of 12 &... -
Page 8: First Start Up Models With Starter
LOAD UP 4. Connect in sequence: - the red clamp to the positive pole (+) - the black clamp to the frame of the car, away from the battery and from the fuel pipe. 5. Find out the voltage of the battery to be charged (12 or 24 V) and position the proper commutator of the battery charger on the same value. -
Page 9: Technical Data
LOAD UP STARTER: 1. In case of very large engines and severe weather conditions, it is advisable to give the battery a quick charge for a few minutes before you try to jump it (see above charging instructions). 2. Contrary to the charging operations, during the starting process the battery must remain connected to the vehicle and the caps must remain closed. - Page 10 LOAD UP LOAD UP 77001-1-77002-1- 77004-1-77006-1 Panel Handle Amperemeter Selector switch charging current On / off switch Selector switch 12/24 V Mains fuse Charging cabels Power plug & cable Housing Amperometric protection Wiring plan LOAD UP 77008 Panel 1 Selector switch current charge / start 2 Timer 3 Connection 12 V 4 Connection 24 V...
- Page 11 LOAD UP Wiring plan...
- Page 12 LOAD UP...
- Page 13 LOAD UP NEDERLANDS INHOUDSOPGAVE 1.0 Algemeen pagina 13 2.0 Beschrijving pagina 13 3.0 Veiligheidsvoorschriften pagina 14 4.0 Algemeen en gebruik pagina 15 5.0 Lengte van het oplaadproces pagina 16 6.0 Instellen van de laadstroom pagina 16 7.0 Thermische beveiliging pagina 17 8.0 Storingsmogelijkheden pagina 17 9.0 Ingebruikname modellen zonder starthulp...
-
Page 14: Veiligheidsvoorschriften
LOAD UP Controleer of het vermogen van de acculader in verhouding staat tot de capaciteit van de accu die wordt opgeladen. Indien de acculader te klein is, duurt het opladen van de accu veel te lang, terwijl een te grote acculader de accu kan beschadigen. -
Page 15: Algemeen En Gebruik
LOAD UP 4.0 ALGEMEEN EN GEBRUIK Om schade aan accu of acculader te voorkomen, moeten de volgende aanwijzingen voor gebruik en waarschuwingen in acht worden genomen: • Na het uitpakken van de acculader controleren of de machine compleet is. • De invoerkabel geheel afwinden over de totale lengte en uitstrekken, zodat er niet op gelopen kan worden;... -
Page 16: Lengte Van Het Oplaadproces
LOAD UP 5.0 LENGTE VAN HET OPLAADPROCES De lengte van het oplaadproces is afhankelijk van de accu (bijna vol, halfvol of helemaal leeg) en van de conditie van de accu. Over het algemeen duurt het ongeveer 2 tot 4 uur om de accu weer op te laden voor normaal gebruik. Het volledig opladen van een accu kan 8 tot 10 uur duren. -
Page 17: Thermische Beveiliging
LOAD UP dus tijdig worden stopgezet. Of gebruik stand MIN en MAX. Op stand kan het voertuig gestart worden (zie ook punt 9.1). 7.0 THERMISCHE BEVEILIGING Alle LOAD UP acculaders zijn uitgerust met een thermische beveiliging die beveiligt tegen: - overbelasting (accu is niet goed of verkeerde verbinding) - kortsluiting (laadtangen maken contact) - verwisselde polen ♦... -
Page 18: Ingebruikname Modellen Zonder Starthulp
LOAD UP 9.0 INGEBRUIKNAME MODELLEN ZONDER STARTHULP (77001-1-77002-1-77004-1-77006-1) Na het opvolgen van alle bovenstaande aanwijzingen als volgt te werk gaan: 1. Controleer of het voltage overeenkomt met de nominale waarde van de acculader op het typeplaatje. 2. Ontkoppel de kabels die verbonden zijn met de positieve (+) pool van de accu. - Page 19 LOAD UP van de schakelaar: - zonder timer: stand 1(laag), 2 (middel) en 3 (hoog) - met timer: stand 4 (laag), 5 (middel) en 6 (hoog). 9. Sluit de toevoerkabel aan op de hoofdleiding van 230 V. 10. Om het opladen te onderbreken achtereenvolgens afkoppelen: - voedingskabel - negatieve geleider (-) - positieve geleider (+)
-
Page 20: Technische Gegevens
LOAD UP LOAD UP 77001-1-77002-1-77004-1-77006-1 Paneel Handgreep Amperemeter Keuzeknop laadstroom Aan/uit schakelaar Keuzeknop 12/24 V Netzekering Laadkabels Netstekker& kabel Omkasting Thermische beveiliging TECHNISCHE GEGEVENS: Model BC-10 BC-20 BC-30 BC-230 BC-50 BC-730 Bestelnummer 77001-1 77002-1 77004-1 77005-1 77006-1 77008 Max. laadstroom 200 start (5 sec.) Voor accu's (Ah) -
Page 21: Elektrisch Schema
LOAD UP LOAD UP 77008 Paneel Keuzeknop laadstroom/start Timer Aansluiting 12 V Aansluiting 24 V Zekering 2 x 50 Amp= 100 Amp Display Elektrisch schema... - Page 22 LOAD UP DEUTSCH INHALTSANGABE 1.0 Allgemein Seite 22 2.0 Beschreibung Seite 22 3.0 Wichtige Sicherheitsvorschriften Seite 23 4.0 Allgemeine Gebrauchshinweise Seite 24 5.0 Ladedauer Seite 24 6.0 Ladestromeinstellung Seite 25 7.0 Überlastungs-Schutzvorrichtung Seite 26 8.0 Störungen Seite 26 9.0 Inbetriebsetzung Modellen ohne Starter Seite 27 9.1 Inbetriebsetzung Modellen mit Starter Seite 27...
-
Page 23: Wichtige Sicherheitsvorschriften
LOAD UP Batterie beschädigen. Die empfohlene Ladespannung entspricht ca. 1 Zehntel der Ah-Kapazität der Batterie (z.B.: entspricht die Kapazität der Batterie 40Ah, so soll die Ladespannung ca. 4A entsprechen). Die Ladespannung darf jedoch am Anfang auch stärker sein. Nur fűr Modell mit Starter (77005-1 und 77008): Das Ladegerät mit Starter ist ein Gerät, das eine kräftige, zum Starten des Motors Kraftfahrzeuges notwendige Ladespannung abgeben kann;... -
Page 24: Allgemeine Gebrauchshinweise
LOAD UP Gefahrenquelle werden kann. 4.0 ALLGEMEINE GEBRAUCHSHINWEISE Um eine Beschädigung der Batterie sowie des Batterieladers zu vermeiden, müssen folgende Gebrauchshinweise und -Vorschläge sorgfältig berücksichtigt werden: • nach dem Entfernen der Verpackung kontrollieren, daß das Gerät und alle seine Teile in einwandfreiem Zustand sind; •... -
Page 25: Ladestromeinstellung
LOAD UP Zum Laden als "Auffrischung" einer Batterie, die normalerweise verwendet wird, genügen 2 bis 4 Stunden. Zur Vollaufladung bedarf es 8 bis 10 Stunden. Bei Ladebeginn hat der Strom einen hohen Wert, der, während die Batterie sich lädt, langsam auf sehr niedrigen Werte sinkt. Achtung: wenn die Batterie unter Ladung ist, kann man den Beginn einer Blasenbildung in der darin enthaltenen Flüssigkeit erkennen. -
Page 26: Überlastungs-Schutzvorrichtung
LOAD UP 7.0 ÜBERLASTUNGS-SCHUTZVORRICHTUNG Alle Modelle unserer LOAD UP Ladegeräte verfügen über eine Amper- schutzvorrichtung gegen Überleistungen (bei Batteriefunktionsstörungen oder unsachgemäßigen Anschluß), Kurzschluß (Direktkontakt der Ladezangen) und Polverwechslung. ♦ Modellen LOAD UP 77001-1 77002-1 77004-1 77006-1 sind ausschließlich für das Laden von 12 V und 24 V Batterien geeignet, sind mit nur zwei Einstellmöglichkeiten MIN. -
Page 27: Inbetriebsetzung Modellen Ohne Starter
LOAD UP 9.0 INBETRIEBSETZUNG MODELLEN OHNE STARTER (77001-1 77002-1 77004-1 77006-1) Die oben erläuteten Hinweise folgen und anschließend wie folgt verfahren: 1. prüfen, daß die Netzspannung der Nennspannung entspricht, die auf dem Batterieschild angegeben ist; 2. die Kabel, die am Pluspol (+) der Batterie geschlossen sind, lösen; 3. - Page 28 LOAD UP und 6 (hoch) 10. Schließ Zufuhrkabel an auf Hauptleitung von 230 V. 11. um den Ladevorgang zu unterbrechen, in der Reinfolge wie folgt vorgehen: - Netzstecker ziehen - Minuspol (-) entfernen - Pluspol (+) entfernen STARTER 1. bei großen Motoren und unter extremen klimatischen Bedingungen wird empfohlen, der Batterie vor dem Anlassen einige Minuten Schnellladung zu geben (siehe oben erläuterte Ladeanleitung);...
-
Page 29: Technische Daten
LOAD UP TECHNISCHE DATEN: Modell BC-10 BC-20 BC-30 BC-230 BC-50 BC-730 Bestellnummer 77001-1 77002-1 77004-1 77005-1 77006-1 77008 Max. Ladestrom 200 (5 Sec. Starter) Für Batterie (Ah) 12-100 25-125 30-200 30-300 40-400 40-1500 Volt 12/24 12/24 12/24 12/24 12/24 12/24 Abmessungen (lxbxh, mm) 275x205x225 275x205x225 295x254x235... -
Page 30: Schaltplan
LOAD UP LOAD UP 77008 Paneel 1 Wahlschalter Ladestrom/Start 2 Zeitschalter 3 Anschluß 12 V 4 Anschluß 24 V 5 Sicherung 2 x 50 Amp= 100 Amp 6 Display Schaltplan... - Page 31 LOAD UP POLSKI SPIS TREŚCI 1.0 Ogólne strona 31 2.0 Opis strona 31 3.0 Przepisy bezpieczeństwa strona 32 4.0 Ogólne ostrzeżenia i sposób eksploatacji strona 33 5.0 Czas trwania procesu ładowania strona 33 6.0 Regulacja prądu ładowania strona 34 7.0 Ochrona termiczna strona 34 8.0 Rozwiązywanie problemów strona 35...
-
Page 32: Przepisy Bezpieczeństwa
LOAD UP prądu zainstalowanego akumulatora. Na przykład: jeśli akumulator zainstalowany w pojeździe ma parametr 88 Ah, prąd rozruchowy wynosi od 3 do 3,5-krotności nominalnej pojemności, tj. między 260 A a 310 A. Zobacz również rozdziały 5.0, 6.0 i Tabela 9.1. 3.0 PRZEPISY BEZPIECZEŃSTWA 12. -
Page 33: Ogólne Ostrzeżenia I Sposób Eksploatacji
LOAD UP 4.0 OGÓLNE ZASTRZEŻENIA I SPOSÓB EKSPLOATACJI Aby nie uszkodzić akumulatora, ani prostownika, należy przestrzegać następujących instrukcji obsługi i ostrzeżeń: • Po wyjęciu urządzenia z opakowania należy upewnić się, czy są wszystkie elementy. • Należy rozwinąć kabel na całą długość i rozciągnąć go tak, aby nie można było po nim deptać... -
Page 34: Regulacja Prądu Ładowania
LOAD UP Na początku procesu ładowania, prąd uzyskuje wysoką wartość, która powoli i stopniowo zmniejsza się, osiągając coraz niższy poziom w trakcie ładowania się akumulatora. Gdy akumulator jest ładowany, ciecz wewnątrz może zacząć wrzeć. 6.0 REGULACJA PRĄDU ŁADOWANIA Model 77001-1-77002-1-77004-1-77006-1: Dzięki odpowiedniemu wielopozycyjnemu regulatorowi (3) możliwe jest zwiększanie lub zmniejszanie prądu ładowania, a tym samym prędkości ładowania akumulatora. -
Page 35: Rozwiązywanie Problemów
LOAD UP 8.0 ROZWIĄZYWANIE PROBLEMÓW Jeśli po podłączeniu zgodnym z instrukcjami powyżej, załączy się zabezpieczenie termiczne i amperomierz osiągnie dolną wartość skali, przyczyny mogą być następujące: Odwrócenie biegunowości przy podłączaniu szczypiec do akumulatora: aby wyeliminować • • • • problem, należy zresetować ochronę termiczną przez naciśnięcie odpowiedniego przycisku w przypadku ręcznego ustawienia lub odczekać... - Page 36 LOAD UP wskazanemu na tabliczce. 2. Odłączyć przewody połączone z biegunem (+) akumulatora. 3. Zdjąć pokrywki akumulatora i sprawdzić poziom cieczy elektrolitycznej. Podłączyć czarny kabel do ujemnej końcówki prostownika. Sprawdzić napięcie ładowania akumulatora (12 lub 24 V) oraz podłączyć czerwony kabel do odpowiedniej końcówki (+12 V) lub (+24 V).
-
Page 37: Dane Techniczne
LOAD UP DANE TECHNICZNE: BC-10 BC-20 BC-30 BC-230 BC-50 BC-730 Model Art. nr 77001-1 77002-1 77004-1 77005-1 77006-1 77008 Maks. prąd 200 (5 sek., ładowania (A) system rozruchu) Pojemność akumulatora (Ah) 12-100 25-125 30-200 30-300 40-400 40-1500 Napięcie 12/24 12/24 12/24 12/24 12/24... - Page 38 LOAD UP LOAD UP 77008 Panel 1 Przełącznik - ładowanie prądem/ start 2 Czasomierz 3 Złącze 12 V 4 Złącze 24 V 5 Bezpiecznik 2 x 50 Amp= 100 Amp 6 Wyświetlacz...
- Page 39 LOAD UP Schemat połączeń...
- Page 40 LOAD UP FRANÇAIS TABLE DES MATIÈRES 1.0 Généralités page 40 2.0 Description page 40 3.0 Importantes normes de sécurité page 41 4.0 Instructions générales et mode d’emploi page 42 5.0 Durée de la charge page 42 6.0 Régulation du courant de charge page 43 7.0 Protection thermique page 43...
-
Page 41: Importantes Normes De Sécurité
LOAD UP démarrer. Un chargeur de batterie trop petit peut employer un temps excessivement long pour charger la batterie, alors qu'un trop puissant peut l'endommager. Le courant de charge conseillable est 1 dixième environ de la capacité en Ah de l'accumulateur (par exemple, la batterie est de 40Ah, le courant approprié... -
Page 42: Instructions Générales Et Mode D'emploi
LOAD UP incapables; 10. ne pas laisser l'appareil sans surveillance inutilement branché, car il peut devenir une source de péril; 4.0 INSTRUCTIONS GENERALES ET MODE D'EMPLOI • Afin d'éviter l'endommagement soit de la batterie que du chargeur de batterie, il faut respecter les modes d'emploi et les instructions suivants: •... -
Page 43: Régler Le Courant De Charge
LOAD UP La durée de la charge dépend toujours de l'état de la batterie (presque chargée, moyennement ou complètement déchargée) et de ses conditions. Pour un "rajeunissement" d'une batterie normalement en usage, en général sont suffisantes 2-4 heures. Pour une re-charge complète, 8-10 heures peuvent être nécessaires. -
Page 44: Inconvénients
LOAD UP ♦ Modèles LOAD UP 77001-1-77002-1-77004-1-77006-1: ils sont prédisposés à la charge pour les seules batteries à 12 / 24 V, ils ont seulement deux régulations de charge (MIN - BOOST) et ils sont munis de protection ampère métrique (secondaire) à rétablissement automatique placée à l'intérieur et un fusible (primaire). -
Page 45: Mise En Fonction Modèle Avec Aide De Démarrage
LOAD UP châssis de la voiture, loin de la batterie et du conduit du carburant; 5. vérifier la tension de la batterie à charger (12÷24V) et positionner le commutateur approprié sur lême valeur; 6. alimenter le chargeur de batterie en faisant attention à la position que l'aiguille de l'ampèremètre prendra;... -
Page 46: Demarrage
LOAD UP DEMARRAGE 1. en cas de moteurs très gros et de conditions de climat rigoureuses, il est conseillable de donner à la batterie une charge rapide de quelques minutes avant d’effectuer le démarrage (voir instructions de charge ci-dessus); 2. contrairement aux opérations de charge, pendant le démarrage la batterie doit rester connectée au véhicule et les bouchons doivent être fermés;... - Page 47 LOAD UP LOAD UP 77001-1-77002-1-77004-1-77006-1 Panneau 1 Poignée 2 Amperemètre 3 Choix de la charge 4 Interrupteur 5 Sélecteur 12/24 V 6 Fusible 7 Câbles de batterie 8 Fiche& câble réseau 9 Coffrage 10 Protection thermique Schéma électrique LOAD UP 77008 Panneau 1 Sélecteur puissance de charge/start...
-
Page 48: Schéma Électrique
LOAD UP Schéma électrique... - Page 49 LOAD UP GARANTIEBESCHEINIGUNG 24 MONATE GARANTIEBEWIJS 24 MAANDEN CERTIFICAT DE GARANTIE 24 MOlS GWARANCJA WAŻNA 24 MIESIĄCE Artikel/Article/Article/Artykuł ....................................Modell/Model/Modèle/Model ....................................Seriennr./Series no./No. série/Nr. seryjny ....................................Aankoopdatum/Kaufdatum/Date d'achat/Data zakupu ....................................Handtekening verkoper Firmastempel verkoper Signatur Verkaufer Firmenstempel Verkaufer Signature du vendeur Timbre du vendeur Podpis sprzedawcy Pieczątka sprzedawcy...
- Page 50 LOAD UP GARANTIEBEPALINGEN De garantie van de geleverde machine/het apparaat bedraagt 24 maanden, ingaande op de aankoopdatum. Indien zich binnen deze tijd storingen voordoen, die te wijten zijn aan materiaal- of constructiefouten, geldt de garantie voor zowel onderdelen als arbeidsloon. Garantieaanspraken worden niet erkend indien: De aanwijzingen in deze handleiding niet zijn nageleefd.
- Page 51 OGÓLNE WARUNKI GWARANCJI OBOWIĄZUJĄCE NA TERENIE RP : Airpress Polska Sp. z o. o. z siedzibą przy ulicy Rynkowej 156 w Przeźmierowie, jako producent, importer i dystrybutor, gwarantuje sprawne działanie urządzeń, na które wydana jest niniejsza Karta Gwarancyjna, pod warunkiem korzystania zgodnego z przeznaczeniem i warunkami techniczno-eksploatacyjnymi opisanymi w instrukcji obsługi.
- Page 52 2006/95/EC Holland, Leeuwarden, 06.07.2015 EG-verklaring van overeenstemming Wij, Airpress Holland, Junokade 1, Postbus 585, 8938 AB Leeuwarden, Nederland, verklaren geheel onder eigen verantwoordelijkheid dat de producten Acculaders 77001-1 77002-1 77004-1 77005-1 77006-1 77008 waarop deze verklaring betrekking heeft, in overeenstemming zijn met de volgende normen :...