NEFF D51NAA1C0 Manuel D'utilisation Et Notice D'installation

NEFF D51NAA1C0 Manuel D'utilisation Et Notice D'installation

Masquer les pouces Voir aussi pour D51NAA1C0:
Table des Matières

Publicité

Les langues disponibles

Les langues disponibles

Liens rapides

Dunstabzugshaube
Extractor hood
Hotte
Cappa aspirante
[de]
Gebrauchs- und Montagean-
leitung
[en]
User manual and installation
instructions
[fr]
Manuel d' u tilisation et notice
d' i nstallation
[it]
Manuale utente e istruzioni
d' i nstallazione
D51NAA1C0, D51NAA1C0B
2
15
28
42

Publicité

Table des Matières
loading

Sommaire des Matières pour NEFF D51NAA1C0

  • Page 1 Dunstabzugshaube Extractor hood Hotte Cappa aspirante [de] Gebrauchs- und Montagean- leitung [en] User manual and installation instructions [fr] Manuel d' u tilisation et notice d' i nstallation [it] Manuale utente e istruzioni d' i nstallazione D51NAA1C0, D51NAA1C0B...
  • Page 2: Table Des Matières

    de Sicherheit Verwenden Sie das Gerät nicht: Inhaltsverzeichnis ¡ mit einer externen Zeitschaltuhr. 1.3 Einschränkung des Nutzerkreises Dieses Gerät kann von Kindern ab 8 Jahren GEBRAUCHSANLEITUNG und darüber und von Personen mit reduzier- Sicherheit .............    2 ten physischen, sensorischen oder mentalen Sachschäden vermeiden ........
  • Page 3 Sicherheit de me zurückgesaugt. Gaskochstellen ohne aufgesetztes Kochge- schirr entwickeln im Betrieb große Hitze. Ein darüber angebrachtes Lüftungsgerät kann be- schädigt oder in Brand gesetzt werden. ▶ Gaskochstellen nur mit aufgesetztem Koch- geschirr betreiben. Bei gleichzeitigem Betrieb mehrerer Gaskoch- stellen entwickelt sich große Hitze. Ein dar- über angebrachtes Lüftungsgerät kann be- ▶...
  • Page 4: Sachschäden Vermeiden

    de Sachschäden vermeiden ▶ Keinen Dampfreiniger oder Hochdruckreini- umteilen im Spülraum des Geschirrspülers ger verwenden, um das Gerät zu reinigen. können zu Explosionen führen. ▶ Nie stark ätz-alkalische oder stark säurehal- WARNUNG ‒ Explosionsgefahr! tige Reinigungsmittel verwenden. Insbeson- Stark ätz-alkalische oder stark säurehaltige dere keine Reinigungsmittel aus dem Ge- Reinigungsmittel in Verbindung mit Alumini- werbebereich oder Industriebereich in Ver-...
  • Page 5: Betriebsarten

    Betriebsarten de 4  Betriebsarten Sie können Ihr Gerät im Abluftbetrieb oder im Umluft- betrieb verwenden. 4.1 Abluftbetrieb Die angesaugte Luft wird durch die Fettfilter gereinigt und durch ein Rohrsystem ins Freie geleitet. Die Luft darf nicht in einen Kamin abge- leitet werden, der für Abgase von Gerä- ten verwendet wird, die Gas oder ande- re Brennstoffe verbrennen (dies gilt nicht für Umluftgeräte).
  • Page 6: Kennenlernen

    Internet kaufen. Verwenden Sie nur Origi- Sie in unserem Katalog, im Online-Shop oder beim nalzubehör, da dieses genau auf Ihr Gerät abgestimmt Kundendienst. ist. www.neff-international.com Zubehör ist gerätespezifisch. Geben Sie beim Kauf im- Zubehör Bestellnummer mer die genaue Bezeichnung (E-Nr.) Ihres Geräts an.
  • Page 7: Reinigen Und Pflegen

    Reinigen und Pflegen de 8  Reinigen und Pflegen Damit Ihr Gerät lange funktionsfähig bleibt, reinigen Edelstahlflächen mit einem Schwammtuch und ‒ und pflegen Sie es sorgfältig. heißer Spüllauge in Schliffrichtung reinigen. Lackierte Oberflächen mit einem Schwammtuch ‒ und heißer Spüllauge reinigen. 8.1 Reinigungsmittel Aluminium mit einem weichen Tuch und Glasrei- ‒...
  • Page 8: Geruchsfilter Für Umluftbetrieb

    de Störungen beheben Voraussetzung: Die Fettfilter sind ausgebaut. Die Fettfilter abtropfen lassen. → "Fettfilter ausbauen", Seite 7 8.7 Geruchsfilter für Umluftbetrieb Die Informationen zu den Reinigungsmitteln beach- ten. Geruchsfilter binden die Geruchsstoffe im Umluftbe- Die Fettfilter in heißer Spüllauge einweichen. trieb. Regelmäßig gewechselte Geruchsfilter gewähr- Bei hartnäckigem Schmutz einen Fettlöser verwen- leisten einen hohen Geruchsabscheidegrad.
  • Page 9: Entsorgen

    Entsorgen de 9.1 Funktionsstörungen Störung Ursache und Störungsbehebung Gerät funktioniert nicht. Netzstecker der Netzanschlussleitung ist nicht eingesteckt. Schließen Sie das Gerät am Stromnetz an. ▶ Sicherung ist defekt. Prüfen Sie die Sicherung im Sicherungskasten. ▶ Stromversorgung ist ausgefallen. Prüfen Sie, ob die Raumbeleuchtung oder andere Geräte im Raum funktio- ▶...
  • Page 10: Kundendienst

    de Kundendienst 11  Kundendienst Wenn Sie Anwendungsfragen haben, eine Störung am 11.1 Erzeugnisnummer (E-Nr.) und Gerät nicht selbst beheben können oder das Gerät re- Fertigungsnummer (FD) pariert werden muss, wenden Sie sich an unseren Kun- Die Erzeugnisnummer (E-Nr.) und die Fertigungsnum- dendienst. mer (FD) finden Sie auf dem Typenschild des Geräts.
  • Page 11: Warnung - Erstickungsgefahr! Kinder Können Sich Verpackungsmaterial Über

    Montageanleitung de Feuerstätten (z. B. gas-, öl-, holz- oder kohle- WARNUNG ‒ Brandgefahr! betriebene Heizgeräte, Durchlauferhitzer, Die Fettablagerungen im Fettfilter können sich Warmwasserbereiter) beziehen Verbrennungs- entzünden. luft aus dem Aufstellraum und führen die Ab- ▶ Die vorgegebenen Sicherheitsabstände gase durch eine Abgasanlage (z. B. Kamin) müssen eingehalten werden, um einen Hit- ins Freie.
  • Page 12: Allgemeine Hinweise

    de Montageanleitung ▶ Das Gerät nur über eine vorschriftsmäßig Scharfkantige Bauteile innerhalb des Geräts können das Anschlusskabel beschädigen. installierte Steckdose mit Erdung an ein Das Anschlusskabel nicht knicken oder einklem- ▶ Stromnetz mit Wechselstrom anschließen. men. ▶ Das Schutzleitersystem der elektrischen ¡...
  • Page 13: Montage

    Montageanleitung de Gerät vorbereiten 12.10 Hinweise zum Umluftbetrieb Die Fettfilter entnehmen. Das Gerät darf nur im fest installierten Zustand und mit Die Fettfilter nicht biegen, um Beschädigungen zu angeschlossener Verrohrung betrieben werden. vermeiden. Die Blende entfernen. Dazu die zwei Einrastme- 12.11 Montage chanismen gleichzeitig drücken und die Blende Möbel prüfen abnehmen...
  • Page 14 de Montageanleitung Gerät montieren Gerät demontieren ACHTUNG! WARNUNG ‒ Verletzungsgefahr! Wenn Sie bereits den Ausschnitt eines Vorgänger- Bauteile innerhalb des Geräts können scharfkantig modells derselben Marke haben, greift der Einrast- sein. mechanismus nicht. Schutzhandschuhe tragen. ▶ Das Gerät festhalten, damit es nicht herabfällt ▶...
  • Page 15 Safety en Do not use the appliance: Table of contents ¡ With an external timer. 1.3 Restriction on user group This appliance may be used by children aged USER MANUAL 8 or over and by people who have reduced Safety ..............   15 physical, sensory or mental abilities or inad- Avoiding material damage.........
  • Page 16 en Safety shaft are sucked back into the living space. flames carefully using a lid, fire blanket or something similar. When gas burners are in operation without any cookware placed on them, they can build up a lot of heat. A ventilation appliance in- stalled above the cooker may become dam- aged or catch fire.
  • Page 17: Avoiding Material Damage

    Avoiding material damage en WARNING ‒ Risk of electric shock! WARNING ‒ Risk of explosion! An ingress of moisture can cause an electric Highly caustic alkaline or highly acidic clean- shock. ing agents in conjunction with aluminium parts ▶ Before cleaning, pull out the mains plug or in the interior of the appliance may cause ex- switch off the fuse in the fuse box.
  • Page 18: Operating Modes

    en Operating modes 4  Operating modes You can use your appliance in air extraction mode or circulating-air mode. 4.1 Air extraction mode The air which is drawn in is cleaned by the grease fil- ters and conveyed to the exterior by a pipe system. The air must not be discharged into a flue that is used for exhausting fumes from appliances burning gas or other...
  • Page 19: Familiarising Yourself With Your Appliance

    Accessories vary from one appliance to another. When Accessories Order number purchasing accessories, always quote the exact product number (E no.) of your appliance.
  • Page 20: Cleaning And Servicing

    en Cleaning and servicing 8  Cleaning and servicing To keep your appliance working efficiently for a long Clean aluminium using a soft cloth and glass ‒ time, it is important to clean and maintain it carefully. cleaner. Clean plastic using a soft cloth and glass ‒...
  • Page 21: Odour Filter For Recirculating Air Mode

    Troubleshooting en Use special grease solvent for stubborn dirt. You 8.7 Odour filter for recirculating air mode can obtain grease solvents from after-sales service Odour filters bind odorous substances in air recircula- or the online shop. tion mode. Regularly replaced odour filters guarantee a Use a brush to clean the grease filters.
  • Page 22: Replacing The Led Lights

    en Disposal Disconnect the appliance from the power supply. 9.2 Replacing the LED lights Loosen and remove the bulb cover ⁠ . Unscrew the bulb and replace it with a bulb of the WARNING ‒ Risk of electric shock! same type. When changing the bulb, the bulb socket contacts are live.
  • Page 23: Installation Instructions

    Installation instructions en 12  Installation instructions Observe this information when installing the appliance.  12.4 Secure installation Follow these safety instructions when in- stalling the appliance. WARNING ‒ Risk of poisoning! Risk of poisoning from flue gases being drawn back in. Room-air-dependent heat-pro- 12.1 Scope of delivery ducing appliances (e.g.
  • Page 24: General Information

    en Installation instructions ▶ Unrestricted operation is possible if the ap- WARNING ‒ Risk of electric shock! pliance is operated exclusively in circulat- Sharp-edged components inside the appli- ing-air mode. ance may damage the connecting cable. ▶ Do not kink or trap the connecting cable. WARNING ‒ Risk of suffocation! If the appliance or the power cord is dam- Children may put packaging material over...
  • Page 25: Instructions For The Electrical Connection

    Installation instructions en ¡ Do not use any flat ducts with sharp bends. 12.6 Instructions for the electrical connection 12.9 Instructions for the air extraction mode In order to safely connect the appliance to the elec- For air extraction mode, a one-way flap should be in- trical system, follow these instructions.
  • Page 26 en Installation instructions Make the cut-out for the exhaust pipe. Installing the appliance ATTENTION! If you already have a cut-out for a previous model of the same brand, the latching mechanism does not engage. Secure the appliance so that it does not fall ▶...
  • Page 27 Installation instructions en Removing the appliance WARNING ‒ Risk of injury! Components inside the appliance may have sharp edges. Wear protective gloves. ▶ Disconnect the appliance from the power supply. Loosen the exhaust pipe. Remove the grease filters. To avoid causing damage, do not bend the grease filters.
  • Page 28 fr Sécurité ¡ à une hauteur maximale de 2000 m au- Table des matières dessus du niveau de la mer. N’utilisez pas l’appareil : ¡ avec un réveil externe. MANUEL D'UTILISATION 1.3 Restrictions du périmètre utilisateurs Sécurité...............    28 Les enfants de 8 ans et plus, les personnes Prévenir les dégâts matériels......
  • Page 29 Sécurité fr de l'air dans la cuisine et dans les pièces voi- bon) uniquement en présence d’un capot sines. L'absence d'un apport d'air suffisant fermé et non amovible. Il ne doit pas y crée une pression négative. Les gaz toxiques avoir de projection d’étincelles. provenant de la cheminée ou du conduit L'huile et la graisse chaudes s'enflamment ra- d'évacuation sont réaspirés dans les pièces...
  • Page 30: Prévenir Les Dégâts Matériels

    fr Prévenir les dégâts matériels ▶ Ne pas utiliser de nettoyeur vapeur ou Les objets déposés sur l'appareil peuvent haute pression pour nettoyer l’appareil. tomber. ▶ Ne déposez aucun objet sur l’appareil. AVERTISSEMENT ‒ Risque d'explosion ! Des modifications sur la construction élec- Les nettoyants caustiques fortement alcalins trique ou mécanique sont dangereuses et ou acides peuvent provoquer des explosions peuvent conduire à...
  • Page 31: Modes De Fonctionnement

    Modes de fonctionnement fr En cas de vapeurs de cuisson intensives, sélection- Éteignez l'éclairage quand vous n'en avez plus be- nez dès que possible une vitesse de ventilation plus soin. importante. ¡ L'éclairage ne consomme ainsi aucune énergie. ¡ Les odeurs se répandent moins dans la pièce. Nettoyez ou remplacez les filtres aux intervalles spéci- Éteignez l'appareil quand vous n'en avez plus besoin.
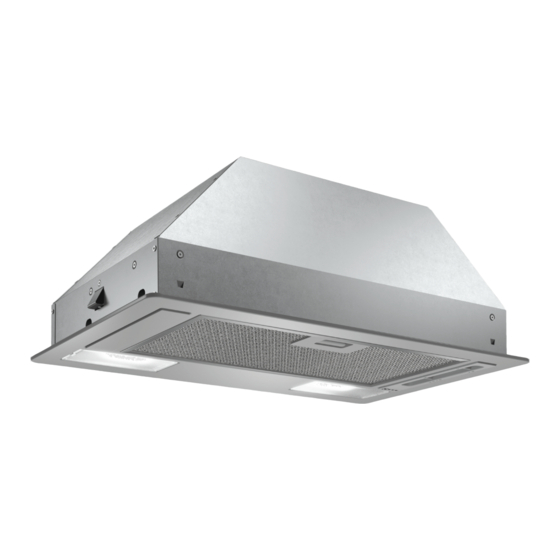
  • Page 32: Description De L'appareil

    à votre appareil. www.neff-international.com Les accessoires sont spécifiques à l'appareil. Lors de Accessoires Référence l'achat, indiquez toujours la désignation exacte de votre appareil (E-Nr.).
  • Page 33: Nettoyage Et Entretien

    Nettoyage et entretien fr 8  Nettoyage et entretien Pour que votre appareil reste longtemps opérationnel, Selon la surface, nettoyez comme suit : nettoyez-le et entretenez-le avec soin. Nettoyez les surfaces en acier inoxydable avec ‒ une lavette éponge et de l'eau chaude addition- 8.1 Produits de nettoyage née de produit de nettoyage dans le sens du brossage.
  • Page 34: Nettoyage Manuel Des Filtres À Graisse

    fr Nettoyage et entretien En présence de salissures tenaces, vous pouvez uti- 8.5 Nettoyage manuel des filtres à graisse liser un dégraissant spécial. Vous trouverez un dé- Les filtres à graisse filtrent la graisse issue de la va- graissant auprès du service après-vente ou sur la peur de cuisson.
  • Page 35: Dépannage

    Dépannage fr 9  Dépannage Si l'appareil est défectueux, appeler le service Vous pouvez corriger par vous-même les petits défauts ▶ après-vente. de votre appareil. Lisez les renseignements de dépan- nage avant de contacter le service consommateurs. Vous vous épargnerez ainsi des dépenses inutiles. AVERTISSEMENT ‒ Risque de blessure ! Les réparations non conformes sont dangereuses.
  • Page 36: Mise Au Rebut

    fr Mise au rebut 10  Mise au rebut Apprenez comment mettre au rebut correctement les Cet appareil est marqué selon la di- appareils usagés. rective européenne 2012/19/UE rela- tive aux appareils électriques et élec- 10.1 Mettre au rebut un appareil usagé troniques usagés (waste electrical and electronic equipment - WEEE).
  • Page 37: Installation En Toute Sécurité

    Instructions de montage fr 4 Pa (0,04 mbar). Cette valeur n'est réali- 12.3 Distances de sécurité sable que si l'apport d'air frais nécessaire à Respectez les distances de sécurité de l'appareil. la combustion est assuré par des ouver- tures non obturables, par exemple dans des portes ou fenêtres, associées à...
  • Page 38: Indications Générales

    fr Instructions de montage ▶ Lors de l’installation de l’appareil, veiller à AVERTISSEMENT ‒ Risque de ce que le cordon d’alimentation secteur ne blessure ! soit pas coincé ni endommagé. Des pièces à l'intérieur de l'appareil peuvent présenter des arêtes vives. 12.5 Indications générales ▶ Portez des gants de protection. Prenez en compte les remarques générales lors de Si l'appareil n'est pas correctement fixé, il l'installation.
  • Page 39: Remarques Concernant La Situation D'encastrement

    Instructions de montage fr Assurez-vous que les meubles d'encastrement ré- 12.7 Remarques concernant la situation sistent à la chaleur jusqu'à 90 °C. d'encastrement Assurez-vous que le meuble d'encastrement est tou- ¡ Installez cet appareil dans une armoire de cuisine. jours stable après les travaux de découpe. ¡...
  • Page 40 fr Instructions de montage Retirez le bandeau de commande. Pour ce faire, ap- Monter l'appareil puyez simultanément sur les deux mécanismes ATTENTION ! enlevez le bandeau ⁠ . Si vous disposez déjà de la découpe d'un modèle précédent de la même marque, le mécanisme d'in- sertion ne fonctionne pas.
  • Page 41 Instructions de montage fr Démonter l’appareil AVERTISSEMENT ‒ Risque de blessure ! Des pièces à l'intérieur de l'appareil peuvent présenter des arêtes vives. Portez des gants de protection. ▶ Débranchez l’appareil du réseau électrique. Retirez le conduit d'évacuation. Retirez le filtre à graisse. Ne pliez pas le filtre à graisse, afin d'éviter tout en- dommagement.
  • Page 42 it Sicurezza Non usare l'apparecchio: Indice ¡ con un timer esterno. 1.3 Limitazione di utilizzo Questo apparecchio può essere utilizzato da MANUALE UTENTE bambini di età pari o superiore a 8 anni e da Sicurezza ............   42 persone con ridotte facoltà fisiche, sensoriali Prevenzione di danni materiali......
  • Page 43 Sicurezza it aspirazione vengono riaspirati nelle stanze. ▶ e non versare mai acqua sul burro o sull'olio bollenti. Disattivare la zona di cottu- ra. Soffocare le fiamme con un coperchio, una coperta ignifuga o qualcosa di simile. Le zone di cottura a gas sviluppano molto ca- lore se vengano fatte funzionare senza appog- giarci sopra una stoviglia.
  • Page 44: Prevenzione Di Danni Materiali

    it Prevenzione di danni materiali ▶ Non lavare l'apparecchio con pulitori a va- La luce delle spie LED è molto intensa e può pore o idropulitrici. danneggiare gli occhi (gruppo di rischio 1). ▶ Non guardare direttamente le spie LED ac- AVVERTENZA ‒ Pericolo di esplosione! cese per un periodo superiore a 100 se- I detersivi alcalini altamente corrosivi o ad ele-...
  • Page 45: Modalità Di Funzionamento

    Modalità di funzionamento it 4  Modalità di funzionamento È possibile utilizzare l'apparecchio con la modalità a estrazione d'aria o a ricircolo d'aria. 4.1 Aspirazione L’aria aspirata viene purificata attraverso il filtro anti- grasso e convogliata all'esterno tramite un sistema di tubi. L'aria non deve essere deviata in un ca- mino che viene utilizzato per lo scarico di gas di apparecchi che bruciano gas o altri combustibili (questo non vale per...
  • Page 46: Conoscere L'apparecchio

    Gli accessori sono specifici dell'apparecchio. Al mo- Accessori Codice dell'ordine mento dell'acquisto indicare sempre il codice prodotto preciso (cod.
  • Page 47: Pulizia E Cura

    Pulizia e cura it 8  Pulizia e cura Per mantenere a lungo l'apparecchio in buone condi- Pulire le superfici in acciaio inox seguendo la di- ‒ zioni, sottoporlo a una cura e a una manutenzione rezione di spazzolatura con un panno di spugna scrupolose.
  • Page 48: Pulizia Dei Filtri Antigrasso

    it Pulizia e cura In caso di sporco ostinato è possibile utilizzare uno 8.5 Pulizia dei filtri antigrasso sgrassatore. Gli sgrassatori sono disponibili presso I filtri antigrasso filtrano il grasso contenuto nel vapore. il servizio clienti o il punto vendita online. Per garantire l'adeguato assorbimento di grassi è ne- Avviare la lavastoviglie.
  • Page 49: Sistemazione Guasti

    Sistemazione guasti it 9  Sistemazione guasti Se l'apparecchio presenta guasti, rivolgersi al servi- I guasti minori possono essere sistemati autonoma- ▶ zio di assistenza clienti. mente dall'utente. Utilizzare le informazioni per la siste- mazione dei guasti prima di contattare il servizio di as- sistenza clienti.
  • Page 50: Smaltimento

    it Smaltimento 10  Smaltimento Di seguito sono indicate informazioni sul corretto smal- Questo apparecchio dispone di con- timento degli apparecchi dismessi. trassegno ai sensi della direttiva eu- ropea 2012/19/UE in materia di ap- 10.1 Rottamazione di un apparecchio parecchi elettrici ed elettronici (waste electrical and electronic equipment - dismesso WEEE).
  • Page 51: Dimensioni Apparecchio

    Istruzioni per il montaggio it aspirazione vengono riaspirati nelle stanze. 12.2 Dimensioni apparecchio Qui sono riportate le dimensioni dell'apparecchio Ø 120 ▶ È necessario assicurare sempre un'alimen- tazione di aria sufficiente quando l'apparec- chio in modalità aspirazione a ricircolo vie- ne utilizzato contemporaneamente a un fo- colare dipendente dall'aria ambiente.
  • Page 52: Avvertenze Generali

    it Istruzioni per il montaggio pre la distanza maggiore. Se vengono in- ▶ Il sistema del conduttore di protezione stallate zone di cottura a gas ed elettriche dell’impianto elettrico domestico deve es- insieme, è necessario rispettare la distanza sere installato a norma. massima indicata. ▶ Non alimentare mai l'apparecchio da un commutatore esterno ad es.
  • Page 53 Istruzioni per il montaggio it Componenti a spigolo vivo all'interno dell'apparecchio 12.10 Avvertenza per un funzionamento a possono danneggiare il cavo di collegamento. ricircolo d'aria Non piegare o schiacciare il cavo di collegamento. ▶ L'apparecchio deve essere messo in funzione solo se ¡...
  • Page 54 it Istruzioni per il montaggio Realizzare un'apertura per il tubo di scarico. Montaggio dell’apparecchio ATTENZIONE! Se si inserisce l'apparecchio in un'apertura già pre- sente di un modello precedente dello stesso mar- chio, il meccanismo di innesto non si aggancia in posizione. Tenere fermo l'apparecchio affinché...
  • Page 55 Istruzioni per il montaggio it Smontaggio dell'apparecchio AVVERTENZA ‒ Pericolo di lesioni! Alcuni componenti all'interno dell'apparecchio possono essere affilati. Indossare guanti protettivi. ▶ Staccare l'apparecchio dalla rete elettrica. Allentare il tubo di espulsione. Rimuovere il filtro grassi. Non piegare il filtro grassi per evitare di danneggiar- Rimuovere il pannello.
  • Page 56 Valid within Great Britain: Imported to Great Britain by BSH Home Appliances Ltd. Grand Union House Old Wolverton Road Wolverton, Milton Keynes MK12 5PT United Kingdom *9001621796* 9001621796 Constructa-Neff Vertriebs-GmbH Carl-Wery-Straße 34 010222 81739 München de, en, fr, it GERMANY...

Ce manuel est également adapté pour:

D51naa1c0b

Table des Matières