Table des Matières
Publicité
Les langues disponibles
Les langues disponibles
Liens rapides
Publicité
Table des Matières

Manuels Connexes pour CDVI Digicode CAA


Sommaire des Matières pour CDVI Digicode CAA
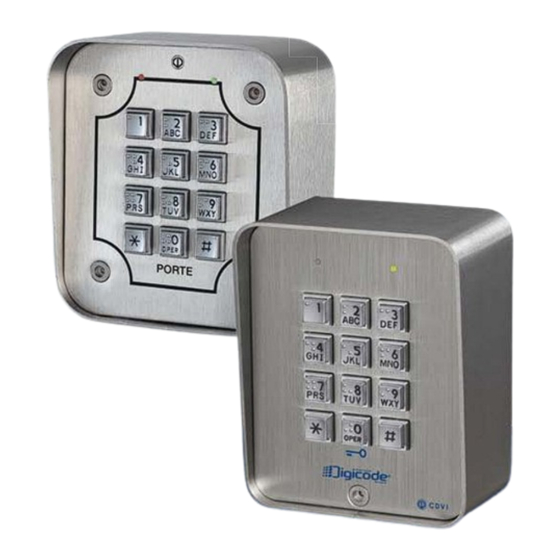
- Page 1 ENGLISH FRANCAIS Digicode avec électronique intégrée - Touches braille ® Self-contained Keypads - braille keys Range: Digicode keypads / Gamme : Digicode ® ® INSTALLATION MANUAL MANUEL D’INSTALLATION Group Products...
-
Page 2: Presentation Produit
Afi n d’optimiser la fi xation du lecteur Recommandations d’installation et de prévenir les tentatives d’arrachage, Pour sécuriser l’installation, n’oubliez pas de placer privilégiez les surfaces planes. la varistance sur le système de verrouillage, en parallèle, au niveau de l’alimentation. * Tension libre. cdvi.com cdvigroup.com... -
Page 3: Kit De Montage
DIAX à que l’ouverture pour le passage électrique dans son ouverture. tête fraisée et de son outil spécifi que du câble électrique destiné au clavier. (clé mâle coudée). cdvi.com cdvigroup.com... -
Page 4: Raccordement
Si l’appareil fonctionne avec plusieurs gâches, chacune doit être équipée de varistance. La varistance limite les surtensions provoquées par le bobinage de la gâche – effet de self. Dans le cas où la ventouse utilisée est du type « Shear Lock », celle-ci doit être alimentée par une alimentation indépendante du CBB. cdvi.com cdvigroup.com... -
Page 5: Programmation
- Le clavier est sorti de programmation - La led rouge s’allume pour confi rmer et les valeurs par défaut sont rétablies. l’entrée en programmation. 2. T apez 4 pour la saisie du nombre de termes des codes. 1. Coupez l’alimentation. - La led verte s’allume 1s. Court-circuiter P2. cdvi.com cdvigroup.com... -
Page 6: Programmation Du Code Maître
- La led verte s’allume 1 s. D. Programmation des codes - Tapez la durée de commande en secondes. - La led verte s’allume 1 s pour confi rmer Relais 1 la programmation. Groupe 1 : Du rang 00 au rang 59. cdvi.com cdvigroup.com... -
Page 7: Remise À Zéro Du Code Maître
du groupe 2. - Un bip est émis. Attendre que la led verte - La led verte s’allume 1s. s’éteigne. - Tapez les deux termes de modifi cations. - La led verte s’allume 1s pour confi rmer la programmation. cdvi.com cdvigroup.com... -
Page 8: P Rogrammation Du Signal Sonore
Par défaut, lors de la composition du code d’ouver- au mode normal de fonctionnement. ture, aucun bip touche n’est audible. Ci-joint un tableau récapitulatif qui vous servira à indiquer le code attribué à chaque utilisateur Rangs Code Nom, Prénom Rangs Code Nom, Prénom cdvi.com cdvigroup.com... - Page 9 L’une ou l’autre de ces interventions sont défi nis par le service-après-vente de CDVI. Le préjudice imputable à CDVI ne saurait en aucun cas dépasser la valeur du produit. La responsabilité de CDVI ne peut être engagée auprès de l’acheteur, installateur, client fi nal ou qui que ce soit, lors de dommages consécutifs à...
-
Page 10: Synthèse De Programmation
1 x bip 1 x bip 1 x bip 1 x bip 1 x bip 1 x bip 4’,5’ ou 6 4’,5’ ou 6 01-99 sec 01-99 sec 01-99 sec 10-99 sec termes chiffres 00 = bistable 00 = bistable 00 = bistable 1 x bip = OK led verte led verte led verte led verte led verte allumée allumée allumée allumée allumée 4 x bip = erreur Tapez # pour sortir de la programmation led rouge éteinte cdvi.com cdvigroup.com... - Page 11 1 x bip 1 x bip 1 x bip 1 x bip 1 x bip 4, 5 ou 6 chiffres 0 = supprimer les bips 4 x led 2 chiffres 2 chiffres 2 chiffres 1 = autoriser rouge = les bips rang occupé Tapez * led verte = ensuite # rang libre led verte allumée 1 x bip = OK led verte led verte led verte 1 x bip = OK 4 x bip = allumée allumée allumée erreur cdvi.com cdvigroup.com...
-
Page 12: Reminders And Recommendations
To secure the system from back electromagnetic Mounting recommendations fi elds do not forget to insert the varistor Mount the keypad on a fl at surface to avoid in parallel with the lock. any vandalism and to ensure the best mounting. * Tension libre. cdvi.com cdvigroup.com... -
Page 13: Mounting Kit
Mount the back casing of the keypad Finally Mount the keypad and mark the mounting holes. and the electric cable from the wiring with the DIAX screw. ® Then drill the 4 mounting holes access area. and the wiring access area. cdvi.com cdvigroup.com... -
Page 14: Wiring Diagram
If this device controls more than one electronic release, then each lock should be fi tted with a varistor. The varistor controls the overload produced by the strike coil - back emf. It is recommended to use a separate power supply when using a Shear Lock Magnet. cdvi.com cdvigroup.com... -
Page 15: Resetting The Memory
- Green LED lights on for 1 second. - Enter 4, 5 or 6 for number of digits. - The green LED lights on for 1 second to confi rm the new code length. 1. Turn off the power supply. Short the P2 2-pins. cdvi.com cdvigroup.com... - Page 16 Group 2: From location 60 to location 79. - Enter the duration in seconds. E.g. : From 01 for 1 second to 99 Relay 3 for 99 seconds or enter 00 for a permanent Group 3: From location 80 to location 99. cdvi.com cdvigroup.com...
- Page 17 - The relay is activated. - Green LED lights on. 2. Press . - One beep is emitted. 2. Enter the 2-digit sub master code Press 0 to disable the audible signal - The red LED lights on to authorise during a keypress. the modifi cation. cdvi.com cdvigroup.com...
- Page 18 - A beep is emitted to confi rm T wo beeps sound are emitted to confi rm the new setting. the return to the normal operating mode. User code table. User User Code Name, First name Code Name, First name location location cdvi.com cdvigroup.com...
- Page 19 INSTALLATION MANUAL CAA - CBB Self-contained Keypads - braille keys User User Code Name, First name Code Name, First name location location cdvi.com cdvigroup.com...
- Page 20 1 x beep 1 x beep 1 x beep 1 x beep 1 x beep 1 x beep 4, 5 or 6 4, 5 or 6 01-99 sec 01-99 sec 01-99 sec 10-99 sec digits digits 00 = toggle 00 = toggle 00 = toggle 1 x beep Green LED Green LED Green LED Green LED = OK Green LED lights on lights on lights on lights on lights on 4 x beep = error Press # to exit from programmation Red LED lights off cdvi.com cdvigroup.com...
- Page 21 1 x beep 1 x beep 1 x beep 1 x beep 1 x beep 4, 5 or 6 digit code 0 = Buzzer 4 x red LED = disabled 2 digits 2 digits 2 digits User location: 1 = Buzzer “Used” enabled Green LED = Press * User location: then # “Free” Green LED lights on 1 x beep = OK 1 x beep = Green LED Green LED Green LED 4 x beep = lights on lights on lights on error cdvi.com cdvigroup.com...
- Page 22 “Limited Lifetime Warranty”, complete the enclosed registration card and return it, either by e-mail or post, to the relevant CDVI address or completion of the on line registration at www.cdvigroup.com. Repair or replacement of the defective product is the exclusive remedy. CDVI shall not be liable for any incidental or consequential damages arising from any defect in, or malfunction of, its product.
- Page 23 INSTALLATION MANUAL CAA - CBB Self-contained Keypads - braille keys cdvi.com cdvigroup.com...
- Page 24 FRANCE (Headquarter/Siège social) Phone: +33 (0)1 48 91 01 02 Fax: +33 (0)1 48 91 21 21 CDVI CDVI CDVI IBÉRICA CDVI SWEDEN FRANCE + EXPORT TAIWAN [SPAIN - PORTUGAL] [SWEDEN - DENMARK - NORWAY - FINLAND] Phone: +33 (0)1 48 91 01 02...