Publicité
Les langues disponibles
Les langues disponibles
Liens rapides
All manuals and user guides at all-guides.com
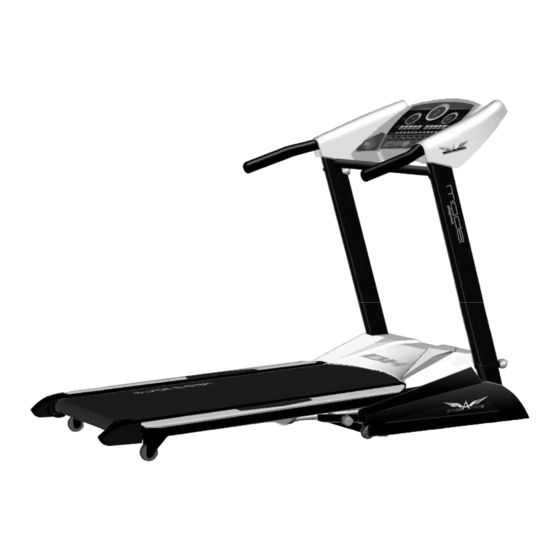
G6158R
Instrucciones de montaje y utilización
Instructions for assembly and use
Instructions de montage et utilisation
Montage und gebrauchsanleitung
Instruções de montagem e utilização
Istruzioni di montaggio e uso
Montage-en gebruiksinstrukties
Publicité

Manuels Connexes pour BH FITNESS G6158R


Sommaire des Matières pour BH FITNESS G6158R
- Page 1 All manuals and user guides at all-guides.com G6158R Instrucciones de montaje y utilización Instructions for assembly and use Instructions de montage et utilisation Montage und gebrauchsanleitung Instruções de montagem e utilização Istruzioni di montaggio e uso Montage-en gebruiksinstrukties...
- Page 2 All manuals and user guides at all-guides.com Fig.0 Fig.1...
- Page 3 All manuals and user guides at all-guides.com Fig.2 Fig.3...
- Page 4 All manuals and user guides at all-guides.com Fig.4 Fig.5...
- Page 5 All manuals and user guides at all-guides.com Fig.6 Fig.7 Fig.8 Fig.9...
- Page 6 All manuals and user guides at all-guides.com Fig.10 Fig.11 Fig.12 Fig.13...
- Page 7 All manuals and user guides at all-guides.com Español INDICACIONES GENERALES.- informados sobre todas precauciones necesarias. Lea atentamente las instrucciones de Los padres y otras personas este manual. Este le da indicaciones importantes sobre la seguridad, el uso y responsables de los niños deber de el mantenimiento de la cinta de andar.
- Page 8 All manuals and user guides at all-guides.com Tenga cuidado de no lubricar en exceso ya que se puede manchar el suelo o las alfombras donde la unidad esté colocada. accesorios recomendados por el fabricante. INSTRUCCIONES DE Siempre utilice aparato eléctrico, deberá...
- Page 9 All manuals and user guides at all-guides.com PROTECCIÓN.- Compruebe tiene todas piezas: Este modelo esta dotado de una (1) Estructura principal; (49) Tapa protección electrónica parada inferior barandilla (Izq.); (50) Tapa automática para óptima inferior barandilla derecha; (35) conservación de los circuitos tanto Apoyos laterales;...
- Page 10 All manuals and user guides at all-guides.com MONTAJE DE LOS APOYOS que no debe golpearse. Si se golpea, podría dañarse y afectar al correcto LATERALES.- funcionamiento de la cinta. Coja el apoyo lateral (35), acérquelo a la estructura principal (1) en dirección PLEGADO DE SU UNIDAD.- de la flecha posicionándolo en los IMPORTANTE: Antes de realizar el...
- Page 11 All manuals and user guides at all-guides.com Si desea mover la cinta en primer lugar vuelta en sentido de las agujas del deberá plegarla, coloque las manos reloj. sobre los pasamanos (58) e incline la cinta, Fig.11, hasta apoyar las ruedas AJUSTE DE BANDA.- de transporte (61) en el suelo.
- Page 12 All manuals and user guides at all-guides.com Observe la posición de la banda, si al minutos, se vuelve aeróbico. El ejercicio cabo de un minuto la banda no queda aeróbico es el ejercicio que utiliza totalmente centrada, repita oxígeno fundamentalmente. operación.
- Page 13 All manuals and user guides at all-guides.com CONTROL DEL RITMO Ritmo Pulsaciones cardiaco CARDIACO Máximo El trabajo realizado por el organismo viene reflejado en el ritmo cardiaco Zona (pulsaciones), que aumenta cuando la aeróbica intensidad de trabajo aumenta. En el caso de la máquina de andar, el esfuerzo depende de la velocidad y de la inclinación.
- Page 14 All manuals and user guides at all-guides.com Ello protegerá músculos barandillas y la consola electrónica preparará adecuadamente su sistema con un paño o una toalla húmeda. No cardiorrespiratorio. utilice disolventes. El siguiente paso será durante 15-20 Utilice un aspirador para aspirar minutos con un ritmo que le lleve a un cuidadosamente alrededor de todos número de pulsaciones situado entre...
- Page 15 All manuals and user guides at all-guides.com SÍMBOLOS SITUACIÓN.- Peligro. Mantenga las manos alejadas durante la elevación. Riesgo atrampamiento en movimiento. Sitúese en los perfiles laterales al subir o bajar de la máquina. Prohibido el acceso a niños. Mantenga las manos alejadas. Use calzado apropiado.
- Page 16 All manuals and user guides at all-guides.com LOCALIZACIÓN DE FALLOS O AVERIAS SÍNTOMAS COMPROBACIONES SOLUCIONES enciende 1) Asegúrese de que la 1) Enchufe el cable a la red. monitor. máquina está enchufada a Coloque el interruptor en la red, el interruptor general posición 1 y ponga la llave en posición 1 y la llave de de seguridad.
- Page 17 All manuals and user guides at all-guides.com English GENERAL INSTRUCTIONS.- curious nature and how this can often lead to hazardous situations and Carefully read through the instructions behaviour which could cause contained in this manual. It provides accidents. This is why they should you with important information about always be supervised.
- Page 18 All manuals and user guides at all-guides.com SAFETY INSTRUCTIONS.- Make sure that the mains supply This product must have an earth voltage matches that of the machine connection. In the event that the before plugging it in. The supply appliance malfunctions then the earth voltage must be the same as that connection will redirect the electrical stated on the characteristics plate and...
- Page 19 All manuals and user guides at all-guides.com -Solvent based lubricants used, bottom holding knobs (29) click into - Belt is too tight. position. Plug the unit into a wall socket with an NOTE: Make sure that you hear the EARTH terminal. Set switch (L) to top holding knobs click into the Position [1].
-
Page 20: Important
All manuals and user guides at all-guides.com ATTENTION: Cylinder (21) Fig.9 is your hands on the handrails (58) and factory set to high pressure so it must tilt the treadmill, Fig.11, so that the not be knocked. If it is knocked this wheels (61) rest on the floor. - Page 21 All manuals and user guides at all-guides.com ADJUSTING THE BELT.- effect on the position of the belt as one turn of the left screw (L) in an If your unit is not seated evenly on the anticlockwise direction. Consequently, in four contact points, this may cause the the event of excessive belt movement belt (X) to shift sideways.
- Page 22 All manuals and user guides at all-guides.com keep our vital functions active. The Heart rate Pulsations table shows approximate energy use Maximum for an average person doing various Aerobic activities. zone ACTIVITY CALORIES USED HOUR Walking, moderate pace Housework Swimming (400 m/h) Dancing Walking, brisk (6 km/h) Tennis...
- Page 23 All manuals and user guides at all-guides.com At a later stage, once we have become (belt, structure, etc.). You can also fitter, we can divide this time between vacuum the underside of the unit by both levels but always remembering that resting it on one of its sides.
- Page 24 All manuals and user guides at all-guides.com SYMBOLS LOCATION.- Warning Keep hands clear when lifting Risk of entrapment when in motion Stand on the side rails when getting on or off the machine Child access not permitted Keep hands well clear Use suitable footwear Do not ingest...
-
Page 25: Fault Finding Chart
All manuals and user guides at all-guides.com FAULT FINDING CHART PROBLEM CHECKS SOLUTIONS The monitor does not switch 1) Make sure that 1) Plug the machine into the machine is plugged in, the mains supply. ON/OFF switch in position 1 switch to position 1 and and that the safety key is insert the safety key. - Page 26 All manuals and user guides at all-guides.com Français CONSIGNES GÉNÉRALES.- les informations requises à propos des précautions à prendre. Lire cette notice très attentivement. Elle Les parents ou personnes à qui des contient d’importantes informations sur sécurité l’utilisation enfants ont été confiés doivent tenir maintenance du tapis de course.
- Page 27 All manuals and user guides at all-guides.com dont la configuration sera la même Ne pas utiliser la machine en plein que celle de la fiche. Ne pas utiliser air. d’adaptateur avec cet appareil. Veillez à ne pas graisser la machine exagérément car vous risquez de tacher le sol ou les tapis sur lesquels repose la machine.
- Page 28 All manuals and user guides at all-guides.com Cette protection s’active si l’appareil latéraux; (28); Clés à tube combinées; est soumis à un effort ou à une (27) Clé mixte avec tournevis étoile; surchauffe. (26), Clé Allen 6mm; (74) Vis de M- Auquel cas, il faudra: 6x20;...
- Page 29 All manuals and user guides at all-guides.com MONTAGE DES APPUIS endommager altérer fonctionnement du tapis. LATÉRAUX.- Prendre l’appui latéral (35), PLIAGE DE L’APPAREIL.- l’approcher à la structure principale (1) IMPORTANT:Avant plier dans le sens de la flèche en le plaçant machine, vérifier que les appuis-mains dans les pivots d’ancrage comme (58)
-
Page 30: Pour Déplacer Le Tapis, Il Faudra
All manuals and user guides at all-guides.com Pour déplacer le tapis, il faudra En environnements agressifs, avec un degré élevée de particules ou personnes d’abord le plier, poser les mains sur avec poids élevé, lubrification fréquence les mains courantes (58) et incliner le devrait être augmenté... - Page 31 All manuals and user guides at all-guides.com des aiguilles d’une montre. Observez la l’oxygène. Normalement il s’agit d’un position du tapis, si au bout d’une exercice continu sans pauses. Car minute, le tapis n’est pas parfaitement outre, le sucre et la graisse, le corps a centré, répétez l’opération.
- Page 32 All manuals and user guides at all-guides.com CONTROLE DU RYTHME CARDIAQUE Le travail effectué par l’organisme est reproduit par le rythme cardiaque (pulsations), rythme que augmente au fur et à mesure de l’intensité de travail. Dans le cas de la machine à marcher, l’effort qui doit être effectué...
- Page 33 All manuals and user guides at all-guides.com Plus tard, quand votre forme physique vous laissez reposer la machine sur le se sera améliorée, vous pourrez côté, vous pourrez également passer distribuer le temps dans les deux l’aspirateur dans le bas de la machine. niveaux mais sans oublier que le Passez également l’aspirateur dans la nombre de pulsations ne doit pas...
- Page 34 All manuals and user guides at all-guides.com SYMBOLES SITUATION.- Danger. Tenir les mains à l’écart pendant le levage. Risque happement mouvement. Pour monter sur la machine ou en descendre, placez-vous profilés latéraux. Accès interdit aux enfants. Tenir les mains à l’écart. Portez des chaussures appropriées.
-
Page 35: Défaillances Ou Pannes
All manuals and user guides at all-guides.com DÉFAILLANCES OU PANNES SYMPTÔMES VÉRIFICATIONS SOLUTIONS 1. Le moniteur ne s'allume 1) Vérifiez si la machine est 1) Branchez le câble à la pas. branchée courant prise de courrant. Placez électrique, si l'interrupteur l'interrupteur sur la position général se trouve sur la 1 et la clé... - Page 36 All manuals and user guides at all-guides.com Deutsch ALLGEMEINE HINWEISE.- Laufbandes über notwendigen Sicherheitsvorkehrungen unterrichtet Lesen Anleitungen dieses sind. Handbuchs aufmerksam. Hier finden Sie Eltern und Aufsichtspersonen sollten wichtige Hinweise Sicherheit, Benutzung und Wartung des Laufbands. die natürliche Neugier von Kindern Bei der Benutzung elektrischer Geräte berücksichtigen, diese...
- Page 37 All manuals and user guides at all-guides.com Benutzen Sie das Gerät nicht im Freien. Achten Sie darauf, dass Sie das Gerät nicht zu stark schmieren, da sonst der Boden oder die Teppiche unter dem Gerät verschmutzt werden. Benutzen Sie nur Zubehör, das vom Bei der Benutzung elektrischer Geräte Hersteller empfohlen ist.
- Page 38 All manuals and user guides at all-guides.com Diese Sicherungsvorrichtung wird Steckschlüssel Kreuzschlitz- ausgelöst, wenn Gerät einer schraubenzieher; (26) Inbusschlüssel ungewöhnlichen Belastung oder einer 6mm; (74) Schraube M-6x20; (90) Überhitzung ausgesetzt ist. Schraube M-5x16; (126) Wenn ein solcher Fall auftritt, Sicherheitsschlüssel; (132) Fläschchen 1.- Stellen Sie den Schalter (L) am Schmiermittel;...
- Page 39 All manuals and user guides at all-guides.com Anschließend setzen sich, dass die Handauflagen (58) Schrauben (74) ein und ziehen sie mit montiert und korrekt festgezogen sind. Hilfe des Schraubschlüssels (28) an der Fußstütze fest Fig.6. Dieses Laufband verfügt über einen Danach führen gleiche...
- Page 40 All manuals and user guides at all-guides.com Legen Sie dann die Hände auf die Bei gewerblicher Nutzung empfehlen wir, das Gerät monatlich zu warten. Handauflagen (58) und Kippen Sie das In aggressive Umgebungen mit hoher Band Fig.11 bis die Transporträder (61) Dispergierverhalten von Teilchen oder mit den Boden berühren.
- Page 41 All manuals and user guides at all-guides.com VERSCHIEBEN DES BANDES VORTEILE DES TRAININGS.- NACH LINKS.- Regelmäßige sportliche Betätigung Sollte sich das Band nach links unterhalb eines gewissen Niveaus und verschoben haben, drehen Sie die im Rahmen von 15/20 Minuten hat Schraube (L) auf der linken Seite des aerobischen Charakter.
- Page 42 All manuals and user guides at all-guides.com AKTIVITÄT VERBRAUCHTE KALORIEN PRO Herzfrequenz Pulsschlägen STUNDE Maximum Laufen gemäßigtem Tempo Aerobyc Hausarbeit zone Schwimmen 400 m/h Tanzen Schnelles Laufen km/h Tennis Radfahren 30 km/h Squash MESSEN DES HERZRHYTHMUS Organismus vollbrachte Anstrengung wird wom Herzrhytrmus (Pulsschlägen) registriert, zunehmenender...
- Page 43 All manuals and user guides at all-guides.com Der nächste Schritt ist ein Training von oder einen feuchten Lappen. 15-20 Minuten einer Gesch- Benutzen Sie keine Lösemittel. windigkeit, der Ihren Pulsschlag auf 65- Saugen Sie mit einem Staubsauger 75% bzw. bei trainierten Personen auf vorsichtig rund um alle sichtbaren 75-85% bringt.
- Page 44 All manuals and user guides at all-guides.com SYMBOLE ANBRINGUNGSORT.- Gefahr. Beim Anheben Hände fernhalten. Einklemmgefahr bei laufendem Gerät. Beim Betreten und Absteigen von dem Gerät die seitlichen Profile benutzen. Zugang für Kinder verboten. Hände fernhalten. Geeignetes Schuhwerk benutzen. Nicht verschlucken.
- Page 45 All manuals and user guides at all-guides.com AUFFINDEN VON FEHLERN UND PROBLEMEN SYMPTOME MASSNAHMEN LÖSUNGEN 1. Der Monitor schaltet 1) Vergewissern Sie sich, dass 1) Stecken Sie das Kabel in nicht ein. Gerät Netz die Steckdose. Stellen Sie angeschlossen den Schalter auf Position 1 Hauptschalter auf Position 1 setzen steht.
- Page 46 All manuals and user guides at all-guides.com Português INDICAÇÕES GERAIS.- ter em conta a sua natureza curiosa, que poderá levá-las a situações e Leia atentamente as instruções deste comportamentos podem manual. Este lhe dará indicações perigosos. Por isso, sempre deverão importantes sobre a segurança, o uso estar vigiadas.
- Page 47 All manuals and user guides at all-guides.com INSTRUÇÕES DE SEGURANÇA.- Antes de ligar a unidade comprove Este produto deverá estar ligado á se a voltagem da sua instalação terra. Se não funciona correctamente coincide com a da máquina. ou se tiver uma avaria, a ligação á voltagem da sua instalação deve ser terra proporciona uma percurso de igual á...
- Page 48 All manuals and user guides at all-guides.com No caso da protecção ser activada no sentido da seta (58), como mostra repetidamente, causas mais a Fig.2, até ouvir o “CLIC” de encaixe prováveis são: dos manípulos de sujeição superior - condições de trabalho anormais, (29).
- Page 49 All manuals and user guides at all-guides.com MONTAGEM DOS APOIOS DE DESDOBRAR A SUA UNIDADE.- MÃOS.- Se deseja utilizar a faixa, siga o procedimento inverso, Aperte com o Em primeiro lugar, pegue na chave de pé a alavanca (16) na direcção da tubo combinada (28) e desaperte um seta como mostra a Fig.10 e desça a pouco,...
- Page 50 All manuals and user guides at all-guides.com Recomenda-se lubrificar a base da sua máquina 1/4 de volta no sentido banda entre a tabela e a faixa, dos ponteiros do relógio. Observe a conforme a frequência de uso. posição da banda, se passado um minuto a banda não ficar totalmente centrada, repita...
- Page 51 All manuals and user guides at all-guides.com INSTRUÇÕES DE USO.- aumento de peso e vice-versa, se queimamos mais calorias do que as CONDIÇÃO FÍSICA. consumidas perderemos peso. Em Estar em forma física, significa viver repouso o nosso corpo queima á volta plenamente.
- Page 52 All manuals and user guides at all-guides.com Uma fórmula simples para o calcular Recomendamos que a frequência dos consiste em substrair ao número 220 seus exercícios seja de 3 a 5 vezes a idade em anos. Para que o exercício por semana.
- Page 53 All manuals and user guides at all-guides.com INSPECÇÕES E MANUTENÇÃO.- Reveja e aperte todas as partes da sua unidade de três em três meses. Apague a unidade e desligue o cabo O uso desta máquina com partes da rede eléctrica. gastas ou debilitadas, como por...
- Page 54 All manuals and user guides at all-guides.com SÍMBOLOS SITUAÇÃO. Perigo Mantenha mãos afastadas durante a elevação. Risco atrapamento movimento. Situe-se nos perfis laterais ao subir ou baixar da máquina Proibido o acesso as crianças. Mantenha as mãos afastadas. Utilize calçado apropriado. Não ingerir...
- Page 55 All manuals and user guides at all-guides.com LOCALIZAÇÃO DE FALHAS OU DE AVARIAS SINTOMAS COMPROVAÇÕES SOLUÇÕES 1. O monitor não 1) Verifique se a máquina está 1) Ligue o cabo à rede. acende. ligada à rede, se o interruptor Coloque o interruptor na geral está...
- Page 56 All manuals and user guides at all-guides.com Italiano INDICAZIONI GENERALI.- roulant siano stati adeguatamente informati tutte precauzioni Legga con attenzione le istruzioni di necessarie da prendere. questo manuale, fornisce indicazioni genitori altre persone importanti sulla sicurezza, uso e manutenzione del tapis roulant. responsabili bambini devono...
- Page 57 All manuals and user guides at all-guides.com usi nessun adattatore con questa Non è consigliabile mantenere il macchina. suo apparecchio permanentemente in luogo umido dato l’ ossidazione sarebbe inevitabile. Faccia attenzione a non lubrificarlo eccessivamente dato che si potrebbe sporcare il pavimento od i tappeti che si trovano sotto l’...
- Page 58 All manuals and user guides at all-guides.com PROTEZIONE.- Verifichi di avere a disposizione tutti i Questo modello ha una protezione pezzi: elettronica di fermata automatica per Struttura pirncipale; (49) assicurare un’ ottima conservazione Protezione inferiore appoggio Sinistro; dei circuiti sia elettronici che elettrici. (50) Protezione inferiore appoggio Questa protezione si attiverà...
- Page 59 All manuals and user guides at all-guides.com MONTAGGIO DEI SOSTEGNI PIEGATURA DEL TAPIS LATERALI.- ROULANT.- Prendi sostengo laterale (35), avvicinalo alla struttura principale (1) IMPORTANTE: Prima di piegare la secondo il verso della freccia verso i sua unità, controllate se i poggiamano perni di ancoraggio così...
- Page 60 All manuals and user guides at all-guides.com Si assicuri che il cavo elettrico sia stato staccato dalla rete elettrica. Dopo aver lubrificato, se il nastro Se desidera spostare il tapis roulant, scivola verifichi la sua tensione. Per primo luogo dovrà inclinarlo.
- Page 61 All manuals and user guides at all-guides.com SPOSTAMENTO DEL NASTRO VANTAGGI DELL’ VERSO SINISTRA.- ALLENAMENTO FISICO.- Nel caso in cui il nastro si sia spostato Un allenamento regolare al di sotto di verso sinistra, giri la vite (L) del lato un certo livello e con una durata di sinistro del suo apparecchio 1/4 di giro 15/20 minuti, si trasforma in aerobico.
- Page 62 All manuals and user guides at all-guides.com ATTIVITÀ CALORIE Ritmo Pulsazioni CONSUMATE/ cardiaco Massimo Camminare Zona ritmo moderato aeróbica Lavori di casa Nuoto (400m/ora) Ballare Camminare veloce (6km/ora) Tennis Ciclismo (30km/h) Squash CONTROLLO DEL RITMO CARDIACO Il lavoro svolto dall’organismo si riflette nel ritmo cardiaco (pulsazioni) che aumenta l’accrescersi...
- Page 63 All manuals and user guides at all-guides.com Questo proteggerà i suoi muscoli e coperchio che protegge il motore preparerà adeguatamente (faccia attenzione ai cavi). sistema cardiorespiratorio. El passo seguente sarà durante 15-20 ATTENZIONE: minuti ad un ritmo che porti le Verificare periodicamente che tutti gli pulsazioni del battito cardiaco fra il 65 elementi di fissaggio siano stretti a...
- Page 64 All manuals and user guides at all-guides.com SIMBOLI SITUAZIONE.- Pericolo Mantenere le mani lontane durante il sollevamento. Rischio di incastro in movimento Situarsi lungo i profili laterali quando si sale o si scende dalla macchina. Vietato l’accesso ai minori. Mantenere le mani lontane. Usare calzature appropriate.
- Page 65 All manuals and user guides at all-guides.com LOCALIZZAZIONI DI GUASTI O DANNI SINTOMI VERIFICHE SOLUZIONI 1. Non si accende 1) Si assicuri che l'apparecchio 1) Colleghi il cavo alla il monitor. sia collegato alla rete elettrica, rete elettrica. Collochi l'interruttore generale si trovi in l'interruttore in posizione posizione 1 e la chiave di 1 e metta la chiave di...
- Page 66 All manuals and user guides at all-guides.com Nederlands ALGEMENE AANWIJZINGEN.- Het valt onder de verantwoording van Lees zorgvuldig de instructies in deze de eigenaar zich ervan te verzekeren dat gebruiksaanwijzing. Deze geeft alle gebruikers apparaat belangrijke aanwijzingen over gedegen geïnformeerd zijn over de veiligheid, het gebruik en het onderhoud benodigde voorzorgsmaatregelen.
- Page 67 All manuals and user guides at all-guides.com Let erop dat u niet te veel olie gebruikt bij het smeren van het apparaat, omdat dit op de vloer of vloerkleden zou kunnen lekken, daar waar het apparaat staat. Gebruik geen accessoires die niet worden aanbevolen door de fabrikant.
- Page 68 All manuals and user guides at all-guides.com BESCHERMING.- Haal het apparaat uit de verpakking en plaats het op de grond, zoals wordt model uitgerust getoond in Fig.0. Controleer of alle elektronische automatische stop onderdelen aanwezig zijn: beveiliging, die voor een optimaal Hoofdstructuur;...
- Page 69 All manuals and user guides at all-guides.com DE ZIJSTEUNEN BEVESTIGEN.- OPKLAPPEN VAN HET Breng de zijsteun (35) omhoog naar APPARAAT.- de hoofdstructuur (1) en plaats deze BELANGRIJK: Voordat u het toestel houdpennen, zoals opvouwt moet u ervoor zorgen dat de weergegeven in Fig.6.
- Page 70 All manuals and user guides at all-guides.com Voordat u het apparaat verplaatst Wanneer de band slipt nadat u deze dient u dit eerst te hebben opgeklapt. gesmeerd heeft, dient u de spanning Vervolgens plaatst u de handen op de controleren. band handgrepen (58) en laat de loopband spannen neemt u de inbussleutel van...
- Page 71 All manuals and user guides at all-guides.com Wanneer u de band heeft afgesteld, lichamelijke conditie te verbeteren en kunt u opnieuw met de oefening om te ontspannen. beginnen. DE VOORDELEN VAN VERPLAATSING VAN DE BAND LICHAAMSBEWEGING.- NAAR LINKS.- Een regelmatige oefening, op een Wanneer de band zich naar links heeft bepaald niveau en met een tijdsduur verplaatst, draai u de schroef (L) aan...
- Page 72 All manuals and user guides at all-guides.com ACTIVITEIT CALORIE Hartritme Polsslag VERBRUIK Maximum PER UUR Lopen in een rustig tempo Aerobische Huishoudelijk werk zone Zwemmen (400m/uur) Dansen Snel lopen (6 km/uur) Tennissen Wielrennen (30km/uur) Squash CONTROLE HARTRITME De inspanning die door het lichaam wordt verricht, wordt weergegeven door het hartritme (polsslag), dat toeneemt...
- Page 73 All manuals and user guides at all-guides.com Vervolgens gaat u de daaropvolgende elektronische eenheid met een vochtige 15-20 minuten over op een snelheid doek. Gebruik geen oplosmiddelen. waarbij uw hartslag blijft tussen de 65 Gebruik een stofzuiger om zorgvuldig en 75% of tussen de 75 en 85% voor om alle zichtbare onderdelen (band, meer getrainde...
- Page 74 All manuals and user guides at all-guides.com SYMBOLEN LOCATIE.- Waarschuwing Houd de handen vrij bij het optillen Risico op vast komen zitten tijdens verplaatsing Sta op de zijrails bij het bestijgen of verlaten van het toestel Toegang van kinderen niet toegestaan Houd uw handen goed vrij Gebruik geschikt schoeisel Neem niet in...
- Page 75 All manuals and user guides at all-guides.com STORINGS- EN FOUTMELDINGEN SYMPTOMEN CONTROLE HANDELINGEN OPLOSSINGEN monitor 1) Controleer of het apparaat is Sluit schakelt niet in. aangesloten op het lichtnet, de lichtnet. hoofdschakelaar op stand 1 hoofdschakelaar staat en de veiligheidssleutel stand 1 en plaats de correct geplaatst is.
- Page 76 All manuals and user guides at all-guides.com G6158...
- Page 77 All manuals and user guides at all-guides.com Para pedido de repuesto: Indicar el modelo de la máquina Nº correspondiente a la pieza Cantidad. To order replacement parts: State the machine model Corresponding parts nº Quantity. Pour toute commande pièces détachées Indiquer le modèle de la machine Numéro de la pièce Quantité.
- Page 78 All manuals and user guides at all-guides.com Español Por medio de la presente Exercycle S.L. declara que este producto cumple con los requisitos esenciales y cualesquiera otras disposiciones aplicables o exigibles de las Directivas 2004/108/CE, 2006/95/CE y 98/37/CE. English Hereby, Exercycle S.L, declares that this product is in compliance with the essential requirements and other relevant provisions of Directives 2004/108/EC, 2006/95/EC and 98/37/EC.
- Page 79 3750-325 Agueda (PORTUGAL ) e-mail: bh.fitness@wanadoo.fr Tel.: +351 234 729 510 Fax: +351 234 729 519 BH FITNESS MEXICO BH FITNESS NORTH AMERICA BH Exercycle de México S.A. de CV 20155 Ellipse Eje 132 / 136 Foothill Ranch Zona Industrial, 2A Secc.