Netatmo Smart Thermostat Mode D'emploi
2
Smart Thermostat
EN – Replacing a wireless thermostat or installing your first thermostat | Smart Thermostat
FR – Vous remplacez un thermostat sans-fil ou vous installez votre premier thermostat | Thermostat Intelligent
IT – Sostituzione di un termostato wireless oppure installazione del primo termostato | Termostato Intelligente
ES – Sustitución de un termostato inalámbrico o instalación de un primer termostato | Termostato Inteligente
DE – Ersetzen eines drahtlosen Thermostats oder installation Ihres ersten Thermostats | Smart Thermostat
NL – Een draadloze thermostaat vervangen of uw eerste thermostaat installeren | Intelligente Thermostaat

Manuels Connexes pour Netatmo Smart Thermostat


Sommaire des Matières pour Netatmo Smart Thermostat
- Page 1 Smart Thermostat EN – Replacing a wireless thermostat or installing your first thermostat | Smart Thermostat FR – Vous remplacez un thermostat sans-fil ou vous installez votre premier thermostat | Thermostat Intelligent IT – Sostituzione di un termostato wireless oppure installazione del primo termostato | Termostato Intelligente ES –...
- Page 2 Lea estas instrucciones detenidamente antes de comenzar la instalación. The Netatmo Thermostat must be installed according to applicable standards. El Termostato Netatmo se debe instalar en conformidad con la normativa vigente. Before any intervention, make sure power is turned off.
- Page 3 Video-Installationshilfe unter folgender Adresse anschauen: Video-Installationshilfe unter folgender Adresse anschauen: Om een draadloze thermostaat te vervangen, kunt u een online Om een eerste thermostaat te installeren, kunt u een online installatievideo bekijken op het volgende adres: installatievideo bekijken op het volgende adres: netatmo.com/video2 netatmo.com/video3...
-
Page 4: Pack Contents
Pack contents Contenu du pack 4. Adaptateur chaudière 8. Adaptateur secteur* 1. Thermostat 5. Support mural* 9. Adhésif double face 2. Support mobile 6. Plaque murale* 10. 3 piles AAA 3. Relais 7. Adhésifs couleur 11. 4 vis & 4 chevilles *Non utilisé... - Page 5 1/3 Identify the wires 1/3 Identifier les fils Coupez le courant. Ouvrez la porte de votre chaudière. Si nécessaire, retirez le capot de protection en plastique pour accéder à la borne de raccordement. Identifiez les deux connecteurs de l’entrée thermostat de votre chaudière, souvent labellisés Ls-Lr, TA ou RT. Voir les conseils de résolution de problème p.
- Page 6 2/3 Identify the wires 2/3 Identifier les fils Si vous remplacez un thermostat sans-fil, retirez votre ancien relais de thermostat. Si vous installez votre premier thermostat, vous devez peut-être retirer le pont entre les deux connecteurs thermostat. Branchez les fils noir et gris de l’adaptateur chaudière sur l’entrée thermostat que vous avez identifiée (pas de polarité).
- Page 7 3/3 Identify the wires 3/3 Identifier les fils Identifiez les connecteurs d’alimentation 220/230V ; ils portent généralement les indications P/N ou L/N. Connectez le fil bleu de l’adaptateur chaudière au terminal N de votre chaudière, puis connectez le fil marron au terminal P ou L. Si des fils sont déjà...
- Page 8 Set the Relay Fixez le Relais L’adaptateur chaudière doit être éloigné autant que possible d’éléments métalliques (tableau électrique, tuyaux, câblages…). Vous pouvez fixer l’adaptateur chaudière à l’aide de l’adhésif double face ou le visser. The boiler adaptor should be placed Fissare il Relè...
- Page 9 Test the Relay Testez le Relais 1. Connectez le Relais sur l’adaptateur chaudière. 2. Rétablissez le courant. 3. La LED du Relais clignote. Voir les conseils de résolution de problème p. 31 pour plus d’aide. Connect the Relay into the boiler adaptor.
- Page 10 Test the Relay Testez le Relais 4. Appuyez brièvement sur le bouton du Relais. 5. La LED du Relais émet une lumière et la chaudière s’allume. 6. Appuyez de nouveau sur le bouton du Relais. 7. La LED du Relais s’éteint et la chaudière s’arrête. Voir les conseils de résolution de problème p.
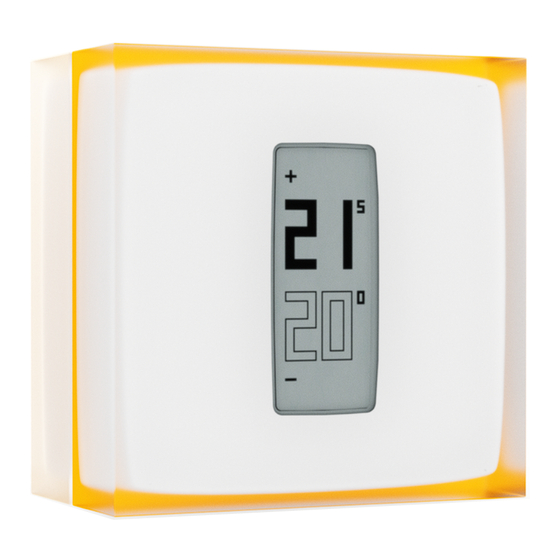
- Page 11 Prepare the Thermostat Préparez le Thermostat 1. Insérez les piles dans le Thermostat en respectant la polarité. 2. Le Thermostat affi che l’écran de démarrage ci-contre, et recherche le Relais. 3. Quand le Thermostat a trouvé le Relais, il affi che la température de consigne (haut) et la température mesurée (bas).
- Page 12 Customise your Thermostat Personnalisez votre Thermostat 1. Vous pouvez choisir de personnalisez votre Thermostat avec l’un des adhésifs couleur. 2. Décollez le cadre extérieur de l’adhésif. 3. Collez-le sur l’arrière du Thermostat. You can choose to customize your Thermostat by using one Personalizzare il suo Termostato of the colour adhesives.
- Page 13 Set the Thermostat Fixez le Thermostat Fixez le Thermostat sur son support mobile et placez-le sur un meuble dans la pièce à vivre, ou fixez-le au mur à l’aide de son support mural en le vissant. Le Thermostat doit être placé à plus d’un mètre des ouvertures, et loin des sources de chaleur et de froid.
- Page 14 Test the Thermostat Testez le Thermostat 1. Appuyez plusieurs fois sur le haut du Thermostat jusqu’à ce qu’il affi che « MAX ». Le Thermostat allume la chaudière. 2. Appuyez sur le bas du Thermostat jusqu’à ce qu’il affi che « OFF ». Le Thermostat éteint la chaudière.
- Page 15 Scaricare l’applicazione mobile Energy Netatmo Per controllare a distanza il Termostato dal proprio smartphone o tablet, visitare il sito: Descárgate la aplicación de móvil Energy Netatmo Para controlar el Termostato a distancia desde tu smartphone o tableta, consulta: Netatmo Energy...
- Page 16 9 connecté à des connecteurs thermostat ON/OFF permettant de EMS… the Relay of Netatmo Thermostat. différents : eBus, EMS… connecter le Relais du Thermostat. Send a picture to photo@netatmo. Envoyez une photo à l’adresse I cannot identify the terminals com and our support team Je n’arrive pas à...
- Page 17 OFF del termostato per collegare p. 9 conectado a diferentes terminales: cendido y apagado para conectar EMS, ecc. il Relè del Termostato Netatmo. eBus, EMS... el Relé del Termostato Netatmo. Inviare una foto a photo@netatmo. Enviar una imagen a photo@netat-...
- Page 18 Meine früheren Thermostate kamerthermostaataansluitingen OFF-Raumthermostatklemmen blz. 9 aangesloten op andere aansluitin- sind an verschiedene Terminals om het Relais van de Netatmo für den Anschluss des Relais des gen: eBus, EMS, enz. angeschlossen: eBus, EMS ... Thermostaat op aan te sluiten. Netatmo Thermostats.
- Page 19 Copyright Netatmo © 2020 All rights reserved. Reproduction and distribution prohibited without written authorization from Netatmo Apple and the Apple logo are trademarks of Apple Inc., registered in the U.S. and other countries. App Store is a service mark of Apple Inc.,...