Yealink IP DECT W56P Mode D'emploi
Masquer les pouces
Voir aussi pour IP DECT W56P:
- Guide de démarrage rapide (17 pages) ,
- Mode d'emploi (125 pages)

Manuels Connexes pour Yealink IP DECT W56P


Sommaire des Matières pour Yealink IP DECT W56P
- Page 1 IP DECT Phone W56P & W56H English | Deutsch | Español | Français Quick Start Guide(V80.18) www.yealink.com Applies to firmware version 25.80.0.15 or later.
- Page 2 Table of Contents English ..........1 Deutsch ........15 Español ........30 Français ........44...
-
Page 3: Packaging Contents
Two Power Adapters Belt Clip Ethernet Cable Rechargeable Battery Quick Start Guide Yealink W56P IP DECT phone consists of one Base for W52P/W56P and one W56H Handset. Note: The following items are included in your W56H package: W56H Handset USB Charger Cradle... - Page 4 The following item is optional accessory: W56P Handset Protective Case Note: You need to purchase separately if required. Assembling the DECT Phone Assembling the Phone 1. Connect the network and power for the base station in one of the following ways, as shown below: a.
- Page 5 3. Connect the charger cradle and charge the handset, as shown below: The handset should be used with original power adapter (5V/600mA) only. The use of the third- Note: party power adapter may cause the damage to the handset. The charging status of the handset is indicated in the top right-hand corner of the LCD screen. 4.
-
Page 6: Getting Started
Getting Started Shortcuts This helps you get quick access to features by pressing the shortcut keys directly without having to scroll through the menu.You can press the following predefined shortcut keys to access some frequently used features when the handset is idle: Press the left soft key to access the call history. -
Page 7: Network Settings
2. Select the desired base and press the soft key. The handset begins searching the base. 3. Press the soft key after searching a base successfully. 4. Enter the base PIN (default: 0000), and then press the soft key to complete registeration. Done After the success of registration, the handset LCD screen prompts “Handset subscribed”. -
Page 8: Basic Operations
Basic Operations Turning Handset On/Off To turn the handset on, do one of the following: Press , then the LCD screen lights up. Place the handset in the charger cradle. The handset will be turned on automatically. To turn the handset off: Long press to turn the handset off. - Page 9 Ring Tones 1. Press the key to enter the main menu, and then select Settings->Audio->Ring Tones ->Melodies 2. Press or to highlight the option or the desired line. Intercom Call 3. Press or to select the desired ring tone. 4.
-
Page 10: Placing Calls
Basic Call Features Placing Calls To place a call directly: 1. Do one of the following: Enter the desired number when the handset is idle. Press to enter the pre-dialing screen. Enter the desired number using the keypad. If there are multiple lines assigned to your handset as outgoing lines, press the soft key to select Line the desired line. -
Page 11: Answering Calls
Answering Calls To answer a call, do one of the following: Press the soft key. Accept Press Press Press You can ignore an incoming call by pressing the Silence soft key or reject an incoming call by Note: pressing Ending Calls Press Call Mute Press... -
Page 12: Call Forward
2. Enter the number you want to transfer the call to. 3. Press the soft key. Transfer Semi-Attended Transfer 1. Press the soft key during a call, and then select Options Transfer 2. Enter the number you want to transfer the call to. 3. -
Page 13: Safety Instructions
Safety Notes During Operation Use only spare parts and accessories supplied or authorized by Yealink. The operation of non- authorized parts cannot be guaranteed. Do not place heavy objects on top of the handset or the base station in case of damage and deformation caused by the heavy load. - Page 14 Use only the rechargeable battery pack delivered with the handset or those rechargeable battery packs expressly recommended by Yealink. Defective or exhausted battery should never be disposed of as municipal waste. Return old battery to the battery supplier, a licensed battery dealer or a designated collection facility.
- Page 15 ENVIRONMENTAL RECYCLING Never dispose of the device with domestic waste Ask your Town Council about how to dispose of it in an environmentally friendly way. The cardboard box, plastic packaging and player components may be recycled in accordance with prevailing recycling regulations in your country. Always adhere to prevailing regulations Those who fail to do so may be fined or prosecuted in accordance with the law.
-
Page 16: Declaration Of Conformity
YEALINK (XIAMEN) NETWORK TECHNOLOGY CO.,LTD WWW.YEALINK.COM Declaration of Conformity YEALINK(XIAMEN) NETWORK TECHNOLOGY CO.,LTD, Address: 309, 3th Floor, No.16, Yun Ding North Road, Huli District, Xiamen City, Fujian, P.R. China CE DATE: 17th/July/2017 declare that the product Type: IP DECT Phone... - Page 17 Basisstation für W52P/W56P USB-Ladeschale Zwei Netzteile Wiederaufladbare Gürtelclip Ethernet-Kabel Kurzanleitung Batterie Das Yealink IP DECT phone W56P besteht aus einer Basisstation für W52P/W56P und einem Hinweis: Handset W56H. Folgende Teile sind im Lieferumfang des W56H enthalten: Wiederaufladbare W56H-Mobilteil USB-Ladeschale Netzteil Gürtelclip...
- Page 18 Der folgende Artikel ist optionales Zubehör: Schutzetui für das Handset W56P Hinweis: Falls Sie das Schutzetui benötigen, müssen Sie es separat erwerben. Das DECT-Telefon zusammensetzen 1. Verbinden Sie die Basisstation mit dem Netzwerk und der Stromversorgung auf eine der nachfolgend beschriebenen Weisen: a.
- Page 19 3. Schließen Sie die Ladestation an und laden Sie das Mobilteil wie unten dargestellt auf: Das Mobilteil darf nur mit dem originalen Netzteil (5 V/600 mA) betrieben werden. Bei Hinweis: Verwendung eines Drittanbieter-Netzteils kann das Mobilteil beschädigt werden. Der Ladestatus des Mobilteils wird oben rechts im Display angezeigt. 4.
-
Page 20: Erste Schritte
Erste Schritte Schnellzugriffstasten Sie können Funktionen schnell aufrufen, indem Sie auf die Schnellzugriffstasten drücken, statt endlos durch das Menü zu scrollen. Befindet sich das Mobilteil im Bereitschaftszustand, können Sie die folgenden voreingestellten Schnellzugriffstasten drücken, um einige häufig verwendete Funktionen aufzurufen: Drücken Sie den linken Softkey, um das Anrufprotokoll anzuzeigen. -
Page 21: Netzwerkeinstellungen
Wenn das Display des Mobilteils „Press base page 2s then press OK“ anzeigt, halten Sie die Taste an der Basisstation gedrückt, bis die Anmelde-LED langsam blinkt. Drücken Sie dann die -Taste am Mobilteil und wählen Sie Register Handset 2. Wählen Sie die gewünschte Basisstation aus und drücken Sie die -Taste. -
Page 22: Grundlegende Funktionen
Das IP DECT phone unterstützt sowohl IPv4- als auch IPv6-Adressen, wobei das IPv6-Protokoll standardmäßig Hinweis: deaktiviert ist. Falsche Netzwerkeinstellungen können zur Folge haben, dass Ihr DECT-Telefon nicht erreichbar ist, und können sich auf die Leistung Ihres Netzwerks auswirken. Weitere Informationen zu diesen Einstellungen erhalten Sie von Ihrem Systemadministrator. -
Page 23: Lautstärke Einstellen
Lautstärke einstellen Drücken Sie im Ruhemodus des Mobilteils die Taste oder , um die Lautstärke des Klingeltons einzustellen. Drücken Sie während eines Anrufs oder , um die Lautstärke der Freisprechfunktion/des Mobilteils anzupassen. Klingeltöne 1. Drücken Sie die -Taste, um das Hauptmenü... -
Page 24: Anrufe Tätigen
Kurzwahlnummer einrichten: 1. Drücken Sie die Taste zum Öffnen des Hauptmenüs und wählen Sie dann Settings->Telephony->Speed Dial 2. Drücken Sie auf oder , um die gewünschte Zifferntaste zu markieren, und drücken Sie dann den Softkey Assign 3. Drücken Sie oder , um den gewünschten Eintrag zu markieren, und drücken Sie dann den -Softkey. -
Page 25: Anrufe Entgegennehmen
2. Drücken Sie oder , um den gewünschten Eintrag zu markieren, und drücken Sie dann oder , um einen Anruf über die Standardleitung zu tätigen. Einen Anruf über die Wiederwahl-Liste tätigen: 1. Drücken Sie am im Bereitschaftszustand befindlichen Mobilteil oder 2. - Page 26 Gehen Sie wie folgt vor, um einen Anruf fortzusetzen: Falls nur ein Anruf gehalten wird, drücken Sie den Softkey Resume Wenn zwei Anrufe gehalten werden, drücken Sie den Softkey , um den aktuellen Anruf Resume fortzusetzen. Drücken Sie den Softkey , um zwischen Anrufen umzuschalten.
- Page 27 3. Drücken Sie oder , um die gewünschte Art der Anrufumleitung zu markieren, und drücken Sie dann den -Softkey. Always----Eingehende Anrufe werden sofort umgeleitet. Busy----Eingehende Anrufe werden umgeleitet, wenn die Leitung besetzt ist. No Answer----Eingehende Anrufe werden umgeleitet, wenn sie innerhalb einer bestimmten Zeit nicht entgegengenommen werden.
-
Page 28: Sicherheitshinweise
Waschküchen und feuchten Kellern auf. Sicherheitshinweise für den Betrieb Verwenden Sie nur von Yealink gelieferte oder zugelassene Ersatz- oder Zubehörteile. Die ordnungsgemäße Funktion von nicht zugelassenen Teilen kann nicht garantiert werden. Legen Sie keine schweren Objekte auf das Mobilteil oder die Basisstation, da die Geräte hierdurch beschädigt werden können. - Page 29 Öffnen oder beschädigen Sie den Akku nicht, da austretendes Elektrolyt ätzend wirkt und Ihre Augen oder Ihre Haut schädigen kann. Verwenden Sie nur mit dem Mobilteil ausgelieferte oder ausdrücklich von Yealink empfohlene Akkus. Defekte oder leere Akkus und Batterien dürfen nicht mit dem Hausmüll entsorgt werden.
- Page 30 UMWELTFREUNDLICHE VERWERTUNG Entsorgen Sie das Gerät nicht mit dem Hausmüll. Erkundigen Sie sich bei Ihrer Stadtverwaltung, wie Sie das Gerät umweltfreundlich entsorgen können. Pappkarton, Kunststoffverpackung und Bauteile des Gerätes können im Einklang mit den geltenden Vorschriften in Ihrem Land verwertet werden. Halten Sie stets die geltenden Vorschriften ein.
-
Page 31: Konformitätserklärung
YEALINK (XIAMEN) NETWORK TECHNOLOGY CO.,LTD WWW.YEALINK.COM Konformitätserklärung Wir, YEALINK(XIAMEN) NETWORK TECHNOLOGY CO.,LTD, Adresse: 309, 3rd Floor, No.16, Yun Ding North Road, Huli District, Xiamen City, Fujian, P.R. China CE-DATUM: 17.07.2017 erklären hiermit, dass das Produkt Typ: IP DECT Telefon Modell: W56P/W56H die grundlegenden Anforderungen und andere relevante Bestimmungen der folgenden EG-Richtlinie erfüllt. -
Page 32: Contenido De La Caja
Pinza para el Cable Ethernet Batería recargable Guía de inicio rápido cinturón W56P Teléfono Inalámbrico DECT IP de Yealink consiste en una base para W52P/W56P y un Handset Nota: W56H. En la caja del W56H se incluyen los siguientes artículos: Ñ... - Page 33 El siguiente elemento es un accesorio opcional: Funda protectora del teléfono W56P : Se tiene que adquirir por separado si es necesario. Nota Instalación del teléfono DECT 1. Conecte la estación base a la red y la alimentación de una de las dos formas posibles: a.
- Page 34 3. Conecte la base de carga y cargue el teléfono como se muestra a continuación: El teléfono debe usarse únicamente con el alimentador original (5V/600 mA). El uso de un Nota: adaptador de terceros podría dañar el teléfono. El estado de carga del teléfono se indica en la esquina superior derecha de la pantalla LCD. 4.
-
Page 35: Primeros Pasos
Primeros pasos Accesos directos Permiten tener un acceso directo a ciertas funciones pulsando las teclas de acceso directo sin necesidad de desplazarse por el menú. Cuando el teléfono esté en reposo, puede pulsar los siguientes accesos directos predefinidos para acceder a algunas de las funciones más utilizadas: Pulse la tecla izquierda para acceder al registro de llamadas. -
Page 36: Configuración De Red
Si la pantalla LCD del teléfono muestra “Press base page 2s then press OK”, mantenga pulsado en la estación base hasta que el LED de registro parpadee lentamente. A continuación, pulse la tecla del teléfono y seleccione Registrar inalámbrico. 2. Seleccione la base deseada y pulse la tecla . -
Page 37: Operaciones Básicas
Operaciones básicas Encender/apagar el teléfono Encender el teléfono, realice una de las siguientes acciones: Pulse y se encenderá la pantalla LCD. Coloque el teléfono en la base de carga. El teléfono se encenderá automáticamente. Apagar el teléfono: Mantenga pulsado para apagar el teléfono. Bloquear/desbloquear el teclado Mantenga pulsado cuando el teléfono esté... - Page 38 Tonos de llamada 1. Pulse la tecla para acceder al menú principal y, a continuación, seleccione Ajustes->Audio->Tonos -> Melodías. 2. Pulse o para seleccionar la opción o la línea deseada. Llamada Intercom 3. Pulse o para seleccionar el tono de timbre deseado. 4.
-
Page 39: Hacer Llamadas
Funcionalidades básicas de llamadas Hacer llamadas Hacer una llamada directamente: 1. Ejecute una de las siguientes acciones: Introduzca el número deseado cuando el teléfono esté en reposo. Pulse para acceder a la pantalla de premarcado. Introduzca el número deseado con el teclado. Si hay varias líneas asignadas al teléfono como líneas de salida, pulse la tecla para seleccionar la Line... -
Page 40: Transferencia De Llamadas
Responder llamadas Para responder una llamada, realice una de las siguientes acciones: Pulse la tecla de función Aceptar. Pulse . Pulse Pulse Puede ignorar una llamada entrante pulsando la tecla de función Silence o rechazar una llamada Nota: entrante pulsando Finalizar llamadas Pulse Silenciar la llamada... - Page 41 Transferencia semi atendida 1. Pulse la tecla de función durante la llamada y seleccione Opciones Transferir 2. Marque el número al que quiere transferir la llamada. 3. Pulse para marcar. 4. Cuando escuche el tono de llamada, pulse la tecla de función Transferir Transferencia atendida 1.
-
Page 42: Instrucciones De Seguridad
Notas de seguridad durante el funcionamiento Utilice solo piezas de respuesto y accesorios suministrados o autorizados por Yealink. No se puede garantizar el funcionamiento de piezas no autorizadas. No coloque objetos pesados sobre el teléfono ni la estación base para evitar daños o deformaciones causados por el peso. - Page 43 Utilice únicamente el paquete de baterías recargables suministrado con el teléfono o los paquetes de baterías recargables recomendados explícitamente por Yealink. Nunca elimine las baterías defectuosas o agotadas con los residuos urbanos. Devuelva las baterías viejas al proveedor de las baterías, a un distribuidor de baterías autorizado o una instalación de...
- Page 44 RECICLAJE AMBIENTAL Nunca elimine el equipo con los residuos domésticos Pregunte en su ayuntamiento cómo eliminarlo de forma respetuosa con el medio ambiente. Se debe reciclar la caja de cartón, el embalaje de plástico y los componentes en conformidad con la normativa de reciclaje vigente en su país. Respete siempre la normativa vigente En caso de incumplirla, podría ser multado o procesado en cumplimiento de la ley.
-
Page 45: Declaración De Conformidad
YEALINK (XIAMEN) NETWORK TECHNOLOGY CO.,LTD WWW.YEALINK.COM Declaración de conformidad Declarante: YEALINK(XIAMEN) NETWORK TECHNOLOGY CO.,LTD, Dirección: 309, 3th Floor, No.16, Yun Ding North Road, Huli District, Xiamen City, Fujian, R.P. China Fecha de CE: 2017.07.17 Declara que el producto Tipo: Teléfono IP DECT... -
Page 46: Contenu De La Boîte
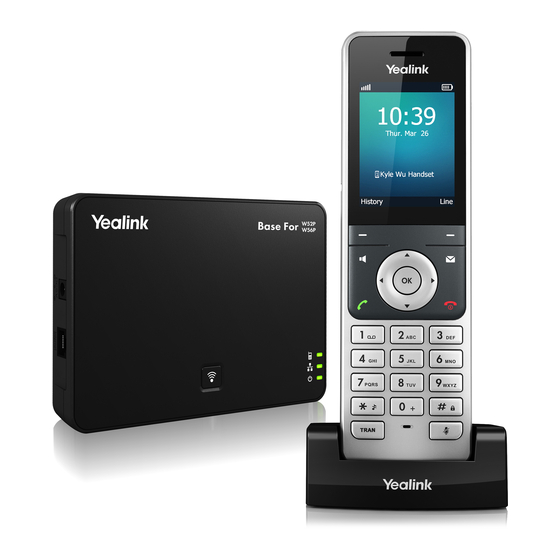
Clip de ceinture Câble Ethernet Batterie rechargeable Guide de démarrage rapide Le Yealink W56P inclut une base DECT W52P/W56P et un combiné DECT W56H. Remarque : Les articles suivants sont inclus dans l’ensemble W56H : Combiné W56H Socle chargeur USB Adaptateur secteur Clip de ceinture Batterie rechargeable Nous vous recommandons d’utiliser uniquement des accessoires fournis ou approuvés par... -
Page 47: L'article Suivant Est Un Accessoire Optionnel
L’article suivant est un accessoire optionnel: Etui de protection du combiné W56P : vous devez l’acheter séparément si besoin. Remarque Montage du téléphone DECT 1. Procédez à la connexion au réseau et à l’alimentation électrique de la station de base d’une des façons suivantes, comme illustré... - Page 48 3. Raccordez le socle chargeur et chargez le combiné, comme illustré ci-dessous : Le combiné doit uniquement être utilisé avec l’adaptateur d’alimentation d’origine Remarque : (5 V/600 mA). L’utilisation d’un adaptateur tiers est susceptible d’endommager le combiné. Le niveau de charge du combiné est indiqué dans le coin supérieur droit de l’écran LCD. 4.
-
Page 49: Enregistrement Du Combiné
Démarrer Raccourcis En vous servant des touches de raccourci, vous pourrez accéder rapidement aux fonctionnalités voulues sans devoir faire défiler le menu. Vous pouvez appuyer sur les raccourcis prédéfinis suivants pour accéder à certaines des fonctionnalités de votre combiné fréquemment utilisées quand le combiné est inactif : Appuyez sur la touche gauche pour accéder à... -
Page 50: Paramètres Du Réseau
6. Appuyez sur la touche de fonction pour accepter la modification. Save La solution DECT Yealink supporte IPV4 et IPV6. IPV6 est désactivé par défaut. Remarque : Des paramètres réseau incorrects sont susceptibles de rendre votre téléphone DECT inaccessible et d’avoir un impact sur les performances du réseau. Pour plus d’informations sur ces paramètres, contactez votre administrateur système. -
Page 51: Fonctions Élémentaires
Fonctions élémentaires Allumer/éteindre le combiné Pour allumer le combiné, effectuez l’une des actions suivantes : Appuyez sur et l’écran LCD s’allumera. Placez le combiné sur le socle chargeur. Le combiné s’allumera automatiquement. Pour éteindre le combiné : Maintenez la touche enfoncée pour éteindre le combiné. -
Page 52: Tonalités
Tonalités 1. Appuyez sur la touche our ouvrir le menu principal, puis sélectionnez Settings->Audio->Ring Tones-> Melodies 2. Appuyez sur ou sur pour sélectionner l’option ou la ligne souhaitée. Intercom Call 3. Appuyez sur ou pour sélectionner la sonnerie choisie. 4. -
Page 53: Fonctions D'appel De Base
Fonctions d’appel de base Passer des appels Pour passer directement un appel : Deux méthodes : Saisissez le numéro souhaité lorsque le combiné est inactif. Appuyez sur pour ouvrir l’écran de prénumérotation. Saisissez le numéro souhaité à l’aide du clavier numérique. Si plusieurs lignes sont affectées à... -
Page 54: Répondre Aux Appels
Répondre aux appels Pour répondre à un appel, effectuez l’une des procédures suivantes : Appuyez sur la touche Accept Appuyez sur Appuyez sur Appuyez sur Vous pouvez ignorer un appel entrant en appuyant sur la touche Silence ou rejeter un appel Remarque : entrant en appuyant sur Mettre fin aux appels... -
Page 55: Renvoyer Un Appel
Transfert semi-privé 1. Appuyez sur la touche au cours d’un appel, puis sélectionnez Options Transfer 2. Saisissez le numéro vers lequel vous voulez transférer l’appel. 3. Appuyez sur pour appeler le numéro. 4. Appuyez sur la touche lorsque vous entendez la tonalité de retour. Transfer Transfert supervisé... -
Page 56: Consignes De Sécurité
Consignes d’utilisation Utilisez uniquement les pièces de rechange et les accessoires fournis ou autorisés par Yealink. Le bon fonctionnement de pièces non autorisées ne peut être garanti. Ne placez pas d’objets lourds sur le combiné ou la station de base, au risque de les endommager et de les déformer. - Page 57 Utilisez uniquement l’accumulateur rechargeable fourni avec le combiné ou un accumulateur expressément recommandé par Yealink. Les batteries défectueuses ou épuisées ne doivent jamais être traitées comme des déchets ménagers. Renvoyez les batteries usagées à leur fournisseur, à un vendeur de batteries agréé ou à...
- Page 58 RECYCLAGE ENVIRONNEMENTAL Ne jetez pas cet appareil avec les déchets ménagers Contactez vos collectivités locales pour savoir comment l’éliminer de façon écologique. La boîte en carton, l’emballage en plastique et les composants de l’appareil peuvent être recyclés conformément à la réglementation en vigueur dans votre pays. Respectez toujours la réglementation en vigueur Les personnes qui l’enfreignent sont passibles de poursuites judiciaires.
-
Page 59: Déclaration De Conformité
YEALINK (XIAMEN) NETWORK TECHNOLOGY CO.,LTD WWW.YEALINK.COM Déclaration de conformité Nous, YEALINK(XIAMEN) NETWORK TECHNOLOGY CO.,LTD, Adresse : 309, 3th Floor, No.16, Yun Ding North Road, Huli District, Xiamen City, Fujian, P.R. Chine DATE CE : 2017-07-17 déclarons que le produit Type : Téléphone IP DECT Modèle : W56P/W56H... - Page 60 Founded in 2001, Yealink, a leading provider of VoIP Phone and IP communication solutions, has been focusing on VoIP products characterized by reliable quality, easy deployment and affordable price for more than a decade. Today, customers from over 140 countries rely on Yealink as the backbone of global collaboration to extend the value of network communications.