Table des Matières

Publicité

Les langues disponibles

Les langues disponibles

Liens rapides

SCT71800S1
EN User manual
FR Notice d'utilisation
IT Istruzioni per l'uso
2
24
49

Publicité

Table des Matières
loading

Sommaire des Matières pour AEG SCT71800S1

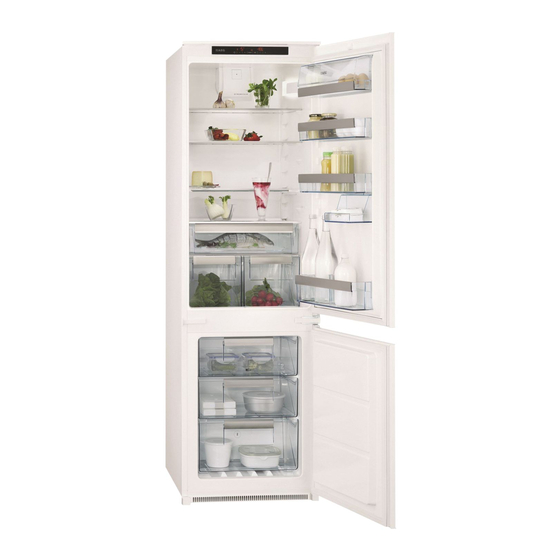
  • Page 1 EN User manual SCT71800S1 FR Notice d'utilisation IT Istruzioni per l’uso...
  • Page 2: Table Des Matières

    9. TECHNICAL DATA ............23 FOR PERFECT RESULTS Thank you for choosing this AEG product. We have created it to give you impeccable performance for many years, with innovative technologies that help make life simpler –...
  • Page 3: Safety Instructions

    ENGLISH SAFETY INSTRUCTIONS In the interest of your safety and to en- 1.2 General safety sure the correct use, before installing WARNING! and first using the appliance, read this user manual carefully, including its hints and warnings. To avoid unnecessary mis- Keep ventilation openings, in the appli- takes and accidents, it is important to ance enclosure or in the built-in struc-...
  • Page 4 WARNING! • Appliance's manufacturers storage Any electrical component (power recommendations should be strictly cord, plug, compressor) must be adhered to. Refer to relevant instruc- replaced by a certified service tions. agent or qualified service per- • Do not place carbonated or fizzy sonnel to avoid hazard.
  • Page 5: Environment Protection

    ENGLISH • The appliance must not be located ozone layer, in either its refriger- close to radiators or cookers. ant circuit or insulation materials. The appliance shall not be dis- • Make sure that the mains plug is ac- carded together with the urban cessible after the installation of the ap- refuse and rubbish.
  • Page 6: Switching Off The Fridge

    Alarm indicator Press the fridge temperature regula- tor. Child Lock function Minute Minder function Press the Mode button until the cor- DYNAMICAIR function responding icon appears. The Fridge Off indicator flashes. 2.2 Switching on Press the OK button to confirm.
  • Page 7: Child Lock Function

    ENGLISH The Timer start to flash (min). The alarm indicator continue to flash At the end of the countdown the Minute until the normal conditions are re- Minder indicator flashes and an audible stored. alarm sounds: When the alarm has returned the alarm indicator goes off.
  • Page 8: Daily Use

    To switch on the function: Press the OK button to confirm. Press the Mode button until the cor- The FROSTMATIC indicator goes responding icon appears. off. The Holiday indicator flashes. The function switches off by se- lecting a different freezer set The fridge temperature indicator temperature.
  • Page 9: Storage Of Frozen Food

    ENGLISH The maximum amount of food that can 3.4 Thawing be frozen in 24 hours is specified on the Deep-frozen or frozen food, prior to be- rating plate, a label located on the in- ing used, can be thawed in the refrigera- side of the appliance.
  • Page 10: Movable Shelves

    10 www.aeg.com 3.8 Movable shelves The walls of the refrigerator are equip- ped with a series of supports so that the shelves can be positioned as desired. For better use of space, the front half- shelves can be placed under the rear ones.
  • Page 11: Helpful Hints And Tips

    ENGLISH 3.11 DYNAMICAIR The refrigerator compartment is equip- ped with a device that allows for rapid cooling of foods and more uniform tem- perature in the compartment. This device activates by itself when nee- ded, for example for a quick tempera- ture recovering after door opening or when the ambient temperature is high.
  • Page 12: Care And Cleaning

    12 www.aeg.com • the maximum quantity of food which partment, can possibly cause the skin can be frozen in 24 hrs. is shown on to be freeze burnt; the rating plate; • it is advisable to show the freezing in •...
  • Page 13: Defrosting The Refrigerator

    ENGLISH After cleaning, reconnect the equipment to the mains supply. 5.2 Defrosting the refrigerator Frost is automatically eliminated from the evaporator of the refrigerator com- partment every time the motor compres- sor stops, during normal use. The de- frost water drains out through a drain hole into a special container at the back of the appliance, over the motor com- pressor, where it evaporates.
  • Page 14 14 www.aeg.com Problem Possible cause Solution The appliance does The appliance is switched Switch on the appliance. not operate. The off. lamp does not oper- ate. The mains plug is not Connect the mains plug to connected to the mains the mains socket correctly.
  • Page 15: Replacing The Lamp

    ENGLISH Problem Possible cause Solution Products prevent that wa- Make sure that products ter flows into the water do not touch the rear collector. plate. The temperature in The temperature regula- Set a higher/lower temper- the appliance is too tor is not set correctly. ature.
  • Page 16: Installation

    16 www.aeg.com 7. INSTALLATION WARNING! 7.2 Electrical connection Read the "Safety Information" Before plugging in, ensure that the volt- carefully for your safety and cor- age and frequency shown on the rating rect operation of the appliance plate correspond to your domestic pow- before installing the appliance.
  • Page 17: Ventilation Requirements

    ENGLISH • Loosen and remove the lower pin. On the opposite side: • Tighten the lower pin. • Install the lower door. • Tighten the middle hinge. • Install the spacer. • Install the upper door. • Tighten the upper pin. 7.4 Ventilation requirements The airflow behind the appliance must min.
  • Page 18 18 www.aeg.com Install the appliance in the niche. Push the appliance in the direction of the arrow (1) until the upper gap cover stops against the kitchen furniture. Push the appliance in the direction of the arrow (2) against the cupboard on the opposite side of the hinge.
  • Page 19 ENGLISH Remove the correct part from the hinge cover (E). Make sure to remove the part DX, in the case of right hinge, SX in opposite case. Attach the covers (C, D) to the lugs and the hinge holes. Install the vent grille (B). Attach the hinge covers (E) to the hinge.
  • Page 20 20 www.aeg.com Disconnect the parts (Ha), (Hb), (Hc) and (Hd). Install the part (Ha) on the inner side of ca. 50 mm the kitchen furniture door. 90° 21 mm 90° ca. 50 mm 21 mm Push the part (Hc) on the part (Ha).
  • Page 21: Noises

    ENGLISH Remove the brackets and mark a dis- tance of 8 mm from the outer edge of 8 mm the door where the nail must be fitted (K). Place the small square on the guide again and fix it with the screws sup- plied.
  • Page 22 22 www.aeg.com HISSS! BRRR SSSRRR! SSSRRR! HISSS! HISSS! BLUBB! CRACK! CRACK! BLUBB!
  • Page 23: Technical Data

    ENGLISH 9. TECHNICAL DATA Dimension of the recess Height 1780 mm Width 560 mm Depth 550 mm Rising Time 21 h Voltage 230-240 V Frequency 50 Hz The technical information are situated in the rating plate on the internal left side of the appliance and in the energy label.
  • Page 24 9. CARACTÉRISTIQUES TECHNIQUES ......... . . 48 POUR DES RÉSULTATS PARFAITS Merci d'avoir choisi ce produit AEG. Nous l'avons conçu pour qu'il vous offre des performances irréprochables pour longtemps, en intégrant des technologies innovantes qui vous simplifient la vie grâce à...
  • Page 25: Instructions De Sécurité

    FRANÇAIS INSTRUCTIONS DE SÉCURITÉ Pour votre sécurité et garantir une utili- ATTENTION sation correcte de l'appareil, lisez atten- Votre appareil a été conçu pour tivement cette notice, y compris les con- être utilisé par des adultes. Il est seils et avertissements, avant d'installer destiné...
  • Page 26 26 www.aeg.com ATTENTION • Les appareils sont destinés unique- Respectez la chaîne de froid dès ment à la conservation des aliments l'acquisition d'un aliment jusqu'à et/ou des boissons dans le cadre d’un sa consommation pour exclure le usage domestique normal, tel que ce- risque d'intoxication alimentaire.
  • Page 27 FRANÇAIS Ne branchez pas le cordon d'ali- bricant de l'appareil. Consultez les ins- mentation à une rallonge. tructions respectives. Assurez-vous que la prise n'est • Ne mettez pas de bouteilles ni de boî- pas écrasée ou endommagée par tes de boissons gazeuses dans le com- l'arrière de l'appareil.
  • Page 28: Bandeau De Commande

    28 www.aeg.com • Placez de préférence votre appareil tiennent pas de C.F.C. contri- loin d'une source de chaleur (chauffa- buant ainsi à préserver l'environ- ge, cuisson ou rayons solaires trop in- nement. L'appareil ne doit pas tenses). être mis au rebut avec les ordu- res ménagères et les déchets ur-...
  • Page 29: Affichage

    FRANÇAIS 2.1 Affichage 2.3 Mise à l'arrêt Pour mettre à l'arrêt l'appareil, procédez comme suit : COOL FROST Appuyez sur le bouton ON/OFF MATIC MATIC pendant 5 secondes. L'affichage est désactivé. Pour mettre l'appareil hors tension, débranchez-le électriquement. Voyant du compartiment réfrigéra- teur 2.4 Mise à...
  • Page 30: Fonction Sécurité Enfants

    30 www.aeg.com ant sur les dispositifs de réglage de tem- Appuyez sur la touche OK pour arrê- pérature. ter le signal sonore et désactiver la Température par défaut : fonction. Il est possible de désactiver cette fonc- • + 5 °C dans le compartiment réfrigéra- tion à...
  • Page 31: Alarme Porte Ouverte

    FRANÇAIS Le voyant de température du congé- L'indicateur COOLMATIC s'éteint. lateur affiche la température maxi- La fonction se désactive en sélec- mum régnant dans le compartiment tionnant une température de durant quelques secondes. Puis il af- consigne différente. fiche à nouveau la température pro- grammée.
  • Page 32: Utilisation Quotidienne

    32 www.aeg.com Appuyez sur le bouton Mode jus- Le voyant DYNAMICAIR s'affiche. qu'à ce que l'indicateur FROSTMA- Pour désactiver la fonction : TIC clignote. Appuyez sur la touche Mode jusqu’à Appuyez sur la touche OK pour con- ce que le voyant DYNAMICAIR cli- firmer.
  • Page 33: Décongélation

    FRANÇAIS AVERTISSEMENT Les petites portions peuvent même être Assurez-vous que la quantité cuites sans décongélation préalable (la d'aliments ne dépasse pas la cuisson sera cependant un peu plus lon- charge limite indiquée sur le côté gue). de la section supérieure (le cas 3.5 Fabrication de glaçons échéant) Cet appareil est équipé...
  • Page 34: Clayettes Amovibles

    34 www.aeg.com 3.8 Clayettes amovibles Les parois du réfrigérateur sont équi- pées d'une série de supports afin que les clayettes puissent être positionnées comme vous le souhaitez. Pour exploiter au mieux l'espace, vous pouvez placer les demi-clayettes avant sous les clayettes arrière.
  • Page 35: Conseils Utiles

    FRANÇAIS 3.11 DYNAMICAIR Le compartiment réfrigérateur est équi- pé d'un dispositif qui permet le refroidis- sement rapide des aliments et qui main- tient une température plus homogène dans le compartiment. Ce dispositif s'active automatiquement en cas de besoin, par exemple pour ra- fraîchir rapidement le réfrigérateur lors- que la porte est laissée ouverte ou si la température ambiante est élevée.
  • Page 36: Entretien Et Nettoyage

    36 www.aeg.com feuilles d'aluminium ou de polyéthylène, • les aliments maigres se conservent pour emmagasiner le moins d'air pos- mieux et plus longtemps que les ali- sible. ments gras ; le sel réduit la durée de Lait en bouteille : bouchez-le et placez-...
  • Page 37: Dégivrage Du Réfrigérateur

    FRANÇAIS Ne pas tirer, déplacer ou endom- Attention à ne pas endommager mager les tuyaux et/ou câbles le système de réfrigération. qui se trouvent à l'intérieur de De nombreux détergents pour la cuisine l'appareil. recommandés par les fabricants contien- Ne JAMAIS utiliser de produits nent des produits chimiques qui peuvent abrasifs ou caustiques ni d'épon- attaquer/endommager les pièces en...
  • Page 38: En Cas D'anomalie De Fonctionnement

    38 www.aeg.com 6. EN CAS D'ANOMALIE DE FONCTIONNEMENT AVERTISSEMENT Avant d'intervenir sur l'appareil, débranchez-le. La résolution des problèmes, non mentionnés dans la présente no- tice, doit être exclusivement con- fiée à un électricien qualifié ou à une personne compétente. Problème...
  • Page 39 FRANÇAIS Problème Cause probable Solution La température ambiante Diminuez la température est trop élevée. ambiante. Le compresseur ne Ce phénomène est nor- Le compresseur démarre démarre pas immé- mal, il ne s'agit pas d'une au bout d'un certain diatement après anomalie.
  • Page 40: Fermeture De La Porte

    40 www.aeg.com Problème Cause probable Solution Un carré supérieur Une erreur s'est produite Contactez le service après- ou inférieur apparaît lors la mesure de la tem- vente (le système de réfri- sur l'afficheur de pérature. gération continue de main- température.
  • Page 41: Réversibilité De La Porte

    FRANÇAIS branchés. Calibre des fusibles en ligne endommagé, il doit être remplacé par (un par phase) : 10 A à 230 V. un câble d'alimentation certifié. Cette opération ne peut être effectuée que L'installation doit être réalisée par une personne habilitée, par votre conformément aux règles de vendeur, ou par le fabricant.
  • Page 42: Installation De L'appareil

    42 www.aeg.com • Dévissez, puis retirez le pivot inférieur. Du côté opposé : • Serrez le pivot inférieur. • Mettez en place la porte inférieure. • Serrez la charnière intermédiaire. • Mettez en place l'entretoise. • Mettez en place la porte supérieure.
  • Page 43 FRANÇAIS Insérez l'appareil dans le meuble d'en- castrement. Poussez l'appareil dans la direction in- diquée par la flèche (1) jusqu'à ce que la partie couvrant l'interstice en haut de l'appareil butte contre le meuble de cuisine. Poussez l'appareil dans la direction in- diquée par la flèche (2) contre le meu- ble, du côté...
  • Page 44 44 www.aeg.com Retirez la pièce correcte du cache- charnière (E). Assurez-vous que vous retirez bien la pièce DX s'il s'agit de la charnière droite, SX s'il s'agit de l'autre charnière. Fixez les protections (C, D) sur les er- gots et dans les trous des charnières.
  • Page 45 FRANÇAIS Détachez les pièces (Ha), (Hb), (Hc) et (Hd). Mettez en place la pièce (Ha) sur la fa- ca. 50 mm ce intérieure du meuble de cuisine. 90° 21 mm 90° ca. 50 mm 21 mm Poussez la pièce (Hc) sur la pièce (Ha). Ouvrez la porte de l'appareil et la por- te du meuble de cuisine à...
  • Page 46: Bruits

    46 www.aeg.com Retirez les supports et repérez une dis- tance de 8 mm à partir de l'arête exté- 8 mm rieure de la porte où le clou doit être posé (K). Placez de nouveau le petit carré sur le guide et fixez-le à l'aide des vis four- nies.
  • Page 47 FRANÇAIS HISSS! BRRR SSSRRR! SSSRRR! HISSS! HISSS! BLUBB! CRACK! CRACK! BLUBB!
  • Page 48: Caractéristiques Techniques

    48 www.aeg.com 9. CARACTÉRISTIQUES TECHNIQUES Dimensions de la niche d'encastrement Hauteur 1780 mm Largeur 560 mm Profondeur 550 mm Temps de levée 21 h Tension 230-240 V Fréquence 50 Hz Les caractéristiques techniques figurent côté gauche à l'intérieur de l'appareil et sur la plaque signalétique située sur le...
  • Page 49 9. DATI TECNICI ............. 71 PER RISULTATI PERFETTI Grazie per aver scelto di acquistare questo prodotto AEG. Lo abbiamo creato per fornirvi prestazioni impeccabili per molti anni, grazie a tecnologie innovative che vi semplificheranno la vita - funzioni che non troverete sui normali elettrodomestici.
  • Page 50: Istruzioni Di Sicurezza

    50 www.aeg.com ISTRUZIONI DI SICUREZZA Per garantire un impiego corretto e sicu- minare l'apparecchio sostituito, per ro dell'apparecchio, prima dell'installa- evitare che diventi una trappola mor- zione e del primo utilizzo leggere con at- tale per i bambini. tenzione il libretto istruzioni, inclusi i suggerimenti e le avvertenze.
  • Page 51: Uso Quotidiano

    ITALIANO AVVERTENZA! posteriore (per le apparecchiature di Tutti i componenti elettrici (cavo tipo no-frost) di alimentazione, spina, com- • Gli alimenti congelati non devono es- pressore) devono essere sostituiti sere ricongelati una volta scongelati. da un tecnico certificato o da •...
  • Page 52: Assistenza Tecnica

    52 www.aeg.com • Attorno all'apparecchio vi deve essere • Gli interventi di assistenza devono es- un'adeguata circolazione dell'aria, al- sere eseguiti esclusivamente da tecni- trimenti si può surriscaldare. Per otte- ci autorizzati e utilizzando solo ricambi nere una ventilazione sufficiente se- originali.
  • Page 53: Accensione Del Frigorifero

    ITALIANO Indicatore della temperatura e timer 2.4 Spegnimento del del frigorifero frigorifero Spia off del frigorifero Per spegnere il frigorifero: FunzioneCOOLMATIC Premere il tasto Mode finché non Funzione Holiday appare l'icona corrispondente. FunzioneFROSTMATIC L'indicatore di frigorifero spento e Indicatore della temperatura del l'indicatore dello scomparto frigo congelatore lampeggiano.
  • Page 54: Allarme Sportello Aperto

    54 www.aeg.com Dopo un'interruzione di corrente 2.8 Funzione Sicurezza la temperatura impostata rimane Bambini in memoria. Per evitare che i tasti vengano premuti accidentalmente, selezionare la funzione 2.7 Funzione Minute Minder Sicurezza Bambini. La funzione Minute Minder deve essere Per attivare la funzione:...
  • Page 55: Funzione Coolmatic

    ITALIANO • La spia di allarme lampeggia L'indicatore della temperatura del frigorifero visualizza la temperatura • Segnale acustico impostata. Al ripristino delle condizioni normali (sportello chiuso), l'allarme si interrom- Premere il tasto OK per confermare. Viene visualizzato l'indicatore Holi- Durante l'allarme, il segnale acustico day.
  • Page 56: Utilizzo Quotidiano

    56 www.aeg.com Premere il tasto OK per confermare. La spia DYNAMICAIR si spegne. Se la funzione è attivata automa- ticamente, la spia DYNAMICAIR viene visualizzata (fare riferimen- to a "Utilizzo quotidiano"). L'attivazione della funzione DY- NAMICAIR aumenta il consumo di energia.
  • Page 57: Accumulatori Di Freddo

    ITALIANO I pezzi piccoli possono addirittura essere Non usare strumenti metallici per cucinati ancora congelati, direttamente rimuovere le vaschette dal con- dal congelatore: in questo caso la cottu- gelatore. ra durerà più a lungo. 3.6 Accumulatori di freddo 3.5 Produzione di cubetti di Il congelatore dispone di uno o più...
  • Page 58: Consigli E Suggerimenti Utili

    58 www.aeg.com 3.10 Posizionamento della scatola scorrevole La scatola scorrevole può essere inserita a diverse altezze. Per regolare l'altezza, procedere come segue: sollevare il ripiano con la parte supe- riore della scatola rivolta verso l'alto ed estrarla dalle guide togliere le staffe di fissaggio dalla...
  • Page 59: Conservazione Dei Surgelati

    ITALIANO • coprire o avvolgere il cibo, in partico- • preparare il cibo in piccole porzioni lare se emana un odore forte per consentire un congelamento rapi- do e completo e per scongelare in se- • posizionare il cibo in modo che l'aria guito solo la quantità...
  • Page 60: Pulizia E Cura

    60 www.aeg.com 5. PULIZIA E CURA ATTENZIONE Pulire il condensatore (griglia nera) e il Staccare la spina dell'apparec- compressore sul retro dell'apparecchio chio prima di eseguire lavori di con una spazzola. Questa operazione manutenzione. migliorerà le prestazioni dell'apparec- chiatura riducendone i consumi di ener- Questo apparecchio contiene gia.
  • Page 61: Periodi Di Inutilizzo

    ITALIANO all'interno del vano da una ventola azio- • rimuovere tutto il cibo nata automaticamente. • sbrinare (se necessario) e pulire l'ap- parecchiatura e tutti gli accessori 5.4 Periodi di inutilizzo • lasciare la/e porta/e socchiusa/e per evitare odori sgradevoli. Quando l'apparecchio non è...
  • Page 62 62 www.aeg.com Problema Possibile causa Soluzione Viene emesso un se- La temperatura nel vano Fare riferimento alla sezio- gnale acustico. La congelatore è troppo al- ne "Allarme di alta tempe- spia di allarme lam- ratura". peggia. Il compressore rima- La temperatura non è im-...
  • Page 63: Chiusura Della Porta

    ITALIANO Problema Possibile causa Soluzione Sono stati introdotti molti Introdurre gli alimenti un alimenti contemporanea- poco alla volta. mente. La temperatura nel L'aria fredda non circola Adottare le misure neces- frigorifero è troppo correttamente all'interno sarie per garantire una cor- alta.
  • Page 64: Installazione

    64 www.aeg.com 7. INSTALLAZIONE AVVERTENZA! 7.2 Collegamento elettrico Leggere con attenzione le "Infor- Prima di inserire la spina, verificare che la mazioni per la sicurezza" per la tensione e la frequenza riportate sulla vostra sicurezza e per il corretto targhetta corrispondano ai valori della funzionamento dell'apparecchio rete elettrica domestica.
  • Page 65: Requisiti Di Ventilazione

    ITALIANO • Allentare e rimuovere il perno inferio- Sul lato opposto: • Serrare il perno inferiore. • Installare la porta inferiore. • Serrare la cerniera centrale. • Installare il distanziatore. • Installare la porta superiore. • Serrare il perno superiore. 7.4 Requisiti di ventilazione Il flusso d'aria dietro l'apparecchiatura min.
  • Page 66 66 www.aeg.com Installare l'apparecchiatura nella nic- chia. Spingere l'apparecchiatura in direzione della freccia (1) finché la mascherina superiore si arresta contro il mobile da cucina. Spingere l'apparecchiatura in direzione della freccia (2) contro il mobile sul lato opposto rispetto alla cerniera.
  • Page 67 ITALIANO Rimuovere la parte appropriata del co- pricerniera (E). Accertarsi di rimuovere la parte DESTRA per la cerniera di de- stra, o la parte SINISTRA per quella di sinistra. Applicare i cappucci (C, D) a coprigiun- ti e fori delle cerniere. Installare la griglia di sfiato (B).
  • Page 68 68 www.aeg.com Staccare le parti (Ha), (Hb), (Hc) e (Hd). Installare la parte (Ha) sul lato interno ca. 50 mm della porta del mobile. 90° 21 mm 90° ca. 50 mm 21 mm Spingere la parte (Hc) sulla parte (Ha).
  • Page 69: Rumori

    ITALIANO Togliere le staffe e segnare la posizio- ne in cui deve essere inserito il chiodo 8 mm (K) ad una distanza di 8 mm dal bordo esterno della porta. Riapplicare il quadratino sulla guida e fissarlo con le viti in dotazione. Allineare lo sportello del mobile da cu- cina con quello dell'apparecchiatura regolando la parte (Hb).
  • Page 70 70 www.aeg.com HISSS! BRRR SSSRRR! SSSRRR! HISSS! HISSS! BLUBB! CRACK! CRACK! BLUBB!
  • Page 71: Dati Tecnici

    ITALIANO 9. DATI TECNICI Nicchia di incasso Altezza 1780 mm Larghezza 560 mm Profondità 550 mm Tempo di salita 21 h Tensione 230-240 V Frequenza 50 Hz I dati tecnici sono riportati sulla targhet- interno dell'apparecchiatura, e sull'eti- ta del modello, applicata sul lato sinistro chetta dei valori energetici.
  • Page 72 www.aeg.com/shop...

Table des Matières