Télécharger Imprimer la page

Publicité

Les langues disponibles

Les langues disponibles

Liens rapides

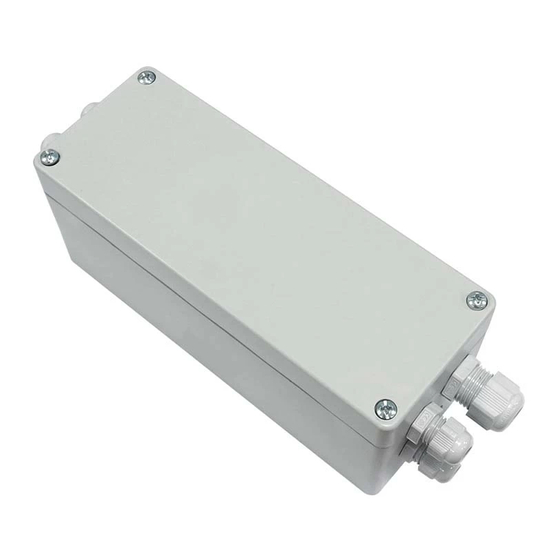
IT - RICEVITORE RADIO 230VAC PER IL CONTROLLO DI 4 MOTORI 230VAC PER SCREEN, CON FINECORSA
INTEGRATO E POTENZA MASSIMA 350W
EN - 230VAC RADIO RECEIVER CONTROLLING FOUR 230VAC MOTORS FOR SCREEN, WITH INTEGRATED LIMIT
SWITCH AND MAXIMUM POWER 350W
FR – RÉCEPTEUR RADIO 230VAC POUR LA COMMANDE DE 4 MOTEURS 230VAC POUR STORES VERTICAUX,
AVEC FIN DE COURSE INTÉGRÉE ET PUISSANCE MAXIMALE DE 350W
DE - 230VAC FUNKEMPFÄNGER ZUR STEUERUNG VON VIER 230VAC-MOTOREN FÜR VERTIKAL- MARKISEN,
MIT INTEGRIERTER ARRETIERUNG UND MAXIMALLEISTUNG VON 350 W
IT - Codice prodotto
EN - Product code
FR - Code du produit
DE - Artikelnummer
IT - Ingresso per sensore vento.
EN - Input for wind sensor.
FR - Entrée pour capteur de vent.
DE - Eingang für Windwächter.
230
M
Vac
230Vac
IT - Comando indipendente o simultaneo delle uscite motore.
EN - Independent or synchronized control of motor outputs.
FR - Sorties moteurs indépendantes ou synchronisées.
DE - Unabhängige oder synchronisierte Steuerung der Motorausgänge.
TVPL4XXXAC4
This document is the property of Teleco Automation Srl who reserves all reproduction and copying rights
TELECO AUTOMATION SRL
Via dell'Artigianato, 16 - 31014 Colle Umberto (TV) ITALY
TELEPHONE: ++39.0438.388511 FAX: ++39.0438.388536 - www.telecoautomation.com
TVPL4868AC4
TVPL4916AC4
M
M
M
230Vac
230Vac
230Vac
230
M
Vac
230Vac
(868.3Mhz)
(916Mhz)
IT - Configurazione dei finecorsa per motori elettronici.
EN - Configuration of the limit switches for electronic motors.
FR - Configuration des fins de course pour moteurs électroniques.
DE - Konfiguration der Endschalter für Elektromotoren.
/
M
M
230Vac
230Vac
DOC.: T589.05
DATE:06/04/18

Publicité

loading

Sommaire des Matières pour Teleco TVPL4868AC4

  • Page 1 FR - Configuration des fins de course pour moteurs électroniques. DE - Unabhängige oder synchronisierte Steuerung der Motorausgänge. DE - Konfiguration der Endschalter für Elektromotoren. 230Vac 230Vac 230Vac TVPL4XXXAC4 DATE:06/04/18 DOC.: T589.05 This document is the property of Teleco Automation Srl who reserves all reproduction and copying rights...
  • Page 2 SMALTIMENTO DEL PRODOTTO: alla fine dalla vita utile, l’apparecchio non deve essere smaltito come rifiuto domestico, ma conferito in un centro di raccolta rifiuti elettrici ed elettronici. Il fabbricante, Teleco Automation s.r.l , dichiara che il tipo di Apparecchiatura radio è conforme alla direttiva 2014/53/UE. Il testo completo della dichiarazione di conformità UE è disponibile al seguente indirizzo Internet: www.
  • Page 3 IT - Collegamenti/regolazioni EN - Connections/adjustments FR - Branchements/réglages DE - Anschlüsse Einstellungen P1 ► M1 P1 P2 P3 P4 P2 ► M2 P3 ► M3 P4 ► M4 IT - È possibile memorizzare un M1 M2 M3 M4 GND codice radio in differenti uscite.
  • Page 4 TRASMETTITORI 1 TASTO COMANDI AUTOMATICI (2 o 3 TASTI) COMANDI MANUALI (2 o 3 TASTI) Apertura (STOP) Apertura (uomo presente) Apertura Chiusura (STOP) Apertura Chiusura (uomo presente) (uomo presente) Apertura (STOP) Apertura (uomo presente) Chiusura (STOP) Chiusura STOP (uomo presente) STOP Apertura Apertura...
  • Page 5 Cancellazione codici radio P1..P4 TIPO DI P1..P4 ** CANCELLAZIONE TENUTO Premere un tasto del trasmettitore suono SINGOLO CODICE RADIO relativo al codice da cancellare continuo Premere 5 volte il tasto P1, P2, P3 o P4 (**) e tenere premuto. Il buzzer emette un suono intermittente. Premere un tasto del trasmettitore relativo al codice da cancellare entro 10 secondi.
  • Page 6 Condizione di fabbrica Sensore VENTO L2 lampeggia ATTIVATO L’anemometro (ANEM4) rileva la velocità del vento e la centrale la confronta con la soglia impostata tramite i DIP 1-2-3 (vedi tabella). DIP1 DIP2 DIP3 Km/h La centrale è compatibile solamente con anemometri a 4 impulsi/giro. ALLARME ATTIVO quando Cosa fa quando ALLARME ATTIVO ALLARME NON ATTIVO quando...
  • Page 7 Configurazione dei finecorsa per motori elettronici È necessario usare un trasmettitore 3 canali (oppure CH5..CH7 di un 7 canali) associato al motore da configurare. Cominciare da una posizione intermedia. Motore Deprat Opzione 2: configurazione con P3 Opzione 1: configurazione con DIP4 Spostare DIP5 e DIP6 su OFF.
  • Page 8 Motore Somfy Oximo Opzione 2: configurazione con P3 Opzione 1: configurazione con DIP4 Spostare DIP5 su ON e DIP6 su OFF. Spostare DIP5 su ON e DIP6 su OFF. Premere 8 volte il tasto P3 del trasmettitore e tenere premuto. Il motore selezionato esegue un breve Spostare DIP4 su ON.
  • Page 9 Motore Geiger Solidline Opzione 2: configurazione con P3 Opzione 1: configurazione con DIP4 Spostare DIP5 su OFF e DIP6 su ON. Spostare DIP5 su OFF e DIP6 su ON. Premere 8 volte il tasto P3 del trasmettitore e tenere premuto. Il motore selezionato esegue un breve Spostare DIP4 su ON.
  • Page 10 TRANSMITTERS 1 BUTTON AUTOMATIC COMMANDS (2 or 3 BUTTONS) HOLD-TO-RUN COMMANDS (2 or 3 BUTTONS) Open (STOP) Open (hold-to-run) Open Close (STOP) Open Close (hold-to-run) (hold-to-run) Open (STOP) Open (hold-to-run) Close (STOP) Close STOP (hold-to-run) STOP Open Open (hold-to-run) STOP STOP Close Close...
  • Page 11 Radio codes deletion P1..P4 P1..P4 ** TYPE OF DELETION hold Press the button of the transmitter continuous SINGLE RADIO CODE sound relative to the code to delete Press P1, P2, P3 or P4 (**) 5 times and hold. The buzzer emits an intermittent sound. Press the button of the transmitter relative to the code to be deleted within 10 seconds.
  • Page 12 Factory setting WIND sensor L2 flashes ACTIVATED The anemometer (ANEM4) detects wind speed, which the control unit compares with the threshold set through DIPs 1-2-3 (see table). DIP1 DIP2 DIP3 Km/h The control unit is only compatible with anemometers generating 4 pulses per rev. ACTIVE ALARM when Once ACTIVE ALARM DEACTIVATED ALARM when...
  • Page 13 Configuration of the limit switches for electronic motors Use a 3 channel transmitter (or CH5..CH7 of any 7 channel transmitter) associated to the motor to be configured. Start from an intermediate point of the run. Deprat motor Option 2: configuration with P3 Option 1: configuration with DIP4 Move DIP5 and DIP6 to OFF.
  • Page 14 Somfy Oximo motor Option 2: configuration with P3 Option 1: configuration with DIP4 Move DIP5 to ON and DIP6 to OFF Move DIP5 to ON and DIP6 to OFF. Press 8 times P3 button of a memorized transmitter, and keep it pressed. The selected motor makes a Move DIP4 to ON.
  • Page 15 Geiger Solidline motor Option 2: configuration with P3 Option 1: configuration with DIP4 Move DIP5 to OFF and DIP6 to ON. Move DIP5 to OFF and DIP6 to ON. Press 8 times P3 button of a memorized transmitter, and keep it pressed. The selected motor makes a Move DIP4 to ON.
  • Page 16 ÉMETTEURS 1 BOUTON COMMANDES AUTOMATIQUES (2 ou 3 BOUTONS) COMMANDES MAINTENUES (2 ou 3 BOUTONS) Ouverture (STOP) Ouverture (maintenue) Ouverture Fermeture (STOP) Ouverture Fermeture (maintenue) (maintenue) Ouverture (STOP) Ouverture (maintenue) Fermeture (STOP) Fermeture STOP (maintenue) STOP Ouverture Ouverture (maintenue) STOP STOP Fermeture Fermeture...
  • Page 17 Suppression des codes radio P1..P4 TYPE DE P1..P4 ** SUPPRESSION maintenue Appuyer sur un bouton de l’émetteur UN SEUL CODE RADIO concernant le code à supprimer. continu Appuyer 5 fois de suite sur le bouton P1, P2, P3 ou P4 (**) et le maintenir appuyé. L’avertisseur sonore émet un son intermittent. Dans les 10 secondes qui suivent, appuyer sur un bouton de l’émetteur concernant le code à...
  • Page 18 Réglage d’usine Capteur de VENT L2 clignote ACTIVÉ L’anémomètre (ANEM4) détecte la vitesse du vent et la centrale la compare au seuil réglé au moyen des DIPS 1-2-3 (voir tableau). DIP1 DIP2 DIP3 Km/h La centrale est compatible seulement avec les anémomètres à 4 impulsions/tour. L’ALARME SE DÉCLENCHE quand Que fait-il quand l’ALARME SE DÉCLENCHE L’ALARME NE SE DÉCLENCHE PAS quand...
  • Page 19 Configuration des fins de course pour moteurs électroniques Il faut utiliser un émetteur 3 canaux (ou CH5..CH7 d’un émetteur 7 canaux) associé au moteur à configurer. Commencer d’un point intermédiaire du démarrage. Moteur Deprat Option 2: configuration avec P3 Option 1: configuration avec DIP4 Mettre le DIP5 et DIP6 sur OFF.
  • Page 20 Moteur Somfy Oximo Option 2: configuration avec P3 Option 1: configuration avec DIP4 Mettre le DIP5 sur ON et le DIP6 sur OFF. Mettre le DIP5 sur ON et le DIP6 sur OFF. Appuyer 8 fois de suite sur le bouton P3 de l’émetteur déjà Mettre le DIP4 sur ON.
  • Page 21 Moteur Geiger Solidline Option 2: configuration avec P3 Option 1: configuration avec DIP4 Mettre le DIP5 sur OFF et le DIP6 sur ON. Mettre le DIP5 sur OFF et le DIP6 sur ON. Appuyer 8 fois de suite sur le bouton P3 de l’émetteur déjà mémorisé...
  • Page 22 SENDER 1 TASTE AUTOMATISCHE BEFEHLE (2 oder 3 Tasten) MANUELLE BEFEHLE (2 oder 3 Tasten) (STOP) (manuelle befehl) (STOP) (manuelle befehl) manuelle befehl (STOP) (manuelle befehl) STOP STOP (STOP) (manuelle befehl) STOP STOP manuelle befehl 7/42-Kanal Sender 3/18-Kanal Sender 7/42-Kanal Sender 3/18-Kanal Sender (STOP) (STOP)
  • Page 23 Löschung von Funkcodes P1..P4 P1..P4 ** LÖSCHUNGSART gedrückt halten Appuyer sur un bouton de l’émetteur EINZELNER FUNKCODE Dauerton concernant le code à supprimer. Fünfmal die Taste P1, P2, P3 oder P4 (**) drücken und gedrückt halten. Der Summer gibt einen intermittierender Ton ab. Innerhalb von 10 Sekunden eine Taste des Senders drücken, die dem zu löschenden Code zugeordnet ist.
  • Page 24 Werkseinstellung WINDWÄCHTER L2 blinkt AKTIVIERT Der Windwächter (ANEM4) ermittelt die Windgeschwindigkeit und das Steuergerät vergleicht den Wert mit der mittels DIP 1-2-3 DIP1 DIP2 DIP3 Km/h vorgegebenen Schwelle (s. Tabelle). Das Steuergerät ist nur kompatibel mit Windmessern mit 4 Impulsen/Umdrehung. ALARM AUSGELÖST, wenn Was macht er bei ALARM AUSGELÖST ALARM NICHT AUSGELÖST wenn...
  • Page 25 Konfiguration der Endschalter für Elektromotoren Es muss ein 3-Kanal Sender (oder CH5..CH7 eines 7-Kanal Senders) verwendet werden der dem zu konfigurierenden Motor zugeordnet ist. In einer mittleren Ausfahrposition beginnen. Motor Deprat Option 2: Konfiguration mit P3 Option 1: Konfiguration mit DIP4 DIP5 und DIP6 auf AUS stellen DIP5 und DIP6 auf AUS stellen.
  • Page 26 Motor Somfy Oximo Option 2: Konfiguration mit P3 Option 1: Konfiguration mit DIP4 DIP5 auf EIN, DIP6 auf AUS stellen. DIP5 auf EIN, DIP6 auf AUS stellen. Drücken Sie 8 mal die Taste P3 des Senders und halten Sie gedrückt. Der gewählte Motor führt eine kurze Bewegung aus DIP4 auf EIN stellen.
  • Page 27 Motor Geiger Solidline Option 2: Konfiguration mit P3 Option 1: Konfiguration mit DIP4 DIP5 auf AUS, DIP6 auf EIN stellen. DIP5 auf AUS, DIP6 auf EIN stellen. Drücken Sie 8 mal die Taste P3 des Senders und halten Sie gedrückt. Der gewählte Motor führt eine kurze Bewegung DIP4 auf EIN stellen.
  • Page 28 TELECO AUTOMATION GMBH TELECO AUTOMATION OCEANIA PTY LTD ITALY FRANCE GERMANY AUSTRALIA Tel. +33.(0)472.145080 Tel. +39.0438.388511 Tel. +49.(0)8122.9563024 Tel. +61.(07)5502.7801 info@telecoautomation.com info@telecofrance.com info.de@telecoautomation.com info@telecoautomation.com.au This document is the property of Teleco Automation Srl who reserves all reproduction and copying rights...

Ce manuel est également adapté pour:

Tvpl4916ac4