Ghost Party Set Manuel
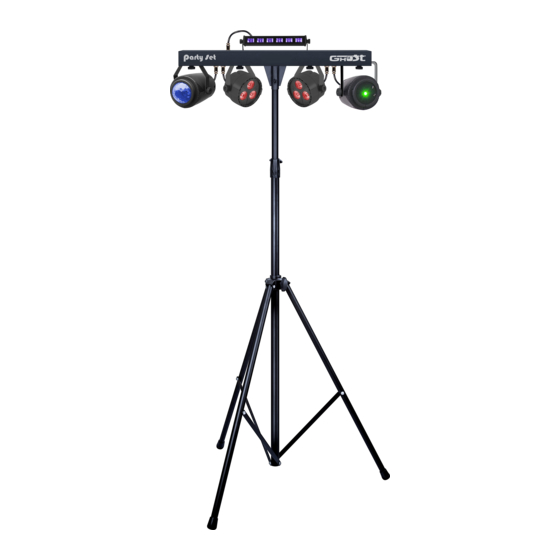
Multi-effet sur trépied.
Table des Matières
Les langues disponibles
Les langues disponibles
Table des Matières

Manuels Connexes pour Ghost Party Set


Sommaire des Matières pour Ghost Party Set
- Page 1 MANUEL MANUAL...
- Page 2 Réglementation Cet appareil est parfaitement conçu. Il répond aux dispositions réglementaires actuelles : CE, ROHS, R&TTE Recyclage Appareil soumis à la DEEE (Collecte sélective). Contribuez à la protection de l’environnement en éliminant les matériaux d’emballage de ce produit via les filières de recyclage appropriées. Recyclez ce produit via une filière DEEE (déchets d’équipements électroniques). Ce produit doit être repris par votre revendeur ou doit être déposé...
- Page 3 Multi-effet sur trépied. Cet ensemble complet enflammera vos soirées ! Il est équipé d’un strobos- cope, de deux Par, d’un projecteur « boule » et d’un laser multipoints. Spécifications Techniques Alimentation : 100-230V - 50/60 Hz Consommation : 60W Sources : 2 Projecteurs de 4x3W LEDS RVBW - 1 Barre 6 x 2W leds UV + 6 X 2W Leds blanches (strobe) - 1 Boule effet 4 x 3W RVBW...
-
Page 4: Installation Du Projecteur
INSTALLATION DU PROJECTEUR : Avant le montage de l’ensemble, s’assurer de la bonne stabilité du sol afin d’éviter tout risque de basculement. Sur chacun des projecteurs, monter les supports et fixer les sur la barre puis connecter les fiches d’alimentation sur les embases intitulées PAR LIGHT ou EFFECT LIGHT. -
Page 5: Menu Description
MENU Menu Description Sous Menu Description Réglage de dxxx d001 - d512 Sélection de l’adresse DMX de départ du projecteur l’adresse DMX Mode 3 Canaux Réglage du ChMd 03Ch / 12Ch mode DMX Mode 12 Canaux Sélection du Atxx mode automa- At01 - At09 Auto 1 à... - Page 6 SoXX - Sélection du mode Audio Appuyer sur la touche MENU jusqu’à ce que SOXX s’affiche. Appuyer sur ENTER. L’afficheur indique «SO01» jusqu’à «SO03». Sélectionner le mode avec les touches UP & DOWN. Appuyer sur ENTER pour valider la sélection. SnXX - Sélection de la sensibilité...
-
Page 7: Raccordement Dmx
RACCORDEMENT DMX: Les projecteurs sont connectés en série à une console DMX. Raccorder les projecteurs comme le montre le schéma ci-dessus. - Raccorder le côté mâle du câble DMX à la sortie de la console DMX512. - Puis connecter la sortie DMX du projecteur à l’entrée du projecteur suivant. - Répéter l’opération sur l’ensemble de la chaine. -
Page 8: Canaux Dmx
CANAUX DMX Mode 3 canaux CANAL VALEURS FONCTION MODE AUTOMATIQUE 000-009 PAS DE FONCTION 010-039 AUTO 1: FONCTIONNEMENT DE L’ENSEMBLE DES PROJECTEURS 040-069 AUTO 2: FONCTIONNEMENT DES PARS 070-099 AUTO 3: FONCTIONNEMENT DES PARS, FLOWER ET LASER 100-129 AUTO 4: FONCTIONNEMENT DES PARS, FLOWER, LASER ET STROBE 130-159 AUTO 5: FONCTIONNEMENT DES PARS, FLOWER, LASER ET UV 160-189... - Page 9 TELECOMMANDE IR : 1. Touche On/OFF : Allumage et extinction du projecteur. 2. Touche Auto : Sélection du mode automatique puis choix du programme désirée à l’aide des touches Pro light - et Pro Light +. 3. Touche Music 1 : Sélection du mode audio 1 puis réglage de la vitesse de défilement à...
-
Page 10: Remplacement De Fusible
Dans le but d’améliorer les produits, des modifications techniques peuvent être effectuées sans informations préalable. C’est la raison pour laquelle les caractéristiques techniques et l’aspect physique des produits peuvent évoluer. Pour bénéficier des dernières mises à jour de nos produits veuillez-vous connecter sur : www.ghost-france.com. Page 10... - Page 11 NOTES...
- Page 12 GHOST É Z.a.C. douard uffard de la harBonnière MonTeVrain 77771 M arne allÉe edex Tél. : +33 (0)820 230 007...
- Page 23 NOTES...
- Page 24 GHOST É Z.a.C. douard uffard de la harBonnière MonTeVrain 77771 M arne allÉe edex Tél. : +33 (0)820 230 007...