Table des Matières

Publicité

Les langues disponibles
  • FR

Les langues disponibles

  • FRANÇAIS, page 23

Liens rapides

LAURUS
DE Kochfeld / Gebrauchsanweisung
FR Table de cuisson/Notice d'utilisation
NL Kookplaat / Gebruikershandleiding
IT
Piano cottura / Manuale utente
ES Manual de usuario de encimera
EN Hob / User Manual
LCA78ZKB

Publicité

Table des Matières
loading

Sommaire des Matières pour Laurus LCA78ZKB

  • Page 1 LAURUS DE Kochfeld / Gebrauchsanweisung FR Table de cuisson/Notice d’utilisation NL Kookplaat / Gebruikershandleiding Piano cottura / Manuale utente ES Manual de usuario de encimera EN Hob / User Manual LCA78ZKB...
  • Page 2 Vielen Dank, dass Sie sich für dieses Produkt entschieden haben. Diese Gebrauchsanweisung enthält wichtige Sicherheitshinweise sowie Hinweise zum Gebrauch und der Wartung Ihres Gerätes.Lesen Sie diese Gebrauchsanweisung vor der ersten Benutzung des Geräts aufmerksam durch, und bewahren Sie sie sorgfältig auf. Symbol Bedeutung WARNUNG...
  • Page 3: Table Des Matières

    INHALT 1. SICHERHEITSHINWEISE ....................4 1.1 Allgemeine Sicherheitshinweise ..................4 1.2 Hinweise zum Aufstellen und Anschließen ..............7 1.3 Während des Betriebs ....................7 1.4 Warnhinweise zur Reinigung und Wartung ..............8 2.Installation und Vorbereitung für den Gebrauch ..............10 2.1 Einbauen des Kochfeldes .....................10 2.2 Elektrischer Anschluss und Sicherheitshinweise ............12 3.PRODUKTMERKMALE ....................13 4.Verwenden des Produkts....................14 4.1 Bedienen des Kochfeldes .....................14...
  • Page 4: Sicherheitshinweise

    1. SICHERHEITSHINWEISE • Lesen Sie diese Gebrauchsanweisung aufmerksam durch, bevor Sie das Gerät verwenden, und bewahren Sie sie an einem zugänglichen Ort auf, um bei Bedarf wichtige Informationen nachschlagen zu können. • Diese Gebrauchsanweisung wurde für mehrere Modelle erstellt. Daher verfügt Ihr Gerät möglicherweise nicht über einige der Eigenschaften, die in diesem Dokument beschrieben werden.
  • Page 5 NIEMALS einen Brand mit Wasser zu löschen. Schalten Sie stattdessen den Herd aus, und bedecken Sie die Flamme mit einem Deckel oder einer Feuerdecke. VORSICHT: Die Garvorgang muss überwacht werden. Ein kurzfristiger Garvorgang muss ständig überwacht werden. WARNUNG: Brandgefahr:Legen Sie keine Gegenstände auf dem Kochfeld ab.
  • Page 6 die von nicht autorisierten Technikern ausgeführt werden, können Sie gefährden. Nehmen Sie keine Änderungen an den Eigenschaften des Herdes vor. Es besteht Unfallgefahr durch Verwendung ungeeigneter Schutzabdeckungen für das Kochfeld. • Vergewissern Sie sich vor dem Anschluss des Gerätes, dass die lokalen Versorgungsbedingungen (Gasart und Gasdruck im Gasversorgungsnetz und/ oder Spannung und Frequenz des Stromnetzes) kompatibel zu den technischen Daten des Gerätes...
  • Page 7: Hinweise Zum Aufstellen Und Anschließen

    1.2 hinweiSe zum AufStellen und AnSchlieSSen • Nehmen Sie den Herd erst in Betrieb, nachdem er vollständig installiert wurde. • Das Gerät darf nur von einem autorisierten Techniker installiert werden. Der Hersteller ist nicht haftbar für Schäden, die durch falsche Aufstellung oder wegen der Installation durch nicht autorisierte Personen verursacht werden.
  • Page 8: Warnhinweise Zur Reinigung Und Wartung

    können bei sehr hohen Temperaturen in Brand geraten. Gießen Sie niemals Wasser in brennendes Fett oder Öl. Schalten Sie stattdessen den Herd aus, und decken Sie die Pfanne mit ihrem Deckel oder einer Feuerdecke zu. • Stellen Sie Pfannen immer mittig auf die Kochzone, und drehen Sie die Griffe in eine sichere Position, damit sie nicht angestoßen werden oder sich verfangen.
  • Page 9 Hause ausgelegt.Jegliche andere Verwendung, wie das Beheizen eines Raumes, ist unsachgemäß und gefährlich. Die Gebrauchsanweisungen gelten für mehrere Modelle.Möglicherweise gibt es Abweichungen zwischen der Gebrauchsanweisung und Ihrem Modell. Entsorgung von Altgeräten Das Symbol auf dem Gerät oder der Verpackung weist darauf hin, dass dieses Gerät nicht in den Hausmüll gehört.Es muss stattdessen an die entsprechende Sammelstelle für das Recycling von...
  • Page 10: Installation Und Vorbereitung Für Den Gebrauch

    2. Installation und Vorbereitung Kochfeldoberfläche und jeglichem Schrank/jeglicher Dunstabzugshaube für den Gebrauch den in der Abbildung unten aufgeführten WARNUNG:Das Gerät muss von Werten entsprechen. einem autorisierten Servicemitarbeiter oder einem qualifizierten Techniker gemäß den Hinweisen in dieser Gebrauchsanweisung und unter Einhaltung der geltenden lokalen Vorschriften installiert werden.
  • Page 11 Kochfeld Kochfeld Abschirmung Abschirmung • Das mitgelieferte, einseitig Befestigungsklammer Arbeitsplatte selbstklebende Dichtband umlaufend um die Unterkante der Kochfeldoberfläche herum aufkleben. Das Klebedichtung nicht dehnen. Selbstklebendes Dichtband • Die vier Befestigungsklammern für die Arbeitsplatte an den Seiten des Gerätes DE – 11...
  • Page 12: Elektrischer Anschluss Und Sicherheitshinweise

    festschrauben. Kabelschelle zugentlasten und die Abdeckung schließen. • Das Gerät in den Ausschnitt einsetzen. • Der richtige Klemmenanschluss ist auf dem Anschlusskasten dargestellt. 2.2 eleKtriScher AnSchluSS und SicherheitShinweiSe WARNUNG:Der elektrische Anschluss des Gerätes muss von einem autorisierten Servicemitarbeiter oder einer qualifizierten Elektrofachkraft gemäß den Hinweisen in dieser Gebrauchsanweisung und unter Einhaltung der geltenden lokalen Vorschriften...
  • Page 13: Produktmerkmale

    3. PRODUKTMERKMALE Wichtig:Die Merkmale der einzelnen Produkte können sich unterscheiden und Ihr Gerät sieht möglicherweise anders aus als auf den Abbildungen. Liste der Komponenten 1.Glaskeramikkochzone 2.Bedienfeld DE – 13...
  • Page 14: Verwenden Des Produkts

    4. Verwenden des Produkts Ein/Aus-Taste mindestens 1 Sekunde lang gedrückt halten.Der erfolgreiche Abschluss des Vorgangs wird durch ein 4.1 Bedienen deS KochfeldeS akustisches Signal bestätigt. Die Bedienung des Kochfeldes erfolgt Daraufhin wird auf allen durch Drücken der entsprechenden Kochstufenanzeigen der Wert „0“ elektronischen Tasten.Jedes Drücken einer angezeigt, und alle Dezimalpunkte an allen Taste wird mit einem akustischen Signal...
  • Page 15 akustischen Signal bestätigt.Zudem werden abwechselnd die Werte „A“ und leuchtet die entsprechende Zweikreis- „9“ angezeigt.Dies bedeutet, dass die Zonen-Anzeige.Wenn Sie die Taste ein Schnellaufheizfunktion nun aktiviert ist. zweites Mal drücken, wechselt der Status Die Schnellaufheizfunktion kann deaktiviert von Zweikreis-Zone „Ein“ zu Zweikreis- werden, indem Sie die Taste solange Zone „Aus“, und nach einem weiteren...
  • Page 16 sondern es werden auch die Timer- eingeschaltet ist oder nicht, kann der Funktions-/Kochzonenanzeige und die Kurzzeitwecker durch Drücken der Taste Timer-Anzeige ausgeschaltet. eingeschaltet werden. Daraufhin wird der Wert „00“ angezeigt, um anzugeben, dass Falls an einer Kochzone noch Restwärme der Timer aktiviert ist.Der Dezimalpunkt vorhanden ist, wird in der entsprechenden auf der Timer-Anzeige gibt an, dass nun Kochstufenanzeige der Wert „H“...
  • Page 17 mehr vorgenommen wurde, wechselt gesetzt wurde, blinkt die Sperranzeige, und die Timer-Anzeige zu dem Timer, der als die Kochzonen sind gesperrt. nächstes abläuft.Die Timer-Zuweisung wird Das Kochfeld kann nur im Betriebsmodus durch eine blinkende Timer-Funktions-/ gesperrt werden. Kochzonenanzeige angezeigt.Die Anzahl Wenn das Kochfeld gesperrt ist, kann der laufenden Timer wird durch die nur die Taste...
  • Page 18 Drücken Sie anschließend mindesten das akustische Signal beendet. 0,5 Sekunden lang gleichzeitig auf die Sobald keine falsche Betätigung mehr Tasten und anschließend vorliegt, werden sowohl die akustischen als ausschließlich auf die Taste .Das auch die visuellen Signale beendet. erfolgreiche Entsperren wird bestätigt, Übertemperaturabschaltung indem der Wert „L“...
  • Page 19: Reinigung Und Wartung

    beschrieben automatisch ausgeschaltet Kochgeschirrs trocken ist, bevor es auf wurde, kann sie wieder eingeschaltet und das Kochfeld gestellt wird. auf die gewünschte Kochstufe gestellt • Wenn die Kochzone eingeschaltet ist, werden, wobei dann wieder die maximale muss das Kochgeschirr mittig auf der Betriebszeit für die jeweilige Kochstufe gilt.
  • Page 20 Gerät prüfen, ob die verwendeten Schicht eines geeigneten Schutzmittels Reinigungsmittel geeignet sind und vom auf. Hersteller empfohlen werden. • Staub mit einem feuchten Tuch von der • Ausschließlich Reinigungsgel oder Oberfläche entfernen. -flüssigkeiten verwenden, die keine • Jegliche entstehenden Partikel enthalten.Keine ätzenden Farbabweichungen in der Glaskeramik (korrosiven) Gels, Scheuerpulver, stellen keine Beeinträchtigung der...
  • Page 21: Fehlerbehebung Und Transport

    6. FEHLERBEHEBUNG UND TRANSPORT 6.1 fehlerBeheBung Wenn an Ihrem Gerät weiterhin ein Fehler vorliegt, nachdem Sie die unten aufgeführten grundlegenden Schritte zur Fehlerbehebung befolgt haben, wenden Sie sich an einen autorisierten Servicemitarbeiter oder einen qualifizierten Techniker. Fehler Mögliche Ursache Lösung Prüfen Sie die Sicherungen für das Gerät im Die Anzeige der Kochfeld- Sicherungskasten.
  • Page 22: Technische Daten

    7. TECHNISCHE DATEN 7.1. energieBlAtt LAURUS Marke Modell LCA78ZKB Kochfeldart Elektro Anzahl Kochzonen Heiztechnologie – 1 Strahlungsbeheizung Größe – 1 Ø 14,5 Energieverbrauch – 1 Wh/kg 192,0 Heiztechnologie – 2 Strahlungsbeheizung Größe – 2 Ø 18,0 Energieverbrauch – 2 Wh/kg 192,0 Heiztechnologie –...
  • Page 23 Merci d’avoir choisi ce produit. Cette notice d’utilisation contient des informations et des consignes de sécurité importantes concernant l’utilisation et l’entretien de votre appareil. Lire attentivement cette notice d’utilisation avant d’utiliser votre appareil et la conserver pour consultation ultérieure. Icône Type Signification AVERTISSEMENT...
  • Page 24 TABLE DES MATIÈRES 1.CONSIGNES DE SÉCURITÉ ....................4 1.1. Avertissements de sécurité généraux ................4 1.2. Avertissements relatifs à l’installation ................6 1.3. En cours d’utilisation......................7 1.4. Nettoyage et entretien ....................8 2.INSTALLATION ET PRÉPARATION À L’UTILISATION ...........10 2.1. Installation de la table de cuisson................10 2.2.
  • Page 25: Consignes De Sécurité

    1. CONSIGNES DE SÉCURITÉ • Lire attentivement cette notice d’utilisation dans son intégralité avant d’utiliser votre appareil et la conserver dans un endroit accessible pour consultation ultérieure. • Ce manuel a été préparé pour plusieurs modèles, votre appareil peut donc ne pas disposer de certaines fonctions décrites dans ce manuel.
  • Page 26 essayer d'éteindre un incendie avec de l'eau, mais arrêter l'appareil puis couvrir les flammes par exemple avec un couvercle ou une couverture anti-feu. MISE EN GARDE : Le processus de cuisson doit être surveillé. Le processus de cuisson à court terme doit être surveillé...
  • Page 27: Avertissements Relatifs À L'installation

    dispositifs de protections non adaptés à la table de cuisson peuvent provoquer des accidents. • Avant l'installation s'assurer que les conditions de distribution locale (nature du gaz et pression du gaz ou tension et fréquence électrique) et le réglage de l'appareil sont compatibles. Les conditions de réglage de cet appareil sont inscrites sur la plaque signalétique de l’appareil.
  • Page 28: En Cours D'utilisation

    • Un moyen de déconnexion du réseau d’alimentation ayant une distance d’ouverture des contacts de tous les pôles doit être prévu dans la canalisation fixe conformément aux règles d’installation. • Lors du déballage de l’appareil, vérifier qu’il n’a pas été endommagé au cours du transport. En cas de défaut, ne pas utiliser l’appareil et faire appel immédiatement à...
  • Page 29: Nettoyage Et Entretien

    dangereux et déclencher un incendie. NE JAMAIS essayer d'éteindre un incendie avec de l'eau, mais arrêter l'appareil puis couvrir les flammes par exemple avec un couvercle ou une couverture anti-feu. • Toujours positionner les ustensiles de cuisson au centre de la zone de cuisson et placer les poignées de façon à...
  • Page 30 bandeau de commandes. • Pour assurer l’efficacité et la sécurité de votre appareil, utiliser uniquement les pièces détachées d’origine et faire appel à nos techniciens qualifiés en cas de besoin. Déclaration CE de conformité Nous déclarons que nos produits satisfont aux exigences des directives, des décisions et des réglementations européennes en vigueur.
  • Page 31: Installation Et Préparation À L'utilisation

    2. INSTALLATION ET PRÉPARATION À L’UTILISATION AVERTISSEMENT : Cet appareil doit être installé par un professionnel agréé ou par un technicien qualifié, conformément aux instructions de cette Minimum Minimum 42 cm 42 cm notice et conformément aux normes Table d’installation en vigueur. cuisson •...
  • Page 32 Table de cuisson Table de cuisson Plaque de protection Plaque de protection • Appliquer la bande d’étanchéité adhésive tout le long du bord inférieur Fixation pour plan du plan de cuisson. Ne pas étirer le de travail ruban adhésif. Bande d’étanchéité adhésive •...
  • Page 33: Branchement Électrique Et Sécurité

    sur les parois latérales de l’appareil. • Le branchement du boîtier de jonction est placé sur le boîtier de jonction. • Insérer l’appareil dans l’ouverture. 2.2. brAnchement électrique et sécurité AVERTISSEMENT : Le branchement électrique de cet appareil doit être effectué...
  • Page 34: Caractéristiques Du Produit

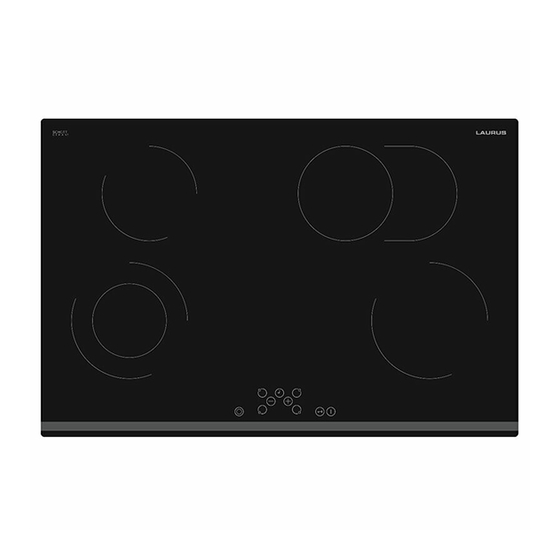
    3. CARACTÉRISTIQUES DU PRODUIT Important : Les caractéristiques du produit varient et l’apparence de votre appareil peut être différente de celle présentée sur les figures ci-dessous. Liste des composants 1. Foyer radiant 2. Bandeau de commande FR - 13...
  • Page 35: Utilisation De L'appareil

    4. UTILISATION DE L’APPAREIL Si l’appareil est en mode Veille, il peut être mis en mode Fonctionnement en appuyant pendant au moins 1 seconde sur le bouton 4.1. commAndes de lA tAble de cuisson Marche/Arrêt . Un signal sonore retentit La table de cuisson est contrôlée par des pour confirmer que cette opération a réussi.
  • Page 36 La zone d’extension ne peut être activée La résistance peut être éteinte de qu’après sélection d’un niveau entre 1 et 9 3 manières : sur la zone de base de la résistance. • Une pression simultanée sur les Mise en marche de la zone triple boutons La zone double ou la zone triple ne peut • Réduction du réglage de chaleur à...
  • Page 37 Minuteur de résistance triple s’éteint lui aussi s’il était allumé. Le signal sonore retentit aussi lorsque le Les minuteurs de résistance ne peuvent minuteur s’arrête. Toucher n’importe quel être réglés que pour les résistances bouton pour arrêter le vibreur. activées (le niveau de la résistance doit être réglé...
  • Page 38 • Appuyer simultanément sur pendant une demi-seconde jusqu’à ce que « 00 » apparaisse sur l’affichage du minuteur. Une fois qu’un minuteur arrive à « 00 », le niveau de chaleur correspondant est réglé sur « 0 ». La fin du minuteur de résistance ou du minuteur de fin de cuisson est indiquée par un signal sonore.
  • Page 39 Le temps de fonctionnement des commandes de la table de cuisson est limité. Si le réglage de chaleur d’une résistance n’a pas été modifié pendant un certain temps, la résistance s’arrête automatiquement (« 0 » s’affiche pendant 10 secondes. Il peut rester une certaine quantité...
  • Page 40: Nettoyage Et Entretien

    résistances s’allument et s’éteignent remplacer par un technicien agréé. régulièrement. Cela n’endommage pas la table de cuisson et ne rallonge que très peu 5. NETTOYAGE ET ENTRETIEN les temps de cuisson. 5.1. nettoyAge AVERTISSEMENT : AVERTISSEMENT : Arrêter l’appareil • Ne jamais utiliser la table de cuisson et le laisser refroidir avant de le sans placer d’ustensiles sur la zone de...
  • Page 41 cuisson vitrocéramique. Si du plastique, du papier aluminium, du sucre ou des aliments sucrés sont tombés sur la plaque de cuisson vitrocéramique chaude, veuillez gratter la surface chaude rapidement et sans vous mettre en danger. Si ces substances fondent, elles peuvent endommager la table de cuisson vitrocéramique.
  • Page 42: Dépannage Et Transport

    6. DÉPANNAGE ET TRANSPORT 6.1. dépAnnAge Si le problème persiste sur votre appareil après avoir suivi ces étapes de dépannage de base, contacter un professionnel agréé ou un technicien qualifié. Problème Cause possible Solution Vérifier le fusible se rapportant à l’appareil L’afficheur de la table de cuisson est dans le boîtier de fusibles.
  • Page 43 Wij danken u dat u voor dit product hebt gekozen. Deze gebruikershandleiding bevat belangrijke informatie over veiligheid en instructies die zijn bedoeld u te helpen in de bediening en het onderhoud van uw apparaat. Neem de tijd om deze gebruikershandleiding door te lezen voordat u uw apparaat in gebruik neemt en bewaar hem als naslagwerk voor de toekomst.
  • Page 44 INHOUD 1.VEILIGHEIDSINSTRUCTIES ....................4 1.1. Algemene veiligheidswaarschuwingen ................4 1.2. Waarschuwingen bij de installatie .................6 1.3. Tijdens het gebruik ......................7 1.4. Tijdens reiniging en onderhoud ..................8 2.INSTALLATIE EN VOORBEREIDING VOOR GEBRUIK ..........10 2.1. Installatie van de kookplaat ..................10 2.2. Elektrische aansluiting en veiligheid ................12 3.PRODUCTKENMERKEN ....................13 4.GEBRUIK VAN HET PRODUCT ..................14 4.1.
  • Page 45: Veiligheidsinstructies

    1. VEILIGHEIDSINSTRUCTIES • Lees deze instructies zorgvuldig en volledig voor u uw apparaat in gebruik neemt en bewaar deze op een handige locatie voor eventuele raadpleging in de toekomst. • Deze handleiding is geschreven voor meer dan één model en het is daarom mogelijk dat een aantal functies, die in deze handleiding worden besproken, niet aanwezig zijn op uw apparaat.
  • Page 46 LET OP: Op het bereidingsproces moet worden toegezien. Op een kort bereidingsproces moet voortdurend worden toegezien. WAARSCHUWING: Brandgevaar: bewaar geen voorwerpen op de kookoppervlakken. WAARSCHUWING: Als het oppervlak gebarsten is, moet u het apparaat uitschakelen om het risico op elektrische schokken te voorkomen. •...
  • Page 47: Waarschuwingen Bij De Installatie

    ervoor zorgen dat de lokale distributievoorwaarden (soort gas en gasdruk of elektrische spanning en frequentie) en de vereisten van het apparaat compatibel zijn. De specificaties voor dit apparaat staan vermeld op het label. LET OP: Dit apparaat is uitsluitend bedoeld voor de bereiding van etenswaren en voor huishoudelijk gebruik.
  • Page 48: Tijdens Het Gebruik

    er tijdens het transport geen schade is opgelopen. Neem in geval van twijfel het apparaat niet in gebruik en neem onmiddellijk contact op met uw leverancier of een erkende servicedienst. De materialen van de verpakking (nylon, nietjes, piepschuim, enz.) kunnen schadelijk zijn voor kinderen.
  • Page 49: Tijdens Reiniging En Onderhoud

    • Let erop dat de bedieningstoetsen van het fornuis steeds op “0” (stop) staan als het apparaat niet wordt gebruikt. 1.4. tijdens reiniging en onderhoud • Zorg ervoor dat uw apparaat van de stroom is afgesloten voordat u schoonmaak- of onderhoudswerkzaamheden uitvoert.
  • Page 50 Afvoeren van uw oude machine Dit symbool op het product of op de verpakking geeft aan dat dit product niet mag worden behandeld als huishoudelijk afval. In plaats daarvan moet het worden afgevoerd naar het geschikte verzamelpunt voor de hergebruik van elektrische en elektronische apparatuur.
  • Page 51: Installatie En Voorbereiding Voor Gebruik

    2. INSTALLATIE EN VOORBEREIDING VOOR GEBRUIK WAARSCHUWING: Dit apparaat mag uitsluitend worden geïnstalleerd door Minimaal Minimaal erkend onderhoudspersoneel of een 42 cm 42 cm gekwalificeerd elektricien en overeenkomstig de instructies van deze handleiding en conform de geldende plaatselijke voorschriften. • Het apparaat mag niet worden geïnstalleerd direct boven een •...
  • Page 52 KOOKPLAAT KOOKPLAAT Separator Separator • Breng de bijgeleverde eenzijdige zelfklevende tape aan rond de Bevestigingshaakje onderkant van de kookplaat. Rek de werkblad tape niet uit. Zelfklevende afdichttape • Schroef de 4 montagebeugels voor het aanrecht op de zijkanten van het apparaat. NL - 11...
  • Page 53: Elektrische Aansluiting En Veiligheid

    Zet het apparaat in de opening. 2.2. elektrische AAnsluiting en veiligheid WAARSCHUWING: De elektrische aansluiting van dit apparaat mag uitsluitend worden uitgevoerd door erkend onderhoudspersoneel of een gekwalificeerd elektricien en overeenkomstig de instructies van deze handleiding en conform de geldende voorschriften.
  • Page 54: Productkenmerken

    3. PRODUCTKENMERKEN Belangrijk: De specificaties van het product verschillen en het uiterlijk van uw apparaat kan afwijken van de afbeeldingen die hieronder zijn weergegeven. Onderdelenlijst 1. Keramische kookplaat 2. Bedieningspaneel NL - 13...
  • Page 55: Gebruik Van Het Product

    4. GEBRUIK VAN HET PRODUCT aan, 1 seconde uit). Als het apparaat niet binnen 10 seconden wordt bediend, wordt het display van alle kookzones 4.1. bediening vAn de kookplAAt uitgeschakeld. The hob is controlled by the pressing the Als de displays worden uitgeschakeld, wordt de appropriate electronic button.
  • Page 56 kookzone en ook de bijbehorende timer Kookzone- drukt, is er nog een zoemtoon en wordt indicator. De timerfunctie en het timerdisplay zijn de drievoudige kookzone ingeschakeld. De uitgeschakeld. Drievoudige zone-indicator zal oplichten en de drievoudige zone zal van stroom worden voorzien. Als deze kookzone nog heet is, wordt restwarmte aangegeven door een “H”...
  • Page 57 aflopen wordt aangegeven door het aantal Door nogmaals op te drukken, wordt de verlichte kookzone-indicators. volgende timer rechtsom toegewezen aan de Door te schakelen met kunt u de volgende actieve kookzone. Enzovoort. timerwaarden voor de kookzonetimer en Kookwekker de kookwekker weergeven. De toewijzing Ongeacht of een kookzone geactiveerd wordt aangegeven door de knipperende is of niet, kan de kookwekker bediend...
  • Page 58 apparaat echter uitschakelt, kunt u het Bewaking van de toetsen is inbegrepen om niet opnieuw opstarten zonder het te ongewenste bediening van de toetsen van ontgrendelen. het apparaat te voorkomen. Wanneer één of meer knoppen langer dan 12 seconden worden Na 2 seconden ingedrukt te hebben gehouden, ingedrukt, is er een hoorbaar geluid te horen dat...
  • Page 59 Als de temperatuur is gedaald, verdwijnt de “t” op kookplaat en weinig vertraging in de kooktijd. het kookzonedisplay en de bedieningseenheid van de kookplaat komt terug in de S-stand te staan. Dit WAARSCHUWING: betekent dat de gebruiker het apparaat opnieuw • Gebruik de kookplaat nooit zonder pan op de kan activeren door in te drukken.
  • Page 60: Reiniging En Onderhoud

    5. REINIGING EN ONDERHOUD de warme glaskeramische kookplaat terecht is/zijn gekomen, schraap dit/ deze dan zo snel en veilig mogelijk van 5.1. reiniging het warme oppervlak. Als deze stoffen WAARSCHUWING: Schakel het smelten kunnen ze de glaskeramische apparaat uit en laat het volledig afkoelen kookplaat beschadigen.
  • Page 61: Probleemoplossing En Transport

    6. PROBLEEMOPLOSSING EN TRANSPORT 6.1. probleemoplossing Als u na deze basisprobleemoplossing nog problemen met uw apparaat ondervindt, neem dan contact op met een erkend servicebedrijf of een erkende technicus. Probleem Mogelijke oorzaak Oplossing Controleer de zekering voor het apparaat. Het scherm van de besturingskaart van de kookplaat is zwart.
  • Page 62 Grazie per aver scelto questo prodotto. Questo manuale utente contiene importanti informazioni sulla sicurezza e istruzioni sul funzionamento e la manutenzione del vostro apparecchio. Prima di utilizzare quest’ultimo, si prega di leggere attentamente questo manuale utente e di conservarlo per future consultazioni.
  • Page 63 SOMMARIO 1.ISTRUZIONI DI SICUREZZA ....................4 1.1. Avvertenze generali di sicurezza ...................4 1.2. Avvertenze per l'installazione ..................7 1.3. Precauzioni durante l'uso ....................8 1.4. Precauzioni per la pulizia e la manutenzione ..............8 2.INSTALLAZIONE E PREPARAZIONE PER L'USO ............11 2.1. Istruzioni per l'installatore .................... 11 2.2.
  • Page 64: Istruzioni Di Sicurezza

    1. ISTRUZIONI DI SICUREZZA • Leggere attentamente tutte le istruzioni prima di utilizzare l'apparecchio e tenerle in un luogo adatto per riferimento quando necessario. • Questo manuale è stato preparato per più di un modello, quindi il vostro apparecchio potrebbe non avere alcune delle funzioni descritte all'interno.
  • Page 65 PERICOLO: Se la superficie è incrinata, spegnere l'apparecchio per evitare la possibilità di scosse elettriche. • Per i modelli che incorporano un coperchio del piano di cottura, rimuovere qualsiasi residuo di cibo dal coperchio prima di aprirlo. Lasciar raffreddare la superficie del piano di cottura prima di chiudere il coperchio.
  • Page 66 Le specifiche di questo apparecchio sono riportate sull'etichetta. ATTENZIONE: Questo apparecchio è progettato esclusivamente per la cottura di alimenti ed è destinato esclusivamente all'uso domestico. Non deve essere utilizzato per altri scopi o in qualsiasi altra applicazione, ad esempio per uso non domestico, in un ambiente commerciale o per riscaldare una stanza.
  • Page 67: Avvertenze Per L'installazione

    deve contattare il rivenditore o il produttore per i chiarimenti necessari prima di effettuare qualsiasi operazione. • Le zone cottura non devono funzionare a vuoto, senza le pentole. • Non utilizzare contenitori di plastica e di alluminio per la preparazione di cibo. Sul piano cottura caldo non si devono mettere oggetti in plastica e di alluminio.
  • Page 68: Precauzioni Durante L'uso

    Non esporlo a sole, pioggia, neve, polvere o umidità eccessiva. • I materiali intorno all'apparecchio (per esempio i mobili) devono essere in grado di sopportare una temperatura minima di 100° C. • Prestare attenzione durante il trasporto del prodotto poiché è pesante. È necessario valutare il numero di persone e le attrezzature necessarie.
  • Page 69 • Non rimuovere le manopole di controllo per pulire il pannello dei comandi. • Per mantenere l'efficienza e la sicurezza del vostro apparecchio, raccomandiamo di utilizzare sempre parti di ricambio originali e di contattare il servizio di assistenza tecnica autorizzato quando necessario. Dichiarazione di conformità...
  • Page 70 l’apparecchiatura. Lo smaltimento abusivo del prodotto da parte dell’utente comporta l’applicazione delle sanzioni amministrative di cui al D.Lgs. n. 152 del 3 aprile 2006. IT - 10...
  • Page 71: Installazione Epreparazione Per L'uso

    2. INSTALLAZIONE E PREPARAZIONE PER L'USO PERICOLO: questo apparecchio deve essere installato dal servizio di assistenza tecnica autorizzato o da un tecnico qualificato, secondo le istruzioni Min. Min. 42 cm 42 cm contenute in questo manuale e in PIANO COTTURA conformità...
  • Page 72 PIANO COTTURA PIANO COTTURA Separatore Separatore • Applicare il nastro adesivo sigillante in Staffa di montaggio del piano di lavoro dotazione a filo del bordo inferiore del piano cottura. Non tirarlo per allungarlo. Nastro adesivo sigillante • Avvitare le 4 staffe di montaggio del piano di lavoro alle pareti laterali del IT - 12...
  • Page 73: Collegamento Elettrico E Sicurezza

    prodotto. • I collegamenti della morsettiera sono riportati sulla morsettiera stessa. • Inserire l'apparecchio nell'apertura. 2.3. collegAmento elettrico e sicurezzA PERICOLO: Il collegamento elettrico di questo apparecchio deve essere eseguito da un tecnico autorizzato o da un elettricista qualificato, secondo le istruzioni contenute in questo manuale e nel rispetto delle normative locali vigenti.
  • Page 74: Caratteristiche Del Prodotto

    3. CARATTERISTICHE DEL PRODOTTO Importante: le specifiche del prodotto variano e l'aspetto dell'apparecchio potrebbe essere diverso da quello mostrato nelle figure seguenti. Elenco delle parti 1. Piastra in vetroceramica 2. Pannello dei comandi IT - 14...
  • Page 75: Uso Del Prodotto

    4. USO DEL PRODOTTO secondo. Un segnale acustico indica il completamento dell'operazione. Uno "0" apparirà su tutti i display degli 4.1. controlli del piAno cotturA elementi riscaldanti e tutti i punti decimali L'apparecchio si aziona tramite la pressione corrispondenti agli elementi riscaldanti dei tasti appropriati.
  • Page 76 l'indicatore doppia zona corrispondente Il riscaldamento Boost può essere si illuminerà. Una seconda pressione del disattivato premendo il tasto fino a tasto commuterà lo stato della doppia zona, quando appare l'impostazione di calore "0". modificandolo da attivo a non attivo, e così Se è...
  • Page 77 questo sarà indicato da una "H" nel display valore del timer. di impostazione del calore. Il contaminuti può essere selezionato Uso della funzione timer di quando tutti gli indicatori della zona di spegnimento per l’elemento riscaldante cottura sono accesi o spenti (nessun corrispondente indicatore di zona di cottura lampeggia).
  • Page 78 L'assegnazione è sempre mostrata solo l'operazione di spegnimento, dall'indicatore della zona di cottura premendo il tasto . Tuttavia, se si lampeggiante. Se nessun indicatore della spegne l'apparecchio, non può essere zona di cottura lampeggia, il tempo del riavviato nuovamente senza essere contaminuti viene visualizzato nel display sbloccato.
  • Page 79 (che non copre un tasto), portando il piano cottura a una temperatura molto elevata, la quale rende il vetro e i pulsanti pericolosi da toccare. Per evitare danni all'unità di controllo del piano cottura, i controlli monitorano costantemente la temperatura e spengono il piano in caso di surriscaldamento.
  • Page 80: Pulizia E Manutenzione

    il vetro. Se la temperatura calcolata è superiore a + 60° C, questo verrà indicato dal display dell’elemento riscaldante corrispondente. Dopo aver spento l’elemento riscaldante o il controllo del piano di cottura, sul display verrà indicato calore residuo finché la temperatura calcolata dall’elemento riscaldante è...
  • Page 81 cucina. superficie. 2. Utilizzo di piatti non adatti che erodono la Non utilizzare detergenti che superficie del piano cottura. contengono particelle in quanto 3. Utilizzo di materiali di pulizia non corretti. possono graffiare il vetro, le parti smaltate e/o verniciate dell’apparecchio. Pulizia delle parti in acciaio inossidabile (se disponibili) •...
  • Page 82: Risoluzione Dei Problemi E Trasporto

    6. RISOLUZIONE DEI PROBLEMI E TRASPORTO 6.1. risoluzione dei problemi Se dopo aver verificato i seguenti passaggi di base per la risoluzione dei problemi si verificano ancora problemi con l’apparecchio, contattare il servizio di assistenza tecnica autorizzata o un tecnico qualificato. Problema Possibile causa Soluzione...
  • Page 83 Gracias por elegir este producto. Este Manual de usuario contiene información de seguridad e instrucciones importantes relacionadas con el uso y mantenimiento del aparato. Tómese el tiempo que necesite para leer este Manual de usuario antes de usar el aparato y guárdelo por si tuviese que consultarlo más adelante.
  • Page 84 ÍNDICE 1.INSTRUCCIONES DE SEGURIDAD ................4 1.1. Advertencias generales de seguridad ................4 1.2. Advertencias para la instalación ..................6 1.3. Durante el uso .......................7 1.4. Durante la limpieza y el mantenimiento.................8 2.INSTALACIÓN Y PREPARACIÓN PARA SU USO ............10 2.1. Instalación de encimera....................10 2.2.
  • Page 85: Instrucciones De Seguridad

    1. INSTRUCCIONES DE SEGURIDAD • Lea detenidamente todas las instrucciones antes de usar el aparato y guarde este manual en un lugar de fácil acceso para poder consultarlo cuando sea necesario. • Este manual ha sido redactado para más de un modelo.
  • Page 86 debe ser supervisado continuamente. ADVERTENCIA: Peligro de incendio: No coloque objetos sobre las superficies donde se cocina. ADVERTENCIA: Si la superficie está agrietada, apague el aparato para evitar una posible descarga eléctrica. • En los modelos que incorporan una tapa de encimera, limpie los alimentos que se hayan derramado sobre la tapa antes de usar el aparato y deje que se enfríe la cocina antes de cerrar la tapa.
  • Page 87: Advertencias Para La Instalación

    compatibles. Las especificaciones de este aparato se indican en la etiqueta. PRECAUCIÓN: Este aparato solo ha sido diseñado para cocinar alimentos en el interior de una vivienda. No se debe usar para ningún otro fin o aplicación, como para uso no doméstico, en un entorno comercial o para calentar una habitación.
  • Page 88: Durante El Uso

    estireno, etc.) pueden resultar dañinos para los niños y se deben recoger y retirar inmediatamente. • Proteja el aparato de la atmósfera. No lo exponga al sol, la lluvia, la nieve, el polvo o una humedad excesiva. • Los materiales que rodean el aparato (p. ej., armarios), deben ser capaces de soportar al menos una temperatura de 100 °C.
  • Page 89: Durante La Limpieza Y El Mantenimiento

    1.4. durAnte lA limpiezA y el mAntenimiento • Asegúrese de que el aparato esté desconectado de la red eléctrica antes de realizar cualquier tarea de limpieza o mantenimiento. • No extraiga los mandos de control para limpiar el panel de mando. • Para preservar la eficacia y seguridad del aparato, le recomendamos que use siempre piezas de repuesto originales y que llame a un agente...
  • Page 90 obtener información detallada sobre el reciclaje de este producto, póngase en contacto con su oficina municipal, el servicio de desecho de residuos domésticos o la tienda en la que adquirió el producto. ES - 9...
  • Page 91: Instalación Ypreparación Para Su Uso

    2. INSTALACIÓN Y PREPARACIÓN PARA SU USO ADVERTENCIA: Este aparato debe instalarlo una persona de servicio autorizada o un técnico cualificado siguiendo las instrucciones proporcionadas Mínimo Mínimo 42 cm 42 cm en esta guía y cumpliendo las normativas ENCIMERA locales vigentes. •...
  • Page 92 ENCIMERA ENCIMERA Separador Separador • Aplique la cinta sellante autoadhesiva por una cara suministrada alrededor de Soporte de montaje de todo el borde inferior de la encimera. No encimera estire la cinta. Cinta sellante autoadhesiva ES - 11...
  • Page 93: Conexión Eléctrica Y Seguridad

    • Atornille los 4 soportes de montaje de • Fije el cable de alimentación a la la encimera a las paredes laterales del abrazadera de cable y a continuación aparato. cierre la tapa. • Inserte el aparato en la apertura. • La conexión de la caja de terminales se encuentra en la caja de terminales.
  • Page 94: Características Del Producto

    3. CARACTERÍSTICAS DEL PRODUCTO Importante: Las especificaciones para el producto varían y el aspecto del aparato podría variar con respecto al mostrado en las figuras que se muestran debajo. Lista de componentes 1. Calentador cerámico 2. Panel de mando ES - 13...
  • Page 95: Uso Del Producto

    4. USO DEL PRODUCTO Si no se realiza ninguna operación en un intervalo de 10 segundos, se apagarán los indicadores de todos los calentadores. 4.1. control de encimerA Si se apagan los indicadores, se pondrá el La encimera se controla pulsando el botón calentador en modo de espera.
  • Page 96 indicador del calentador y también el indicador vuelve a pulsar otra vez, volverá a sonar de la zona de cocción del temporizador el zumbador y se activará el calentador correspondiente. Se apagarán la función de triple. El indicador de zona triple se iluminará temporizador y el indicador del temporizador.
  • Page 97 parpadea ningún indicador de zona de cocción, asignar más temporizadores a otros sino que todos están encendidos o apagados). calentadores activados. Si se toca el botón por segunda vez, 10 segundos tras la última operación, se asigna un temporizador a uno de los el indicador del temporizador pasará...
  • Page 98 bloqueado. Si se pulsa cualquier otro botón en el modo de bloqueo de teclado, sonará el zumbador y parpadeará el indicador de bloqueo de teclado. Solo se puede ejecutar la operación de apagado mediante . Sin embargo, si apaga el aparato, no puede reiniciarlo de nuevo sin desbloquear el teclado.
  • Page 99 Para evitar que se produzcan daños en un corte eléctrico, parpadea el indicador de calor residual. Si un calentador tenía un calor residual la unidad de control de la encimera, los controles comprueban constantemente la superior a +60 °C antes de que se produjese el corte eléctrico, el indicador parpadeará...
  • Page 100: Limpieza Y Mantenimiento

    • La temperatura de las piezas accesibles de fusión en la base de los utensilios podría ser alta cuando el aparato esté en de cocina o en el revestimiento, se funcionamiento. Mantenga tanto a niños puede dañar la placa de vitrocerámica. como animales alejados de la encimera Si restos de plástico, papel de aluminio, mientras esta esté...
  • Page 101: Solución De Problemas Y Transporte

    6. SOLUCIÓN DE PROBLEMAS Y TRANSPORTE 6.1. solución de problemAs Si sigue teniendo algún problema con su aparato tras comprobar estos pasos básicos de resolución de problemas, póngase en contacto con un técnico de servicio autorizado o con un técnico cualificado. Problema Posible causa Solución...
  • Page 102 Thank you for choosing this product. This User Manual contains important safety information and instructions on the operation and maintenance of your appliance. Please take the time to read this User Manual before using your appliance and keep this book for future reference. Icon Type Meaning...
  • Page 103 CONTENTS 1.SAFETY INSTRUCTIONS ....................4 1.1 General Safety Warnings ....................4 1.2 Installation Warnings ......................6 1.3 During Use ........................7 1.4 During Cleaning and Maintenance .................7 2.INSTALLATION AND PREPARATION FOR USE ..............9 2.1 Installation of the Hob .....................9 2.2 Electrical Connection and Safety.................. 11 3.PRODUCT FEATURES ....................12 4.USE OF PRODUCT ......................13 4.1 Control of Hob ......................13...
  • Page 104: Safety Instructions

    1. SAFETY INSTRUCTIONS • Carefully read all instructions before using your appliance and keep them in a convenient place for reference when necessary. • This manual has been prepared for more than one model therefore your appliance may not have some of the features described within.
  • Page 105 WARNING: Danger of fire: Do not store items on the cooking surfaces. WARNING: If the surface is cracked, switch off the appliance to avoid the possibility of electric shock. • For models which incorporate a hob lid, clean any spillages off the lid before use and allow the cooker to cool before closing the lid.
  • Page 106: Installation Warnings

    other purpose or in any other application, such as for non-domestic use, in a commercial environment or for heating a room. • All possible measures have been taken to ensure your safety. Since the glass may break, care should be taken when cleaning to avoid scratching. Avoid hitting or knocking the glass with accessories.
  • Page 107: During Use

    100°C. • The temperature of the bottom surface of the hob may rise during operation, therefore a board must be installed underneath the product. 1.3 DurinG uSe • Do not put flammable or combustible materials in or near the appliance while it is operating. Do not leave the cooker unattended when cooking with solid or liquid oils.
  • Page 108 CE Declaration of conformity We declare that our products meet the applicable European Directives, Decisions and Regulations and the requirements listed in the standards referenced. This appliance has been designed to be used only for home cooking. Any other use (such as heating a room) is improper and dangerous.
  • Page 109: Installation And Preparation For Use

    2. INSTALLATION AND PREPARATION FOR USE WARNING : This appliance must be installed by an authorised service person or qualified technician, according to the instructions in this guide Minimum Minimum 42 cm 42 cm and in compliance with the current local regulations.
  • Page 110 Separator Separator • Apply the supplied one-sided self- adhesive sealing tape all the way Worktop mounting around the lower edge of the cooktop. bracket Do not stretch the tape. Self-adhesive sealing tape • Screw the 4 worktop mounting brackets on to the side walls of the appliance. EN - 10...
  • Page 111: Electrical Connection And Safety

    • Insert the appliance into the aperture. 2.2 eleCtriCal ConneCtion anD Safety WARNING: The electrical connection of this appliance should be carried out by an authorised service person or qualified electrician, according to the instructions in this guide and in compliance with the current local regulations.
  • Page 112: Product Features

    3. PRODUCT FEATURES Important: Specifications for the product vary and the appearance of your appliance may differ from that shown in the figures below. List of Components 1. Ceramic Heater 2. Control Panel EN - 12...
  • Page 113: Use Of Product

    4. USE OF PRODUCT be sent into Stand-By mode. is pressed for more than 2 seconds (in Operating mode), the appliance is switched 4.1 Control of hob off and is sent into S-Mode again. The The hob is controlled by the pressing the appliance can be turned off by pressing appropriate electronic button.
  • Page 114 a status change of the dual/triple zones in this will be indicated by a “H” in the heat the following manner (Dual zone on, triple setting display. zone on, all extended zones off, dual zone Reduction of the heat setting to “0” by on, triple zone on, dual zone on, etc.
  • Page 115 switching the appliance into S-Mode using pessing , “00” is displayed and shows . A minute minder will not be cleared, it that timer is active. The dot in the Timer will continue to count down, Display indicates that can now be used to set the timer value.
  • Page 116 heater displays show “L” as confirmation. If residual heat is present, it will be displayed in all other heater displays. If the minute minder is still running, it will proceed until ´00` is reached and the The hob control will then go into S-Mode. timer will beep.
  • Page 117: Cleaning And Maintenance

    heat setting. pan with a different diamater to hotplate being used. If a timer was associated with the heater, “00” will be shown on the timer display for 10 sec. After this, the timer display turns off. After a heater has been automatically turned off, as described above, the heater can be used and the maximum operating time for this heat setting is applied.
  • Page 118 hard tools as they may damage the • Clean the stainless steel parts of your cooker surfaces. appliance on a regular basis. Do not use cleaners that contain • Wipe the stainless steel parts with a soft particles, as they may scratch the cloth soaked in only water.
  • Page 119: Troubleshooting&Transport

    6. TROUBLESHOOTING&TRANSPORT 6.1 troubleShootinG If you still have a problem with your appliance after checking these basic troubleshooting steps, please contact an authorised service person or qualified technician. Problem Possible Cause Solution Check the household fuse for the appliance. Hob control card’s display is blacked out.
  • Page 120 52313358...

Table des Matières