Télécharger Imprimer la page

Publicité

Les langues disponibles

Les langues disponibles

Liens rapides

3 +
My First Pet Checkup Set
ASSEMBLY INSTRUCTIONS
#654046M
Adult assembly required. Approx. assembly time: 25 min.
Look for video of assembly at
littletikes.com/videoinstructions
XIM654046 - 7/20
1

Publicité

loading

Sommaire des Matières pour Little Tikes My First Pet Checkup Set

  • Page 1 My First Pet Checkup Set ™ ASSEMBLY INSTRUCTIONS #654046M Adult assembly required. Approx. assembly time: 25 min. Look for video of assembly at littletikes.com/videoinstructions XIM654046 - 7/20...
  • Page 2 • Clear a flat surface to lay out all the materials so everything is close at hand. • You will need a Phillips head screwdriver (not included) to assemble the My First Pet Checkup Set™. - When installing screws, be sure screws are tightened snugly, but do NOT OVERTIGHTEN.
  • Page 3 The Little Tikes Company makes fun, high quality toys. We warrant to the original purchaser that this product is free of defects in materials or workmanship for one year * from the date of purchase (dated sales receipt is required...
  • Page 4 Some packages of hardware may have extras pieces. ” (1,27 cm) (14) Actual size Questions? We’re here to help. Little Tikes customer service team at 1-800- 321-0183. Hole plugs Front wall -- left side (1) Front wall -- right side (1) Top back wall (1)
  • Page 5 Light arm (1) Faucet (1) Scale (1) Faucet fastener (1) Sides (2) Light (1) Knobs (2) Clips (2) Bins (2) Pet beds (2) (1) Decal sheet is located in the hardware pack. Illustrations are for reference only. Styles may vary from actual contents. Accessories Blood pressure cuff (1) Stethoscope (1)
  • Page 6 Ready...let’s start! Tool required (not included) Battery installation MUST be completed by an adult: 1. Using a Phillips screwdriver (not included) remove the screw and battery compartment covers (2) located on the light. 2. On the left side of the light, install two (2) fresh AAA alkaline batteries (not included), making sure the (+) and (-) ends face the proper direction as indicated inside the battery compartment.
  • Page 7 Simple to start First, place the Left side - front wall (part B) onto the Right side - front wall (part A). Second, secure using (2) ” (1,27 cm) screws. " (1,27 cm) (view from the back)
  • Page 8 Get Snappin’ Snap (1) side (part J) onto the assembled front walls. Make sure ALL (4) tabs line up before snapping! WAIT! If they don’t line up - flip the side around. Snap (1) side (part J) onto the opposite side of assembled front walls.
  • Page 9 Flip it Turn the unit upside down and snap on the bottom platform (part F). Align indents The countertop is a SNAP! Turn the unit right side up and snap on the countertop (part G). WAIT! Make sure ALL the tabs line up and SNAP! If they don’t, the...
  • Page 10 This is tricky Hole plug Snap on side exam table support (part E). Check to be sure you install shelf on the correct side! Locate (2) holes on this side of the unit. Insert a hole plug into each hole. Long Short post...
  • Page 11 Swing it in Pop-in the side exam table (part D) into countertop. Still more to swing Swing table support upward and snap it into the underneath of the side exam table.
  • Page 12 You gotta have a faucet! Insert faucet (part M1) into the countertop and secure by attaching the faucet fastener (part M2) under the countertop from the back of the unit. (view from the back) 1...2...3... Insert the light arm (part L1) into the hole located on the top back wall (part C).
  • Page 13 Get down with it First, fit assembled top back wall onto countertop. Second, secure using (6) ” (1,27 cm) screws. " (1,27 cm)
  • Page 14 Key it in. Pop it on. Part (K) is Insert scale (part K) into the top shelf. keyed to fit. Pop light (part L2) onto light arm.
  • Page 15 Almost there!!! Fit clear panel (part I) onto the rear of the back wall. Align the holes. Second, secure using (6) ” (1,27 cm) screws. " (1,27 cm)
  • Page 16 Clip it on Insert 2 clips (part O) into side, next to the scale. Sticker it up Decal (1) MUST MUST MUST be applied before knobs are installed. Apply decal (2) to the back wall.
  • Page 17 Turn it on PUSH in (2) knobs (part N) onto front control panel. WAIT! You put decal on - right? Plug it up! PLUG the remaining holes with the (4) remaining hole plugs. Hole plug...
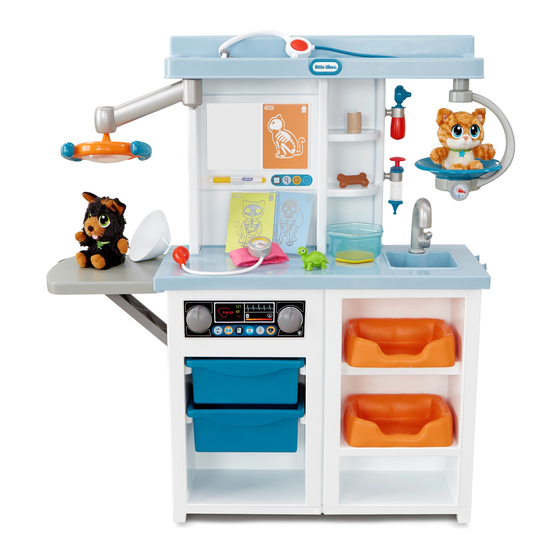
  • Page 18 Time to PLAY!!! Marker (1) Bins (2) Pet beds (2) To insert x-ray slide...
  • Page 19 ™ INSTRUCTIONS DE MONTAGE Montage par un adulte requis. Durée de montage approximative : 25 min. Merci d’avoir choisi l’ensemble My First Pet Checkup Set™ de Little Tikes © . Nous sommes déterminés à fournir un jouet durable et facile à...
  • Page 20 Quelques trucs avant de 3. N’utilisez pas des piles standard (zinc carbone), des piles alcalines ou des piles rechargeables en commencer! même temps. N’utilisez pas des piles de marques différentes en même temps. N’utilisez que les piles Avant de commencer le montage, assurez-vous d’avoir recommandées ou d’un type équivalent.
  • Page 21 à compter de sa date d’achat (le reçu d’achat daté est exigé comme preuve d’achat). Au titre de la présente garantie, la seule responsabilité de The Little Tikes Company et le seul recours se limitent enclenchez-le sous la table d’examen latérale.
  • Page 22 • Proteja sus ojos. Siempre use anteojos de seguridad la mano. al usar herramientas eléctricas. • Necesitará un desarmador Phillips (no está incluido) para ensamblar My First Pet Checkup Set™. ¡ADVERTENCIA! - Al instalar los tornillos, asegúrese de que los tornillos estén bien ajustados, pero NO LOS PELIGRO DE ATRAGANTAMIENTO: piezas pequeñas...
  • Page 23 4. Cuando el juguete no se usa durante un período Llame a nuestro equipo de servicio al cliente de de tiempo extendido, retire las baterías para Little Tikes al 1-800-321-0183. impedir una posible fuga y daño a la unidad. Requiere herramientas (no se incluyen) 5.
  • Page 24 (se requiere el recibo de compra fechado como prueba). A exclusiva elección de la compañía Little Tikes, el único remedio disponible bajo esta garantía será el reemplazo de la parte asegúrelo colocando el sujetador de grifo (pieza defectuosa del producto o el reemplazo del producto.

Ce manuel est également adapté pour:

654046m