Sunny SF-B0891 Manuel D'utilisation
Table des Matières
Les langues disponibles
Les langues disponibles
Liens rapides
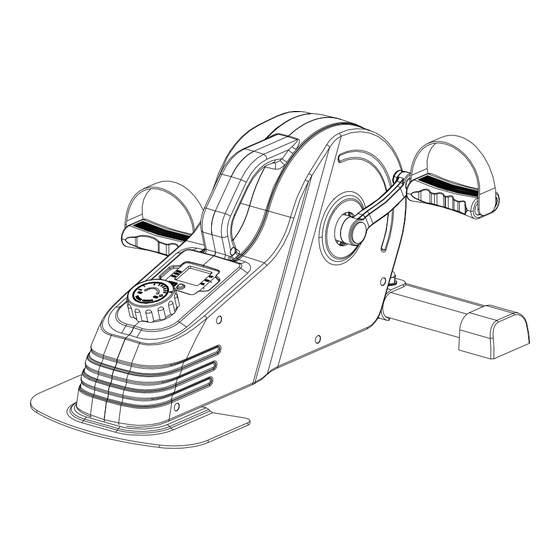
UNDER DESK MAGNETIC CYCLE
IMPORTANT! Please retain owner's manual for maintenance and adjustment instructions. Your satisfaction
English, Page 7~11
is very important to us, PLEASE DO NOT RETURN UNTIL YOU HAVE CONTACTED US:
support@sunnyhealthfitness.com or 1- 877 - 90SUNNY (877-907-8669).
Español, Page 12~16
¡IMPORTANTE! Conserve el manual del propietario para las instrucciones de mantenimiento y ajuste. Su
satisfacción es muy importante para nosotros, NO DEVUELVA HASTA HABERNOS ONTACTADO:
support@sunnyhealthfitness.com ó 1- 877 - 90SUNNY (877-907-8669).
IMPORTANT! Veuillez conserver le manuel du propriétaire pour les instructions de réglage et d'entretien.
Français, Page 17~21
Votre satisfaction est très importante pour nous, VEUILLEZ NE PAS EFFECTUER DE RETOUR AVANT DE
NOUS AVOIR CONTACTÉ: support@sunnyhealthfitness.com ou 1- 877 - 90SUNNY (877-907-8669).
Deutsche, Seite 22~26
WICHTIG! Bitte bewahren Sie das Benutzerhandbuch für Wartungs- und Einstellanweisungen auf. Ihre
Zufriedenheit ist besonders wichtig für uns, BITTE SCHICKEN SIE DAS PRODUKT NICHT ZURÜCK,
BEVOR SIE SICH MIT UNS IN VERBINDUNG GESETZT HABEN: support@sunnyhealthfitness.com
oder 1- 877 - 90SUNNY (877-907-8669).
SF-B0891
USER MANUAL
DO NOT STAND ON THE UNIT.
Table des Matières

Manuels Connexes pour Sunny SF-B0891

Sommaire des Matières pour Sunny SF-B0891
- Page 1 UNDER DESK MAGNETIC CYCLE SF-B0891 USER MANUAL DO NOT STAND ON THE UNIT. IMPORTANT! Please retain owner’s manual for maintenance and adjustment instructions. Your satisfaction English, Page 7~11 is very important to us, PLEASE DO NOT RETURN UNTIL YOU HAVE CONTACTED US: support@sunnyhealthfitness.com or 1- 877 - 90SUNNY (877-907-8669).
-
Page 3: Informations De Sécurité Importantes
INFORMATIONS DE SÉCURITÉ IMPORTANTES Nous vous remercions d’avoir choisi notre produit. Pour assurer votre sécurité et votre santé, veuillez utiliser cet équipement correctement. Il est important de lire entièrement le présent manuel avant d’assembler l’appareil et de l’utiliser. L’utilisation sûre et efficace n’est possible que si l’appareil est correctement assemblé, entretenu et utilisé. -
Page 4: Exploded Diagram
EXPLODED DIAGRAM #51 S13-S14-S15 1PC #52 S17-S19 1PC HARDWARE PACKAGE 1 PC... -
Page 6: Liste Des Éléments
LISTE DES ÉLÉMENTS Nº Description Spécification Qté Nº Description Spécification Qté Cadre Principal Écrou Borgne Haut Axe de Pédale Boulon M6 × 15 3L/R Manivelle Écrou en Nylon Panneau Magnétique Roue de Courroie Arbre de la Roue Libre Courroie J300 Axe de Manivelle Pince en C 7L/R... -
Page 18: Instructions D'assemblage
INSTRUCTIONS D’ASSEMBLAGE Votre expérience d’utilisation des produits Sunny Health and Fitness compte pour nous. Pour obtenir de l’aide avec pièces dépannage, veuillez nous contacter à l’adresse : support@sunnyhealthfitness.com ou au 1-877-90SUNNY (877-907-8669). ÉTAPE 1: Fixer la Plaque Arrière à Base Fixe (Nº... - Page 19 Votre expérience d’utilisation des produits Sunny Health and Fitness compte pour nous. Pour obtenir de l’aide avec pièces dépannage, veuillez nous contacter à l’adresse : support@sunnyhealthfitness.com ou au 1-877-90SUNNY (877-907-8669). ÉTAPE 3: REMARQUE : Les Pédales (Nº 7L et Nº 7R) sont marquées «...
-
Page 20: Compteur D'exercice
COMPTEUR D’EXERCICE SPÉCIFICATIONS : SPEED (VITESSE)------------------------------0,0 à 999,9 MPH (Milles/heure) TIME (DURÉE)-----------------------------------0:00 à 99:59 MIN (Minutes) DIST (DISTANCE)-------------------------------0,0 à 9 999 M (Milles) CAL (CALORIES)--------------------------------0,0 à 9 999 KCAL (Kilocalories) TOUCHES DE FONCTION : MODE : Appuyer plusieurs fois sur la touche rouge pour sélectionner la valeur souhaitée (DURÉE, VITESSE, DISTANCE, CALORIES, BALAYAGE). -
Page 21: Réglage De La Résistance
RÉGLAGES ET GUIDE D’UTILISATION RÉGLAGE DE LA RÉSISTANCE Régler la tension en tournant le Bouton de Contrôle de Tension (Nº 9) dans le sens horaire pour augmenter le niveau de résistance. Tourner Bouton Contrôle de Tension (Nº 9) dans le sens antihoraire pour réduire le niveau de résistance. -
Page 22: Installation Et Remplacement Des Piles
INSTALLATION ET REMPLACEMENT DES PILES COUVERCLE EN PLASTIQUE PILES COUVERCLE EN PLASTIQUE COMPARTIMENT À PILES TROU D’INSERTION DU CÂBLE Retirer le Compteur (Nº 10) du Cadre Principal (Nº 1). Ensuite, débrancher le câble de liaison de l’Inducteur (Nº 38) avec le Compteur (Nº 10). Retirer le couvercle en plastique situé...