DESKFIT DFX100 Manuel
Masquer les pouces Voir aussi pour DFX100:

Publicité

Les langues disponibles
  • FR

Les langues disponibles

Liens rapides

DFX100
Underdesk Elliptical
DE
EN
ES
FR
IT

Publicité

Table des Matières
loading

Sommaire des Matières pour DESKFIT DFX100

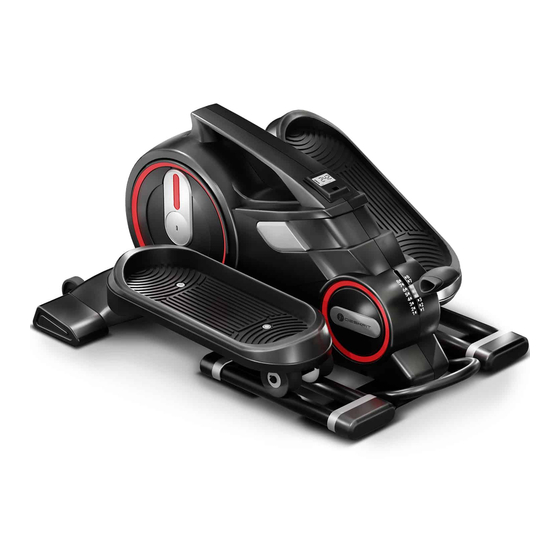
  • Page 1 DFX100 Underdesk Elliptical...
  • Page 3 Video Tutorials Unsere für dich! Aufbau Benutzung Abbau In 3 einfachen Schritten zum schnellen und sicheren Start: 1. QR-Code scannen 2. Videos anschauen 3. schnell und sicher starten Link zu den Videos: www.sportstech.de/qr/dfx100.html...
  • Page 4 Sehr geehrter Kunde wir freuen uns, dass Sie sich für ein Gerät aus der DeskFit Produktpalette entschieden haben. Deskfit Sportgeräte bieten Ihnen höchste Qualität und neueste Technologie. Um die Leistungsfähigkeit des Gerätes voll nutzen zu können und viele Jahre Freude an Ihrem Gerät zu haben, lesen Sie bitte vor der Inbetriebnahme und dem Beginn des Trainings dieses Benutzerhandbuch sorgfältig durch und verwenden Sie das Gerät den Anweisungen entsprechend.
  • Page 5: Table Des Matières

    INHALTVERZEICHNIS Wichtige Sicherheitshinweise .....................6 Montagezubehör ......................8 Explosionszeichnung ......................9 Teileliste .........................10 Stückliste vormontierter Teile .....................11 Montageanleitung ......................12 Anleitung für die Konsole ....................14 Technische Daten ......................15 Wartung/Pflege .......................16 Anwendungssoftware (APP) ....................17 Stuhlstopper ........................18 Dehnübungen .........................19...
  • Page 6: Wichtige Sicherheitshinweise

    WICHTIGE SICHERHEITSHINWEISE Diese allgemeinen Sicherheitsinformationen müssen unbedingt für die Benutzung dieses Produkt beachtet werden. Lesen Sie alle Hinweise, bevor Sie das Produkt in Benutzung nehmen. Bitte bewahren Sie diese Anleitung zum späteren Nachschlagen auf. Bevor Sie mit der Montage und Nutzung Ihres neuen Fitness-Gerätes beginnen, sollten Sie die Bedienungsanleitung sorgfältig durchlesen, damit Sie die Informationen verstehen.
  • Page 7 Das Gerät ist nicht zur Verwendung als medizinisches Gerät geeignet. Positionieren Sie das Gerät auf einer sauberen und ebenen Oberfläche. ACHTUNG! Benutzen Sie das Gerät nicht im Stehen. Nutzen Sie es nur während Sie sitzen. Das Stehen auf dem Gerät kann ernsthafte Verletzungen verursachen. Die Abdeckung sollte während der Benutzung niemals entfernt werden.
  • Page 8: Montagezubehör

    MONTAGEZUBEHÖR Beschreibung Figure Inbusschraube M8x15 Inbusschraube M8x20 Unterlegscheibe Gummifüße Inbusschlüssel 6mm Inbusschlüssel 5mm...
  • Page 9: Explosionszeichnung

    EXPLOSIONSZEICHNUNG...
  • Page 10: Teileliste

    TEILELISTE Beschreibung Beschreibung Hauptrahmen 36 Achse für Riemenscheibe Basisplatte 37 Riemenscheibe Inbusschraube M6*15 38 Inbusschraube M6*15 Klemmfeder 39 Klemmfeder Ф17 6000 Lager 40 Lager Schwungrad 41 Sensorhalterung Magnetkörper 42 Konsole Schraube M5*15 43 Spannungsknauf Sechskantmutter M6 44 Verbindungsschraube 10 Sechskantschraube M6 45 Gummifüße 11 Achse für Schwungrad 46 Riemen...
  • Page 11: Stückliste Vormontierter Teile

    STÜCKLISTE VORMONTIERTER TEILE 26L/26R Beschreibung Anz. Hauptrahmen Basisplatte Stabilisator hinten 26L/26R Pedale ( L / R) Abdeckung Stabilisator hinten Stuhlstopper Netzteil mit Stecker...
  • Page 12: Montageanleitung

    MONTAGEANLEITUNG Schritt 1 Die Basisplatte (2) an der Vorderseite des Hauptrahmens (1) befestigen und mit je fünf Inbusschrauben (3) und Gummifüßen (45) sichern. Den hinteren Stabilisator (32) an der Rückseite des Hauptrahmens (1) befestigen und mit je zwei Inbusschrauben (27) und Unterlegscheiben (33) sichern.
  • Page 13 Schritt 2 1. Linkes Pedal (26L) am linken Pedal des Hauptrahmens (1) befestigen und mit zwei Inbusschrauben (27) und Unterlegscheiben (33) sichern. Für die Montage des rechten Pedals (26R) wiederholen. 2. Die Abdeckung für den hinteren Stabilisator (18) an der Rückseite des Hauptrahmens (1) befestigen und mit zwei Blechschrauben (13) sichern.
  • Page 14: Anleitung Für Die Konsole

    ANLEITUNG FÜR DIE KONSOLE A. LCD-Vollanzeige B. Funktionsliste Funktion Display Kurzbeschreibung Anzeige alle Reihenfolge der Anzeige ZEIT→ ANZAHL→ ANZAHL SCAN 6 Sekunden GES.→ KAL→ UpM Im SCAN-Modus drücken Sie die umschalten Taste MODUS für weitere Optionen. 0:00~99:00 (Minute: TIME Zählt bis 99:59 und geht dann auf 0:00 zurück. Sekunde) COUNT 0~9999 ANSCHLÄGE Zählt bis 9999 und geht dann auf 0 zurück.
  • Page 15: Technische Daten

    E. Anleitung 1. Nach dem Einschalten (oder Drücken von MODE für 3 Sekunden) zeigt der LCD für 1 Sekunde alles an und wechselt dann in den SCAN-Modus. 2. Nach Eingabe des Drehzahlwertes beginnt jede Funktion mit der Datenerfassung (ZEIT ANZAHL ANZAHL GES.
  • Page 16: Wartung/Pflege

    WARTUNG/PFLEGE Die richtige Wartung ist sehr wichtig, um sicherzustellen, dass Ihr Gerät immer in einwandfreiem Zustand ist. Unsachgemäße Wartung kann Schäden verursachen, die die Lebensdauer Ihres Gerätes verkürzen und den Garantieschutz unwirksam machen kann. Wichtig: Verwenden Sie niemals Scheuermittel oder Lösungsmittel, um das Gerät zu reinigen. Um Schäden am Computer zu vermeiden, halten Sie Flüssigkeiten davon fern und schützen Sie ihn vor direkter Sonneneinstrahlung.
  • Page 17: Anwendungssoftware (App)

    ANWENDUNGSSOFTWARE (APP) Sie können die App "iconsole" über den hier abgebildeten QR-Code herunterladen. Voraussetzung für mobiles Gerät: Android 3.0 oder höher mit Bluetooth 4.0, iOS 8.0 oder höher. Bitte schalten Sie zuerst Ihre Bluetooth-Funktion auf Ihrem Gerät an. Android Android: www.sportstech.de/uploads/sportstech.apk iOS: Sie können im App Store nach iconsole suchen, oder es über den QR-Code herunterladen.
  • Page 18: Stuhlstopper

    STUHLSTOPPER Setzen Sie die Drehstuhl-Rollen in die Stuhlstopper (51) , damit ihr Stuhl rutschfest bleibt. So können Sie sich bequem hinsetzen und wieder aufstellen.
  • Page 19: Dehnübungen

    DEHNÜBUNGEN Dehnen vor dem Training hilft die Flexibilität zu verbessern und das Verletzungsrisiko zu mindern. MIT DEM KOPF ROLLEN Drehen Sie den Kopf nach rechts für eine Sekunde, fühlen Sie die Streckung auf der linken Seite des Nackens, dann drehen Sie den Kopf zurück für eine Sekunde, recken Sie Ihr Kinn nach oben und lassen Ihren Mund geöffnet.
  • Page 20 Europäische Entsorgungsrichtlinie 2002/96/EG Entsorgen Sie Ihr Trainingsgerät in keinem Fall über den normalen Hausmüll. Entsorgen Sie das Gerät ausschließlich über einen kommunalen oder zugelassenen Entsorgungsbetrieb.Beachten Sie hierbei die aktuell geltenden Vorschriften.Erkundigen Sie sich im Zweifelsfall bei Ihrer Stadt- bzw. Gemeindeverwal- tung nach einer sach- und umweltgerechten Entsorgungsmöglichkeit.
  • Page 22 3 simple steps for a fast and safe start: 1. scan the QR code 2. watch videos 3. start fast and safely Link to the videos: www.sportstech.de/qr/dfx100.html...
  • Page 23 Dear customer, We are pleased you chose a device from the SPORTSTECH product range. With sports equipment from SPORTSTECH you get the highest quality and latest technology. In order to fully use the potential of your device and be able to enjoy it for many years, please read this manual carefully before starting up and beginning of training, and use the device according to the instructions.
  • Page 24 INDEX Important Safety Information ...................25 Scope of supply ......................27 Exploded View ......................28 Parts List ........................29 Pre-Assembly Parts List ....................30 Assembly Instruction .....................31 Console Instructions ......................33 Technical Details ......................34 Maintenance/Care ......................35 Application Software (APP) .....................36 Chair Stopper .......................37 Stretch Exercise ......................38...
  • Page 25: Important Safety Information

    IMPORTANT SAFETY INFORMATION This general safety information must be observed when using this product. Read all instructions before using the product. Please keep this manual for future reference. Before commencing assembly and use of your new device, carefully read the instruction manual to understand the information provided.
  • Page 26 The device is not suitable for use as a medical device. Position the device on a clean and level surface Attention! Do not use the device while standing. Do only use the device when you are sitting. Standing on the device may cause serious injury. The cover should never be removed during use.
  • Page 27: Scope Of Supply

    SCOPE OF SUPPLY Description Drawings Allen Bolt M8x15 Allen Bolt M8x20 Flat Washer Rubber Feet Allen key 6mm Allen key 5mm...
  • Page 28: Exploded View

    EXPLODED VIEW...
  • Page 29: Parts List

    PARTS LIST Description Description Main frame 36 Axle for belt pulley Base board 37 Belt pulley Allen bolt M6*15 37 Allen bolt M6*15 Clamp spring 38 Clamp spring Ф17 6000 Bearing 39 Bearing Flywheel 40 Sensor bracket Magnet assembly 41 Console Screw M5*15 42 Tension knob Hex Nut M6...
  • Page 30: Pre-Assembly Parts List

    PRE-ASSEMBLY PARTS LIST 26L/26R Description Main frame Base board Stabilizer 26L/26R Pedal ( L / R) Rear Stabilizer Cover Chair Stopper Power adapter with connector...
  • Page 31: Assembly Instruction

    ASSEMBLY INSTRUCTION Step 1 Attach the base board (2) to the front of the main frame (1) securing with five sets of Allen bolts (3) and rubber feet (45). Attach the Rear Stabilizer (32) to the rear of the main frame (1) securing with two sets of Allen bolts (27) and flat washers (33).
  • Page 32 Step 2 1. Attach the left pedal (26L) to the left pedal of main frame (1), secure using two Allen bolts (27) and flat washers (33). Repeat for right pedal (26R) installation. 2. Attach the Cover for Rear Stabilizer (18) to the rear of the Main frame (1) securing with two Self-tapping screws (13).
  • Page 33: Console Instructions

    CONSOLE INSTRUCTIONS A. LCD full display B. Function List Function Display Brief Description Switch Display Displays order TIME→ COUNT→ T.COUNT→ CAL→ RPM SCAN every 6 seconds Under SCAN mode, press MODE key for further options. 0:00~99:00 TIME Counts up till 99:59 then returns to 0:00. (minute: second) COUNT 0~9999 HITS...
  • Page 34: Technical Details

    E. Instructions 1. After the power is on (or press MODE for 3 seconds) LCD full display for 1 second and enter than the SCAN mode 2. After entering RPM value, each function starts collecting data (TIME COUNT TOTAL COUNT CAL RPM) 3.
  • Page 35: Maintenance/Care

    MAINTENANCE/CARE Proper maintenance is very important to ensure that your equipment is always in top working condition. Improper maintenance could cause damage or shorten the life of your equipment and exceed the WARRANTY coverage. Important: Never use abrasives or solvents to clean the equipment. To prevent damage to the computer, keep liquids away and keep it out of direct sunlight.
  • Page 36: Application Software (App)

    APPLICATION SOFTWARE (APP) You can download the app "iconsole" via the QR code shown here. Mobile device requirement: Android 3.0 or higher with Bluetooth 4.0, iOS 8.0 or higher. Please turn on the Bluetooth function on your device first. Android Android: www.sportstech.de/uploads/sportstech.apk iOS: You can search the App Store for iconsole, or download via the QR Code.
  • Page 37: Chair Stopper

    CHAIR STOPPER Position the chair into the chair stopper (51) and your chair will be slip resistant. Now you will be able to get in and out of your seat comfortably.
  • Page 38: Stretch Exercise

    STRETCH EXERCISE We suggest the following stretch exercise, five times.10 counts for each time or longer do these exercise again after sports. HEAD ROLLS Rotate your head to the right for one count, feeling the stretch up the left side of your neck, then rotate your head back for one count, stretching your chin to the ceiling and letting your mouth open.
  • Page 39 European Disposal Directive 2002/96/EG Never dispose your training device in your regular household waste. Dispose the device only at a local or approved disposal. Take care of the currently applicable regulations. If you have doubts contact your local authorities for information about a correct and environment friendly disposal option.
  • Page 41 Nuestros para usted! Construcción Utilizar Reducción En 3 sencillos pasos para un arranque rápido y seguro: 1. Escanear el código QR 2. Ver vídeos 3. Comienza rápido y seguro Enlace a los videos: www.sportstech.de/qr/dfx100.html...
  • Page 42 Estimado cliente, Nos complace que haya elegido un dispositivo de la línea de productos SPORTSTECH. Con el equipo deportivo de SPORTSTECH usted obtiene la más alta calidad y la mejor tecnología. Con el fin de usar todo el potencial de su dispositivo y para que pueda disfrutarlo durante muchos años, por favor lea este manual cuidadosamente antes de comenzar a ejercitarse, y use el dispositivo de acuerdo a las instrucciones.
  • Page 43 CONTENIDOS Información importante de seguridad .................. 44 Accesorios de montaje ..................... 46 Dibujo de despiece ......................47 Lista de componentes ...................... 48 Lista de piezas premontadas ..................... 49 Instrucciones de instalación ....................50 Instrucciones para la consola ..................... 52 Datos tecnicos ........................ 53 Mantenimiento / cuidado ....................
  • Page 44: Información Importante De Seguridad

    INFORMACIÓN IMPORTANTE DE SEGURIDAD Esta información general de seguridad debe observarse al usar este producto. Lea todas las instrucciones antes de usar el producto. Por favor guarde este manual para consultas futuras. Antes de comenzar el ensamblaje y usar su nueva caminadora, lea cuidadosamente el manual de instrucciones para entender la información suministrada.
  • Page 45 La caminadora no es apta para usarse como un dispositivo médico. Ubique la caminadora sobre una superficie sólida y nivelada. ADVERTENCIA! No use el dispositivo de pie, úselo solamente mientras está sentado. Pararse sobre el dispositivo puede causar lesiones graves. La cubierta del motor nunca debe retirarse durante su uso.
  • Page 46: Accesorios De Montaje

    ACCESORIOS DE MONTAJE Descripción Cdad. Ilustración Tornillo Allen M8x15 Tornillo Allen M8x20 Arandela Patas de goma Llave Allen de 6mm Llave Allen de 5mm...
  • Page 47: Dibujo De Despiece

    DIBUJO DE DESPIECE...
  • Page 48: Lista De Componentes

    LISTA DE COMPONENTES No. Descripción Cdad. No. Descripción Cdad. Bastidor principal Eje para polea Placa principal Polea Tornillo Allen M6*15 Tornillo Allen M6*15 Resorte de sujeción Muelle de sujeción Ф17 6000 Rodamientos Valores Volante Montaje del sensor Cuerpo magnético Consola Tornillo M5*15 Perilla de tensión Tuerca hexagonal M6...
  • Page 49: Lista De Piezas Premontadas

    LISTA DE PIEZAS PREMONTADAS 26I/26D Descripción Cdad. Bastidor principal Placa principal Estabilizador trasero 26I/26D Pedal (izquierdo/derecho) Tapa estabilizadora de cubierta trasero Tapón para silla Fuente de alimentación con enchufe...
  • Page 50: Instrucciones De Instalación

    INSTRUCCIONES DE INSTALACIÓN Paso 1 Asegure la placa principal (2) a la parte delantera del bastidor principal (1) y asegúrela con cinco tornillos allen (3) y las patas de goma (45) en cada lado. Adjunte el estabilizador trasero (32) en la parte posterior del bastidor principal (1) y fíjelo con dos tornillos Allen (27) y las arandelas (33).
  • Page 51 Paso 2 1. Ensamble el pedal izquierdo (26L) al pedal izquierdo del bastidor principal (1) con dos tornillos Allen (27) y las arandelas (33). Repita lo mismo (26R) para montar el pedal derecho. 2. Asegure la tapa del estabilizador trasero (18) a la parte posterior del bastidor principal (1) y asegúrela con dos tornillos autorroscantes (13).
  • Page 52: Instrucciones Para La Consola

    INSTRUCCIONES PARA LA CONSOLA A. Pantalla LCD completa B. Lista de funciones Función Visualización Resumen Reihenfolge der Anzeige ZEIT→ ANZAHL→ ANZAHL Cambiar de pantalla SCAN GES.→ KAL→ UpM Im SCAN-Modus drücken Sie die cada 6 segundos Taste MODUS für weitere Optionen. 0:00~99:00 (minutos: TIME Cuenta hasta 99:59 y luego regresa a 0:00.
  • Page 53: Datos Tecnicos

    E. Instrucciones 1. Después de encender (o presionar MODE durante 3 segundos), la pantalla LCD mostrará todo durante 1 segundo y luego cambiará al modo SCAN 2. Después de ingresar el valor de velocidad, cada función comenzará con la adquisición de datos (PARÁMETROS TIEMPO, CAL, RPM).
  • Page 54: Mantenimiento / Cuidado

    MANTENIMIENTO / CUIDADO El mantenimiento adecuado es muy importante para garantizar que su dispositivo esté siempre en buen estado de funcionamiento. un mantenimiento inadecuado puede causar daños, acortar la vida útil de su dispositivo e invalidar la garantía. Importante: Nunca use agentes de limpieza o solventes para limpiar el dispositivo. Para evitar daños al ordenador, mantenga los líquidos alejados y protéjalos de la luz solar directa.
  • Page 55: Software (Aplicación)

    SOFTWARE (APLICACIÓN) Puede descargar la aplicación "iconsole" "a través del código QR que se muestra aquí. Requisitos de dispositivos móviles: Android 3.0 o superior con Bluetooth 4.0, iOS 8.0 o superior. Primero active el Bluetooth en su dispositivo. Android Android: www.sportstech.de/uploads/sportstech.apk iOS: iOS: puede buscar iconsole en App Store o descargarla a través del código QR.
  • Page 56: Tapón Para Silla

    TAPÓN PARA SILLA Coloque los rodillos de la silla giratoria en los tapones de la silla (51) para mantener su silla antidesli- zante. A este punto va a poder sentarse cómodamente.
  • Page 57: Ejercicios De Estiramiento

    EJERCICIOS DE ESTIRAMIENTO No importa cómo se ejercite, siempre haga algo de estiramiento primero. El calentamiento muscular hará que sus músculos se extiendan fácilmente, así que caliente al menos 5-10 minutos. Luego le sugerimos hacer los siguientes ejercicios de estiramiento cinco veces. El estiramiento antes del ejercicio le ayuda a mejorar la flexibilidad y reduce los riesgos de lesiones.
  • Page 58 Directiva Europea de Residuos 2002/96/EG Nunca elimine su dispositivo de entrenamiento en su basura doméstica ordinaria. Elimine el dispositivo únicamente en un sitio de eliminación aprobado. Tenga en cuenta las normativas aplicables actualmen- te. Si tiene dudas contacte a las autoridades locales para conseguir información sobre una opción de eliminación adecuada y ecológica.
  • Page 59 MANUEL FRANÇAIS...
  • Page 60 3 étapes simples pour un démarrage ra- pide et sécurisé: 1. Scannez le code QR 2. Regarder les vidéos 3. Démarrez rapidement et en toute sécurité. Lien vers les vidéos: www.sportstech.de/qr/dfx100.html...
  • Page 61 Cher client, Nous sommes ravis que vous ayez choisi un appareil de la gamme de produits SPORTSTECH. Avec les équipements sportifs de SPORTSTECH, vous obtenez la plus haute qualité et la meilleure technologie. Afin d'utiliser pleinement le potentiel de votre appareil et de pouvoir l'apprécier pendant de nombreuses années, lisez attentivement ce manuel avant l'utilisation et le début de votre entraînement et utilisez l'appareil conformément aux instructions.
  • Page 62 CONTENU Informations de sécurité importantes ...................63 Accessoires de montage....................65 Vue eclatee ........................66 Liste des pièces ......................67 Liste des pièces pré-assemblées ..................68 Instructions d'installation....................69 Instructions pour la console ....................71 Données techniques ......................72 Maintenance ........................73 Application (APP) ......................74 Bouchon de chaise ......................75 Excercice d'étirement ....................
  • Page 63: Informations De Sécurité Importantes

    INFORMATIONS DE SÉCURITÉ IMPORTANTES Cette information générale sur la sécurité doit être respectée lors de l'utilisation de ce produit. Lisez toutes les instructions avant d'utiliser le produit. Veuillez garder ce manuel pour toute future référence. Avant de commencer l'assemblage et l'utilisation de votre nouveau tapis roulant, lisez attentivement le mode d'emploi pour comprendre les informations fournies.
  • Page 64 L'équipement n'est pas approprié pour l'utilisation comme dispositif médical. Placez le tapis roulant sur une surface propre et plane. AVERTISSEMENT! N'utilisez pas l'appareil debout, utilisez-le uniquement pendant que vous êtes assis. Se tenir debout sur l'appareil peut causer des blessures graves. Le couvercle du moteur ne doit jamais être enlevé...
  • Page 65: Accessoires De Montage

    ACCESSOIRES DE MONTAGE Num. Description Quantité Figure vis Allen M8x15 vis Allen M8x20 Rondelle pieds en caoutchouc Clé Allen 6mm Clé Allen 5mm...
  • Page 66: Vue Eclatee

    VUE ECLATEE...
  • Page 67: Liste Des Pièces

    LISTE DES PIECES Num. Description Num. Description Qté cadre principal Essieu pour poulie plaque de base poulie Vis Allen M6*15 Vis Allen M6 * 15 ressort de serrage Ressort de serrage Ф17 Roulements 6000 Roulement Volant d'inertie Support de capteur corps magnétique console Vis M5 * 15...
  • Page 68: Liste Des Pièces Pré-Assemblées

    LISTE DES PIÈCES PRÉ-ASSEMBLÉES 26G/26D Num. Description Quantité cadre principal plaque de base Stabilisateur arrière 26G/26D Pédale (gauche / droite) Couvercle stabilisateur arrière bouchon de chaise Alimentation avec fiche...
  • Page 69: Instructions D'installation

    INSTRUCTIONS D'INSTALLATION Étape 1 Fixez la plaque de base (2) à l'avant du cadre principal (1) avec cinq vis Allen (3) et des pieds en caoutchouc (45). Fixez le stabilisateur arrière (32) à l'arrière du cadre principal (1) avec deux vis Allen (27) et des rondelles (33).
  • Page 70 Étape 2 1. Fixez la pédale gauche (26L) sur cadre principal (1) à l'aide de deux vis Allen (27) et les rondelles (33). Répétez pour la pédale droite (26R). 2. Fixez le couvercle du stabilisateur arrière (18) à l'arrière du cadre principal (1) à l'aide de deux vis auto-taraudeuses (13).
  • Page 71: Instructions Pour La Console

    INSTRUCTIONS POUR LA CONSOLE A. Ecran LCD B. Liste des fonctions Fonction Affichage Résumé Commutateur Ordre d'affichage TIME → COUNT → T.COUNT → SCAN d'affichage toutes CAL → RPM En mode SCAN, appuyez sur le bouton les 6 secondes MODE pour plus d'options. 0:00~99:00 (minute: TIME Compte jusqu'à...
  • Page 72: Données Techniques

    E. Instructions 1. Après la mise sous tension (ou en appuyant sur MODE pendant 3 secondes), l'écran LCD affichera tout pendant 1 seconde puis passera en mode SCAN 2. Après avoir entré la valeur de vitesse, chaque fonction commencera par l'acquisition des données. (TEMPS NOMBRE, NOMBRE TOTAL CAL RPM).
  • Page 73: Maintenance

    MAINTENANCE Un bon entretien est très important pour assurer que votre appareil soit toujours en bon état de fonctionnement, et une maintenance incorrecte peut causer des dommages, raccourcir la durée de vie de votre appareil et invalider la garantie. Important: N'utilisez jamais d'agents de nettoyage ou de solvants pour nettoyer l'appareil. Pour éviter d'endommager l'ordinateur, éloignez les liquides et protégez-le des rayons directs du soleil.
  • Page 74: Application (App)

    APPLICATION (APP) Vous pouvez télécharger l'application "iconsole" via le code QR affiché ici Condition préalable pour appareil mobile: Android 3.0 ou supérieur avec Bluetooth 4.0, iOS 8.0 ou supérieur. Veuillez d'abord activer le Bluetooth sur votre appareil. Android Android: www.sportstech.de/uploads/sportstech.apk iOS: iOS: Vous pouvez rechercher iconsole dans l'App Store, ou la télécharger en utilisant le code Remarques sur l'utilisation de l'application: En tant qu'utilisateur Android, assurez-vous que sous "Paramètres ->...
  • Page 75: Bouchon De Chaise

    BOUCHON DE CHAISE Placez les bouchons de chaise (51) dans la chaise pour la rendre antidérapante. Vous pouvez main- tenant vous asseoir et vous lever confortablement.
  • Page 76: Excercice D'étirement

    EXCERCICE D'ÉTIREMENT Peu importe comment vous pratiquez le sport, Veuillez faire quelques étirements avant de commencer votre entraî-nement, le muscle chaud s’étendra facilement, donc réchauffez vous durant 5-10minutes, nous suggérons l'exercice d'étirement suivant : 5 fois ,10 comptes pour chaque fois ou plus, faire ces exercices à...
  • Page 77 Directive européenne n° 2002/96/EG relative aux déchets Ne jeter en aucun cas l‘appareil avec les ordures ménagères. Ne disposez de l‘appareil que dans les décharges publiques (Gestion des déchets communaux de la ville). Pour leur élimination respectez les réglementations en vigueur locales. Renseignez-vous à la mairie ou à la commune de votre ville sur les possibilités offertes pour éliminer votre appareil correctement et en respectant l‘environnement.
  • Page 78 MANUALE D’USO ITALIANO...
  • Page 79 Video Tutorial Il nostro per te! Montaggio Utilizzo Smontaggio 3 semplici passaggi per un inizio veloce e sicuro: 1. Scannerizza il QR-Code 2. Guarda il Video 3. Inizia ad allenarti! Link per il Video: www.sportstech.de/qr/dfx100.html...
  • Page 80 Gentile cliente Siamo lieti che abbiate scelto un dispositivo della gamma SPORTSTECH. Con le attrezzature sportive di SPORSTECH potrete usufruire della più alta qualità e della più recente tecnologia. Per sfruttare a pieno il potenziale del dispositivo e poterlo utilizzare per molti anni, raccomandiamo di leggere attentamente questo manuale prima di iniziare l’allenamento e di utilizzare il dispositivo seguendo le istruzioni.
  • Page 81 INDICE Informazioni Importanti Sulla Sicurezza ................82 Accessori per il Montaggio .....................84 Simbolo Esplosione .......................85 Lista Pezzi ........................86 Distinta Pezzi Premontati ....................87 Istruzioni di Montaggio ....................88 Istruzioni per la Console ....................90 Dati Tecnici ........................91 Manutenzione/Cura .......................92 Software di Utilizzo (APP) ....................93 Piede Fisso per Sedia ....................94 Esercizi di Stretching .....................95...
  • Page 82: Informazioni Importanti Sulla Sicurezza

    INFORMAZIONI IMPORTANTI SULLA SICUREZZA Queste informazioni generali sulla sicurezza devono essere sempre rispettate quando si utilizza questo prodotto. Leggere tutte le istruzioni prima di utilizzare il prodotto. Conservare questo manuale per un futuro riferimento. Prima di iniziare l'assemblaggio e l'utilizzo del nuovo tapis roulant, leggere attentamente il manuale di istruzioni per comprendere le informazioni fornite.
  • Page 83 Posizionare il tapis roulant su una superficie piana e pulita. ATTENZIONE! Non utilizzate l'apparecchio quando siete in piedi. Utilizzatelo solo da seduti. Rimanere in piedi sull'apparecchio può causare gravi lesioni. Il coperchio del motore non deve mai essere rimosso durante l'uso. Un elettricista qualificato deve essere presente durante tutti i lavori di manutenzione.
  • Page 84: Accessori Per Il Montaggio

    ACCESSORI PER IL MONTAGGIO Descrizione Quantità Figura Vite a brugola M8x15 Vite a brugola M8x20 Spessorino Piedini in gomma Chiave a brugola 6mm Chiave a brugola 5mm...
  • Page 85: Simbolo Esplosione

    SIMBOLO ESPLOSIONE...
  • Page 86: Lista Pezzi

    LISTA PEZZI Descrizione Qtà Descrizione Qtà Telaio principale 36 Asse per puleggia Piastra base 37 Puleggia Brugola M6*15 38 Brugola M6*15 Molla di fissaggio 39 Morsetto a molla Ф17 Cuscinetto 6000 40 Cuscinetto Volano 41 Supporto sensore Magnete 42 Console Vite M5*15 43 Pulsante tensione Dado a sei facce M6...
  • Page 87: Distinta Pezzi Premontati

    DISTINTA PEZZI PREMONTATI 26S/26D Descrizione Qtà Telaio principale Piastra di base Stabilizzatore posteriore 26L/26R Pedale (sinistro/destro) Copertura stabilizzatore posteriore Puntali per sedia Istruzioni di montaggio...
  • Page 88: Istruzioni Di Montaggio

    ISTRUZIONI DI MONTAGGIO Passo 1 Fissate al piastra di base (2) sulla parte anteriore del telaio principale (1) con una vite a brugola (3) e piedini in gomma (45). Fissate con due viti a brugola ciascuno (7) e spessorini (33) lo stabilizzatore posteriore (32) con il retro del telaio principale (1).
  • Page 89 Passo 2 Fissate il pedale sinistro (26L) a quello destro col telaio (1) utilizzando due brugole (27) e rondelle (33). Ripetere la stessa procedura per montare il pedale destro (26R). Fissare con due viti (13) la copertura per lo stabilizzatore posteriore (18) sul retro del telaio principale.
  • Page 90: Istruzioni Per La Console

    ISTRUZIONI PER LA CONSOLE A. Schermo LCD B. Lista delle funzioni Funzione Display Breve descrizione Indicazione TEMPO→ QUANTITA'→ QUANTITA' Indicazione ogni 6 SCAN TOTALE→ KAL→ RPM. Modalità SCAN. Premere il secondi tasto MODUS per ulteriori opzioni. 0:00~99:00 TIME Conta fino a 99:59 e ritorna a 0:00 . (Minuti:secondi) COUNT 0~9999 Attacchi...
  • Page 91: Dati Tecnici

    E. Istruzioni 1. Dopo l'accensione (o dopo aver premuto il tasto MODE per 3 secondi) il display LCD si attiva e dopo 1 secondo va in modalità SCAN. 2. Dopo aver indicato il numero dei giri al minuto inizia a immagazzinare i dati di ogni funzione (TEMPO, QUANTITA', QUANTITA' TOT.
  • Page 92: Manutenzione/Cura

    MANUTENZIONE/CURA Una manutenzione corretta è di fondamentale importanza per assicurare il corretto funzionamento del macchinario. Una manutenzione impropria può causare danni che compromettono la durata di vita del macchinario, con il rischio che la garanzia perda valore. Importante: non utilizzate mai sostanze abrasive o solventi per pulire il macchinario. Per evitare danni al computer tenete lontani i liquidi dal computer e proteggetelo da raggi solari diretti.
  • Page 93: Software Di Utilizzo (App)

    SOFTWARE DI UTILIZZO (APP) l'app "iconsole" è scaricabile qui col codice QR-Code mostrato in figura. Dovete però disporre di un apparecchio mobile quale: Android 3.0 oppure maggiore che possieda la funzione Bluetooth 4.0, iOS 8.0 o maggiore. In primo luogo attivate la funzione Bluetooth sul vostro telefono. Android Android: www.sportstech.de/uploads/sportstech.apk...
  • Page 94: Piede Fisso Per Sedia

    PIEDE FISSO PER SEDIA Inserite le ruote della sedia mobile nel vano per puntali della sedia (51). In questo modo la sedia non scivolerà. Adesso potrete sedervi e alzarvi quando volete.
  • Page 95: Esercizi Di Stretching

    ESERCIZI DI STRETCHING Non importa la ragione per cui fai sport, fai in modo di fare sempre esercizi di stretching prima di cominciare. Il uscolo riscaldato si allungherà facilmente, quindi scaldati con degli esercizi per 5-10 minuti. Ti suggeriamo di eseguire i seguenti esercizi cinque volte conta fino a dieci ogni volta o anche più a lungo quando ripeti l’esercizio dopo aver praticato sport.
  • Page 96 Direttive Europee 2002/96/EG per lo smaltimento Non gettare mai il tuo attrezzo sportivo nell’immondizia normale. Smaltisci l’attrezzo solo tramite un siste- ma locale o approvato. Tieni in conto le regole applicabili correntemente. Se hai dubbi contatta le autorità locali per informazioni circa le opzioni per uno smaltimento corretto ed ecosostenibile. Batterie / Batterie ricaricabili In accordo con il regolamento per le batterie, sei obbligato legalmente a ritornare tutte le batterie usate ed esaurite.
  • Page 97 Verkauf durch / Distributed by / Distribuido por / Distribué / Distribuito da InnovaMaxx GmbH Potsdamer Platz 11 10785 Berlin +49 30 220 663 569 service@innovamaxx.de http://www.sportstech.de...

Table des Matières