Télécharger Imprimer la page
Celestron POWERSEEKER 60AZ Guide D'installation Rapide

Celestron POWERSEEKER 60AZ Guide D'installation Rapide

Masquer les pouces Voir aussi pour POWERSEEKER 60AZ:

Publicité

Les langues disponibles
  • FR

Les langues disponibles

Liens rapides

Q U I C K S E T U P G U I D E
E N G L I S H
1
1
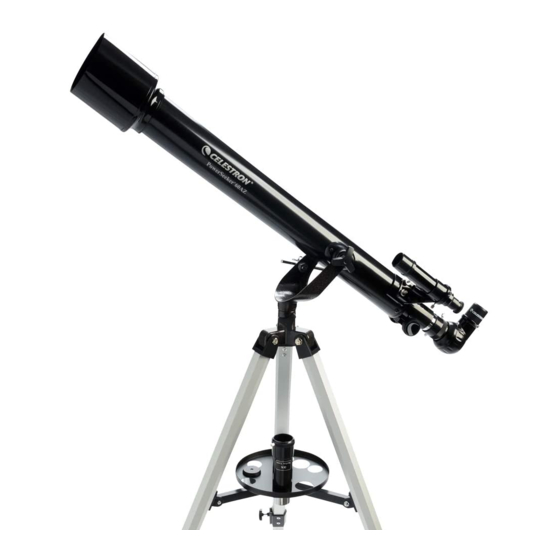
Unpack your telescope and verify that all parts are present. Your
PowerSeeker 60AZ includes: an optical tube with two threaded
mounting bolts, a tripod with center support bracket, two eyepieces,
a 3x Barlow lens, a fi nderscope, an erect image diagonal, and an
eyepiece accessory tray.
4
Check to ensure that all three legs are the same height once
extended to provide a level platform for the telescope.
7
Locate the optical tube and insert the attached slow motion control
rod into the hole on the mount.
60AZ
#21041
2
To set up the tripod, spread the legs outward until they are fully
extended and push down center leg brace.
5
5
Place the eyepiece accessory tray on top of the tripod's center leg
brace. Thread the tray into the threaded hole in the center of the leg
brace until it is fully seated.
8
Line up the tube with the holes on the mount and secure the tube
to the mount using the two threaded mounting bolts. Tighten to
secure in place.
3
Extend the center portion of each of the three tripod legs down about
6 to 12 inches. Use the tightening screw on each leg to secure the
extended leg in place.
6
If necessary, rotate the accessory tray counterclockwise until
the accessory holes are not covered by the leg brace arms as
shown here.
9
Remove the knurled nuts on the threaded posts at the focuser end
of the telescope tube.
E NG LISH | 1

Publicité

loading

Sommaire des Matières pour Celestron POWERSEEKER 60AZ

  • Page 1 To set up the tripod, spread the legs outward until they are fully Extend the center portion of each of the three tripod legs down about PowerSeeker 60AZ includes: an optical tube with two threaded extended and push down center leg brace.
  • Page 2 Remove the cap from the Barlow. For more information on this product or to download the instruction manual, please visit the respective product page on celestron.com SOLAR WARNING: Never attempt to view the sun through any telescope without a proper solar filter.
  • Page 3 ALIGNING THE FINDERSCOPE The fi nder is one of the most important parts of your telescope. It helps you The fi nder is one of the most important parts of your telescope. It helps you locate objects and center them in the eyepiece. The fi rst time you assemble your locate objects and center them in the eyepiece.
  • Page 4 You may need to adjust the focus knobs when you change eyepieces, so make sure you are getting the sharpest Celestron’s free SkyPortal app for iOS and Android can image possible. help you locate and identify a wide array of celestial objects quickly and easily.
  • Page 5 Pour installer le trépied, écartez les pieds vers l’extérieur jusqu’à ce Étendez la portion centrale de chacun des trois pieds du trépied sur présentes. Votre PowerSeeker 60AZ est livré avec : un tube optique qu’ils soient complètement étendus et abaissez l’entretoise centrale.
  • Page 6 à l’aide d’un télescope sans utiliser un filtre solaire adéquat. BESOIN D'ASSISTANCE? Contactez le support technique de Celestron Ensuite, insérez le barillet de l’oculaire de 20 mm dans la lentille de celestron.com/pages/technical-support Barlow et serrez les vis de fixation pour le maintenir en place.
  • Page 7 ALIGNER LE CHERCHEUR Le chercheur est l’un des composants les importants de votre télescope. Il vous Le chercheur est l’un des composants les importants de votre télescope. Il vous aide à localiser des objets et à les centrer dans votre oculaire. La première fois que aide à...
  • Page 8 L'appli SkyPortal gratuite de Celestron, disponible pour iOS et Android, peut vous aider à identifi er une grande variété d'objets célestes, rapidement et aisément.
  • Page 9 Zum Aufbau des Stativs die Beine nach außen ziehen, bis sie Den mittleren Teil jeder der drei Beinstreben ca. 15 bis 30 cm nach aller Teile. Ihr PowerSeeker 60AZ umfasst: einen optischen Tubus mit vollständig ausgezogen sind. Drücken Sie die mittlere Beinstrebe unten ausfahren.
  • Page 10 Teleskop in die Sonne schauen. BRAUCHEN SIE UNTERSTÜTZUNG? Setzen Sie anschließend die Steckhülse des 20-mm-Okulars in Wenden Sie sich an die technische Unterstützung von Celestron die Barlowlinse ein und ziehen Sie die Stellschrauben fest, um unter celestron.com/pages/technical-support es zu fixieren.
  • Page 11 SUCHER AUSRICHTEN Der Sucher ist einer der wichtigsten Teile Ihres Teleskops. Mit dem Sucher Der Sucher ist einer der wichtigsten Teile Ihres Teleskops. Mit dem Sucher lokalisieren Sie Objekte und zentrieren sie im Okular. Wenn Sie das Teleskop zum lokalisieren Sie Objekte und zentrieren sie im Okular. Wenn Sie das Teleskop zum ersten Mal zusammenbauen, müssen Sie den Sucher nach der Hauptoptik des ersten Mal zusammenbauen, müssen Sie den Sucher nach der Hauptoptik des Teleskops ausrichten.
  • Page 12 Möglicherweise müssen Sie die Fokussierknöpfe nachstellen, wenn Sie die Okulare wechseln, so erhalten Sie das schärfste Bild. Mit der kostenlosen SkyPortal-App von Celestron für iOS und Android können Sie schnell und einfach viele Himmelsobjekte fi nden und identifi zieren. 12 | DE UTSCH...
  • Page 13 Per confi gurare il treppiede, allargare le gambe verso l’esterno fi no a Allungare la parte centrale di ciascuna delle tre gambe del treppiede componenti. PowerSeeker 60AZ include: un tubo ottico con due quando non saranno completamente estese e spingere verso il basso verso il basso di 15-30 cm.
  • Page 14 Rimuovere il cappuccio dal Barlow. focheggiatore. Per maggiori informazioni su questo prodotto o per scaricare il manuale di istruzioni, visitare la rispettiva pagina prodotto su celestron.com AVVERTENZA SOLARE: Non tentare mai di osservare il sole attraverso un telescopio senza un filtro solare adeguato.
  • Page 15 ALLINEAMENTO DEL CERCATORE Il cercatore è uno dei componenti più importanti del telescopio. Aiuta a localizzare Il cercatore è uno dei componenti più importanti del telescopio. Aiuta a localizzare gli oggetti e a centrarli nell'oculare. Al primo assemblaggio del telescopio gli oggetti e a centrarli nell'oculare.
  • Page 16 Per assicurare la maggiore nitidezza possibile, quando si sostituisce l'oculare, potrebbe essere necessario regolare le manopole di messa a fuoco. L'app gratuita SkyPortal Celestron per iOs e Android può aiutare a localizzare e identifi care un'ampia gamma di corpi celesti in maniera facile e veloce.
  • Page 17 Para instalar el trípode, separe las patas hacia fuera hasta que Extienda la sección central de cada una de las tres patas del trípode piezas. Su PowerSeeker 60AZ incluye: un tibo óptico con dos pernos estén totalmente extendidas y presione hacia abajo el soporte de hacia abajo entre 6 y 12 pulgadas (15 y 30 cm).
  • Page 18 AVISO SOLAR: No intente nunca observar el sol por un telescopio sin un filtro solar adecuado. ¿NECESITA AYUDA? Contacte con el soporte técnico de Celestron A continuación, inserte el cañón del ocular de 20mm en la Barlow y celestron.com/pages/technical-support apriete los tornillos para asegurarlo en posición.
  • Page 19 ALINEAR EL LOCALIZADOR El localizador es una de las piezas más importantes de su telescopio. Le ayuda a El localizador es una de las piezas más importantes de su telescopio. Le ayuda a localizar objetos y centrarlos en el ocular. La primera vez que monte el telescopio, localizar objetos y centrarlos en el ocular.
  • Page 20 Puede tener que ajustar los mandos de enfoque cuando cambie oculares, para asegurarse de obtener la imagen más defi nida posible. La app gratuita de Celestron SkyPortal para iOS y Android puede ayudarle a localizar e identifi car una amplia gama de objetos celestes rápida y fácilmente.

Ce manuel est également adapté pour:

21041