Publicité

Les langues disponibles
  • FR

Les langues disponibles

Liens rapides

Walkyrie
Wandheizgerät
Wall heater
Radiateur mural
Radiador mural
Radiatore da parete
10033139

Publicité

Table des Matières
loading

Sommaire des Matières pour oneConcept Wallkyrie

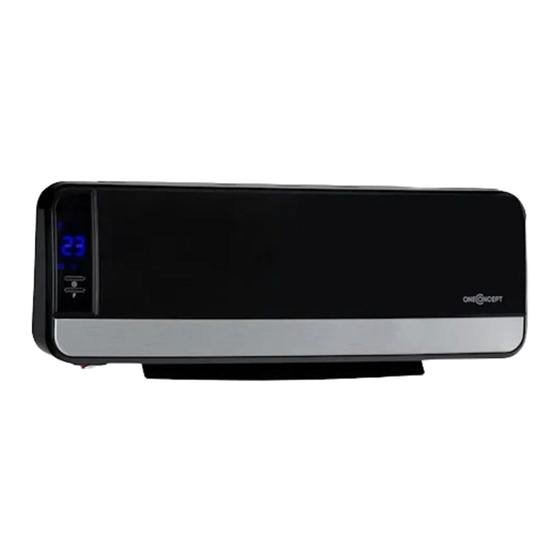
  • Page 1 Walkyrie Wandheizgerät Wall heater Radiateur mural Radiador mural Radiatore da parete 10033139...
  • Page 3: Table Des Matières

    Sehr geehrter Kunde, wir gratulieren Ihnen zum Erwerb Ihres Gerätes. Lesen Sie die folgenden Hinweise sorgfältig durch und befolgen Sie diese, um möglichen Schäden vorzubeugen. Für Schäden, die durch Missachtung Hinweise unsachgemäßen Gebrauch entstehen, übernehmen wir keine Haftung. Scannen Sie den QR-Code, um Zugriff auf die aktuellste Bedienungsanleitung und weitere Informationen rund um das Produkt zu erhalten.
  • Page 4: Sicherheitshinweise

    SICHERHEITSHINWEISE • Lesen Sie die Bedienungsanleitung vor dem Gebrauch des Geräts aufmerksam durch und bewahren Sie diese für den zukünftigen Gebrauch auf. • Dieses Gerät kann von Kindern über 8 Jahren und Personen mit eingeschränkten physischen, psychischen oder mentalen Fähigkeiten oder mangelnder Erfahrung und Wissen verwendet werden, insofern diese in das Gerät eingewiesen wurden und die damit verbundenen Gefahren begriffen haben.
  • Page 5: Montage

    MONTAGE VORSICHT • Um eine Gefährdung durch unbeabsichtigtes Zurücksetzen des Wärmeschalters zu vermeiden, darf dieses Gerät nicht über ein externes Schaltgerät, wie beispielsweise einen Timer, versorgt oder an einen Stromkreis angeschlossen werden, der regelmäßig vom Versorgungsunternehmen ein- und ausgeschaltet wird. WARNUNG •...
  • Page 6 • Das Gerät ist ausschließlich zur Installation im Innenbereich geeignet. Wählen Sie den Aufhängungsort unter Berücksichtigung der folgenden Hinweise aus: • Bohren Sie, auf Höhe der Aussparungen auf der Rückseite des Heizgeräts, zwei Löcher in die Wand und stecken Sie jeweils einen Dübel hinein.
  • Page 7: Bedienung

    BEDIENUNG Bedienelemtente Fernbedienung Bedienfeld 1. Verbinden Sie das Netzstromkabel mit einer Wandsteckdose und schalten Sie das Gerät, durch Drücken der Taste 0/I ein. Das Gerät befindet sich nun im Standby-Modus und der Bildschirm zeigt „5“ an. 2. Drücken Sie, um in den Lüftermodus zu gelangen, einmal die Taste Der Bildschirm zeigt dann „--“...
  • Page 8 Automatisches Einschalten Wenn Sie im Standby-Modus die Taste drücken, können Sie eine automatische Einschaltzeit zwischen 00 – 12 Stunden auswählen. Nach dem Beenden der Einstellung, zeigt der Bildschirm die Zeit bis zum automatischen Einschalten an und das Symbol ist erleuchtet. Die angezeigte Zeit reduziert sich nach einer Stunde jeweils automatisch.
  • Page 9 Beispiel (siehe Abbildung): Einstellung auf Mittwoch, 9:30 AM, unter 25 °C heizen auf Stufe 2 Hinweis: • Drücken Sie zum Überprüfen der aktuell eingestellten Zeit und des Wochentags mehrfach die Taste SET. • Der LCD-Bildschirm wird nach 5 Sekunden Inaktivität automatisch ausgeschaltet.
  • Page 10 Heizung die Taste oder drücken Sie die Tasten oder . Das Gerät arbeitet dann ohne Temperatureinstellung. Auf dem Bildschirm erlischt das Symbol „°C“ und „--“ wird angezeigt. Nach 12 Stunden kontinuierlichem Heizen, geht für 30 Sekunden der Kühlventilator an und das Gerät wechselt in den Standby-Modus.
  • Page 11 Tages festzulegen. Stellen Sie anschließend mit den Tasten + oder – die gewünschte Temperatur (Temperaturbereich 10 – 49 °C) ein und drücken Sie zum Bestätigen Ihrer Einstellungen die Taste OK. 10. Drücken Sie, zum Deaktivieren der wöchentlichen Funktion, erneut die Taste P.
  • Page 12: Reinigung Und Pflege

    Andernfalls funktioniert das Programm nicht. REINIGUNG UND PFLEGE • Schalten Sie zunächst das Gerät aus und ziehen Sie den Netzstecker aus der Steckdose und lassen Sie das Gerät vor der Reinigung vollständig abkühlen. • Verwenden Sie zur äußeren Reinigung ein feuchtes Tuch mit einer milden Seifenlösung.
  • Page 13: Hinweise Zur Entsorgung

    HINWEISE ZUR ENTSORGUNG Befindet sich die linke Abbildung (durchgestrichene Mülltonne auf Rädern) auf dem Produkt, gilt die Europäische Richtlinie 2012/19/EU. Diese Produkte dürfen nicht mit dem normalen Hausmüll entsorgt werden. Informieren Sie sich über die örtlichen Regelungen zur getrennten Sammlung elektrischer und elektronischer Gerätschaften.
  • Page 14 Technische Parameter 10033139 Modellkennung(en) Angabe Symbol Wert Einheit Angabe Einheit Wärmeleistung Nur bei elektrischen Speicher-Einzelraumheizgeräten: Art der Regelung der Wärmezufuhr Nennwärmeleistung Manuelle Regelung der Wärmezufuhr mit nein integriertem Thermostat Mindestwärmeleistung Manuelle Regelung der Wärmezufuhr nein (Richtwert) mit Rückmeldung der Raum- und/oder Außentemperatur Maximale kontinuierliche Elektronische Regelung der Wärmezufuhr...
  • Page 15 Dear Customer, Congratulations on purchasing this equipment. Please read this manual carefully and take care of the following hints to avoid damages. Any failure caused by ignoring the items and cautions mentioned in the instruction manual are not covered by our warranty and any liability.
  • Page 16: Safety Instructions

    SAFETY INSTRUCTIONS Read the safety instructions carefully and keep them for future reference. • This appliance can be used by children aged from 8 years and above and persons with reduced physical, sensory or mental capabilities or lack of experience and knowledge if they have been given supervision or instruction concerning use of the appliance in a safe way and understand the hazards involved.
  • Page 17: Installation

    INSTALLATION CAUTION • In order to avoid a hazard due to inadvertent resetting of the thermal cutout, this appliance must not be supplied through an external switching device, such as a timer, or connected to a circuit that is regularly switched on and off by the utility.
  • Page 18 • INDOOR USE ONLY • Choose a correct location for the heater in taking in account the safety instructions: • To hang you heater on the wall: Drill two holes at the level of the slots located at the back of the heater then put two pegs in the holes. •...
  • Page 19: Operation

    OPERATION Control elements Remote control Control panel 1. Plug in and switch on by pressing the red switch 0/I, enter into standby mode and display shows„5“. 2. Press . “ button for one time, enter into fan mode and the display show “--”...
  • Page 20 4. Appointment “ON”: In standby mode, press” timer button, you can set the appointment turn-on time in 00-12 hours. After complete setting, the display shows the appointment turn-on time and also the light is on. The display automatically decreases 1 hour for each hour passed. When the appointment power-on time arrived, the product will automatically turns on.
  • Page 21 For example: Setting to Wednesday, 9:30 AM under 25 °C under II heating, please refer to the following photos. Note: • Press SET to check the current time & day in turn; • The LCD was display off if no any operation during 5 seconds; •...
  • Page 22 After complete setting of current TIME/DAY, below is the steps to set weekly program After complete setting of current TIME/DAY, below is the steps to set weekly program: 1. Press , the product enter into working status. 2. Press P. The display shows „P, it enter into weekly program setting. 3.
  • Page 23: Cleaning And Maintenance

    Set open-window detection(ONLY by remote control) • Press , the product enter into working status. Heating for a moment until stable. • Press on the remote control. „ / °C“ will light on. The temperature is displayed "23" by default. •...
  • Page 24: Disposal Considerations

    DISPOSAL CONSIDERATIONS According to the European waste regulation 2012/19/EU this symbol on the product or on its packaging indicates that this product may not be treated as household waste. Instead it should be taken to the appropriate collection point for the recycling of electrical and electronic equipment.
  • Page 25 Technical parameters 10033139 Model identifier(s): Item Symbol Value Unit Item Unit Heat output Type of heat input, for electric storage local space heaters only Nominal heat output manual heat charge control, with integrated thermostat Minimum heat output manual heat charge control with room and/ (indicative) or outdoor temperature feedback Maximum continuous...
  • Page 27 Chère cliente, cher client, Toutes nos félicitations pour l’acquisition de ce nouvel appareil. Veuillez lire attentivement et respecter les instructions de ce mode d’emploi afin d’éviter d’éventuels dommages. Nous ne saurions être tenus pour responsables des dommages dus au non-respect des consignes et à...
  • Page 28: Consignes De Sécurité

    CONSIGNES DE SÉCURITÉ • Lisez attentivement ce mode d‘emploi avant d’utiliser l’appareil et conservez-le pour référence ultérieure. • Cet appareil peut être utilisé par des enfants de plus de 8 ans et des personnes ayant des capacités physiques, sensorielles ou mentales limitées, ou dénuées d’expérience et de connaissances, dans la mesure où...
  • Page 29: Montage

    MONTAGE ATTENTION • Pour éviter le risque de réinitialisation accidentelle du thermo contact, n‘alimentez pas cet appareil avec un dispositif de commutation externe, tel qu‘une minuterie, et ne le connectez pas non plus à un circuit périodiquement activé et désactivé par le service public. MISE EN GARDE •...
  • Page 30 • L‘appareil ne convient que pour une installation à l‘intérieur. Sélectionnez l‘emplacement pour accrocher le radiateur en veillant aux points suivants : • Percez deux trous dans le mur à la hauteur des renfoncements à l’arrière de l’appareil de chauffage et insérez dans chacun un goujon. •...
  • Page 31: Utilisation

    UTILISATION Eléments de commande Télécommande Panneau de commande 1. Branchez le cordon d’alimentation secteur sur une prise murale et allumez l’appareil en appuyant sur la touche 0 / I. L‘appareil est maintenant en mode veille et l‘écran affiche „5“. 2. Appuyez une fois sur le bouton pour passer en mode ventilateur. L‘écran affiche ensuite „-“.
  • Page 32 4. Démarrage automatique Si vous appuyez sur la touche en mode veille, vous pouvez régler une durée avant démarrage automatique entre 00 – 12 heures. Une fois le réglage effectué, l‘écran affiche la durée jusqu‘au démarrage automatique et le symbole est éclairé.
  • Page 33 Exemple (voir figure) : réglage sur mercredi, 9:30 AM, en dessous de 25 °C chauffer à la vitesse 2 Remarque : • Pour vérifier l’heure réglée et le jour de la semaine, appuyez plusieurs fois sur le bouton SET. • L‘écran LCD s‘éteint automatiquement au bout de 5 secondes d‘inactivité.
  • Page 34 interrompre le réglage de la température, appuyez sur la touche appuyez sur les touches . L‘appareil fonctionne alors sans réglage de température. Le symbole „°C“ disparaît de l‘écran et „-“ est affiché. Au bout de 12 heures de chauffage continu, le ventilateur de refroidissement se met en marche pendant 30 secondes et l‘appareil passe en mode veille.
  • Page 35 vos réglages. 10. Pour annuler la fonction hebdomadaire, appuyez à nouveau sur la touche P. L‘indicateur „P“ à l‘écran s‘éteint pour indiquer que le programme hebdomadaire a été désactivé. L‘appareil revient à son état de fonctionnement précédent.. Remarque : Une fois que les réglages ci-dessus sont terminés et que le programme hebdomadaire est actif, vous pouvez appuyer sur les touches DAY / EDIT / TIME / ON / TIME / OFF pour vérifier les réglages respectifs.
  • Page 36: Nettoyage Et Entretien

    NETTOYAGE ET ENTRETIEN • Mettez tout d‘abord l‘appareil hors tension, débranchez-le et laissez-le refroidir complètement avant de le nettoyer. • Pour le nettoyage externe, utilisez un chiffon humide avec une solution douce savonneuse. • Assurez-vous que de l‘eau ou d‘autres liquides ne pénètrent pas dans l‘appareil, car cela pourrait provoquer un incendie ou un risque de choc électrique.
  • Page 37: Informations Sur Le Recyclage

    INFORMATIONS SUR LE RECYCLAGE Vous trouverez sur le produit l’image ci-contre (une poubelle sur roues, barrée d‘une croix), ce qui indique que le produit se trouve soumis à la directive européenne 2012/19/UE. Renseignez-vous sur les dispositions en vigueur dans votre région concernant la collecte séparée des appareils électriques et électroniques.
  • Page 38: Fiche De Données Produit

    FICHE DE DONNÉES PRODUIT 10033139 Référence (s) du produit Donnée Symbole Valeur Unité Donnée Unité Puissance calorifique Uniquement pour les radiateurs électriques à accumulation : Type de régulation de l'apport de chaleur Puissance calorifique Pnom Régulation manuelle de l'apport de chaleur nominale avec thermostat intégré...
  • Page 39 Estimado cliente, le felicitamos por la adquisición de su aparato. Lea atentamente las siguientes instrucciones y sígalas para evitar posibles daños. No asumimos ninguna responsabilidad por los daños que resulten del incumplimiento de las instrucciones y del uso inadecuado. Escanee el siguiente código QR para acceder al manual de usuario más reciente y a otra información sobre el producto: ÍNDICE...
  • Page 40: Instrucciones De Seguridad

    INSTRUCCIONES DE SEGURIDAD • Lea atentamente el manual de instrucciones antes de utilizar el aparato y guárdelo para futuras consultas. • Este dispositivo puede ser utilizado por niños mayores de 8 años y personas con capacidades físicas, mentales o psicológicas limitadas o con falta de experiencia y conocimientos, siempre que hayan sido instruidos en el dispositivo y hayan comprendido los peligros que entraña.
  • Page 41 MONTAJE ATTENTION • Para evitar el riesgo de un reajuste accidental del interruptor de calor, este dispositivo no debe ser alimentado por un interruptor externo, como un temporizador, o conectado a un circuito que la compañía de servicios públicos enciende y apaga regularmente. ADVERTENCIA •...
  • Page 42 • El dispositivo sólo es adecuado para su instalación en interiores. Seleccione la ubicación de la suspensión de acuerdo con las siguientes instrucciones: • Taladre dos agujeros en la pared a nivel de los huecos en la parte posterior del calentador e inserte un pasador en cada uno de ellos. •...
  • Page 43: Funcionamiento

    FUNCIONAMIENTO Elementos de manejo Mando a Panel de control distancia 1. Conecte el cable de alimentación a una toma de corriente y encienda el aparato pulsando la tecla 0/I. La unidad se encuentra ahora en modo de espera y en la pantalla aparece „5“. Appuyez une fois sur le bouton pour passer en mode ventilateur.
  • Page 44 3. Encendido automático Si pulsa la tecla en el modo de espera, puede seleccionar un tiempo de encendido automático entre 00 y 12 horas. Cuando se completa la configuración, la pantalla muestra la hora de encendido automático y el icono se ilumina. El tiempo visualizado se reduce automáticamente al cabo de una hora.
  • Page 45 Ejemplo (ver ilustración): Ajuste al miércoles, 9:30 AM, por debajo de 25 °C calentamiento al nivel 2 Nota: • Pulse la tecla SET repetidamente para comprobar la hora y el día de la semana actualmente ajustados. • La pantalla LCD se apaga automáticamente después de 5 segundos de inactividad.
  • Page 46 de temperatura, pulse el botón ou appuyez sur les touches para seleccionar el calentador. El dispositivo funciona entonces sin ajuste de temperatura. El símbolo „°C“ desaparece de la pantalla y aparece „--“. Después de 12 horas de calentamiento continuo, el ventilador de refrigeración se enciende durante 30 segundos y la unidad pasa al modo de espera.
  • Page 47 10. Para desactivar la función semanal, pulse de nuevo la tecla P. El indicador „P“ de la pantalla se apaga e indica que se ha desactivado el programa semanal. El aparato vuelve a su estado de funcionamiento anterior. Nota: Una vez finalizados los ajustes anteriores y activado el programa semanal, puede pulsar los botones DAY/ EDIT/ TIME/ON/ TIME/OFF para comprobar los ajustes respectivos.
  • Page 48: Limpieza Y Cuidado

    LIMPIEZA Y CUIDADO • Primero apague el aparato, desenchufe el aparato de la toma de corriente y deje que se enfríe completamente antes de limpiarlo. • Para la limpieza externa, utilice un paño húmedo con una solución jabonosa suave. • No permita que el agua u otros líquidos entren en el interior de la unidad, ya que podría provocar un incendio o una descarga eléctrica.
  • Page 49: Retirada Del Aparato

    RETIRADA DEL APARATO Si el aparato lleva adherida la ilustración de la izquierda (el contenedor de basura tachado) entonces rige la normativa europea, directiva 2012/19/UE. Este producto no debe arrojarse a un contenedor de basura común. Infórmese sobre las leyes territoriales que regulan la recogida separada de aparatos eléctricos y electrónicos.
  • Page 50: Hoja De Datos Del Producto

    HOJA DE DATOS DEL PRODUCTO 10033139 Denominación del modelo Dato Símbolo Valor Unidad Dato Unidad Potencia térmica Solo con disposítivos de acumulación de calor eléctricos para abastecimiento local: Tipo de regulación del abastecimiento de calor Potencia térmica nominal Pnom Regulación manual del abastecimiento de calor con termostato integrado: Potencia térmica mínima Pmin...
  • Page 51 Gentile Cliente, La ringraziamo per aver acquistato il dispositivo. La preghiamo di leggere attentamente le seguenti istruzioni per l’uso e di seguirle per evitare possibili danni tecnici. Non ci assumiamo alcuna responsabilità per danni scaturiti da una mancata osservazione delle avvertenze di sicurezza e da un uso improprio del dispositivo.
  • Page 52: Avvertenze Di Sicurezza

    AVVERTENZE DI SICUREZZA • Leggere attentamente le istruzioni per l‘uso prima di utilizzare l‘apparecchio e conservarle per riferimenti futuri. • Questo apparecchio può essere utilizzato da bambini di età superiore agli 8 anni e da persone con limitate capacità fisiche, mentali o spirituali o con scarsa esperienza e conoscenza, purché...
  • Page 53: Montaggio

    MONTAGGIO ATTENZIONE • Per evitare il rischio di accensione accidentale dell‘interruttore termico, questo dispositivo non deve essere alimentato da un quadro esterno, come un timer, o collegato a un circuito regolarmente acceso e spento dall‘azienda di servizi pubblici. AVVERTENZA • Non coprire l‘apparecchio per evitare il pericolo di surriscaldamento.
  • Page 54 • L‘apparecchio è adatto solo per l‘installazione interna. Selezionare la posizione della sospensione secondo le seguenti istruzioni: • Praticare due fori nella parete a livello degli incavi sul retro della stufa e inserire un tassello ciascuno. • Agganciare l‘apparecchio portando prima gli incavi dell‘apparecchio all‘altezza dei fori e poi spingendo le viti e fissandole nei tappi.
  • Page 55: Funzionamento

    FUNZIONAMENTO Elementi di controllo Telecomando Pannello di controllo 1. Collegare il cavo di rete ad una presa a muro e accendere l‘apparecchio premendo il tasto 0/I. L apparecchio è ora in modalità standby e lo schermo visualizza „5“. 2. Per entrare in modalità ventilatore, premere una volta il tasto , sul display compare „--“.
  • Page 56 4. Accensione automatica Se si preme il tasto in modalità standby, è possibile selezionare un orario di accensione automatica tra 00 - 12 ore. Quando l‘impostazione è completa, lo schermo visualizza l‘ora di accensione automatica e l‘icona è illuminata. L‘ora visualizzata si riduce automaticamente dopo un‘ora. Allo scadere del tempo, l‘unità...
  • Page 57 Esempio (vedi figura): impostazione su mercoledì, ore 9:30 AM, riscaldamento sotto i 25 °C fino al livello 2. Nota: • Premere per controllare l‘ora correntemente impostata e l‘opzione • Nei giorni feriali, premere più volte il tasto SET. • Lo schermo LCD si resetta automaticamente dopo 5 secondi di inattività. •...
  • Page 58 riscaldamento oppure premere i tasti . Il dispositivo funziona quindi senza impostazione della temperatura. Il simbolo „°C“ scompare dallo schermo e viene visualizzato „--“. Dopo 12 ore di riscaldamento continuo, la ventola di raffreddamento si accende per 30 secondi e l‘unità passa alla modalità standby. Impostazione del programma settimanale (solo tramite telecomando) Al termine delle impostazioni del giorno e dell‘ora, è...
  • Page 59 pulsante OK per confermare le impostazioni. 10. Per disattivare la funzione settimanale, premere nuovamente il tasto OK. L‘indicatore „P“ sullo schermo si spegne indicando che il programma settimanale è stato disattivato. Il dispositivo ritorna al suo stato di funzionamento precedente. Nota: - Dopo che le impostazioni di cui sopra sono state completate e l‘opzione programma settimanale è...
  • Page 60: Pulizia E Manutenzione

    PULIZIA E MANUTENZIONE • Spegnere prima l‘apparecchio e scollegare la spina di rete e lasciare raffreddare l‘apparecchio completamente incustodito prima della pulizia. • Per la pulizia esterna, utilizzare un panno umido con un detergente delicato. Soluzione di sapone. • Assicuratevi che non ci siano acqua o altri liquidi. all‘interno dell‘unità, in quanto ciò...
  • Page 61: Smaltimento

    SMALTIMENTO Se sul prodotto è presente la figura a sinistra (il bidone dei rifiuti con le ruote), si applica la direttiva europea 2012/19/UE. Questi prodotti non possono essere smaltiti con i rifiuti normali. Informarsi sulle disposizioni vigenti per la raccolta di dispositivi elettrici ed elettronici.
  • Page 62: Scheda Informativa Del Prodotto

    SCHEDA INFORMATIVA DEL PRODOTTO 10033139 Identificazione del modello (i) Indicazione Simbolo Valore Unità Indicazione Unità Potenza termica Solo per gli apparecchi per il riscaldamento d'ambiente locale elettrici ad accumulo: Tipo di controllo dell´apporto termico Potenza termica nominale Pnom Controllo manuale del carico termico con termostato integrato Potenza termica minima Pmin...

Ce manuel est également adapté pour:

10033139

Table des Matières