Fisher-Price FVD20 Mode D'emploi
Table des Matières
Liens rapides
FVD20
We're happy to help!
Don't return this product to the store. Call for assistance right away.
1-800-432-5437 (US & Canada).
Nous sommes à votre service!
Ne retournez pas ce produit au magasin. Communiquez avec nous sans tarder.
1-800-432-5437 (Canada et É.-U.)
IMPORTANT! Please keep these instructions for future reference.
Please read these instructions before assembly and use of this product.
IMPORTANT! Conserver ce mode d'emploi pour s'y référer en cas de besoin.
Lire attentivement ce mode d'emploi avant d'assembler et d'utiliser le produit.
fisher-price.com
1
Table des Matières

Manuels Connexes pour Fisher-Price FVD20


Sommaire des Matières pour Fisher-Price FVD20
- Page 1 FVD20 We’re happy to help! Don’t return this product to the store. Call for assistance right away. 1-800-432-5437 (US & Canada). Nous sommes à votre service! Ne retournez pas ce produit au magasin. Communiquez avec nous sans tarder. 1-800-432-5437 (Canada et É.-U.) IMPORTANT! Please keep these instructions for future reference.
- Page 2 WARNING Prevent death: Keep seat fully reclined until child is at least 4 months old AND can hold head up without help. Young infants have limited head and neck control. If seat is too upright, infant’s head can drop forward and compress the airway, resulting in DEATH.
- Page 3 Consumer Information Renseignements pour les consommateurs IMPORTANT! Maximum Weight Limit: 11,3 kg (25 lb). If your child weighs less than 11,3 kg (25 lb), but is really active and appears to be able to climb out of the swing, immediately discontinue its use.
-
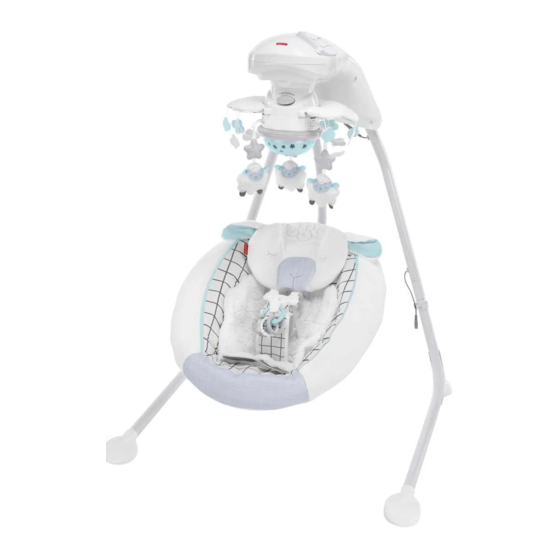
Page 4: Assembled Parts Éléments À Assembler
Assembled Parts Éléments à assembler Cloud Clip Nuages Motorized Frame Boîtier motorisé Body Support Support pour bébé 2 Upper Legs Lower Seat Tube 2 pattes Tube inférieur supérieures Pad with Headrest du siège Coussin avec appuie-tête Side Rail Montant latéral Seat with Restraint System Siège avec système de retenue Side Rail... -
Page 5: Assembly Assemblage
Assembly Assemblage IMPORTANT! Before assembly and each use, inspect this product for damaged hardware, loose joints, missing parts or sharp edges. Do not use the product if any parts are missing, damaged or broken. Do not use accessories or replacement parts other than those approved by the manufacturer. - Page 6 Assembly Assemblage Upper Leg Patte supérieure PRESS APPUYER Lower Leg Patte inférieure • While pressing the button on the straight end of an lower leg, insert the lower leg into a upper leg. Make sure the button on the lower leg “snaps” into the hole in the upper leg. •...
- Page 7 Assembly Assemblage • Stand the assembly upright. • Pull the legs out so that the buttons “snap” into the holes in the motorized frame. • When standing behind the product, all four feet should be flat upon the floor. • Mettre le cadre debout. •...
- Page 8 Assembly Assemblage Side Rail Montant latéral Side Rail Montant latéral Seat Siège • Fit the side rails to the side tabs on the seat. • Insert four M4,5 x 1,9 cm screws into the side rails. Fully tighten the screws with a Philips screwdriver.
- Page 9 Assembly Assemblage Shoulder Belts Courroies d’épaule Smaller Baby • Insert the ends of the shoulder belts through the lower slots in the seat pad and the slots in the body support. Enfant plus petit • Insérer les extrémités des courroies d'épaule dans les fentes inférieures du coussin et dans les fentes du support pour bébé.
- Page 10 Assembly Assemblage • Fit the pad edges around the rim of the seat. • Placer les bords du coussin sur le rebord du siège. Elastic Loops Boucles élastiques • Hook both elastic loops at the top of the seat pad around the pegs at the top of the seat. •...
- Page 11 Assembly Assemblage Lower Seat Tube Tube inférieur du siège Short Tube Tube court • Fit the lower seat tube into the short tube on the seat. • Insérer le tube inférieur du siège dans le tube court du dossier. M5 x 40 mm Bolt Boulon M5 de 40 mm •...
- Page 12 Assembly Assemblage Lower Seat Tube Tube inférieur du siège Upper Seat Tube Tube supérieur du siège • Tip the assembly on its side. • Fit the lower seat tube onto the upper seat tube. • Mettre le produit sur le côté. •...
- Page 13 Assembly Assemblage M5 x 40 mm Bolt Boulon M5 de 40 mm • Insert an M5 x 40 mm bolt into the upper seat tube. Fully tighten the bolt with the Allen wrench. • Turn the assembly upright. • Insérer un boulon M5 de 40 mm dans le tube supérieur du siège. Bien serrer le boulon avec la clé...
- Page 14 Assembly Assemblage Cloud Clip Nuages • Fit the ends of the cloud clip into the sockets in the mobile dome. Push to secure in place. • Insérer les extrémités des nuages dans les encoches du dôme du mobile. Pousser pour bien les fixer.
-
Page 15: Battery Installation Installation Des Piles
Battery Installation Installation des piles Install batteries if you need to use this swing away from an electrical outlet. Installer des piles dans le produit pour pouvoir l’utiliser dans un endroit où il n’y a pas de prise de courant. 1,5V x 4 D (LR20) Battery Compartment Door... -
Page 16: Battery Safety Information Mises En Garde Au Sujet Des Piles
Battery Safety Information Mises en garde au sujet des piles In exceptional circumstances, batteries may leak fluids that can cause a chemical burn injury or ruin your product. To avoid battery leakage: • Do not mix old and new batteries or batteries of different types: alkaline, standard (carbon-zinc) or rechargeable. -
Page 17: Restraint System Système De Retenue
Restraint System Système de retenue Shoulder Belt Shoulder Belt Courroie d’épaule Courroie d’épaule Waist Belt Courroie abdominale Waist Belt Courroie abdominale Restraint Pad Coussinet de retenue • Place your child in the seat. Position the restraint pad between your child’s legs. •... - Page 18 Restraint System Système de retenue TIGHTEN LOOSEN SERRER DESSERRER • To tighten the waist belts: Feed the anchored end of the belt up through the buckle to form a loop . Pull the free end of the belt . Repeat this procedure to tighten the other belt. •...
-
Page 19: Adjust Seat Motion Réglage De La Position Du Siège
Adjust Seat Motion Réglage de la position du siège Head-to-toe Head-to-toe Side-to-side Side-to-side D’avant en arrière D’avant en arrière De gauche à droite De gauche à droite • Press the seat tube button to unlock the PRESS PRESS seat tube. APPUYER APPUYER •... -
Page 20: Adjust Seat Position Réglage De La Position Du Siège
Adjust Seat Position Réglage de la position du siège Upright Upright Redressée Redressée Recline Recline Inclinée Inclinée PRESS PRESS APPUYER APPUYER You can adjust the seat to two different positions: Recline or Upright. • From behind the seat, press both seat position buttons. •... - Page 21 AC Power Use Utilisation de l’adaptateur c.a. AC Power Use • Place the swing near a standard wall outlet. • Plug the AC adaptor into the power cord extending from the back of a leg. • Plug the AC adaptor into the wall outlet. •...
- Page 22 Swing, Mobile, Music and Sounds Settings Réglages : balancelle, mobile, musique et sons Power Switch Interrupteur Power LED Swing Speed Buttons Voyant de fonctionnement Boutons de vitesse de balancement Mobile Button Bouton du mobile Volume Buttons Boutons du volume Music & Sounds Buttons Boutons de la musique et des sons Swing •...
- Page 23 Care Entretien • Unbuckle the restraint system. • Remove the pad elastic loops from the pegs. • Remove the pad and body support from the restraint system. • Machine wash the pad and body support in cold water with a mild detergent. Do not use bleach. Tumble dry on low heat and remove promptly.
- Page 24 Storage Rangement PRESS PRESS APPUYER APPUYER • Press the buttons on the back of the motorized frame while pushing the legs inward. • Appuyer sur les boutons à l’arrière du boîtier motorisé tout en poussant les pattes vers l’intérieur.
- Page 25 Storage Rangement • Lean the swing frame against a wall for storage. IMPORTANT! Remove the batteries for long-term storage. • Appuyer le cadre de la balancelle contre un mur pour le rangement. IMPORTANT! Retirer les piles du produit avant de le ranger pour une longue période.
-
Page 26: Consumer Information Renseignements Pour Les Consommateurs
Consumer Information Renseignements pour les consommateurs FCC STATEMENT (UNITED STATES ONLY) This equipment has been tested and found to comply with the limits for a Class B digital device, pursuant to Part 15 of the FCC rules. These limits are designed to provide reasonable protection against harmful interference in a residential installation. This equipment generates uses and can radiate radio frequency energy and, if not installed and used in accordance with the instructions, may cause harmful interference to radio communications. However, there is no guarantee that... - Page 27 Adults Note: If you use this product with the AC adaptor, periodically examine the AC adaptor for damage to the cord, housing or other parts that may result in the risk of fire, electric shock or injury. If the AC adaptor is damaged, do not use the product with the AC adaptor.
- Page 28 1020 Brussels. Gratis nummer België: 0800-16 936; Gratis nummer Luxemburg: 800-22 784; UNITED STATES Gratis nummer Nederland: 0800-262 88 35. 1-800-432-5437. Fisher-Price, Inc., 636 Girard Avenue, East Aurora, NY 14052. AUSTRALIA Hearing-impaired consumers: Mattel Australia Pty. Ltd., 658 Church Street, 1-800-382-7470.