Table des Matières
Publicité
Liens rapides
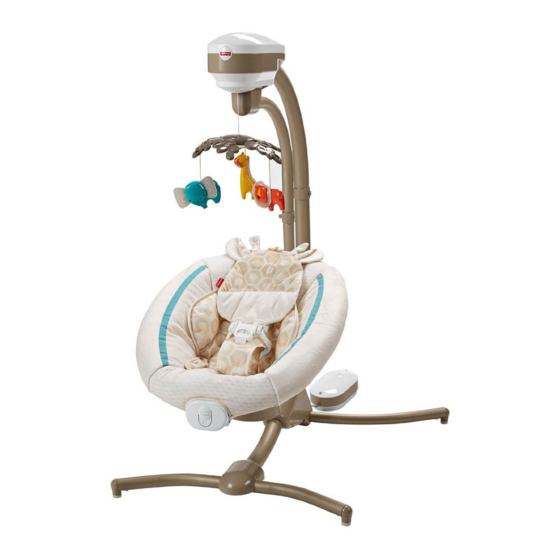
FDH43
Side-to-side
Head-to-toe
De gauche à droite
D'avant en arrière
IMPORTANT! Keep these instructions for future reference.
Please read these instructions before assembly and use of this product.
Product features and decorations may vary from photographs and diagrams.
IMPORTANT! Conserver ce mode d'emploi pour s'y référer en cas de besoin.
Lire attentivement ce mode d'emploi avant d'assembler et d'utiliser le produit.
Les caractéristiques et les décorations du produit peuvent varier par rapport aux illustrations.
fisher-price.ca
1
Publicité
Table des Matières

Manuels Connexes pour Fisher-Price FDH43


Sommaire des Matières pour Fisher-Price FDH43
- Page 1 FDH43 Side-to-side Head-to-toe De gauche à droite D’avant en arrière IMPORTANT! Keep these instructions for future reference. Please read these instructions before assembly and use of this product. Product features and decorations may vary from photographs and diagrams. IMPORTANT! Conserver ce mode d’emploi pour s’y référer en cas de besoin.
-
Page 2: Consumer Information Renseignements Pour Les Consommateurs
Consumer Information Renseignements pour les consommateurs WARNING Prevent death: Keep seat fully reclined until child is at least 4 months old AND can hold head up without help. Young infants have limited head and neck control. If seat is too upright, infant’s head can drop forward and compress the airway, resulting in DEATH. - Page 3 Consumer Information Renseignements pour les consommateurs • Adult assembly is required. Tools needed for assembly: Allen wrench (included) and Phillips screwdriver (not included). • Requires two C (LR14) alkaline batteries (not included) for seat vibration. • Requires four D (LR20) alkaline batteries (not included) or AC adapter (included) (input 100 - 240 VAC, 50 - 60Hz, with an output of 6 VDC) for swing operation.
- Page 4 Parts Pièces Mobile Mobile Dome Lower Frame Cover Mobile Dôme du mobile Couvercle de la partie inférieure du cadre Seat with Soother (We recommend installing batteries into Swing Battery Box B tt the soother before beginning assembly. See Boîtier des piles de Soother Battery Installation on page 17).
- Page 5 Parts Pièces M8 x 60 mm Screw – 4 (One of these screws is located in the lower frame retainer. You will need to remove it to assemble the lower frame to the upper frame.) Vis M8 de 60 mm – 4 (Une de ces vis se trouve dans le dispositif de retenue de la partie inférieure du cadre.
-
Page 6: Assembly Assemblage
Assembly Assemblage IMPORTANT! Before each use or assembly, inspect this product for damaged hardware, loose joints, missing parts or sharp edges. Do not use the product if any parts are missing, damaged or broken. Do not use accessories or replacement parts other than those approved by the manufacturer. IMPORTANT! Avant l’assemblage et avant chaque utilisation, vérifier qu’aucune pièce n’est endommagée ou manquante, que les fixations sont bien serrées et qu’aucun bord n’est tranchant. - Page 7 Assembly Assemblage Rear Base Base arrière • Turn the lower frame assembly over with the front base down. • Fit the rear base onto the lower frame. Hint: The rear base is designed to fit onto the lower frame one way. If it does not seem to fit, turn it around and try again.
- Page 8 Assembly Assemblage Lower Frame Cover Couvercle de la partie inférieure du cadre • Turn lower frame assembly upright. • “Snap” the lower frame cover onto the front base and lower frame. • Remettre la partie inférieure du cadre à l’endroit. •...
- Page 9 Assembly Assemblage mbly Assembla Upper Frame Partie supérieure du cadre • Fit the upper frame tube into the lower frame tube. • Fixer le tube de la partie supérieure du cadre sur celui de la partie inférieure. • Insert an M8 x 60 mm screw into the lower frame tube retainer. Fully tighten the screw with the larger end of the Allen wrench.
- Page 10 Assembly Assemblage BACK VIEW VUE ARRIÈRE • Plug the power cord from the upper frame tube into the power cord in the lower frame tube. • Brancher le cordon d’alimentation du tube de la partie supérieure du cadre sur celui du tube de la partie inférieure du cadre.
- Page 11 Assembly Assemblage Strap Courroie Mobile Mobile FRONT VIEW VUE AVANT • Fold the end of the strap on the upper frame and fit it into the slot on the mobile. • Tug on the mobile to be sure it is attached to the upper frame. •...
- Page 12 Assembly Assemblage Remove this screw Enlever cette vis FRONT VIEW VUE AVANT IMPORTANT! The screw used to assemble the seat tube to the upper seat tube is located in the upper seat tube retainer. Loosen the M5 x 45 mm screw in the upper seat tube retainer with the smaller end of the Allen wrench and remove it.
- Page 13 Assembly Assemblage • Insert the M5 x 45 mm screw into the upper seat tube retainer and tighten with the smaller end of the Allen wrench. Make sure the screw is fully tightened. • Insérer la vis M5 de 45 mm dans le dispositif de retenue du tube supérieur du siège avec la petite extrémité...
- Page 14 Assembly Assemblage Lowest Slots Fentes inférieures • Insert the waist belts through the lowest slots in the pad. Make sure the waist belts are not twisted. • Insérer les courroies abdominales dans les fentes inférieures du coussin. S’assurer que les courroies ne sont pas tortillées.
- Page 15 Assembly Assemblage Upper Slots Fentes supérieures Larger Baby • This product is shipped with the shoulder belts installed in the lower slots in the seat. For a larger baby, you will need to push the ends of the shoulder belts back through back side lower slots in the seat.
- Page 16 Assembly Assemblage Body Support Support pour bébé • Insert the restraint pad through the large slot, the waist belts through the lower slots and the shoulder belts through the upper slots in the body support. • Insérer le coussinet de retenue dans la grande fente, les ceintures abdominales dans les fentes inférieures et les courroies d’épaule dans les fentes supérieures du support pour bébé.
-
Page 17: Soother Battery Installation Installation Des Piles Dans L'unité De Vibrations
Soother Battery Installation Installation des piles dans l’unité de vibrations 1,5V x 2 C (LR14) For longer life, use alkaline batteries. Utiliser des piles alcalines pour une durée plus longue. BOTTOM VIEW VUE DE DESSOUS • Locate the soother battery compartment underneath the seat. •... -
Page 18: Swing Battery Box Installation Installation Du Boîtier Des Piles De La Balancelle
Swing Battery Box Installation Installation du boîtier des piles de la balancelle Install batteries in the swing battery box if you need to use this swing away from an electrical outlet. Installer des piles dans le boîtier des piles de la balancelle pour pouvoir utiliser la balancelle dans un endroit où... -
Page 19: Battery Safety Information Mises En Garde Au Sujet Des Piles
Battery Safety Information Mises en garde au sujet des piles In exceptional circumstances, batteries may leak fluids that can cause a chemical burn injury or ruin your product. To avoid battery leakage: • Do not mix old and new batteries or batteries of different types: alkaline, standard (carbon-zinc) or rechargeable (nickel-cadmium). -
Page 20: Setup And Use Installation Et Utilisation
Setup and Use Installation et utilisation WARNING Prevent death: Keep seat fully reclined until child is at least 4 months old AND can hold head up without help. Young infants have limited head and neck control. If seat is too upright, infant’s head can drop forward and compress the airway, resulting in DEATH. -
Page 21: Restraint System Système De Retenue
Restraint System Système de retenue Shoulder Belt Shoulder Belt Courroie d’épaule Courroie d’épaule Waist Belt Waist Belt Courroie abdominale Courroie abdominale Restraint Pad Coussinet de retenue • Place your child in the seat. Position the restraint pad between your child’s legs. •... - Page 22 Restraint System Système de retenue TIGHTEN LOOSEN SERRER DESSERRER • To tighten the waist belts: Feed the anchored end of the belt up through the buckle to form a loop . Pull the free end of the belt . Repeat this procedure to tighten the other belt. •...
-
Page 23: Adjust Seat Motion Réglage De La Position Du Siège
Adjust Seat Motion Réglage de la position du siège Side-to-side Head-to-toe De gauche à droite D’avant en arrière • While holding the sides of the swing seat, turn the seat to adjust the motion direction to side-to-side or head-to-toe. • Tenir le siège de la balancelle par les côtés puis le tourner afin qu’il se balance de gauche à... -
Page 24: Adjust Seat Position Réglage De La Position Du Siège
Adjust Seat Position Réglage de la position du siège Upright Upright Redressée Redressée Recline Recline Inclinée Inclinée SQUEEZE SQUEEZE PRESSER PRESSER • From behind the seat, squeeze and hold the seat position latch. - Lift the seat back to the upright position. - Lower the seat back to the recline position. -
Page 25: Swing Battery Power Alimentation De La Balancelle Avec Des Piles
Swing Battery Power Alimentation de la balancelle avec des piles Swing Battery Box Boîtier des piles de la balancelle • Insert the pin on the battery box into the socket in the swing base. Note: The swing battery box does not power seat calming vibrations. The seat soother is powered separately with two, C (LR14) alkaline batteries. - Page 26 Swing AC Power Utilisation de l’adaptateur c.a. • Place the swing near a standard wall outlet. • Insert the AC adapter pin into the socket in the swing base. • Plug the AC adapter into the wall outlet. • Use the AC adapter only in a wall outlet. Do not plug the AC adapter into a ceiling outlet. IMPORTANT! AC power does not power seat calming vibrations.
- Page 27 Swing Power, Music and Sounds Settings Alimentation et réglage de la musique et des sons Press the power button to turn swing Press the volume buttons to power ON. adjust the volume level. LED display lights up to indicate the Appuyer sur le bouton d’alimentation volume level.
- Page 28 Calming Vibrations Vibrations apaisantes Power Button Bouton d’alimentation • Press the power button on the soother to turn calming vibrations ON or OFF. Hint: Vibrations will time out after approximately 30 minutes. Press the power button again to restart. • Appuyer sur le bouton d’alimentation de l’unité...
-
Page 29: Care Entretien
Care Entretien • Unbuckle the restraint system. Lift the edges of the pad from the seat and pull to remove the pad and body support from the restraint system. • Machine wash the pad and body support in cold water with a mild detergent. Do not use bleach. Tumble dry on low heat and remove promptly. - Page 30 Adults Note: If you use this product with the AC adapter, periodically examine the AC adapter for damage to the cord, housing or other parts that may result in the risk of fire, electric shock or injury. If the AC adapter is damaged, do not use the product with the AC adapter.
- Page 31 Consumer Information Renseignements pour les consommateurs FCC STATEMENT (UNITED STATES ONLY) This equipment has been tested and found to comply with the limits for a Class B digital device, pursuant to Part 15 of the FCC rules. These limits are designed to provide reasonable protection against harmful interference in a residential installation. This equipment generates uses and can radiate radio frequency energy and, if not installed and used in accordance with the instructions, may cause harmful interference to radio communications. However, there is no guarantee that...
- Page 32 CANADA Mattel Canada Inc., 6155 Freemont Blvd., Mississauga, Ontario L5R 3W2. 1-800-432-5437 UNITED STATES 1-800-432-5437. Fisher-Price, Inc., 636 Girard Avenue, East Aurora, NY 14052. Hearing-impaired consumers: 1-800-382-7470. ©2016 Mattel. All Rights Reserved. Tous droits réservés. FDH43-2B70 PRINTED IN MEXICO/IMPRIMÉ AU MEXIQUE...