Publicité
Les langues disponibles
Les langues disponibles
Liens rapides
Publicité

Manuels Connexes pour Axis Q1635


Sommaire des Matières pour Axis Q1635
- Page 1 AXIS Q1635 Network Camera Installation Guide...
- Page 3 English France: Français Deutschland: Deutsch Italia: Italiano España: Español 日本: 日本語 中文: 简体中文...
- Page 4 Every care has been taken in the preparation of this 2011/65/EU. See Disposal and recycling 5. document. Please inform your local Axis office of any A copy of the original declaration of conformity may be inaccuracies or omissions. Axis Communications AB cannot obtained from Axis Communications AB.
- Page 5 Should you require any technical assistance, please contact contact your local authority responsible for waste disposal. your Axis reseller. If your questions cannot be answered In accordance with local legislation, penalties may be immediately, your reseller will forward your queries through...
- Page 6 • find answers to resolved problems in the FAQ database. Search by product, category, or phrase • report problems to Axis support staff by logging in to your private support area • chat with Axis support staff •...
- Page 7 AXIS Q1635 Network Camera Package contents • AXIS Q1635 Network Camera • 2–pin connector block for power input • 4–pin I/O connector block for connecting external devices • 2–pin RS485/422 connector block (x2) • Camera stand • Allen key Resistorx® T20 •...
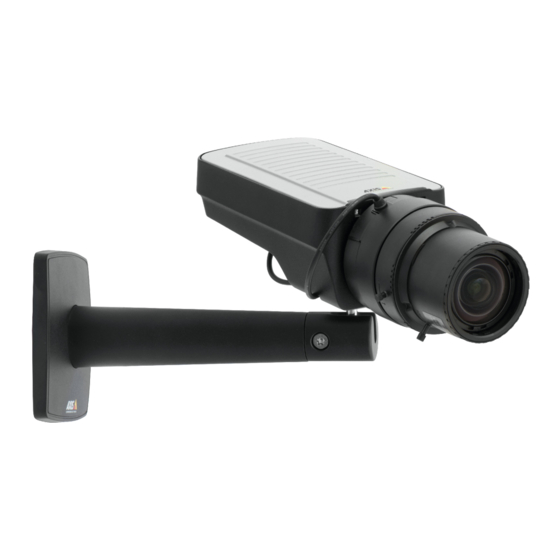
- Page 8 AXIS Q1635 Network Camera Product overview Status LED indicator Focus ring Lock screw for focus ring Zoom puller...
- Page 9 14. microSD Card slot 15. Audio in 16. Audio out Important If the Axis product is installed in an external camera housing, leave an unobstructed cylinder-shaped zone with Ø85 mm (3 3/8 in) around the lens to enable lens movements within the housing.
- Page 10 To unmount, go to Setup > System Options > Storage > SD Card and click Unmount. How to access the product AXIS IP Utility and AXIS Camera Management are recommended methods for finding Axis products on the network and assigning them IP addresses in Windows®. Both applications are free and can be downloaded from www.axis.com/support...
- Page 11 AXIS Q1635 Network Camera How to adjust focus and zoom 1. Open the product’s home page and go to Setup > Basic Setup > Focus. 2. Under the Basic tab, click Open iris. If the button is inactive the iris is already open.
- Page 12 In order to set the focus and position the lens, the product must be connected to the network. It is possible to use optional lenses for the Axis product. To replace the lens: 1.
- Page 13 AXIS Q1635 Network Camera 1. Download the iris configuration file from www.axis.com 2. Go to Setup > Video and Audio > Camera Settings. Iris configuration shows the current configured iris type. 3. In Iris configuration: Click Edit. 4. Go to the Upload tab.
- Page 14 AXIS Q1635 Network Camera How to reset to factory default settings Important Reset to factory default should be used with caution. A reset to factory default resets all settings, including the IP address, to the factory default values. To reset the product to the factory default settings: 1.
- Page 15 AXIS Q1635 Network Camera Further information • For the latest version of this document, see www.axis.com • The user manual is available at www.axis.com • To check if there is updated firmware available for your product, see www.axis.com/support • For useful online trainings and webinars, see www.axis.com/academy...
- Page 16 AXIS Q1635 Network Camera Specifications LED Indicators Note • The Status LED can be configured to be unlit during normal operation. To configure, go to Setup > System Options > Ports & Devices > LED. See the online help for more information.
- Page 17 • Risk of data loss and corrupted recordings. Do not remove the SD card while the product is running. Disconnect power or unmount the SD card from the product’s webpage before removal. This product supports microSD/microSDHC/microSDXC cards (not included). For SD card recommendations, see www.axis.com...
- Page 18 • Resetting the product to factory default settings. See page 14. • Connecting to an AXIS Video Hosting System service or AXIS Internet Dynamic DNS Service. For more information about these services, see the User Manual. Function button The function button has multiple functions: •...
- Page 19 AXIS Q1635 Network Camera • Audio out (green) – 3.5 mm output for audio (line level) that can be connected to a public address (PA) system or an active speaker with a built-in amplifier. A stereo connector must be used for audio out.
- Page 20 AXIS Q1635 Network Camera 3– Configurable Digital input – Connect to pin 1 to activate, or 0 to max 30 V DC (Input or leave floating (unconnected) to deactivate. Output) Digital output – Connected to pin 1 when 0 to max 30 V DC,...
- Page 21 RX pair for all modes (combined RX/TX for 2-wire RS485) RS485/422 RX(B) RS485A alt RS485/422 RX(A) TX pair for RS422 and 4-wire RS485 RS485/RS422 TX(B) RS485/RS422 TX(A) Important The recommended maximum cable length is 30 m (98 ft). Operating Conditions The Axis product is intended for indoor use.
- Page 22 AXIS Q1635 Network Camera Product Temperature Humidity AXIS Q1635 0 °C to 55 °C 10-85% RH (non-condensing) (32 °F to 131 °F)
- Page 23 AXIS Q1635 Network Camera Safety information Hazard levels DANGER Indicates a hazardous situation which, if not avoided, will result in death or serious injury. WARNING Indicates a hazardous situation which, if not avoided, could result in death or serious injury.
- Page 24 Battery The Axis product uses a 3.0 V CR2032 lithium battery as the power supply for its internal real-time clock (RTC). Under normal conditions this battery will last for a minimum of five years. Low battery power affects the operation of the RTC, causing it to reset at every power-up. When the battery needs replacing, a log message will appear in the product’s server report.
- Page 25 WARNING • Risk of explosion if the battery is incorrectly replaced. • Replace only with an identical battery or a battery which is recommended by Axis. • Dispose of used batteries according to local regulations or the battery manufacturer's instructions.
- Page 26 AXIS Q1635 Network Camera Contenu de l’emballage • Caméra réseau AXIS Q1635 • Bloc de connexion à 2 broches utilisé pour l’alimentation en entrée • Bloc de connexion à 4 broches pour le raccordement de dispositifs externes au connecteur pour terminaux E/S •...
- Page 27 AXIS Q1635 Network Camera Vue d'ensemble du produit Voyant d’état Bague de mise au point Vis de verrouillage de la bague de mise au point Commande de zoom...
- Page 28 16. Sortie audio Important Si le produit Axis est installé dans un boîtier de caméra externe, laissez une zone dégagée de forme cylindrique de 85 mm (3 3/8 po.) de diamètre autour de l'objectif afin de permettre les mouvements de l'objectif dans le boîtier.
- Page 29 (Démonter). Comment accéder au produit Si vous souhaitez rechercher des produits Axis sur le réseau ou leur affecter des adresses IP sous Windows®, nous recommandons l’utilisation des applications AXIS IP Utility et AXIS Camera Management. Ces deux applications sont gratuites et peuvent être téléchargées depuis www.axis.com/support...
- Page 30 AXIS Q1635 Network Camera ® • Chrome ou Firefox avec les autres systèmes d’exploitation. Pour plus d’informations concernant l’utilisation du produit, consultez le manuel de l’utilisateur disponible sur le site www.axis.com Réglage de la mise au point et du zoom 1.
- Page 31 Cependant, le produit doit être redémarré si vous passez d'un type d'objectif à un autre. Afin d’effectuer la mise au point et de positionner l’objectif, le produit doit être connecté au réseau. Il est possible d'utiliser des objectifs en option pour le produit Axis.
- Page 32 Pour modifier la configuration de l'iris des objectifs à iris P qui n'apparaissent pas dans la liste déroulante : 1. Téléchargez le fichier de configuration de l'iris sur www.axis.com 2. Accédez à Setup > Video and Audio > Camera Settings (Configuration > Vidéo et image >...
- Page 33 AXIS Q1635 Network Camera Comment réinitialiser les paramètres par défaut Important La réinitialisation aux paramètres par défaut doit être utilisée avec prudence. Cette opération reconfigure tous les paramètres, y compris l’adresse IP, aux valeurs d’usine par défaut. Pour réinitialiser l’appareil aux paramètres d’usine par défaut : 1.
- Page 34 AXIS Q1635 Network Camera Informations complémentaires • Pour la dernière version de ce document, consultez le site www.axis.com • Le Manuel de l’utilisateur est disponible à l’adresse suivante : www.axis.com • Pour vérifier si des mises à jour des logiciels sont disponibles pour votre appareil réseau, consultez le site www.axis.com/techsup.
- Page 35 AXIS Q1635 Network Camera Caractéristiques techniques Voyants Note • Le voyant d'état peut être éteint pendant le fonctionnement normal. Pour ce faire, rendez-vous dans Setup > System Options > Ports & Devices > LED (Configuration > Options système > Ports et dispositifs > DEL). Consultez l'aide en ligne pour plus d'informations.
- Page 36 AXIS Q1635 Network Camera Voyant d'alimentation Indication Vert Fonctionnement normal. Orange Le voyant vert/orange clignote pendant la mise à niveau du microprogramme. Comportement du voyant d’état pour l'assistant de mise au point Le voyant d’état clignote lorsque l’assistant de mise au point est activé.
- Page 37 • Réinitialisation du produit aux paramètres d’usine par défaut. Cf. page 33. • Connexion au service du Système d'hébergement vidéo AXIS ou au service AXIS Internet Dynamic DNS. Pour plus d'informations sur ces services, reportez-vous au Manuel de l'utilisateur. Bouton Fonction Le bouton Fonction permet de réaliser les opérations suivantes :...
- Page 38 Pour plus d’informations sur les exigences réglementaires, consultez Electromagnetic compatibility (EMC) 4. Connecteur audio Le produit Axis dispose des connecteurs audio suivants : • Entrée audio (rose) – entrée de 3,5 mm pour microphone mono ou signal d'entrée mono. •...
- Page 39 AXIS Q1635 Network Camera Sortie numérique - Permet de connecter des dispositifs externes, comme des relais ou des voyants. Les appareils connectés peuvent être activés par l'interface de programmation VAPIX® ou dans les pages Web des produits. Entrée numérique - Pour connecter des dispositifs pouvant passer d'un circuit ouvert à un circuit fermé, par exemple capteurs infrarouge passifs, contacts de porte/fenêtre et détecteurs de bris de...
- Page 40 AXIS Q1635 Network Camera 0 V CC (-) Sortie CC 12 V, maxi. 50 mA Entrée/sortie configurée comme entrée Entrée/sortie configurée comme sortie Connecteur d'alimentation Bloc terminal à 2 broches pour l'alimentation CC. Utilisez une source d'alimentation limitée (LPS) conforme aux exigences de Très basse tension de sécurité...
- Page 41 RS485/RS422 TX(B) RS485/RS422 TX(A) Important La longueur maximale de câble recommandée est de 30 mètres (98 pieds). Conditions d'utilisation Le produit Axis est uniquement destiné à une utilisation en intérieur. Produit Température Humidité AXIS Q1635 0 °C à 55 °C Humidité...
- Page 43 AXIS Q1635 Network Camera Informations sur la sécurité Niveaux de risques DANGER Indique une situation dangereuse qui, si elle n'est pas évitée, entraînera le décès ou des blessures graves. AVERTISSEMENT Indique une situation dangereuse qui, si elle n'est pas évitée, pourrait entraîner le décès ou des blessures graves.
- Page 44 éviter d'endommager le produit. Batterie Le produit Axis utilise une batterie au lithium CR2032 3,0 V comme alimentation de son horloge en temps réel interne (RTC). Dans des conditions normales, cette batterie a une durée de vie minimale de cinq ans.
- Page 45 La batterie doit être remplacée uniquement en cas de besoin, et pour ce faire, contactez l'assistance technique d'Axis à l'adresse www.axis.com/support et obtenir de l'aide. Les piles boutons 3,0 V au lithium contiennent du 1,2-diméthoxyéthane, éthylène glycol diméthyl éther (EGDME), CAS N°...
- Page 46 AXIS Q1635 Network Camera Lieferumfang • AXIS Q1635 Netzwerk-Kamera • 2-poliger Anschlussblock für Stromeingang • 4-poliger E/A-Anschlussblock für den Anschluss externer Geräte • 2-poliger RS485/422-Anschlussblock (2 x) • Kameramontagefuß • Inbusschlüssel Resitorx® T20 • Gedruckte Dokumente Installationsanleitung (dieses Dokument) Zusätzliche Etiketten mit der Seriennummer (2x)
- Page 47 AXIS Q1635 Network Camera Produktübersicht LED-Statusanzeige Fokusring Feststellschraube für den Fokusring Zoomregler...
- Page 48 14. microSD-Kartensteckplatz 15. Audioeingang 16. Audioausgang Wichtig Wenn das Axis Produkt an einem externen Kameragehäuse installiert ist, lassen Sie einen zylinderförmigen Bereich mit einem Durchmesser von 85 mm um das Objektiv frei, um Bewegungen des Objektivs im Gehäuse zu ermöglichen.
- Page 49 SD-Karte) auf und klicken Sie auf Unmount (Trennen). Zugriff auf das Produkt Für die Suche nach Axis Produkten im Netzwerk und zur Zuweisung einer IP-Adresse unter Windows® werden AXIS IP Utility und AXIS Camera Management empfohlen. Beide Anwendungen sind kostenlos und können von www.axis.com/support heruntergeladen werden.
- Page 50 AXIS Q1635 Network Camera Weitere Informationen zur Nutzung dieses Produkts finden Sie im Benutzerhandbuch unter www.axis.com. Einstellen von Fokus und Zoom 1. Rufen Sie die Startseite des Produkts auf und gehen Sie zu Setup > Basic Setup (Grundeinstellungen) > Focus (Fokus).
- Page 51 AXIS Q1635 Network Camera Wenn die Status-LED rot oder gelb blinkt, bevor Sie das Objektiv einstellen können, beenden Sie den Fokus-Assistenten und wiederholen Sie die Schritte. Siehe Verhalten der LED-Statusanzeige für den Fokus-Assistenten auf Seite 56. 1. Rufen Sie die Startseite des Produkts auf und gehen Sie zu Setup > Basic Setup (Grundeinstellungen) >...
- Page 52 AXIS Q1635 Network Camera der Bildschärfe und zur Positionierung des Objektivs muss die Kamera an das Netzwerk angeschlossen sein. Das Axis-Produkt kann mit optionalen Objektiven verwendet werden. So wird das Objektiv gewechselt: 1. Ziehen Sie das Blendenkabel ab. 2. Drehen Sie das Standardobjektiv heraus.
- Page 53 AXIS Q1635 Network Camera Zurücksetzen auf die werksseitigen Standardeinstel- lungen Wichtig Die Funktion zum Zurücksetzen auf die werksseitigen Standardeinstellungen sollte mit Vorsicht verwendet werden. Mit dieser Funktion werden alle Einstellungen einschließlich der IP-Adresse auf die werksseitigen Standardeinstellungen zurückgesetzt. So wird das Produkt auf die werksseitigen Standardeinstellungen zurückgesetzt: 1.
- Page 54 Unter www.axis.com/support finden Sie Firmware-Aktualisierungen für Ihre Produkte. • Nützliche Onlineschulungen und Webinare finden Sie unter www.axis.com/academy. Optionales Zubehör Unter www.axis.com finden Sie Informationen zu dem verfügbaren Zubehör wie Zubehör für die Stromversorgung und Gehäuse für den Einsatz in Außenbereichen.
- Page 55 AXIS Q1635 Network Camera Technische Daten LEDs Beachten • Die Status-LED kann so eingestellt werden, dass sie während des Normalbetriebs nicht leuchtet. Diese Konfiguration können Sie unter Setup > System Options > Ports & Devices > LED (Setup > Systemoptionen > Ports & Geräte > LED) einstellen. Weitere Informationen finden Sie in der Online-Hilfe.
- Page 56 AXIS Q1635 Network Camera Verhalten der LED-Statusanzeige für den Fokus-Assistenten Die Status-LED blinkt, wenn der Fokus-Assistent aktiviert ist. Farbe Bedeutung Bild unscharf. Objektiv einstellen. Gelb Bild nahezu scharf. Feineinstellung des Objektivs vornehmen. Grün Bild scharf. Summton für Fokus-Assistenten Summer Objektiv...
- Page 57 Die Steuertaste hat folgende Funktionen: • Zurücksetzen des Produkts auf die Werkseinstellungen. Siehe Seite 53. • Verbinden mit einem AXIS Video Hosting System-Service oder einem AXIS Internet Dynamic DNS-Service. Weitere Informationen zu diesen Diensten finden Sie in der Bedienungsanleitung. Funktionstaste Die Funktionstaste hat mehrere Aufgaben: •...
- Page 58 AXIS Q1635 Network Camera Audioanschlüsse Das Axis Produkt ist mit den folgenden Audioanschlüssen ausgestattet: • Audioeingang (rosa) – 3,5-mm-Anschluss für ein Monomikrofon oder ein Monosignal. • Audioausgang (grün) – 3,5-mm-Audioausgang (Leitungspegel) zum Anschließen einer Rundrufanlage (PA) oder eines Aktivlautsprechers mit integriertem Verstärker. Für den Audioausgang muss ein Stereostecker verwendet werden.
- Page 59 AXIS Q1635 Network Camera DC-Ausgang Kann für die Stromversorgung von Zusatzgeräten 12 V DC verwendet werden. Max. Stromstärke = Hinweis: Dieser Kontakt kann nur für den 50 mA Stromausgang verwendet werden. 3– Konfigurier- Digitaleingang – zum Aktivieren mit Pin 1 0 bis max.
- Page 60 RX-Paar für alle Modi (kombinierter RX/TX für RS485 mit 2 RS485/422 RX(B) Leitern) RS485A alt RS485/422 RX(A) TX-Paar für RS422 und RS485 mit 4 Leitern RS485/RS422 TX(B) RS485/RS422 TX(A) Wichtig Die empfohlene maximale Kabellänge beträgt 30 m. Betriebsbedingungen Das Axis Produkt ist für die Verwendung in Innenräumen ausgelegt.
- Page 61 AXIS Q1635 Network Camera Produkt Temperatur Luftfeuchtigkeit AXIS Q1635 0 °C bis 55 °C 10 bis 85 % relative (32 °F bis 131 °F) Luftfeuchtigkeit (nicht kondensierend)
- Page 63 AXIS Q1635 Network Camera Sicherheitsinformationen Gefährdungsstufen GEFAHR Weist auf eine gefährliche Situation hin, welche zum Tod oder zu schweren Verletzungen führt. WARNUNG Weist auf eine gefährliche Situation hin, welche, falls nicht verhindert, zu Tod oder schweren Verletzungen führen kann. VORSICHT Weist auf eine gefährliche Situation hin, welche, falls nicht verhindert, zu geringfügiger...
- Page 64 Außenbereich zugelassenen Gehäusen installiert werden. • Lagern Sie das Axis Produkt in einer trockenen und belüfteten Umgebung. • Achten Sie darauf, dass das Axis Produkt weder Stößen noch starkem Druck ausgesetzt ist. • Installieren Sie das Produkt nicht an instabilen Masten, Halterungen, Oberflächen oder Wänden.
- Page 65 Produkts, wenn ein Batteriewechsel erforderlich ist. Weitere Informationen über den Serverbericht finden Sie auf den Setup-Seiten des Produkts, oder wenden Sie sich an den Axis Support. Die Batterie sollte nur bei Bedarf ersetzt werden. Wenden Sie sich in diesem Fall unter www.axis.com/support an den Axis-Support.
- Page 66 AXIS Q1635 Network Camera Contenuto della confezione • Telecamera di rete AXIS Q1635 • Morsettiera a 2 pin per input alimentazione • Morsettiera I/O a 4 pin per collegare dispositivi esterni • Morsettiera RS485/422 a 2 pin (x2) • Piedistallo telecamera •...
- Page 67 AXIS Q1635 Network Camera Panoramica del dispositivo Indicatore LED di stato Ghiera di messa a fuoco Vite di arresto della ghiera di messa fuoco Levetta zoom...
- Page 68 15. Ingresso audio 16. Uscita audio Importante Se il dispositivo Axis è installato in un alloggiamento per telecamera esterno, lasciare sgombra una zona a forma di cilindro di Ø85 mm (3 3/8 in) intorno all'obiettivo per permettere i movimenti dell'obiettivo all'interno dell'alloggiamento.
- Page 69 Unmount (Smonta). Come accedere al dispositivo AXIS IP Utility e AXIS Camera Management sono i metodi consigliati per trovare i dispositivi Axis in rete e assegnare loro un indirizzo IP in Windows®. Queste applicazioni sono entrambe gratuite e possono essere scaricate da www.axis.com/support Il dispositivo può...
- Page 70 AXIS Q1635 Network Camera Modalità di regolazione della messa a fuoco e dello zoom 1. Aprire la pagina iniziale del dispositivo e selezionare Setup (Configurazione) > Basic Setup (Configurazione di base) > Focus (Messa a fuoco). 2. Nella scheda Basic (Base), fare clic su Open iris (Aprire diaframma). Se il pulsante è...
- Page 71 Non è necessario riavviare il dispositivo dopo la sostituzione dell'obiettivo. Il dispositivo deve tuttavia essere riavviato se la sostituzione avviene tra diversi tipi di obiettivi. Per impostare la messa a fuoco e posizionare l'obiettivo, il dispositivo deve essere collegato alla rete. Per il dispositivo Axis è possibile utilizzare obiettivi opzionali.
- Page 72 3. Selezionare il diaframma dell'obiettivo installato dall'elenco a discesa e fare clic su OK. Per modificare la configurazione del diaframma per obiettivi P-Iris non presenti nell'elenco a discesa: 1. Scaricare il file di configurazione del diaframma da www.axis.com 2. Andare su Setup > Video and Audio > Camera Settings (Configurazione > Video e audio >...
- Page 73 IP, impostare la password e accedere al flusso video. Gli strumenti per l'installazione e la gestione del software sono disponibili nelle pagine dedicate all'assistenza sul sito Web www.axis.com/support. 6. Ripetere la messa a fuoco del dispositivo. È anche possibile reimpostare i parametri alle impostazioni predefinite di fabbrica mediante l'interfaccia Web.
- Page 74 AXIS Q1635 Network Camera Ulteriori Informazioni • Per la versione più recente di questo documento, visitare il sito all'indirizzo www.axis.com • Il manuale per l'utente è disponibile all'indirizzo www.axis.com • Per verificare se sono stati pubblicati aggiornamenti del firmware per il proprio dispositivo, vedere www.axis.com/support...
- Page 75 AXIS Q1635 Network Camera Dati tecnici Indicatori LED Nota • Lo stato del LED può essere configurato per essere spento durante il normale funzionamento. Per configurarlo, selezionare Setup > System Options > Ports & Devices > LED (Configurazione > Opzioni di sistema > Porte & Dispositivi > LED). Per ulteriori informazioni, consultare l'aiuto in linea.
- Page 76 AXIS Q1635 Network Camera Comportamento del LED di stato per l'Assistente di messa a fuoco Il LED di stato lampeggia quando l'Assistente di messa a fuoco è attivo. Colore Indicazione Rosso L'immagine è sfocata. Regolare l'obiettivo. L'immagine è vicino al fuoco.
- Page 77 • Ripristino del dispositivo alle impostazioni predefinite di fabbrica. Consultare pagina 73. • Collegamento a un servizio AXIS Video Hosting System o AXIS Internet Dynamic DNS Service. Per ulteriori informazioni su questi servizi, consultare il Manuale Utente. Tasto Funzione Il tasto Funzione può essere utilizzato per più finalità: •...
- Page 78 Per maggiori informazioni sui requisiti normativi, consultare Electromagnetic compatibility (EMC) 4. Connettore audio Il dispositivo Axis dispone dei seguenti connettori audio: • Ingresso audio (rosa) - Ingresso audio da 3,5 mm per microfono in mono o segnale mono line-in.
- Page 79 AXIS Q1635 Network Camera Funzione Note Specifiche Terra CC 0 V CC 0 V CC (-) Uscita CC Può essere utilizzato per alimentare una periferica 12 V CC ausiliaria. Carico massimo = Nota: questo pin può essere usato solo come 50 mA uscita alimentazione.
- Page 80 RS485A alt RS485/422 RX(A) Coppia TX per RS422 e RS485 con quattro cavi RS485/RS422 TX(B) RS485/RS422 TX(A) Importante La lunghezza del cavo massima consigliata è di 30 m. Condizioni di funzionamento Il prodotto Axis è destinato all'uso interno.
- Page 81 AXIS Q1635 Network Camera Prodotto Temperatura Umidità AXIS Q1635 Da 0 °C a 55 °C 10 - 85% (umidità relativa (da 32 °F a 131 °F) senza condensa)
- Page 83 AXIS Q1635 Network Camera Informazioni di sicurezza Livelli di pericolo PERICOLO Indica una situazione pericolosa che, se non evitata, provoca morte o lesioni gravi. AVVERTENZA Indica una situazione pericolosa che, se non evitata, potrebbe provocare la morte o lesioni gravi.
- Page 84 • Durante il trasporto del dispositivo Axis, utilizzare l'imballaggio originale o equivalente per evitare danni al dispositivo. Batteria Il dispositivo Axis utilizza una batteria al litio da 3,0 V CR2032 come alimentazione per il suo real-time clock (RTC) interno. In condizioni normali questa batteria avrà una durata minima di cinque anni.
- Page 85 • Rischio di esplosione se la batteria viene sostituita in modo errato. • Sostituire solo con una batteria identica o una batteria consigliata da Axis. • Smaltire le batterie usate in base alle normative locali o alle istruzioni del produttore...
- Page 86 AXIS Q1635 Network Camera Contenido del paquete • Cámara de red AXIS Q1635 • Bloque de conectores de dos pines para entrada de alimentación • Bloque de conectores de E/S de cuatro pines para conectar dispositivos externos • Bloque de conectores de dos pines RS485/422 (2) •...
- Page 87 AXIS Q1635 Network Camera Información general del producto Indicador LED de estado Anillo de enfoque Tornillo de bloqueo del anillo de enfoque Palanca de zoom...
- Page 88 16. Salida de audio Importante Si el producto de Axis está instalado en una carcasa de exterior para cámaras, deje despejado un espacio concéntrico cilíndrico de 85 mm de diámetro alrededor del objetivo para permitir su movimiento en el interior de la carcasa.
- Page 89 Cómo acceder al producto Se recomiendan AXIS IP Utility y AXIS Camera Management como métodos para buscar los productos de Axis en la red y asignarles direcciones IP en Windows®. Ambas aplicaciones son gratuitas y pueden descargase de www.axis.com/support El producto se puede utilizar con la mayoría de los sistemas operativos y navegadores. Los navegadores recomendados son: ®...
- Page 90 AXIS Q1635 Network Camera Cómo ajustar el enfoque y el zoom 1. Abra la página de inicio del producto y vaya a Setup (Configuración) > Basic Setup (Configuración básica) > Focus (Enfoque). 2. En la pestaña Basic (Básica), haga clic en Open iris (Abrir iris). Si el botón no está...
- Page 91 Para poder establecer el enfoque y la posición del objetivo, es necesario conectar el producto a la red. Con este producto de Axis, es posible utilizar objetivos opcionales. Para sustituir el objetivo: 1.
- Page 92 Para cambiar la configuración del iris de los objetivos de iris de tipo P que no figuren en la lista desplegable: 1. Descargue el archivo de configuración de iris de www.axis.com 2. Vaya a Setup > Video and Audio > Camera Settings (Configuración > Vídeo y audio >...
- Page 93 AXIS Q1635 Network Camera Cómo restablecer la configuración predeterminada de fábrica Importante Es preciso tener cuidado si se va a restablecer la configuración predeterminada de fábrica. Todos los valores, incluida la dirección IP, se restablecerán a la configuración predeterminada de fábrica.
- Page 94 AXIS Q1635 Network Camera Más información • Para consultar la versión más reciente de este documento, vaya a www.axis.com • El manual de usuario se encuentra disponible en www.axis.com. • Para comprobar si existe un firmware actualizado disponible para su producto, vaya a www.axis.com/support...
- Page 95 AXIS Q1635 Network Camera Especificaciones Indicadores LED Nota • Se puede configurar el LED de estado para que se apague durante el funcionamiento normal. Para ello, vaya a Setup > System Options > Ports & Devices > LED (Configuración > Opciones del sistema > Puertos y dispositivos > LED). Vea la ayuda en línea para obtener más información.
- Page 96 AXIS Q1635 Network Camera Comportamiento del indicador LED de estado del Asistente de enfoque Cuando el LED de estado parpadea, el Asistente de enfoque está activado. Color Indicación Rojo La imagen está desenfocada. Ajuste del objetivo. La imagen está casi enfocada.
- Page 97 Restablecer el producto a la configuración predeterminada de fábrica. Consulte página • Conectarse a un servicio AXIS Video Hosting System o al Servicio de DNS dinámico de Internet de AXIS. Para obtener más información sobre estos servicios, consulte el Manual del usuario.
- Page 98 Para obtener información sobre los requisitos normativos, vea Electromagnetic compatibility (EMC) 4. Conector de audio El producto de Axis integra los siguientes conectores de audio: • Entrada de audio (rosa): entrada de 3,5 mm para micrófono mono, o entrada de línea de señal mono.
- Page 99 AXIS Q1635 Network Camera Bloque de terminales de 4 pines Notas Especificaciones Función Tierra CC 0 V CC 0 V CC (-) Salida de CC Se puede utilizar para conectar el equipo auxiliar. 12 V CC Nota: Este pin solo se puede utilizar como salida Carga máx.
- Page 100 AXIS Q1635 Network Camera 0 V CC (-) Salida de CC 12 V, 50 mA máx. E/S configurada como entrada E/S configurada como salida Conector de alimentación Bloque de terminales de 2 pines para la entrada de alimentación de CC.
- Page 101 RS485/RS422 TX(B) RS485/RS422 TX(A) Importante La longitud de cable máxima recomendada es 30 m. Condiciones de funcionamiento El producto de Axis se ha creado para su uso en interiores. Producto Temperatura Humedad AXIS Q1635 De 0 °C a 55 °C Humedad relativa del 10 al 85 % (sin condensación)
- Page 103 AXIS Q1635 Network Camera Información de seguridad Niveles de peligro PELIGRO Indica una situación peligrosa que, si no se evita, provocará lesiones graves o la muerte. ADVERTENCIA Indica una situación peligrosa que, si no se evita, puede provocar lesiones graves o la muerte.
- Page 104 Batería Este producto de Axis utiliza una batería de litio CR2032 de 3,0 V como fuente de alimentación del reloj interno en tiempo real. En condiciones normales, esta batería durará un mínimo de cinco años.
- Page 105 La batería no debe sustituirse a menos que sea necesario; no obstante, si precisa hacerlo, póngase en contacto con el servicio de asistencia técnica de Axis en www.axis.com/support para solicitar ayuda. Las pilas de botón de litio de 3,0 V contienen 1,2-dimetoxietano; éter dimetílico de etilenglicol (EGDME), n.º...
- Page 106 AXIS Q1635 Network Camera パ パ パ ッ ッ ッ ケ ケ ケ ー ー ー ジ ジ ジ の の の 内 内 内 容 容 容 AXIS Q1635 ネットワークカメラ • 電源⼊⼒⽤の2ピンコネクタブロック • 外部デバイス接続⽤4ピンI/Oコネクタブロック • 2ピンRS485/422コネクタブロック (×2) • カメラスタンド...
- Page 107 AXIS Q1635 Network Camera 製 製 製 品 品 品 の の の 概 概 概 要 要 要 ステータスLEDインジケーター フォーカスリング フォーカスリング固定ネジ ズーム調節レバー...
- Page 108 AXIS Q1635 Network Camera I/Oコネクタ アイリスコネクタ 電源コネクタ 電源LEDインジケーター ネットワークLEDインジケーター 10. RS485/RS422コネクタ 11. ネットワークコネクタ (PoE) 12. コントロールボタン (1) 13. 機能ボタン (2) 14. microSDカードスロット 15. ⾳声⼊⼒ 16. ⾳声出⼒ 重要 本製品が外部カメラハウジングに設置されている場合、レンズ周囲の直径85 mm のシリンダ形ゾーンを妨害がない状態にし、ハウジング内でレンズを移動でき るようにします。...
- Page 109 [Unmount] ( ( ( ア ア ア ン ン ン マ マ マ ウ ウ ウ ン ン ン ト ト ト ) ) ) をクリックします。 [Unmount] 製 製 製 品 品 品 の の の ア ア ア ク ク ク セ セ セ ス ス ス ⽅ ⽅ ⽅ 法 法 法 ネットワーク上でAxis製品を検索したり、Windows®でそれにIPアドレスを割り当てる には、AXIS IP UtilityまたはAXIS Camera Managementの使⽤をお勧めします。 いずれ www.axis.com/support のアプリケーションも無料で、 からダウンロードできます。...
- Page 110 AXIS Q1635 Network Camera www.axis.com 製品の使⽤の詳細については、Axisのホームページ ( ) でユーザーズマ ニュアルを参照してください フ フ フ ォ ォ ォ ー ー ー カ カ カ ス ス ス と と と ズ ズ ズ ー ー ー ム ム ム の の の 調 調 調 整 整 整 ⽅ ⽅ ⽅ 法 法 法...
- Page 111 AXIS Q1635 Network Camera 1. 製品のホームページを開き、[Setup Setup ( ( ( 設 設 設 定 定 定 ) ) ) ] > [Basic Setup Basic Basic Setup Setup ( ( ( 基 基 基 本 本 本 設 設 設 定 定 定 ) ) ) ] >...
- Page 112 AXIS Q1635 Network Camera 1. アイリスケーブルを外します。 2. 標準のレンズのネジを外します。 3. 新しいレンズを取り付けます。 注意 Pアイリスレンズに対してDCアイリス設定ファイルを選択すると、[Camera [Camera [Camera Settings Settings ( ( ( カ カ カ メ メ メ ラ ラ ラ の の の 設 設 設 定 定 定 )] )] )] ページの絞り設定タイプに、エラーメッセージが...
- Page 113 AXIS Q1635 Network Camera ⼯ ⼯ ⼯ 場 場 場 出 出 出 荷 荷 荷 時 時 時 の の の 設 設 設 定 定 定 に に に リ リ リ セ セ セ ッ ッ ッ ト ト ト す す す る る る ⽅ ⽅ ⽅ 法 法 法...
- Page 114 AXIS Q1635 Network Camera 関 関 関 連 連 連 情 情 情 報 報 報 www.axis.com 本書の最新バージョンについては、 にアクセスしてください。 • www.axis.com ユーザーズマニュアルは、 で⼊⼿できます。 • ご使⽤の製品の新しいファームウェアがリリースされていないかを確認す • www.axis.com/support るには、 にアクセスしてください。 役に⽴つオンライントレーニングおよびWebセミナーをご⽤意しており • www.axis.com/academy ます。 をご覧ください。 オ オ オ プ プ プ シ シ シ ョ ョ ョ ン ン ン の の の ア ア ア ク ク ク セ セ セ サ サ サ リ リ リ ー ー ー...
- Page 115 AXIS Q1635 Network Camera 仕 仕 仕 様 様 様 LED イ イ イ ン ン ン ジ ジ ジ ケ ケ ケ ー ー ー タ タ タ ー ー ー 注意 • ステータスLEDは、正常動作時に消灯させることができます。 設定は、 [Setup [Setup > > > System...
- Page 116 AXIS Q1635 Network Camera 電 電 電 源 源 源 LED 説 説 説 明 明 明 緑 正常動作。 ⻩ ファームウェアアップグレード中は緑と⻩の交互点滅。 フ フ フ ォ ォ ォ ー ー ー カ カ カ ス ス ス ア ア ア シ シ シ ス ス ス タ タ タ ン ン ン ト ト ト ⽤ ⽤ ⽤ ス ス ス テ テ テ ー ー ー タ タ タ ス ス ス LED LED の...
- Page 117 コントロールボタンの位置については、を参照してください。 コントロールボタンは、以下の⽤途で使⽤します。 113ページ 製品を⼯場出荷時の設定にリセットする。 を参照してください。 • AXIS Video Hosting SystemサービスまたはAXIS Internet Dynamic DNSサービ • スに接続する。これらのサービスの詳細については、ユーザーズマニュ アルを参照してください。 機 機 機 能 能 能 ボ ボ ボ タ タ タ ン ン ン 機能ボタンには、以下のような機能があります。 レ レ レ ベ ベ ベ ル ル ル ア ア ア シ シ シ ス ス ス タ タ タ ン ン ン ト ト ト ‒ カメラを⽔平にするのに役⽴つ機能です。 ボタンを...
- Page 118 AXIS Q1635 Network Camera コ コ コ ネ ネ ネ ク ク ク タ タ タ ー ー ー ネ ネ ネ ッ ッ ッ ト ト ト ワ ワ ワ ー ー ー ク ク ク コ コ コ ネ ネ ネ ク ク ク タ タ タ...
- Page 119 AXIS Q1635 Network Camera デ デ デ ジ ジ ジ タ タ タ ル ル ル 出 出 出 ⼒ ⼒ ⼒ - - - リレーやLEDなどの外部デバイスを接続します。接続されたデバイス は、VAPIX®アプリケーションプログラミングインターフェースまたは製品のWeb ページで有効にすることができます。 デ デ デ ジ ジ ジ タ タ タ ル ル ル ⼊ ⼊ ⼊ ⼒ ⼒ ⼒ - - - 開回路と閉回路の切り替えが可能なデバイス (PIRセンサー、ドア/窓...
- Page 120 AXIS Q1635 Network Camera 0 V DC (-) DC出⼒12 V、最⼤50 mA I/O (⼊⼒として設定) I/O (出⼒として設定) 電 電 電 源 源 源 コ コ コ ネ ネ ネ ク ク ク タ タ タ ー ー ー DC電源⼊⼒⽤2ピンターミナルブロック。 定格出⼒ が100 W以下または5 A以下の安全特別低電圧 (SELV) に準拠し...
- Page 121 AXIS Q1635 Network Camera シリアルポートの設定により、次のモードをサ ポート可能。 • 2ワイヤーRS485半⼆重 • 4ワイヤーRS485全⼆重 • 2ワイヤーRS422単⽅向 • 4ワイヤーRS422全⼆重ポイントツー ポイント通信 機 機 機 能 能 能 ピ ピ ピ ン ン ン 備 備 備 考 考 考 RS485Bまたは すべてのモードのRXペア (2ワイヤーRS485のRX/TXペ RS485/422 RX(B) ア) RS485A5Bまたは...
- Page 123 AXIS Q1635 Network Camera 安 安 安 全 全 全 情 情 情 報 報 報 危 危 危 険 険 険 レ レ レ ベ ベ ベ ル ル ル 危険 回避しない場合、死亡または重傷につながる危険な状態を⽰します。 警告 回避しない場合、死亡または重傷につながるおそれのある危険な状態を ⽰します。 注意 回避しない場合、軽傷または中程度の怪我につながるおそれのある危険 な状態を⽰します。 注記...
- Page 124 AXIS Q1635 Network Camera 安 安 安 全 全 全 ⼿ ⼿ ⼿ 順 順 順 注記 • 本製品は、お使いになる地域の法律や規制に準拠して使⽤してください。 • Axisは、シールドネットワークケーブル (STP) CAT5以上の使⽤を推奨します。 • 本製品を屋外またはそれに準じる環境で使⽤する場合は、認定済みの屋外⽤ 筐体に収納して設置する必要があります。 • 本製品は乾燥した換気のよい環境に保管してください。 • 本製品に衝撃または強い圧⼒を加えないでください。 • 本製品を不安定なポール、ブラケット、表⾯、または壁に設置しないで ください。 • 本製品を設置する際には、適切な⼯具のみを使⽤してください。 電動⼯具を 使⽤して過剰な⼒をかけると、製品が損傷することがあります。 • 化学薬品、腐⾷剤、噴霧式クリーナーは使⽤しないでください。 • 清掃には、きれいな⽔に浸した清潔な布を使⽤してください。...
- Page 125 AXIS Q1635 Network Camera ログメッセージが表⽰されます。 サーバーレポートの詳細については、製品の設定 ページを参照するか、Axisサポートまでお問い合わせください。 必要な場合以外はバッテリーを交換しないでください。バッテリーの交換が必要な場 www.axis.com/support 合は、Axisサポート までご連絡ください。 リチウムコイン型3.0 V電池は、1,2-ジメトキシエタン (エチレングリコールジメチル エーテル (EGDME)、CAS番号110-71-4) を含有しています。 警告 • バッテリーは、正しく交換しないと爆発する危険があります。 • 交換⽤バッテリーとしては、同⼀品またはAxisが推奨するバッテリーのみを 使⽤してください。 • 使⽤済みバッテリーは、地域の規制またはバッテリーメーカーの指⽰に 従って廃棄してください。...
- Page 126 AXIS Q1635 Network Camera 包 包 包 装 装 装 内 内 内 容 容 容 AXIS Q1635 网络摄像机 • 用于电源输入的 2 针连接器块 • 用于连接外部设备的 4 针 I/O 连接器块 • 2 针 RS485/422 连接器块(2 个) • 摄像机支架 • 内六角扳手 Resistorx® T20 •...
- Page 127 AXIS Q1635 Network Camera 产 产 产 品 品 品 概 概 概 述 述 述 1. LED 状态指示灯 对焦环 对焦环的锁定螺丝 变焦拉杆...
- Page 128 AXIS Q1635 Network Camera 5. I/O 接口 光圈接口 电源接口 8. LED 电源指示灯 9. LED 网络指示灯 10. RS485/RS422 接口 11. 网络接口(PoE) 12. 控制按钮 (1) 13. 功能按钮 (2) 14. microSD 卡插槽 15. 音频输入 16. 音频输出 重要 如果安讯士产品安装在外部摄像机防护罩内,请在镜头周围留出一个 Ø85 毫米(3 3/8 英寸)的无障碍圆柱形区域,以便镜头在防护罩内移动。...
- Page 129 SD 卡 卡 卡 并单击卸 卸 卸 载 载 载 。 如 如 如 何 何 何 访 访 访 问 问 问 产 产 产 品 品 品 AXIS IP Utility 和 AXIS Camera Management 是用于在网络上查找安讯士产品以及在 Windows® 中为其分配 IP 地址的建议方法。 这两种应用程序都是免费的,可以从...
- Page 130 AXIS Q1635 Network Camera 3. 如果先前已设置对焦,请单击 Reset Reset Reset ( ( ( 重 重 重 置 置 置 ) ) ) 以重置后焦。 4. 逆时针转动镜头上的变焦拉杆和对焦环的锁定螺丝,以将其松开。 请参见。 5. 移动变焦拉杆和对焦环以设置变焦和对焦,并在图像窗口中检查图像质量。 6. 重新紧固变焦拉杆和对焦环的锁定螺丝。 7. 在 Focus Focus ( ( ( 对 对 对 焦 焦 焦 ) ) ) 页面上,单击 Fine...
- Page 131 AXIS Q1635 Network Camera 12. 单击 Enable Enable iris Enable iris iris ( ( ( 启 启 启 用 用 用 光 光 光 圈 圈 圈 ) ) ) 。 如果按钮为非活动状态,则光圈已经启用。 如果需要,请在 Advanced Advanced ( ( ( 高 高 高 级 级 级 ) ) ) 选项卡下进行更多调整:...
- Page 132 AXIS Q1635 Network Camera 6. 单击 Upload Upload ( ( ( 上 上 上 载 载 载 ) ) ) 。 已安装的光圈镜头此时应包含在 Iris Upload Iris Iris Selection Selection ( ( ( 光 光 光 圈 圈 圈 Selection 选 选 选 择 择 择 ) ) ) 下拉列表中。...
- Page 133 AXIS Q1635 Network Camera 如 如 如 何 何 何 重 重 重 置 置 置 为 为 为 出 出 出 厂 厂 厂 默 默 默 认 认 认 设 设 设 置 置 置 重要 重置为出厂默认值时应谨慎。 重置为出厂默认值会将所有设置(包括 IP 地址)...
- Page 134 AXIS Q1635 Network Camera 更 更 更 多 多 多 信 信 信 息 息 息 www.axis.com 有关本文档的最新版本,请参见 • www.axis.com 用户手册可从 获取 • www.axis.com/support 要检查是否有产品的可用更新固件,请参见 • www.axis.com/academy 如需有用的在线培训和在线研讨会,请参见 • 可 可 可 选 选 选 附 附 附 件 件 件...
- Page 135 AXIS Q1635 Network Camera 规 规 规 格 格 格 LED 指 指 指 示 示 示 灯 灯 灯 备注 Setup > > > System System • 状态 LED 可配置为在正常工作期间熄灭。 要进行配置,请转到Setup Setup System Options Options > > > Ports Options Ports &...
- Page 136 AXIS Q1635 Network Camera 颜 颜 颜 色 色 色 指 指 指 示 示 示 红色 图像失焦。 调整镜头。 淡黄色 图像接近对焦。 镜头需要微调。 绿色 图像已对焦。 对 对 对 焦 焦 焦 助 助 助 手 手 手 的 的 的 蜂 蜂 蜂 鸣 鸣 鸣 器 器 器 信 信 信 号 号 号...
- Page 137 AXIS Q1635 Network Camera 按 按 按 钮 钮 钮 控 控 控 制 制 制 按 按 按 钮 钮 钮 有关控制按钮的位置,请参见。 控制按钮用于: 第133页 将产品重置为出厂默认设置。请参见 。 • 连接到安讯士视频托管系统服务或安讯士互联网动态 DNS 服务。有关这些服 • 务的更多信息,请参阅用户指南。 功 功 功 能 能 能 按 按 按 钮 钮 钮...
- Page 138 AXIS Q1635 Network Camera 3.5 毫米音频连接器 (立体声) 1 尖部 2 中间环 3 尾段 音 音 音 频 频 频 输 输 输 入 入 入 麦克风/线路输入 接地 音 音 音 频 频 频 输 输 输 出 出 出 线路输出,单声道(兼容...
- Page 139 AXIS Q1635 Network Camera 0 V DC (-) DC 输出12 V,最大 50 mA I/O 已配置为输入 I/O 已配置为输出 电 电 电 源 源 源 接 接 接 口 口 口 2 针接线端子用于 DC 电源输入。使用符合安全超低压 (SELV)规定,且额定输出功率 ≤100 W 或额定输出电流 ≤5 A 的有限电源(LPS)。...
- Page 140 AXIS Q1635 Network Camera 串行端口可配置为支持: • 两线 RS485 半双工 • 四线 RS485 全双工 • 两线 RS422 单工 • 四线 RS422 全双工点对点通信 功 功 功 能 能 能 针 针 针 备 备 备 注 注 注 RS485B alt 适用于所有模式的 RX 对(用于两线 RS485 的组合...
- Page 141 AXIS Q1635 Network Camera 安 安 安 全 全 全 信 信 信 息 息 息 危 危 危 险 险 险 等 等 等 级 级 级 危险 表示如果不避免则会导致死亡或严重伤害的危险情况。 警告 表示如果不避免则可能导致死亡或严重伤害的危险情况。 小心 表示如果不避免则可能导致轻微或中度伤害的危险情况。 注意 表示如果不避免则可能导致财产损失的情况。 其 其 其 他 他 他 消 消 消 息 息 息 等 等 等 级 级 级...
- Page 142 AXIS Q1635 Network Camera 安 安 安 全 全 全 说 说 说 明 明 明 注意 • 使用安讯士产品时应遵守当地法律和法规。 • 安讯士推荐使用屏蔽网络电缆 (STP) CAT5 或更高版本。 • 要在室外或类似环境中使用安讯士产品,应将该产品安装在获得批准的室外 防护罩中。 • 在干燥通风的环境中存放安讯士产品。 • 避免将安讯士产品暴露在冲击或重压下。 • 请勿将本产品安装在不稳定的立杆、支架、表面或墙壁上。 • 安装安讯士产品时,仅使用适用的工具。 使用电动工具过度施力可能导致 产品损坏。 • 请勿使用化学品、腐蚀剂或气雾剂。 • 使用蘸纯净水的干净布进行清洁。...
- Page 143 AXIS Q1635 Network Camera 3.0 V 纽扣锂电池包含 1,2-二甲氧基乙烷 (EGDME),CAS 编码为 110-71-4。 警告 • 如果未正确更换电池,则存在爆炸危险。 • 仅可使用相同电池或安讯士推荐的电池进行更换。 • 根据当地法规或电池制造商的说明处理废电池。...
- Page 144 Installation Guide Ver. M4.2 AXIS Q1635 Network Camera Date: May 2017 © Axis Communications AB, 2014 - 2017 Part No. 1731629...