
Manuels Connexes pour Hofmann monty 1270 smart


Sommaire des Matières pour Hofmann monty 1270 smart
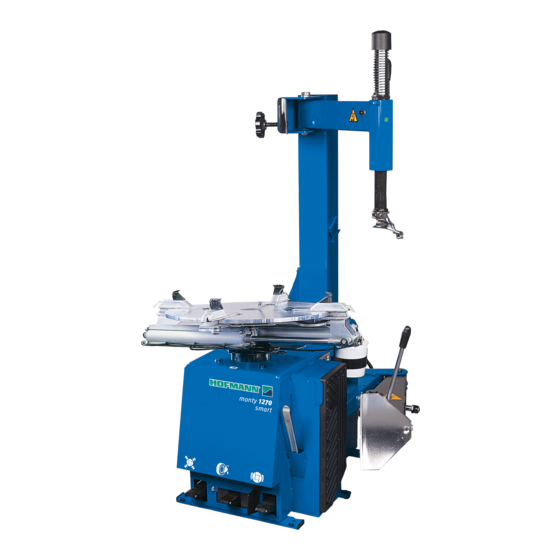
- Page 1 monty 1270 smart Operation manual Semiautomatic Tire Changer Mode d’emploi Démonte-pneus semiAutomatique Manual del Operador Desmontador Semi-Automático de Neumáticos...
-
Page 2: Safety Information
RU}-Director Operator SLO-Výkonný riaditeº SLV-Operativni vodja SˆE-Driftledare TUR-‰letme }üdürü HUN-Operatív Igazgató necessary to service the vehicle in a safe manner. RUS - Ã(&!•/‘“.#¾ (&•#'••)••••‚ monty 1270 smart Francesco Frezza Correggio (RE) - ITALY Before using the present tire changer, always refer to and follow the safe-... -
Page 3: Important Safety Instructions
IMPORTANT SAFETY INSTRUCTIONS NOTE SULLA DOCUMENTAZIONE NOTES REGARDING DOCUMENTATION - ITA ENG - NOTAS SOBRE A DOCUMENTAÇÃO NOTES SUR LA DOCUMENTATION - POR FRA - When using this equipment, basic safety precautions should always be followed, in- NOTAS SOBRE LA DOCUMENTACIÓN ANMERKUNGEN ZUR DOKUMENTATION - SPA DEU -... -
Page 4: Table Des Matières
U P D A T I N G G U I D E TABLE OF CONTENTS Release of 10/2018 Disposing Notes (completed) PCN: _______ Air control information - 4,5 bar PCN: 18G0109 Safety Lables Meanings Page 6 Release of 01/2019 Safety Page 10 Format of this Manual... - Page 5 TABLE DES MATIÈRES ÍNDICE Lecture de la plaque de sécurité Página 7 Señales de Seguridad Página 7 Sécurité Página 11 Seguridad Página 11 Typographie Página 15 Tipografía Página 15 Plaquette du constructeur Página 15 Datos de marcación Página 15 Spécifi cations Página 17 Especifi...
-
Page 6: Safety Lables Meanings
Safety Label Meanings WARNING: MAKE SURE THAT THE SAFETY SIGNS ARE ALWAYS CLEARLY VISIBILE IN THE POSITIONS INDICATED BY THE MANUFACTURER. For any reset, use the Part Number (P/N) listed in this charter. EAL0408G77A Risk of fl ying fragments during beading. •... -
Page 7: Lecture De La Plaque De Sécurité
Lecture de la plaque de Interpretação dos Sinais de sécurité Segurança ATTENTION: ATTENÇÃO:INTERVENHA DE MANEIRA QUE FAIRE EN SORTE QUE LES SIGNAUX DE SECURITE OS SINIS DE SEGURANÇA ENCONTREM-SE SOIENT TOUJOURS BIEN VISIBLES AUX EMPLACEMENTS SEMPRE BEM VISÍVEIS NAS POSIÇÕES PRÉ- PREVUS PAR LE CONSTRUCTEUR. - Page 8 EAL0408G43A - EAL0413G17A Risk of crushing. • Become familiar with all controls before proceeding with operation. • Stand away from the bead breaker arm when in operation. • Apply air to breaker in bursts if necessary to control arm depth. •...
- Page 9 EAL0408G43A - EAL0413G17A EAL0408G43A - EAL0413G17A Risque d’écrasement. Risco de esmagamento. • Se familiariser avec toutes les commandes • Adquirir familiaridade com todos os comandos avant toute utilisation. antes de proceder com as operações. • Rester à distance de sécurité du bras de l’outil •...
-
Page 10: Safety
Safety The safety precautions must be completely understood and observed by every operator. THE OPERATOR MUST STAY NEAR ‘THE MACHINE, IN GOOD POSITION OF WORK, AT THE COMMAND UNIT SIDE (A). ONLY THE OPERATOR MAY ACCESS THE WORK AREA. THE USE OF THIS DEVICE IS ALLOWED ONLY TO PERSONNEL DULY TRAINED BY AN AUTHO- RIZED DEALER. -
Page 11: Sécurité
Sécurité Seguridad Tout opérateur doit avoir une parfaite connaissance Todos los operadores deberán comprender las precauciones de seguridad y respetarlas. des consignes de sécurité : toutes les consignes de sécurité doivent être respectées. EL OPERADOR DEBE ENCONTRARSE CERCA DE LA MÁQUINA, EN UNA POSICIÓN DE TRABAJO L’EXPLOITANT DOIT RESTER PRES DE LA CORRECTA;... - Page 12 BEFORE PERFORMING ANY MAINTENANCE OR REPAIRS THE MACHINE MUST BE DISCONNECTED FROM THE AIR AND ELECTRICAL SUPPLY. NEVER WEAR TIES, CHAINS OR OTHER LOOSE ARTICLES WHEN USING, MAINTAINING OR REPAIRING THE MACHINE. LONG HAIR IS ALSO DANGEROUS AND SHOULD BE KEPT UNDER A HAT.
- Page 13 AVANT TOUTE OPÉRATION D’ENTRETIEN ET ANTES DE REALIZAR CUALQUIER OPERACIÓN DE RÉPARATION LA MACHINE DOIT ÊTRE DE MANTENIMIENTO O REPARACIÓN HAY QUE DEBRANCHÉE DU RÉSEAU ÉLECTRIQUE ET DE DESCONECTAR LA MÁQUINA DE LA RED DE SUMINISTRO L’AIR COMPRIMÉ. ELÉCTRICO Y DE LA LINEA DE AIRE COMPRIMIDO. NE PORTER JAMAIS DE CRAVATES, DE CHAÎNES NO USAR NUNCA CORBATAS, CADENAS U OTROS OU AUTRES LORSQUE L’ON EXÉCUTE DES...
-
Page 14: Format Of This Manual
Format of this Manual This manual contains text styles which make you pay extra attention: Note: Suggestion or explanation. CAUTION: STRESSES THAT THE FOLLOWING ACTION MAY CAUSE DAMAGE TO THE UNIT OR OBJECTS ATTACHED TO IT. WARNING: STRESSES THAT THE FOLLOWING ACTION MAY CAUSE (SEVERE) INJURY TO THE OPERATOR OR OTHERS. -
Page 15: Typographie
Typographie Tipografía Ce manuel contient des styles de texte qui vous Este manual contiene estilos de texto para llamar demande de prêter une attention particulière: su atención especial: Remarque: Suggestion ou explication. Nota: Sugerencia o explicación. MESURE DE PRUDENCE: INDIQUE QUE L’AC- PRECAUCIÓN: SIGNIFICA QUE LA ACCIÓN TION SUIVANTE RISQUE D’ENDOMMAGER LA SIGUIENTE PUEDE CAUSAR DAÑO A LA... -
Page 16: Specifi Cations
Specifi cations Specifi cations Electric-air tire changer for car, light commercial vehicle Electric-air tire changer for car, light commercial and motorcycle tires designed for one-piece rims. vehicle and motorcycle tires designed for one-piece rims. Weight Weight 381lbs (173 Kg) 173 Kg (381lbs) Weight (Tubeless System Version) Weight (Tubeless System Version) 459 lbs (208 Kg) 208 Kg (459 lbs) -
Page 17: Spécifi Cations
Spécifi cations Spécifi cations Especifi caciones Especifi caciones Démonte-pneus électro-pneuma-tique pour roues de Démonte-pneus électro-pneuma-tique pour roues de Desmontadora de neumáticos electro-neumática Desmontadora de neumáticos electro-neumática voiture, de fourgon et de moto avec pneus montés voiture, de fourgon et de moto avec pneus montés para automóviles, furgones y motos con neumáticos para automóviles, furgones y motos con neumáticos montados en llantas acanaladas. -
Page 18: Introduction
Introduction Congratulations on purchasing the pneumatic-electric monty 1270 smart tire changer: This tIre changer is designed for ease of operation, safe handling of rims, reliability and speed. With a minimum of maintenance and care your tIre changer will provide many years of trouble-free operation. -
Page 19: Introduction
Félicitations pour avoir acheté le démonte-pneu Felicitaciones por haber comprado el desmontador électro-pneumatique: de neumáticos: monty 1270 smart monty 1270 smart Construit pour des utilisateurs professionnels qui Construido para el empleo de profesionales que travaillent intensément, ce démonte-pneu est d’emploi trabajan intensamente, este desmontador de ruedas facile, sûr et fiable. -
Page 20: Accessories
Accessories A series of accessories are usually available for the machine. All accessories are indicated on the website: http://service.snapon-equipment.net/ After accessing the website, proceed as follows: Figure 3-1 - Select Accessory Plan (1). - Select the reference brand in the fi eld Brands (2). -
Page 21: Accessoires
Accessoires Accessorios Une série d’accessoires sont normalement disponibles La máquina dispone de una serie de accesorios. avec la machine. Tous les accessoires sont listés sur Todos los accesorios están enumerados en el sitio web: le site web : http://service.snapon-equipment.net/ http://service.snapon-equipment.net/ Después de acceder a la página web, realizar las Une fois entré... -
Page 22: Controls
Controls Before operating the machine ensure that you have well understood the operation and function of all the controls (Fig. 4.1-1). • Press down and release, WITH LEFT FOOT, the first pedal from the left: the clamps of the turntable will retract. -
Page 23: Commandes
Commandes Mandos Avant de travailler avec la machine, s’assurer Antes de trabajar con la máquina hay que estar bien d’avoir bien compris la position et les fonctions des seguro de que se ha comprendido bien la posición y commandes (Fig. 4.1-1). las funciones de los mandos (Fig. - Page 24 Only for Tubeless wheel models: Refer to Figure 4.1-4 / 4.1-5. F1. Press bead seater/infl ator pedal (1) on left side of the machine half way down: air will come from infl ation hose end only (2). WARNING: HOLD THE TUBELESS BEADING NOZZLE FIRMLY.
- Page 25 Dans le modèle avec talloneur pour tubeless : Sólo para el modelo Tubeless: Se reporter à la Figure 4.1-4 / 4.1-5. Consultar Figura 4.1-4 / 4.1-5. F1. Appuyer sur la pédale du gonfl eur (1) jusqu’à F1. Apretar hasta la mitad el pedal de hinchado (1): mi-course: l’air sort seulement de l’extrémité...
-
Page 26: Mounting And Demounting
Mounting and demounting. General precautions CAUTION: BEFORE MOUNTING A TIRE ON A RIM ENSURE THE FOLLOWING RULES ARE OBSERVED: A- THE RIM MUST BE CLEAN AND IN GOOD CONDITION: IF NECESSARY CLEAN AFTER REMOVING ALL WHEEL-WEIGHTS INCLUDING ‘TAPE WEIGHTS’ INSIDE THE RIM. B- THE TIRE MUST BE CLEAN AND DRY, WITH NO DAMAGE TO THE BEAD AND THE CASING. -
Page 27: Montage Et Démontage
Montage et démontage Montaje y desmontaje - pneus. precauciones generales Précautions générales ATENCIÓN: ANTES DE MONTAR EL NEUMÁTICO EN ATTENTION: UNA LLANTA RESPETAR LAS SIGUIENTES AVANT DE MONTER UN PNEU SUR UNE INDICACIONES: JANTE SUIVRE LES INDICATIONS SUIVANTES: A- LA LLANTA DEBE ESTAR LIMPIA Y EN BUEN A- LA JANTE DOIT ÊTRE PROPRE ET EN ESTADO: SI FUERA NECESARIO LIMPIARLA BON ETAT: SI NÉCESSAIRE, LA NETTOYER... -
Page 28: Demounting Tubeless Tires
Demounting tubeless tires • Remove all wheel-weights from the rim. Remove the valve stem or core and deflate the tire (Fig. 5.1-1). • Break outer bead starting from opposite the valve position. lubricate the bead and rim with a tire lube only. -
Page 29: Démontage Pneus Sans Chambre
Démontage pneus sans Desmontaje de neumáticos chambre (tubeless) tubeless • Enlever toutes les masses des bords de la jante. • Quitar todos los contrapesos de los bordes de la llanta. Enlever la vanne et dégonfl er le pneu (Fig. 5.1-1). Quitar la válvula y desinflar la rueda (Fig. -
Page 30: Tool Head Angular Adjustment
Note: once the mount/demount head is positioned properly, matching wheels may be changed without having to reset the head. Note: the plastic insert inside the mount/demount tool must be periodically replaced. every machine is equipped with several plastic inserts (inside standard equipment box). Follow the instructions included with the replacement parts. -
Page 31: Regulación Angular Del Utensilio
Remarque: quand l’outil de montage/démontage a Nota: u n a v e z q u e l a h e r r a m i e n t a d e été correctement positionné, les roues montaje/desmontaje ha sido ubicada identiques peuvent être montées sans correctamente, las ruedas iguales pueden devoir régler l’outil de nouveau. -
Page 32: Mounting Tubeless Tyres
Mounting tubeless tyres • Lubricate the entire rim surface (Fig. 5.2-1). • Lubricate both beads, inside and outside, (Fig. 5.2-2). OBSERVE THE ROTATION DIRECTION OF THE TIRE, IF REQUIRED. SOME TIRES HAVE A COLOR DOT THAT MUST BE KEPT ON THE OUTSIDE OF THE WHEEL. -
Page 33: Montage Pneus Sans Chambre
Montage pneus sans chambre Montaje de neumáticos (tubeless) sur jantes à base tubeless en llantas acanaladas creuse • Lubricar toda la superficie de la llanta (Fig. 5.2-1). • Lubrifier toute la surface de la jante (Fig. 5.2-1). • Lubricar los dos talones del neumático, dentro y fuera, con un lubricante para neumáticos (Fig. -
Page 34: Beading The Tires
Beading the tires Beading means the initial grip of the tire bead on the rim, in order to allow the infl ation operations and subsequent settling in the seat on the rim. 5.3.1 Safety Precautions: For safety reasons a quick-infl ating valve preset to 4,5 bar is fi... -
Page 35: Enjantage Du Talon Des Pneus
Enjantage du talon des pneus Entalonado de los neumáticos Par enjantage du talon, on entend l’adhérence intiale Por Entalonado se entiende una adherencia du talon du pneu à la jante, de manière à permettre la inicial de los talones del neumático a la llanta tal suite des opérations à... - Page 36 Beading Tubeless tires: Perform the beading with the wheel blocked on the tire changer. • Ensure that both the beads and the inside of the rim are thoroughly lubricated. • Screw the valve insert. • Connect the compressed air hose to the valve (1,Figure 5.3-1).
- Page 37 Enjantage talon de pneus Tubeless: Entalonado de Neumáticos Tubeless: Effectuer l’enjantage talon avec la roue bloquée sur Realizar el entalonado con la rueda bloqueada sobre le démonte-pneus. el desmontador de ruedas. • S’assurer que les deux talons et l’intérieur de la •...
- Page 38 Beading with Tubeless device on turntable: If the machine is fitted with the beading system for Tubeless tyres integrated in the slidings of the turn- table, follow the procedure set out below. Beading with Tubeless device on turntable: Proced as follows: A.
- Page 39 Enjantage avec dispositif Tubeless intégré dans Entalonado con dispositivo para neumáticos sin l’autocentrant : cámara de aire en autocentrador: Si la machine présente un système d’enjantage pour Si la máquina incorpora un sistema de entalonado pneus Tubeless intégré dans les guides du plateau para neumáticos sin cámara de aire en las guías autocentrant, suivre la procédure indiquée ci-dessous.
-
Page 40: Demounting Tube-Type Tires
Demounting tube-type tires • To demount the tire operate as described for tubeless tires in section 5.1.A through section 5.1 In this case the valve cannot be replaced because it is part of the tube. BE CAREFUL NOT TO DAMAGE THE TUBE DURING THE BEAD-BREAKING OPERATION. -
Page 41: Démontage Pneus Avec Chambre
Démontage pneus avec Desmontaje de neumáticos chambre con camara de aire • Pour le démontage opérer comme décrit pour Para el desmontaje trabajar de acuerdo con lo les pneus sans chambre au 5.1. Dans ce cas la indicado para los neumáticos tubeless en 5.1. En vanne ne peut pas être remplacée car elle est este caso la válvula no puede ser substituida ya que unie à... -
Page 42: Mounting And Demounting Motorcycle Tires
Mounting and Demounting Motorcycle tires To mount and demount motorcycle tires it is necessary to utilize the optional motorcycle adaptors (1) and the Motorcycle bead breaker blade (2). The bead-breaking, mounting and demounting technique is the same as per car tires. MOTORCYCLE RIMS MUST ALWAYS BE CLAMPED FROM THE OUTSIDE. -
Page 43: Montage Et Démontage Pneus Moto
Montage et démontage Montaje y Desmontaje de pneus moto neumáticos de Motos Pour opérer sur les pneus pour moto il faut monter les Para trabajar con neumáticos de motos es necesario adaptateurs spéciaux à prise rapide sur les griffes de montar los adaptadores especiales (1) en las garras del l’autocentreur EAA0351G92A (4 pièces) et Palette autocentrante &... -
Page 44: Maintenance
Maintenance BEFORE ATTEMPING ANY MAINTENANCE OR REPAIRS THE MACHINE MUST BE DISCONNECTED FROM THE AIR AND ELECTRIC SUPPLY. A. Periodically clean the vertical hexagonal rod with nonflammable liquid detergent. Lubricate with oil (Fig. 6-1). B. Periodically clean the turntable with a nonflammable liquid detergent, dry and lubricate the sliding surface of the clamps with oil. -
Page 45: Entretien
Entretien Mantenimiento AVANT DE COMMENCER TOUTE OPÉRATION ANTES DE COMENZAR CUALQUIER D’ENTRETIEN ET DE RÉPARATION OPERACION DE MANTENIMIENTO FIJARSE DÉBRANCHER LA MACHINE DU RÉSEAU QUE LA MÁQUINA ESTE DESCONECTADA DE ÉLECTRIQUE ET DE L’AIR COMPRIMÉ. LA LINEA ELECTRICA Y DE LA LINEA DE AIRE COMPRIMIDO. -
Page 46: Storage
H. Check and discharge the water every day from air filter/ water separator ‘F’ by pressing the “S” button (Fig. 6-3). I. The machine is equipped with an automatic lubricator. Check the oil level weekly. When adding oil to the lubricator, disconnect the air supply first, and add oil as needed. -
Page 47: Mise De Côté
H. Vider tous les jours le filtre de l’eau ‘F’ par la H. Vaciar cada dia el agua del fi ltro ‘F‘ por el décharge ‘S’ rapide (S, Fig. 6-3). descargo rápido ‘S’ (Fig. 6-3). I. La machine est équipée d’un huileur I. -
Page 48: Trouble Shooting
Trouble shooting If a problem with the pneumatic electric tire changer, proceed in the following order to solve the problem: 1. Rethink the last steps taken. Did you work according to the manual? Did the machine work as described and expected? 2. -
Page 49: Dépannage
Dépannage Resolución de problemas Si ocurre algún problema en el desmontador, En cas de problème avec le démonte-pneus électro- proceda en el siguiente orden para resolverlo: pneumatique, procéder comme suit pour résoudre le problème: 1. Recuerde los últimos pasos dados. ¿Ha trabajado de acuerdo con el manual? 1. - Page 50 Turntable does not hold the rim. 1. Jaws are dirty. • Clean jaw teeth. 2. Turntable dirty. • Clean and lubricate turntable. 3. Low air pressure. • Check air pressure 4. Jaw teeth worn out. • Check jaws condition. • Call the authorized service center for assistance Machine damages rims.
- Page 51 L’autocentreur ne serre pas les jantes. No aprieta las llantas. 1. Faible pression. 1. Garras sucias. • Nettoyer les mors. • Limpiar las garras. 2. Mors détériorés. 2. Autocentrador sucio. • Nettoyer l’autocentreur. • Limpiar el autocentrante. 3. Mors sales. 3.
-
Page 52: Disposing Of The Unit
8. DISPOSING OF THE UNIT To dispose of the equipment at the end of its life, contact the reseller for a quote or for the regulations on disposal which apply to the unit. This symbol indicates that separate collection of waste electrical and electronic equipment is mandatory for scrapping. -
Page 53: Eliminación De La Unidad
8. VENTE 8. ELIMINACIÓN DE LA UNIDAD Pour la mise à la décharge de l’équipement arrivé en Para el desguace del aparato al fi nal de su vida útil, fi n de vie, contacter le revendeur pour une offre ou pour póngase en contacto con el revendedor para que le connaître les instructions utiles à... - Page 55 Appendix: Installation Instructions. Annexe: Instructions pour l’Installation. Anexo: Instrucciones Instalación.
-
Page 56: Installation Requirements
Installation requirements THE INSTALLATION SHALL BE CARRIED OUT ONLY BY QUALIFIED PERSONNEL AND WITHIN THE SCOPE OF THE INSTRUCTIONS PROVIDED IN THIS MANUAL. Install the machine in a covered and dry area. The installation of the machine requires a free space of at least 87”x106”... -
Page 57: Requisitos De Instalación
Conditions requises pour Requisitos de Instalación l’installation L’INSTALLATION DOIT ÊTRE EFFECTUÉE PAR DU LA INSTALACIÓN TIENE QUE SER EFECTUADA PERSONNEL QUALIFIÉ DANS LE RESPECT DES POR PERSONAL CALIFICADO EN EL TOTAL INSTRUCTIONS DONNÉES. RESPETO DE LAS INSTRUCCIONES DADAS EN ESTE MANUAL. Installer la machine dans un lieu couvert et sec. - Page 58 Carriage instructions – Uncrating instructions - Moving the machine Carriage instructions The machine is crated in a corrugated box of appropriate strength. The box is mounted on a pallet. Handling of the machine must be made with an appropriate lifting device (fork lift) (Fig.ii-1). The machine can be alternatively mounted on the pallet with the column assembled.
-
Page 59: Transporte, Desembalaje, Transporte
Transport – Déballage - Transporte – Desembalaje - Déplacement de la machine Dislocación Transporte Transport La máquina se entrega embalada en una caja de La machine est emballée dans une boîte de carton de cartón de resistencia adecuada. robustesse adéquate. Cette boîte est montée sur une Esta caja a su vez está... -
Page 60: Installation Procedures
installation procedures Electric installation THE INSTALLATION SHALL BE CARRIED OUT ONLY BY QUALIFIED PERSONNEL AND WITHIN THE SCOPE OF THE INSTRUCTIONS PROVIDED IN THIS MANUAL. Check on the plate of the machine that the electrical specifications of the power source are the same as the machine. -
Page 61: Procedimiento De Instalación
Procédures d’installation Procedimiento de Instalación Branchement électrique Conexión eléctrica L’INSTALLATION DOIT ÊTRE EFFECTUÉE PAR DU LA INSTALACIÓN TIENE QUE SER EFECTUADA PERSONNEL QUALIFIÉ DANS LE RESPECT DES POR PERSONAL CALIFICADO EN EL TOTAL INSTRUCTIONS DONNÉES. RESPETO DE LAS INSTRUCCIONES DADAS EN ESTE MANUAL. -
Page 62: Testing Procedures
If the air pressure exceeds 12 bar (170 psi) it is mandatory to install a pressure regulator before the air inlet of the machine. It is suggested that the air supply be equipped with a water separator to reduce the amount of water at the air inlet. -
Page 63: Procedimiento De Prueba
Si la pression est supérieure à 12 bar (170 psi), il faut Si la presión del aire es menor que el mínimo necesario installer un régulateur de pression avant la prise d’air de 8 bar (110 psi) la fuerza de bloqueo del autocentrante de la machine. - Page 64 309 Exchange Ave. 309 Exchange Ave. Conway, AR 72032 Conway, AR 72032 Ph: 501-450-1500 Ph: 501-450-1500 Fax: 501-450-2085 Fax: 501-450-2085 Notice: The information contained in this document is subject to change without notice. Snap-on Equipment makes Notice: The information contained in this document is subject to change without notice. Snap-on Equipment makes no warranty with regard to present documentation.