Publicité

Les langues disponibles
  • FR

Les langues disponibles

Liens rapides

Bora
smart dehumidifier
user manual | gebruikershandleiding | manuel d'utilisation
manual de usuario | Bedienungsanleitung
1

Publicité

Table des Matières
loading

Sommaire des Matières pour Duux bora Smart

  • Page 1 Bora smart dehumidifier user manual | gebruikershandleiding | manuel d’utilisation manual de usuario | Bedienungsanleitung...
  • Page 2: Table Des Matières

    Thank you for choosing Duux. We’re so glad you decided to read the instructions to your new Duux dehumidifier! Many users casually dismiss instructions and seek to figure it out on their own. But studies show that people who read instructions will get up to speed more quickly and efficiently than those who poke around with trial and error.
  • Page 3: Product Overview

    1. Product overview 2. Installation and use Safety requirements into the dehumidifier in case that error and • Install this dehumidifier on a stable flat surface damage occur. place to reduce vibration and noise. Keep a • If the supply cord is damaged, it must be replaced distance of at least 50cm between appliances and by the manufacturer, its service agent or similarly surroundings.
  • Page 4 Warnings Installation • The end of the drain hose should not be fed • Cleaning and user maintenance shall not be made outdoors in low temperatures. by children without supervision. • To prevent spillages, empty the water tank before • Please do not turn on or turn off this dehumidifier •...
  • Page 5 Installing the device Continuous drainage When the water tank is released from the Unpack the device and remove the packing device, turn the water tank handle upright, If you do not want to frequently drain water from materials from the device. Store the packing remove the cover and gently pour out the the water tank, you can connect a drain tube on materials for possible future transportation.
  • Page 6: Maintenance

    3. Maintenance Locate the drain outlet on the back of the device, unscrew the drain cover and pull out Attention: the drain tube may not be extended the water plug. and must always be placed at least 10cm below the Important: Be sure to remove the power plug water outlet to ensure water can flow through.
  • Page 7: Functions

    4. Functions Storage Before storing the device, use the cleaning mode to completely dry the humidifier from the inside to prevent the growth of contaminants like mold and bacteria. See chapter 4 for instructions. Once clean NIGHT and dry, put the device and all its components into the original box and store them in a dry place.
  • Page 8 Scan below QR code to download the Duux APP mode. been completed. With every press the display will or search DUUX APP in the App Store or Google show the selected timer. To deactivate the timer, Play Store to start the procedure to download the...
  • Page 9: Technical Specifications

    5. Technical specifications Weight: 15 kg Power consumption: 400 Watt Water tank capacity: Effective area: up to 40m² Dehumidifying capacity: The stylish 20L / day 33,5 cm Air circulation: 230 CBM/h Timer Modes: climate controller 1-24 hours Noise Level: 46dBA that deals with Hygrostat range: 30-80% RH...
  • Page 10: Faq

    Please check if nothing is blocking the air in- or municipal waste stream. Old appliances must repair is required contact Duux outlet. be collected separately in order to optimize the Why the device cannot run or stops The “flowing”...
  • Page 11 Notes/notities/les notes/notas/Notitzen Notes/notities/les notes/notas/Notitzen...
  • Page 12 Bedankt dat je voor Duux hebt gekozen. We zijn blij dat je hebt besloten de handleiding bij je nieuwe luchtontvochtiger van Duux door te lezen! Veel gebruikers laten de handleiding links liggen en proberen er zelf achter te komen. Uit onderzoek blijkt echter dat mensen die de handleiding lezen sneller en beter snappen hoe een apparaat werkt dan mensen die er met vallen en opstaan achterkomen.
  • Page 13 1. Productoverzicht 2. Installatie en gebruik Veiligheidsvoorschriften weer inschakelt. • Plaats deze luchtontvochtiger op een stabiele • Houd de watertank rechtop tijdens het vlakke ondergrond om trillingen en geluid te verwijderen uit de luchtontvochtiger, omdat verminderen. Zorg voor een afstand van minstens gemorst water schade kan veroorzaken aan het 50cm tussen de apparaten en de omgeving.
  • Page 14 Waarschuwingen Installatie voltage dat overeenkomt met het voltage op het maar gebruik een licht vochtige, zachte doek. voltagelabel. • Neem deze luchtontvochtiger niet af met • Gebruik geen verlengsnoer voor de chemische oplosmiddelen zoals benzeen, • Gebruik geen reinigingsmiddelen of middelen •...
  • Page 15 Installatie Pak het apparaat uit en verwijder al het verpakkingsmateriaal. Bewaar het verpakkingsmateriaal voor toekomstig vervoer. Haal het koolstoffilter uit de verpakking, plaats het in het frame van de filterhouder en monteer het frame met koolstoffilter in de luchtinlaat. Steek de stroomkabel in een stopcontact. Je hoort een piepje en de stroomindicator knippert.
  • Page 16 3. Onderhoud Schroef het afvoerdeksel van de afvoer aan Let op: de afvoerslang kan niet worden de achterzijde van het apparaat los en haal de uitgetrokken en moet altijd minstens 10cm onder afsluitdop uit het apparaat. de wateruitlaat worden geplaatst zodat het water Belangrijk: verwijder vóór ieder onderhoud de goed kan weglopen.
  • Page 17 4. Functies Opbergen Voer vóór het opbergen van het apparaat het reinigingsprogramma uit om de luchtontvochtiger van binnenuit volledig te drogen om schimmelvorming en bacteriegroei te voorkomen. NIGHT Raadpleeg hoofdstuk 4 voor instructies. Plaats na het schoonmaken en drogen het apparaat en alle onderdelen in de oorspronkelijke verpakking en bewaar deze op een droge plaats.
  • Page 18 In de timerstand wordt ook de dan de luchtvochtigheid in de ruimte, begint de ingestelde duur van de timer getoond. Klik na de registratie op 'add duux device' op het compressor op de ingestelde snelheid vocht af hoofdscherm of gebruik de knop '+' rechtsboven...
  • Page 19 5. Technische specificaties Gewicht: 15kg Stroomverbruik: 400W Inhoud watertank: De stijlvolle Effectieve ruimte: tot 40m² Ontvochtigingscapaciteit: klimaatregelaar 20L/dag 33,5cm Luchtcirculatie: 230CBM/uur Timerstanden: die overmatige 1-24 uur Geluidsniveau: 46dBA luchtvochtigheid Bereik hygrostat: 30-80% RV Hoofdmaterialen: Het uiterlijk en de aanpakt. specificaties van het Wifi-frequentie: 2,4Ghz apparaat kunnen...
  • Page 20 Controleer of er niets de luchttoevoer of huishoudelijk afval worden afgevoerd. Oude Waarom werkt het apparaat niet of werkt -afvoer blokkeert. contact op met Duux apparaten moeten gescheiden worden het plotseling niet meer? Het 'stromende' geluid wordt veroorzaakt door ingezameld om hergebruik en recycling van de De sensor voor het koelmiddel.
  • Page 21 Notes/notities/les notes/notas/Notitzen Notes/notities/les notes/notas/Notitzen...
  • Page 22 4 litres. L’hygrostat intégré assure une régulation automatique de l’humidité ambiante tandis que 3. Maintenance le filtre à charbon élimine les odeurs indésirables. Vous pouvez utiliser l’appli Duux pour une utilisation à 4. Fonctions distance pratique, à tout moment, n’importe où.
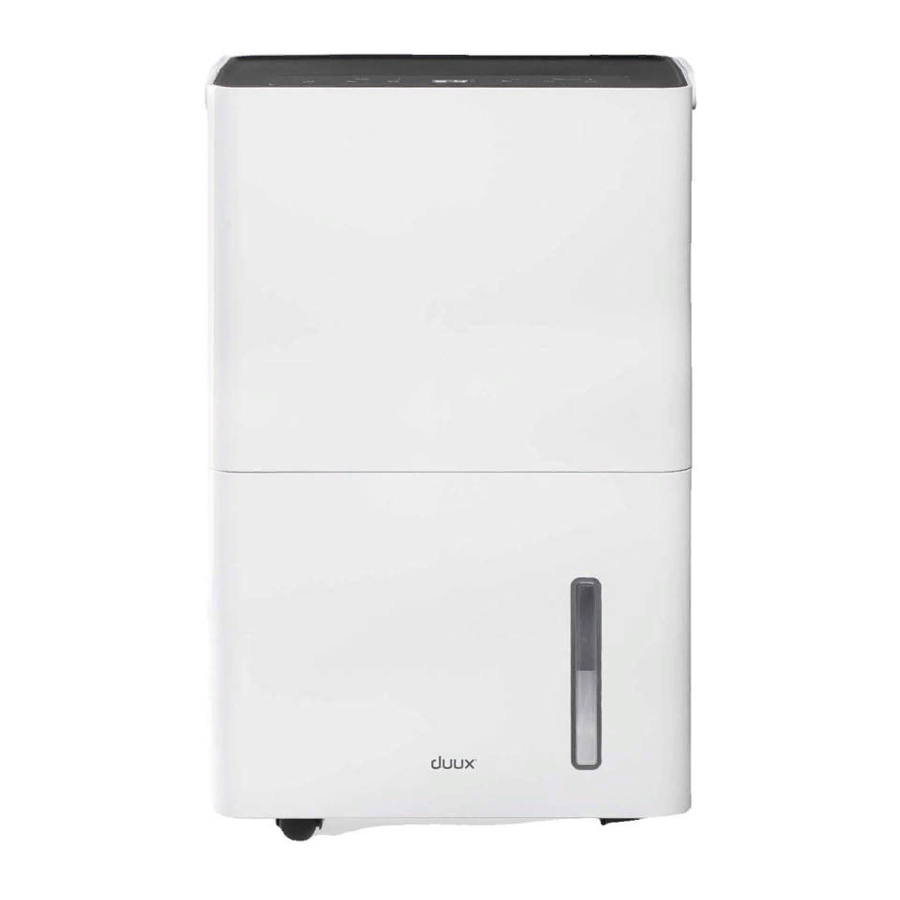
  • Page 23: Aperçu Du Produit

    1. Aperçu du produit 2. Installation et utilisation Exigences de sécurité • Veuillez ne pas incliner le déshumidificateur au • Installez ce déshumidificateur sur une surface cas où l’eau renversée endommagerait l’appareil. plane et stable pour réduire les vibrations et •...
  • Page 24 Avertissements Installation radiateurs, etc.). des solvants chimiques tels que le benzène, • Utilisez la fonction de séchage interne si l’appareil l’essence, l’alcool, etc. Si ce déshumidificateur est n’a pas été utilisé pendant une longue période. effectivement sale, essuyez-le avec un détergent •...
  • Page 25 Installation de l’appareil Déballer l’appareil et retirer les matériaux d’emballage de l’appareil. Conserver les matériaux d’emballage pour un éventuel transport futur. Déballez le filtre à charbon, placez-le dans le cadre du porte-filtre et placez le cadre du filtre avec le filtre à charbon dans l'entrée d'air. Brancher le cordon d’alimentation dans une prise murale.
  • Page 26: Maintenance

    3. Maintenance Localisez la sortie de vidange à l'arrière de Attention : le tuyau de vidange ne doit pas être l'appareil, dévissez le couvercle de vidange et rallongé et doit toujours être placé au moins 10cm retirez le bouchon d'eau. sous la sortie d'eau pour garantir que l'eau puisse Important : assurez-vous de retirer le cordon s'écouler.
  • Page 27: Fonctions

    4. Fonctions Stockage Avant de stocker l'appareil, utilisez le mode de nettoyage pour sécher complètement le déshumidificateur de l'intérieur afin d'éviter le développement de contaminants comme les NIGHT moisissures et les bactéries. Voir le chapitre 4 pour les instructions. Une fois propre et sec, placez l'appareil et tous ses composants dans la boîte d'origine et stockez-le dans un endroit sec.
  • Page 28 Une fois enregistré, cliquez sur « ajoutez en dessous de l'humidité réelle, le compresseur également les heures réglées de la minuterie l'appareil duux » sur l'écran principal ou utilisez commence à extraire l'humidité à la vitesse réglée le bouton « + » dans le coin supérieur droit pour Verrouillage enfant jusqu'à...
  • Page 29 5. Caractéristiques techniques Poids : 15kg Consommation électrique : 400watts Capacité du réservoir d’eau : Surface utile: jusqu’à 40m² Capacité de déshumidification : Le contrôleur de 20l/jour 33,5cm Circulation d'air : 230CBM/h Modes minuterie : climat élégant qui 1-24 heures Niveau sonore : 46dBA élimine l’excès Plage de l’hygrostat : 30 à...
  • Page 30: Faq

    Veuillez vérifier si rien ne bloque l'entrée ou la en fin de vie doivent être collectés séparément Pourquoi l'appareil ne fonctionne-t-il pas sortie d'air. nécessaire, contacter Duux pour optimiser la récupération et le recyclage ou s'arrête-t-il soudainement ? Le bruit de « fluide » s’explique par le des matériaux qu'ils contiennent et réduire leur...
  • Page 31 Notes/notities/les notes/notas/Notitzen Notes/notities/les notes/notas/Notitzen...
  • Page 32 En Duux creemos en la importancia de un ambiente cómodo y saludable. Mejorar su bienestar diseñando productos atractivos, funcionales y eficaces es la pasión que nos mueve cada día. Con nuestra gama de productos innovadores para el tratamiento del aire deseamos ofrecerle la mejor calidad posible de aire Índice...
  • Page 33 1. Descripción general del producto 2. Instalación y uso Requisitos de seguridad deshumidificador. • Coloque el deshumidificador en una superficie • No incline el deshumidificador para evitar daños estable y plana para reducir la vibración y el por el agua derramada. ruido.
  • Page 34 Advertencias Instalación • Utilice la función de secado interno si el aparato de un certificado actualizado validado por no se ha utilizado durante mucho tiempo. una autoridad acreditada por la industria, Esto evitará la formación de moho u olores que le otorgue la competencia de manipular •...
  • Page 35 Instalación del aparato Desempaquete el dispositivo y retire los materiales de embalaje del mismo. Guarde los materiales de embalaje en previsión de un posible transporte en el futuro. Desempaquete el filtro de carbón, póngalo en el bastidor del soporte del filtro y colóquelo en la entrada de aire.
  • Page 36 3. Mantenimiento Busque la salida de drenaje de la parte Atención: no se puede alargar el tubo de posterior del dispositivo, desatornille la tapa y drenaje y se debe colocar siempre al menos 10cm extraiga el tapón de agua. por debajo de la salida de agua para que el agua Importante: Asegúrese de retirar el enchufe pueda pasar sin problema.
  • Page 37 4. Funciones Conservación Antes de guardar el aparato, seque el interior del deshumidificador por completo utilizando el modo de limpieza para evitar que proliferen contaminantes como moho o bacterias. Consulte NIGHT el capítulo 4 para ver las instrucciones. Cuando esté limpio y seco, meta el aparato y todos los componentes en su caja original y guárdelos en un lugar seco.
  • Page 38 Pulse el botón para activar el higrostato aparato se apagará automáticamente cuando se busque DUUX APP en App Store o en Google Play autorregulable. La intensidad de extracción se complete el tiempo. Cada vez que pulse el botón, en Store. Una vez instalada, escriba su dirección de Modo de funcionamiento regulará...
  • Page 39 5. Especificaciones técnicas Peso: 15kg Consumo de energía: 400 vatios Capacidad del depósito de agua: El elegante Área de alcance efectiva: hasta 40m² Capacidad de deshumidificación: 20l/día controlador del 33,5cm Circulación del aire: 230CBM/h Modos de temporizador: clima que se 1-24 horas Nivel de ruido: 46dBA...
  • Page 40 Compruebe que no haya nada que bloquee la antiguos deben recogerse de forma separada entrada ni la salida de aire. contacte con Duux para optimizar la recuperación y el reciclaje de ¿Por qué no funciona el aparato o deja de Ese sonido lo provoca el refrigerante.
  • Page 41 Notes/notities/les notes/notas/Notitzen Notes/notities/les notes/notas/Notitzen...
  • Page 42 Duux entschieden Wir freuen uns sehr darüber, dass du dir die Anleitung für deinen neuen Duux Entfeuchter durchlesen willst! Viele Nutzer verzichten auf das Lesen der Anleitung und versuchen, selbst herauszufinden, wie das Produkt verwendet wird. Studien haben allerdings gezeigt, dass Menschen, die Anleitungen lesen, ein Produkt schneller und besser nutzen können, als diejenigen, die nach dem Grundsatz „Versuch macht klug“...
  • Page 43: Produktübersicht

    1. Produktübersicht 2. Installation und Verwendung Sicherheitsanforderungen diesen Entfeuchter. • Dieser Entfeuchter muss auf einer glatten • Bitte leere den Wassertank, bevor du diesen Oberfläche aufgestellt werden, um Vibrationen Entfeuchter wieder in Betrieb nimmst, um und unnötigen Lärm zu vermeiden. Es muss ein ein Überlaufen und Austreten von Wasser zu Abstand von mindestens 50cm zur Umgebung verhindern.
  • Page 44 Warnhinweise Installation Typenschild angegebenen Spannung. Stoffe. • Verwende kein Verlängerungskabel, um dieses • Zerkratze die Oberfläche des Entfeuchters nicht Gerät mit Strom zu versorgen. mit scharfen Gegenständen. • Es dürfen keine Hilfsmittel zur Beschleunigung • Gieße bitte das Wasser aus dem Tank, bevor du •...
  • Page 45 Installation des Geräts Schalte das Gerät ab und ziehe den Stecker Nachdem du den Wassertank aus dem Achtung: Bitte überprüfe, ob sich der aus der Steckdose. Gerät genommen hast, drehst du den Griff Schwimmer in der richtigen Position befindet, Packe das Gerät aus und entferne das Wenn du frontal vor dem Gerät stehst, nimmst des Wassertanks nach oben, nimmst die bevor du den Wassertank wieder in das Gerät...
  • Page 46: Wartung Und Pflege

    3. Wartung und Pflege Suche den Auslauf an der Rückseite des Hinweis: Der Ablaufschlauch darf nicht Gerätes, schraube den Deckel auf dem Auslauf verlängert werden und muss immer mindestens ab und ziehe den Wasserstopfen heraus. 10cm unterhalb des Wasserablaufs platziert Wichtig: Achte darauf, den Netzstecker vor der werden, damit das Wasser ungehindert abfließen Pflege/Wartung des Geräts aus der Steckdose zu...
  • Page 47: Funktionen

    4. Funktionen Lagerung Bevor du das Gerät einlagerst, solltest du den Reinigungsmodus nutzen, um den Entfeuchter an der Innenseite vollständig zu trockenen und so das Wachstum von schädlichen Stoffen wie Schimmel NIGHT und Bakterien zu vermeiden. Eine Anleitung dazu findest du in Kapitel 4. Wenn das Gerät trocken und sauber ist, steckst du es mit sämtlichem Zubehör in die Originalverpackung und bewahrst alles an einem trockenen Ort auf.
  • Page 48 Lüftergeschwindigkeit Hinweis: Wenn der Feuchtigkeitsregler auf Betriebsmodus Nachdem der Timer eingestellt wurde, schaltet einen Wert unter der tatsächlichen Luftfeuchtigkeit sich das Gerät automatisch ab, wenn der Timer eingestellt wird, beginnt der Kompressor, Berühre die Taste, um von niedriger (I) auf Drücke die Taste, um zwischen dem abgelaufen ist.
  • Page 49 Betrieb über WLAN und App Scanne folgenden QR-Code, um die Duux App herunterzuladen oder suche im AppStore oder bei Google Play nach der Duux App und lade sie dort herunter. Nach der Installation gibst du deine E-Mail-Adresse ein und schließt die Registrierung...
  • Page 50: Technische Angaben

    5. Technische Angaben Gewicht: 15kg Stromverbrauch: 400 Watt Fassungsvermögen Wassertank: Die stilvolle Wirkfläche: bis zu 40m² Klima-Steuerung Entfeuchtungsleistung: 20L/Tag 33,5cm Luftzirkulation: 230CBM/Std für Innenräume, Timer Modus: 1-24 Stunden die kurzen Prozess Geräuschpegel: 46dBA Bereich Feuchtigkeitsregler: 30-80% RH mit übermäßiger Hauptsächlich verwendete Materialien: Aussehen und Spezifikationen WLAN-Frequenz:...
  • Page 51: Faq

    Verpflichtung, dass du das Gerät bei der wieder ordnungsgemäß ein. Betriebsgeräusch. Entsorgung trennen musst. Für Informationen Sie sich an Duux Eventuell ist die Umgebungstemperatur über die richtige Entsorgung ihrer Altgeräte Das Gerät befindet sich im Aus dem Gerät tritt Wasser aus. Wo liegt zu hoch oder zu niedrig um Feuchtigkeit sollten Verbraucher sich an die Behörden oder...
  • Page 52 Designed in The Netherlands by Duux BV. Made in P.R.C. Duux BV, P.O. Box 145, 5400 AC Uden The Netherlands, www.duux.com © 2020 Duux. All rights reserved. DUUX® is a trademark of Duux BV, registered in the EU and other countries.

Ce manuel est également adapté pour:

882352Dxdh02

Table des Matières