
Manuels Connexes pour Beamz DMX384


Sommaire des Matières pour Beamz DMX384
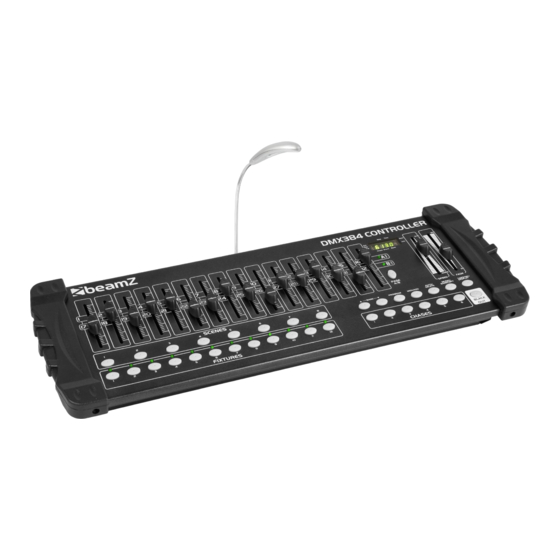
- Page 1 DMX384 Controller Ref. nr.: 154.048 INSTRUCTION MANUAL MANUAL DE INSTRUCCIONES MANUEL D'INSTRUCTIONS V1.1...
- Page 2 ENGLISH Congratulations to the purchase of this Beamz product. Please read this manual thoroughly prior to using the product in order to benefit fully from all features. Read the manual prior to using the product. Follow the instructions in order not to invalidate the warranty. Take all precautions to avoid fire and/or electrical shock.
-
Page 3: Unpacking Instruction
UNPACKING INSTRUCTION CAUTION! Immediately upon receiving the product, carefully unpack the carton, check the contents to ensure that all parts are present, and have been received in good condition. Notify the shipper immediately and retain packing material for inspection if any parts appear damage from shipping or the package itself shows signs of mishandling. -
Page 4: Rear View
REAR VIEW 1. Midi in 4. DC Input DC 9 – 12V, 300mA Receives MIDI data. 2. DMX Out 5. USB This connector sends your DMX value to the DMX fixture or For connect a USB lamp DMX pack. 6. Power Switch 3. -
Page 5: Resetting The System
1.0 OPERATION GUIDE GENERAL The is a universal intelligent lighting controller. It allows the control of 24 fixtures composed of 16 channels each and up to 240 programmable scenes. Six chase banks can contain up to 240 steps composed of the saved scenes and in any order. programs can be triggered by music, midi, automatically or manually. -
Page 6: Manual Mode
OPERATION 3.0 MANUAL MODE The manual mode allows direct control of all fixture. You are able to move them and change attributes by using the channel faders. 1) Press the AUTO DEL button repeatedly until the Note: All changes made while in Manual Mode are MANUAL LED is lit. - Page 7 3.4 CHECK PROGRAM 1) Press and hold the PROGRAM button until the LED blinks. 2) Use the BANK UP/DOWN buttons to select the PROGRAM bank to review. 3) Press the SCENES buttons to review each scene individually. 3.5 EDITING A PROGRAM Scenes will need to be modified manually.
-
Page 8: Edit Chase (Copy Scene Into Chase)
4.4 EDIT CHASE (COPY BANK INTO CHASE) 1) Press and hold the PROGRAM button to enter 4) Press MUSIC/BANK COPY button to prepare copy. programming mode. 5) Press MIDI/ADD button to copy the bank. All LEDs will 2) Press the desired CHASE button. blink. - Page 9 5.0 SCENE PROGRAMMING (STEPS) 5.1 INSERT A SCENE 1) Press and hold the PROGRAM button to enter 5) Press MIDI/ADD button to prepare the insert. programming mode. 6) Use the BANK UP/DOWN button to locate the SCENE. 2) Press the desired CHASE button. 7) Press the SCENE button that corresponds to the scene 3) Press the TAPSYNC/DISPLAY to switch the LED to be inserted.
-
Page 10: Midi Operation
6.2 BLACKOUT The BLACKOUT button brings all lighting output to 0 or off. MIDI OPERATION The controller will only respond to MIDI commands on the MIDI channel which it is set to full stop. All MIDI control is performed using Note on commands. All other MIDI instructions are ignored. To stop a chase, send the blackout on note. 1) Press and hold the MIDI/ADD button for about 3 4) To release MIDI control, press any other button except seconds. - Page 11 ESPAÑOL Enhorabuena por la compra de este efecto de luces Beamz. Por favor lea atentamente este manual antes de usar el aparato para disfrutar al completo de sus prestaciones. Seguir las instrucciones le permite no invalidar la garantía. Tome todas las precauciones para evitar que se produzca fuego o una descarga eléctrica.
-
Page 12: Instrucciones De Desembalaje
INSTRUCCIONES DE DESEMBALAJE ATENCIÓN! Inmediatamente después de recibir un dispositivo, desempaque cuidadosamente la caja de cartón, compruebe el contenido para asegurarse de que todas las partes están presentes, y se han recibido en buenas condiciones. Notifique inmediatamente al transportista y conserve el material de embalaje para la inspección por si aparecen daños causados por el transporte o el propio envase muestra signos de mal manejo. -
Page 13: Vista Trasera
VISTA TRASERA 1. Midi in 4. DC Input DC 9 – 12V, 300mA Recibe señal MIDI. 2. DMX Out 5. USB Este conector envía su valor DMX al dispositivo DMX o Para conectar una lámpara USB paquete DMX 6. Interruptor Encendido 3. - Page 14 1.0 GUIA OPERACIONES GENERAL Este es un controlador de iluminación inteligente universal. Permite el control de 24 aparatos compuestos de 16 canales cada uno y hasta 240 escenas programables. Seis bancos de persecución pueden contener hasta 240 pasos compuestos de las escenas guardadas y en cualquier orden.
-
Page 15: Modo Manual
OPERACIONES 3.0 MODO MANUAL El modo manual permite el control directo de todos los accesorios. Puede moverlos y cambiar atributos utilizando los faders de canal. 1) Pulse el botón AUTO DEL repetidamente hasta que el Nota: Todos los cambios realizados en modo manual son LED MANUAL se ilumine. - Page 16 3.4 VERIFICAR EL PROGRAMA 1) Mantenga presionado el botón PROGRAM hasta que el LED parpadee. 2) Utilice los botones BANK UP / DOWN para seleccionar el banco del PROGRAMA a revisar. 3) Pulse los botones SCENES para revisar cada escena individualmente. 3.5 EDITANDO UN PROGRAMA Las escenas tendrán que ser modificadas manualmente.
- Page 17 4.4 EDITAR CHASE (COPIAR BANCO EN UN CHASE) 1) Mantenga pulsado el botón PROGRAM para entrar en el 4) Presione el botón MUSIC / BANK COPY para preparar modo de programación. la copia. 2) Presione el botón CHASE deseado. 5) Pulse el botón MIDI / ADD para copiar el banco. Todos los LED parpadearán.
-
Page 18: Borrar Una Escena
5.0 PROGRAMACIÓN DE ESCENAS (PASOS) 5.1 INSERTAR UNA ESCENA 1) Mantenga pulsado el botón PROGRAM para entrar en el modo de programación. 6) Utilice el botón BANK UP / DOWN para localizar la ESCENA. 2) Presione el botón CHASE deseado. 7) Presione el botón ESCENA que corresponde a la 3) Presione el TAPSYNC / DISPLAY para cambiar la escena que se va a insertar. -
Page 19: Operación Midi
6.1 EJECUTANDO EN MODO AUTO 1) Pulse el botón AUTO DEL hasta que se encienda el LED AUTO. 5) Puede ajustar el tiempo entre pasos moviendo el fader SPEED y la duración del paso moviendo el fader FADE 2) Si no se pulsa un botón CHASE, el controlador ejecutará TIME. - Page 20 La garantie deviendrait également caduque en cas d’accidents ou dommages causes par une utilisation inappropriée de l’appareil ou un non respect des consignes présentes dans cette notice. Beamz ne pourrait être tenu responsable en cas de dommages matériels ou corporels causés par un non respect...
-
Page 21: Deballage
DEBALLAGE ATTENTION ! Immédiatement après réception, vérifiez le contenu du carton et assurez-vous que tous les éléments sont bien présents et en bon état. Si besoin, faites les réserves nécessaires si le matériel ou les cartons sont endommagés. SI l’appareil doit être retourné, faites-le dans l’emballage d’origine. -
Page 22: Face Arriere
FACE ARRIERE 1. Midi in 4. Entrée DC Alimentation DC 9 – 12V, 300mA Reçoit les données MIDI. 2. DMX Out 5. USB Envoie votre valeur DMX à l'appareil ou au pack DMX. Port USB pour brancher une lampe 3. DMX In 6. -
Page 23: Canaux Pan Et Tilt
1.0 PRESENTATION GENERALITES Ce contrôleur universel permet de gérer 24 appareils composés de 16 canaux chacun et jusqu'à 240 scènes programmables. 6 banques de chases peuvent contenir jusqu'à 240 steps composés des scènes mémorisées dans n'importe quel ordre. Les programmes peuvent être gérés par la musique, le mode MIDI, automatiquement ou manuellement Tous les chases peuvent être exécutés en même temps. -
Page 24: Mode Manuel
2.3 DUREE TRANSITION Vous pouvez choisir si la durée de transition s'applique à tous les canaux de sortie ou uniquement aux canaux de mouvements Pant et Tilt. Cela est important car souvent, on veut que les gobos et couleurs changent rapidement sans affecter le mouvement de la lumière. -
Page 25: Creer Une Scene
3.2 CREER UNE SCENE Une scène est un état statique ; les scènes sont mémorisées dans des banques ; il y a 30 banques de mémoires dans le contrôleur, chaque banque peut contenir 8 mémoires de scènes. Le contrôleur peut sauvegarder 240 scènes en tout. 1) Appuyez sur la touche PROGRAM jusqu'à... -
Page 26: Editer Un Chase (Copie D'une Banque Dans Un Chase)
4.0 PROGRAMMATION D'UN CHASE Un chase est créé en utilisant des scènes préalablement créées. Les scènes peuvent être mises dans un ordre de votre choix. Il est recommandé d'effacer les chases de la mémoire avant de les programmes. Voir point “Effacer tous les chases“. 4.1 CREER UN CHASE Un chase contient 240 scènes. -
Page 27: Effacer Une Scene Dans Un Chase
4.6 EDIT CHASE (INSERT SCENE INTO A CHASE) 1) Appuyez sur la touche PROGRAM et maintenez-la 6) Utilisez la touche BANK UP/DOWN pour trouver la enfoncée pour entrer dans le mode Programmation. scène. 2) Appuyez sur la touche CHASE voulue. 7) Appuyez sur la touche SCENE qui correspond à... -
Page 28: Copier Une Scene
5.2 COPIER UNE SCENE 1) Appuyez sur la touche PROGRAM et maintenez-la 4) Appuyez sur la touche MIDI/ADD pour copier la scène. enfoncée pour accéder au mode Programmation. 5) Sélectionnez la banque BANK qui contient la scène 2) Sélectionnez la banque BANK qui contient la scène à mémorisée à... - Page 29 MIDI NOTE FONCTION (ON/OFF MIDI NOTE FONCTION (TURN ON/OFF Scène 1 – 8 in bank 1 Scène 1 – 8 in bank 1 88 à 95 00 à 07 Scène 1 – 8 in bank 2 Scène 1 – 8 in bank 2 96 à...
-
Page 30: Declaration Of Conformity
+31(0)546589298 The Netherlands Product number: 154.048 Product Description: DMX 384 Controller Trade Name: BEAMZ Regulatory Requirement: EN 60598-1/-2 EN 60335-1 EN 55014-1/-2 EN 61000-3 I hereby declare that the product meets the requirements stated in Directives 2014/35/EU and 2014/30/EU and conforms to the above mentioned Declarations. - Page 32 Specifications and design are subject to change without prior notice.. www.tronios.com Copyright © 2016 by TRONIOS the Netherlands...