LG G Pad 8.0 Guide De L'utilisateur

Masquer les pouces Voir aussi pour G Pad 8.0:
Table des Matières

Publicité

Les langues disponibles
  • FR

Les langues disponibles

Liens rapides

Benutzerhandbuch
Guide de l'utilisateur
Guida per l'utente
Uporabniški priročnik
User Guide
MFL69183801 (1.0)
LG-V480
D E U T S C H
F R A N Ç A I S
I T A L I A N O
SLOVENŠČINA
E N G L I S H
www.lg.com

Publicité

Table des Matières
loading

Sommaire des Matières pour LG G Pad 8.0

  • Page 1 D E U T S C H F R A N Ç A I S I T A L I A N O SLOVENŠČINA E N G L I S H Benutzerhandbuch Guide de l’utilisateur Guida per l'utente Uporabniški priročnik User Guide LG-V480 www.lg.com MFL69183801 (1.0)
  • Page 3 DEUTSCH Benutzerhandbuch • Die gezeigten Bildschirme und Abbildungen können vom Gerät und dessen Anzeige abweichen. • Der Inhalt dieser Anleitung kann je nach Modell variieren, abhängig von der Software des Geräts oder dem Dienstanbieter. Alle Informationen in diesem Dokument können ohne vorherige Ankündigung geändert werden. • Dieses Gerät wird wegen seiner Touchscreen-Tastatur für Sehbehinderte nicht empfohlen. • Copyright © 2015 LG Electronics, Inc. Alle Rechte vorbehalten. LG und das LG-Logo sind eingetragene Marken der LG Group und deren zugehöriger Unternehmen. Alle anderen Marken sind Eigentum ihrer jeweiligen Inhaber. • Google™, Google Maps™, Gmail™, YouTube™, Hangouts™ und Google Play™ sind Marken von Google, Inc.
  • Page 4: Table Des Matières

    Inhaltsverzeichnis Info zu diesem Benutzerhandbuch ..5 Wischen oder streichen ......35 Doppelt tippen ..........35 Info zu diesem Benutzerhandbuch ..5 Mit den Fingern vergrößern/ Marken ............6 verkleinern ............35 DivX HD ............6 Anzeige drehen ..........35 Richtlinien für den sicheren und Homescreen ..........35 effizienten Gebrauch ......8 Homescreen anpassen .......37...
  • Page 5 Durch Steuerung per Gestik das Synchronisieren des Geräts mit Windows vorgeschlagene Wort eingeben....50 Media Player ........... 62 Sonderzeichen eingeben ......51 PC-Verbindungen mit einem USB-Kabel für Mac OS X-Benutzer ..63 Google-Konto einrichten ..... 52 Kontakte ..........64 Mit Netzwerken und Geräten Einen Kontakt suchen ......64 verbinden..........
  • Page 6 Rechner ............88 Info über die Sicherung und Kalender ...........88 Wiederherstellung von Gerätedaten ..116 Aufgaben ..........90 Tablet-Daten mit LG Backup sichern ..117 Datei-Manager .........90 Daten des Tablets wiederherstellen ..117 Sprach-Memo ...........91 POLARIS Office 5 ........93 Software-Update für das Tablet ..119 Google+ ............94...
  • Page 7: Info Zu Diesem Benutzerhandbuch

    Info zu diesem Benutzerhandbuch Info zu diesem Benutzerhandbuch • Lesen Sie diese Anleitung vor Verwendung des Geräts sorgfältig durch. So stellen Sie sicher, dass Sie das Gerät sicher und korrekt verwenden. • Einige der Bilder und Screenshots in dieser Anleitung werden auf dem Tablet möglicherweise anders dargestellt. • Ihre Inhalte können sich vom Endprodukt oder von der von Dienstanbietern oder Betreibern bereitgestellten Software unterscheiden. Diese Inhalte unterliegen Änderungen ohne Vorankündigung. Die neueste Version dieser Anleitung finden Sie auf der LG-Website unter www.lg.com. • Die Apps des Geräts und ihre Funktionen können je nach Land, Region oder Hardwarespezifikationen unterschiedlich sein. LG ist nicht haftbar für Leistungsprobleme aufgrund der Verwendung von Apps, die nicht von LG entwickelt wurden. • LG ist nicht haftbar für Leistungs- oder Kompatibilitätsprobleme aufgrund von bearbeiteten Registry-Einstellungen oder geänderter Betriebssystemsoftware. Jeder Versuch, das Betriebssystem anzupassen, kann dazu führen, dass das Gerät oder seine Apps nicht ordnungsgemäß funktionieren. • Software, Audio, Hintergrund, Bilder und andere Medien, die mit dem Gerät bereitgestellt werden, sind für eingeschränkten Gebrauch lizenziert. Wenn Sie diese Materialien für kommerzielle oder andere Zwecke extrahieren und verwenden, verstoßen Sie möglicherweise gegen Urheberrecht. Als Benutzer sind Sie allein verantwortlich für die illegale Nutzung von Medien.
  • Page 8: Marken

    • Für Datendienste wie Nachrichten, Hochladen und Herunterladen, automatische Synchronisierung oder die Nutzung von Standortdiensten fallen möglicherweise zusätzliche Kosten an. Um zusätzliche Kosten zu vermeiden, wählen Sie einen Datentarif aus, der für Ihren Bedarf geeignet ist. Wenden Sie sich an Ihren Dienstanbieter, um weitere Informationen zu erhalten. Marken • LG und das LG-Logo sind registrierte Marken von LG Electronics. • Alle anderen Marken und Urheberrechte sind Eigentum ihrer jeweiligen Inhaber. DivX HD INFORMATIONEN ZU DIVX VIDEO: DivX® ist ein digitales Videoformat von DivX, LLC, einer Tochter der Rovi Corporation. Dies ist ein offiziell DivX-zertifiziertes® Gerät, das strengen Tests zur Überprüfung der DivX- Videowiedergabe unterzogen wurde. Weitere Informationen sowie Software- Tools zum Konvertieren Ihrer Dateien in das DivX-Videoformat finden Sie unter www.divx.com. INFO ZU DIVX-VIDEO-ON-DEMAND: Zum Abspielen von erworbenen DivX- Video-on-Demand (VOD)-Filmen mit DivX auf diesem DivX Certified® Gerät ist eine DivX-Registrierung erforderlich. Um einen Registrierungscode zu erhalten, rufen Sie im Setup-Menü den Abschnitt „DivX VOD“ auf. Unter vod.divx.com erhalten Sie ausführliche Informationen, wie Sie Ihre Registrierung durchführen.
  • Page 9 DivX Certified® für die Wiedergabe von DivX®-Videos bis HD 720p, einschließlich Premiuminhalten. DivX®, DivX Certified® und zugehörige Logos sind Marken der Rovi Corporation oder ihrer Tochterunternehmen und werden unter Lizenz verwendet. Information: Hinweis bezüglich Open-Source-Software Den Quellcode unter GPL, LGPL, MPL sowie weitere Open-Source- Lizenzen, die in diesem Produkt enthalten sind, können Sie unter http:// opensource.lge.com herunterladen. Neben dem Quellcode stehen dort noch alle Lizenzbedingungen, auf die verwiesen wird, Garantieausschlüsse sowie Urheberrechtshinweise zum Download bereit. LG Electronics stellt Ihnen gegen eine Gebühr (für Distribution, Medien, Versand und Verwaltung) auch den Quellcode auf CD-ROM bereit. Wenden Sie sich per E-Mail an LG Electronics: opensource@lge.com. Dieses Angebot ist drei (3) Jahre ab Kaufdatum des Produkts gültig.
  • Page 10: Richtlinien Für Den Sicheren Und Effizienten Gebrauch

    Richtlinien für den sicheren und effizienten Gebrauch Lesen Sie diese einfachen Richtlinien sorgfältig durch. Die Nichtbeachtung dieser Richtlinien kann gefährlich oder gesetzeswidrig sein. Sollte eine Störung auftreten, sorgt ein in Ihrem Gerät integriertes Software- Tool dafür, dass ein Fehlerprotokoll erstellt wird. Dieses Tool erfasst nur Informationen über die aufgetretene Störung wie z. B. Signalstärke und geladene Apps. Das Protokoll dient ausschließlich dazu, die Ursache der Störung zu bestimmen. Die Protokolle sind verschlüsselt und können nur von einem autorisierten LG-Reparaturzentrum abgerufen werden, falls Sie Ihr Gerät zur Reparatur geben müssen. Sicherheitshinweis über die Einwirkung elektromagnetischer Energie im Radiofrequenzbereich Informationen zur Einwirkung elektromagnetischer Felder und zur Spezifischen Absorptionsrate (SAR). Das Tablet LG-V480 entspricht den geltenden Sicherheitsbestimmungen hinsichtlich der Einwirkung elektromagnetischer Felder. Diese Bestimmungen basieren auf wissenschaftlichen Richtlinien, die auch Sicherheitsabstände definieren, um eine gesundheitliche Gefährdung von Personen (unabhängig von Alter und allgemeinem Gesundheitszustand) auszuschließen. • In den Richtlinien hinsichtlich der Einwirkung elektromagnetischer Felder wird eine Maßeinheit verwendet, die als Spezifische Absorptionsrate (SAR) bezeichnet wird. Der SAR-Wert wird mit standardisierten Testmethoden ermittelt, bei denen das Gerät in allen getesteten Frequenzbändern mit der höchsten zulässigen Sendeleistung betrieben wird. • Auch wenn Unterschiede zwischen den SAR-Werten verschiedener LG-Gerätemodelle bestehen, entsprechen sie in jedem Fall den geltenden...
  • Page 11 • Der von der Internationalen Kommission für den Schutz vor nichtionisierenden Strahlen (International Commission on Non-lonizing Radiation Protection, ICNIRP) empfohlene SAR-Grenzwert liegt bei 2 W/kg gemittelt über zehn (10) Gramm Gewebe. • Der höchste, für dieses Gerät ermittelte SAR-Wert liegt bei 0,497 W/kg, wenn es, wie es im Benutzerhandbuch beschrieben, am Körper getragen wird. • Dieses Gerät entspricht den Sicherheitsstandards hinsichtlich der Strahlenbelastung bei normaler Verwendung am Ohr oder wenn der Abstand vom Körper mindestens 0,00 cm beträgt. Tragetaschen, Gürtelclips oder Vorrichtungen zum Tragen des mobilen Geräts am Körper dürfen kein Metall enthalten und müssen das Gerät in einem Abstand von mindestens 0,00 cm vom Körper halten. Um Dateien oder Nachrichten übertragen zu können, benötigt dieses Gerät eine gute Netzwerkverbindung. In einigen Fällen wird die Übertragung von Dateien und Nachrichten verzögert, bis die Netzwerkverbindung entsprechend gut ist. Stellen Sie sicher, dass der oben genannte Abstand eingehalten wird, bis die Übertragung abgeschlossen ist. Pflege und Wartung des Tablets WARNUNG Verwenden Sie ausschließlich Akkus, Ladegeräte und Zubehörteile, die für die Verwendung mit diesem Gerät zugelassen sind. Die Verwendung anderer Teile kann zum Erlöschen der Zulassungen oder Garantien für dieses Gerät führen und kann gefährlich sein. • Öffnen Sie dieses Gerät nicht. Sollten Reparaturen erforderlich sein, wenden Sie sich an einen qualifizierten Kundendienstmitarbeiter. • LG ist berechtigt, bei Reparaturen im Rahmen der Garantie neue oder überholte Ersatzteile oder Platinen zu verwenden, sofern diese über den gleichen Funktionsumfang verfügen wie die zu ersetzenden Teile.
  • Page 12 • Benutzen Sie dieses Tablet nicht in der Nähe elektrischer Geräte (z. B. Fernsehgeräte, Radios, PCs). • Halten Sie das Tablet von Wärmequellen wie Heizungen oder Herdplatten fern. • Lassen Sie das Tablet nicht fallen. • Setzen Sie das Tablet keinen starken Erschütterungen oder Stößen aus. • Schalten Sie das Gerät aus, wenn dies aufgrund von jeweils geltenden Bestimmungen erforderlich ist. Verwenden Sie Ihr Gerät beispielsweise nicht in Krankenhäusern, da sonst die Funktionalität empfindlicher medizinischer Geräte beeinträchtigt werden kann. • Fassen Sie das Gerät während des Ladevorgangs nicht mit nassen Händen an. Es besteht sonst Stromschlaggefahr, auch kann das Gerät schwer beschädigt werden. • Laden Sie das Gerät nicht in der Nähe von entflammbarem Material auf, da das Gerät heiß werden kann und somit eine Brandgefahr darstellt. • Reinigen Sie das Gerät außen mit einem trockenen Tuch (verwenden Sie keine Lösungsmittel wie Benzin, Verdünner oder Alkohol). • Legen Sie das Tablet beim Aufladen nicht auf Polstermöbel. • Das Gerät sollte in einer gut belüfteten Umgebung aufgeladen werden. • Bewahren Sie das Gerät nicht in sehr verrauchten oder staubigen Umgebungen auf. • Bewahren Sie das Gerät nicht in der Nähe von Gegenständen mit Magnetstreifen (Kreditkarten, Flugtickets usw.) auf, da andernfalls die auf dem Magnetstreifen gespeicherten Informationen beschädigt werden könnten. • Berühren Sie das Display nicht mit spitzen oder scharfen Gegenständen; andernfalls kann das Gerät beschädigt werden. • Setzen Sie das Gerät keiner Feuchtigkeit oder Nässe aus.
  • Page 13 • Verwenden Sie Zubehörteile (wie z. B. Kopfhörer) immer mit der erforderlichen Sorgfalt. • Berühren, entfernen oder reparieren Sie nicht zerbrochenes oder gesprungenes Glas. Schäden am Glas-Display aufgrund von Missbrauch fallen nicht unter die Garantiebedingungen. • Ihr Tablet ist ein elektronisches Gerät, das sich bei normalem Betrieb erhitzt. Besteht anhaltender, direkter Hautkontakt ohne angemessene Belüftung, kann es zu Beschwerden oder leichten Verbrennungen kommen. Gehen Sie daher während und direkt nach dem Betrieb vorsichtig mit Ihrem Gerät um. • Falls Ihr Gerät nass wird, müssen Sie es sofort vom Netz trennen und vollständig trocknen lassen. Versuchen Sie nicht, das Trocknen mit einer externen Heizquelle, wie Ofen, Mikrowelle oder Haartrockner, zu beschleunigen. • In Ihr Telefon eingedrungene Flüssigkeit ändert die Farbe der Produktkennzeichnung im Gerät. Ein Geräteschaden, der aufgrund des Eindringens von Flüssigkeiten entsteht, fällt nicht unter die Garantiebedingungen. • Verwenden Sie Ihr Tablet nach Möglichkeit nur bei Temperaturen zwischen 0 °C und 40 °C. Die Verwendung bei besonders niedrigen oder hohen Temperaturen kann zu Beschädigungen, Fehlfunktionen oder sogar zu einer Explosion führen. Effizienter Betrieb des Geräts Elektronische Geräte Bei Tablets kann es zu Interferenzen kommen, die die Leistung beeinträchtigen können. • Verwenden Sie das Gerät nicht unerlaubt in der Nähe medizinischer Geräte. Wenn Sie einen Herzschrittmacher haben, tragen Sie das Tablet nicht in der Nähe des Herzschrittmachers am Körper, also z. B. nicht in der Brusttasche.
  • Page 14 • Einige Hörhilfen können durch Tablets beeinträchtigt werden. • Bei Fernsehgeräten, Radios, PCs usw. können ebenfalls leichte Interferenzen auftreten. Sicherheit im Straßenverkehr Erkundigen Sie sich über die jeweils geltenden Gesetze und Bestimmungen über die Verwendung von Tablets in Fahrzeugen. • Benutzen Sie kein Tablet, wenn Sie während der Fahrt am Steuer sitzen. • Richten Sie Ihre ganze Aufmerksamkeit auf den Straßenverkehr. • Elektromagnetische Strahlen können u.U. elektronische Systeme in Ihrem Fahrzeug stören, wie beispielsweise das Autoradio oder Sicherheitssysteme. • Falls Ihr Fahrzeug mit einem Airbag ausgestattet ist, achten Sie darauf, das Tablet nicht auf bzw. vor dem Airbag abzulegen und die Freisprecheinrichtung nicht in der Nähe des Airbags zu installieren. Andernfalls kann die Funktionsweise des Airbags beeinträchtigt werden, was zu schweren Verletzungen führen kann. • Wenn Sie Musik hören, während Sie unterwegs sind, stellen Sie sicher, dass die Lautstärke auf ein angemessenes Maß eingestellt ist, sodass Sie Ihre Umgebung wahrnehmen. Dies ist vor allem dann wichtig, wenn Sie sich in der Nähe einer Straße befinden. Vermeiden von Hörschäden HINWEIS: Übermäßige Lautstärke und übermäßiger Druck der Ohrhörer und Kopfhörer können zu Hörverlust führen. Um einer Schädigung des Gehörs vorzubeugen, sollten Sie nicht über einen längeren Zeitraum mit hoher Lautstärke hören.
  • Page 15 • Wenn Sie längere Zeit einem hohen Geräuschpegel ausgesetzt sind, können Hörschäden auftreten. Wir empfehlen deshalb, dass Sie das Tablet beim Ein- und Ausschalten nicht ans Ohr halten. Es empfiehlt sich außerdem, die Lautstärke von Musik auf ein angemessenes Maß einzustellen. • Reduzieren Sie die Lautstärke bei der Verwendung von Kopfhörern, wenn Sie die Stimmen von Personen in Ihrer Nähe nicht hören können, oder wenn die Person neben Ihnen Ihre Musik hören kann. Glasteile Einige Teile Ihres Tablets bestehen aus Glas. Das Glas kann zerbrechen, wenn Ihr Gerät herunterfällt, oder wenn es einen kräftigen Stoß oder Schlag erfährt. Sollte das Glas zerbrechen, berühren Sie es nicht, und versuchen Sie nicht, es zu entfernen. Verwenden Sie das Gerät erst wieder, wenn das Glas von einem autorisierten Dienstanbieter ersetzt wurde. Sprenggebiete Benutzen Sie das Tablet nicht, wenn in der Nähe gesprengt wird. Beachten Sie die Einschränkungen, und befolgen Sie alle geltenden Vorschriften und Regeln. Explosionsgefährdete Orte • Verwenden Sie das Tablet nicht an Tankstellen. • Verwenden Sie das Tablet nicht in der Nähe von Kraftstoffen oder Chemikalien. • Transportieren und lagern Sie keine brennbaren Flüssigkeiten, Gase oder Explosivstoffe im selben Raum des Fahrzeugs, in dem sich auch das Tablet oder dessen Zubehör befindet.
  • Page 16 In Flugzeugen In einem Flugzeug können drahtlos arbeitende Geräte zu Interferenzen führen. • Schalten Sie daher Ihr Tablet aus, bevor Sie in ein Flugzeug steigen. • Verwenden Sie es auch nicht während des Aufenthalts auf dem Flughafengelände, sofern dies nicht ausdrücklich vom Personal erlaubt wurde. Kinder Bewahren Sie das Tablet an einem sicheren Ort außerhalb der Reichweite von Kleinkindern auf. Es enthält Kleinteile, die verschluckt oder eingeatmet werden könnten. Das Gerät enthält außerdem einen internen Akku, der gefährlich sein kann, wenn das Gerät nicht ordnungsgemäß verwendet oder gepflegt wird. Hinweise zum Akku und zur Pflege des Akkus • Es ist nicht erforderlich, den Akku vor dem Laden vollständig zu entladen. Anders als bei herkömmlichen Akkus tritt bei diesem Akku kein Memory- Effekt auf, der die Leistung vermindert. • Verwenden Sie ausschließlich Akkus und Ladegeräte von LG. Ladegeräte von LG sind so ausgelegt, dass die Lebensdauer des Akkus optimiert wird. • Öffnen Sie den Akku nicht, und schließen Sie ihn nicht kurz. • Wenn Sie den Akku längere Zeit nicht verwendet haben, laden Sie ihn erneut auf, um maximale Leistung zu erzielen. • Setzen Sie das Ladegerät keiner direkten Sonneneinstrahlung oder hoher Luftfeuchtigkeit (z. B. in einem Badezimmer) aus.
  • Page 17 Bewahren Sie den Akku nicht in sehr heißen oder sehr kalten Räumen auf, da dies die Leistung beeinträchtigen kann. • Bei Austausch des Akkus mit einem ungeeigneten Akkutyp besteht Explosionsgefahr. • Entsorgen Sie unbrauchbar gewordene Akkus gemäß den Anweisungen des Herstellers. Nutzen Sie Recycling, wenn dies möglich ist. Geben Sie Akkus nicht einfach in den Hausmüll. • Entfernen Sie das Ladegerät immer aus der Steckdose, wenn das Tablet voll aufgeladen ist. So vermeiden Sie, dass das Ladegerät unnötig Strom verbraucht. • Die tatsächliche Akkulaufzeit ist abhängig von der Netzwerkkonfiguration, den Produkteinstellungen, dem Gebrauch und den Umgebungsbedingungen. • Stellen Sie sicher, dass keine spitzen Gegenstände wie Tierzähne oder Nägel in Kontakt mit dem Akku kommen. Dies könnte ein Feuer verursachen.
  • Page 18 WARNUNG! Hinweis zum Akkuaustausch • Wiederaufladbare Li-Ion-Akkus können bei unsachgemäßer Verwendung zu Verletzungen führen. • Das Austauschen von Akkus von einem NICHT qualifizierten Techniker kann zu Schäden am Gerät führen. • Tauschen Sie den Akku nicht selbst aus. Beschädigungen am Akku können zu Überhitzung und Verletzungen führen. Der Austausch des Akkus muss von einem autorisierten Dienstanbieter durchgeführt werden. Der Akku sollte durch Recycling aufbereitet oder getrennt vom Hausmüll entsorgt werden. • Falls dieses Produkt einen ins Produkt eingearbeiteten Akku enthält, der nicht ohne weiteres durch den Endbenutzer entfernt werden kann, empfiehlt LG, dass nur qualifizierte Fachkräfte den Akku entfernen, entweder wegen eines Austauschs oder um ihn am Ende der Lebensdauer des Produkts dem Recycling zuzuführen. Um Schäden am Produkt zu vermeiden, und für ihre eigene Sicherheit, sollten Benutzer nicht versuchen, den Akku zu entfernen und diesbezüglich den LG-Kundendienst oder einen anderen unabhängigen Dienstleister zwecks Beratung kontaktieren. • Das Entfernen des Akkus erfordert ein Zerlegen des Produkts, die Trennung der elektrischen Leitungen/Kontakte und eine sorgfältige Entnahme der Akkuzelle mit Spezialwerkzeugen. Wenn Sie die Anweisungen für qualifizierte Fachkräfte benötigen, wie man den Akku sicher entfernen kann, besuchen Sie bitte http://www.lge.com/global/ sustainability/environment/take-back-recycling...
  • Page 19 So halten Sie Ihr Tablet auf dem aktuellen Stand Zugriff auf die neuesten Firmwareversionen sowie neue Softwarefunktionen und -verbesserungen. • Tablet ohne einen PC auf den aktuellen Stand bringen: Wählen Sie Update-Center > Software Update > Jetzt auf Updates prüfen. • Aktualisieren Sie Ihr Tablet, indem Sie es an Ihren PC anschließen. Weitere Informationen zur Verwendung dieser Funktion finden Sie unter http://www.lg.com/common/index.jsp, nach Auswahl von Land und Sprache. KONFORMITÄTSERKLÄRUNG LG Electronics erklärt hiermit, dass das LG-V480 den wichtigsten Anforderungen und anderen relevanten Bestimmungen der Richtlinie 1999/5/EC entspricht. Eine Kopie der Konformitätserklärung finden Sie unter http://www.lg.com/global/declaration Kontaktbüro für die Compliance dieses Produkts LG Electronics Inc. EU Representative, Krijgsman 1, 1186 DM Amstelveen, The Netherlands...
  • Page 20 Entsorgung Ihres Altgeräts Alle Elektro- und Elektronik-Altgeräte müssen getrennt vom Hausmüll in staatlichen oder kommunalen Sammeleinrichtungen und entsprechend den geltenden Vorschriften entsorgt werden. Durch eine vorschriftsmäßige Entsorgung von Altgeräten können schädliche Auswirkungen auf Mensch und Umwelt vermieden werden. Genauere Informationen zur Entsorgung von Altgeräten erhalten Sie bei den lokalen Behörden, der Entsorgungseinrichtung oder dem Fachhändler, bei dem Sie das Produkt erworben haben. Entsorgen von alten Akkus Dieses Symbol kann mit den chemischen Symbolen für Quecksilber (Hg), Kadmium (Cd) oder Blei (Pb) kombiniert sein, wenn die Akkus mehr als 0,0005 % Quecksilber, 0,002 % Kadmium oder 0,004 % Blei enthalten. Akkus müssen immer getrennt vom Hausmüll in staatlichen oder kommunalen Sammeleinrichtungen und entsprechend den geltenden Vorschriften entsorgt werden. Durch eine vorschriftsmäßige Entsorgung Ihrer alten Akkus können schädliche Auswirkungen auf Mensch, Tier und Umwelt vermieden werden. Ausführliche Informationen zur Entsorgung alter Akkus erhalten Sie bei den lokalen Behörden, der Entsorgungseinrichtung oder dem Fachhändler, bei dem Sie das Produkt erworben haben.
  • Page 21: Wichtiger Hinweis

    Wichtiger Hinweis Bitte lesen Sie dies vor Verwendung des Tablets! Bevor Sie sich mit einem Servicemitarbeiter in Verbindung setzen oder das Tablet zur Reparatur bringen, prüfen Sie bitte, ob das aufgetretene Problem in diesem Abschnitt beschrieben wird. 1. Tablet-Speicher Wollen Sie mehr Speicher verfügbar machen, überprüfen Sie den Speicherinhalt des Tablets und löschen einige Dateien, z. B. Apps. So deinstallieren Sie Apps: Tippen Sie auf > > Registerkarte Apps > Einstellungen > Apps. Sobald alle Apps angezeigt werden, wählen Sie die App aus, die Sie deinstallieren wollen. Tippen Sie auf Deinstallieren und bestätigen Sie mit OK. 2. Vor der Installation einer Open-Source-App und eines Open-Source-Betriebssystems WARNUNG Wenn Sie ein anderes Betriebssystem installieren als das, das vom Hersteller für dieses Gerät zur Verfügung gestellt wurde, kann das zu Fehlfunktionen des Tablets führen. Außerdem erlischt die Garantie für das Tablet.
  • Page 22 WARNUNG Um Ihr Tablet und Ihre persönlichen Daten zu schützen, sollten Sie Apps nur von vertrauenswürdigen Quellen herunterladen, z. B. von Play Store. Wenn sich auf dem Tablet nicht ordnungsgemäß installierte Apps befinden, funktioniert das Tablet möglicherweise nicht ordnungsgemäß, oder es treten schwerwiegende Fehler auf. Sie müssen dann diese Apps und alle zugehörigen Daten und Einstellungen vom Tablet entfernen. 3. Bildschirmsperre verwenden Legen Sie zum Schutz des Tablets eine Bildschirmsperre fest. Tippen Sie auf > > Registerkarte Apps > Einstellungen > Anzeige > Bildschirmsperre > Bildschirmsperre auswählen und wählen Sie die gewünschte Bildschirmsperre aus folgenden Optionen: Keine, Ziehen, Knock Code, Muster, PIN oder Passwort. Sie können als Sicherheitsmaßnahme eine Backup-PIN erstellen für den Fall, dass Sie die Bildschirmsperre und deren Aufhebung vergessen. Achtung: Erstellen Sie erst ein Google-Konto, bevor Sie eine Bildschirmsperre festlegen, und denken Sie bei der Festlegung der Bildschirmsperre an die Backup-PIN.
  • Page 23 WARNUNG Sicherheitshinweise zur Verwendung einer Bildschirmsperre. Prägen Sie sich Ihre Bildschirmsperre und deren Aufhebung gut ein. Nach 5-maliger Eingabe eines falschen Aufhebungssignals oder -codes für die Bildschirmsperre wird der Zugriff auf Ihr Tablet gesperrt. Sie erhalten 5-mal die Gelegenheit, Ihr Entsperrmuster, Ihre PIN oder Ihr Passwort einzugeben. Wenn Sie alle 5 Gelegenheiten bereits genutzt haben, können Sie es nach 30 Sekunden erneut versuchen. Wenn Sie sich nicht an Ihr Entsperrmuster, Ihre PIN oder Ihr Passwort erinnern können: < Falls Sie das Muster vergessen haben > Wenn Sie sich mit dem Tablet bei Ihrem Google-Konto angemeldet und 5-mal ein falsches Muster verwendet haben, tippen Sie auf Muster vergessen? unten auf dem Bildschirm. Anschließend werden Sie aufgefordert, sich über Ihr Google-Konto anzumelden oder die Backup-PIN einzugeben, die Sie beim Erstellen des Entsperrmusters festgelegt haben. Falls Sie auf dem Tablet kein Google-Konto erstellt oder Ihre Backup-PIN vergessen haben, müssen Sie einen Hardware-Reset ausführen.
  • Page 24 HINWEIS: Wenn Sie das Entsperrmuster vergessen haben und Sie sich nicht bei Ihrem Google-Konto angemeldet haben, müssen Sie Ihre Backup-PIN eingeben. 4. Hardware-Reset durchführen (auf Werkseinstellungen zurücksetzen) Wenn sich beim Tablet der ursprüngliche Zustand nicht wiederherstellen lässt, verwenden Sie die Funktion „Hardware-Reset“ (Zurücksetzen auf Werkseinstellungen), um das Gerät zu initialisieren. Schalten Sie das Tablet aus. Erst die Leiser-Taste gedrückt halten, dann auf der rechten Seite des Tablets die Taste Ein-/Aus-/Sperrtaste gedrückt halten, bis das LG-Logo angezeigt wird. Erst wenn das LG-Logo angezeigt wird, alle Tasten loslassen. Sofort gleichzeitig die Ein-/Aus-/Sperrtaste + Leiser-Taste drücken. Erst wenn der Bildschirm "Factory data reset" angezeigt wird, alle Tasten loslassen. Betätigen Sie eine der Lautstärke-Tasten , um den Cursor zur Option Yes (Ja) zu bewegen, und drücken Sie die Ein-/Aus-/Sperrtaste , um fortzufahren. Betätigen Sie eine der Lautstärke-Tasten , um den Cursor erneut zur Option Yes (Ja) zu bewegen, und drücken Sie die Ein-/Aus-/Sperrtaste , um die Auswahl zu bestätigen. Ihr Gerät wird auf Werkseinstellungen zurückgesetzt.
  • Page 25 WARNUNG Wenn Sie die Funktion Hardware-Reset ausführen, werden alle Apps von Benutzern, Benutzerdaten und DRM-Lizenzen gelöscht. Sichern Sie alle wichtigen Daten, bevor Sie die Funktion „Hardware-Reset“ ausführen. 5. Wenn der Bildschirm einfriert Wenn der Bildschirm einfriert oder das Tablet beim Bedienen nicht reagiert: Halten Sie 8 Sekunden lang die Ein-/Aus-/Sperrtaste gedrückt, bis das LG-Logo angezeigt wird, sodass das Tablet neu startet. Falls das Problem weiterhin besteht, wenden Sie sich bitte an das Service Center.
  • Page 26: Über Ihr Gerät

    Über Ihr Gerät Überblick über das Tablet Nach vorne gerichtete Kamera Ein-/Aus-/Sperrtaste Lautstärke-Tasten Kopfhörerbuchse Infrarot (IR)-LED Steckplatz für microSD- Speicherkarte Mikrofon Ladegerät-/USB- Anschluss Nach hinten gerichtete Kamera Lautsprecher HINWEIS: Aus ästhetischen Gründen hat Ihr Tablet auf der Rückseite zwei Lautsprecheröffnungen. Tatsächlich kommt der Ton nur aus einem Lautsprecher. Beachten Sie bitte, dass das kein Defekt des Produkts ist. HINWEIS: Achten Sie bei der Aufnahme von Videos oder Ton darauf, dass das Mikrofon nicht verdeckt ist.
  • Page 27 Damit können Sie Fotos und Videos von sich selbst aufnehmen. Kann auch verwendet werden, Nach vorne um per Video zu chatten. Achten Sie darauf, dass gerichtete Kamera das Objektiv stets sauber ist, damit eine optimale Leistung gewährleistet ist. Kurz drücken, um das Display zu sperren oder zu entsperren. Gedrückt halten, um das Tablet Ein-/Aus-/ ein- oder auszuschalten, es neu zu starten, den Sperrtaste Flugmodus zu aktivieren/deaktivieren oder um die Toneinstellungen zu ändern. Damit können Sie bei Medienwiedergabe die Lautstärke regeln. Um auf die Funktion Lautstärke-Tasten QuickMemo+ zuzugreifen, beide Tasten gleichzeitig drücken und gedrückt halten. Ermöglicht das Anschließen eines optionalen Headsets als praktische Freisprecheinrichtung. Sie Kopfhörerbuchse können auch Kopfhörer anschließen, um Musik zu hören. Infrarot (IR)-LED Dient als Sensor für die App QuickRemote. Steckplatz Sie können hier eine microSD-Speicherkarte für microSD- einsetzen, um Dateien darauf zu speichern, z. B. Speicherkarte Musik, Videos und Fotos. Zum Aufnehmen gesprochenen Textes und für Mikrofon Funktionen, die per Stimme aktiviert werden.
  • Page 28 Über das hier anzuschließende USB-Kabel können Ladegerät-/USB- Sie das Tablet am Ladegerät anschließen, an Ihren Anschluss PC oder an kompatibles Zubehör. Damit können Sie Fotos und Videos aufnehmen. Nach hinten Achten Sie darauf, dass das Objektiv stets sauber gerichtete Kamera ist, damit eine optimale Leistung gewährleistet ist. Dient zur Audio-Wiedergabe bei einer ausgewählten Lautsprecher Funktion (z. B. Musik, Videos, Tondateien, etc.). WARNUNG Das Tablet und die Funktionen des Touchscreens können beschädigt werden, wenn Sie schwere Gegenstände auf das Tablet legen oder sich darauf setzen. TIPP! • Tippen Sie auf die Menütaste , wenn Sie eine App öffnen. Auf diese Weise können Sie prüfen, welche Optionen zur Verfügung stehen. • Wenn das Gerät gesperrt ist und nicht funktioniert, drücken und halten Sie die Ein-/Aus-/Sperrtaste 8 Sekunden lang gedrückt, bis das LG-Logo angezeigt wird, so dass das Tablet neu startet.
  • Page 29: Tablet Aufladen

    Tablet aufladen Der Akku wird über den mitgelieferten USB-Adapter aufgeladen. Bevor Sie das Tablet zum ersten Mal verwenden, vergewissern Sie sich, dass der Akku vollständig geladen ist. HINWEIS: Ihr Gerät ist mit einem internen wiederaufladbaren Akku ausgestattet. Aus Sicherheitsgründen sollten Sie den Akku nicht aus dem Gerät entfernen. Warnung! Wenn der Touchscreen während des Ladevorgangs nicht funktioniert, kann das an einer instabilen Stromversorgung liegen. Trennen Sie in diesem Fall das USB-Kabel vom Gerät, oder trennen Sie den USB- Adapter von der Steckdose. Den USB-Adapter und das USB-Kabel anschließen. Das USB-Kabel am Ladegerät-/USB-Anschluss des Tablets anschließen (wie unten gezeigt). Das Ladegerät an eine Steckdose anschließen.
  • Page 30: Die Akkulaufzeit Optimieren

    HINWEIS: Um die Lebensdauer des Akkus zu verlängern, muss dieser beim ersten Ladevorgang vollständig aufgeladen werden. Die Akkulaufzeit optimieren Sie können die Akkulaufzeit zwischen den Ladevorgängen erhöhen, indem Sie nicht benötigte Funktionen, die fortlaufend im Hintergrund ausgeführt werden, deaktivieren. Sie können außerdem überwachen, wie stark Apps und Systemressourcen den Akku beanspruchen. So erhöhen Sie die Akkulaufzeit • Deaktivieren Sie Funkverbindungen, die Sie nicht verwenden, wie Wi-Fi, Bluetooth oder GPS. • Verringern Sie die Helligkeit des Bildschirms, und stellen Sie eine kürzere Wartezeit für die Bildschirmabschaltung ein. • Deaktivieren Sie die automatische Synchronisierung für Gmail™, Kalender, Kontakte und andere Apps. • Einige Apps, die Sie heruntergeladen haben, verringern möglicherweise die Akkulaufzeit. • Prüfen Sie bei Verwendung heruntergeladener Apps den Ladezustand des Akkus. So überprüfen Sie den Ladezustand des Akkus > Über das Auf dem Homescreen auf Apps > Einstellungen Tablet > Akku tippen. Unter dem Menü oben auf dem Bildschirm wird der Status („Wird geladen“ oder „Wird entladen“) und der Ladezustand des Akkus angezeigt.
  • Page 31: So Überwachen Und Kontrollieren Sie Die Stromentnahme Beim Akku

    So überwachen und kontrollieren Sie die Stromentnahme beim Akku > Über das Auf dem Homescreen auf Apps > Einstellungen Tablet > Akku > Akkuverbrauch tippen. Es wird die Akku-Nutzungszeit und eine Liste von Apps und Diensten angezeigt, die Akkustrom verbrauchen, in der Reihenfolge vom größten zum kleinsten Verbraucher. Eine microSD-Karte einsetzen Das Gerät unterstützt microSD-Speicherkarten mit einer Speicherkapazität von bis zu 32 GB. Auf der microSD-Karte können Multimedia-Inhalte gespeichert werden. M it dem Fingernagel in die Ausfräsung fassen und vorsichtig an der Abdeckung des Speicherkarten-Steckplatzes ziehen, um sie zu entfernen. D ie Speicherkarte in den Steckplatz einsetzen, die Kontakte zum Bildschirm gerichtet. Die Abdeckung des Speicherkarten-Steckplatzes wieder andrücken, um den Steckplatz zu schließen.
  • Page 32: Die Microsd-Karte Entfernen

    Die MicroSD-Karte entfernen Um die microSD-Speicherkarte sicher aus dem Tablet zu entfernen, müssen Sie die Karte zuvor deaktivieren. Auf dem Homescreen auf Apps > Einstellungen > Speicherverwaltung > Speicherkarte entfernen tippen. Das Fach für die microSD-Karte öffnen und auf die Karte drücken, um sie aus der Arretierung zu lösen. Die microSD-Speicherkarte vorsichtig aus dem Steckplatz ziehen. Warnung! Entfernen Sie nicht die microSD™-Karte, ohne sie zuvor zu deaktivieren. Sonst könnten die microSD-Karte, das Tablet und die auf der microSD-Karte gespeicherten Daten beschädigt werden.
  • Page 33: Die Microsd-Karte Formatieren

    Die microSD-Karte formatieren Warnung! Beim Formatieren der microSD-Karte werden alle auf ihr gespeicherten Dateien gelöscht. Auf dem Homescreen auf Apps > Einstellungen > Speicherverwaltung tippen. Auf Speicherkarte löschen tippen (zweimal). Wenn Sie ein Entsperrmuster festgelegt haben, geben Sie dieses ein, und tippen Sie dann auf Alles löschen. Die Karte wird daraufhin formatiert und kann dann verwendet werden. HINWEIS: Falls sich auf Ihrer microSD-Karte Daten befinden, kann sich die Ordnerstruktur nach dem Formatieren verändert haben, da alle Dateien gelöscht wurden. Bildschirm sperren und entsperren Wenn Sie das Tablet über einen gewissen Zeitraum nicht verwenden, wird der Bildschirm automatisch ausgeschaltet und gesperrt. Dies verhindert versehentliche Berührungen von Schaltflächen und Symbolen und schont den Akku. Wenn Sie das Tablet nicht verwenden, drücken Sie die Ein-/Aus-/ Sperrtaste , um das Tablet zu sperren. Falls bei Aktivierung der Bildschirmsperre Programme ausgeführt werden, ist es möglich, dass diese im Sperrmodus weiterhin ausgeführt werden. Zur Vermeidung unnötiger Kosten wird empfohlen, alle Programme (z. B. Zugriff aufs Web und Datenübertragungen) zu beenden, bevor Sie den Sperrmodus aktivieren.
  • Page 34: Mit Der Knockon-Funktion Den Bildschirm Einschalten

    Um das gesperrte Tablet zu entsperren, drücken Sie auf die Ein-/Aus-/ Sperrtaste . Dann wird der Sperrbildschirm angezeigt. Um die Startseite zu entsperren, den Sperrbildschirm berühren und in eine beliebige Richtung ziehen. Der zuletzt angezeigte Bildschirm erscheint. Mit der KnockON-Funktion den Bildschirm einschalten Mit der Funktion KnockON ist es möglich, den Bildschirm ein- oder auszuschalten, einfach indem Sie doppelt auf den Bildschirm tippen. • Um den Bildschirm einzuschalten, doppelt, d. h. zwei Mal schnell nacheinander, auf die Mitte des Bildschirms tippen. • Um den Bildschirm auszuschalten, doppelt auf die Statusanzeige, auf einen leeren Bereich des Homescreens oder auf den Sperrbildschirm tippen. Bildschirm mit der Funktion Knock Code entsperren Die Funktion Knock Code ermöglicht Ihnen, Ihren eigenen Klopf-Code zum Entsperren festzulegen, indem Sie dazu eine Klopffolge (oder Kombinationen von Tipp-Berührungen) benutzen. • Wenn der Bildschirm ausgeschaltet ist, tippen Sie irgendwo auf dem Bildschirm dieselbe einmal festgelegte Sequenz. Die Startseite wird direkt aufgerufen.
  • Page 35 Die Funktion Knock Code aktivieren Auf dem Homescreen auf Apps > Einstellungen > Anzeige > Bildschirmsperre > Bildschirmsperre auswählen > Knock Code tippen. Es wird ein Bildschirm angezeigt, der Ihnen beim Erstellen der Klopffolge zum Entsperren hilft. Sie müssen als Sicherheitsmaßnahme eine Backup- PIN erstellen für den Fall, dass Sie die Bildschirmsperre und deren Aufhebung vergessen.
  • Page 36: Ihr Homescreen

    Ihr Homescreen Touchscreen-Tipps Nachfolgend finden Sie einige Tipps zum Navigieren auf dem Tablet. HINWEIS: • Um ein Element auszuwählen, berühren Sie das Symbol in der Mitte. • Drücken Sie nicht zu fest, da der Touchscreen schon auf die leichteste Berührung reagiert. • Berühren Sie mit der Fingerspitze leicht die gewünschte Option. Achten Sie dabei darauf, dass Sie nicht die Tasten für andere Funktionen berühren. Tippen oder berühren Ein einmaliges Antippen von gewünschten Elementen, von Links, Verknüpfungen oder Zeichen auf der Bildschirmtastatur. Berühren und halten Ein Element auf dem Bildschirm berühren und halten, indem Sie den Finger dort so lange liegen lassen, bis eine Aktion ausgeführt wird. Um beispielsweise die verfügbaren Optionen für einen Kontakt zu öffnen, berühren und halten Sie den betreffenden Kontakt in der Kontaktliste, bis sich das Kontextmenü öffnet. Ziehen Ein Element kurz berühren und halten und dann den Finger über den Bildschirm bis zur Zielposition ziehen, ohne abzusetzen. Um Elemente neu zu positionieren, können Sie diese auf die Startseite ziehen.
  • Page 37: Wischen Oder Streichen

    Wischen oder streichen Zum Wischen oder Streichen bewegen Sie Ihren Finger schnell über die Oberfläche des Bildschirms, ohne bei der ersten Berührung zu pausieren (damit Sie nicht versehentlich ein Element ziehen). Beispielsweise können Sie auf diese Weise die Anzeige nach oben oder unten ziehen, um in einer Liste zu blättern, oder von links nach rechts (oder umgekehrt), um durch die einzelnen Seiten des Homescreens zu blättern. Doppelt tippen Um eine Webseite oder eine Karte vergrößert anzuzeigen, tippen Sie diese doppelt an, d. h. 2-mal kurz hintereinander. Um beispielsweise einen Abschnitt einer Webseite auf die Breite des Bildschirms anzupassen, tippen Sie doppelt auf den Abschnitt. Wenn Sie z. B. bei der Anzeige eines Bildes oder einer Landkarte diese(s) einzoomen (vergrößern) oder auszoomen (verkleinern) wollen, tippen Sie das Bild bzw. die Landkarte 2-mal an. Um ein Wort hervorzuheben, tippen Sie doppelt auf das betreffende Wort. Durch Doppeltippen können Sie auch die KnockON-Funktion aktivieren, so dass der Bildschirm ein- bzw. ausgeschaltet wird. Mit den Fingern vergrößern/verkleinern Um bei Verwendung von Browser oder Maps oder beim Durchsuchen von Bildern Bereiche zu vergrößern oder zu verkleinern, über dem Bildschirm mit Zeigefinger und Daumen eine Kneif- oder Spreizbewegung ausführen. Anzeige drehen Bei vielen Apps und Menüs passt sich die Bildschirmanzeige der Lage des Geräts an. Homescreen Wischen Sie einfach mit dem Finger nach links oder rechts, um die Panels anzuzeigen. Sie können jedes einzelne Panel mit Apps, Downloads, Widgets und Hintergrundbildern anpassen.
  • Page 38 Unten auf dem Homescreen befinden sich die Schnelltasten (Quick Keys). Damit haben Sie mit einer einzigen Berührung Zugriff auf die Funktionen, die Sie am häufigsten benutzen. Statusleiste – Zeigt Gerätestatusinformationen an, einschließlich Uhrzeit, Wi-Fi-Signalstärke, Akkustatus und Benachrichtigungssymbole. Appsymbole – Tippen Sie auf ein Symbol (App, Widget, Ordner usw.), um das Element zu öffnen und zu benutzen. Schnelltasten (Quick Keys) – Einmaliges Berühren von Schnelltasten ermöglicht den schnellen Zugriff auf die am häufigsten verwendeten Funktionen. Taste „Dual Window“ – Tippen Sie auf diese Schaltfläche, um den Modus Dual Window aufzurufen. Dadurch wird der Bildschirm in zwei Fenster aufgeteilt, in denen Sie zwei verschiedene Apps gleichzeitig sehen und bedienen können. Taste „Zuletzt verwendet“ – Tippen Sie auf diese Schaltfläche, um die zuletzt verwendeten Apps anzuzeigen. Sie können sie auch berühren und halten, wenn Sie die Menüoptionen in einer App sehen wollen. Home-Taste – Zum Aufrufen des Homescreens (oder für die Rückkehr zum Standardhintergrund des Homescrees, wenn Sie sich bei einer Erweiterung der Hintergründe für Homescreens befinden). Berühren und halten Sie diese Schaltfläche, um Google Now aufzurufen. Zurück-Taste – Für die Rückkehr zum vorherigen Bildschirm. Dient auch zum Schließen von Menüs, Dialogfeldern und der Bildschirmtastatur. Berühren und halten Sie diese Schaltfläche, um die Funktion Dual Window aufzurufen.
  • Page 39: Homescreen Anpassen

    Homescreen anpassen Sie können Ihren Homescreen anpassen, indem Sie ihm Apps, Downloads, Widgets oder Hintergrundbilder hinzufügen. Um Ihr Tablet noch leichter bedienen zu können, fügen Sie dem Homescreen Ihre bevorzugten Apps und Widgets hinzu. Dem Homescreen Elemente hinzufügen: Berühren und halten Sie einen leeren Teil des Homescreens. Tippen Sie auf die Registerkarte Apps oder Widgets. Ziehen Sie das gewünschte Objekt an die gewünschte Stelle, und lassen Sie dann den Bildschirm los. So entfernen Sie ein Element vom Homescreen: Berühren und halten Sie das Symbol, das Sie entfernen möchten, ziehen Sie es zu , und nehmen Sie dann den Finger weg. TIPP! Um das Symbol einer App auf dem App-Bildschirm eines Homescreens hinzuzufügen, berühren und halten Sie das Symbol, das Sie hinzufügen möchten, und ziehen es an die gewünschte Stelle. TIPP! Sie können mehrere Appsymbole in einem Ordner ablegen. Ziehen Sie auf dem Homescreen ein Appsymbol über ein anderes, um einen Ordner zu erstellen.
  • Page 40: Apps Öffnen, Umschalten Und Beenden

    Apps öffnen, umschalten und beenden Tippen Sie auf , um Ihre vor kurzem verwendeten Apps anzuzeigen. Sie können mehrere Apps gleichzeitig ausführen und dann zwischen den geöffneten Apps umschalten. Sie können auch die Ausführung von Apps manuell beenden. Die Funktion Dual Window verwenden Durch die Funktion Dual Window wird der Bildschirm in zwei Bereiche aufgeteilt, um Multitasking und Drag & Drop-Interaktionen zu ermöglichen sowie das automatische Verbinden und Ausführen kürzlich verwendeter Apps. Um den Bildschirm zu teilen, die Schaltfläche berühren, oder berühren und halten, bis die Liste der Apps angezeigt wird. Das entsprechende App-Symbol berühren und in den gewünschten Bereich ziehen. Auf tippen, um die folgende Optionen anzuzeigen. Sie können auch an den Reitern ziehen, wenn Sie die Größe der Fenster ändern wollen.
  • Page 41: So Passen Sie App-Symbole Auf Dem Homescreen An

    Beide Bildschirme tauschen Appliste anzeigen Zur Vollbildansicht wechseln Aktuelle App schließen Die Funktion Dual Window deaktivieren > Dual Window tippen. Auf > Apps > Einstellungen Auf den Schalter Dual Window tippen, um diese Funktion auf AUS zu schalten. TIPP! Sie können gleichzeitig zwei Internet-Apps benutzen. So passen Sie App-Symbole auf dem Homescreen an: Sie können jedes Appsymbol anpassen, indem Sie es durch ein Bild aus der Galerie ersetzen. Berühren und halten Sie ein Appsymbol, bis es von seiner ursprünglichen Position bewegt werden kann. Wenn Sie es anschließend wieder loslassen, wird das Symbol für Bearbeiten oben rechts in der App angezeigt. Tippen Sie erneut auf das App-Symbol, wählen Sie das gewünschte Symboldesign, und tippen Sie auf OK. Sie können auch auf Neu hinzufügen tippen, die Größe des Symbols anpassen und ein Bild in der Galerie auswählen.
  • Page 42 Homescreen-Panels einsehen • Wischen Sie mit dem Finger nach links oder rechts über die Startseite. • Um die Minipanel-Ansicht anzuzeigen, auf dem Homescreen mit den Fingern eine Kneifbewegung vollziehen und dann auf das Homescreen-Panel tippen, das Sie sehen wollen.
  • Page 43: Schnellzugriff

    Schnellzugriff Um die Elemente im Schnellzugriff zu sehen, den Bereich der Fronttasten an einer beliebigen Stelle berühren und nach oben ziehen. Folgende Optionen stehen zur Verfügung: Google Now. Benachrichtigungen Benachrichtigungen informieren Sie über den Eingang neuer Nachrichten, über Kalendertermine und über Alarme sowie über laufende Vorgänge wie Downloads. Im Benachrichtigungs-Panel werden der aktuelle Status des Tablet und anstehende Benachrichtigungen angezeigt. Wenn eine Benachrichtigung eingeht, wird das entsprechende Symbol oben auf dem Bildschirm angezeigt. Symbole für anstehende Benachrichtigungen werden links angezeigt, und Systemsymbole z. B. für Wi-Fi oder Akkustand rechts. Anstehende Benachrichtigungen Systembenachrichtigungen...
  • Page 44: Auf Benachrichtigungen Zugreifen

    Auf Benachrichtigungen zugreifen Um das Benachrichtigungs-Panel zu öffnen und um auf Benachrichtigungen zugreifen zu können, die Statusleiste nach unten ziehen. Zum Schließen des Benachrichtigungs-Panels die Leiste unten auf dem Bildschirm nach oben ziehen. Leiste Schnelleinstellungen – Um durch die Liste zu scrollen, nach rechts oder links wischen. Um eine Funktion zu aktivieren/deaktivieren, auf das entsprechende Symbol tippen. QSlide-Apps – Wenn Sie auf eine QSlide- App tippen, wird sie als kleines Fenster auf dem Bildschirm geöffnet. Um QSlide-Apps zu entfernen, hinzuzufügen oder neu zu anzuordnen, tippen Sie auf Um die Helligkeit des Bildschirms / Lautstärke anzupassen, den Regler nach links bzw. rechts ziehen. Taste Löschen – Um die Liste ereignisbezogener Benachrichtigungen zu löschen, tippen Sie hier. Tippen Sie auf eine Benachrichtigung, wenn Sie sie öffnen wollen Schnelleinstellungen im Benachrichtigungs-Panel Verwenden Sie Schnelleinstellungen, wenn Sie schnell bei Funktionen wie Wi-Fi (WLAN) umschalten wollen. Die Schnelleinstellungen befinden sich oben im Benachrichtigungs-Panel.
  • Page 45: So Ordnen Sie Elemente Der Schnelleinstellungen Auf Dem Benachrichtigungs-Panel Neu An

    HINWEIS: Berühren und halten Sie ein Symbol auf der Leiste der Schnelleinstellungen, um das Einstellungsmenü der betreffenden Funktion aufzurufen. So ordnen Sie Elemente der Schnelleinstellungen auf dem Benachrichtigungs-Panel neu an Öffnen Sie das Benachrichtigungs-Panel, wischen Sie die Schnelleinstellungen nach links und tippen Sie auf . Um Elemente neu anzuordnen, an die gewünschte Stelle ziehen. Um weitere Symbole hinzuzufügen, die gewünschten Funktionen mit einem Häkchen versehen. QSlide-Apps auf dem Benachrichtigungs-Panel QSlide-Apps werden auf dem Benachrichtigungs-Panel in einer Leiste unter der Leiste für Schnelleinstellungen angezeigt. Über diese Symbole ist es möglich, schnell und bequem auf demselben Bildschirm per Multitasking zwischen geöffneten Apps umzuschalten (ähnlich wie die Bild-in-Bild- Funktion bei einem TV-Gerät). Durch QSlide wird ein kleines Appfenster auf dem Bildschirm geöffnet. Dieses können Sie verschieben, in der Größe ändern oder transparent machen. HINWEIS: Sie können die Leiste der QSlide-Apps entfernen, indem Sie in der Leiste der Schnelleinstellungen auf das QSlide-Symbol tippen.
  • Page 46: Qslide-Apps Verwenden

    QSlide-Apps verwenden Um eine QSlide-App zu aktivieren, tippen Sie auf dessen Symbol in der Leiste. Nach Aktivierung wird durch die QSlide-Funktion die App in einem Fenster geöffnet, das sich im Vordergrund befindet. Sie können auf weitere Apps im Hintergrund zugreifen. Sie können bis zu zwei QSlide-Fenster gleichzeitig geöffnet haben. Anzeigesymbole auf der Statusleiste Die in der folgenden Tabelle aufgeführten Symbole gehören zu den häufigsten. Symbol Beschreibung Flugmodus Verbindungsaufbau zu einem Wi-Fi-Netzwerk Headset angeschlossen Bluetooth ist aktiv Systemwarnung Vibrationsmodus ist aktiviert Der Lautlos-Modus ist aktiviert Akku vollständig geladen Akku wird geladen Freigabe von Inhalten ist aktiviert...
  • Page 47: Mehrere Benutzer

    Daten werden heruntergeladen Daten werden hochgeladen Wecker ist eingestellt GPS ist eingeschaltet Daten werden synchronisiert Neue Gmail-Nachricht Neue Hangout-Nachricht Es wird gerade ein Titel abgespielt Das Tablet ist über ein USB-Kabel an einen PC angeschlossen Energiesparmodus eingeschaltet Mehrere Benutzer Für jedes Tablet kann nur eine Besitzer-ID erstellt werden, es können jedoch mehrere Benutzer-IDs hinzugefügt werden, so dass sich andere Personen anmelden und das Tablet verwenden können. Jeder Benutzer kann seine eigenen Tablet-Einstellungen konfigurieren, seinen eigenen Speicherplatz verwenden und verfügt über seine eigenen Berechtigungen zum Aktualisieren von Apps. Berechtigungen des Tablet-Besitzers • Nur nach Anmeldung mit der Tablet-Besitzer-ID kann eine neue Benutzer- ID für die Anmeldung hinzugefügt oder entfernt werden.
  • Page 48 Nutzungsbeschränkungen bei mehreren Benutzern des Tablets • Jeder Benutzer teilt sich mit den anderen Benutzer denselben Akku, den internen Speicher und die Möglichkeit der Datennutzung. • Die von einem Benutzer festgelegte Spracheinstellung gilt auch für alle anderen Benutzer. • Jeder Benutzer kann nur seine eigenen Daten und seine eigenen Inhalte konfigurieren (z. B. Einstellungen des Startbildschirms, Ton-Einstellungen, etc.). • Jeder Benutzer kann aktualisierte Appberechtigungen im Namen aller anderen Nutzer akzeptieren. • Nachrichten und geplante Kalendertermine werden nur an den Benutzer mit der entsprechenden Benutzer-ID gesendet. • Wenn ein Benutzer ein Dokument mit Mobile Print druckt, bleibt der Druckauftrag auch bei Benutzerwechsel, d. h. bei Wechsel der Benutzer-ID, bestehen. • Datenübertragungen, Downloads, die Wiedergabe von Multimedia-Dateien und Kommunikationsdienste werden beendet, wenn der Benutzer bzw. dessen ID wechselt. Die Datenübertragung über den Play Store kann dagegen selbst bei einer Änderung der Benutzer-ID fortgesetzt werden. Auf dem Tablet einen neuen Benutzer hinzufügen Auf dem Homescreen auf Apps > Einstellungen > Benutzer > Benutzer hinzufügen. tippen. Die gewünschte Art von Benutzer auswählen. • Benutzer: Ein Benutzer verfügt über seine eigenen Apps und Inhalte. • Eingeschränkter Benutzer: Sie können den Zugriff auf Apps und Inhalte Ihres Kontos beschränken.
  • Page 49: Qslide

    Der Setup-Assistent wird angezeigt und hilft dabei, einen neuen Benutzer hinzuzufügen. Auf Jetzt einrichten tippen. • Nachdem eine neuer Benutzer hinzugefügt ist, muss dieser nach seiner ersten Anmeldung den Einrichtungsvorgang durchlaufen. Zwischen Benutzern wechseln Ziehen Sie die Statusleiste am oberen Bildschirmrand nach unten. Tippen Sie auf das Benutzersymbol , um das Panel für den Benutzerwechsel anzuzeigen. Tippen Sie auf eines der Benutzersymbole auf dem Bildschirm. Wählen Sie aus dem Besitzer oder einem anderen Benutzernamen, die Sie erstellt haben. QSlide Mit der QSlide-Funktion können Sie mehrere überlappende Fenster auf dem Bildschirm anzeigen und damit die Vorteile von Multitasking nutzen. QSlide- Fenster können von der QSlide-Appleiste auf dem Benachrichtigungs-Panel geöffnet werden, oder direkt von der App aus, die die QSlide-Funktion unterstützt. Öffnen Sie das Benachrichtigungs- Panel und tippen Sie im Abschnitt QSlide Apps auf die gewünschte App. ODER...
  • Page 50: Qslide Verwenden

    Während Sie in einer App sind, die QSlide unterstützt, tippen Sie auf . Die Funktion wird von nun an als kleines Fenster auf dem Bildschirm angezeigt. QSlide verwenden Die QSlide-Funktion öffnet die zugehörige App in einem Fenster, das sich im Vordergrund befindet. Sie können auf andere Apps im Hintergrund zugreifen. Das Fenster wird kontinuierlich angezeigt, bis Sie es schließen. Tippen, um QSlide auszuführen. Tippen, um QSlide zu beenden und zur Vollbildanzeige zurückzukehren. Tippen, um die Transparenz einzustellen. Tippen, um QSlide zu beenden. Tippen, um die Größe anzupassen.
  • Page 51: Screenshot Aufnehmen

    HINWEIS: Die QSlide-Funktion unterstützt zwei Fenster gleichzeitig. QSlide unterstützt nur die folgenden Apps: Video, Browser, Kalender, E-Mail, Dateimanager und Rechner. Screenshot aufnehmen Um einen Screenshot des aktuellen Bildschirminhalts zu erstellen, ungefähr 2 Sekunden lang die Tasten Lautstärke Nach unten und Ein-/Aus-/ Sperrtaste gleichzeitig drücken und halten. Um das erfasste Bild zu sehen, gehen Sie zu Apps > Galerie > Ordner Screenshots. Mit QuickMemo+ einen Screenshot erfassen Auf dem zu erfassenden Bildschirm ziehen Sie die Statusleiste nach unten und wählen QuickMemo+ ODER Beide Lautstärke-Tasten gleichzeitig drücken und halten. Mit Capture Plus einen Screenshot des Browsers erfassen Mit dieser Funktion ist es möglich, im Standard-Internetbrowser einen Bildschirmausschnitt zu erfassen. Die App Internet öffnen und zu der Seite navigieren, von der Sie einen Screenshot machen wollen. > Capture Plus tippen. Auf die Menütaste Die blaue Box auf die gewünschte Größe bringen und dann auf Speichern tippen. Der ausgewählte Bereich wird in der Galerie im Ordner Capture...
  • Page 52: Methoden Zur Eingabe Von Text

    Um die Feststellfunktion Um in einem zu aktivieren, damit Nachrichtenfeld eine neue alle Buchstaben Zeile zu erzeugen, auf großgeschrieben werden, diese Taste tippen. doppelt auf die Taste tippen. Tippen Sie, um einen der gewünschten Tastaturtypen zu Um die Tastatur auf wählen. Zahlen und Symbole umzuschalten, auf diese Um ein Leerzeichen Taste tippen. einzufügen, auf diese Taste tippen. Tippen Sie darauf, Antippen, um die Einstellungen der LG um die Tastatursprache Tastatur aufzurufen. Um auf die Zwischenablage auszuwählen. zuzugreifen, dieses Symbol berühren und halten. Durch Steuerung per Gestik das vorgeschlagene Wort eingeben Beim Eingeben von Text mit der Tastatur werden passende Wörter vorgeschlagen. Um den auf der linken Seite angezeigten Vorschlag zu übernehmen, darauf tippen oder auf der linken Seite der Tastatur nach oben wischen. Um den auf der rechten Seite angezeigten Vorschlag zu übernehmen, darauf tippen oder auf der rechten Seite der Tastatur nach oben wischen.
  • Page 53: Sonderzeichen Eingeben

    Per Geste die Tastatur teilen Mit der Funktion „Geteilte Tastatur“ können Sie mit beiden Händen gleichzeitig tippen. Die beiden Hälften der Tastatur ziehen sich jeweils nach links bzw. rechts auf dem Bildschirm zurück. Die Höhe der Tastatur ändern Sie können die Höhe der Tastatur ändern, so dass Sie mehr auf dem Bildschirm sehen oder die Tastatur leichter bedienen können. • Tippen Sie auf > Tastaturhöhe und -Layout > Tastaturhöhe im Hochformat > Das Symbol antippen und ziehen , um die Höhe der Tastatur anzupassen. Die Tasten der unteren Reihe wechseln • Tippen Sie auf > Tastaturhöhe und -Layout > QWERTZ-Tastatur- Layout > Tasten antippen und ziehen, um sie entweder hinzuzufügen, zu löschen oder um ihre Anordnung zu ändern. HINWEIS: Nur QWERTY-, QWERTZ-, AZERTY-Tastaturen können angepasst werden. In einigen Sprachen wird diese Funktion nicht unterstützt. Sonderzeichen eingeben Mit der Bildschirmtastatur können Sie Sonderzeichen eingeben (z. B. „á“).
  • Page 54: Google-Konto Einrichten

    Google-Konto einrichten Wenn Sie das Tablet zum ersten Mal einschalten, haben Sie die Möglichkeit, das Netzwerk zu aktivieren, sich bei Ihrem Google-Konto anzumelden und auszuwählen, wie Sie bestimmte Google-Dienste verwenden möchten. So richten Sie Ihr Google-Konto ein • Melden Sie sich über den Einrichtungsbildschirm bei einem Google-Konto ODER • Tippen Sie auf dem Homescreen auf Apps > Registerkarte Apps > Einstellungen > Konten & Synchronisation > Konto hinzufügen > Google. Wenn Sie bereits ein Google-Konto haben, geben Sie Ihre E-Mail-Adresse ein, und tippen Sie auf WEITER. Berühren Sie anderenfalls ODER EIN NEUES KONTO ERSTELLEN, und geben Sie die erforderlichen Daten ein, um ein neues Google-Konto einzurichten. Sobald Sie Ihr Google-Konto mit dem Tablet eingerichtet haben, synchronisiert sich Ihr Tablet automatisch mit Ihrem Google-Konto im Internet. Ihre Kontakte, Google Mail-Nachrichten, Kalendertermine sowie weitere Informationen dieser Apps und Web-Dienste werden mit den entsprechenden Daten auf Ihrem Tablet synchronisiert. (Dies hängt von Ihren Synchronisierungseinstellungen ab.) Nach dem Einrichten Ihres Kontos können Sie Gmail™ verwenden und die Google-Dienste auf Ihrem Tablet nutzen.
  • Page 55: Mit Netzwerken Und Geräten Verbinden

    Mit Netzwerken und Geräten verbinden Wi-Fi Mit der Wi-Fi-Funktion (oder WLAN-Funktion) können Sie eine schnelle Internetverbindung aufbauen, wenn Sie sich in Reichweite eines drahtlosen Zugangspunkts (AP - Access Point) befinden. Dank Wi-Fi können Sie einen drahtlosen Internetzugriff verwenden, ohne dass weitere Gebühren anfallen. Verbindung zu Wi-Fi-Netzwerken herstellen Um auf Ihrem Tablet Wi-Fi zu nutzen, greifen Sie auf einen drahtlosen Zugangspunkt („Hotspot“) zu. Manche Zugangspunkte sind öffentlich zugänglich, und Sie können problemlos eine Verbindung zu ihnen herstellen. Andere sind versteckt oder verwenden Sicherheitsfunktionen; Sie müssen das Tablet entsprechend konfigurieren, um eine Verbindung zu diesen herzustellen. Deaktivieren Sie Wi-Fi, wenn Sie es nicht benötigen, um die Akkulaufzeit zu erhöhen. Wi-Fi aktivieren und eine Verbindung zu einem Wi-Fi-Netzwerk herstellen Auf dem Homescreen auf Apps > Registerkarte Apps > Einstellungen > Wi-Fi tippen. Auf tippen, um Wi-Fi einzuschalten, um dann nach verfügbaren Wi-Fi-Netzwerken zu suchen. Tippen Sie auf Suchen, um die in Reichweite befindlichen Wi-Fi- Netzwerke zu suchen und aufzulisten. • Gesicherte Netzwerke werden durch ein Schlosssymbol gekennzeichnet.
  • Page 56: Bluetooth

    Um eine Verbindung zu einem Netzwerk herzustellen, den betreffenden Netzwerkeintrag in der Liste berühren. • Wenn das Netzwerk gesichert ist, werden Sie aufgefordert, ein Passwort oder andere Zugangsdaten einzugeben. (Wenden Sie sich wegen der Details an Ihren Netzwerkadministrator.) Auf der Statusleiste werden Symbole angezeigt, die den Wi-Fi-Status signalisieren. Bluetooth Sie können Daten per Bluetooth übertragen, indem Sie eine entsprechende App ausführen, aber nicht vom Bluetooth-Menü aus, wie es bei den meisten Mobiltelefonen und Tablets üblich ist. HINWEIS: • LG übernimmt keine Verantwortung für den Verlust, Abfang oder Missbrauch von Daten, die über die drahtlose Bluetooth-Funktion gesendet oder empfangen werden. • Stellen Sie immer sicher, dass Sie Daten über Geräte austauschen und empfangen, die vertrauenswürdig und abgesichert sind. Falls es Hindernisse zwischen den Geräten gibt, muss der Abstand zwischen den Geräten verringert werden. • Einige Geräte, insbesondere solche, die nicht von Bluetooth SIG getestete oder zugelassen sind, sind mit Ihrem Gerät möglicherweise nicht kompatibel.
  • Page 57: Bluetooth Aktivieren Und Das Tablet Mit Einem Bluetooth-Gerät Koppeln

    Bluetooth aktivieren und das Tablet mit einem Bluetooth-Gerät koppeln Sie müssen Ihr Gerät mit einem anderen Gerät koppeln, bevor Sie die Verbindung herstellen können. Auf dem Homescreen auf Apps > Registerkarte Apps > Einstellungen > Bluetooth tippen. Auf den Bluetooth-Schalter tippen, um die Funktion einzuschalten. Tippen Sie auf das Kontrollkästchen neben dem Namen des Tablets, um Ihr Tablet für andere Bluetooth-Geräte sichtbar zu machen. HINWEIS: Um den Zeitraum einzustellen, in dem das Gerät sichtbar ist, tippen Sie auf die Menütaste > Sichtbarkeit einst.. Es wird eine Liste der verfügbaren Geräte angezeigt. Tippen Sie auf das Gerät in der Liste, mit dem das Tablet gekoppelt werden soll. HINWEIS: Je nach Gerätetyp müssen Sie möglicherweise einen passenden Code eingeben oder diesen bestätigen, oder die Geräte nehmen automatisch eine Kopplung vor. Sobald die Kopplung erfolgreich ist, ist Ihr Tablet mit dem anderen Gerät verbunden. HINWEIS: Das Profil „Freisprechen“ wird von Ihrem Tablet nicht unterstützt. Darum stehen bei diesem Gerät Anruffunktionen im Zusammenhang mit Zubehörgeräten wie Bluetooth-Headsets oder Bluetooth-fähigen Geräten möglicherweise nicht zur Verfügung.
  • Page 58: Mit Der Bluetooth-Funktion Daten Senden

    Mit der Bluetooth-Funktion Daten senden Das Element öffnen und auf tippen. ODER Das Element berühren und halten und Weiterleiten wählen. ODER Das Element öffnen und auf die Menütaste > Weiterleiten tippen. Auf Bluetooth tippen, um über Bluetooth Inhalte gemeinsam zu nutzen. HINWEIS: Die Methode zur Auswahl einer Option variiert je nach Datentyp. Nach dem Bluetooth-Gerät suchen, mit dem Ihr Tablet gekoppelt werden soll. Mit der Bluetooth-Funktion Daten empfangen Informieren Sie sich in der Betriebsanleitung zum Bluetooth-Gerät, wie Sie mit diesem Dateien zu Ihrem Tablet senden. Die beiden Geräte müssen miteinander gekoppelt sein, und bei beiden muss die Bluetooth-Funktion eingeschaltet sein. Um die Dateien anzunehmen, koppeln Sie die Geräte, und tippen Sie auf Akzeptieren, wenn Sie eine Bluetooth-Autorisierungsaufforderung erhalten. SmartShare Die SmartShare-Funktionen können Sie problemlos in den Apps Galerie, Musik und anderen nutzen.
  • Page 59: Inhalte Auf Verschiedenen Geräten Wiedergeben

    Inhalte auf verschiedenen Geräten wiedergeben Sie können die Inhalte Ihres Tablets mit einer Vielzahl von Geräten gemeinsam nutzen. Tippen Sie auf oder auf > SmartShare, um den Inhalt in den Apps Galerie, Musik und POLARIS Office 5 freizugeben. Wiedergeben/Senden Play – Sie können die Inhalte über TV, Bluetooth-Lautsprecher und andere Geräte wiedergeben. Beam – Sie können die Inhalte an Geräte mit Bluetooth- und SmartShare Beam-Unterstützung senden. • SmartShare Beam – Ermöglicht, Inhalte schnell über Wi-Fi Direct zu übertragen. < Play > < Beam > Inhalte von Geräten in der Nähe wiedergeben Sie können die Inhalte auf Geräten in der Umgebung (d. h. PC, NAS, Mobilgeräte) in den Apps Galerie, Musik und Videos wiedergeben. Geräte verbinden Verbinden Sie Ihr Gerät und andere von DLNA unterstützte Geräte mit demselben Wi-Fi-Netzwerk.
  • Page 60: Nach Anderen Geräten Suchen

    Nach anderen Geräten suchen Tippen Sie auf Geräte in der Umgebung, um die von DLNA unterstützten Geräte anzuzeigen. Verbinden Sie das Tablet mit dem Gerät, um dessen Inhalte anzuzeigen. Inhalte aus der Cloud wiedergeben Sie können Inhalte aus der Cloud (z.B. Dropbox) in den Apps Galerie und Musik wiedergeben. Verwenden der Cloud HINWEIS: Die jeweils unterstützten Funktionen sind von der Cloud abhängig. Je nach Cloud kann der Datenabruf einige Zeit in Anspruch nehmen. Wählen Sie in den Apps Galerie oder Musik die Option für die Cloud aus. Wählen Sie die gewünschte Cloud aus, und melden Sie sich an. Nach der Anmeldung können Sie die Inhalte der Cloud nutzen. Legen Sie in den Cloud-Einstellungen die App fest, die die Cloud verwenden soll. QPair Wenn Sie Ihr Tablet und Ihr Mobiltelefon via QPair miteinander verbinden, können Sie eingehende Anrufe, Nachrichten und Benachrichtigungen aus sozialen Netzwerken zwischen Tablet und Mobiltelefon synchronisieren.
  • Page 61 Führen Sie zunächst auf Ihrem Tablet QPair aus und tippen Sie auf Anfangseinstellung > OK > Starten, und vollziehen Sie dann dieselben Schritte bei Ihrem Mobiltelefon. TIPP! Möglicherweise ist QPair auf Ihrem Mobiltelefon nicht vorinstalliert. In diesem Fall gehen Sie zum Google Play Store, suchen nach QPair und installieren diese App. HINWEIS: • QPair kann auf Mobiltelefonen unter Android 4.1 oder höher ausgeführt werden. Je nach Modell Ihres Mobiltelefons können einige Funktionen eingeschränkt sein. • Da QPair die Bluetooth-Funktion verwendet, kann die Funktionsweise beeinträchtigt werden, wenn Sie die Bluetooth-Einstellungen ändern, während QPair verwendet wird. Die Bluetooth-Verbindung wird automatisch eingeschaltet.
  • Page 62 QPair-Funktionen Anrufbenachrichtigung – Sendet dem Tablet eine Meldung, wenn beim Mobiltelefon ein Anruf eingeht. In der Meldung wird die Nummer des Anrufers angezeigt, und Sie erhalten die Möglichkeit, den Anruf anzunehmen oder die Entgegennahme des Anrufs abzulehnen. Sie können auch Anrufeinstellungen ändern, wie den Rufton, die Ruftonlautstärke und den Rufton mit Vibration, oder eine Ablehnungsnachricht senden, wenn ein Anruf eingeht. HINWEIS: Sie können von Bluetooth-Technologie unterstützte Anrufe nur entgegennehmen. Sie können keine ausgehenden Anrufe über die QPair- Funktion mit dem Tablet tätigen. Nachricht Benachrichtigung – Sendet dem Tablet eine Meldung, wenn beim Mobiltelefon eine Nachricht eingeht. Sie können die Nachrichteneinstellungen, wie Popup-Nachrichten, Nachrichtenvorschau, Benachrichtigungston und Benachrichtigungsvibration, auch ändern. SNS-Benachrichtigung – Wenn bei Ihrem Mobiltelefon eine Benachrichtigung aus einem sozialen Netzwerk eingeht, wird das in der Statusleiste Ihres Tablets angezeigt. HINWEIS: Um diese Funktion zu aktivieren, schalten Sie bei Ihrem Mobiltelefon die Option QPair Benachrichtigungen aus sozialen Netzwerken ein (Einstellungen > Bedienungshilfen > QPair Benachrichtigungen aus sozialen Netzwerken). Diese Funktion ermöglicht es, über Benachrichtigungen aus sozialen Netzwerken über das Tablet informiert zu werden.
  • Page 63: Pc-Anschluss Per Usb-Kabel

    QuickMemo+ Übertragung – Speichert Ihr aktuelles QuickMemo+ in der Galerie des Tablets und synchronisiert dann die Tablet-Galerie mit der des Mobiltelefons. Internet über Telefon – Verbindet Ihr Tablet automatisch über Ihr Mobiltelefon (als Wi-Fi-Hotspot) mit dem Internet. Bei Nutzung dieser Funktion können Gebühren anfallen. Befindet sich ein vertrauter Wi-Fi- Hotspot in Reichweite des Mobiltelefons, verbindet sich das Mobiltelefon automatisch mit diesem, so dass die Datenübertragung über diese Verbindung läuft. PC-Anschluss per USB-Kabel Sie können Ihr Tablet an Ihren PC anschließen, um das Tablet aufzuladen und um Dateien zu übertragen, in beide Richtungen. Musik, Fotos und Videos mit dem Modus „Mediengerät (MTP)“ übertragen Schließen Sie das Tablet über ein USB-Kabel am PC an. Wenn Sie den LG Android Platform Driver nicht auf Ihrem PC installiert haben, müssen Sie die Einstellungen manuell ändern. Um die Einstellungen zu ändern, schieben Sie die Statusleiste nach unten, und tippen Sie auf den aktuellen USB-Verbindungsmodus > Mediengerät (MTP). Sie können nun die Massenspeicherinhalte auf dem PC anzeigen und die Dateien übertragen. HINWEIS: Wenn Sie die PC-Verbindungseinstellungen ändern möchten, schieben Sie die Statusleiste nach unten, und wählen Sie die Option USB- Verbindungsmodus. Diese Einstellung ist nur in der Statusleiste sichtbar, wenn ein USB-Kabel an das Tablet angeschlossen wird.
  • Page 64: Synchronisieren Des Geräts Mit Windows Media Player

    Synchronisieren des Geräts mit Windows Media Player Stellen Sie sicher, dass der Windows Media Player auf Ihrem PC installiert ist. Verwenden Sie das USB-Kabel, um das Tablet an den PC anzuschließen, auf dem der Windows Media Player installiert wurde. Wählen Sie die Option Mediengerät (MTP). Daraufhin wird beim PC ein Popup-Fenster angezeigt. Wählen Sie die Option Windows Media Player, um die Musikdateien zu synchronisieren. Geben Sie den Namen Ihres Geräts im Popup-Fenster ein, oder bearbeiten Sie ihn (falls erforderlich). Wählen Sie die gewünschten Musikdateien aus, und ziehen Sie sie in die Synchronisierungsliste. Beginnen Sie die Synchronisierung. • Folgende Voraussetzungen müssen für die Synchronisierung mit Windows Media Player erfüllt sein. Elemente Voraussetzung Betriebssystem Microsoft Windows XP SP2, Vista oder höher Version von Windows Windows Media Player 10 oder höher Media Player • Wenn Sie eine ältere Version als Windows Media Player 10 installiert haben, installieren Sie die Version 10 oder höher.
  • Page 65: Pc-Verbindungen Mit Einem Usb-Kabel Für Mac Os X-Benutzer

    PC-Verbindungen mit einem USB-Kabel für Mac OS X-Benutzer Sie können Medieninhalte vom Tablet zu Ihrem Mac OS X und zurück übertragen, indem Sie das Programm Android File Transfer einrichten. Laden Sie das Programm Android File Transfer von der Website android.com für Mac-Benutzer (http://www.android.com/filetransfer/) herunter, und installieren Sie es. Schließen Sie das Tablet an den Computer an, und doppelklicken Sie auf die Anwendung AFT (Android File Transfer), um sie zu starten. Sie können die Medieninhalte anzeigen und Mediendateien per Drag & Drop in das Tablet oder aus dem Tablet (oder Computer) verschieben.
  • Page 66: Kontakte

    Kontakte Sie können auf dem Tablet Kontakte hinzufügen und diese mit den Kontakten in Ihrem Google-Konto oder anderen Konten synchronisieren, sofern diese das Synchronisieren von Kontakten unterstützen. Einen Kontakt suchen Auf dem Homescreen tippen Sie auf Kontakte um Ihre Kontaktliste zu öffnen. Tippen Sie auf das Suchfeld Kontakte und geben Sie den Namen des Kontakts ein. Sie können auch einen Buchstaben auf der linken Seite des Bildschirms eingeben, um Namen, die mit dem gewünschten Buchstaben beginnen, aufzurufen. Neuen Kontakt hinzufügen Auf dem Homescreen auf Kontakte tippen. Auf Neuer Kontakt tippen. Das gewünschte Konto auswählen (falls zutreffend). Wenn Sie dem neuen Kontakt ein Bild hinzufügen möchten, auf tippen. Sie können auswählen unter Foto aufnehmen, um mit der Kamera ein Bild aufzunehmen, oder Aus Galerie auswählen. In diesem Fall suchen Sie nach einem Bild und wählen es aus. Auf tippen, wenn Sie genauere Angaben zum Namen eingeben wollen. Die Details zum Kontakt eingeben. Auf Speichern tippen.
  • Page 67: Bevorzugte Kontakte

    Bevorzugte Kontakte Sie können häufig angerufene Kontakte als Favoriten einordnen. So fügen Sie einen Kontakt Ihren Favoriten hinzu Tippen Sie auf dem Homescreen auf Kontakte , um die Kontakte zu öffnen. Tippen Sie auf einen Kontakt, um dessen Details anzuzeigen. Tippen Sie auf den Stern rechts neben dem Namen des Kontakts. Der Stern erhält eine goldene Farbe, und der Kontakt wird zu Ihren Favoriten hinzugefügt. So entfernen Sie einen Kontakt aus Ihrer Favoritenliste Tippen Sie auf dem Homescreen auf Kontakte , um die Kontakte zu öffnen. Tippen Sie auf die Registerkarte Favoriten, um Ihre beliebtesten Kontakte aufzurufen. Tippen Sie auf einen Kontakt, um dessen Details anzuzeigen. Tippen Sie auf den goldenen Stern rechts neben dem Namen des Kontakts. Der Stern erhält eine graue Farbe, und der Kontakt wird aus Ihren Favoriten entfernt. Eine Gruppe erstellen Tippen Sie auf dem Homescreen auf Kontakte , um die Kontakte zu öffnen.
  • Page 68 Geben Sie einen Namen für die neue Gruppe ein. • Tippen Sie auf Fügen Sie Mitglieder hinzu, um Kontakt-Einträge Ihrer neuen Gruppe hinzuzufügen. • Tippen Sie auf das Feld KONTO, um das Konto zu wechseln, unter dem die neue Gruppe gespeichert werden soll. Berühren Sie Speichern, um die Gruppe zu speichern. HINWEIS: Wenn Sie eine Gruppe löschen, bleiben die einzelnen Kontakte dieser Gruppe erhalten. Sie bleiben in Ihren Kontakten gespeichert.
  • Page 69: E-Mail

    E-Mail Mit der App E-Mail können Sie E-Mail-Nachrichten lesen, die Sie über E-Mail-Dienste wie Yahoo!, MSN und AOL erhalten haben. Die E-Mail-App unterstützt die folgenden Kontotypen: POP3, IMAP und Exchange. Die erforderlichen Kontoeinstellungen erhalten Sie bei Ihrem Dienstanbieter oder Systemadministrator. E-Mail-Konto verwalten Tippen Sie auf dem Homescreen auf E-Mail . Beim erstmaligen Öffnen der App E-Mail wird ein Einrichtungsassistent angezeigt, der Ihnen beim Einrichten eines E-Mail-Kontos hilft. Nach der Ersteinrichtung wird der Inhalt Ihres Posteingangs angezeigt. Wenn Sie mehrere Konten hinzugefügt haben, können Sie zwischen Konten wechseln. So fügen Sie ein weiteres E-Mail-Konto hinzu: • Öffnen Sie die App E-Mail und tippen Sie auf die Menütaste > Einstellungen > Konto hinzufügen. So wechseln Sie zwischen Konten: Wenn Sie mehr als ein Konto hinzugefügt haben, können Sie leicht zwischen den Konten wechseln. Von einem beliebigen E-Mail-Ordner aus tippen Sie auf das aktuelle Konto (am oberen Bildschirmrand) und dann auf das Konto, auf das Sie zugreifen möchten.
  • Page 70: Arbeiten Mit Konto-Ordnern

    Ändern der allgemeinen Einstellungen für E-Mails: Öffnen Sie die E-Mail-App und tippen Sie auf die Menütaste > Einstellungen > Allgemeine Einstellungen, um Einstellungen zu konfigurieren, die für alle Ihre Konten gelten werden sollen. Um die Einstellungen eines bestimmten Kontos zu konfigurieren, tippen Sie auf dieses Konto. So löschen Sie ein E-Mail-Konto: • Öffnen Sie die App E-Mail und tippen Sie auf die Menütaste > Einstellungen > Menütaste > Konto entfernen > das Konto berühren, das Sie löschen möchten > Entfernen > Ja. Arbeiten mit Konto-Ordnern Öffnen Sie die App E-Mail und tippen Sie auf die Menütaste und wählen Sie Ordner. Jedes Konto besitzt die Ordner Eingang, Ausgang, Gesendet und Entwürfe. Abhängig von den Funktionen, die vom Dienstanbieter Ihres Kontos angeboten werden, besitzen Sie möglicherweise noch weitere Ordner. E-Mail-Nachrichten verfassen und senden Tippen Sie in der E-Mail-App auf Schreiben Geben Sie die Adresse des Empfängers ein, der die Nachricht erhalten soll. Während der Texteingabe werden passende Adressen aus Ihrer Kontaktliste zur Auswahl angeboten. Bei Angabe mehrerer Adressen müssen diese jeweils durch ein Semikolon getrennt werden.
  • Page 71: E-Mails Empfangen

    Geben Sie den Betreff und die Nachricht ein. Tippen Sie auf Senden , um die Nachricht zu senden. Wenn Sie mit keinem Netzwerk verbunden sind, z. B. wenn Sie im Flugmodus arbeiten, werden die Nachrichten im Postausgang gespeichert, bis Sie wieder eine Verbindung mit einem Netzwerk herstellen. Wenn der Postausgang ausstehende Nachrichten enthält, wird er auf dem Bildschirm „Konten“ angezeigt. E-Mails empfangen Wenn eine neue E-Mail im Posteingang eingeht, werden Sie (je nach Einstellung des Signaltons und der Vibration) von einem Signalton oder einer Vibration benachrichtigt.
  • Page 72: Unterhaltung

    Unterhaltung Kamera Um die Kamera-App zu öffnen, tippen Sie auf dem Homescreen auf Kamera Der Sucher O ptionen anzeigen/verbergen – Berühren Sie diese Option, um Menüs im Sucher ein- oder auszublenden. K amera wechseln – Zum Wechseln zwischen dem nach hinten gerichteten Kameraobjektiv und dem nach vorne gerichteten. Sie können die Kamera auch wechseln, indem Sie über den Bildschirm wischen. Modus – Der Aufnahmemodus kann auf Automatisch oder Panorama gestellt werden. Einstellungen – Bei Berühren wird das Menü „Einstellungen“ geöffnet. G alerie – Bei Berühren wird das zuletzt aufgenommene Foto angezeigt. Ermöglicht, die Galerie aufzurufen und Ihre gespeicherten Fotos anzuzeigen, während sich das Gerät im Kameramodus befindet.
  • Page 73: Erweiterte Einstellungen

    Videoaufzeichnung – Bei Berühren beginnen Sie, ein Video aufzunehmen. Aufnehmen – Zum Aufnehmen eines Fotos. Beenden – Zum Beenden des Kameramodus. HINWEIS: Stellen Sie sicher, dass das Kameraobjektiv sauber ist, bevor Sie Fotos aufnehmen. Erweiterte Einstellungen Tippen Sie im Sucher auf , um alle erweiterten Optionen anzuzeigen. Hiermit wird die Auflösung des Fotos ausgewählt. Wenn Sie eine hohe Auflösung auswählen, erhöht sich die Dateigröße, und Sie können weniger Fotos speichern. Fotos aufnehmen durch Sprachbefehl. Sie können eine Zeitverzögerung festlegen, so dass nach Drücken der Aufnahmetaste das Foto erst nach einer Verzögerung aufgenommen wird. Das ist ideal, wenn Sie selbst auch auf dem Foto sein möchten. Zeigt Rasterlinien auf dem Bildschirm, um das Motiv besser ausrichten zu können. Hiermit wird die Hilfe geöffnet, die weitere Informationen zur Funktionsweise einer Option enthält. TIPP! Wenn Sie die Kamera schließen, werden einige Einstellungen wieder auf die Standardwerte zurückgesetzt, beispielsweise der Timer. Bitte überprüfen Sie diese Einstellungen, bevor Sie Ihr nächstes Foto aufnehmen.
  • Page 74: Ein Foto Machen

    Ein Foto machen Öffnen Sie die Kamera-App. Richten Sie das Objektiv auf das gewünschte Motiv, das Sie fotografieren wollen. Berühren Sie , um das Foto aufzunehmen. Sie können das Foto auch aufnehmen, indem Sie an einer beliebigen Stelle den Bildschirm berühren, wenn Sie die Optionen verborgen haben. Bild ein- und auszoomen Um beim Fotografieren oder beim Aufnehmen eines Videos das Motiv einzuzoomen (vergrößern), legen Sie zwei Finger auf den Bildschirm und vollziehen mit den Fingern eine Spreizbewegung. Um das Motiv wieder auszuzoomen (verkleinern), ziehen Sie Ihre Finger wie bei einer Kneifbewegung wieder zusammen. Gesten-Auslöser Mit der Gesten-Auslöser-Funktion können Sie mit einer Handbewegung ein Bild mit der Frontkamera aufnehmen. Um ein Foto aufzunehmen, halten Sie die geöffnete Hand vor die Frontkamera, bis diese sie erkennt und ein Rahmen auf dem Bildschirm angezeigt wird. Machen Sie dann eine Faust. Dadurch wird ein Timer gestartet, und Sie können sich auf das Bild vorbereiten.
  • Page 75: Nach Der Aufnahme Des Fotos

    Nach der Aufnahme des Fotos Wenn Sie unten auf dem Bildschirm bei der Aufnahmetaste auf Bildvorschau tippen, sehen Sie das zuletzt aufgenommene Foto. Tippen Sie auf Galerie oder Fotos, dann auf OK. Berühren, um das Foto zu bearbeiten. Berühren, um sofort ein weiteres Foto aufzunehmen. Berühren, um das Foto an andere Personen zu senden oder über Social Network-Dienste weiterzuleiten. Berühren, um das Foto zu löschen. Berühren, um weitere Optionen zu erhalten. Berühren, um das Foto zu Ihren Favoriten hinzuzufügen. TIPP! Wenn Sie über ein Konto bei einem sozialen Netzwerk verfügen und dieses Konto auf Ihrem Tablet einrichten, können Sie Ihr Foto für Ihre Freunde im Netzwerk freigeben. Um alle erweiterten Optionen zu sehen, das Symbol Menü berühren. SmartShare – Berühren, um Ihr Foto mit der SmartShare-Funktion weiterzuleiten. Festlegen als – Berühren, um das Foto als Hintergrund, Bildschirmsperre, Homescreen oder Kontaktbild zu verwenden. Verschieben – Berühren, um das Foto in ein anderes Album zu verschieben. Kopieren – Berühren, um das ausgewählte Foto zu kopieren und es in einem anderen Album zu speichern.
  • Page 76: Gespeicherte Fotos Ansehen

    In die Zwischenablage kopieren – Berühren, um das Foto in die Zwischenablage zu kopieren. Diashow – Die Bilder im aktuellen Ordner werden automatisch nacheinander angezeigt. Nach links oder rechts drehen – Damit drehen Sie das Bild nach links oder rechts. Zuschneiden – Zum Zuschneiden von Fotos. Bewegen Sie Ihre Finger über den Bildschirm, um den Bereich auszuwählen, auf den das Foto zugeschnitten werden soll. Standort hinzufügen – Zum Hinzufügen von Standortinformationen. Umbenennen – Berühren, um den Namen des ausgewählten Fotos zu bearbeiten. Drucken – Berühren, um das Bild zu drucken. Details – Zur Anzeige weiterer Informationen zum Bild. Gespeicherte Fotos ansehen Sie können aus dem Kameramodus heraus auf gespeicherte Fotos zugreifen. Tippen Sie einfach auf die Bildvorschau unten auf dem Bildschirm, und die Galerie wird angezeigt. Wählen Sie die App , um Ihre Fotos anzusehen und/oder zu bearbeiten. Tippen Sie auf Galerie oder Fotos Tippen Sie auf OK. • Zum Anzeigen weiterer Fotos blättern Sie nach links oder rechts. • Zum Vergrößern können Sie doppelt auf den Bildschirm tippen oder zwei Finger auf den Bildschirm setzen und sie auseinanderspreizen (wenn Sie die Finger aufeinander zu bewegen, wird die Anzeige verkleinert).
  • Page 77: Videos Aufzeichnen

    Videos aufzeichnen Öffnen Sie die Kamera-App. Richten Sie das Objektiv auf das gewünschte Motiv für das Video. Berühren Sie das Symbol Videoaufzeichnung , um mit der Aufnahme zu beginnen. Ein Timer mit der Längenanzeige des Videos wird angezeigt. Um die Aufnahme zu beenden, berühren. TIPP! • Bei Tippen auf wird die Aufzeichnung angehalten. • Bei Tippen auf wird ein Screenshot erfasst, während das Video aufgezeichnet wird. Gespeicherte Videos ansehen Um aus dem Videokamera-Modus gespeicherte Video zu sehen, tippen Sie neben der Aufnahmetaste auf die Bildvorschau. Tippen Sie im Sucher neben der Aufnahmetaste auf die Bildvorschau. Auf dem Bildschirm erscheint die Galerie und zeigt die zuletzt aufgezeichneten Videos. Um auf andere Videos zuzugreifen, eine Wischbewegung nach links machen. Um ein Video wiederzugeben, auf dem betreffenden Videosymbol auf das Symbol tippen. HINWEIS: Videos können Sie mit den Apps Galerie und Fotos abspielen. HINWEIS: Drücken Sie nicht zu fest, da der Touchscreen schon auf die leichteste Berührung reagiert.
  • Page 78: Galerie

    Galerie Sie können Multimediadateien im internen Speicher speichern, um schnell und einfach auf Ihre gesamten Multimedia-Dateien zugreifen zu können. Sie können diese App benutzen, um Multimediadateien wie Bilder und Videos anzuzeigen. Tippen Sie auf dem Homescreen auf Apps > Registerkarte Apps > Galerie . Hier können Sie Ihre gesamten Bild- und Videodateien verwalten und für andere freigeben. HINWEIS: • Manche Dateiformate werden nicht unterstützt. Dies ist abhängig von der Software, die auf dem Gerät installiert ist. • Einige Dateien werden je nach Codierung möglicherweise nicht ordnungsgemäß wiedergegeben. • Falls die Dateigröße den verfügbaren Speicher übersteigt, können beim Öffnen von Dateien Fehler auftreten. Anzeigen von Bildern Nach Starten der App Galerie werden die verfügbaren Ordner angezeigt. Wenn in einer anderen App, z. B. E-Mail, ein Bild gespeichert wird, wird der Download-Ordner, der das Bild enthalten soll, automatisch erstellt. Dementsprechend wird durch Erfassen eines Screenshots automatisch ein Screenshot-Ordner erstellt. Tippen Sie auf den Ordner, der geöffnet werden soll. Die Bilder werden in der Reihenfolge von Aufnahmedatum und -uhrzeit angezeigt. Um ein Bild im Vollbildmodus anzuzeigen, wählen Sie es aus. Blättern Sie nach links oder rechts, um das nächste oder vorherige Bild anzuzeigen.
  • Page 79: Wiedergabe Von Videos

    Wiedergabe von Videos Öffnen Sie die App Galerie und wählen Sie ein Album. Auf den Video- Dateien wird das Symbol angezeigt. Tippen Sie auf ein Bild, um das entsprechende Video auszuwählen. Wählen Sie die für die Wiedergabe zu verwendende App (auf die App Fotos oder die App Videos tippen), dann auf OK tippen, so dass das Video abgespielt wird. HINWEIS: • Um bei der Wiedergabe über die App Videos die Helligkeit anzupassen, auf der linken Seite des Bildschirms mit dem Finger nach oben bzw. unten streichen. Um bei der Wiedergabe die Lautstärke anzupassen, auf der rechten Seite des Bildschirms mit dem Finger nach oben bzw. unten streichen. • Um bei der Wiedergabe über die App Videos zurück- oder vorzuspulen, auf dem Bildschirm nach links bzw. rechts streichen. Bilder und Videos löschen Verwenden Sie eines der folgenden Verfahren: • Tippen Sie im betreffenden Ordner auf und wählen Sie die Fotos und Videos aus, die Sie löschen möchten. Tippen Sie dann auf Löschen und dann auf Ja, um den Vorgang zu bestätigen. • Bei der Wiedergabe eines Fotos oder Videos tippen Sie auf und dann auf Ja, um den Vorgang zu bestätigen. Als Hintergrund festlegen Berühren Sie beim Anzeigen eines Fotos das Symbol Menü > Festlegen als, und wählen Sie Bildschirmsperre, Hintergrund, Homescreen oder Kontaktbild.
  • Page 80: Diashow

    Diashow Sie können Ihre Fotos in einer Diashow anzeigen, indem Sie Alben oder Ihre Fotos auswählen. Tippen Sie auf dem Homescreen auf Galerie • Tippen Sie auf das Album, das die Fotos enthält, die Sie sehen möchten. Tippen Sie dann auf das Symbol Menü > Diashow > die gewünschten Bilder auswählen > Weiter > die Diashow-Einstellungen bestätigen > Starten. Tippen Sie auf die Mitte des Bildschirms, um die Wiedergabe der Diashow anzuhalten. Videos Die Galerie verfügt über einen integrierten Videoplayer zur Wiedergabe Ihrer Videos. Video wiedergeben Tippen Sie auf dem Homescreen auf Apps > Registerkarte Apps > Galerie > Videos Wählen Sie das gewünschte Video.
  • Page 81 Berühren, um das Video zu Ihren Favoriten hinzuzufügen. Berühren, um auf QSlide zuzugreifen und das Video in einem kleinen Fenster anzuzeigen. Berühren, um das Video über die SmartShare-Funktion weiterzuleiten. Berühren, um weitere Optionen zu erhalten. Berühren, um die Lautstärke des Videos zu regulieren. Berühren und halten, wenn Sie in Schritten von jeweils 3 Sekunden zurückspulen wollen. 1-mal tippen, um 10 Sekunden zurückzuspulen. Berühren, um die Videowiedergabe anzuhalten. Berühren und halten, wenn Sie in Schritten von jeweils 3 Sekunden vorspulen wollen. 1-mal tippen, um 10 Sekunden vorzuspulen Berühren, um den Videobildschirm zu sperren/entsperren. Um während der Videowiedergabe die Lautstärke zu ändern, drücken Sie die Lautstärke-Tasten auf der rechten Seite des Tablets. Tippen Sie auf Galerie > (oben links in der Titelleiste) > Videos, und halten Sie dann ein Video in der Liste gedrückt, um auf die folgenden Optionen zuzugreifen: Weiterleiten, Löschen, Zuschneiden, Umbenennen und Details.
  • Page 82: Musik

    TIPP! Um bei der Wiedergabe die Helligkeit anzupassen, auf der linken Seite des Bildschirms mit dem Finger nach oben bzw. unten streichen. Um bei der Wiedergabe die Lautstärke anzupassen, auf der rechten Seite des Bildschirms mit dem Finger nach oben bzw. unten streichen. Musik Ihr Tablet verfügt über einen Musikplayer zur Wiedergabe von Musikdateien. Um auf den Musikplayer zuzugreifen, tippen Sie auf dem Homescreen auf Apps > Registerkarte Apps > Musik Musik mit dem Modus „Mediengerät (MTP)“ übertragen Schließen Sie das Tablet mit dem USB-Kabel am PC an. Wählen Sie die Option Mediengerät (MTP). Ihr Tablet wird als zusätzliches Laufwerk auf Ihrem Computer angezeigt. Klicken Sie auf das Laufwerk, um es anzuzeigen. Kopieren Sie die Dateien von Ihrem PC in den Laufwerksordner. Musiktitel abspielen Tippen Sie auf dem Homescreen auf Apps > Registerkarte Apps > Musik Berühren Sie die Registerkarte Titel. Wählen Sie den gewünschten Titel.
  • Page 83 Berühren, um den Musiktitel über die SmartShare-Funktion weiterzuleiten. Berühren, um den aktuellen Titel als Favoriten festzulegen. Berühren, um die aktuelle Playlist anzuzeigen. Berühren, um weitere Optionen zu erhalten. Berühren, um den Modus „Zufällige Wiedergabe“ festzulegen. Berühren, um den Wiederholungsmodus festzulegen. Berühren, um die Lautstärke zu regulieren. Berühren, um zum Beginn des Titels zurückzukehren. Um zum vorherigen Titel zurück zu gehen, 2-mal berühren. Berühren und halten, wenn Sie in Schritten von jeweils 3 Sekunden zurückspulen wollen.
  • Page 84 Berühren, um die Wiedergabe zu pausieren. Berühren, um zum nächsten Titel im Album oder in der Playlist zu springen. Berühren und halten, wenn Sie in Schritten von jeweils 3 Sekunden vorspulen wollen. Berühren, um den Audio-Effekt einzustellen. Um während der Musikwiedergabe die Lautstärke zu ändern, drücken Sie die Lautstärke-Tasten an der rechten Seite des Tablets. Wenn Sie einen Titel in der Liste berühren und halten, können Sie auf die folgenden Optionen zuzugreifen: Wiedergeben, Zur Playlist hinzufügen, Löschen, Weiterleiten, Info und Suchen. HINWEIS: • Je nach Gerätesoftware werden einige Dateiformate nicht unterstützt. • Falls die Dateigröße den verfügbaren Speicher übersteigt, können beim Öffnen von Dateien Fehler auftreten. • Musikdateien können durch internationale Abkommen und nationale Urheberrechtsgesetze geschützt sein. Unter Umständen ist daher eine Genehmigung bzw. Lizenz zum Wiedergeben oder Vervielfältigen von Musiktiteln erforderlich. In einigen Ländern ist die Vervielfältigung von urheberrechtlich geschütztem Material für private Zwecke durch nationale Gesetze verboten. Prüfen Sie vor dem Herunterladen oder Kopieren der Datei die im jeweiligen Land geltenden gesetzlichen Bestimmungen zur Verwendung solchen Materials.
  • Page 85: Extras

    Extras QuickMemo+ Mit der Funktion QuickMemo+ können Sie Notizen und Screenshots erstellen. Mit QuickMemo+ können Sie Screenshots erstellen, auf diesen zeichnen und sie mit Familie und Freunden teilen. Eine Notiz erstellen Tippen Sie auf dem Homescreen auf QuickMemo+ und dann auf um eine neue Notiz zu schreiben. Sie können Wörter direkt eintippen, oder Sie können Stifttyp und Farbe auswählen, um dann Text handschriftlich einzugeben. Sie können eine Erinnerung hinzufügen, indem Sie berühren, um eine Benachrichtigungserinnerung für ein Ereignis festzulegen. Wenn ein Datennetzwerk verfügbar ist können Sie Wetter- und Standortinformationen hinzufügen. Optionen von QuickMemo+ verwenden Die folgenden Optionen stehen in der QuickMemo+-Symbolleiste am oberen Bildschirmrand zur Verfügung. Berühren, um die Notiz in QSlide zu öffnen. Ermöglicht das Rückgängigmachen und Wiederholen früherer Aktionen. Ermöglicht, den Text, die Schriftfarbe und die Ausrichtung zu bearbeiten.
  • Page 86 Ermöglicht, Text handschriftlich einzugeben. Sie können den Typ des Stiftes auswählen, dessen Stärke, Transparenz und Farbe. Entfernt Bearbeitungen in der Notiz. Speichert die Notiz in QuickMemo+. Berühren, um weitere Optionen zu erhalten. Ermöglicht, eine Erinnerungsnotiz für ein Ereignis zu verfassen. Ermöglicht, der Notiz Informationen über das Wetter hinzuzufügen. Ermöglicht, der Notiz Standortdaten anhand von GPS hinzuzufügen. Mit QuickMemo+ einen Screenshot erstellen Um auf die QuickMemo+-Funktion zuzugreifen, die Statusleiste nach unten ziehen und berühren. O DER Eine Sekunde lang beide Lautstärke-Tasten gleichzeitig drücken. Aus der Symbolleiste die gewünschte Menüoption auswählen und eine Notiz erstellen. Auf tippen, um das Memo zu speichern. Um QuickMemo+ zu beenden, können Sie jederzeit die Zurück-Taste berühren.
  • Page 87: Quickremote

    HINWEIS: Verwenden Sie für QuickMemo+ Ihre Fingerspitze. Benutzen Sie nicht Ihren Fingernagel. QuickRemote QuickRemote verwandelt Ihr Tablet in eine Universalfernbedienung für Ihren Fernseher, Blu-ray-Player oder DVD-Player. HINWEIS: QuickRemote ist auf einigen Geräten und in einigen Gebieten nicht verfügbar. QuickRemote öffnen und konfigurieren Tippen Sie auf dem Homescreen auf Apps > Registerkarte Apps > QuickRemote Sie können auch vom Benachrichtigungs-Panel aus die Ersteinrichtung von QuickRemote vornehmen. Ziehen Sie die Statusleiste nach unten und tippen Sie auf das Symbol QuickRemote und dann auf FERNBEDIENUNG HINZUFÜGEN.
  • Page 88 Berühren Sie , um die Art des Raumes auszuwählen, und berühren Sie , um das Gerät hinzuzufügen. Wählen Sie den Typ und die Marke des gewünschten Geräts aus, und befolgen Sie dann die Anleitung auf dem Bildschirm, um das Gerät bzw. die Geräte zu konfigurieren. HINWEIS: QuickRemote arbeitet in Ihrer Region oder Ihrem Land genauso wie eine normale Infrarot-Fernbedienung. Achten Sie darauf, oben am Tablet den Infrarotsensor nicht zu verdecken, wenn Sie die QuickRemote-Funktion verwenden. Diese Funktion wird möglicherweise nicht von allen Modellen, Herstellern oder Dienstanbietern unterstützt. QuickRemote verwenden Öffnen Sie QuickRemote und wählen Sie den Raum, für den Sie die Konfiguration durchgeführt haben. Wählen Sie die gewünschte Fernbedienung, indem Sie in der QuickRemote-Leiste auf der linken Seite des Bildschirms deren Typ / Bezeichnung auswählen. Tippen Sie auf die Schaltflächen auf der angezeigten Fernbedienung.
  • Page 89: Uhr

    HINWEIS: Beim Hinzufügen einer TV-Fernbedienung kann QuickRemote die INPUT-Taste verwenden, um die geeignete Fernbedienung zu konfigurieren. Wenn Sie die INPUT-Taste konfigurieren, kann die Eingabequelle des TV-Geräts gewechselt werden. Um die TV-Eingabequelle zurückzusetzen, tippen Sie mehrere Male (je nach Anzahl der mit dem Fernseher verbundenen Geräte) auf die INPUT-Taste von QuickRemote. QuickRemote-Optionen Um auf das Menü der QuickRemote-Optionen zuzugreifen, tippen Sie auf das Symbol Menü , um die gewünschte Option auszuwählen. HINWEIS: Wenn Sie während des Abspielens von Musik im Hintergrund eine beliebige QuickRemote-Taste drücken, wird der Ton für eine Sekunde stumm geschaltet. Wecker einstellen Tippen Sie auf dem Homescreen auf Apps > Registerkarte Apps > Uhr > Legen Sie die gewünschte Weckzeit fest. Sie können folgende Optionen festlegen: Wiederholen, Schlummer- Dauer, Vibration wenn der Alarm ertönt, Alarmton, Lautstärke für Wecker, Automatischer Anwendungsstart, Puzzle-Sperre und Notizen. Berühren Sie Speichern.
  • Page 90: Rechner

    HINWEIS: Berühren Sie zum Bearbeiten der Alarmeinstellungen in der Alarmliste das Symbol Menü und wählen Sie Einstellungen. Rechner Taschenrechner Tippen Sie auf dem Homescreen auf Apps > Registerkarte Apps > Rechner Um Zahlen einzugeben, tippen Sie diese über die Zifferntasten ein. Für einfache Berechnungen berühren Sie die gewünschte Funktion oder ) und dann HINWEIS: • Für kompliziertere Berechnungen berühren Sie das Symbol Menü wählen Wissenschaftlicher Rechner und wählen dann die gewünschte Funktion aus. • Um den Verlauf der Berechnungen einzusehen, tippen Sie auf das Symbol Menü > Berechnungsverlauf. Kalender Im Kalender werden alle Termine angezeigt, die Sie in einem beliebigen Konto hinzugefügt haben und so konfiguriert sind, dass sie mit dem Kalender synchronisiert werden.
  • Page 91 Eines neuen Termin hinzufügen Tippen Sie auf dem Homescreen auf Apps > Registerkarte Apps > Kalender Um die Kalenderansicht zu ändern (Tag, Woche, Monat, Jahr, Terminübersicht), tippen Sie oben links auf den Menüpunkt. Tippen Sie zuerst auf das Datum, für das Sie einen Termin hinzufügen möchten, und dann auf Berühren Sie das Feld Terminname, und geben Sie den Terminnamen ein. Berühren Sie das Feld Ort, und geben Sie den Ort ein. Prüfen Sie das Datum, und geben Sie die Uhrzeit für den Beginn und das Ende des Termins ein. Wenn Sie Ihrem Termin eine Notiz hinzufügen möchten, berühren Sie das Feld Beschreibung, und geben Sie die Details ein. Wenn der Alarm wiederholt werden soll, legen Sie WIEDERHOLEN und, falls erforderlich, ERINNERUNGEN fest. Berühren Sie Speichern, um den Termin im Kalender zu speichern. HINWEIS: Berühren und halten Sie eine Stelle auf dem Kalender, um für den entsprechenden Tag schnell ein Kalenderereignis zu erstellen. Geben Sie einfach den Namen des Termins und die Uhrzeit ein, und tippen Sie auf Speichern. Sie können Details antippen, um weitere Informationen einzugeben, oder später mit zusätzlichen Details aktualisieren.
  • Page 92: Aufgaben

    Kalenderansicht ändern Wo auch immer Sie sich in der Kalender-App befinden, Sie können leicht zwischen den Kalenderansichten wechseln. Sie rufen das Menü der Kalenderansichten auf, indem Sie einfach oben links in der Titelleiste auf tippen, oder indem Sie auf der linken Seite des Bildschirms mit dem Finger von links nach rechts wischen. Tippen Sie auf Tag, Woche, Monat, Jahr oder Terminübersicht. Aufgaben Diese Aufgaben-App kann mit Ihrem MS Exchange-Konto synchronisiert werden. Sie können Ihre Aufgaben mit Ihrem Tablet oder MS Outlook oder MS Office Outlook Web Access erstellen und verwalten. Tippen Sie auf dem Homescreen auf Apps > Aufgaben Tippen Sie auf das Symbol für Aufgabe Hinzufügen (in der rechten oberen Ecke des Bildschirms). Geben Sie je nach Bedarf Folgendes ein: Betreff, ANFANGSDATUM, FÄLLIGKEITSDATUM, BESCHREIBUNG, WIEDERHOLEN und ERINNERUNG. Tippen Sie auf Speichern. Datei-Manager Mit der App Datei-Manager können Sie Dateien im internen/externen Speicher verwalten. Mit dem Datei-Manager ist es einfach, Dateien einzusehen und zu verwalten. Einfach auf einen Dateityp tippen (Alle Dateien, Musikdateien, Bilddateien, Videodateien, Dokumentdateien oder Cloud-Dateien) und dann auf den erforderlichen Ordner tippen, um die entsprechenden Dateien zu finden.
  • Page 93: Sprach-Memo

    So öffnen Sie die App Datei-Manager • Tippen Sie auf dem Homescreen auf Apps > Registerkarte Apps > Datei-Manager Dateimanager-Optionen Um die folgenden Optionen (oben auf dem Bildschirm) zu erhalten, öffnen Sie die App Datei-Manager > Alle Dateien > Interner Speicher: Ermöglicht, den Datei-Manager in einem QSlide-Fenster zu öffnen. Ermöglicht, nach Dateien oder Informationen zu suchen. Ermöglicht, einen neuen Ordner zu erstellen. Ermöglicht, Dateien und Ordnern in einen anderen Ordner zu verschieben. Ermöglicht, Dateien und Ordnern in einen anderen Ordner zu kopieren. Ermöglicht, Dateien und Ordner zu löschen. Ermöglicht den Zugriff auf weitere Optionen. Sprach-Memo Mit der Sprachmemo-Funktion können Sie Sprachnotizen oder andere Audiodateien aufzeichnen. Ton- oder Sprache aufzeichnen • Tippen Sie auf dem Homescreen auf Apps > Registerkarte Apps > Sprach-Memo...
  • Page 94 Berühren, um auszuwählen, wo die Aufzeichnungen gespeichert werden sollen. Berühren, um mit der Aufzeichnung zu beginnen. Berühren, um eine Liste Berühren, um die Ihrer Aufzeichnungen Aufzeichnung zu anzuzeigen. beenden. HINWEIS: Die verfügbare Aufnahmezeit kann sich von der tatsächlichen Aufnahmezeit unterscheiden. Sprachnotizen verwalten In der Liste der Sprachaufzeichnungen: • Um die Sprachnotiz mit anderen zu teilen, auf das Symbol Weiterleiten tippen und dann unter den Wahlmöglichkeiten auswählen. • Um eine Sprachnotiz zu löschen, diese auswählen und dann auf das Symbol Löschen tippen. • Wenn Sie eine Sprachnotiz berühren und halten, wird das Kontextmenü angezeigt. Es enthält folgende Optionen: Weiterleiten, Löschen, Umbenennen, Zuschneiden und Details.
  • Page 95: Polaris Office 5

    POLARIS Office 5 POLARIS Office 5 ist eine professionelle Lösung für das mobile Büro, mit der Anwender jederzeit bequem verschiedene Dokumententypen über ihre mobilen Geräte ansehen können, beispielsweise Dateien im Word-, Excel- und PowerPoint-Format. So erstellen Sie ein neues Dokument Tippen Sie auf dem Homescreen auf Apps > Registerkarte Apps > POLARIS Office 5 Registrieren Sie sich mit Ihrer E-Mail-Adresse auf der Seite zur Benutzerregistrierung. HINWEIS: Sie können auf Überspringen tippen, wenn Sie die Aufforderung zur Registrierung ignorieren möchten. Tippen Sie auf , um ein neues Dokument zu beginnen. Tippen Sie in der Dropdown-Liste auf die gewünschte Dokumentart und wählen Sie dann eine Vorlage. Geben Sie den gewünschten Inhalt mithilfe der Werkzeuge am oberen Bildschirmrand und der Bildschirmtastatur in das Dokument ein. Wenn Sie Ihre Arbeit am Dokument abgeschlossen haben, tippen Sie auf (oben links auf dem Bildschirm) und tippen dann auf Speichern (oder Speichern unter). Geben Sie den Namen des Dokuments ein und tippen Sie auf Speichern. Dokumente auf Ihrem Gerät anzeigen und bearbeiten Sie können ab sofort verschiedene Dateiformate wie Microsoft Office- Dokumente oder Adobe PDF problemlos direkt auf Ihrem Mobilgerät anzeigen.
  • Page 96: Google

    Öffnen Sie POLARIS Office 5 und suchen Sie nach dem gewünschten Dokument. Berühren Sie das Dokument, dass Sie einsehen oder bearbeiten wollen. Bei der Darstellung von Dokumenten über POLARIS Office 5 werden Layout und Objekte des Originaldokuments beibehalten. Um das Dokument zu bearbeiten, auf tippen. Google+ Nutzen Sie die App Google+, um über den Social Network-Dienst von Google in Kontakt zu bleiben. Tippen Sie auf dem Homescreen auf Apps > Registerkarte Apps > Google > Google+ HINWEIS: Diese App ist möglicherweise nicht in jeder Region bzw. von jedem Dienstanbieter erhältlich. LG SmartWorld LG SmartWorld bietet eine Vielzahl an unterhaltsamen Inhalten – Schriftarten, Designs, Spiele und Apps. So gelangen Sie von Ihrem Tablet zu LG SmartWorld: Tippen Sie auf > Apps > Registerkarte Apps > tippen Sie auf das Symbol , um auf LG SmartWorld zuzugreifen. Tippen Sie auf Anmelden, und geben Sie Ihre ID bzw. Ihr Passwort für LG SmartWorld ein. Wenn Sie sich noch nicht registriert haben, tippen Sie auf Registrieren, um Mitglied von LG SmartWorld zu werden.
  • Page 97 Laden Sie die gewünschten Inhalte herunter. • LG SmartWorld ist möglicherweise nicht bei allen Betreibern oder in allen Ländern verfügbar. HINWEIS: Das Symbol wird nicht angezeigt? Rufen Sie über einen mobilen Webbrowser LG SmartWorld (www.lgworld.com) auf, und wählen Sie Ihr Land aus. Laden Sie die LG SmartWorld-App herunter. Führen Sie die heruntergeladene Datei aus, und installieren Sie sie. Rufen Sie LG SmartWorld auf, indem Sie auf das Symbol tippen. Besondere Vorteile von LG SmartWorld Gestalten Sie Ihr Smartphone in Ihrem eigenen Stil – mit Schriftarten sowie Display- und Tastatur-Hintergründen von LG SmartWorld. (Hinweis: Dieser Service ist nur für bestimmte Geräte verfügbar. Überprüfen Sie die Verfügbarkeit auf der Seite von LG SmartWorld.) Kommen Sie in den Genuss der besonderen Services von LG SmartWorld, indem Sie an den laufend angebotenen Aktionen teilnehmen.
  • Page 98: Das Internet

    Das Internet Internet Verwenden Sie diese App, um im Internet zu surfen. Mit dem Browser haben Sie direkt von Ihrem Tablet aus Zugriff auf eine große Auswahl an Spielen, Musik, Nachrichten, Sport, Unterhaltung und vieles mehr – ganz gleich, wo Sie sich gerade aufhalten. Für jeden Geschmack ist etwas dabei. Tippen Sie auf dem Homescreen auf Apps > Registerkarte Apps > Internet Tippen, um QSlide auszuführen. Berühren, um eine Seite zurückzublättern. Berühren, um zur nächsten Seite zu wechseln. Hat die gegenteilige Funktion wie die Zurück-Taste , die Sie zur vorigen Seite bringt. Berühren, um die aktuelle Seite neu zu laden oder um das Laden zu stoppen. Berühren, um zur Startseite zurückzukehren. Berühren, um auf Lesezeichen zuzugreifen. Berühren, um weitere Optionen zu erhalten.
  • Page 99: Eine Seite Öffnen

    Eine Seite öffnen • Um eine neue Webseite zu öffnen, tippen Sie oben im Browser auf • Um zu einer anderen Webseite zu gehen, tippen Sie oben auf dem Bildschirm auf einen Kartenreiter, um die Seite einzusehen. Lesezeichen Um eine als Lesezeichen markierte Webseite zu öffnen, tippen Sie in der Browser-Symbolleiste auf und wählen eine Seite aus. Verlauf Tippen Sie in der Browser-Symbolleiste auf , und wählen Sie die Registerkarte Verlauf, um eine Webseite aus der Liste der zuletzt besuchten Webseiten zu öffnen. Um den gesamten Verlauf zu löschen, tippen Sie auf Lesemodus verwenden Um das Lesen zu erleichtern, stellt das Tablet eine vereinfachte Darstellung von Webseiten zur Verfügung. Ob zum Lesen von Nachrichten, Blogs oder anderer Beiträge, mit dem Lesemodus erhalten Sie eine übersichtliche Darstellung, ohne dass Sie abgelenkt werden. Tippen Sie in der Browser-Symbolleiste auf QSlide verwenden Verwenden Sie diese Funktion, um ohne Schließen der aktuellen App auf das Internet zuzugreifen. Beim Anzeigen von Inhalten im Browser, tippen Sie auf . Sie können dann nach anderen Informationen auf dem Tablet suchen. Um den Browser im Vollbild anzuzeigen, tippen Sie auf...
  • Page 100: Dateien Herunterladen

    Dateien herunterladen Nutzen Sie die Download-App, um zu sehen, welche Dateien heruntergeladen wurden. Tippen Sie auf dem Homescreen auf Apps > Registerkarte Apps > Downloads Chrome Sie können Chrome verwenden, um nach Informationen zu suchen und Webseiten zu durchstöbern. Tippen Sie auf dem Homescreen auf Apps > Registerkarte Apps > Chrome HINWEIS: Diese App ist möglicherweise nicht in jeder Region bzw. von jedem Dienstanbieter erhältlich. Webseiten anzeigen Tippen Sie auf das Adressfeld (oben auf dem Bildschirm), geben Sie die Webadresse oder das Suchkriterium ein, und tippen Sie auf der Tastatur auf Eine Seite öffnen • Um zu einer neuen Webseite zu gehen, tippen Sie oben im Browser auf • Um zu einer anderen Webseite zu gehen, tippen Sie oben auf dem Bildschirm auf einen Kartenreiter und wählen die Seite.
  • Page 101: Im Internet Suchen Per Spracheingabe

    Im Internet suchen per Spracheingabe Tippen Sie auf das Adressfeld, dann auf , sprechen Sie ein Stichwort, und wählen Sie dann eines der vorgeschlagenen Stichwörter aus. HINWEIS: Die Funktion ist möglicherweise nicht in allen Regionen bzw. von allen Dienstanbietern erhältlich. Mit anderen Geräten synchronisieren Synchronisieren Sie offene Registerkarten und Lesezeichen zur Verwendung mit Chrome auf einem anderen Gerät, wenn Sie mit demselben Google- Konto angemeldet sind. Um offene Registerkarten auf anderen Geräten anzuzeigen, tippen Sie > Zuletzt geöffnete Tabs. Sie müssen mit allen auf das Symbol Menü Geräten beim selben Google-Konto angemeldet sein. Wählen Sie die Webseite, die geöffnet werden soll. Lesezeichen hinzufügen und einsehen Um ein Lesezeichen hinzuzufügen, tippen Sie in der URL-Leiste auf Um die Webseite zu öffnen, auf die ein Lesezeichen verweist, tippen Sie auf das Symbol Menü > Lesezeichen und wählen die gewünschte Seite. Menü-Optionen in Chrome Um die folgenden Optionen zu sehen, das Symbol Menü berühren. • Neuer Tab – Antippen, um eine neue Webseiten-Registerkarte zu erstellen. • Neuer Inkognito-Tab – Antippen, um eine neue Inkognito-Registerkarte zu erstellen.
  • Page 102 • Lesezeichen – Zeigt die mit Lesezeichen versehenen Webseiten. • Zuletzt geöffnete Tabs – Zeigt Ihre geöffneten Webseiten auf anderen Geräten an. • Verlauf – Zeigt Ihre Browsing-Daten (Webseiten, die Sie besucht haben) • Teilen... – Ermöglicht das Teilen der Webseite. • Drucken... – Antippen, um die Webseite zu drucken. Sie können wählen, ob automatisch ein Drucker in Ihrem Netzwerk gefunden werden soll, oder ob der Drucker manuell angegeben werden soll. • Suchen auf der Seite – Mit dieser Option können Sie den Text einer aktuellen Webseite durchsuchen. • Zum Startbildschirm hinzu – Ermöglicht, auf Ihrer Startseite eine Verknüpfung zur aktuell angezeigten Webseite hinzuzufügen. • Desktop-Version – Markieren, um auf die Desktop-Seite zuzugreifen, wenn Webseiten auf dem Tablet angezeigt werden. • Einstellungen – Ermöglicht Ihnen, die spezifischen Einstellungen der Chrome-App zu ändern. • Hilfe und Feedback – Zur Anzeige von Informationen über die Benutzung der Chrome-App auf Ihrem Tablet; ermöglicht, den Entwicklern von Chrome Feedback zu geben.
  • Page 103: Einstellungen

    Einstellungen Das Menü „Einstellungen“ aufrufen Tippen Sie auf dem Homescreen auf Apps > Registerkarte Apps > Einstellungen ODER A uf dem Homescreen berühren und halten Sie Taste „Zuletzt verwendet“ > Systemeinstellungen. Wählen Sie die gewünschte Einstellungskategorie und dann die gewünschte Option. DRAHTLOSE NETZWERKE Wi-Fi Wi-Fi – Aktiviert Wi-Fi (WLAN), um die Verbindung zu verfügbaren Wi-Fi- Netzwerken (WLAN-Netzwerken) herzustellen. Es wird eine Liste der verfügbaren Wi-Fi-Netzwerke angezeigt. Um eine Verbindung herzustellen, tippen Sie auf ein verfügbares Netzwerk. HINWEIS: Um nach verfügbaren Wi-Fi-Netzwerken zu suchen, tippen Sie auf Suchen. Um die folgenden Optionen zu sehen, im Wi-Fi-Menü das Symbol Menü berühren. Wi-Fi hinzufügen – Ermöglicht, manuell die Daten eines neuen Wi-Fi- Netzwerks einzugeben. Gespeichertes Wi-Fi – Hier können Sie das gespeicherte Wi-Fi-Netzwerk vergessen.
  • Page 104 Erweitertes Wi-Fi – Ermöglicht die folgenden erweiterten Wi-Fi- Einstellungen. Interaktive Anleitung – Zeigt einige nützliche Tutorials für die Wi-Fi-Funktion. TIPP! So rufen Sie die MAC-Adresse ab Bei manchen Drahtlosnetzwerken mit MAC-Filtern müssen Sie beim Einrichten einer Verbindung gegebenenfalls dem Router die MAC- Adresse Ihres Tablets angeben. Sie können die MAC-Adresse wie folgt finden: Tippen Sie auf dem Homescreen auf Apps > Einstellungen > Wi-Fi > Symbol Menü > Erweitertes Wi-Fi > MAC-Adresse. Bluetooth Um Bluetooth zu verwenden, schalten Sie die Bluetooth-Funktion ein bzw. aus. Bei eingeschalteter Bluetooth-Funktion können Sie das Tablet mit anderen Bluetooth-Geräten koppeln und dann mit diesen verbinden. Um die folgenden Optionen zu sehen, im Bluetooth-Menü das Symbol Menü berühren. Gerätenamen bearbeiten – Um das Tablet beim Koppeln und Verbinden leichter identifizieren zu können, können Sie den Namen des Tablets ändern. Geben Sie den neuen Tablet-Namen ein, und tippen Sie auf Speichern. Sichtbarkeit einst. – Legt die Zeit fest, die Ihr Tablet für andere Bluetooth- Geräte sichtbar ist, damit die Geräte gekoppelt und verbunden werden können. Wählen Sie für das Timeout unter folgenden Optionen: 2 Minuten, 5 Minuten, 1 Stunde oder Immer sichtbar.
  • Page 105 Interaktive Anleitung – Zeigt einige nützliche Tutorials zu Bluetooth- Funktionen. Datennutzung Zeigt die Datennutzung in den ausgewählten Zeitspannen. Um die Datennutzung einer App zu sehen, tippen Sie in der Liste auf die entsprechende App. Mehr... Ermöglicht, zusätzliche Einstellungen für drahtlose Verbindungen und Netzwerke festzulegen. Flugmodus – Sie können den Flugmodus einschalten. Durch Aktivieren des Flugmodus werden alle drahtlosen Verbindungen deaktiviert. Miracast – Mit Miracast können Sie den Tablet-Bildschirm und -ton drahtlos auf einem Miracast-Dongle oder Fernsehgerät wiedergeben. SmartShare Beam – Ermöglicht, Multimedia-Inhalte von LG Telefonen oder Tablets über SmartShare Beam zu erhalten. LG PC Suite – Ermöglicht, dass über eine Wi-Fi-Verbindung zwischen Computer und Tablet Musik und Bilder übertragen werden. Medienserver – Ermöglicht, Medieninhalte via DLNA mit benachbarten Geräten gemeinsam zu nutzen. VPN – Zeigt die Liste der bereits von Ihnen konfigurierten Virtual Private Networks (VPNs) an. Ermöglicht Ihnen das Hinzufügen verschiedener VPN- Typen. HINWEIS: Sie müssen eine PIN, ein Passwort oder ein Muster zur Entsperrung des Bildschirms festgelegt haben, um einen Speicher für Berechtigungsdaten nutzen können.
  • Page 106: Gerät

    GERÄT Töne Ton-Profil – Damit können Sie das Ton-Profil festlegen: Töne, Nur vibrieren oder Bitte nicht stören. Lautstärke – Zum Einstellen der Lautstärke des Benachrichtigungston, des Tons beim Berühren des Bildschirms und Musik, Video, Spiele und andere Medien. Vibrationstärke – Ermöglicht, die Vibrationsstärke bei Anrufen, Benachrichtigungen und Berührungsrückmeldungen festzulegen. Benachrichtigungston – Mit dieser Option können Sie den Standard- Benachrichtigungston festlegen. Bitte nicht stören – Damit haben Sie die Möglichkeit, Termine festzulegen, an denen Störungen durch Benachrichtigungen vermieden werden sollen. Sie können Einstellungen vornehmen, damit bestimmte Funktionen gegebenenfalls doch unterbrechen dürfen, wenn Nur mit Priorität eingestellt ist. Sperrbildschirm – Sie haben die Möglichkeit zu entscheiden, ob Benachrichtigungen trotz Bildschirmsperre angezeigt werden sollen oder nicht. Apps – Damit haben Sie die Möglichkeit, zu verhindern, dass Benachrichtigungen bestimmter Apps angezeigt werden. Sie können Apps auch so einstellen, dass sie unterbrechen dürfen, wenn Nur mit Priorität eingestellt ist. Tastenton – Mit dieser Option können Sie festlegen, dass Ihr Tablet beim Berühren von Schaltflächen, Symbolen und anderen berührungsempfindlichen Anzeigeelementen einen Ton ausgibt. Ton bei Bildschirmsperre – Mit dieser Option können Sie festlegen, dass Ihr Tablet beim Sperren und Entsperren des Displays einen Ton abspielt.
  • Page 107 Vibrieren beim Tippen – Ermöglicht das Einstellen der Vibrations- Rückmeldung beim Berühren des Tablets. Anzeige Homescreen Thema – Legt das Bildschirmmotiv für Ihr Gerät fest. Hintergrund – Legt den Hintergrund für den Homescreen fest. Bildschirmübergang – Legt fest, welcher Effekt abgespielt wird, wenn Sie über den Bildschirm streichen, um zu einem anderen Bildschirm zu wechseln. Bildschirmwiederholung – Wenn Sie ein Häkchen setzen, gelangen Sie am Ende wieder zur ersten Seite des Homescreens, so dass Sie nicht mehr in entgegengesetzte Richtung zurückblättern müssen, um dorthin zu gelangen. Sicherung & Wiederherstellung des Homescreens – Ermöglicht die Sicherung und Wiederherstellung der Konfigurationen von Apps und Widgets und von Bildschirmmotiven. Hilfe – Zeigt Informationen über die Bedienung des Homescreens an. Bildschirmsperre Bildschirmsperre auswählen – Zum Auswählen der Bildschirmsperre, um damit Ihr Tablet zu sichern. HINWEIS: Nach dem Upgrade auf Lollipop OS steht Ihre Bildschirmsperre möglicherweise nicht zur Verfügung, außer für Muster, PIN und Passwort. Gehen Sie in diesem Fall zu Apps > Einstellungen > Sicherheit > Zertifikats-Speicher löschen, um die Sicherheitszertifikate zu löschen und eine Bildschirmsperre einzurichten. Seien Sie vorsichtig, wenn Sie Anmeldeinformationen löschen, da alle installierten Sicherheitszertifikate gelöscht werden.
  • Page 108 Smart Lock – Ihr Tablet bleibt entsperrt, wenn Sie ein vertrauenswürdiges Bluetooth-Gerät an einem vertrauten Standort, wie in Ihrer Wohnung oder an Ihrem Arbeitsplatz, mit Ihrem Tablet verbunden haben, oder wenn es Ihr Gesicht erkennt. Bildschirmübergang – Bietet Bildschirmübergangsoptionen. Hintergrund – Legt den Hintergrund des Sperrbildschirms fest. Sie können ihn auswählen in der Galerie oder unter Hintergrundbilder. Verknüpfungen – Hier können Sie die Verknüpfungen auf dem Sperrbildschirm wechseln, die auf dem Sperrbildschirm zum Ziehen angezeigt werden. Inhaberinformationen – Ermöglicht, die Kontaktdaten des Inhabers einzugeben, die auf dem Sperrbildschirm angezeigt werden für den Fall, dass das Tablet verloren gegangen ist. Sperrzeit – Mit dieser Option können Sie festlegen, nach welcher Zeit das Display automatisch gesperrt werden soll. Ein/Austaste sperrt sofort – Aktivieren Sie diese Option, wenn das Display sofort gesperrt werden soll, sobald Sie die Ein-/Aus-/Sperrtaste drücken. Diese Einstellung setzt den Timer für die Sicherheitssperre außer Kraft. Helligkeit – Zum Anpassen der Helligkeit des Bildschirms. Bei Aktivierung von Nachthelligkeit wird die Helligkeit in der Zeit von 24:00 ~ 06:00 Uhr automatisch auf 0 % gesenkt. Bildschirmabschaltung – Mit dieser Option können Sie die Zeitspanne bis zur automatischen Bildschirmabschaltung festlegen. Bildschirm-Abschaltungseffekt – Legt den Effekt fest, der vorgeführt wird, wenn der Bildschirm sich ausschaltet. Automatisch drehen – Verwenden Sie diese Option, damit sich bei Drehen des Tablets die Ausrichtung der Anzeige automatisch entsprechend ändert.
  • Page 109 Tagtraum – Bei Tippen auf diese Schaltfläche wird diese Funktion ein- bzw. ausgeschaltet. Nach Einschalten können Sie festlegen, dass im Stand- by, bei Andocken und/oder beim Laden des Akkus der Bildschirmschoner angezeigt wird und welches Motiv dieser haben soll. Sie können auswählen unter Uhr und Google Fotos. HINWEIS: Bei eingeschaltetem Bildschirmschoner kann der Ladevorgang länger dauern. Schriftart – Zum Ändern der Schriftart auf dem Display. Schriftgröße – Zum Ändern der Schriftgröße auf dem Display. Intelligenter Bildschirm – Der Bildschirm bleibt eingeschaltet, wenn das Gerät erkennt, dass Sie auf den Bildschirm sehen. Bedienungsleiste – Ermöglicht festzulegen, welche Berührungstasten angezeigt werden und an welcher Position auf der Leiste. Sie können auch die Farbe und den Hintergrund auswählen. Kalibrierung des Bewegungssensors – Ermöglicht das Erhöhen der Genauigkeit des Sensor in Bezug auf Neigung und Geschwindigkeit. Speicherverwaltung INTERNER SPEICHER – Zeigt an, wie viel Speicher im Speicher des Geräts insgesamt zur Verfügung steht und belegt ist, und durch welche Art von Daten der Speicher belegt ist. SPEICHERKARTE – Zeigt die Gesamtmenge des Speichers auf der microSD-Karte an. Speicherkarte entfernen/verbinden – Aktivieren und Deaktivieren der microSD-Karte des Tablets, so dass Sie auf die darauf gespeicherten Daten zugreifen, die Karte formatieren und sie sicher entfernen können. Wenn keine microSD-Karte installiert ist, sie bereits deaktiviert wurde oder Sie die microSD- Karte im Computer aktiviert haben, wird diese Einstellung verdunkelt dargestellt.
  • Page 110 Speicherkarte löschen – Diese Option löscht alle Dateien auf der microSD™- Karte unwiderruflich und bereitet die Karte für den Einsatz in Ihrem Tablet vor. Akku AKKUINFORMATIONEN – Zeigt an, wie viel Akkuleistung für Geräteaktivitäten verbraucht wird. Der Akkustand wird als Prozentzahl angegeben. Die verbleibende Akkulaufzeit wird ebenfalls angezeigt. Akkuverbrauch – Zeigt den Akkuverbrauch an. Akkuladung in Prozent in der Statusleiste – Zeigt in der Statusleiste die Akkuladung in Prozent an. Energiesparmodus – Hier können Sie den Akku steuern und die Elemente für den Energiesparmodus prüfen. Um diese Funktion einzuschalten, tippen Sie auf den Schalter . Tippen Sie auf Energiesparmodus, wenn Sie Zugriff auf folgende Optionen haben wollen: • ENERGIESPARMODUS AKTIVIEREN: Zum Festlegen des Akku- Ladestandes, bei dem sich die Akkustromverwaltung einschalten soll. Wählen Sie zwischen Sofort, 5% Akku und 15% Akku. Hilfe – Bei Berühren erhalten Sie Hinweise zum Energiesparmodus. Smart cleaning Sie können nicht benutzte Apps, gespeicherte Dateien und temporär gespeicherte Internetdateien verwalten. Apps Zeigt die Liste der Apps, die derzeit ausgeführt oder heruntergeladen werden. Wischen Sie von links und rechts, um eine der drei Registerkarten am oberen Rand des Bildschirms anzuzeigen, um detaillierte Informationen für HERUNTERGELADENE, AUF SPEICHERKARTE, AUSGEFÜHRTE, und ALLE Apps zu sehen.
  • Page 111: Dual Window

    Wenn Sie einen Eintrag antippen, sehen Sie weitere Informationen dazu. Um eine App zu beenden, tippen Sie auf Stoppen erzwingen (oder Anhalten) und dann auf OK, damit die App nicht mehr ausgeführt wird. Dual Window Ansicht teilen – Ermöglicht festzulegen, dass automatisch ein zweites Fenster geöffnet wird, wenn Sie im Vollbildmodus auf einen Link tippen oder auf den Anhang einer E-Mail (nur Bilder) tippen. Hilfe – Zeigt hilfreiche Informationen zur Funktion Dual Window. PRIVAT Cloud-Dienste Tippen Sie auf Konto hinzufügen um ein Cloud-Konto hinzuzufügen. Von diesem Menü aus können Sie auf Ihre Cloud-Konten zugreifen. Um Dateien hochzuladen, auf dieses Menü-Symbol tippen. Benutzer Dieses Menü zeigt die derzeit angelegten Benutzerkonten an. Benutzer hinzufügen, wenn das Tablet gesperrt ist – Ermöglicht das Hinzufügen eines neuen Benutzers, wenn Ihr Tablet gesperrt ist. Benutzer hinzufügen – Ermöglicht, für das Tablet ein neues Konto hinzuzufügen und damit eine Mehrbenutzerumgebung einzurichten. Standort Modus • Hohe Genauigkeit (GPS und Netzwerke) – Um den aktuellen Standort zu ermitteln, werden GPS und Wi-Fi-Netzwerke verwendet.
  • Page 112 • Nur Gerätesensoren (Nur GPS) – GPS wird verwendet, um Ihren Standort genau zu ermitteln. STANDORTDIENSTE – Zeigt Apps, die vor kurzem Ihre Standortdaten abgefragt haben. Kamera – Erlaubt dem Gerät, Fotos und Videos mit Standort-Tags zu versehen. Anti-Flimmer – Damit können Sie die Frequenz einstellen, um zu verhindern, dass der Kameravorschau-Bildschirm flackert. Standortbericht von Google – Hier können Sie Ihre Einstellungen von Google-Standortberichten anzeigen. Sicherheit Tablet verschlüsseln – Hiermit können Sie die Daten auf Ihrem Tablet aus Sicherheitsgründen verschlüsseln. Dann müssen Sie immer bei Einschalten des Tablets Ihre PIN oder Ihr Passwort eingeben, um die Daten zu entschlüsseln. SD-Speicherkarte verschlüsseln – Hiermit können Sie die Daten auf der microSD-Speicherkarte aus Sicherheitsgründen verschlüsseln. Passworteingabe sichtbar – Während der Eingabe eines verborgenen Passworts wird jeweils das letzte Zeichen angezeigt. Geräteadministratoren – Zum Anzeigen oder Deaktivieren von Geräte- Administratoren. Unbekannte Quellen – Ermöglicht das Installieren von Apps, die nicht über Play Store bezogen werden. Apps überprüfen – Die Installation von möglicherweise schädlichen Apps verbieten oder davor warnen. Speichertyp – Zeigt den Speichertyp bei Zertifikaten. Vertrauenswürdige Zertifikate – Sichere CA Zertifikate anzeigen.
  • Page 113: Sprache Und Eingabe

    Vom Speicher installieren – Wählen Sie diese Option, um verschlüsselte Zertifikate zu installieren. Zertifikats-Speicher löschen – Alle Zertifikate werden gelöscht. Trust agents – Trust Agents werden angezeigt oder deaktiviert. Bildschirm anheften – Mit dieser Funktion haben Sie die Möglichkeit, Ihr Gerät zu sperren, sodass der aktuelle Benutzer nur auf die angeheftete Apps zugreifen kann. Diese Option ist sehr praktisch für Benutzer mit Kindern. Apps mit Nutzungszugang – Ermöglicht die Anzeige von Nutzungsinformationen von Apps. Konten & Synchronisation Diese Option gestattet es Apps, Daten im Hintergrund zu synchronisieren, unabhängig davon, ob Sie gerade mit diesen Apps arbeiten. Wenn Sie die Funktion Automatisch synchronisieren deaktivieren, werden die Akkulast und die Datenlast verringert (letztere aber nicht eliminiert). Sprache und Eingabe Verwenden Sie die Einstellungen für Sprache und Eingabe, um die Sprache für den Text Ihres Tablets auszuwählen und um die Bildschirmtastatur zu konfigurieren, einschließlich der von Ihnen dem Wörterbuch hinzugefügten Wörter. Sichern und Zurücksetzen Meine Daten sichern – Zum Sichern Ihrer Einstellungen und Appdaten auf dem Google-Server. Sicherungskonto – Legen Sie das Konto fest, unter dem die Daten gesichert werden sollen.
  • Page 114: System

    LG Backup-Dienst – Dieser Dienst sichert alle Informationen auf Ihrem Gerät und stellt sie im Fall von Datenverlust oder nach einem Austausch des Geräts wieder her. Weitere Informationen finden Sie auf Seite 116. Speicher zurücksetzen – Zum Zurücksetzen Ihrer Einstellungen auf die Werkseinstellung und Löschen aller Ihrer Daten. Wenn Sie das Tablet auf diese Art zurücksetzen, werden Sie aufgefordert, die Informationen, die Sie beim ersten Start von Android eingegeben haben, erneut einzugeben. SYSTEM Schnellzugriff-Tasten Damit können Sie die Shortcut-Tasten ein- und ausschalten. Datum und Uhrzeit Mit den Einstellungen zu Datum und Uhrzeit legen Sie fest, wie diese Angaben angezeigt werden. Über diese Einstellungen können Sie auch selber die Uhrzeit und Ihre Zeitzone bestimmen, statt die aktuelle Zeit über das mobile Netzwerk zu beziehen. Eingabehilfen Mit diesen Einstellungen für Eingabehilfen konfigurieren Sie alle Eingabehilfen-Plug-Ins, die Sie auf dem Tablet installiert haben. HINWEIS: Die Auswahl setzt zusätzliche Plug-Ins voraus. TalkBack – Ermöglicht das Einrichten der TalkBack-Funktion, mit deren Hilfe Personen mit eingeschränkter Sehfähigkeit verbale Anleitung erhalten. Um die Funktion einzuschalten, tippen Sie in der oberen rechten Ecke des Bildschirms auf den TalkBack-Schalter . Um die TalkBack-Einstellungen anzupassen, tippen Sie unten auf dem Bildschirm auf Einstellungen.
  • Page 115 Schriftgröße – Stellen Sie die auf dem Bildschirm verwendete Schriftgröße ein. Farbe umkehren – Bei Aktivierung werden die Farben des Bildschirms und von Inhalten invertiert dargestellt. Farbanpassung – Ermöglicht, den Farbkontrast auf dem Bildschirm anzupassen. Um die Funktion einzuschalten, tippen Sie auf den Schalter . Dann tippen Sie auf den Bildschirm und ziehen über den Bildschirm in irgendeine Richtung, so dass der Farbkontrast entsteht, der benutzt werden soll. Touch-Zoom – Ermöglicht das Ein- und Auszoomen, indem Sie 3-mal kurz auf den Bildschirm tippen. Bildschirm-Verdunkeln – Dunkelt die Hintergrundbeleuchtung des Bildschirms ab. Zugriffs-Shortcuts – Bei Aktivierung dieser Funktion können Sie schnell in zwei Schritten Bedienungshilfen aktivieren. Text-zu-Sprache Ausgabe – Zum Festlegen der gewünschten Text- to-Speech-Engine und der Sprechgeschwindigkeit. Es wird auch ein kurzes Muster der Sprachsynthese abgespielt. Auch der Status der Standardsprache wird angezeigt. Audio-Typ – Legt den Audio-Typ fest. Sie können wählen zwischen Mono und Stereo. Klangabgleich – Legt die Balance bei der Audio-Wiedergabe fest. Zum Einstellen den Schieberegler benutzen. Alle Töne deaktivieren – Zum Ausschalten aller Töne. Beschriftung – Ermöglicht, die Einstellungen für Beschriftungen für Menschen mit Hörbehinderungen anzupassen. Um diese Funktion einzuschalten, tippen Sie auf den Schalter . Sie können die Sprache, die Textgröße und den Stil festlegen.
  • Page 116 Touch-Feedback-Zeit – Legt die Zeit fest, nach der bei Berühren eine Rückmeldung erfolgt. Sie können wählen zwischen Kurz, Mittel und Lang. Touch assistant – Diese Option zeigt ein Bedienfeld mit einfachem Zugang zu häufigen Aktionen an. Bildschirmabschaltung – Legt fest, nach welchem Zeitraum der Bildschirm abgeschaltet werden soll. Touch-Control-Bereiche – Um diese Funktion einzuschalten, tippen Sie auf den Schalter . Ermöglicht, die Tastatursteuerung auf bestimmte Bereiche des Bildschirms zu begrenzen. Um diese Funktion zu aktivieren und zu deaktivieren, gleichzeitig die Leiser-Taste und die Home-Taste berühren. Bildschirm automatisch drehen – Bei Aktivierung des Kontrollkästchens wird das Gerät je nach Geräteposition die Bildschirmanzeige (Hochformat oder Querformat) automatisch drehen. Passwortbestätigung über Stimme – Bei Aktivierung erhalten Sie eine verbale Bestätigung bei der Eingabe von Passwörtern. Eingabehilfen - Schnellzugriff – Legt fest, dass nach 3-maligem Tippen auf die Home-Taste ein schneller und einfacher Zugriff auf ausgewählte Funktionen erfolgt. One-Touch Eingabe – Bewirkt, dass bei jeder einzelnen Berührung der LG-Tastatur durch einen Finger ein Buchstabe/Zeichen eingegeben wird. Zugriffswechsel – Diese Option ermöglicht Ihnen die Interaktion mit dem Gerät mithilfe eines oder mehrerer Schalter, die wie Tasten einer Tastatur funktionieren. Dieses Menü kann für Benutzer mit Bewegungseinschränkungen, die eine direkte Interaktion mit dem Gerät verhindern, nützlich sein.
  • Page 117: Über Das Tablet

    Quick Cover Bei Aktivierung wird bei Benutzung von Quick Cover der Bildschirm automatisch ein- oder ausgeschaltet. Drucken Ermöglicht, den Inhalt von bestimmten Bildschirmen (wie z. B. Webseiten, die in Chrome angezeigt werden) über einen Drucker zu drucken, der mit dem selben Wi-Fi-Netzwerk verbunden ist wie Ihr Android-Gerät. Über das Tablet Dieses Menü ermöglicht Ihnen, Software-Updates zu verwalten und verschiedene Informationen über Ihr Tablet anzuzeigen. Tablet-Name – Ermöglicht, den Namen des Tablets festzulegen. Update-Center – Hier können Sie nach App- und Software-Updates suchen. Akku – Ermöglicht, den Akkustatus, den Akkustand und Informationen zur Akkunutzung anzuzeigen. Hardware-Information – Zum Anzeigen von: Modellnummer, IP-Adresse, Betriebszeit, CSN, Wi-Fi MAC-Adresse und Bluetooth-Adresse. Software-Information – Ermöglicht, die Android-Version, Baseband-Version, Kernel-Version, Build-Nummer und Softwareversion anzuzeigen. Rechtliche Hinweise – Zum Anzeigen von: Rechtstexte für LG Software, Open Source-Lizenzen und rechtliche Hinweise von Google.
  • Page 118: Lg Backup

    LG Backup Info über die Sicherung und Wiederherstellung von Gerätedaten Sie sollten regelmäßig eine Backup-Datei der Inhalte des internen Speicher erstellen und speichern, insbesondere vor dem Aktualisieren von Software. Wenn Sie auf der Speicherkarte eine aktuelle Backup-Datei pflegen, könnten Sie ggf. Gerätedaten wiederherstellen, wenn Ihr Gerät verloren geht, gestohlen oder durch unvorhergesehene Umstände beschädigt wird. Die App „LG Backup“ wird bei Smartphones und Tablets von LG und bei anderen Software- oder Betriebssystemversionen unterstützt. Wenn Sie also ein neues LG-Smartphone oder Tablet kaufen, können Sie die zuvor gesicherten Gerätedaten auf das neue Gerät spielen. Wenn Sie die App „LG Backup“ auf dem Smartphone und Tablet bereits geladen haben, können Sie die meisten Daten sichern und wiederherstellen, einschließlich heruntergeladener und vorinstallierter Apps, Lesezeichen, Kalendertermine, Kontakte, Homescreen-Einstellungen und Systemeinstellungen. Folgendes ist ebenfalls möglich: • Manuell ein Backup der Daten Ihres Geräts durchführen. • Daten des Geräts wiederherstellen. Warnung! Stellen Sie sicher, dass der Akku vollständig geladen ist, bevor Sie Daten sichern oder wiederherstellen, damit es nicht aufgrund unzureichender Akkuladung zu unerwartetem Ausschalten kommt.
  • Page 119: Tablet-Daten Mit Lg Backup Sichern

    Tablet-Daten mit LG Backup sichern > Sichern und Auf dem Homescreen auf Apps > Einstellungen Zurücksetzen > LG Backup-Dienst > Sicherung tippen. Auf dem Bildschirm „STANDORT AUSWÄHLEN“ die Option Interner Speicher oder Speicherkarte berühren und dann auf Weiter tippen. Neben den Elementen, von denen ein Backup erstellt werden soll, das Kontrollkästchen markieren, dann auf Weiter tippen. Die Angezeigten Informationen lesen und dann auf Starten tippen. Wenn alle ausgewählten Dateien gesichert sind, wird die Nachricht Abgeschlossen angezeigt. Daten des Tablets wiederherstellen HINWEIS: Bevor auf Grundlage der Backup-Datei die Daten wiederhergestellt werden, werden alle auf dem Tablet gespeicherten Dateien gelöscht. Achten Sie darauf, eine Kopie der Backup-Datei an einem anderen Ort zu speichern. Auf dem Homescreen auf Apps > Einstellungen > Sichern und Zurücksetzen > LG Backup-Dienst > Wiederherstellung & Verwaltung tippen. Auf dem Bildschirm zum Wiederherstellen die Backup-Dateien auswählen, die die Daten enthalten, die wiederhergestellt werden sollen. Die Kontrollkästchen neben den Elementen markieren, die wiederhergestellt werden sollen, dann auf Wiederherstellen tippen, um die entsprechenden Dateien auf dem Tablet wiederherzustellen.
  • Page 120 Wenn die Backup-Datei verschlüsselt ist, geben Sie zur Entschlüsselung das festgelegte Passwort ein. Wenn alle ausgewählten Dateien wiederhergestellt sind, wird das Tablet automatisch neu gestartet. HINWEIS: Beim Erstellen von Backup-Dateien können Sie die Option Backup-Dateien sperren wählen, damit sie besonders geschützt sind. Auf dem Hauptbildschirm von LG Backup tippen Sie auf Menütaste > Passwort festlegen und legen das Passwort fest, außerdem ein Hinweis für den Fall, dass Sie das Passwort vergessen. Sobald Sie ein Passwort eingerichtet haben, müssen Sie dieses jedes Mal erneut eingeben, wenn Sie Daten sichern oder wiederherstellen wollen.
  • Page 121: Software-Update Für Das Tablet

    Software-Update für das Tablet Software-Update für das Tablet Die Funktion ermöglicht es Ihnen, die Firmware Ihres Tablets bequem über das Internet zu aktualisieren, ohne dass Sie dazu ein Service-Center aufsuchen müssen. Weitere Informationen zur Verwendung dieser Funktion finden Sie unter: http://www.lg.com. Das Programm zur Aktualisierung der Tablet-Firmware erfordert während des Aktualisierungsvorgangs Ihre volle Aufmerksamkeit. Bitte beachten Sie alle zu den einzelnen Schritten angezeigten Anweisungen und Hinweise, bevor Sie fortfahren. Bitte beachten Sie, dass das Entfernen des USB-Kabels oder das Entfernen des Akkus während des Upgrades zu schwerwiegenden Schäden an Ihrem Tablet führen kann. Software-Update für Ihr LG Tablet via Over-the-Air (OTA) Mit dieser Funktion können Sie die Firmware ihres Tablets über OTA und ohne das Anschließen eines USB-Datenkabels aktualisieren. Diese Funktion ist nur verfügbar, wenn LG eine neuere Version der Firmware für Ihr Gerät veröffentlicht. Zunächst können Sie die Softwareversion des Tablets ermitteln: Tippen Sie auf dem Homescreen auf Apps > Einstellungen > Über das Tablet > Software-Information. Zum Ausführen des Updates der Tablet-Software tippen Sie auf dem > Über das Tablet > Update- Homescreen auf Apps > Einstellungen...
  • Page 122 HINWEIS: LG behält sich das Recht vor, Firmware-Aktualisierungen nur für ausgewählte Modelle und nach freiem Ermessen herauszugeben, und garantiert nicht die Verfügbarkeit neuerer Versionen der Firmware für alle Geräte. HINWEIS: Ihre persönlichen Daten, die auf dem internen Speicher des Geräts gespeichert sind, einschließlich Informationen zu Ihrem Google- Konto und zu anderen Konten, Ihrer System- und Appdaten und Einstellungen, heruntergeladener Apps und DRM-Lizenzen, können bei der Aktualisierung der Gerätesoftware verloren gehen. LG empfiehlt daher, persönliche Daten vor dem Aktualisieren der Tablet-Software zu sichern. LG übernimmt keine Haftung für den Verlust persönlicher Daten.
  • Page 123: Zubehör

    Zubehör Für das Tablet gibt es folgende Zubehörteile. (Die nachfolgend beschriebenen Produkte sind nicht zwingend im Lieferumfang enthalten.) Ladegerät USB-Kabel Kurzanleitung HINWEIS: • Verwenden Sie ausschließlich Originalzubehör von LG. Die Missachtung dieses Hinweises kann zum Erlöschen Ihrer Garantie führen. • Zubehörteile können je nach Land oder Region unterschiedlich sein.
  • Page 124: Fehlerbehebung

    Ihren Dienstanbieter wenden, die meisten können Sie jedoch einfach selbst beheben. Meldung Mögliche Ursachen Mögliche Abhilfemaßnahmen Diese Funktion Apps wird nicht vom können nicht Wenden Sie sich an Ihren Dienstanbieter eingestellt Dienstanbieter. unterstützt oder muss werden registriert werden. Akku wurde nicht Laden Sie den Akku auf. aufgeladen. Stellen Sie sicher, dass Außentemperatur zu das Tablet bei normalen hoch oder zu tief. Temperaturen aufgeladen wird. Überprüfen Sie das Ladefehler Kontaktprobleme Ladegerät und die Verbindung zum Tablet. Verwenden Sie eine andere Keine Spannung Steckdose für das Ladegerät. Ladegerät defekt Ersetzen Sie das Ladegerät. Verwenden Sie nur Original- Falsches Ladegerät Zubehör von LG.
  • Page 125 Meldung Mögliche Ursachen Mögliche Abhilfemaßnahmen Fotos können nicht Löschen Sie im Tablet einige gesendet/ Speicher voll Bilder. empfangen werden Dateien Nicht unterstütztes Überprüfen Sie die werden nicht Dateiformat unterstützten Dateiformate. geöffnet Prüfen Sie die Einstellung des Menüs „Töne“, um sicherzustellen, dass Sie Kein Ton Vibrationsmodus nicht den Vibrations- oder Lautlos-Modus aktiviert haben.
  • Page 127 FRANÇAIS Guide de l’utilisateur • Les affichages à l'écran et les illustrations peuvent ne pas correspondre à ceux que vous pouvez voir sur l'appareil présenté. • Selon l'opérateur ou la version du logiciel, il est possible que certaines informations contenues dans ce manuel ne s'appliquent pas à votre appareil. Toutes les informations fournies dans ce document peuvent faire l'objet de modifications sans préavis. • Dans la mesure où son écran tactile est utilisé comme clavier, cet appareil n'est pas recommandé pour les personnes malvoyantes. • Copyright ©2015 LG Electronics, Inc. Tous droits réservés. LG et le logo LG sont des marques déposées de LG Group et de ses entités apparentées. Toutes les autres marques commerciales appartiennent à leurs propriétaires respectifs. • Google™, Google Maps™, Gmail™, YouTube™, Hangouts™ et Google Play™ sont des marques commerciales de Google, Inc.
  • Page 128 Sommaire À propos de ce manuel de l'utilisateur ..5 Appui de façon prolongée ......34 Glisser ..............34 À propos de ce manuel de l'utilisateur ..5 Faire glisser ou déplacer ........35 Marques commerciales ......... 6 Double toucher............35 DivX HD ............6 Zoom par pincement ........35 Recommandations pour une utilisation Faire pivoter l'écran ..........35...
  • Page 129 Méthodes de saisie de texte .......50 Synchronisation avec Windows Media  Player ................ 61 Entrez le mot suggéré en utilisant la commande gestuelle ........50 Connexions PC à l'aide d'un câble USB pour les utilisateurs de Mac OS X ....62 Saisie de caractères spéciaux ......51 Répertoire ..........63 Configuration d'un compte Google ..52 Recherche d'un contact ......63...
  • Page 130 Mise à jour logicielle de la tablette ..118 Google+ ............93 Mise à jour logicielle de la tablette ... 118 LG SmartWorld ..........93 Mise à jour du logiciel pour tablette LG par radio (Over-the-Air - OTA) ......118 Le Web ............95 Accessoires ..........120 Internet ............95...
  • Page 131: À Propos De Ce Manuel De L'utilisateur

    À propos de ce manuel de l'utilisateur À propos de ce manuel de l'utilisateur • Avant d'utiliser votre appareil, veuillez lire attentivement ce manuel. Cela permettra d'assurer que vous utilisez correctement votre appareil et en toute sécurité. • Certaines des images et captures d'écran figurant dans ce guide peuvent s'afficher différemment sur votre tablette. • Votre contenu peut être différent du produit final ou des logiciels fournis par les prestataires de service ou les opérateurs. Ce contenu peut faire l'objet de modifications sans avis préalable. Pour obtenir la version la plus récente de ce manuel, consultez le site Web de LG à l'adresse suivante : www.lg.com. • Les applications de votre appareil et leurs fonctions peuvent varier selon le pays, la région ou les spécifications matérielles. LG ne peut être tenu responsable des problèmes de performance liés à l'utilisation d'applications développées par des fournisseurs autres que LG. • LG ne peut être tenu responsable des problèmes de performance ou d'incompatibilité liés à la modification de paramètres de registre ou à la modification de logiciels de système d'exploitation. Toute tentative de personnalisation de votre système d'exploitation peut entraîner un dysfonctionnement de l'appareil ou de ses applications. • Les logiciels, l'audio, les fonds d'écran, les images et les autres éléments multimédias fournis avec votre appareil sont protégés par une licence d'utilisation limitée. Si vous tentez d'extraire ou d'utiliser ces éléments à des fins commerciales ou autres, vous pouvez enfreindre la législation en matière de droits d'auteur. En tant qu'utilisateur, vous êtes entièrement responsable en cas d'utilisation illégale d'éléments multimédias.
  • Page 132: Marques Commerciales

    • Des frais supplémentaires peuvent être appliqués pour les services de données tels que la messagerie, le chargement et le téléchargement, la synchronisation automatique ou l'utilisation des services de localisation. Pour éviter des frais supplémentaires, choisissez un forfait de données adapté à vos besoins. Veuillez contacter votre opérateur pour plus d'informations. Marques commerciales • LG et le logo LG sont des marques déposées de LG Electronics. • Tous les autres marques commerciales et droits d'auteurs sont la propriété de leurs propriétaires respectifs. DivX HD À PROPOS DE LA VIDÉO DIVX : DivX® est un format de vidéo numérique créé par DivX, LLC, une filiale de Rovi Corporation. Ceci est un appareil officiellement certifié par DivX (DivX Certified®) qui a passé de tests de certification rigoureux pour la lecture de vidéos DivX. Visitez le site www.divx.com pour trouver plus d'informations ainsi que des outils logiciels vous permettant de convertir vos fichiers au format vidéo DivX. À PROPOS DE LA VIDÉO À LA DEMANDE DIVX : cet appareil certifié par DivX (DivX Certified®) doit être enregistré afin de pouvoir lire les films de vidéo à la demande DivX (VOD) achetés. Pour obtenir votre code d'enregistrement, vous devez rechercher l'emplacement de la section DivX VOD dans le menu Configuration de votre appareil. Rendez-vous sur le site www.vod.divx.com pour plus d'informations sur la façon de procéder à votre...
  • Page 133 720p en HD, y compris le contenu Premium. DivX®, DivX Certified® et leurs logos respectifs sont des marques déposées de Rovi Corporation ou de ses filiales et elles sont utilisées sous licence. Informations sur les logiciels libres Pour obtenir le code source sous la licence publique générale, la licence publique générale limitée, la licence publique Mozilla ou les autres licences libres de ce produit, rendez-vous sur http://opensource.lge.com. En plus du code source, tous les termes de la licence, ainsi que les exclusions de responsabilité et les droits d’auteur, sont disponibles au téléchargement. LG Electronics propose de vous fournir le code open source sur CD-ROM en échange des coûts couvrant cet envoi, notamment le coût du support, des frais de port et de prise en charge, une fois la demande reçue par LG Electronics à l’adresse suivante : opensource@lge.com. La validité de cette offre est de trois (3) ans à partir de la date d’achat du produit.
  • Page 134: Recommandations Pour Une Utilisation Sûre Et Efficace

    Recommandations pour une utilisation sûre et efficace Veuillez lire ces recommandations. Leur non-respect peut s’avérer dangereux, voire illégal. En cas de panne, un outil logiciel intégré à votre appareil crée un historique des pannes. Cet outil récolte uniquement les données spécifiques à la panne, telles que la force du signal et les applications chargées. L'historique n'est utilisé que pour déterminer la raison de la panne. Ces historiques sont chiffrés et ne peuvent être consultés que par un centre de réparation agréé LG, dans le cas où vous devriez retourner l'appareil pour réparation. Exposition aux radiofréquences Informations sur l'exposition aux ondes radio et sur le débit d'absorption spécifique (DAS). Ce modèle de tablette LG-V480 est conforme aux exigences de sécurité relatives à l'exposition aux ondes radio. Ces exigences sont basées sur des recommandations scientifiques qui comprennent des marges de sécurité destinées à garantir la sécurité de toutes les personnes, quels que soient leur âge et leur condition physique. • Les recommandations relatives à l'exposition aux ondes radio utilisent une unité de mesure connue sous le nom de débit d'absorption spécifique (DAS). Les tests de mesure du DAS sont effectués à l'aide de méthodes normalisées, en utilisant le niveau de puissance certifié le plus élevé de l'appareil, dans toutes les bandes de fréquence utilisées. • Même si tous les modèles d'appareils LG ne présentent pas les mêmes niveaux de DAS, ils sont tous conformes aux recommandations appropriées en matière d'exposition aux ondes radio.
  • Page 135: Entretien Et Réparation

    • La limite de DAS recommandée par l'ICNIRP (Commission internationale de protection contre les rayonnements non ionisants) est de 2 W/kg en moyenne sur 10 grammes de tissus humains. • La valeur DAS la plus élevée pour cet appareil lorsqu'il est porté au niveau du corps, comme décrit dans ce guide d'utilisation, est de 0,497 W/kg. • Cet appareil est conforme aux directives en matière d'exposition aux fréquences radioélectriques lorsqu'il est utilisé dans sa position normale au niveau de l'oreille ou lorsqu'il se trouve à une distance minimale de 0,00 cm du corps. Lorsqu'un étui, un clip ceinture ou un support est utilisé à des fins de transport, il ne doit pas contenir de parties métalliques et doit garantir une distance minimale de 0,00 cm entre le produit et le corps. Pour pouvoir transmettre des fichiers de données ou des messages, cet appareil requiert une connexion de qualité au réseau. Dans certains cas, la transmission de fichiers de données ou de messages peut être retardée jusqu'à ce qu'une telle connexion soit possible. Veillez à bien suivre les instructions relatives à la distance de séparation pour l'établissement de la transmission. Entretien et réparation AVERTISSEMENT Utilisez uniquement des batteries, chargeurs et accessoires agréés pour ce modèle d'appareil. L'utilisation de tous autres types peut annuler tout accord ou garantie applicable à l'appareil et s'avérer dangereuse. • Ne démontez pas cet appareil. Si une réparation s'avère nécessaire, confiez-le à un technicien qualifié. • Les réparations couvertes par cette garantie peuvent inclure, à la discrétion de LG, des pièces ou circuits de remplacement neufs ou reconditionnés, sous réserve que leurs fonctionnalités soient équivalentes à celles des pièces remplacées.
  • Page 136 • Restez éloigné des appareils électriques, tels que les téléviseurs, les postes de radio et les ordinateurs personnels. • Ne placez pas votre appareil à proximité de sources de chaleur, telles qu'un radiateur ou une cuisinière. • Ne le faites pas tomber. • Ne le soumettez pas à des vibrations mécaniques ou à des chocs. • Éteignez votre appareil dans les zones où des règlements spéciaux l'exigent. Par exemple, n'utilisez pas votre appareil dans les hôpitaux, car celui-ci pourrait perturber le bon fonctionnement des équipements médicaux sensibles. • Si vos mains sont humides, ne manipulez pas l'appareil lorsqu'il est en cours de charge. Ceci peut provoquer un choc électrique et endommager gravement votre appareil. • Ne mettez pas un appareil en charge à proximité de matières inflammables car celui-ci pourrait chauffer et déclencher un incendie. • Pour nettoyer l'extérieur de l'appareil, utilisez un chiffon sec (n'utilisez pas de solvant, tel que du benzène, un diluant ou de l'alcool). • Ne rechargez pas la tablette lorsqu'elle est posée sur du tissu. • Rechargez l'appareil dans une zone bien ventilée. • N'exposez pas l'appareil à de la fumée ou de la poussière en quantité excessive. • Ne placez votre appareil à proximité de cartes de crédit ou de titres de transport, car il pourrait altérer les données des bandes magnétiques. • Ne touchez pas l'écran avec un objet pointu qui risquerait d'endommager la tablette. • Ne mettez pas l'appareil en contact avec des liquides ou des éléments humides. • Utilisez les accessoires comme les oreillettes avec précaution.
  • Page 137: Fonctionnement Optimal De L'appareil

    • Évitez d'utiliser, de toucher ou de tenter de retirer ou de réparer du verre cassé, ébréché ou fissuré. Un endommagement de l'écran en verre causé par une utilisation abusive ou incorrecte n'est pas couvert par la garantie. • Votre tablette est un appareil électronique qui génère de la chaleur en fonctionnement normal. Lors d'une utilisation prolongée dans un environnement mal ventilé, le contact direct avec la peau peut provoquer une gêne ou des brûlures bénignes. Manipulez dès lors votre appareil avec précaution lors de son fonctionnement ou immédiatement après utilisation. • Si votre tablette est mouillée, débranchez la immédiatement et laissez-la sécher totalement. Ne tentez pas d’accélérer le séchage avec une source de chaleur externe (four classique ou micro-ondes, sèche-cheveux...). • Le liquide contenu dans votre tablette mouillée modifie la couleur de l’étiquette produit se trouvant à l’intérieur de la tablette. Un endommagement de l’appareil consécutif à une exposition à des liquides n’est pas couvert par la garantie. • Utilisez si possible votre tablette dans une plage de température comprise entre 0 ºC et 40 ºC. Exposer votre appareil à des températures extrêmement basses ou hautes peut l'endommager ou provoquer des dysfonctionnements, voire le faire exploser. Fonctionnement optimal de l'appareil Appareils électroniques Toutes les tablettes peuvent être soumises à des interférences pouvant affecter leurs performances. • N'utilisez pas votre tablette à proximité d'équipements médicaux sans autorisation. Évitez de placer la tablette au-dessus d'un stimulateur cardiaque (par exemple, dans votre poche poitrine). • La tablette peut perturber le fonctionnement de certaines prothèses auditives.
  • Page 138: Sécurité Au Volant

    • Des interférences mineures peuvent perturber le bon fonctionnement des téléviseurs, radios, ordinateurs, etc. Sécurité au volant Vérifiez les lois et règlements en vigueur en matière d'utilisation de la tablette dans la zone où vous conduisez. • N'utilisez pas d'appareil portatif en roulant. • Concentrez toute votre attention sur la conduite. • Les radiofréquences peuvent affecter certains systèmes électroniques de votre véhicule motorisé, tels que le système audio stéréo ou les équipements de sécurité. • Lorsque votre véhicule est équipé d’un airbag, ne gênez pas son déclenchement avec un équipement sans fil mobile ou fixe. Il risquerait de l’empêcher de s’ouvrir ou provoquer de graves blessures en raison de performances inadéquates. • Lorsque vous écoutez de la musique en extérieur, veuillez vous assurer que le volume n'est pas trop élevé de façon à bien entendre ce qu'il se passe autour de vous. Ceci est particulièrement important lorsque vous trouvez à proximité d'une route. Évitez toute nuisance auditive REMARQUE : Un volume sonore trop élevé provenant de vos écouteurs (oreillettes, casques) pourrait entraîner d'éventuels dommages auditifs. Afin d’éviter des dommages auditifs éventuels, ne pas écouter à un niveau sonore élevé pendant une longue durée.
  • Page 139: Pièces En Verre

    • Afin de protéger vos capacités auditives, n'exposez pas votre ouïe à de hauts volumes sonores pendant de longues périodes. Nous vous recommandons de ne pas allumer ou éteindre la tablette près de votre oreille. Nous préconisons également de régler le volume musical à un niveau raisonnable. • Lorsque vous utilisez des écouteurs, baissez le volume si vous n'entendez pas les gens parler près de vous ou si la personne assise à côté de vous entend ce que vous écoutez. Pièces en verre Certaines pièces de votre tablette sont en verre. Ce verre pourrait se briser en cas de chute de l'appareil sur une surface dure ou d'impact important. Dans ce cas, évitez de toucher ou de retirer le verre brisé. N'utilisez plus votre appareil jusqu'à ce que ce verre soit remplacé par un fournisseur de service agréé. Zone de dynamitage N'utilisez pas la tablette lorsque des opérations de dynamitage sont en cours. Respectez les restrictions, les règlements et les lois en vigueur. Atmosphères potentiellement explosives • N'utilisez pas votre tablette dans une station-service. • N'utilisez pas votre téléphone à proximité de carburant ou de produits chimiques. • Ne transportez pas ou ne stockez pas des produits dangereux, des liquides ou des gaz inflammables dans le même compartiment de votre voiture que votre tablette ou ses accessoires.
  • Page 140: Informations Sur La Batterie Et Précautions D'usage

    En avion Les appareils sans fil peuvent générer des interférences dans les avions. • Éteignez votre tablette avant d'embarquer dans un avion. • Ne l'utilisez pas au sol sans autorisation de l'équipage. Enfants Conservez l'appareil dans un endroit sûr, hors de portée des enfants. Il comprend des petites pièces qui peuvent présenter un risque de suffocation. Cet appareil contient également une batterie interne qui peut être dangereuse si l'appareil n'est pas utilisé ou entretenu correctement. Informations sur la batterie et précautions d'usage • Il n'est pas nécessaire de décharger complètement la batterie avant de la recharger. Contrairement aux autres batteries, elle n'a pas d'effet mémoire pouvant compromettre ses performances. • Utilisez uniquement les batteries et chargeurs LG. Les chargeurs LG sont conçus pour optimiser la durée de vie de votre batterie. • Ne démontez pas et ne court-circuitez pas la batterie. • Rechargez la batterie en cas de non-utilisation prolongée afin d'optimiser sa durée d'utilisation. • N'exposez pas le chargeur de batterie au rayonnement direct du soleil et ne l'utilisez pas dans des lieux très humides tels qu'une salle de bains. Ne laissez pas l'appareil dans des endroits très chauds ou froids, car cela pourrait affecter les performances de la batterie. • Le remplacement de la batterie par un modèle inadapté risque d'entraîner une explosion de cette dernière.
  • Page 141 • Respectez les instructions du fabricant relatives à la mise au rebut des batteries usagées. Veuillez recycler autant que faire se peut. Ne vous en débarrassez pas avec les déchets ménagers. • Débranchez systématiquement le chargeur de la prise murale lorsque la tablette est complètement chargée pour éviter une consommation d'énergie inutile. • La durée de vie réelle de la batterie dépend de la configuration du réseau, des paramètres du produit, de son utilisation, de la batterie et des conditions extérieures. • Tenez la batterie hors de portée des animaux et de leurs crocs ou griffes, ainsi que des objets pointus en général. Le non-respect de cette consigne peut entraîner un incendie.
  • Page 142 AVERTISSEMENT Instructions relatives au remplacement de la batterie • Les batteries Li-Ion sont des composants dangereux qui peuvent provoquer des blessures. • Le remplacement de la batterie par un professionnel non qualifié peut endommager votre périphérique. • Ne remplacez pas vous-même la batterie. La batterie pourrait être endommagée et risquerait de provoquer une surchauffe et des blessures. La batterie doit être remplacée par un fournisseur de services agréé. La batterie doit être recyclée et ne pas être jetée avec les déchets ménagers. • Dans le cas où ce produit contiendrait une batterie intégrée impossible à retirer facilement par les utilisateurs finaux, LG recommande de confier exclusivement à des professionnels qualifiés le soin de retirer la batterie, que ce soit pour la remplacer ou pour la recycler lorsque le produit est arrivée en fin de vie. Pour éviter d’endommager le produit et pour leur propre sécurité, les utilisateurs ne doivent pas tenter de retirer la batterie et ils doivent demander conseil à l’aide en ligne de LG Service ou à d’autres prestataires de services indépendants. • Le retrait de la batterie implique de démonter le boîtier du produit, de débrancher les câbles/contacts électriques et d’extraire avec précaution la cellule de la batterie en s’aidant d’outils spécialisés. En allant sur http://www.lge.com/global/sustainability/environment/take-back- recycling, vous trouverez des instructions destinées aux professionnels qualifiés sur les procédures à employer pour retirer la batterie en toute sécurité.
  • Page 143 à jour > Mise à jour logicielle > Rechercher les mises à jour maintenant. • Mettez votre tablette à jour en la connectant à votre PC. Pour plus d'informations sur l'utilisation de cette fonction, veuillez consulter le site http://www.lg.com/common/index.jsp et sélectionnez le pays et la langue. DÉCLARATION DE CONFORMITÉ Par la présente, LG Electronics déclare que le produit LG-V480 est conforme aux exigences fondamentales et autres dispositions pertinentes de la Directive 1999/5/EC. Une copie de la Déclaration de conformité figure sur le site http://www.lg.com/global/declaration Contactez notre bureau pour en savoir plus sur la conformité de ce produit LG Electronics Inc. EU Representative, Krijgsman 1, 1186 DM Amstelveen, The Netherlands...
  • Page 144 Recyclage de votre ancienne tablette Les éléments électriques et électroniques doivent être jetés séparément, dans les vide-ordures prévus à cet effet par votre municipalité ou être rapportés dans un magasin de téléphonie mobile. Le recyclage de votre tablette dans une poubelle appropriée ou en magasin aidera à réduire les risques pour l’environnement et votre santé. Pour plus d’informations concernant l’élimination de votre ancien appareil, veuillez contacter votre mairie, le service des ordures ménagères ou encore le magasin où vous avez acheté ce produit. Recyclage des batteries/accumulateurs usagés Ce symbole peut être associé aux symboles chimiques du mercure (Hg), du cadmium (Cd) ou du plomb (Pb) si la batterie contient plus de 0,0005 % de mercure, 0,002 % de cadmium ou 0,004 % de plomb. Les batteries/accumulateurs doivent être jetés séparément, dans les déchetteries prévues à cet effet par votre municipalité ou être rapportés dans un magasin de téléphonie mobile. La mise au rebut de vos batteries/accumulateurs dans une poubelle appropriée ou dans un magasin de téléphonie mobile aidera à réduire les risques pour l’environnement et votre santé. Pour plus d’informations concernant le recyclage de vos batteries/ accumulateurs, veuillez contacter votre mairie, le service des ordures ménagères ou encore le magasin où vous avez acheté ce produit.
  • Page 145: Avertissement

    Avertissement Veuillez lire ceci avant de commencer à utiliser votre tablette ! Veuillez vérifier si les problèmes rencontrés avec votre tablette sont décrits dans cette section avant d'amener votre tablette pour la faire réparer, ou d'appeler un représentant du service à la clientèle. 1. Mémoire de la tablette Vous devez vérifier la mémoire de votre tablette et supprimer certaines données telles que des applications, pour libérer de la mémoire. Pour désinstaller des applications : Appuyez sur > > onglet Applications > Paramètres > Applications. Lorsque toutes les applications sont affichées, sélectionnez l'application que vous souhaitez désinstaller. Appuyez sur Désinstaller et OK pour confirmer. 2. Avant d'installer une application et un système d'exploitation Open source (OS) AVERTISSEMENT Si vous installez et utilisez un système d'exploitation autre que celui fourni...
  • Page 146: Utilisation Du Verrouillage D'écran

    AVERTISSEMENT Pour protéger votre tablette ainsi que vos données personnelles, téléchargez uniquement des applications provenant de sources fiables, telles que Play Store. Si des applications mal installées figurent sur votre tablette, la tablette peut ne pas fonctionner normalement ou une grave erreur peut se produire. Vous devez désinstaller ces applications de votre tablette, ainsi que tous les paramètres et données associés. 3. Utilisation du verrouillage d'écran Définissez un verrouillage d'écran pour assurer la protection de votre tablette. Appuyez sur > > onglet Applications > Paramètres > Écran > Écran de verrouillage > Choisir l'écran de verrouillage et sélectionnez le verrouillage d'écran souhaité parmi les options Glisser, Knock Code, Schéma, Code PIN et Mot de passe. Vous pouvez créer un code PIN de sauvegarde par mesure de sécurité en cas d'oubli du motif de verrouillage d'écran. Attention : Veuillez créer ou vous connecter à un compte Google avant de définir un verrouillage d'écran et mémorisez le code PIN de sauvegarde créé lors de la création du verrouillage d'écran.
  • Page 147 AVERTISSEMENT Précautions à prendre lors de l'utilisation d'un verrouillage d'écran. Il est très important de se souvenir du verrouillage d'écran que vous avez défini. Vous ne serez plus en mesure d'accéder à votre tablette si vous utilisez à 5 reprises un motif de verrouillage d'écran incorrect. Vous disposez de 5 tentatives pour saisir votre schéma de déverrouillage, votre code PIN ou votre mot de passe. Suite à 5 tentatives infructueuses, vous pouvez réessayer après 30 secondes. Lorsque vous avez oublié votre schéma de déverrouillage, votre code PIN ou votre mot de passe : < si vous avez oublié votre schéma > Si vous êtes connecté à votre compte Google sur la tablette mais que vos tentatives de saisie du schéma correct ont échoué à 5 reprises, appuyez sur le bouton Schéma oublié ? au bas de l'écran. Vous devez ensuite vous...
  • Page 148: Utilisation De La Réinitialisation Matérielle (Réinitialisation D'usine)

    4. Utilisation de la réinitialisation matérielle (réinitialisation d'usine) Si votre tablette ne se restaure pas dans son état d'origine, utilisez une réinitialisation matérielle (réinitialisation aux valeurs d'usine) pour l'initialiser. Éteignez votre tablette. Maintenez au préalable la touche Volume bas enfoncée , puis appuyez de façon prolongée sur la touche Marche-Arrêt/Verrouillage sur le côté droit de la tablette jusqu'à ce que le logo LG s'affiche. Relâchez ces touches uniquement lorsque le logo LG s'affiche. Maintenez ensuite les touches Marche-Arrêt/Verrouillage + Volume bas enfoncées simultanément. Relâchez toutes les touches lorsque l'écran Réinitialisation matérielle aux valeurs d'usine s'affiche. Appuyez sur n'importe laquelle des touches de volume pour déplacer le curseur sur Oui, puis appuyez sur la touche Marche-Arrêt/Verrouillage pour continuer. Appuyez sur n'importe laquelle des touches de volume pour déplacer le curseur sur Oui à nouveau, puis appuyez sur la touche Marche-Arrêt/...
  • Page 149: Lorsque L'écran Reste Figé

    AVERTISSEMENT Si vous effectuez une réinitialisation matérielle, toutes les applications et les données d'utilisateur ainsi que vos licences DRM seront supprimées. N'oubliez pas de sauvegarder toutes les données importantes avant d'effectuer une réinitialisation matérielle. 5. Lorsque l'écran reste figé Si l'écran se fige ou si la tablette ne répond pas lorsque vous essayez de la mettre en marche : appuyez de façon prolongée sur la touche Marche- Arrêt/Verrouillage pendant 8 secondes jusqu'à ce que le logo LG s'affiche, pour redémarrer votre tablette. Si le problème persiste, contactez le centre de services.
  • Page 150: Apprendre À Connaître Votre Appareil

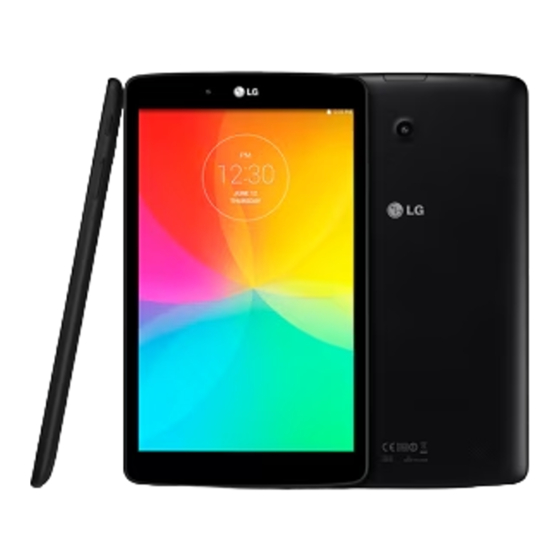
    Apprendre à connaître votre appareil Vue d'ensemble de la tablette Appareil Photo Frontal Touche Marche-Arrêt/Verrouillage Touches de volume Prise casque LED IR (infrarouge) Fente pour carte MicroSD Microphone Chargeur/Port Micro-USB Appareil photo principal Haut-parleurs REMARQUE : Pour des raisons esthétiques, votre tablette est conçue avec deux ouvertures de haut parleur à l'arrière. Toutefois, le son réel provient d'un seul haut-parleur. Veuillez noter qu'il ne s'agit pas d'un défaut du produit. REMARQUE : Assurez-vous que le microphone n'est pas bloqué lors de l'enregistrement d'un clip vidéo ou audio.
  • Page 151 Utilisez-le pour prendre des photos et enregistrer Appareil photo des vidéos de vous-même. Vous pouvez également frontal l'utiliser pour des conversations vidéo. Maintenez-le propre pour des performances optimales. Appuyez pour verrouiller/déverrouiller l'écran. Appuyez de façon prolongée pour allumer ou Touche Marche- éteindre la tablette, redémarrez-la, activez/ Arrêt/Verrouillage désactivez le mode Avion, modifiez ensuite les paramètres de son. Vous permet de régler les volumes des médias. Appuyez simultanément sur les deux touches et Touches de volume maintenez-les enfoncées pour accéder à la fonction QuickMemo+. Vous permet de brancher un casque d'écoute optionnel pour faciliter les conversations mains Prise casque libres. Vous pouvez également brancher des écouteurs pour écouter de la musique. LED IR Utilisé comme un capteur pour l'application (infrarouge) QuickRemote. Insérez une carte microSD pour le stockage de Fente pour carte fichiers tels que de la musique, des vidéos et des MicroSD photos. Enregistre votre voix et est utilisé pour les fonctions Microphone activées par commande vocale.
  • Page 152 Vous permet de connecter la tablette et le câble Chargeur/Port USB pour une utilisation avec l'adaptateur chargeur, Micro-USB votre PC ou d'autres accessoires compatibles. Utilisez-le pour prendre des photos et enregistrer Appareil photo des vidéos. Maintenez-le propre pour des principal performances optimales. Pour lire les fichiers audio depuis les fonctions Haut-parleurs sélectionnées (e.g., musique, vidéos, clips audio, etc.). AVERTISSEMENT Placer un objet lourd sur la tablette ou s'asseoir dessus peut endommager l'écran LCD ainsi que les fonctions de l'écran tactile. ASTUCE ! • Appuyez sur la touche Menu à chaque fois que vous ouvrez une application, pour prendre connaissance des options disponibles. • Si l'appareil est verrouillé et ne fonctionne pas, appuyez de façon prolongée sur la touche Marche/Arrêt pendant 8 secondes jusqu'à ce que le logo LG s'affiche pour redémarrer votre tablette.
  • Page 153: Charger Votre Tablette

    Charger votre tablette Un chargeur USB, inclus avec votre tablette, est utilisé pour recharger la batterie. Avant d'utiliser votre tablette pour la première fois, assurez-vous que la batterie est complètement chargée. REMARQUE : Votre appareil est équipé d'une batterie interne rechargeable. Pour votre sécurité, veuillez ne pas extraire la batterie intégrée au produit. Avertissement ! Si l'écran tactile ne fonctionne pas alors que la tablette est en cours de chargement, cela peut être dû à une alimentation instable. Si cela se produit, déconnectez le câble USB de l'appareil ou débranchez le chargeur USB de la prise électrique. Branchez le chargeur USB et le câble USB. Branchez le câble USB (comme illustré ci-dessous) sur le port du chargeur USB de la tablette. Branchez le chargeur sur une prise électrique.
  • Page 154: Optimisation De La Durée De Vie De La Batterie

    REMARQUE : Pour optimiser la durée de vie de la batterie, celle-ci doit être complètement chargée lors d'une première utilisation. Optimisation de la durée de vie de la batterie Vous pouvez prolonger la durée de vie de votre batterie entre les cycles de charge en désactivant les fonctions dont l'exécution en arrière-plan n'est pas justifiée. Vous pouvez également surveiller le comportement des applications et des ressources du système qui consomment l'énergie de la batterie. Pour prolonger de la durée de vie de votre batterie • Désactivez les communications radio que vous n'utilisez pas, telles que Wi-Fi, Bluetooth ou GPS. • Réduisez la luminosité de l'écran et définissez un délai de mise en veille réduit. • Désactivez la synchronisation automatique de Gmail™, du calendrier, des contacts et autres applications. • Certaines applications que vous avez téléchargées peuvent réduire l'autonomie de la batterie. • Lorsque vous utilisez des applications téléchargées, vérifiez le niveau de charge de la batterie.
  • Page 155: Vérification Du Niveau De Charge De La Batterie

    Vérification du niveau de charge de la batterie Dans l'écran d'accueil, appuyez sur Applications > Paramètres > À propos de la tablette > Batterie. L'état de la batterie (charge ou décharge) et son niveau sont affichés sur le menu supérieur de l'écran. Pour surveiller et contrôler les ressources utilisées par la batterie Dans l'écran d'accueil, appuyez sur Applications > Paramètres > À propos de la tablette > Batterie > Utilisation batterie. L'écran affiche la durée d'utilisation de la batterie et répertorie également les applications ou services utilisant l'énergie de la batterie, en ordre décroissant en fonction de l'énergie qu'ils consomment individuellement. Insertion d'une carte microSD Votre appareil prend en charge l'utilisation de cartes mémoire microSD d'une capacité allant jusqu'à 32 GB. Les contenus multimédias peut être...
  • Page 156: Retrait De La Carte Microsd

    I nsérez la carte mémoire dans la fente avec les contacts orientés vers l'écran. Poussez délicatement le couvercle du logement de la carte mémoire dans la tablette pour la refermer. Retrait de la carte microSD Pour retirer en toute sécurité la carte microSD de votre tablette, vous devez tout d'abord la désactiver. Dans l'écran d'accueil, appuyez sur Applications > Paramètres > Stockage > Désactiver la carte SD. Ouvrez le tiroir de carte microSD et poussez la carte afin de la retirer. Tirez doucement la carte microSD pour l'extraire de la fente.
  • Page 157: Formatage De La Carte Microsd

    Avertissement ! Ne tentez pas d'extraire la carte microSD sans l'avoir préalablement désactivée. Faute de quoi, vous pourriez endommager la carte microSD ainsi que votre tablette, et les données stockées sur la carte microSD pourraient être corrompues. Formatage de la carte microSD Avertissement ! Tous les fichiers stockés dans votre carte microSD sont effacés lorsque vous formatez la carte. Dans l'écran d'accueil, appuyez sur Applications > Paramètres > Stockage. Appuyez (à deux reprises) sur Effacer la carte SD. Si vous avez activé un schéma de déverrouillage, saisissez-le et appuyez sur Tout effacer. La carte est alors formatée et prête à être utilisée. REMARQUE : Si votre carte microSD contient des données, la structure des dossiers peut être différente après le formatage, consécutivement à la suppression de tous les fichiers. Verrouillage et déverrouillage de l'écran Si vous n'utilisez pas la tablette pendant un certain temps, l'écran sera automatiquement éteint et verrouillé. Cela permet de prévenir les sélections accidentelles sur l'écran et d'économiser la batterie. Lorsque vous n'utilisez pas votre tablette, appuyez sur la Touche Marche-Arrêt/Verrouillage pour verrouiller votre tablette.
  • Page 158: Activation De L'écran À L'aide De La Fonction Knockon

    Si des programmes sont en cours d'exécution lors du verrouillage de l'écran, il se peut qu'il continuent à s'exécuter indépendamment du mode Verrouillage. Il est recommandé de quitter tous les programmes avant de saisir le mode Verrouillage, afin d'éviter des frais inutiles (p.ex., accès à Internet, transmission de données ). Pour réactiver votre tablette, appuyez sur la touche Marche-Arrêt/ Verrouillage . L'écran de verrouillage s'affiche. Appuyez sur l'écran de verrouillage et faites glisser votre doigt dans n'importe quelle direction pour déverrouiller votre écran d'accueil. Le dernier écran que vous avez consulté s'ouvre alors. Activation de l'écran à l'aide de la fonction KnockON La fonction KnockON vous permet, en appuyant à deux reprises sur l'écran, de facilement l'activer ou le désactiver. • Appuyez rapidement à deux reprises sur le centre de l'écran pour l'activer. • Appuyez rapidement à deux reprises sur la barre d'état, sur un espace vierge de l'écran d'accueil ou sur l'écran de verrouillage pour éteindre l'écran.
  • Page 159: Déverrouillage De L'écran Avec La Fonction Knock Code

    Déverrouillage de l'écran avec la fonction Knock Code La fonction Knock Code vous permet de créer votre propre code de déverrouillage en utilisant une combinaison de frappes (ou touches) sur l'écran. • Lorsque l'écran est éteint, appuyez sur la même séquence que vous avez établie, n'importe où sur l'écran. L'écran d'accueil sera directement accessible. Pour activer la fonction Knock Code À partir de l'écran d'accueil, appuyez sur Applications > Paramètres > Écran > Écran de verrouillage > Choisir l'écran de verrouillage > Knock Code. Cette option permet d'afficher un écran qui vous aidera à sélectionner une séquence de déverrouillage. Vous devez créer un code PIN de secours par mesure de sécurité en cas d'oubli de votre séquence de déverrouillage.
  • Page 160: Votre Écran D'accueil

    Votre écran d'accueil Conseils d'utilisation de l'écran tactile Voici quelques conseils relatifs à la façon de naviguer sur votre tablette. REMARQUE : • Pour sélectionner un élément, appuyez au centre de l'icône. • N'exercez pas une pression trop forte sur l'écran tactile ; celui-ci est suffisamment sensible pour détecter un toucher léger, et néanmoins ferme. • Appuyez du bout du doigt sur l'option souhaitée. Veillez à ne pas appuyer sur d'autres touches. Appuyer ou effleurer Une simple pression du doigt sélectionne des articles, des liens, des raccourcis et des lettres sur le clavier à l'écran. Appui de façon prolongée Appuyez de façon prolongée sur un élément à l'écran en le touchant, sans relâcher la pression du doigt, jusqu'à ce qu'une action se produise. Par exemple, pour ouvrir les options disponibles d'un contact, appuyez de façon prolongée sur le contact figurant dans la liste Contacts jusqu'à ce que le menu contextuel s'affiche. Glisser Appuyez de façon prolongée sur un élément et, sans relâcher la pression du doigt, déplacez-le ensuite sur l'écran jusqu'à ce que vous atteigniez la position souhaitée. Vous pouvez faire glisser des éléments de l'écran d'accueil pour les repositionner.
  • Page 161: Faire Glisser Ou Déplacer

    Faire glisser ou déplacer Pour faire glisser ou déplacer, déplacez rapidement votre doigt sur la surface de l'écran, sans marquer de temps d'arrêt à partir de l'instant ou vous y posez votre doigt (de sorte à ne pas faire glisser un élément autre que celui sélectionné). Par exemple, vous pouvez déplacer l'écran vers le haut ou vers le bas pour faire défiler une liste, ou parcourir les différents écrans d'accueil en l'effleurant de gauche à droite (et vice versa). Double toucher Double toucher pour zoomer sur une page Web ou une carte. Par exemple, touchez rapidement à deux reprises la section d'une page Web pour redimensionner cette section et l'adapter à la largeur de l'écran. Vous pouvez également appuyer deux fois pour agrandir ou réduire une image et lorsque vous utilisez des Cartes. Touchez un mot à deux reprises pour le mettre en surbrillance. Le double toucher peut aussi activer la fonction KnockON pour allumer ou éteindre l'écran tactile. Zoom par pincement Utilisez votre index et votre pouce, dans un mouvement de pincement ou d'écartement, pour effectuer un zoom avant ou arrière lorsque vous utilisez le navigateur, des cartes, ou en parcourant des images. Faire pivoter l'écran À partir de nombreuses applications et menus, l'orientation de l'écran s'ajuste à l'orientation physique de l'appareil. Écran d'accueil Il vous suffit de faire glisser votre doigt vers la gauche ou vers la droite pour afficher les volets. Vous pouvez personnaliser chaque volet avec des applications, des téléchargements, des gadgets logiciels et des fonds d'écrans.
  • Page 162 Les touches de raccourci sont disponibles au bas de l'écran d'accueil et vous permettent d'accéder, d'un simple toucher, aux fonctions que vous utilisez le plus. Barre d'état – Affiche des informations sur l'état de l'appareil, y compris l'heure, le Wi-Fi, la puissance du signal, l'état d e la batterie et les icônes de notification. Icônes d'applications – Appuyez sur une icône (application, gadget logiciel, dossier, etc.) pour l'ouvrir et l'utiliser. Touches de raccourcis – Permettent d'accéder, d'un simple toucher, aux fonctions les plus souvent utilisées. Touche Dual Window (Double fenêtre) – Appuyez sur la touche pour passer en mode Double fenêtre. Cette fonction vous permet de gérer simultanément deux applications différentes en divisant l'écran en deux. Touche Applications récentes – Appuyez sur cette touche pour afficher les applications récemment utilisées. Vous pouvez également appuyer de façon prolongée sur cette touche pour afficher les options du menu dans les applications. Touche Accueil – Renvoie à l'écran d'accueil (ou restitue votre modèle d'écran d'accueil par défaut à partir de l'un des modèles d'extension d'écran d'accueil). Appuyez et maintenez la touche enfoncée pour accéder à Google Now.
  • Page 163: Personnalisation De L'écran D'accueil

    Personnalisation de l'écran d'accueil Vous pouvez personnaliser votre écran d'accueil en y ajoutant des applications, des téléchargements, des gadgets logiciels ou des fonds d'écran. Pour plus de commodité lors de l'utilisation de votre tablette, ajoutez vos applications préférées et des gadgets logiciels sur l'écran d'accueil. Pour ajouter des éléments sur votre écran d'accueil : Appuyez de façon prolongée sur la partie vierge de l'écran d'accueil. Activez l'onglet Applications ou Widgets. Faites glisser chaque élément à l'endroit souhaité, puis relevez votre doigt. Pour supprimer un élément de l'écran d'accueil : Appuyez de façon prolongée sur l'icône à supprimer, faites-la glisser vers , puis relevez votre doigt. ASTUCE ! Pour ajouter une icône d'application à l'écran d'accueil. Dans l'écran Applications, appuyez de façon prolongée sur l'application que vous souhaitez ajouter et faites-la glisser à l'emplacement voulu. ASTUCE ! Vous pouvez ajouter plusieurs icônes d'applications dans un dossier. Superposez une icône d'application sur une autre icône de l'écran d'accueil pour créer un dossier. Ouverture, activation, et arrêt des applications Appuyez sur pour afficher les applications récemment utilisées. Vous pouvez sauvegarder plusieurs applications en cours d'exécution au même...
  • Page 164: Utilisation De La Fonction Dual Window (Double Fenêtre)

    Utilisation de la fonction Dual Window (Double fenêtre) La fonction Dual window (Double fenêtre) divise l'écran pour permettre d'effectuer plusieurs tâches à la fois, un glisser-déposer, l'auto-liaison et d'exécuter les applications récemment utilisées. Touchez pour diviser l'écran ou appuyez et maintenez la touche jusqu'à ce que la liste des applications s'affiche. Appuyez sur une icône d'application ou déplacez-là vers l'emplacement souhaité. Appuyez sur pour afficher les options suivantes. Vous pouvez également faire glisser les onglets pour modifier la taille des fenêtres. Basculez entre les deux écrans. Modifiez la liste des applications. Affichage plein écran. Fermez les applications.
  • Page 165: Personnalisation Des Icônes Des Applications Sur L'écran D'accueil

    Pour désactiver la fonction Dual Window (Double fenêtre) > Double fenêtre. Appuyez sur > Applications > Paramètres Appuyez sur la touche Dual Window (Double fenêtre) pour la DÉSACTIVER. ASTUCE ! Vous pouvez lancer deux applications du Internet au même moment. Personnalisation des icônes des applications sur l'écran d'accueil Vous pouvez personnaliser chaque icône de l'application avec des images de votre galerie. Exercez une pression prolongée sur l'icône d'application jusqu'à ce que vous puissiez la déplacer. Puis déposez-la à l'endroit voulu. Le symbole de modification apparaît en haut à droite de l'application. Appuyez à nouveau sur l'icône, puis sélectionnez le design de l'icône souhaité et appuyez sur OK. Ou appuyez sur Ajouter nouveau, réglez la taille de l'icône et sélectionnez une image depuis votre Galerie.
  • Page 166: Accès Rapide

    Pour afficher d'autres volets de l'écran d'accueil • Faites glisser votre doigt vers la droite ou la gauche pour parcourir l'écran d'accueil. • Effectuez une pression sur l'écran d'accueil pour afficher la mini-vue du volet, puis appuyez sur le volet de l'écran d'accueil que vous souhaitez afficher. Accès rapide Pour afficher les éléments d'accès rapide, exercez une pression sur la touche avant et tirez-la vers le haut. Les options suivantes sont disponibles : Google Now.
  • Page 167: Notifications

    Notifications Les notifications vous préviennent lors de la réception de nouveaux messages, d'événements du calendrier et d'alarmes, ainsi que lors d'événements en cours tels que des téléchargements. Depuis le panneau de notifications, vous pouvez afficher l'état actuel de votre tablette ainsi que les notifications en attente. Lors de l'arrivée d'une notification, son icône s'affiche en haut de l'écran. Les icônes des notifications en attente s'affichent à gauche et les icônes du système, telles que la Wi-Fi ou le niveau de charge de la batterie, s'affichent à droite. Notifications en attente Notifications du système Accès aux notifications Faites glisser la Barre d'état vers le bas pour ouvrir le volet Notifications et accéder aux notifications. Pour fermer le volet Notifications, faites glisser vers le haut la barre située au bas de l'écran.
  • Page 168: Paramètres Rapides Sur Le Volet Notifications

    Barre des paramètres rapides – Glissez vers la droite ou vers la gauche pour faire défiler la liste. Appuyez sur une icône pour activer/désactiver la fonction. QSLIDE APPS – Appuyez sur une application QSlide pour qu'elle s'ouvre dans une petite fenêtre sur votre écran. Appuyez sur pour supprimer, ajouter ou réorganiser les applications QSlide. Glissez vers la gauche ou vers la droite pour régler la luminosité de l'écran et le volume. Bouton Supprimer – Appuyez ici pour effacer la liste des notifications en fonction des événements. Appuyez sur une notification pour l'ouvrir. Paramètres rapides sur le volet Notifications Utilisez les Paramètres rapides pour activer/désactiver facilement des paramètres de fonctions telles que le Wi-Fi. Les Paramètres rapides figurent en haut du volet Notifications. REMARQUE : Appuyez de façon prolongée sur une icône dans les Paramètres rapides pour afficher le menu Paramètres des fonctions.
  • Page 169: Pour Réorganiser Les Options De Paramètres Rapides Sur Le Volet Notifications

    Pour réorganiser les options de Paramètres rapides sur le volet Notifications Ouvrez le volet Notifications, faites glisser les Paramètres rapides vers la gauche et appuyez sur . Pour réorganiser les éléments, déplacez à l'endroit voulu. Pour ajouter des icônes, cochez les fonctions souhaitées. Applications QSlide sur le volet Notifications Les applications QSlide sont affichées dans une barre située sur le volet Notifications, au-dessous de la barre de paramètres rapides. Ces icônes offrent un moyen rapide et pratique d'effectuer plusieurs tâches sur le même écran (de la même manière qu'une image dans l'image sur un téléviseur). QSlide affiche une petite fenêtre d'application sur l'écran qui peut être déplacée, redimensionnée ou rendue transparente. REMARQUE : Vous pouvez supprimer la barre d'applications QSlide en appuyant sur l'icône QSlide dans la barre Réglages rapides. Utilisation des applications QSlide Appuyez sur l'une des applications QSlide figurant dans la barre pour l'activer. Lorsqu'elle est activée, la fonction QSlide ouvre l'application dans une fenêtre au premier plan, ce qui vous permet d'accéder à d'autres applications en arrière-plan. Vous pouvez ouvrir jusqu'à deux fenêtres QSlide simultanément. Icônes de notification sur la barre d'état Les icônes répertoriées dans le tableau ci-dessous figurent parmi les plus courantes.
  • Page 170 Icône Description Mode Avion Connecté à un réseau Wi-Fi Casque avec fil connecté Le Bluetooth est activé Avertissement du système Mode Vibreur activé Mode silencieux activé Batterie entièrement chargée Batterie en charge Partage de contenu activé Téléchargement de données en cours Chargement de données en cours Alarme activée GPS activé Données en cours de synchronisation Nouveau message Gmail...
  • Page 171: Utilisateurs Multiples

    Nouveau message Hangouts Chanson en cours de lecture Tablette connectée à un PC via un câble USB Mode d'économie de batterie activé Utilisateurs multiples Un seul profil propriétaire de la tablette peut être créé, mais plusieurs profils utilisateurs peuvent être ajoutés de sorte que d'autres personnes puissent se connecter indépendamment et utiliser la tablette. Chaque utilisateur de la tablette peut configurer ses propres paramètres, utiliser son propre espace de stockage, et avoir ses propres privilèges de mise à jour des applications. Privilèges du propriétaire de la tablette • Seul le profil propriétaire de la tablette peut ajouter un nouvel utilisateur parmi les profils et supprimer les profils utilisateurs. Limitations des multiples utilisateurs de la tablette • Tous les utilisateurs partagent entre eux la même batterie, la mémoire interne, et l'utilisation des données. • Les paramètres de langue choisis par l'un des utilisateurs s'appliquent à tous les autres utilisateurs. • Chaque utilisateur peut configurer et utiliser ses propres contenu et données (par ex. paramètres de l'écran d'accueil, du son, etc.). • Chaque utilisateur peut accepter les permissions des applications mises à jour au nom des autres utilisateurs.
  • Page 172: Pour Ajouter Un Nouvel Utilisateur À La Tablette

    • Les messages et les événements planifiés du calendrier ne seront notifiés qu'au profil utilisateur spécifié. • Si l'un des utilisateurs commence à imprimer un document par le Mobile Print, l'impression continuera même si le profil utilisateur a changé. • Le transfert des données, le téléchargement, la reproduction multimédia et les services de communication seront interrompus par un changement d'utilisateur. En revanche, la modification de l'ID utilisateur n'empêche pas la poursuite du transfert de données via Play Store. Pour ajouter un nouvel utilisateur à la tablette Dans l'écran d'accueil, appuyez sur Applications > Paramètres > Utilisateurs > Ajouter un utilisateur. Sélectionnez le type d'utilisateur que vous souhaitez ajouter. • Utilisateur : Les utilisateurs possèdent leurs propres applications et contenus. • Utilisateur restreint : Vous pouvez restreindre l'accès aux applications et au contenu de votre compte. L'assistant de configuration se lance pour vous aider à ajouter un nouvel utilisateur. Appuyez sur Configurer maintenant. • Après la création d'un nouvel utilisateur, l'utilisateur en question doit exécuter le processus de configuration lors de sa première connexion. Pour changer d'utilisateur Tirez la barre d'état en haut de l'écran vers le bas. Appuyez sur l'icône d'utilisateur pour afficher le panneau de changement d'utilisateur.
  • Page 173: Qslide

    QSlide La fonction QSlide vous permet de superposer une fenêtre sur l'écran de votre tablette pour faciliter l'exécution de plusieurs tâches à la fois. La fenêtre QSlide peut être ouverte depuis la barre d'QSLIDE APPS située sur le volet de notifications, ou bien directement depuis les applications qui prennent en charge la fonction QSlide. Ouvrez le volet de notifications et appuyez sur l'application souhaitée figurant dans la section QSLIDE APPS. Lors de l'utilisation d'une application qui prend en charge QSlide, appuyez sur . La fonction sera alors affichée en permanence dans une petite fenêtre sur votre écran.
  • Page 174: Utilisation De Qslide

    Utilisation de QSlide La fonction QSlide ouvre l'application associée dans une fenêtre au premier plan, ce qui vous permet d'accéder à d'autres applications en arrière-plan. Elle reste affichée en permanence à l'écran jusqu'à ce que vous la fermiez. Appuyez pour lancer QSlide. Appuyez sur cette touche pour quitter la fonction QSlide et revenir au mode plein écran. Appuyez ici pour régler la transparence. Appuyez pour quitter QSlide. Appuyez ici pour régler la taille. REMARQUE : La fonction QSlide peut prendre en charge deux fenêtres simultanément. QSlide ne prend en charge que les applications suivantes : Vidéo, Internet, Calendrier, E-mail, Gestionnaire de fichiers et calculatrice.
  • Page 175: Prendre Une Capture D'écran

    Prendre une capture d'écran Appuyez simultanément de façon prolongée sur la touche Volume bas et sur la touche Marche-Arrêt/Verrouillage pendant environ 2 secondes pour prendre une capture d'écran. Pour voir l'image capturée, allez sur Applications > Galerie > Screenshots Dossier. Utiliser QuickMemo+ pour prendre une capture d'écran Sur l'écran que vous souhaitez capturer, faites glisser la barre d'état vers le bas et sélectionnez QuickMemo+ Maintenez enfoncées les touches de Volume simultanément. Utilisation de Capture plus pour prendre une capture d'écran Cette fonctionnalité vous permet de capturer une partie de l'écran dans le navigateur Internet par défaut. Ouvrez l'application Internet et accédez à la page où vous souhaitez effectuer une capture d'écran.
  • Page 176: Méthodes De Saisie De Texte

    Appuyez pour que des majuscules. créer une nouvelle ligne dans le champ Message. Appuyez pour permuter entre le clavier numérique et Appuyez pour sélectionner celui des symboles. l'un des types de clavier. Appuyez pour saisir un Appuyez pour espace. sélectionner la langue du clavier. Appuyez pour accéder aux réglages du clavier LG. Appuyez et maintenez la touche enfoncée pour accéder au Presse-papier. Entrez le mot suggéré en utilisant la commande gestuelle Entrez le texte sur le clavier et les suggestions de mots connexes s'affichent. Appuyez sur ou glissez vers le haut sur l e côté gauche du clavier pour sélectionner la suggestion de gauche. Appuyez sur ou glissez vers le haut sur l e côté droit du clavier pour sélectionner la suggestion de droite.
  • Page 177: Saisie De Caractères Spéciaux

    Divisez le clavier à l'aide de la commande gestuelle La fonction Diviser le clavier vous permet d'utiliser les deux mains pour saisir du contenu. Chaque moitié du clavier décale à gauche et à droite de l'écran. Pour modifier la hauteur du clavier Réglez la hauteur du clavier pour afficher davantage l'écran et pour contrôler le clavier plus facilement. > Hauteur et disposition du clavier > Hauteur du clavier • Appuyez sur en orientation portrait > Appuyez et faites glisser l'icône pour ajuster la hauteur du clavier. Pour modifier les touches de la rangée du bas > Hauteur et disposition du clavier > Disposition • Appuyez sur QWERTY > Appuyez et faites glisser pour ajouter ou supprimer des...
  • Page 178: Configuration D'un Compte Google

    Configuration d'un compte Google Lorsque vous allumez votre tablette, vous avez la possibilité d'activer le réseau, de vous connecter à votre compte Google et de sélectionner la façon dont vous souhaitez utiliser certains services Google. Pour configurer votre compte Google • Connectez-vous à un compte Google à partir de l'écran d'invite de configuration. OU • Dans l'écran d'accueil, appuyez sur Applications > onglet Applications > Comptes et synchronisation > Ajouter un compte > > Paramètres Google. Si vous possédez déjà un compte Google, saisissez votre adresse e-mail et appuyez sur SUIVANT. Dans le cas contraire, appuyez sur OU CRÉER UN COMPTE et saisissez les informations nécessaires pour créer un nouveau compte Google. Une fois que vous avez configuré votre compte Google sur votre tablette, votre tablette se synchronise automatiquement avec votre compte Google sur le Web. Vos contacts, messages Gmail, événements de calendrier et autres informations issues de ces applications et des services sur le Web sont synchronisés avec votre tablette. (Cela dépendra de vos paramètres de synchronisation.) Une fois connecté, vous pouvez utiliser Gmail™ et profiter des services Google sur votre tablette.
  • Page 179: Connexion À Des Réseaux Et Des Périphériques

    Connexion à des réseaux et des périphériques Wi-Fi Le Wi-Fi permet d'accéder à Internet en haut-débit dans la zone de couverture d'un point d'accès sans fil (PA). Bénéficiez d'une connexion Wi-Fi à Internet sans frais supplémentaires. Connexion aux réseaux Wi-Fi Pour utiliser la fonction Wi-Fi sur votre tablette, vous devez accéder à une borne, également nommée « point d'accès sans fil ». Certaines bornes sont libres d'accès et vous pouvez vous y connecter très facilement. D'autres bornes Wi-Fi sont masquées ou font appel à des fonctions de sécurité ; vous devez configurer votre tablette pour pouvoir vous y connecter. Désactivez la fonction Wi-Fi lorsque vous ne l'utilisez pas afin de prolonger la durée de vie de votre batterie. Activation de la fonction Wi-Fi et connexion à un réseau Wi-Fi Dans l'écran d'accueil, appuyez sur Applications > onglet Applications > Paramètres > Wi-Fi. Appuyez sur pour activer le Wi-Fi et commencer la recherche des réseaux Wi-Fi disponibles. Appuyez sur Rechercher pour afficher la liste des réseaux Wi-Fi actifs à...
  • Page 180: Bluetooth

    Bluetooth Vous pouvez envoyer des données via Bluetooth en exécutant une application correspondante, et non depuis le menu Bluetooth, comme il est normalement d'usage sur la plupart d'autres téléphones mobiles et tablettes. REMARQUE : • LG décline toute responsabilité en cas de perte, d'interception ou de mauvaise utilisation de données envoyées ou reçues via la fonction sans fil Bluetooth. • Veillez toujours à ce que les périphériques avec lesquels vous échangez des données, ou dont vous recevez des données, soient toujours de confiance et correctement sécurisés. Si des obstacles se trouvent entre les périphériques, la portée opérationnelle peut être réduite. • Certains appareils, notamment ceux non testés ou approuvés par Bluetooth SIG, peuvent ne pas être compatibles avec votre appareil. Activer le Bluetooth et jumeler votre tablette avec un périphérique Bluetooth Vous devez jumeler votre appareil avec un autre appareil avant de vous y connecter. Dans l'écran d'accueil, appuyez sur Applications > onglet Applications > Paramètres > Bluetooth. Appuyez sur le commutateur Bluetooth pour activer cette fonction. Cochez la case située à coté du nom de votre tablette pour la rendre visible aux autres périphériques Bluetooth. REMARQUE : Pour sélectionner la durée de visibilité de votre dispositif, appuyez sur la touche Menu > Expiration de visibilité.
  • Page 181: Envoyer Des Données À L'aide De La Fonction Bluetooth

    Une liste des périphériques disponibles s'affiche. Appuyez sur le périphérique choisi dans la liste. REMARQUE : Selon le type de périphérique, vous pouvez avoir à saisir des codes correspondants, confirmer les codes concordants, ou les périphériques seront automatiquement associés. Lorsque le pairage est actif, votre tablette se connectera au périphérique. REMARQUE : Votre tablette ne prend pas en charge le profil mains libres. Par conséquent, l'utilisation des fonctions d'appel avec certains accessoires tels que les casques d'écoute Bluetooth ou les dispositifs compatibles Bluetooth peuvent ne pas être disponibles pour cet appareil. Envoyer des données à l'aide de la fonction Bluetooth Ouvrez l'élément et appuyez sur OU Appuyez de façon prolongée sur l'élément et sélectionnez Partager. OU Ouvrez l'élément et appuyez sur la touche Menu > Partager. Appuyez sur Bluetooth pour procéder à un partage via Bluetooth. REMARQUE : La méthode de sélection d'option peut varier en fonction du type de données. Recherchez un périphérique compatible Bluetooth et procédez à un jumelage.
  • Page 182: Recevoir Des Données À L'aide De La Fonction Bluetooth

    Recevoir des données à l'aide de la fonction Bluetooth Reportez-vous au guide d'utilisation du périphérique Bluetooth pour envoyer un fichier vers votre tablette. Les deux appareils doivent être appariés et les fonctions Bluetooth activées. Jumelez les appareils puis, lorsque vous recevez une demande d'autorisation Bluetooth, appuyez sur Accepter pour accepter le(s) fichier(s). SmartShare Vous pouvez facilement utiliser la fonction SmartShare dans les applications Galerie, Musique et autres. Profiter de contenus sur de nombreux périphériques Vous pouvez partager le contenu de votre tablette avec divers périphériques. Appuyez sur ou sur > SmartShare pour partager le contenu des applications Galerie, Musique et POLARIS Office 5. Lecture/Envoi Play – Vous pouvez lire votre contenu sur votre téléviseur, haut-parleur Bluetooth, etc. Beam – Vous pouvez envoyer votre contenu vers des appareils compatibles avec Bluetooth et SmartShare Beam. • SmartShare Beam – Cette fonction permet de transférer rapidement le contenu de la tablette par Wi-Fi Direct.
  • Page 183: Profiter De Contenus De Périphériques Situés À Proximité

    < Play > < Beam > Profiter de contenus de périphériques situés à proximité Vous pouvez bénéficier du contenu disponible sur des périphériques situés à proximité (i.e. PC, NAS, Mobile) dans les applications Galerie, Musique. Connexion de périphériques Connectez votre dispositif et d'autres dispositifs compatibles avec DLNA sur le même réseau Wi-Fi. Recherche d'autres périphériques Appuyez sur Appareils à proximité pour afficher les périphériques compatibles avec DLNA. Connectez votre téléphone au périphérique pour voir son contenu. Utiliser des contenus du Cloud Vous pouvez utiliser le contenu du Cloud (notamment Dropbox) dans les applications Galerie, Musique. Utiliser le Cloud REMARQUE : Les fonctionnalités prises en charge varient en fonction du Cloud. La récupération des données peut prendre un certain temps en fonction du Cloud.
  • Page 184: Qpair

    Sélectionnez Cloud dans les applications Galerie, Musique. Sélectionnez le Cloud que vous souhaitez utiliser et connectez-vous. Une fois connecté, vous pouvez utiliser le contenu du Cloud. Définissez les paramètres du Cloud pour sélectionner l'application qui utilisera le Cloud. QPair En connectant votre tablette et votre téléphone mobile via QPair, vous pouvez synchroniser les appels entrants, les messages ou les notifications des réseaux sociaux entre votre tablette et votre téléphone mobile. Démarrez QPair et appuyez sur Configuration initiale > Démarrer en premier lieu sur votre tablette, puis exécutez ensuite les mêmes étapes sur votre téléphone.
  • Page 185: Caractéristiques De Qpair

    ASTUCE ! Il se peut que l'application QPair ne soit pas préinstallée sur le téléphone. Allez sur Google Play Store, recherchez QPair et installez l'application. REMARQUE : • QPair fonctionne sur les téléphones Android 4.1 ou versions ultérieures. Certaines fonctions peuvent être limitées en fonction du modèle de votre téléphone. • QPair utilise la fonction Bluetooth, il se pourrait donc qu'il ne fonctionne pas correctement si vous modifiez les paramètres Bluetooth alors que QPair est en cours d'utilisation. La connexion Bluetooth est automatiquement activée. Caractéristiques de QPair Notification d'appels – Envoie une notification à la tablette lorsque le téléphone reçoit un appel. La notification affiche le numéro de téléphone de l'appelant et permet de répondre et de refuser l'appel. Vous pouvez également modifier les paramètres d'appel comme la sonnerie, le volume de sonnerie, la fonction Sonnerie avec vibreur ou Rejeter et envoyer un message. REMARQUE : Vous pouvez uniquement recevoir des appels passés avec la technologie Bluetooth. Il n'est pas possible de passer un appel depuis la tablette en utilisant la fonction QPair. Notification de message – Envoie une notification à la tablette lorsque le téléphone reçoit un message. Vous pouvez également modifier les paramètres de messages comme le message contextuel, l'aperçu et la notification sonore et par vibration.
  • Page 186: Connexions Au Pc Via Un Câble Usb

    Internet via téléphone – Connecte automatiquement votre tablette avec Internet via votre tablette (suivant le même principe qu'un point d'accès Wi-Fi mobile). L'utilisation de cette fonction peut entraîner des frais de données supplémentaires. Pour sauvegarder l'utilisation de données sur le téléphone, le téléphone se connecte automatiquement sur tout point d'accès Wi-Fi mobile sécurisé à sa portée. Connexions au PC via un câble USB Vous pouvez connecter votre tablette à votre PC pour la charger, transférer des éléments vers le PC à partir de la tablette et vice versa. Transfert de musique, de photos et de vidéos à l'aide du mode Appareil multimédia (MTP) Connectez votre tablette à l'ordinateur à l'aide d'un câble USB. Si vous n'avez pas installé le pilote LG Android Platform Driver sur votre ordinateur, vous devez modifier les paramètres manuellement. Pour modifier les paramètres, faites glisser la barre d'état vers le bas et appuyez sur le mode de connexion USB actuel > Appareil multimédia (MTP).
  • Page 187: Synchronisation Avec Windows Media Player

    Vous pouvez alors afficher le contenu de l'appareil multimédia sur votre PC et transférer des fichiers. REMARQUE : Si vous souhaitez modifier les paramètres de connexion USB, faites glisser la barre d'état vers le bas et sélectionnez le mode de connexion USB. Le paramètre est visible dans la barre d'état uniquement lorsque vous connectez un câble USB à la tablette. Synchronisation avec Windows Media Player Assurez-vous que Windows Media Player est installé sur votre ordinateur. À l'aide du câble USB, connectez la tablette à un PC sur lequel Windows Media Player est installé. Sélectionnez l'option Appareil média (MTP). Une fois la connexion établie, une fenêtre contextuelle s'affiche sur le PC. Sélectionnez l'option Windows Media Player pour synchroniser des fichiers de musique. Modifiez ou saisissez le nom de votre appareil dans la fenêtre contextuelle (si nécessaire). Sélectionnez et faites glisser les fichiers musicaux souhaités vers liste de synchronisation. Lancez la synchronisation. • Les conditions suivantes doivent être satisfaites pour se synchroniser avec Windows Media Player.
  • Page 188: Connexions Pc À L'aide D'un Câble Usb Pour Les Utilisateurs De Mac Os X

    Éléments Condition requise Microsoft Windows XP SP2, Vista Système d'exploitation ou version ultérieure Windows Media Player 10 ou Version de Windows Media Player version ultérieure • Si la version de Windows Media Player est antérieure à 10, installez la version 10 ou une nouvelle version. Connexions PC à l'aide d'un câble USB pour les utilisateurs de Mac OS X En configurant le programme Android File Transfer, vous pouvez transférer des contenus multimédia depuis votre tablette vers votre ordinateur équipé d'un système d'exploitation Mac OS X et vice versa. Téléchargez et installez le programme Android File Transfer pour les utilisateurs de Mac depuis le site android.com (http://www.android.com/filetransfer/). Connectez votre tablette à votre ordinateur et cliquez deux fois sur l'application AFT (Android File Transfer program) pour lancer cette dernière. Vous pouvez afficher les contenus multimédia et les faire glisser de votre tablette vers votre ordinateur et vice versa.
  • Page 189: Répertoire

    Répertoire Vous avez la possibilité d'ajouter des contacts sur votre tablette et de les synchroniser avec ceux de votre compte Google ou d'autres comptes prenant en charge la synchronisation des contacts. Recherche d'un contact Depuis l'écran d'accueil, appuyez sur Répertoire pour ouvrir votre liste de contacts. Appuyez sur le champ de Rechercher un contact et saisissez le nom du contact. Vous pouvez aussi appuyer sur une des lettres situées le long du coté gauche de l'écran pour accéder aux noms commençant par la lettre choisie. Ajout d'un nouveau contact Sur l'écran d'accueil, appuyez sur Répertoire Appuyez sur Nouveau contact . Sélectionnez le compte voulu (le cas échéant). Si vous souhaitez associer une image au nouveau contact, appuyez sur . Choisissez à partir de Prendre une photo pour prendre une photo avec l'appareil photo ou Sélectionner à partir de la Galerie. Recherchez ensuite une image et sélectionnez-la. Appuyez sur pour saisir des informations plus précises sur le nom. Saisissez les coordonnées du contact. Appuyez sur Enregistrer.
  • Page 190: Contacts Favoris

    Contacts favoris Vous pouvez classer parmi les favoris les contacts que vous appelez fréquemment. Pour ajouter un contact à vos favoris Sur l'écran d'accueil, appuyez sur Répertoire  pour ouvrir votre liste de contacts. Appuyez sur un contact pour afficher les informations le concernant. Appuyez sur l'étoile à la droite du nom du contact. L'étoile passe à la couleur dorée et le contact est ajouté à vos favoris. Pour supprimer un contact de votre liste de favoris Sur l'écran d'accueil, appuyez sur Répertoire  pour ouvrir votre liste de contacts. Appuyez sur l'onglet Favoris pour afficher vos contacts favoris. Appuyez sur un contact pour afficher les informations le concernant. Appuyez sur l'étoile dorée à droite du nom du contact. L'étoile devient grise et le contact est supprimé de vos favoris. Création d'un groupe Sur l'écran d'accueil, appuyez sur Répertoire  pour ouvrir votre liste de contacts. Appuyez sur l'onglet Groupes tab, puis sur Saisissez un nom pour ce nouveau groupe.
  • Page 191 Appuyez sur Enregistrer pour sauvegarder le groupe. REMARQUE : La suppression d'un groupe n'entraîne pas la suppression des contacts qui lui sont affectés. Ils seront conservés dans votre répertoire.
  • Page 192: Email

    Email Vous pouvez vous servir de l'application E-mail pour lire des e-mails provenant de services de messagerie comme Yahoo!, MSN et AOL. L'application E-mail prend en charge les types de comptes suivants : POP3, IMAP et Exchange. Votre opérateur ou votre administrateur système peut vous fournir les paramètres de compte dont vous avez besoin. Gestion d'un compte de messagerie Appuyez sur Email à l'écran d'accueil. La première fois que vous ouvrez l'application Email, un assistant de configuration s'affiche pour vous aider à configurer un compte de messagerie. Après la configuration initiale, le contenu de votre boîte de réception s'affiche. Si vous avez ajouté plusieurs comptes, vous pouvez effectuer des substitutions entre comptes. Ajouter un compte de messagerie : • Ouvrez l'application Email et appuyez sur la touche Menu > Paramètres > Ajouter un compte. Pour basculer entre les comptes : Si vous avez ajouté plus d'un compte, vous pouvez facilement basculer entre eux. Depuis n'importe quel dossier de messagerie, appuyez sur le compte actuel (en haut de l'écran), puis appuyez sur le compte auquel vous souhaitez accéder.
  • Page 193: Utilisation Des Dossiers De Comptes

    Modification des paramètres de messagerie généraux : Ouvrez l'application Email et appuyez sur la touche Menu > Paramètres > Paramètres généraux pour configurer les paramètres qui s'appliquent à tous vos comptes. Appuyez sur un compte individuel pour configurer les paramètres de ce compte seul. Suppression d'un compte de messagerie : • Ouvrez l'application Email et appuyez sur la touche Menu > Paramètres > touche Menu > Supprimer le compte > touchez le compte que vous souhaitez supprimer > Supprimer > Oui. Utilisation des dossiers de comptes Ouvrez l'application Email et appuyez sur la touche Menu puis sélectionnez Dossiers. Chaque compte dispose des dossiers Reçus, Boîte d'envoi, Envoyés et Brouillons. Selon les fonctions prises en charge par le fournisseur de services de votre compte, vous pouvez disposer de dossiers supplémentaires. Composition et envoi d'un e-mail Dans l'application Email, appuyez sur Composer Saisissez l'adresse du destinataire du message. Au fur et à mesure que...
  • Page 194: Recevoir Des Courriels

    Saisissez l'objet et rédigez votre message. Appuyez sur la touche Envoyer pour envoyer le message. Si vous n'êtes pas connecté à un réseau, par exemple, si vous travaillez en mode Avion, les messages sont stockés dans le dossier Boîte d'envoi jusqu'à ce que vous soyez connecté à un réseau. Si elle contient des messages en attente, la boîte d'envoi s'affiche sur l'écran Comptes. Recevoir des courriels Lorsqu'un nouveau message arrive dans votre boite de réception, vous en serez averti par un son ou une vibration (en fonction de votre paramétrage des sons et vibrations) et son icône de notification s'affiche sur la barre d'état.
  • Page 195: Loisirs

    Loisirs Appareil Photo Pour ouvrir l'application Appareil photo, appuyez sur Appareil Photo sur l'écran d'accueil. Familiarisation avec le viseur D égager écran – Permet d'afficher ou de masquer les menus sur le viseur. É changer appareil photo – Permet de basculer entre l'objectif de l'appareil photo orienté vers l'arrière et celui orienté vers l'avant. Pour changer d'appareil photo, vous pouvez également faire glisser votre doigt sur l'écran. M ode – Permet de choisir le mode Auto ou Panorama pour le mode de prise de vue. Paramètres – Appuyez sur cette icône pour ouvrir le menu de paramétrage.
  • Page 196: Utilisation Des Paramètres Avancés

    G alerie – Effleurez pour afficher la dernière photo prise. Vous pouvez ainsi accéder à votre galerie et voir les photos enregistrées en mode Appareil photo. Mode Video – Appuyez pour lancer l'enregistrement d'une vidéo. Capturer – Permet de prendre une photo. Quitter – Touchez pour quitter le menu Appareil photo. REMARQUE : Assurez-vous que l'objectif est propre avant de prendre des photos. Utilisation des paramètres avancés Dans le viseur, appuyez sur pour ouvrir les options avancées. Permet de sélectionner la résolution de la photo. Si vous choisissez une forte résolution, la taille du fichier augmente et vous pourrez donc stocker moins de photos dans la mémoire. Prendre des photos par commande vocale. Définit une temporisation après avoir appuyé sur le déclencheur. La temporisation est très utile si vous voulez figurer sur une photo. Affiche les lignes de grille à l'écran pour vous permettre d'aligner vos photos. Ouvre le guide d'aide pour en savoir plus sur une fonction. ASTUCE ! Lorsque vous quittez le mode Appareil photo, certains paramètres sont rétablis sur leurs valeurs par défaut, comme la minuterie. Vérifiez-les avant de prendre votre prochaine photo.
  • Page 197: Prendre Une Photo

    Prendre une photo Ouvrez l'application Appareil Photo. Pointez l'objectif sur le sujet que vous souhaitez photographier. Appuyez sur pour prendre une photo. Vous pouvez aussi prendre un photo en appuyant n'importe où sur l'écran dans le mode Dégager écran. Permet d'effectuer un zoom avant ou arrière Lors de la prise d'une photo ou de l'enregistrement d'une vidéo, placez deux doigts sur l'écran et écartez-les pour effectuer un zoom avant. Pour effectuer un zoom arrière, pincez l'écran. Fonction Gesture Shot La fonction Gesture Shot avec geste permet de prendre une photo avec une seule main en utilisant l'appareil photo orienté vers l'avant. Pour prendre une photo, levez la main avec la paume ouverte jusqu'à ce que l'appareil photo la détecte et qu'un cadre apparaisse à l'écran. Fermez ensuite le poing. Un compte à rebours se lance, vous laissant le temps de vous préparer.
  • Page 198: Une Fois La Photo Prise

    Une fois la photo prise Appuyez sur l'aperçu de l'image à l'aide du bouton de capture pour afficher la dernière photo prise. Appuyez sur Galerie ou Photos, puis appuyez sur OK. Appuyez pour modifier la photo. Appuyez pour prendre immédiatement une autre photo. Appuyez pour envoyer votre mémo à d'autres personnes ou pour le partager via les services de réseaux sociaux. Appuyez pour supprimer la photo. Touchez pour accéder à plus d'options. Appuyez pour ajouter une photo à vos favoris. ASTUCE ! Si vous possédez un compte sur un site de réseau social et qu'il est configuré sur votre tablette, vous pouvez partager vos photos avec la communauté de votre réseau social. Appuyez sur l'icône Menu pour ouvrir les options suivantes. SmartShare – Appuyez pour partager votre photo à l'aide de la fonction SmartShare. Configurer l'image comme – Touchez pour utiliser la photo comme Fond d'écran d'accueil, Photo du contact, Fond d'écran de verrouillage ou Fond d'écran. Déplacer – Appuyez pour déplacer la photo vers un autre album. Copier – Appuyez pour copier la photo sélectionnée et la sauvegarder dans un autre album.
  • Page 199: Visualisation Des Photos Enregistrées

    Copier dans le presse-papier – Appuyez pour copier la photo et la conserver dans le Presse-papier. Diaporama – Affiche automatiquement les images du dossier sélectionné l'une après l'autre. Rotation à gauche/droite – Permet de faire pivoter l'image vers la gauche ou la droite. Rogner – Appuyez pour rogner une partie de la photo. Déplacez votre doigt sur l'écran pour sélectionner la zone à rogner. Ajouter localisation – Pour ajouter des informations relatives à la position géographique. Renommer – Appuyez pour modifier le nom de l'image sélectionnée. Imprimer – Vous permet d'imprimer la photo. Détails – Affiche des informations supplémentaires sur l'image. Visualisation des photos enregistrées Vous pouvez accéder à vos photos enregistrées depuis le mode Appareil photo. Appuyez simplement sur l'aperçu de l'image à l'aide du bouton de capture pour afficher votre Galerie. Choisissez l'application à utiliser pour voir et/ou éditer vos photos. Appuyez sur Galerie ou Photos Appuyez sur OK. • Pour afficher d'autres photos, faites défiler l'affichage vers la droite ou vers la gauche. • Pour effectuer un zoom avant ou arrière, appuyez à deux reprises sur l'écran ou posez-y deux doigts et écartez-les (pincez vos doigts pour effectuer un zoom arrière).
  • Page 200: Enregistrement D'une Vidéo

    Enregistrement d’une vidéo Ouvrez l'application Appareil Photo. Dirigez l'objectif vers le sujet que vous souhaitez filmer. Appuyez sur l'icône du mode Vidéo pour démarrer l'enregistrement. Un minuteur indiquant la durée de la vidéo s'affiche. Touchez à l'écran pour mettre fin à l'enregistrement. ASTUCE ! • Appuyez sur pour faire une pause dans l'enregistrement. • Appuyez sur pour prendre une photo tout en enregistrant une vidéo. Visionnage des vidéos enregistrées Accédez aux vidéos que vous avez enregistrées depuis le mode caméra vidéo en appuyant sur l'aperçu de l'image à l'aide du bouton de capture. Dans le viseur, appuyez sur l'aperçu de l'image à l'aide du bouton de capture. Votre Galerie apparaitra sur l'écran avec l'affichage de votre dernier enregistrement vidéo. Faite glisser l'écran vers la gauche pour faire défiler vos autres vidéos. Appuyez sur l'icône Lecture sur une vidéo pour démarrer automatiquement la lecture. REMARQUE : Vous pouvez visionner vos vidéos à partir des applications Galerie et Photos.
  • Page 201: Galerie

    REMARQUE : N'exercez pas une pression trop forte sur l'écran tactile ; celui-ci est suffisamment sensible pour détecter une pression légère, et néanmoins ferme. Galerie Vous pouvez enregistrer des fichiers multimédia dans une mémoire interne afin d'accéder facilement à tous vos fichiers multimédia. Utilisez cette application pour afficher les fichiers multimédia tels que les photos et vidéos. Dans l'écran d'accueil, appuyez sur Applications > onglet Applications > Galerie Vous pouvez gérer et partager toutes vos images et vidéos dans la Galerie. REMARQUE : • Selon le logiciel installé sur l'appareil, certains formats de fichiers ne sont pas pris en charge. • Certains fichiers peuvent ne pas être lus correctement, selon leur mode de codage. • Si la taille du fichier dépasse la mémoire disponible, une erreur risque de se produire à l'ouverture des fichiers. Visionnage des images À l'ouverture de la Galerie, vos dossiers disponibles s'affichent. Lorsqu'une autre application, telle qu'E-mail, enregistre une photo, le dossier de téléchargement est automatiquement créé pour y enregistrer la photo. De la même façon, le fait de prendre une capture d'écran crée automatiquement le dossier Captures d'écran. Appuyez sur un dossier pour l'ouvrir.
  • Page 202: Lecture De Vidéos

    Les images sont affichées suivant leur date de création. Sélectionnez une image pour l'afficher en plein écran. Faites défiler l’écran vers la droite ou vers la gauche pour afficher l'image précédente ou suivante. Lecture de vidéos Ouvrez l'application Galerie et sélectionnez un album. L'icône Lecture s'affiche sur les fichiers vidéos. Appuyez sur une image pour la sélectionner. Sélectionnez l'application pour la lire (appuyez sur l'application Photos ou sur l'application Vidéo ), puis appuyez sur OK et la lecture de la vidéo démarre. REMARQUE : • Lorsque vous utilisez l'application Vidéos pour lire une vidéo, faites glisser le côté gauche de l'écran vers le haut et vers le bas pour régler la luminosité. Faites glisser le côté droit de l'écran vers le haut et vers le bas pour régler le volume. • Lorsque vous utilisez l'application Vidéos pour lire une vidéo, faites glisser l'écran vers la gauche ou la droite pour activer le retour ou l'avance rapide. Suppression d'images et de vidéos Utilisez l'une des méthodes suivantes : • Dans un dossier, appuyez sur et sélectionnez les photos et vidéos que vous souhaitez supprimer, appuyez ensuite sur Supprimer, puis sur Oui pour confirmer. • Lors du visionnage d'une photo ou d'une vidéo, appuyez sur , puis sur Oui pour confirmer.
  • Page 203: Définition En Tant Que Fond D'écran

    Définition en tant que fond d'écran Lors du visionnage d'une photo, touchez l'cône Menu > Configurer l'image comme puis sélectionnez Photo du contact, Fond d'écran d'accueil, Fond d'écran de verrouillage ou Fond d'écran. Diaporama Vous pouvez afficher vos photos en mode diaporama par album ou en sélectionnant toutes vos photos. Depuis l'écran d'accueil, appuyez sur Galerie • Appuyez sur l'album contenant les photos que vous voulez regarder, puis appuyez sur l'icône Menu > Diaporama > sélectionnez les images que vous souhaitez regarder > Suivant > vérifiez les paramètres du diaporama > Démarrer. Appuyez sur le centre de l'écran pour arrêter la lecture du diaporama. Vidéos Votre Galerie dispose d'un lecteur vidéo intégré qui vous permet de regarder vos vidéos préférées. Lecture d'une vidéo Dans l'écran d'accueil, appuyez sur Applications > onglet Applications > Galerie > Vidéos...
  • Page 204 Appuyez pour ajouter la vidéo à vos favoris. Appuyez pour accéder à QSlide et pour afficher la vidéo dans une petite fenêtre. Appuyez pour partager votre vidéo via la fonction SmartShare. Touchez pour accéder à plus d'options. Appuyez pour gérer le volume de la vidéo. Touchez et maintenez pour une retour en arrière avec un incrément de 3 secondes. Tapotez une fois pour un retour en arrière de 10 secondes. Appuyez pour suspendre la lecture de la vidéo. Touchez et maintenez pour une avance rapide avec un incrément de 3 secondes. Tapotez une fois pour une avance rapide de 10 secondes. Touchez pour verrouiller/déverrouiller un écran vidéo. Pour modifier le volume au cours du visionnage d'une vidéo, utilisez les touches de réglage du volume situées sur le côté droit de la tablette.
  • Page 205: Musique

    Appuyez sur Galerie > (dans le coin supérieur gauche de la barre de titre) > Vidéos, puis appuyez de façon prolongée sur l'une des vidéos de la liste pour avoir accès aux options suivantes : Partager, Supprimer, Rogner, Renommer et Détails. ASTUCE ! Pendant la lecture de la vidéo, glissez vers le haut et vers le bas le long du coté gauche de l'écran pour régler la luminosité de l'écran. Glissez vers le haut et vers le bas le long du coté droit de l'écran pour régler le volume. Musique Votre tablette est équipée d'un lecteur audio qui vous permet d'écouter tous vos morceaux favoris. Pour accéder au lecteur audio, dans l'écran d'accueil, appuyez sur Applications > onglet Applications > Musique Transférer de la musique grâce au mode Appareil multimédia (MTP) Connectez la tablette à votre PC à l'aide du câble USB. Sélectionnez l'option Appareil média (MTP). Votre tablette s'affiche sur votre ordinateur sous la forme d'un autre disque dur. Cliquez sur ce disque pour l'afficher. Transférez les fichiers de votre PC vers le dossier du périphérique. Lecture d'une chanson Dans l'écran d'accueil, appuyez sur Applications > onglet Applications > Musique Appuyez sur l'onglet Chansons. Sélectionnez la chanson que vous souhaitez lire.
  • Page 206 Appuyez pour partager votre musique via la fonction SmartShare. Appuyez pour définir la chanson actuelle en tant que favorite. Appuyez pour afficher la liste de lecture en cours. Touchez pour accéder à plus d'options. Permet de régler le mode aléatoire. Permet de régler le mode Répétition. Permet de gérer le volume de la musique. Appuyez pour revenir au début de la chanson. Appuyez deux fois pour revenir à la chanson précédente. Appuyez de manière prolongée pour effectuer un retour rapide de 3 secondes.
  • Page 207 Permet de suspendre la lecture. Permet de passer à la piste suivante de l'album ou de la liste d'écoute. Appuyez de manière prolongée pour effectuer une avance rapide de 3 secondes. Appuyez pour régler l'effet audio. Pour changer le volume en cours d'écoute, appuyez sur les touches de réglage de volume situées sur le côté droit de la tablette. Appuyez de façon prolongée sur une chanson de la liste pour accéder aux options suivantes: Lire, Ajouter à la playlist, Supprimer, Partager, Détails et Rechercher. REMARQUE : • Selon le logiciel installé sur l'appareil, certains formats de fichiers ne sont pas pris en charge. • Si la taille du fichier dépasse la mémoire disponible, une erreur risque de se produire à l'ouverture des fichiers. • Les contenus musicaux peuvent être protégés par des traités internationaux, ainsi que par les législations nationales en vigueur en matière de copyright. Par conséquent, la copie ou la reproduction d'un contenu musical peut être soumise à l'obtention d'autorisations ou de licences particulières. Dans certains pays, la législation en vigueur interdit la copie à usage privé de tout contenu protégé par des droits d'auteur. Avant de télécharger ou de copier le fichier, veuillez prendre connaissance de la législation en vigueur dans votre pays relative à l'utilisation d'un tel contenu.
  • Page 208: Outils

    Outils QuickMemo+ La fonction QuickMemo+ vous permet de créer des mémos et de réaliser des captures d'écran. Capturez des écrans, ajoutez-y des dessins et partagez-les avec votre famille et vos amis avec la fonction QuickMemo+. Création d'un mémo À partir de l'écran, taper sur QuickMemo+ , puis sur pour créer un nouveau. Vous pouvez éditer des textes en saisissant les mots directement. Vous pouvez également sélectionner le type et la couleur du stylo que vous souhaitez et entrer le texte par une écriture manuscrite. Ajoutez un Rappel en touchant pour paramétrer la notification de Rappel pour un événement précis. Si un réseau de données est disponible, ajoutez à votre mémo des informations relatives à la météo et la localisation. Utilisations des options de QuickMemo+ Les options suivantes sont disponibles dans la barre d'outils de QuickMemo+ en haut de l'écran. Touchez pour ouvrir le mémo dans QSlide. Vous permet d'annuler ou de rétablir les actions précédentes. Vous permet d'éditer un texte, ses couleurs et son alignement.
  • Page 209 Vous permet de saisir un texte en écriture manuscrite. Vous pouvez choisir le type de stylo à utiliser, son épaisseur, sa transparence et sa couleur. Supprime vos éditions dans le mémo. Enregistre le mémo dans QuickMemo+. Touchez pour accéder à plus d'options. Vous permet de paramétrer une notification de Rappel pour un événement spécifique. Vous permet d'insérer des informations relatives à la météo dans le mémo. Vous permet d'ajouter des informations relatives à la localisation à l'aide d'un GPS. Capture d'écran pour votre QuickMemo. Pour accéder à la fonction QuickMemo+, faites-glisser la barre de statut vers le bas et touchez O U Appuyez simultanément sur les deux boutons de volume pendant une seconde. Sélectionnez l'option de menu que vous souhaitez à partir de la barre d'outils et créer un mémo. Touchez pour enregistrer le mémo. Pour sortir de QuickMemo+ à tout moment, touchez le bouton de retour...
  • Page 210: Quickremote

    REMARQUE : Appuyez sur l'écran tactile du bout du doigt pour utiliser la fonction QuickMemo+. N'utilisez pas vos ongles pour toucher l'écran. QuickRemote Avec QuickRemote, votre tablette se transforme en une commande universelle pour votre téléviseur, Blu-ray ou DVD. REMARQUE : La fonction QuickRemote peut ne pas être disponible sur certains appareils ou dans certaines régions. Ouvrir et Configurer QuickRemote À partir de l'écran d'accueil, touchez Applications > onglet Applications > QuickRemote Vous pouvez aussi effectuer le premier réglage de votre QuickRemote depuis le Panneau de notifications. Déroulez la barre de statut, touchez l'icône QuickRemote , puis touchez AJOUTER.
  • Page 211: Utilisation De Quickremote

    Appuyez sur pour sélectionner un type de pièce ou d'espace et appuyez sur pour ajouter l'appareil. Sélectionnez le type et la marque de chaque appareil, puis suivez les instructions à l'écran pour le configurer. REMARQUE : QuickRemote fonctionne dans votre région ou votre pays de la même manière qu'une télécommande ordinaire à signaux infrarouges (IR). Veillez à ne pas couvrir le capteur infrarouge situé au sommet de la tablette lorsque vous utilisez la fonction QuickRemote. Cette fonction peut ne pas être prise en charge en fonction du modèle, du fabricant ou de la société de service. Utilisation de QuickRemote Lancez QuickRemote et sélectionnez la pièce dans laquelle la télécommande a été configurée. Sélectionnez la télécommande de votre choix en touchant son type/nom sur la barre QuickRemote située sur le côté gauche de l'écran. Appuyez sur les boutons de la télécommande affichée.
  • Page 212: Horloge

    REMARQUE : Lors de l'ajout d'une télécommande de téléviseur, QuickRemote peut utiliser le bouton INPUT (SOURCE) pour configurer la télécommande appropriée. Lors de la configuration du bouton INPUT (SOURCE), la source d'entrée du téléviseur peut être modifiée. Pour réinitialiser la source d'entrée de votre téléviseur, appuyez plusieurs fois (en fonction du nombre d'appareils connectés au téléviseur) sur le bouton INPUT (SOURCE). Options QuickRemote Pour accéder au menu Options QuickRemote, touchez l'icône de menu pour sélectionner l'option désirée. REMARQUE : Lorsque vous lisez un fichier de musique en tâche de fond, le fait d'appuyer sur n'importe quelle touche QuickRemote met le son en sourdine pendant une seconde. Horloge Paramétrage de votre alarme À l'écran d'accueil, touchez Applications > onglet Applications > Horloge > Réglez l'alarme sur l'heure souhaitée. Définissez Répéter, Fréquence de répétition, Vibrer lorsqu’une alarme se met à sonner, Son alarme, Volume, Démarreur automatique d'application, Verrouiller par puzzle et Mémo.
  • Page 213: Calculatrice

    REMARQUE : Pour modifier les paramètres d'alarme dans la liste des alarmes, touchez l'cône du menu Menu icon et sélectionnez Paramètres. Calculatrice Utilisation de la calculatrice Dans l'écran d'accueil, appuyez sur Applications > onglet Applications > Calculatrice Saisissez les nombres à l'aide des touches numériques. Pour effectuer de simples calculs, touchez les symboles d'opérations ou ) suivis de REMARQUE : • Pour des opérations plus complexes, touchez l'icône Menu sélectionnez Calculatrice scientifique, et choisissez la fonction désirée. • Pour afficher l'historique des calculs, touchez l'icône du Menu > Historique des calculs. Agenda Les événements de chaque compte que vous avez ajouté à votre tablette et configurés pour synchroniser les calendriers s'affichent dans votre Calendrier.
  • Page 214: Ajout D'un Événement Au Calendrier

    Ajout d'un événement au calendrier Dans l'écran d'accueil, appuyez sur Applications > onglet Applications > Agenda Touchez l'icône de menu au coin supérieur gauche pour modifier l'aperçu du Calendrier (Jour, Semaine, Mois, Année, Planning). Sélectionnez la date à laquelle vous souhaitez ajouter un événement et touchez Appuyez sur le champ Nom de l'événement, puis saisissez le nom de l'événement. Appuyez sur le champ Emplacement, puis saisissez le lieu. Vérifiez la date, puis saisissez l'heure souhaitée de début et de fin de l'événement. Si vous souhaitez ajouter une note à votre événement, appuyez sur le champ Description et saisissez les détails voulus. Si vous souhaitez répéter l'alarme, définissez RÉPÉTER et définissez RAPPELS, si nécessaire. Appuyez sur Enregistrer pour enregistrer l'événement dans le calendrier. REMARQUE : Touchez et maintenez un point dans le calendrier pour enregistrer rapidement un événement à cette date. Saisissez simplement le nom de l'évènement et l'heure, puis touchez Enregistrer. Vous pouvez toucher Détails et saisir plus d'informations, ou mettre à jour l'évènement avec des détails supplémentaires...
  • Page 215: Tâches

    Modification de l'affichage du Calendrier. N'importe où vous êtes dans l'application Calendrier, vous pouvez facilement basculer entre les vues de calendrier. Touchez simplement dans la colonne supérieure gauche de la barre de titre, ou du côté gauche de l'écran. Glissez votre doigt de la gauche vers la droite pour afficher le menu des aperçus des calendriers. Touchez Jour, Semaine, Mois, Année, ou Planning. Tâches L'application Tâches peut être synchronisée avec votre compte MS Exchange. Vous pouvez créer et gérer vos tâches en utilisant votre tablette ou depuis MS Outlook ou MS Office Outlook Web Access. Dans l'écran d'accueil, touchez Applications > Tâches Touchez l'icône Ajouter une tâche (située au coin supérieur droit de l'écran). Saisissez l'Objet, DATE DE DÉBUT, ÉCHÉANCE, DESCRIPTION, RÉPÉTER et RAPPEL, si nécessaire. Appuyez sur Enregistrer. Gestionnaire de fichiers L'application Gestionnaire de fichiers permet de gérer des fichiers dans votre mémoire de stockage interne ou externe. Le gestionnaire du fichiers vous permet de facilement consulter et gérer vos fichiers. Touchez simplement un type de fichier (Tous les fichiers, fichiers audio, fichiers images, fichiers vidéos, documents ou fichiers cloud), puis touchez le dossier approprié pour retrouver vos fichiers.
  • Page 216: Pour Ouvrir L'application Gestionnaire De Fichiers

    Pour ouvrir l'application Gestionnaire de fichiers : • Dans l'écran d'accueil, appuyez sur Applications > onglet Applications > Gest. de fichiers Options du Gestionnaire de fichiers Lancez l'application Gest. de fichiers > Tous les fichiers > Mémoire de stockage interne pour accéder aux options suivantes (partie supérieure de l'écran) : Vous permet d'ouvrir le Gestionnaire de fichiers dans une fenêtre QSlide. Vous permet de rechercher vos fichiers ou des informations. Vous permet de créer un nouveau dossier Vous permet de déplacer des fichiers et des dossiers d'un emplacement à un autre. Vous permet de copier des fichiers et dossiers d'un emplacement à un autre. Vous permet de supprimer des fichiers et des dossiers. Vous permet d'accéder à plus d'options. Dictaphone Utilisez l'enregistreur vocal pour enregistrer des mémos vocaux ou d'autres fichiers audio.
  • Page 217: Enregistrement D'un Son Ou D'une Voix

    Enregistrement d'un son ou d'une voix • Dans l'écran d'accueil, appuyez sur Applications > onglet Applications > Dictaphone Touchez pour sélectionnez un emplacement de sauvegarde de vos enregistrements. Touchez pour démarrer l'enregistrement. Touchez pour voir la liste Touchez pour mettre fin à de vos enregistrements. l'enregistrement. REMARQUE : La durée d'enregistrement disponible peut différer de la durée d'enregistrement en cours. Gestion de vos mémo vocaux À partir de l'écran de la liste de l'enregistreur vocal : • Touchez l'icône de Partage .pour partager les mémo vocaux à l'aide des choix disponibles. • Touchez l'icône Supprimer pour sélectionner le mémo vocal que vous souhaitez supprimer. • Touchez et maintenez un mémo vocal pour ouvrir un mémo contextuel pour sélectionner Partager, Supprimer, Renommer, Rogner, ou Détails.
  • Page 218: Polaris Office 5

    POLARIS Office 5 POLARIS Office 5 est une solution bureautique destinée aux employés mobiles qui permet aux utilisateurs d'appareils portables d'ouvrir partout et à tout moment plusieurs types de documents professionnels, y compris des fichiers Word, Excel et PowerPoint. Pour créer un nouveau document Dans l'écran d'accueil, appuyez sur Applications > onglet Applications > POLARIS Office 5 Enregistrez votre adresse e-mail sur la page d'enregistrement. REMARQUE : Vous pouvez toucher Ignorer pour ignorer les informations d'enregistrement. Appuyez sur pour démarrer un nouveau document. Appuyez sur un type de document figurant dans la liste déroulante et choisissez ensuite un modèle. Saisissez le contenu dans le document à l'aide, des outils proposés au haut de l'écran, et du clavier à l'écran. Une fois le travail sur le document achevé, touchez (dans le coin supérieur gauche de l'écran), puis touchez Enregistrer (or Energ. sous pour saisir un nouveau nom du document) pour enregistrer. Saisissez le nom du document et touchez Enregistrer. Pour afficher et modifier un document sur votre appareil Vous pouvez facilement afficher et éditer un grand nombre de types de fichiers, y compris des documents Microsoft Office et Adobe PDF, à partir de votre appareil portable.
  • Page 219: Google

    Démarrage de POLARIS Office 5 et recherche d'un document. Touchez le document que vous souhaitez voir ou éditer. Lorsque vous voyez des documents à partir de POLARIS Office 5, les objets et formes restent semblables aux documents originaux. Pour l'éditer, touchez Google+ Utilisez l'application Google+ pour rester connecté avec les personnes par le service du réseau social de Google. Dans l'écran d'accueil, touchez Applications > onglet Applications > Google > Google+ REMARQUE : Selon la région ou l'opérateur, cette application peut ne pas être disponible. LG SmartWorld LG SmartWorld propose un vaste choix de contenus passionnants : polices, thèmes, jeux et applications. Accès à LG SmartWorld à partir d'un tablette Appuyez sur > Applications > onglet Applications > puis appuyez sur l'icône pour accéder à LG SmartWorld. Appuyez sur Connexion et entrez ID/PW pour LG SmartWorld. Si vous n'êtes pas encore inscrit, appuyez sur Enregistrer afin de devenir membre de LG SmartWorld.
  • Page 220 Téléchargez le contenu souhaité. • LG SmartWorld n'est pas disponible chez tous les opérateurs et dans tous les pays. REMARQUE : Que faire s'il n'y a pas d'icône  ? À l'aide d'un tablette, accédez à LG SmartWorld (www.lgworld.com) et sélectionnez votre pays. Téléchargez l'application LG SmartWorld. Exécutez et installez le fichier téléchargé. Accédez à LG SmartWorld en appuyant sur l'icône Avantage spécial uniquement dans LG SmartWorld Personnalisez votre smartphone en choisissant des thèmes d'accueil ou de clavier et des polices sur LG SmartWorld. (Toutefois, ce service n'est disponible que sur certains périphériques. Veuillez consulter le site Web LG SmartWorld pour connaître les compatibilités). Profitez du service spécial de LG SmartWorld en participant aux promotions constamment fournies.
  • Page 221: Le Web

    Le Web Internet Utilisez cette application pour naviguer sur Internet. Le navigateur vous donne accès directement sur votre tablette à un univers tout en couleurs de jeux, musique, informations, sports, divertissements et bien plus encore, où que vous soyez et quoi que vous appréciez. Dans l'écran d'accueil, touchez Applications > onglet Applications > Internet Appuyez pour lancer QSlide. Appuyez pour revenir à la page précédente. Appuyez pour accéder à la page suivante, celle à laquelle vous vous êtes connectés après la page actuelle. Il s'agit de l'opération contraire à celle qui permet de revenir à la page précédente lorsque vous appuyez sur la touche Retour  Appuyez pour rafraîchir ou arrêter la page actuelle. Permet d'accéder à la page d'accueil. Touchez pour accéder à vos signets. Touchez pour accéder à plus d'options. Ouvrir une page • Pour ouvrir une nouvelle page, touchez au dessus du navigateur. • Pour aller sur une autre page web, touchez un onglet au dessus de l'écran pour apercevoir la page.
  • Page 222: Favoris

    Favoris Pour ouvrir une page Web enregistrée dans les favoris, touchez sur la barre d'outils du navigateur et sélectionnez-en une. Historique Touchez dans la barre d'outils du navigateur et sélectionnez l'onglet Historique pour ouvrir une page Web à partir de la liste des pages web récemment visitées. Pour effacer l'historique, touchez Utilisation du mode Lecture Votre tablette affiche les pages web de manière simplifiée pour en faciliter la lecture. Vous pouvez regarder les informations ou les commentaires sur votre blog et autres pages d'articles sans distractions - grâce au mode lecture, vous pouvez lire une page sans encombrement. Touchez sur la barre d'outils du navigateur. Utilisation de QSlide Utilisez cette fonction pour accéder à Internet sans devoir fermer l'application en cours d'utilisation. Pendant que vous voyez le contenu du navigateur, touchez . Vous pouvez alors rechercher d'autres informations sur votre tablette. Pour afficher le navigateur en plein écran, appuyez sur Télécharger des fichiers Utilisez l'application de Téléchargements pour afficher les fichiers téléchargés. Dans l'écran d'accueil, appuyez sur Applications > onglet Applications > Téléchargements...
  • Page 223: Chrome

    Chrome Utilisez Chrome pour rechercher des informations et parcourir des pages Web. Dans l'écran d'accueil, appuyez sur Applications > onglet Applications > Chrome REMARQUE : Selon la région ou l'opérateur, cette application peut ne pas être disponible. Aperçu des pages web Touchez le champ d'adresse (en haut de l'écran), saisissez une adresse internet ou un critère de recherche et touchez sur le clavier. Ouvrir une page • Pour ouvrir une nouvelle page, touchez au dessus du navigateur. • Pour aller sur une autre page web, touchez l'onglet a au dessus de l'écran pour sélectionner la page. Effectuer une recherche vocale sur Internet Appuyez sur le champ de l'adresse, appuyez sur , prononcez un mot-clé et sélectionnez-en un parmi les mots-clés proposés. REMARQUE : selon la région ou l'opérateur, cette fonction peut ne pas être disponible.
  • Page 224: Synchronisation Avec D'autres Appareils

    Synchronisation avec d'autres appareils La synchronisation ouvre des onglets et des signets à utiliser avec Chrome sur un autre appareil lorsque vous y êtes connecté avec le même compte Google. Pour afficher les onglets ouverts sur d'autres appareils, touchez l'icône Menu > Onglets récents. Vous devez être connecté au même compte Google sur tous les appareils. Sélectionnez une page web à ouvrir Ajouter et afficher des favoris Pour ajouter des signets, touchez dans la barre de l'URL. Pour ouvrir une page Internet dans les favoris, touchez l'icône Menu > Favoris et sélectionnez la page désirée. Menu des Options de Chrome Touchez l'icône Menu pour accéder aux options suivantes. • Nouvel onglet – Touchez pour ouvrir une nouvelle page dans un nouvel ongle. • Nouv. onglet nav. privée – Touchez pour créer un nouvel onglet incognito. • Favoris – Affiche vos pages Internet favorites. • Onglets récents – Affiche vos pages Internet ouvertes sur d'autres périphériques. • Historique – Affiche vos données de navigation (pages Internet que vous avez visitées).
  • Page 225 • Imprimer... – Touchez pour imprimer la page Web. Choisissez la recherche automatique de l'imprimante sur votre réseau, ou ajoutez-en une manuellement. • Chercher sur la page – Vous permet de rechercher du texte dans la page Internet actuelle. • Ajouter à l'écran d'accueil – Vous permet d'ajouter un raccourci à la page en cours sur votre écran. • Voir version ordinate... – Cochez pour accéder au site bureau lorsque vous regardez des pages internet sur votre tablette. • Paramètres – Vous permet de modifier les paramètres spécifiques à l'application Chrome. • Aide et commentaires – Affiche les informations relatives à l'utilisation de l'application Chrome sur votre tablette et vous permet un retour d'informations aux développeurs de Chrome.
  • Page 226: Paramètres

    Paramètres Accès au menu Paramètres Dans l'écran d'accueil, appuyez sur Applications > onglet Applications > Paramètres OU D ans l'écran d'accueil, touchez et maintenez Applications récentes > Paramètres système. Sélectionnez une catégorie de réglages et configurez les paramètres désirés. RÉSEAUX SANS FIL Wi-Fi Wi-Fi – Active le Wi-Fi et établit une connexion avec les réseaux Wi-Fi disponibles. La liste des réseaux Wi-Fi disponibles s'affiche. Appuyez sur l'un d'eux pour vous y connecter. REMARQUE : Touchez Rechercher pour rechercher les réseaux Wi-Fi disponibles. Touchez l'icône Menu dans le menu Wi-Fi pour accéder aux options suivantes. Ajouter le Wi-Fi – Vous permet d'ajouter manuellement un nouveau réseau Wi-Fi. Le Wi-Fi est enregistré – Permet de supprimer le réseau Wi-Fi enregistré. Paramètres Wi-Fi avancés – Accède aux paramètres avancés Wi-Fi suivants.
  • Page 227 Tutoriel interactif – Affiche quelques tutoriels utiles pour la fonction Wi-Fi. ASTUCE ! Comment obtenir l'adresse MAC Pour configurer une connexion sur certains réseaux sans fil disposant de filtres MAC, vous devez indiquer au routeur l'adresse MAC de votre tablette. Vous pouvez trouver l'adresse MAC dans l'interface utilisateur suivante : dans l'écran d'accueil, touchez Applications > Paramètres > Wi-Fi > Paramètres Wi-Fi avancés > Adresse MAC. > Menu Bluetooth Activez ou désactivez la fonction sans fil Bluetooth pour utiliser le Bluetooth. L'activation du Bluetooth vous permet d'associer et de vous connecter à d'autres périphériques Bluetooth. Touchez l'icône Menu dans le menu Bluetooth pour accéder aux options suivantes. Modifier le nom de la tablette – Modifie le nom de votre tablette pour une identification facile pendant le pairage et la connexion. Saisissez le nouveau nom de votre tablette, puis touchez Enregistrer. Expiration de visibilité – Règle le délai pendant lequel les autres périphériques Bluetooth peuvent voir votre tablette pour le pairage et la connexion. Choisissez entre 2 minutes, 5 minutes, 1 heure, et Jamais expiré. Afficher les fichiers reçus – Affiche la liste des fichiers reçus via Bluetooth.
  • Page 228: Utilisation Des Données

    Utilisation des données Affiche l'utilisation des données pendant les périodes choisies. Touchez une application dans la liste pour voir l'utilisation des données des applications. Plus... Vous permet de définir les paramètres sans fil et réseaux supplémentaires. Mode Avion – Vous pouvez également paramétrer le mode Avion. L'activation du mode Avion entraîne la désactivation de toutes les connexions sans fil. Miracast – permet de reproduire l'écran et les sonneries de votre téléphone sur un dongle Miracast ou un téléviseur. SmartShare Beam – Activez cette fonction pour recevoir du contenu multimédia via SmartShare Beam de téléphones ou de tablettes LG. LG PC Suite – Permet la connexion Wi-Fi pour le transfert des musiques et des images entre un ordinateur et une tablette. Serveur multimédia – Permet de partager les contenus média avec les périphériques à proximité via DLNA. VPN – Affiche la liste des réseaux privés virtuels (VPN) précédemment configurés. Vous permet d'ajouter différents types de VPN. REMARQUE : Vous devez configurer un PINde verrouillage d'écran, un mot de passe ou un schéma pour pouvoir utiliser le stockage des titres de compétences.
  • Page 229: Appareil

    APPAREIL Profil des sons – Vous permet de régler le profil audio sur Son, Vibreur seulement ou Ne pas déranger. Volume – Permet de gérer les volumes pour les éléments Son de notification, Son touche & système et Musique, vidéos, jeux et autres média. Puissance du vibreur – Permet de définir l'intensité du vibreur pour les appels et les notifications, ainsi que pour le retour lors de la saisie. Son de notification – Vous permet de définir votre sonnerie par défaut des notifications. Ne pas déranger – Permet de définir un calendrier afin d'éviter des interruptions causées par les notifications. Vous pouvez régler cette option pour permettre l'interruption de certaines fonctionnalités en appliquant le paramètre Prioritaires uniquement. Écran de verrouillage – Permet de choisir si vous souhaitez afficher ou masquer les notifications sur l'écran de verrouillage. Applications – Permet d'empêcher des applications d'afficher les notifications ou de régler des applications pour qu'elles affichent les notifications avec priorité lorsque l'option Ne pas déranger est configurée sur Prioritaires uniquement. Son touches – Vous permet de configurer votre tablette pour qu'elle émette un son lorsque vous effleurez les boutons, les icônes et autres éléments tactiles de l'écran.
  • Page 230 Écran Écran d'accueil Thème – Définit le thème d'écran pour votre appareil. Fond d'écran – Définit le fond d'écran à utiliser sur votre écran d'accueil. Effet de défilement des écrans d'accueil – Définit l'effet à l'écran lorsque vous procédez à un glisser pour changer les écrans. Laisser l'écran d'accueil tourner en boucle – Cochez cette option pour définir un défilement en boucle des écrans d'accueil ; cela vous évite d'effectuer un défilement dans le sens inverse lorsque vous arrivez au dernier écran. Sauvegarde & restauration de l’écran d’accueil – Vous permet de sauvegarder et de restaurer les configurations d'applications et de gadgets logiciels ainsi que les thèmes. Aide – Affiche les informations sur l'écran d'accueil. Écran de verrouillage Choisir l'écran de verrouillage – Définissez un type d'écran de verrouillage pour sécuriser votre tablette. REMARQUE : Après la mise à niveau vers Lollipop OS, votre verrouillage de l'écran peut ne pas être disponible sauf via Schéma, PIN et mot de passe.
  • Page 231 Smart Lock – permet de garder votre tablette déverrouillée lorsqu'un périphérique Bluetooth sécurisé y est connecté, lorsqu'il se trouve dans un endroit familier, par exemple votre domicile ou votre lieu de travail, ou lorsqu'il reconnaît votre visage. Effet de défilement des écrans d'accuei – Définit les options de défilement des écrans d'accueil. Fond d'écran – Définit votre fond d'écran de verrouillage. Sélectionnez-le à partir de Galerie ou de Papiers Peints. Raccourcis – Vous permet de modifier les raccourcis qui figurent sur l'écran de verrouillage à glisser. Infos propriétaire – Vous permet de saisir les contacts à afficher sur l'écran de verrouillage de la tablette en cas de perte. Minuterie du verrouillage – Définit la durée de mise en veille à la fin de laquelle l'écran se verrouille automatiquement. Verrouillage instantané par bouton d'alimentation – Cochez cette option pour verrouiller immédiatement l'écran lorsque vous appuyez sur la touche Marche-Arrêt/Verrouillage. Ce réglage neutralise le paramétrage du Minuteur de verrouillage sécurité. Luminosité – Réglez la luminosité de l'écran. Touchez Luminosité de nuit pour régler automatiquement la luminosité à 0 % de 12:00 à 06:00. Mise en veille de l'écran – Permet de régler la durée qui précède la mise en veille automatique de l'écran.
  • Page 232 REMARQUE : Le chargement peut être ralenti lors de l'affichage de l'écran de veille. Type de police – Permet de modifier la police d'affichage. Taille de police – Permet de modifier la taille de la police. Écran intelligent – Laisse l'écran allumé lorsque l'appareil détecte que vos yeux sont dirigés vers l'écran. Touches tactiles – Vous permet de définir quels boutons de la touche Accueil sont affichés et leur position sur la barre. Vous pouvez également sélectionner la couleur et l'arrière-plan. Calibration des capteurs de mouvement – Permet d'améliorer l'exactitude de l'inclinaison et la vitesse du capteur. Stockage MÉMOIRE DE STOCKAGE INTERNE – Affiche la quantité totale d'espace dans la mémoire de l'appareil et indique les types de données qui consomment le plus d'espace. CARTE SD – Affiche la quantité totale d'espace de mémoire sur la carte microSD. Monter/Désactiver la carte SD – Active et désactive la carte microSD de votre tablette pour que vous puissiez accéder aux données qui y sont stockées, formater la carte, ou la retirer en toute sécurité. Cette option apparaît grisée si vous avez déjà désactivée la carte microSD ou si vous l'avez montée sur votre ordinateur, ou lorsqu'aucune carte microSD n'est installée. Effacer la carte SD – Efface définitivement toutes les éléments de la carte microSD et la prépare pour que vous puissiez l'utiliser avec votre tablette.
  • Page 233: Applications

    Batterie INFORMATIONS SUR LA BATTERIE – Voir la quantité d'énergie de la batterie utilisée pour les activités de l'appareil. Le niveau de la batterie est affiché en pourcentage. La durée d'utilisation résiduelle est également affichée. Utilisation batterie – affiche l'utilisation de la batterie. Pourcentage de la batterie dans la barre d’état – Affiche le pourcentage de la batterie sur la barre d'état. Économie d'énergie – Gérez la batterie en fonction des attributs d'économie d'énergie. Appuyez sur le bouton pour activer cette fonctionnalité. Appuyez sur Économie d'énergie pour les options suivantes. • MODE ÉCONOMIE D'ÉNERGIE ACTIVÉE : Définit le niveau de batterie sur lequel vous souhaitez que l'économiseur de batterie s'active. Sélectionnez Immédiatement, Batterie 5% et Batterie 15%. Aide – Touchez pour accéder à certaines astuces pour l'économiseur d'énergie. Smart cleaning Vous pouvez gérer des applications non utilisées, des fichiers enregistrés ou des fichiers Internet temporaires. Applications Affichez la liste des applications telles que celles en cours d'exécution ou celles téléchargées.
  • Page 234: Double Fenêtre

    Double fenêtre Mode fractionné– Permet à l'appareil d'exécuter automatiquement la fonction Double fenêtre lorsque vous touchez un lien en mode plein écran ou lorsque vous touchez une pièce jointe d'un e-mail (images uniquement). Aide – Affiche les informations d'aide sur l'utilisation de la fonction Double fenêtre. PERSONNEL Cloud Appuyez sur Ajouter un compte pour ajouter un compte cloud. Vous pouvez accéder à vos comptes cloud à partir de ce menu. Appuyez sur l'icône Menu pour charger des fichiers. Utilisateurs Ce menu affiche les utilisateurs existants. Ajouter des utilisateurs lorsque la tablette est verrouillée – permet d'ajouter un nouvel utilisateur lorsque la tablette est verrouillée. Ajouter un utilisateur – Vous permet d'ajouter un nouveau compte pour la tablette et d'utiliser la fonctionnalité Multi-utilisateurs. Position Mode • Haute précision (GPS et réseaux) – Utilisez le GPS et les réseaux Wi-Fi pour estimer l'emplacement. • Économiser la batterie (Réseaux seuls) – Utilisez les réseaux Wi-Fi pour estimer l'emplacement.
  • Page 235 DEMANDE RÉCENTE DE POSITION – Affiche les applications qui ont récemment demandé des informations sur votre emplacement. Appareil photo – Permet à l'appareil d'étiqueter les photos et les vidéos avec leurs emplacements. Anti-scintillement – Permet de régler la fréquence afin d'éviter les clignotements sur l'écran d'aperçu de l'appareil photo. Mise à jour de la position Google – Vous permet de voir vos paramètres de localisation Google. Sécurité Cryptez la tablette – Vous permet de crypter les données de votre tablette par mesure de sécurité. Vous serez invité à saisir un code PIN ou un mot de passe pour décrypter votre tablette chaque fois que vous l'allumez. Crypter le stockage de la carte SD – Vous permet de crypter les données de la MicroSD par mesure de sécurité. Mot de passe visible – En cours de saisie, affiche le dernier caractère du mot de passe caché. Administrateurs de la tablette – Affiche ou désactive les administrateurs de la tablette.
  • Page 236: Comptes Et Synchronisation

    Applications ayant accès aux données d’utilisation – permet d'afficher des informations sur l'utilisation des applications. Comptes et synchronisation Autorise les applications à synchroniser les données en arrière-plan, que vous soyez entrain de les utiliser ou non. En décochant cette option, le paramètre Données de Synchronisation automatique peut économiser la batterie et affaiblir (sans éliminer) l'utilisation des données. Langue et saisie Utilisez les paramètres de langue et de saisie pour sélectionner la langue du texte de votre tablette et pour configurer le clavier à l'écran, y compris les mots que vous avez ajouté à son dictionnaire. Sauvegarder & Réinitialiser Sauvegarder mes données – Permet de sauvegarder vos paramètres et vos données d'application sur le serveur Google Compte de sauvegarde – Définit le compte sur lequel vous souhaitez sauvegarder des données. Restaurer automatiquement – Restaure vos paramètres et données d'application lorsque les applications sont réinstallées sur votre appareil. Service LG Backup – Sauvegarde toutes les informations dans l'appareil et les restaure en cas de perte de données ou de remplacement de l'appareil. Référez-vous à la page 115 pour plus d'informations.
  • Page 237: Système

    Réinitialiser valeurs d'usine – Restaure vos paramètres aux valeurs d'usine par défaut et supprime toutes vos données. Si vous procédez de la sorte pour réinitialiser la tablette, vous êtes invités à ressaisir les mêmes informations que lors de votre première utilisation d'Android. SYSTÈME Touche de raccourci Permet d'activer et de désactiver les touches de raccourci. Date et heure Utilisez le Paramètre Date et heure pour déterminer l'affichage des dates. Vous pouvez également utiliser ces paramètres pour régler votre propre heure et fuseau horaire et remplacer ainsi les informations délivrées par le réseau mobile. Accessibilité Utilisez les paramètres Accessibilité pour configurer les plugiciels d'accessibilité que vous avez installés sur votre tablette. REMARQUE : Des plugiciels complémentaires sont nécessaires pour en assurer la sélectionnabilité. TalkBack– Vous permet de configurer la fonction TalkBack destinée à assister les personnes souffrant de problèmes de vue en leur délivrant un message vocal. Appuyez sur le bouton TalkBack en haut à droite de l'écran pour l'activer. Appuyez sur Paramètres au bas de l'écran pour régler les paramètres de la fonction TalkBack. Taille de police – Cochez cette option pour augmenter la taille du texte.
  • Page 238 Inverser couleurs – Cochez cette option pour inverser les couleurs de l'écran et de son contenu. Ajustement des couleurs – Permet d'afficher l'écran avec un meilleur contraste des couleurs. Appuyez sur le commutateur pour l'activer. Ensuite, touchez l'écran et glissez dans n'importe quelle direction jusqu'à ce que vous obteniez le contraste de couleur désiré. Zoom tactile – Vous permet de zoomer et dézoomer en tapotant l'écran à trois reprises. Niveaux de gris de l’écran – Réduit le rétroéclairage de l'écran. Raccourci d'accessibilité – Grâce à cette fonction vous pouvez activer rapidement les fonctions d'accessibilité en deux étapes. Paramètres de la synthèse vocale – Définit le moteur de synthèse vocale préféré et le paramètre de débit de parole. Effectuer également une brève démonstration de synthèse vocale. L'état de la langue par défaut s'affiche également. Type de son – Définit le type audio. Choisissez Mono ou Stéréo. Balance du son – Définit le chemin audio. Déplacez le curseur sur la barre de réglage Désactiver tous les sons – Arrête tous les sons. Légende – Permet de personnaliser les paramètres de légende pour les malentendants. Appuyez sur le bouton pour activer cette...
  • Page 239: Impression

    Rotation automatique de l'écran – Cochez cette option pour permettre à l'appareil de faire pivoter l'écran en fonction de l'orientation (portrait ou paysage). Confirmation vocale du mot de passe – Cochez pour avoir une confirmation verbale lors de la saisie des mots de passe. Raccourci pour les règlages d'accessibilité – Définit l'accès rapide et simple aux fonctionnalités choisies en tapotant trois fois la touche Accueil. Entrée par un appui – Vous permet de saisir des lettres/caractères au moyen de chaque touche tactile du clavier LG. Switch Access – vous permet d'interagir avec votre appareil à l'aide d'un ou plusieurs commutateurs qui fonctionnent comme des touches de clavier. Ce menu peut être utile pour les utilisateurs dont la mobilité est réduite, ce qui les empêche d'interagir directement avec l'appareil. Quick Cover Activez ce menu pour allumer et éteindre automatiquement l'écran lorsque vous utilisez la fonction Quick Cover. Impression Vous permet d'imprimer le contenu de certains écrans (tels que les pages Internet affichées dans Chrome) sur une imprimante connectée au même...
  • Page 240: À Propos De La Tablette

    À propos de la tablette Ce menu vous permet de gérer les mises à jour de votre logiciel et de voir les informations diverses relatives à votre tablette. Nom de la tablette – Vous permet de définir le nom de votre tablette. Centre de mises à jour – Vous permet de vérifier les mises à jour des applications et du logiciel. Batterie – Vous permet d'afficher l'état de la batterie, son niveau, ainsi que les informations relatives à sa consommation. Informations sur le hardware – Vous permet de voir le numéro du modèle, l'adresse IP, le temps de disponibilité, le CSN, l'adresse MAC Wi-Fi et l'adresse Bluetooth. Informations sur le logiciel – Vous permet de voir la version Android, la version kernel, le numéro de version du produit, et la version du logiciel. Informations légales – Vous permet d'afficher les documents légaux des logiciels LG, les licences Open Source et les informations légales de Google.
  • Page 241: Sauvegarde Lg

    Sauvegarde LG À propos de la sauvegarde et de la restauration des données de l'appareil Nous vous conseillons de créer et d'enregistrer régulièrement un fichier de sauvegarde dans la mémoire interne, notamment avant de mettre à jour tout logiciel. En conservant un fichier de sauvegarde dans la mémoire de stockage, vous aurez éventuellement la possibilité de récupérer les données de votre appareil en cas de perte ou de vol, ou si celui-ci venait à être malencontreusement endommagé. Cette application de sauvegarde LG fonctionne entre les smartphones et les tablettes LG et d'autres versions logicielles ou systèmes d'exploitation. Par conséquent, lorsque vous achetez les nouveaux modèles de smartphones et tablettes LG, vous pouvez sauvegarder les données de l'appareil actuel dans votre nouvel appareil. Si vous disposez de l'application de sauvegarde LG préchargée sur vos smartphones et tablettes, vous pouvez sauvegarder et restaurer la plupart des données, y compris les applications téléchargées et préinstallées, les favoris, les entrées du calendrier, les contacts, les paramètres de l'écran d'accueil et du système. Vous pouvez aussi : • Effectuer une sauvegarde manuelle de votre appareil. • Restaurer les données de votre appareil. Avertissement ! Pour prévenir une interruption d'alimentation inattendue au cours d'opérations de sauvegarde ou de restauration (en raison d'une charge de batterie insuffisante) vous devez toujours maintenir votre batterie complètement chargée.
  • Page 242: Sauvegarde Des Données De Votre Tablette

    Sauvegarder & Réinitialiser > Service LG Backup > Sauvegarder. Dans l'écran d'emplacement de la sauvegarde, touchez Mémoire de stockage interne ou Carte SD, puis appuyez sur Suivant. Sélectionnez la case à cocher correspondant à la sauvegarde souhaitée et sélectionnez Suivant. Lisez les informations affichées à l'écran, puis appuyez sur Démarrer. Lorsque tous les fichiers sélectionnés ont été sauvegardés, le message suivant s'affiche Sauvegarde terminée. Restauration des données de la tablette REMARQUE : Tous les fichiers stockés sur votre tablette sont supprimés avant la restauration du fichier de sauvegarde. Veillez à copier les fichiers de sauvegarde à un autre emplacement. Dans l'écran d'accueil, appuyez sur Applications > Paramètres > Sauvegarder & Réinitialiser > Service LG Backup > Restauration et gestion des fichiers. Dans l'écran Restaurer, sélectionnez un fichier de sauvegarde qui contient les données à restaurer. Cochez la case à cocher en regard de l'élément que vous souhaitez restaurer et sélectionnez Suivant pour le restaurer sur votre tablette. REMARQUE : Veuillez noter que les données de votre tablette seront écrasées par le contenu de votre sauvegarde.
  • Page 243 Si le fichier de sauvegarde est crypté, saisissez le mot de passe que vous avez défini pour le crypter. Lorsque tous les fichiers sélectionnés ont été restaurés, la tablette redémarre automatiquement. REMARQUE : Vous pouvez définir l'option Verrouiller les fichiers de sauvegarde lors de la création d'un fichier de sauvegarde pour crypter et protéger vos fichiers de sauvegarde. Dans l'écran principal de sauvegarde LG, touchez le bouton Menu > Définir le mot de passe et saisissez un mot de passe et un indice en cas d'oubli du mot de passe. Après avoir paramétré un mot de passe, vous devrez le saisir à chaque nouvelle sauvegarde/restauration.
  • Page 244: Mise À Jour Logicielle De La Tablette

    Cette fonctionnalité vous permet de mettre à jour le micrologiciel de votre tablette en téléchargeant aisément sa version la plus récente depuis Internet, sans faire appel à un centre de services. Pour plus d'informations sur l'utilisation de cette fonction, veuillez consulter le site Web : http://www.lg.com La mise à jour du micrologiciel de l'appareil portable exigeant une attention particulière de l'utilisateur tout au long du processus, veuillez lire attentivement toutes les instructions et remarques qui s'affichent à chaque étape avant de passer à l'étape suivante. Veuillez noter que le fait de retirer le câble USB ou la batterie durant la mise à niveau peut gravement endommager votre tablette. Mise à jour du logiciel pour tablette LG par radio (Over-the-Air - OTA) Cette fonctionnalité vous permet de mettre à jour le micrologiciel de votre tablette et de télécharger la nouvelle version via OTA, sans utiliser le câble de données USB. Cette fonctionnalité n'est disponible que si et quand LG annonce la disponibilité pour votre appareil de la nouvelle version du micrologiciel. Préalablement, vous pouvez vérifier la version du logiciel installé sur votre tablette : à l'écran d'accueil, appuyez sur Applications > Paramètres > À propos de la tablette > Informations sur le logiciel. Pour procéder à la mise du logiciel de la tablette, dans l'écran d'accueil, > À...
  • Page 245 REMARQUE : LG se réserve le droit de mettre à disposition les mises à jour micrologicielles de certains modèles uniquement, et ce à son entière discrétion, et ne garantit pas la disponibilité de versions micrologicielles plus récentes pour l'ensemble de ses modèles de tablettes. REMARQUE : vos données personnelles — y compris les informations relatives à votre compte Google et à tout autre compte, vos données et paramètres du système et d'applications, ainsi que toutes les applications téléchargées et vos licences DRM — peuvent être perdues lorsque vous mettez à jour le logiciel de votre appareil. Par conséquent, LG vous recommande de sauvegarder vos données personnelles avant de mettre à jour le logiciel de votre tablette. LG ne peut être tenu responsable de toute perte de données personnelles.
  • Page 246: Accessoires

    Accessoires Ces accessoires sont disponibles pour une utilisation avec votre tablette. (Les éléments décrits ci-dessous sont parfois disponibles en option.) Chargeur de voyage Câble USB Guide de démarrage rapide REMARQUE : • Utilisez toujours des accessoires d’origine LG. Le non-respect de cette recommandation peut entraîner l’annulation de votre garantie. • Les accessoires peuvent varier selon les régions.
  • Page 247: Dépannage

    Message Causes possibles Actions correctives possibles Aucune Non pris en charge application par le prestataire Contactez votre prestataire de ne peut être de services ou services. configurée. enregistrement requis. La batterie n'est pas Rechargez la batterie. chargée. La température Assurez-vous de charger votre environnante est trop tablette dans des conditions élevée ou trop basse. de température normales. Vérifiez le chargeur et sa Erreur de Problème de contact connexion à la tablette. chargement Branchez le chargeur sur une Absence de tension autre prise. Chargeur défectueux Remplacez le chargeur. Utilisez uniquement des Chargeur inadapté accessoires d'origine LG.
  • Page 248 Message Causes possibles Actions correctives possibles Impossible de recevoir/ Supprimez certaines images Mémoire pleine envoyer des de votre tablette. photos. Les fichiers Format de fichier non Vérifiez les formats de fichiers ne s'ouvrent pris en charge pris en charge. Vérifiez les paramètres dans le menu Son pour vous assurer Aucun son Mode Vibreur que vous n'êtes pas en mode Vibreur ou Silencieux.
  • Page 249: Guida Per L'utente

    ITALIANO Guida per l'utente • Le schermate e le illustrazioni potrebbero essere diverse da quelle effettivamente visualizzate sul dispositivo. • Alcune delle informazioni fornite in questa guida possono non essere applicabili al dispositivo in uso, variando a seconda del software e delle impostazioni del provider di servizi. Tutte le informazioni contenute in questo documento sono soggette a modifiche senza preavviso. • Questo dispositivo non è indicato per persone con problemi di vista o altro tipo di disabilità, in quanto integra un tastierino con schermo a sfioramento. • Copyright ©2015 LG Electronics, Inc. Tutti i diritti riservati. LG e il logo LG sono marchi di LG Group e delle società affiliate. Tutti gli altri marchi registrati appartengono ai rispettivi proprietari. • Google™, Google Maps™, Gmail™, YouTube™, Hangouts™ e Google Play™ sono marchi registrati di Google, Inc.
  • Page 250 Sommario Informazioni su questa guida per Schermata principale ......31 l'utente .............5 Suggerimenti per lo schermo a sfioramento ..........31 Informazioni su questa guida per l'utente ............5 Toccare o toccare ...........31 Marchi registrati ......... 6 Tenere premuto ..........31 Trascinamento ..........31 DivX HD ............
  • Page 251 QSlide ............44 Utilizzo del cloud ........... 54 QPair ............55 Acquisizione di una schermata....45 Collegamento al PC tramite cavo USB 57 Utilizzo di QuickMemo+ per catturare una schermata ..........46 Trasferimento di musica, foto e video Utilizzo di Capture plus per catturare tramite la modalità...
  • Page 252 Attività ............84 Aggiornamento software del tablet ...112 File Manager ..........84 Aggiornamento software del tablet ..112 Registratore ..........85 Aggiornamento software per tablet LG POLARIS Office 5 ........87 tramite Over-the-Air (OTA) ....112 Google+ ............88 Accessori ..........114 LG SmartWorld ........88 Risoluzione dei problemi .....115...
  • Page 253: Informazioni Su Questa Guida Per L'utente

    Informazioni su questa guida per l'utente Informazioni su questa guida per l'utente • Leggere attentamente questo manuale prima di utilizzare il dispositivo per essere certi di utilizzare il dispositivo in modo sicuro e corretto. • Alcune immagini e schermate fornite in questa guida potrebbero apparire diverse sul tablet. • I contenuti possono variare dal prodotto finale e dal software fornito dai provider di servizi o dai gestori, pertanto questi contenuti possono essere soggetti a modifica senza preavviso. Per la versione più recente di questo manuale, visitare il sito Web di LG all'indirizzo www.lg.com. • Le applicazioni del dispositivo e le rispettive funzioni possono variare a seconda del Paese, dell'area geografica o delle specifiche hardware. LG non può essere ritenuta responsabile per eventuali problemi di prestazioni risultanti dall'utilizzo di applicazioni sviluppate da provider diversi da LG. • LG non può essere ritenuta responsabile per problemi di incompatibilità o prestazioni risultanti da impostazioni dei registri o software di sistemi operativi in corso di modifica. Se si cerca di personalizzare il sistema operativo, il dispositivo o le rispettive applicazioni potrebbero non funzionare correttamente. • Software, audio, sfondi, immagini e altri contenuti multimediali forniti con il dispositivo vengono concessi in licenza per uso limitato. Se si estraggono e si utilizzano questi materiali per fini commerciali o di altra natura, potrebbero essere violate le leggi sul copyright. L'utente è interamente responsabile dell'utilizzo illecito di contenuti multimediali. • Potrebbero essere applicati costi aggiuntivi per servizi dati quali messaggi, caricamento e download, sincronizzazione automatica o utilizzo dei servizi di localizzazione. Per evitare costi aggiuntivi, selezionare un piano dati adatto alle proprie esigenze. Per ulteriori dettagli, contattare il proprio provider di servizi.
  • Page 254: Marchi Registrati

    Marchi registrati • LG e il logo LG sono marchi registrati di LG Electronics. • Tutti gli altri marchi registrati e copyright appartengono ai rispettivi proprietari. DivX HD INFORMAZIONI SUI VIDEO DIVX: DivX® è un formato video digitale creato da DivX, LLC, una filiale di Rovi Corporation. Questo è un dispositivo ufficiale DivX Certified® che ha superato verifiche rigorose per la riproduzione di video DivX. Per ulteriori informazioni e per gli strumenti software per la conversione dei file in video DivX, visitare il sito Web divx.com. INFORMAZIONI SUI VIDEO VOD DIVX: questo dispositivo con marchio DivX Certified® deve essere registrato per poter riprodurre i filmati VOD (Video-on- Demand) DivX acquistati. Per ottenere il codice di registrazione, individuare la sezione relativa a VOD DivX nel menu di impostazione del dispositivo. Per ulteriori informazioni sulla procedura di registrazione, visitare il sito Web vod. divx.com. DivX Certified® per la riproduzione di video DivX® fino a HD 720p, compresi contenuti esclusivi.
  • Page 255 Informazioni avviso software Open Source Per ottenere il codice sorgente contenuto in questo prodotto secondo quanto consentito dalle licenze GPL, LGPL, MPL e altre licenze Open Source, visitare http://opensource.lge.com. In aggiunta al codice sorgente, sono disponibili per il download tutti i termini di licenza, le esclusioni di responsabilità e le relative note di copyright. LG Electronics fornisce anche il codice Open Source su CD-ROM a fronte del pagamento di una cifra a copertura dei costi che tale distribuzione comporta (come il costo del supporto, di spedizione e gestione) in seguito a richiesta inviata via e-mail a: opensource@lge.com. Questa offerta è valida per tre (3) anni a partire dalla data di acquisto del prodotto.
  • Page 256: Indicazioni Per Un Uso Sicuro Ed Efficiente

    Indicazioni per un uso sicuro ed efficiente Leggere le semplici indicazioni riportate di seguito. Il mancato rispetto di tali indicazioni può rivelarsi pericoloso o illegale. Nel caso si verifichino errori, il software integrato nel dispositivo crea un registro degli errori. Questo strumento raccoglie solo i dati specifici dell'errore come l'intensità del segnale e le applicazioni caricate. Il registro viene utilizzato solo per determinare la causa dell'errore. Questi registri sono crittografati e possono essere aperti solo nei centri di riparazione LG autorizzati, nel caso sia necessario restituire il dispositivo per la riparazione. Esposizione all'energia elettromagnetica a radiofrequenze (RF) Informazioni sull'esposizione alle onde radio e sulla SAR (Specific Absorption Rate) Il tablet LG-V480 è stato progettato in conformità ai requisiti di sicurezza vigenti per l'esposizione alle onde radio. Tali requisiti si basano su precise indicazioni scientifiche che definiscono, tra l'altro, i margini di sicurezza necessari per salvaguardare tutte le persone, indipendentemente dall'età e dalle condizioni di salute. • Le indicazioni sull'esposizione alle onde radio fanno riferimento a un'unità di misura detta SAR, acronimo per Specific Absorption Rate. Le prove relative ai valori SAR sono state condotte mediante un metodo standardizzato di trasmissione telefonica al massimo livello di alimentazione certificato, con qualsiasi banda di frequenza. • Anche se si possono riscontrare differenze tra i livelli SAR nei vari modelli di dispositivi LG, questi sono comunque stati progettati con un'attenzione particolare alle normative vigenti sull'esposizione alle onde radio.
  • Page 257 • La commissione internazionale ICNIRP (International Commission on Non- Ionizing Radiation Protection) raccomanda un limite SAR pari a 2 W/kg in media per dieci (10) grammi di tessuto. • Il valore SAR più elevato registrato per questo dispositivo per l'uso a contatto con il corpo è pari a 0,497 W/kg. • Questo dispositivo è conforme alle direttive sull'esposizione alle radiofrequenze quando utilizzato nella normale posizione d'uso vicino all'orecchio o posizionato a una distanza di almeno 0 cm dal corpo. Se una custodia, una clip per cintura o altro sostegno vengono posizionati a stretto contatto con il corpo, tali accessori non devono contenere metallo ed è importante mantenere il dispositivo a una distanza di almeno 0 cm dal corpo. Il dispositivo richiede una connessione ottimale alla rete per poter trasmettere file di dati o messaggi. In alcuni casi, la trasmissione di file di dati o messaggi potrebbe essere ritardata fino a che tale connessione diventi disponibile. Le istruzioni relative alla separazione del dispositivo dal corpo devono essere rispettate fino alla fine della trasmissione. Manutenzione e cura del prodotto ATTENZIONE Usare solo batterie, caricabatteria e accessori approvati per essere utilizzati con questo modello di dispositivo. L’utilizzo di prodotti di terzi può risultare pericoloso ma può anche rendere nulla la garanzia applicata al dispositivo. • Non smontare l'apparecchio. Se è necessaria una riparazione, rivolgersi presso un centro assistenza autorizzato LG. • La garanzia copre, a discrezione di LG, la sostituzione di parti o schede nuove o riconvertite, funzionalmente equivalenti. • Tenere lontano da apparecchiature elettriche quali TV, radio e PC. • Tenere lontano da fonti di calore quali termosifoni o fornelli.
  • Page 258 • Non far cadere l'apparecchio. • Non sottoporre l'apparecchio a scosse, urti o vibrazioni. • Spegnere il dispositivo nelle aree in cui è specificamente richiesto. Ad esempio, non utilizzare il dispositivo all'interno di ospedali in quanto potrebbe interferire con il funzionamento di apparecchiature mediche sensibili. • Non afferrare il dispositivo con le mani bagnate mentre è in carica. Ciò potrebbe provocare scosse elettriche o danneggiare seriamente il dispositivo. • Non ricaricare il dispositivo vicino a materiali infiammabili che potrebbero provocare incendi a causa del calore sviluppato dal dispositivo. • Usare un panno asciutto per la pulizia esterna del tablet (non usare solventi come benzene, acquaragia o alcol). • Non caricare il dispositivo quando si trova su superfici morbide. • Il dispositivo dovrebbe essere caricato in un'area ben ventilata. • Non esporre l'apparecchio a fumo o polvere. • Tenere lontano da carte di credito o supporti magnetici per evitarne la smagnetizzazione. • Non toccare il display con oggetti appuntiti per evitare di danneggiare il tablet. • Non versare liquidi sul dispositivo. • Usare gli accessori con attenzione e delicatezza. • In caso di vetro rotto o scheggiato, non utilizzare il dispositivo, non toccare il vetro, né tentare di rimuoverlo o ripararlo. I danni al display in vetro dovuti ad abuso o utilizzo non corretto non sono coperti dalla garanzia. • Il tablet è un dispositivo elettronico che genera calore durante il normale funzionamento. Il contatto diretto e prolungato con la pelle e l'assenza di un'adeguata ventilazione possono provocare disagi e piccole bruciature. Pertanto, è necessario maneggiare con cura il dispositivo durante o subito dopo l'utilizzo.
  • Page 259 • Se il dispositivo si bagna, scollegarlo immediatamente e farlo asciugare completamente. Non tentare di accelerare il processo di asciugatura con una fonte di calore esterna, ad esempio un forno, un forno a microonde o un asciugacapelli. • Il liquido presente nel dispositivo potrebbe modificare il colore dell'etichetta del prodotto presente all'interno del dispositivo. I danni al dispositivo derivanti dall'esposizione ai liquidi non sono coperti da garanzia. • Utilizzare il tablet a una temperatura compresa tra 0 ºC e 40 ºC, se possibile. L'esposizione del dispositivo a temperature estremamente alte o basse può causare danni, malfunzionamenti o perfino esplosioni. Funzionamento ottimale del dispositivo Dispositivi elettronici Tutti i tablet possono subire interferenze che influiscono sulle prestazioni. • Non utilizzare il tablet in prossimità di apparecchiature mediche senza autorizzazione. Evitare di posizionare il tablet in corrispondenza di pacemaker, ad esempio nel taschino della giacca o della camicia. • Il tablet potrebbe interferire con alcuni tipi di protesi acustiche. • Il tablet potrebbe interferire con apparecchi televisivi, radio, computer, ecc. Sicurezza in automobile Verificare le leggi e le normative che riguardano l'utilizzo dei tablet quando si circola sulla rete stradale. • Non utilizzare il tablet durante la guida. • Prestare la massima attenzione alla guida. • L'energia RF può influire sul sistema elettronico del veicolo, ad esempio sullo stereo o sulle apparecchiature di sicurezza.
  • Page 260: Come Evitare Danni All'udito

    • Se il veicolo è dotato di airbag, non collocarvi accanto oggetti come apparecchi wireless portatili o installati per evitare lesioni gravi causate dall'errato funzionamento dell'air bag. • Durante l'ascolto della musica tramite il tablet, assicurarsi che il volume sia ragionevolmente basso da consentire il rilevamento dei rumori circostanti. Ciò è particolarmente importante in prossimità di strade. Come evitare danni all'udito NOTA: L'utilizzo degli auricolari e cuffie a volume troppo elevato può causare la perdita dell'udito. Per evitare eventuali danni all'udito, non ascoltare audio ad alto volume per lunghi periodi. • L'udito potrebbe danneggiarsi se viene esposto a volumi eccessivi e prolungati nel tempo. Si consiglia pertanto di non accendere o spegnere il tablet indossando gli auricolari e di tenere il volume di ascolto della musica a un livello ragionevole. • Quando si utilizzano gli auricolari, abbassare il volume se non si riescono a sentire le persone nelle vicinanze o se il volume è tale da essere udito dalla persona accanto. Parti in vetro Alcune parti del tablet sono in vetro. Se il dispositivo viene lasciato cadere su una superficie rigida o viene sottoposto a un forte impatto, il vetro potrebbe rompersi. Se ciò accade, non toccare o tentare di rimuovere il vetro. Non utilizzare il dispositivo mobile finché il vetro non viene sostituito da un centro di riparazione autorizzato.
  • Page 261 Aree a rischio di esplosione Non utilizzare il tablet in aree dove siano in atto operazioni di detonazione. Rispettare le restrizioni e osservare tutte le norme o i regolamenti al riguardo. Atmosfere potenzialmente esplosive • Non utilizzare il tablet in prossimità di stazioni di servizio. • Non utilizzare l'apparecchio in prossimità di combustibili o prodotti chimici. • Non trasportare né conservare sostanze esplosive, liquidi o gas infiammabili all'interno dell'autovettura in cui si trovano tablet o i relativi accessori. A bordo di aeromobili L'uso di dispositivi portatili può causare delle interferenze al velivolo. • Spegnere il tablet prima di imbarcarsi su qualsiasi aeromobile. • Utilizzarlo a terra (prima o dopo il decollo) solo con il permesso dell'equipaggio. Bambini Conservare il dispositivo in un posto sicuro, fuori dalla portata dei bambini. L'apparecchio è composto da parti smontabili di piccole dimensioni che, se ingerite, possono provocare soffocamento. Questo dispositivo contiene, inoltre, una batteria interna che può diventare pericolosa in caso di utilizzo o manutenzione non corretti del dispositivo.
  • Page 262 Manutenzione e informazioni sulle batterie • Non è necessario scaricare completamente la batteria prima di ricaricarla. A differenza di altri sistemi a batteria, questo tablet non presenta un effetto memoria in grado di compromettere le prestazioni della batteria. • Utilizzare solo batterie e caricabatterie LG, in quanto sono progettati per consentire una maggiore durata della batteria. • Non smontare né cortocircuitare la batteria. • Se la batteria è rimasta inutilizzata per un lungo periodo, ricaricarla per ottimizzarne le prestazioni. • Non esporre il caricabatterie alla luce solare diretta e non utilizzarlo in ambienti particolarmente umidi, ad esempio nel bagno. Evitare di lasciare il dispositivo in luoghi con temperature troppo basse o elevate per non comprometter le prestazioni della batteria. • L'uso di un tipo di batteria errato può comportare il rischio di esplosioni. • Attenersi alle istruzioni del produttore per lo smaltimento delle batterie usate. Riciclare se possibile. Non smaltire tra i rifiuti domestici. • Quando il tablet è carico, scollegare sempre il caricabatterie dalla presa di corrente per evitare consumi energetici non necessari. • La durata della batteria effettiva varia a seconda di configurazione di rete, impostazioni del prodotto, uso, batteria e condizioni ambientali. • Assicurarsi che la batteria non venga a contatto con oggetti affilati come ad esempio, forbici, denti o unghie di animali. Ciò potrebbe causare incendi.
  • Page 263 ATTENZIONE! Avviso sulla sostituzione della batteria • Una batteria agli ioni di litio è un componente pericoloso che può causare lesioni gravi. • La sostituzione della batteria da parte di personale non qualificato può causare danni al dispositivo. • Non sostituire la batteria autonomamente. La batteria potrebbe essere danneggiata, surriscaldarsi e provocare lesioni. La batteria deve essere sostituita da un provider di assistenza autorizzato. La batteria deve essere riciclata o smaltita separatamente rispetto ai rifiuti domestici. • Nel caso in cui il prodotto contenga una batteria incorporata nel prodotto che non può essere facilmente rimossa dall'utente finale, LG raccomanda che la batteria venga rimossa solo da professionisti qualificati, sia per la sostituzione sia per il riciclaggio al termine della vita del prodotto. Per evitare danni al prodotto, e per la propria sicurezza, gli utenti non devono tentare di rimuovere la batteria, ma contattare il Servizio clienti di LG o altri fornitori di servizi indipendenti per ottenere consiglio. • La rimozione della batteria comporta lo smantellamento della custodia del prodotto, la disconnessione di cavi/contatti elettrici, e l'attenta estrazione della cella batteria utilizzando strumenti specifici. In caso di bisogno di istruzioni per professionisti qualificati su come rimuovere la batteria in modo sicuro, si prega di visitare http://www.lge.com/global/ sustainability/environment/take-back-recycling...
  • Page 264 Come aggiornare il tablet Accesso alle ultime versioni firmware, le nuove funzioni software e miglioramenti. • Come aggiornare il tablet senza PC: Selezionare Centro aggiornamenti > Aggiornamento software > Controlla aggiornamenti. • Aggiornare il tablet collegandolo al PC. Per ulteriori informazioni sull'uso di questa funzione, visitare il sito Web http://www.lg.com/common/index.jsp e selezionare il paese e la lingua. DICHIARAZIONE DI CONFORMITÀ Con il presente documento, LG Electronics dichiara che il prodotto LG-V480 è conforme ai requisiti essenziali e alle altre disposizioni della Direttiva 1999/5/EC. Una copia della Dichiarazione di conformità è disponibile all'indirizzo http://www.lg.com/global/declaration Contattare l'ufficio per informazioni sulla conformità di questo prodotto LG Electronics Inc. EU Representative, Krijgsman 1, 1186 DM Amstelveen, The Netherlands...
  • Page 265 Smaltimento delle apparecchiature obsolete Tutti i prodotti elettrici ed elettronici devono essere smaltiti separatamente rispetto alla raccolta differenziata municipale, mediante impianti di raccolta specifici installati da enti pubblici o dalle autorità locali. Il corretto smaltimento delle apparecchiature obsolete contribuisce a prevenire possibili conseguenze negative sulla salute umana e sull'ambiente. Per informazioni più dettagliate sullo smaltimento delle apparecchiature obsolete, contattare il municipio, il servizio di smaltimento rifiuti o il punto vendita in cui è stato acquistato il prodotto. Smaltimento delle batterie/accumulatori Questo simbolo potrebbe essere associato ai simboli chimici del mercurio (Hg), cadmio (Cd) o piombo (Pb) se la batteria contiene più di 0,0005% di mercurio, 0,002% di cadmio o 0,004% di piombo. Tutte le batterie e gli accumulatori devono essere smaltiti separatamente rispetto alla raccolta differenziata municipale, mediante impianti di raccolta specifici designati dal governo o dalle autorità locali. Il corretto smaltimento di batterie e accumulatori obsoleti contribuisce a prevenire possibili conseguenze negative sull'ambiente, sulla salute degli individui e su tutte le altre specie viventi. Per informazioni più dettagliate sullo smaltimento di batterie e accumulatori obsoleti, contattare l'ufficio del comune di residenza, il servizio di smaltimento rifiuti o il negozio in cui è stato acquistato il prodotto.
  • Page 266: Avviso Importante

    Avviso importante Prima di iniziare a utilizzare il tablet, leggere attentamente le seguenti istruzioni. Prima di contattare l'assistenza, verificare se i problemi riscontrati con il tablet sono descritti in questa sezione. 1. Memoria del tablet È necessario effettuare una verifica nella memoria del tablet ed eliminare alcuni dati, ad esempio applicazioni o messaggi, per aumentare lo spazio disponibile. Per disinstallare le applicazioni: Toccare > > scheda Applicazioni tab > Impostazioni > Applicazioni. Una volta visualizzate tutte le applicazioni, scorrere e selezionare l'applicazione che si desidera disinstallare. Premere Disinstalla e OK per confermare. 2. Prima di installare un'applicazione o un sistema operativo open source ATTENZIONE Se sul tablet si installa e si utilizza un sistema operativo diverso da quello...
  • Page 267 ATTENZIONE Per proteggere il tablet e i dati personali, scaricare le applicazioni solo da fonti attendibili, ad esempio Play Store™. Se vi sono applicazioni installate in modo non corretto, il tablet potrebbe funzionare in modo errato oppure potrebbe verificarsi un errore grave. È necessario disinstallare dal tablet tali applicazioni e tutti i dati e le impostazioni associati. 3. Utilizzo del blocco dello schermo Impostare il blocco dello schermo per proteggere il tablet. Toccare > > Display > Blocco schermo >scheda Applicazioni > Impostazioni > Seleziona blocco schermo e selezionare il blocco schermo desiderato da Nessuno, Trascina, Knock Code, Sequenza, PIN e Password. È necessario creare un Backup PIN come misura di sicurezza nel caso in cui si dimentichi la sequenza di blocco. Attenzione: creare o accedere a un account Google prima di impostare un blocco schermo e memorizzare il Backup PIN creato durante la generazione di tale blocco. ATTENZIONE Precauzioni da osservare quando si utilizza un blocco dello schermo. È molto importante ricordare il blocco dello schermo impostato. Non sarà possibile accedere al tablet se viene utilizzato un blocco schermo errato per 5 volte. L'utente ha a disposizione 5 possibilità per immettere lo schema di sblocco, il PIN o la password. Se sono stati utilizzati tutti e...
  • Page 268 Quando non è possibile ricordare la sequenza di sblocco, il PIN o la password: < Se non si ricorda la sequenza > Se è stato effettuato l'accesso all'account Google sul tablet e per cinque volte non è stata utilizzata la sequenza corretta, sfiorare il pulsante Hai dimenticato la sequenza? nella parte inferiore dello schermo. Viene quindi richiesto di effettuare l'accesso con l'account Google o di immettere il Backup PIN inserito durante la creazione della sequenza di blocco. Se sul tablet non è stato creato un account Google o se è stato dimenticato il Backup PIN, sarà necessario eseguire un ripristino completo. < Se non si ricorda il PIN o la password > Se non si ricorda il PIN o la password, sarà necessario eseguire una reimpostazione completa.
  • Page 269 Spegnere il tablet. Tenere premuto prima il tasto Volume giù quindi tenere premuto il tasto di accensione/blocco sul lato destro del tablet fino a quando non viene visualizzato il logo LG. Rilasciare tutti i tasti solo quando viene visualizzato il logo LG. Immediatamente tenere premuto il tasto accensione/blocco + tasto Volume giù contemporaneamente. Quando viene visualizzata la schermata per il ripristino delle impostazioni predefinite, rilasciare tutti i tasti. Premere i tasti Volume per spostare il cursore su Sì, quindi premere il tasto di accensione/blocco per continuare. Premere i tasti Volume per spostare nuovamente il cursore su Sì, quindi premere il tasto di accensione/blocco per continuare. Il dispositivo eseguirà una reimpostazione completa. ATTENZIONE Quando si effettua una reimpostazione completa, tutte le applicazioni e i dati utente, nonché le licenze DRM, vengono eliminati. Eseguire il backup di tutti i dati importanti prima di effettuare la reimpostazione completa.
  • Page 270: Introduzione Al Dispositivo

    Introduzione al dispositivo Panoramica del tablet Obiettivo fotocamera anteriore Tasto di accensione/blocco Tasti volume Jack auricolare LED infrarosso (IR) Alloggiamento della scheda microSD Microfono Caricabatterie/Porta USB Obiettivo fotocamera posteriore Altoparlanti NOTA: Il tablet è progettato in modo che le aperture degli altoparlanti sul retro siano due per motivi estetici. Tuttavia, il suono reale viene solo da un altoparlante. Tenere presente che non si tratta di un difetto del prodotto. NOTA: Assicurarsi che il microfono non sia bloccato quando si registra un video o una clip audio.
  • Page 271 Usare per fare fotografie e video di se stessi. Può Obiettivo fotocamera essere usato anche per la chat video. Mantenere anteriore sempre pulito l'obiettivo per prestazioni ottimali. Premere per bloccare/sbloccare lo schermo. Tasto di accensione/ Tenere premuto per spegnere, accendere, riavviare, blocco attivare/disattivare la modalità aereo o modificare le impostazioni dei suoni. Consente di regolare i volumi dei supporti. Tenere Tasti volume premuti entrambi i tasti contemporaneamente per accedere alla funzione QuickMemo+. Consente di collegare un auricolare opzionale per un comodo utilizzo in modalità vivavoce. È anche Jack auricolare possibile collegare auricolari per l'ascolto della musica. LED infrarosso (IR) Usato come sensore per l'app QuickRemote. Alloggiamento della Inserire la scheda microSD per memorizzare file scheda microSD come musica, video e foto. Microfono Registra la voce e viene usato per le funzioni vocali. Consente di collegare il tablet e il cavo USB Caricabatterie/Porta da utilizzare con il caricatore, il PC o con altri accessori compatibili.
  • Page 272: Carica Del Tablet

    ATTENZIONE Non collocare oggetti pesanti sul tablet e prestare attenzione a non sedersi sul tablet, se riposto in tasca, per evitare di danneggiare il display LCD e lo schermo a sfioramento. SUGGERIMENTO: • Premere il tasto Menu ogni volta che si seleziona un'applicazione per verificare le opzioni disponibili. • Se il dispositivo è bloccato e non funziona, tenere premuto il tasto di accensione/blocco per più di 8 secondi fino a quando non viene visualizzato il logo LG per riavviare il tablet. Carica del tablet Per caricare la batteria, viene usato un adattatore USB, in dotazione con il tablet. Prima di utilizzare il tablet per la prima volta, assicurarsi che la batteria sia completamente carica. NOTA: Questo dispositivo è dotato di una batteria ricaricabile interna. Per la propria sicurezza, non rimuovere la batteria inclusa nel prodotto. Attenzione! Se lo schermo a sfioramento non funziona mentre il tablet è in fase di ricarica, ciò potrebbe essere dovuto ad un'alimentazione instabile. In tal caso, scollegare quindi il cavo USB dal dispositivo o scollegare l'adattatore USB dalla presa di corrente.
  • Page 273: Ottimizzazione Della Durata Della Batteria

    Collegare l'adattatore USB ed il cavo USB. Collegare il cavo USB alla porta caricabatterie/USB del tablet (come illustrato di seguito). Inserire il caricabatterie in una presa elettrica. NOTA: Per aumentare la durata della batteria, caricarla completamente al primo utilizzo. Ottimizzazione della durata della batteria È possibile estendere la durata della batteria tra una ricarica e l'altra disattivando le funzioni che non si utilizzano costantemente in background. È inoltre possibile monitorare il consumo della batteria da parte delle applicazioni e delle risorse di sistema.
  • Page 274: Per Estendere La Durata Della Batteria

    Per estendere la durata della batteria • Disattivare le comunicazioni radio che non vengono utilizzate, ad esempio le funzioni Wi-Fi, Bluetooth o GPS. • Ridurre la luminosità e impostare un timeout dello schermo più ridotto. • Disattivare la sincronizzazione automatica per Gmail™, Calendario, Contatti e altre applicazioni. • Alcune delle applicazioni scaricate possono causare la riduzione della durata della batteria. • Durante l'uso delle applicazioni scaricate, controllare il livello di carica della batteria. Per verificare il livello di carica della batteria Nella schermata iniziale, sfiorare Applicazioni > Impostazioni > Informazioni sul tablet > Batteria. Vengono visualizzati il livello di carica e lo stato (in carica o in uso) della batteria nel menu superiore dello schermo. Per monitorare e controllare l'uso della batteria Dalla schermata iniziale, sfiorare Applicazioni > Impostazioni >...
  • Page 275: Inserimento Di Una Scheda Microsd

    Inserimento di una scheda microSD Il dispositivo supporta l'utilizzo di schede di memoria microSD con una capacità fino a 32 GB. Sulla scheda microSD è possibile salvare contenuti multimediali. I nserire l'unghia nella fessura e tirare fuori con delicatezza il coperchio dell'alloggiamento della scheda di memoria per rimuoverlo. I nserire la scheda di memoria nell'alloggiamento con i contatti rivolti verso lo schermo. Spingere con delicatezza il coperchio dell'alloggiamento della scheda nel tablet per chiuderlo.
  • Page 276: Rimozione Della Scheda Microsd

    Rimozione della scheda microSD Per rimuovere la scheda microSD in sicurezza, occorre innanzitutto smontarla. Nella schermata iniziale, premere Applicazioni > Impostazioni > Archiviazione > Smonta scheda SD. Aprire il vassoio della scheda microSD e spingere la scheda verso l'interno per rilasciarlo. Estrarre con delicatezza la scheda microSD dall'alloggiamento. Attenzione! Non rimuovere la scheda microSD senza prima averla smontata. In tal caso, potrebbero verificarsi danni al tablet e alla scheda microSD nonché ai dati memorizzati in quest'ultima. Formattazione della scheda microSD Attenzione! Tutti i file memorizzati sulla scheda microSD vengono cancellati quando la scheda viene formattata. Nella schermata iniziale, sfiorare Applicazioni > Impostazioni > Archiviazione. Toccare Cancella scheda SD (due volte). Se è stata impostata una sequenza di sblocco, immetterla e quindi premere Cancella tutto. La scheda verrà formattata e potrà essere utilizzata.
  • Page 277: Blocco E Sblocco Dello Schermo

    NOTA: Se la scheda microSD contiene già dei dati, la struttura della cartella potrebbe risultare diversa dopo la formattazione, poiché tutti i file saranno stati eliminati. Blocco e sblocco dello schermo Se non si utilizza il tablet per un certo periodo di tempo, lo schermo verrà disattivato e bloccato automaticamente. Ciò consente di prevenire la pressione accidentale dei tasti e di limitare il consumo della batteria. Quando non si utilizza il tablet, premere il tasto di accensione/blocco per bloccare il tablet. Se sono presenti programmi in esecuzione durante il blocco dello schermo, l'esecuzione di tali programmi potrebbe avvenire nella modalità di blocco. Per evitare che vengano addebitati costi aggiuntivi, si consiglia di chiudere tutti i programmi prima di inserire la modalità di blocco (ad es. accesso Web e comunicazioni dati). Per riattivare il tablet, premere il tasto di accensione/blocco . Viene visualizzato il blocco schermo. Toccare e scorrere il blocco schermo in qualsiasi direzione per sbloccare la schermata iniziale. Si apre l'ultima schermata visualizzata. Attivare la schermata usando la funzione Toc Toc La funzione Toc Toc consente di toccare due volte lo schermo per attivarlo o disattivarlo rapidamente.
  • Page 278: Sbloccare La Schermata Usando La Funzione Knock Code

    • Toccare rapidamente due volte il centro dello schermo per accenderlo. • Toccare rapidamente due volte la barra di stato, un'area vuota sulla schermata iniziale o il blocco schermo per spegnere lo schermo. Sbloccare la schermata usando la funzione Knock Code La funzione Knock Code consente di creare il proprio codice di sblocco usando una combinazione di colpetti (o sfioramenti) sullo schermo. • Mentre la schermata è spenta, sfiorare la stessa sequenza stabilita in qualsiasi punto dello schermo. L'accesso alla schermata iniziale è diretto. Per attivare la funzione Knock Code Dalla schermata iniziale, sfiorare Applicazioni > Impostazioni > Display > Blocco schermo > Seleziona il blocco dello schermo > Knock Code. Questa operazione consente di aprire una schermata che guiderà l'utente nel processo di selezione della sequenza di sblocco. È necessario creare un Backup PIN come misura di sicurezza nel caso in cui si dimentichi la sequenza di sblocco.
  • Page 279: Schermata Principale

    Schermata principale Suggerimenti per lo schermo a sfioramento Di seguito, vengono forniti alcuni suggerimenti su come utilizzare il tablet. NOTA: • Per selezionare una voce, toccare il centro dell'icona. • Non esercitare una forte pressione, poiché lo schermo a sfioramento è abbastanza sensibile da rilevare un tocco leggero. • Toccare l'opzione desiderata con la punta del dito. Fare attenzione a non toccare i tasti circostanti. Toccare o toccare Con un'unica pressione del dito è possibile selezionare elementi, collegamenti, opzioni a scelta rapida e lettere sulla tastiera su schermo. Tenere premuto Tenere premuta una voce sullo schermo toccandola senza sollevare il dito finché non viene eseguita l'azione. Ad esempio, per accedere alle opzioni disponibili di un contatto, tenere premuto il contatto nell'elenco Contatti fino a quando non viene attivato il menu di scelta rapida. Trascinamento Tenere premuto un elemento per un secondo, quindi spostare il dito sulla schermata senza sollevarlo fino a quando non si raggiunge la posizione desiderata. È possibile trascinare gli elementi sulla schermata iniziale per riposizionarli.
  • Page 280: Scorrere

    Scorrere Per spostarsi da una schermata all'altra o scorrere lungo la schermata, muovere rapidamente il dito attraverso la superficie dello schermo, senza fermarsi dal momento del contatto (per evitare che si attivi il trascinamento di elementi). Ad esempio, è possibile scorrere verso l'alto o verso il basso di un elenco, oppure spostarsi tra diverse schermate iniziale muovendo il dito da sinistra a destra (e viceversa). Doppio tocco Premere due volte per attivare la funzione di zoom su una pagina Web o una cartina. Ad esempio, premere velocemente due volte sulla sezione di una pagina Web per regolare la sezione in modo tale che rientri nella larghezza dello schermo. È inoltre possibile premere due volte per attivare la funzione di zoom (ingrandimento o riduzione) quando si visualizza una foto o quando si utilizza la funzione Mappe. Toccare due volte una parola per evidenziarla. Il doppio tocco può anche attivare la funzione Accendi lo schermo per attivare o disattivarle lo schermo a sfioramento. Ingrandire/Ridurre Avvicinare o allontanare il pollice e l'indice per attivare la funzione di zoom rispettivamente per ingrandire o ridurre gli elementi durante la navigazione su browser, la visualizzazione di immagini e l'uso della funzione Mappe. Ruotare lo schermo Da molte applicazioni e menu, l'orientamento dello schermo si regola in base all'orientamento fisico del dispositivo. Sfondo Per visualizzare i pannelli, è sufficiente fare scorrere il dito verso sinistra o verso destra. È possibile personalizzare ciascun pannello con applicazioni, download, widget e sfondi.
  • Page 281 I tasti di scelta rapida si trovano nella parte inferiore della schermata principale e consentono di accedere direttamente e in modo semplice alle funzioni più utilizzate. Barra di stato – Consente di visualizzare le informazioni sullo stato del dispositivo, come l'ora, l'intensità del segnale Wi-Fi, lo stato della batteria e le icone di notifica. Icone Applicazione – Toccare un'icona (applicazione, cartella ecc.) per aprirla e utilizzarla. Tasti di scelta rapida – Forniscono un accesso semplice, rapido alle funzioni utilizzate più spesso Tasto Dual Window – Toccare per cambiare la modalità Dual Window. Consente di gestire due diverse app contemporaneamente dividendo la finestra in due. Tasto applicazioni recenti – Toccare per visualizzare le applicazioni usate di recente. È anche possibile tenere premuto per visualizzare le opzioni del Menu nelle applicazioni. Tasto Home – Riporta alla schermata principale (o riporta all'area principale predefinita da una qualsiasi delle aree di estensione della schermata principale). Toccare e trascinare per accedere a Google Now. Tasto indietro – Consente di tornare alla schermata precedente. Inoltre chiude gli elementi a comparsa, come i menu, le finestre di dialogo e la tastiera su schermo. Toccare e trascinarlo per accedere alla Dual Window.
  • Page 282: Personalizzazione Della Schermata

    Personalizzazione della schermata iniziale È possibile personalizzare la schermata iniziale aggiungendo applicazioni, download, widget o sfondi. Per utilizzare il tablet in modo più pratico, aggiungere le applicazioni e i widget preferiti alla schermata iniziale. Per aggiungere elementi alla schermata iniziale: Tenere premuta la parte vuota della schermata iniziale. Toccare la scheda Applicazioni o Widget. Trascinare l'elemento nella posizione desiderata e rilasciare il dito. Per rimuovere un elemento dalla schermata iniziale: Tenere premuta l'icona che si desidera rimuovere, trascinarla su rilasciare il dito. SUGGERIMENTO: Per aggiungere l'icona di un'applicazione alla schermata iniziale dalla schermata Applicazioni, tenere premuta l'applicazione che si desidera aggiungere e trascinarla nella posizione desiderata. SUGGERIMENTO: È possibile aggiungere diverse icone delle applicazioni in una cartella. Trascinare l'icona di un'applicazione su un'altra icona nella schermata iniziale e verrà creata una cartella.
  • Page 283: Apertura, Chiusura E Passaggio Tra Le Applicazioni

    Apertura, chiusura e passaggio tra le applicazioni Toccare per visualizzare le applicazioni usate di recente. È possibile mantenere in esecuzione applicazioni multiple contemporaneamente e passare da un'applicazione aperta all'altra. È inoltre possibile arrestare manualmente l'esecuzione delle applicazioni. Utilizzo della Dual Window La funzione Dual Window divide la schermata per abilitare il multi-tasking, l'interazione trascina e rilascia, il collegamento automatico e le applicazioni utilizzate di recente. Toccare per dividere la schermata o toccare e tenere premuto ino a quando non viene visualizzato l'elenco delle app. Toccare o trascinare un'icona app nello spazio desiderato. Toccare per visualizzare le seguenti opzioni.s. È inoltre possibile trascinare le schede per cambiare le dimensioni della finestra.
  • Page 284: Personalizzazione Delle Icone Delle Applicazioni Nella Schermata Iniziale

    Attivare due schermi. Cambiare l'elenco delle applicazioni. Vista schermo intero. Chiudere le applicazioni. Per disabilitare la funzione Dual Window > Dual Window. Toccare > Applicazioni > Impostazioni toccare l'interruttore della Dual Window per impostare su OFF. SUGGERIMENTO: È possibile avviare due Browser contemporaneamente. Personalizzazione delle icone delle applicazioni nella schermata iniziale È possibile personalizzare ciascuna icona applicazione con immagini della Galleria. Tenere premuta l'icona di un'applicazione fino a quando non viene sbloccata dalla posizione corrente. Quindi, trascinarla nella schermata. Nell'angolo superiore destro dell'applicazione, viene visualizzata l'icona di modifica Sfiorare nuovamente l'icona dell'applicazione e selezionare l'aspetto dell'icona desiderato. Infine sfiorare OK. In alternativa, sfiorare Nuovo, regolare le dimensioni dell'icona e selezionare un'immagine dalla Galleria.
  • Page 285 Per visualizzare altri pannelli della schermata iniziale • Far scorrere il dito (o spostare) verso sinistra o verso destra lungo la schermata home. • Allontanare le dita nella schermata iniziale per visualizzare la vista pannello mini, quindi toccare il pannello della schermata iniziale che si desidera visualizzare.
  • Page 286: Accesso Rapido

    Accesso rapido Per visualizzare gli elementi dell'accesso rapido, toccare in un punto qualsiasi nell'area dei tasti anteriori e trascinare. In Google Now sono disponibili le opzioni descritte di seguito. Notifiche Con Notifiche si ricevono avvisi relativi all'arrivo di nuovi messaggi, a eventi del calendario e a sveglie, nonché a eventi in corso, ad esempio i download. Nell'area delle notifiche, è possibile visualizzare lo stato corrente del tablet e le notifiche in attesa. Quando arriva una notifica, la relativa icona viene visualizzata nella parte superiore dello schermo. Le icone relative alle notifiche in attesa vengono visualizzate a sinistra, mentre le icone di sistema che mostrano elementi quali Wi-Fi o livello della batteria appaiono a destra. Notifiche in attesa Notifiche di sistema...
  • Page 287: Accesso Alle Notifiche

    Accesso alle notifiche Scorrere verso il basso dalla barra di stato per aprire l'area delle notifiche di accesso. Per chiudere l'area delle notifiche, scorrere verso l'alto la barra nella parte inferiore dello schermo. Barra Impostazioni rapide – Scorrere a destra o a sinistra per scorrere l'elenco. Toccare un'icona per attivare/disattivare la funzione. QSLIDE APPS – Toccare un'applicazione QSlide per aprirla come una piccola finestra sullo schermo. Toccare per rimuovere, aggiungere o riorganizzare QSlide Apps. Fare scorrere a sinistra e a destra per regolare luminosità e volume dello schermo. Pulsante Cancella – Toccare qui per cancellare l'elenco delle notifiche basate sugli eventi. Toccare una notifica per aprirla. Impostazioni rapide sul pannello delle notifiche Le Impostazioni rapide consentono di passare facilmente da un'impostazione all'altra per funzioni quali Wi-Fi. Impostazioni rapide sono posizionate nella parte superiore dell'area delle notifiche. NOTA: Toccare e tenere premuta un'icona nella barra delle Impostazioni rapide per visualizzare il menu delle impostazioni della funzione.
  • Page 288: Per Riorganizzare Le Opzioni Di Impostazione Rapida Dell'area Delle Notifiche

    Per riorganizzare le opzioni di impostazione rapida dell'area delle notifiche Aprire il pannello delle notifiche, fare scorrere le impostazioni rapide a sinistra e toccare . Per sistemare di nuovo gli elementi, trascinare nella posizione desiderata. Per aggiungere ulteriori icone, contrassegnare le funzioni desiderate. Applicazioni QSlide nel pannello delle notifiche Le applicazioni QSlide vengono visualizzate in una barra sul pannello delle notifiche al di sotto della barra delle impostazioni rapide. Queste icone forniscono un modo rapido, conveniente di eseguire varie attività sulla stessa schermata (simile all'immagine dentro l'immagine sulla TV). QSlide visualizza una piccola finestra delle applicazioni sullo schermo che può essere spostata, ridimensionata o resa trasparente. NOTA: È possibile rimuovere la barra delle applicazioni QSlide toccando l'icona QSlide nella barra delle impostazioni rapide. Utilizzo delle app QSlide Toccare una qualsiasi delle applicazioni QSlide nella barra per attivarla. Una volta attivata, la funzione QSlide apre l'applicazione in una finestra in primo piano, consentendo l'accesso ad altre applicazioni in background. È possibile aprire due finestre QSlide contemporaneamente. Icone delle notifiche sulla barra di stato Le icone elencate nella tabella di seguito sono alcune delle più comuni.
  • Page 289 Icona Descrizione Modalità aereo Rete Wi-Fi connessa Auricolare con fili connesso Funzione Bluetooth attiva Avviso di sistema Modalità vibrazione attiva Modalità Silenzioso attiva Batteria completamente carica Batteria in carica La condivisione del contenuto è attiva. Download dati in corso Caricamento dati in corso Allarme impostato GPS attivo Sincronizzazione dati in corso Nuovo messaggio Gmail Nuovo messaggio di Hangout...
  • Page 290: Utenti Multipli

    Riproduzione brano in corso Il tablet è collegato al PC mediante cavo USB Modalità Risparmio energetico attivata Utenti multipli Può essere creato un solo ID del proprietario del tablet, ma possono essere aggiunti più ID utenti in modo che altri possano accedere e utilizzare il tablet indipendentemente. Ogni utente può configurare le proprie impostazioni del tablet, usare il proprio spazio di archiviazione e godere dei propri privilegi di aggiornamento delle applicazioni. Privilegi del proprietario del tablet • Solo l'ID del proprietario del tablet può aggiungere un nuovo ID di accesso di un utente e rimuovere ID utente. Limitazioni ai diversi utenti del tablet • Tutti gli utenti condividono la stessa batteria, memoria interna e utilizzo dei dati con gli altri utenti. • Le impostazioni di lingua impostate da un utente si applicano a tutti gli altri. • Ogni utente può configurare e utilizzare solo il proprio contenuto e i propri dati (per es. impostazioni della schermata iniziale, impostazioni del suono, ecc.). • L'utente può accettare le autorizzazioni dell'applicazione aggiornata a nome di tutti gli altri utenti.
  • Page 291 • I messaggi e gli eventi del calendario in programma saranno notificati solo all'ID utente specificato. • Una volta che un utente avvia la stampa di un documento utilizzando Mobile Print, la stampa continua anche se l'ID utente viene modificato. • Il trasferimento dei dati, il download, i giochi multimediali e i servizi di comunicazione si fermeranno se l'ID utente viene modificato. Il trasferimento dei dati tramite il Play Store può proseguire anche se l'ID utente cambia. Per aggiungere un nuovo utente sul tablet Dalla schermata principale, sfiorare Applicazioni > Impostazioni > Utenti > Aggiungi utente. Selezionare il tipo di utente che si desidera aggiungere. • Utente: Gli utenti hanno le proprie applicazioni e il proprio contenuto. • Utente con restrizioni: È possibile restringere l'accesso alle applicazioni e al contenuto dal proprio account. Viene aperta la configurazione guidata che aiuta ad aggiungere un nuovo utente. Toccare Imposta adesso. • Dopo aver creato un nuovo utente, quella persona deve registrarsi al primo accesso. Per cambiare utente Spingere verso il basso la barra di stato nella parte superiore dello schermo. Toccare l'icona utente per visualizzare il pannello di cambio utente.
  • Page 292: Qslide

    QSlide La funzione QSlide consente di sovrapporre più finestre sul display del tablet per un multitasking semplice. Le finestre QSlide possono essere aperte dalla barra delle QSLIDE APPS sul pannello delle notifiche oppure direttamente dalle applicazioni che supportano la funzione QSlide. Aprire il pannello delle notifiche e toccare l'applicazione desiderata dalla sezione QSLIDE APPS. OPPURE Mentre si usano applicazioni che supportano QSlide, toccare La funzione sarà visualizzata continuamente come una piccola finestra sullo schermo. Utilizzo di QSlide La funzione QSlide apre l'applicazione associata in una finestra in primo piano, consentendo l'accesso ad altre applicazioni in background. Viene visualizzato continuamente sullo schermo fin quando non viene chiuso.
  • Page 293: Acquisizione Di Una Schermata

    Toccare per eseguire QSlide. Toccare per uscire da QSlide e tornare alla finestra intera. Toccare per regolare la trasparenza. Toccare per uscire da QSlide. Toccare per regolare le dimensioni. NOTA: La funzione QSlide può supportare due finestre contemporaneamente. QSlide supporta solo per le seguenti applicazioni: Video, Browser, Calendario, Email, File Manager e Calcolatore. Acquisizione di una schermata Tenere premuto il tasto Volume Giù e il tasto di accensione/blocco contemporaneamente per 2 secondi per catturare la schermata dello schermo corrente. Per visualizzare l'immagine acquisita, andare a Applicazioni > Galleria > Screenshots.
  • Page 294: Utilizzo Di Quickmemo+ Per Catturare Una Schermata

    Utilizzo di QuickMemo+ per catturare una schermata Sulla schermata che si desidera catturare, trascinare la barra di stato verso il basso e selezionare QuickMemo+ OPPURE Tenere premuti entrambi Tenere premuti contemporaneamente i tasti Volume . Utilizzo di Capture plus per catturare una schermata Questa funzione consente di catturare una parte della schermata nel Internet predefinito. Aprire l'applicazione Browser e navigare fino alla pagina di cui si desidera eseguire uno screenshot. Toccare il tasto Menu > Capture plus. Regolare la casella blu nelle dimensioni desiderate e quindi sfiorare Salva. L'area selezionata viene salvata nella cartella Capture plus nella Galleria. Metodi di inserimento testo La tastiera a schermo viene visualizzata automaticamente per consentire l'immissione del testo desiderato. Per visualizzare la tastiera a schermo manualmente, è sufficiente toccare un campo di testo in cui si desidera immettere del testo.
  • Page 295: Inserire La Parola Suggerita Usando Il Controllo Dei Movimenti

    Toccare per creare una nuova riga nel Toccare per campo del messaggio. passare dal tastierino Sfiorare per numerico alla tastiera selezionare uno dei tipi simboli. di tastiera desiderati. Sfiorare per Toccare per inserire selezionare la lingua uno spazio. della tastiera. Toccare per accedere alle impostazioni della tastiera LG. Toccare e trascinarlo per accedere al vassoio clip. Inserire la parola suggerita usando il controllo dei movimenti Inserire il testo sulla tastiera e vengono visualizzate le parole suggerite correlate. Toccare o scorrere verso l'alto sul lato sinistro della tastiera per selezionare il suggerimento a sinistra. Toccare o scorrere verso l'alto sul lato destro della tastiera per selezionare il suggerimento a destra. Dividere la tastiera usando i movimenti La funzione Dividi tastiera consente di utilizzare entrambe le mani per digitare. Ciascuna metà della tastiera viene disegnata sul lato sinistro e destro dello schermo.
  • Page 296: Inserimento Di Caratteri Speciali

    Per modificare l'altezza della tastiera Regolare l'altezza della tastiera per lasciare libera una superficie maggiore dello schermo e per controllare la tastiera più facilmente. • Toccare > Altezza e layout della tastiera > Altezza della tastiera in verticale > Sfiora e trascina l'icona per regolare l'altezza della tastiera. Per modificare i tasti della riga inferiore > Altezza e layout della tastiera > Layout QWERTY > Toccare • Toccare e trascinare per aggiungere o eliminare i tasti o cambiare l'ordine. NOTA: Possono essere personalizzate solo le tastiere QWERTY, QWERTZ, AZERTY. Questa funzione non supporta alcune lingue. Inserimento di caratteri speciali La tastiera su schermo consente di inserire caratteri speciali (ad esempio “á”).
  • Page 297: Configurazione Di Un Account Google

    Configurazione di un account Google Alla prima accensione del tablet, è possibile attivare la rete, accedere all'account Google e scegliere le impostazioni per l'utilizzo di determinati servizi Google. Per configurare l'account Google • È possibile accedere a un account Google dalla schermata di configurazione. OPPURE • Nella schermata iniziale, premere Applicazioni >scheda Applicazioni > Account e sincronizzazione > Aggiungi account > > Impostazioni Google. Se si dispone già di un account Google, immettere il proprio indirizzo e-mail e sfiorare AVANTI. Altrimenti, toccare OPPURE CREA UN NUOVO ACCOUNT ed immettere le informazioni necessarie per creare n nuovo account Google. Una volta impostato l'account Google sul tablet, il tablet sincronizza automaticamente con l'acocunt Google sul Web. La rubrica, i messaggi Gmail, gli eventi del calendario e le altre informazioni relative a tali applicazioni e servizi su Web vengono sincronizzati con il tablet (a seconda delle impostazioni di sincronizzazione). Dopo aver effettuato l'accesso, è possibile utilizzare Gmail™ e usufruire dei vantaggi offerti dai servizi Google nel tablet.
  • Page 298: Connessione A Reti E Dispositivi

    Connessione a reti e dispositivi Wi-Fi Con la funzione Wi-Fi, è possibile utilizzare l'accesso Internet ad alta velocità entro i confini della copertura del punto di accesso wireless (AP). Internet wireless con Wi-Fi, senza addebiti aggiuntivi. Connessione alle reti Wi-Fi Per utilizzare la funzione Wi-Fi del tablet, è necessario accedere a un punto di accesso wireless o a un "hotspot". Alcuni punti di accesso sono aperti ed è sufficiente connettersi ad essi. Altri sono nascosti o utilizzano funzioni di protezione; è necessario configurare il tablet in modo che sia in grado di connettersi a essi. Per estendere la durata della batteria, disattivare la funzione Wi-Fi quando non è in uso. Attivazione della funzione Wi-Fi e connessione a una rete Wi-Fi Nella schermata iniziale, premere Applicazioni > scheda Applicazioni > Impostazioni > Wi-Fi. Toccare per attivare il Wi-Fi e iniziare la ricerca delle reti Wi-Fi disponibili. Toccare Cerca per visualizzare un elenco delle reti Wi-Fi attive che si trovano all'interno della portata. • Le reti protette vengono indicate da un'icona di blocco. Toccare una rete per connettersi ad essa.
  • Page 299: Bluetooth

    Bluetooth È possibile inviare dati tramite Bluetooth eseguendo l'applicazione corrispondente, anziché dal menu Bluetooth come sui normali telefoni cellulari e tablet. NOTA: • LG non è responsabile della perdita, dell'intercettazione o dell'uso improprio di dati inviati o ricevuti tramite la funzione wireless Bluetooth. • Accertarsi sempre di condividere e ricevere dati da dispositivi affidabili e adeguatamente protetti. Se vi sono ostacoli fra i dispositivi, la distanza operativa potrebbe ridursi. • Alcuni dispositivi, in particolare quelli che non sono testati o approvati da Bluetooth SIG, possono essere incompatibili con il dispositivo in uso. Attivazione del Bluetooth e associazione del tablet con un dispositivo Bluetooth Prima di poter effettuare la connessione, è necessario accoppiare il dispositivo in uso con l'altro dispositivo desiderato. > scheda Applicazioni > Nella schermata iniziale, premere Applicazioni Impostazioni > Bluetooth. Toccare l'interruttore Bluetooth per accenderlo. Selezionare la casella di controllo di fianco al nome del tablet per rendere il tablet visibile ad altri dispositivi Bluetooth. NOTA: Per selezionare il periodo di tempo per il quale il dispositivo sarà visibile, toccare il tasto Menu > Timeout visibilità.
  • Page 300: Invio Di Dati Tramite La Funzione Bluetooth

    Verrà visualizzato un elenco di dispositivi disponibili. Selezionare dall'elenco il dispositivo con cui si desidera eseguire l'associazione. NOTA: In base al tipo di dispositivo, potrebbe essere necessario inserire codici corrispondenti, oppure l'associazione dei dispositivi avverrà automaticamente. Una volta effettuato l'accoppiamento, il tablet si connetterà all'altro dispositivo. NOTA: Il tablet non supporta il Profilo Vivavoce. Quindi, l'utilizzo di funzioni di chiamata con alcuni accessori come cuffie bluetooth o dispositivo abilitati per il bluetooth potrebbe non essere disponibile per questo dispositivo. Invio di dati tramite la funzione Bluetooth Aprire la voce e toccare OPPURE Tenere premuto l'elemento e selezionare Condividi. OPPURE Aprire la voce e toccare il tasti Menu > Condividi. Toccare Bluetooth per condividere tramite Bluetooth. NOTA: Il metodo di selezione dell'opzione può variare a seconda del tipo di dati. Cercare un dispositivo abilitato Bluetooth ed eseguire l'associazione.
  • Page 301: Ricezione Di Dati Tramite La Funzione Bluetooth

    Ricezione di dati tramite la funzione Bluetooth Fare riferimento alla guida per l'utente del dispositivo Bluetooth per inviare un file al tablet. Entrambi i dispositivi devono essere accoppiati e il Bluetooth deve essere attivo. Associare i dispositivi e toccare Accetta quando si riceve una richiesta di autorizzazione Bluetooth per accettare i file. SmartShare È possibile utilizzare la funzione SmartShare in modo semplice nelle applicazioni Galleria, Musica, ecc. Riproduzione dei contenuti tramite diversi dispositivi È possibile condividere il contenuto del tablet con diversi dispositivi. Sfiorare o sfiorare > SmartShare per condividere il contenuto delle applicazioni Galleria, Musica, POLARIS Office 5. Riproduz./Invio Play – È possibile riprodurre il contenuto tramite un televisore, un dispositivo vivavoce Bluetooth ecc. Beam – È possibile inviare il contenuto al dispositivo Bluetooth e SmartShare Beam supportato. • SmartShare Beam – Questo consente di trasferire il contenuto rapidamente tramite Wi-Fi Direct. < Play > <...
  • Page 302: Riproduzione Dei Contenuti Da Dispositivi Nelle Vicinanze

    Riproduzione dei contenuti da dispositivi nelle vicinanze È possibile utilizzare il contenuto di dispositivi nelle vicinanze (ad esempio, PC, NAS, cellulare) nelle applicazioni Galleria, Musica. Connessione dei dispositivi Connettere il dispositivo e altri dispositivi supportati da DLNA nella stessa rete Wi-Fi. Ricerca di altri dispositivi Toccare Dispositivi nelle vicinanze, in questo modo, è possibile visualizzare i dispositivi supportati da DLNA. Connettersi al dispositivo per visualizzare il contenuto. Utilizzo dei contenuti provenienti dal Cloud È possibile utilizzare il contenuto del cloud (ad es., Dropbox) nelle applicazioni Galleria, Musica. Utilizzo del cloud NOTA: Le funzioni supportate possono variare a seconda del cloud. Il recupero dei dati potrebbe richiedere tempo, a seconda del cloud. Selezionare Cloud nelle applicazioni Galleria, Musica. Selezionare il cloud che si desidera utilizzare, quindi effettuare l'accesso. Dopo aver effettuato l'accesso, è possibile utilizzare il contenuto del cloud. Configurare le impostazioni del cloud, in modo da selezionare l'applicazione per l'utilizzo del cloud.
  • Page 303: Qpair

    QPair Se si collega il tablet e il telefono cellulare con QPair, è possibile sincronizzare chiamate in entrata, messaggi e notifiche di Social network tra telefono e tablet. e sfiorare Configurazione iniziale > Inizio sul tablet Eseguire QPair prima e quindi eseguire le stesse operazioni sul telefono. SUGGERIMENTO: QPair potrebbe non essere pre installato sul telefono. Andare su Google Play Store, cercare l'app QPair e installarla. NOTA: • QPair funziona con i telefoni con Android 4.1 o superiore. Alcune funzioni possono essere limitate in base al modello di telefono. • Poiché QPair utilizza la funzione Bluetooth, potrebbe non funzionare correttamente se si modificano le impostazioni Bluetooth mentre QPair è in uso. La connessione Bluetooth viene attivata automaticamente.
  • Page 304 Funzioni QPair Notifica di chiamata – Invia al tablet una notifica quando il telefono riceve una chiamata. La notifica visualizza il numero del chiamante e consente di rispondere e di rifiutare la chiamata. È possibile anche modificare le impostazioni delle chiamate, come ad esempio la suoneria, il volume, la suoneria con vibrazione o l'invio di un messaggio di rifiuto quando si riceve una chiamata. NOTA: È possibile ricevere una chiamata solo tramite l'utilizzo della tecnologia Bluetooth. Non è possibile effettuare chiamate dal tablet utilizzando la funzione QPair. Notifica di messaggio – Invia al tablet una notifica quando il telefono riceve un messaggio. È possibile anche modificare le impostazioni dei messaggi, come ad esempio la visualizzazione, l'anteprima, il suono di notifica e la vibrazione per la notifica. Notifica SNS – Visualizza una notifica social network sulla barra di stato del tablet quando arriva sul telefono. NOTA: Per abilitare questa funzione, attivare la funzione Notifiche social network QPair sul telefono (Impostazioni > Accesso facilitato > Notifiche social network QPair). Questa opzione consente di ricevere le notifiche del Social network sul tablet. QuickMemo+ Transfer. – Salva QuickMemo+ corrente nella Galleria del tablet e quindi sincronizza la Galleria del tablet con quella del telefono.
  • Page 305: Collegamento Al Pc Tramite Cavo Usb

    Internet via telefono – Collega automaticamente il tablet a Internet attraverso il cellulare (come hotspot Wi-Fi). Se si usa questa funzione il gestore può addebitare dei costi. Per risparmiare sull'uso dei dati sul telefono, il telefono si collega automaticamente a qualsiasi hotspot Wi-Fi riconosciuto nell'intervallo. Collegamento al PC tramite cavo USB Il tablet può essere collegato al PC per essere caricato, per trasferire elementi al PC dal tablet e viceversa. Trasferimento di musica, foto e video tramite la modalità Dispositivo Media (MTP) Collegare il tablet al PC tramite un cavo USB. Se non è stato installato il driver della piattaforma LG Android sul PC, è necessario modificare manualmente le impostazioni. Per modificare le impostazioni, scorrere la barra di stato verso il basso e toccare la modalità di connessione USB corrente > Dispositivo Media (MTP). A questo punto, è possibile visualizzare i contenuti del dispositivo multimediale sul PC e trasferire i file. NOTA: Per modificare le impostazioni di connessione del PC, scorrere la barra di stato verso il basso e selezionare l'opzione di connessione USB desiderata. Tale impostazione viene visualizzata sulla barra di stato solo quando al tablet viene collegato un cavo USB.
  • Page 306: Sincronizzazione Con Windows Media Player

    Sincronizzazione con Windows Media Player Accertarsi che Windows Media Player sia installato sul PC. Utilizzare il cavo USB per collegare il tablet a un PC con installato Windows Media Player. Selezionare l'opzione Dispositivo Media (MTP). Una volta effettuata la connessione, sul PC viene visualizzata una finestra a comparsa. Selezionare l'opzione Windows Media Player per sincronizzare i file musicali. Modificare o immettere il nome del dispositivo nella finestra a comparsa (se necessario). Selezionare e trascinare i file musicali nell'elenco di sincronizzazione. Avviare la sincronizzazione. • Per eseguire la sincronizzazione con Windows Media Player è necessario soddisfare i seguenti requisiti. Elementi Requisito Microsoft Windows XP SP2, Vista o Sistema operativo versione successiva Windows Media Player 10 o versione Versione Window Media Player successiva • Se la versione di Windows Media Player è precedente alla 10, installare la versione 10 o superiore.
  • Page 307: Collegamento A Un Computer Tramite

    Collegamento a un computer tramite cavo USB per utenti Mac OS X È possibile trasferire contenuti multimediali dal tablet al computer MAC OS X e viceversa configurando il programma Android File Transfer. Scaricare e installare il programma Android File Transfer per utenti Mac dal sito Web android.com (http://www.android.com/filetransfer/). Collegare il tablet al computer e fare doppio clic sull'applicazione AFT (programma Android File Transfer) per avviarla. È possibile visualizzare i contenuti multimediali trascinando i file da e verso il tablet (o il computer).
  • Page 308: Rubrica

    Rubrica È possibile aggiungere contatti nel tablet e sincronizzarli con i contatti dell'account Google o di altri account che supportano tale funzione. Ricerca di un contatto Dalla schermata iniziale, toccare Rubrica per aprire l'elenco dei contatti. Toccare la casella Cerca in rubrica e immettere il nome del contatto. Inoltre, è possibile toccare una lettera lungo il lato sinistro dello schermo per accedere ai nomi che iniziano con la lettera scelta. Aggiunta di un nuovo contatto Nella schermata iniziale, premere Rubrica Toccare Nuovo contatto . Selezionare l'account desiderato (se applicabile). Se si desidera aggiungere un'immagina al nuovo contatto, premere Scegliere Scatta foto per scattare una foto utilizzando la fotocamera o Seleziona dalla Galleria. Quindi sfogliare le immagini e selezionarne una. Premere per inserire i dettagli più specifici del nome. Immettere i dettagli sul contatto. Toccare Salva. Contatti preferiti È possibile classificare i contatti chiamati più di frequente come Preferiti.
  • Page 309: Creazione Di Un Gruppo

    Per aggiungere un contatto ai preferiti Nella schermata iniziale, toccare Rubrica per aprire i contatti. Premere un contatto per visualizzarne i dettagli. Premere l'asterisco alla destra del nome del contatto. L'asterisco diventa dorato e il contatto viene aggiunto tra i preferiti. Per rimuovere un contatto dall'elenco dei preferiti Nella schermata iniziale, toccare Rubrica per aprire i contatti. Premere la scheda Preferiti per visualizzare i contatti preferiti. Premere un contatto per visualizzarne i dettagli. Premere la stella dorata alla destra del nome del contatto. La stella diventa grigia e il contatto viene rimosso dai preferiti. Creazione di un gruppo Nella schermata iniziale, toccare Rubrica per aprire i contatti. Toccare la scheda Gruppi, quindi toccare Assegnare un nome al nuovo gruppo. • Toccare Aggiungi iscritti per aggiungere contatti al nuovo gruppo. • Toccare il campo ACCOUNT per modificare l'account in cui si desidera salvare il nuovo gruppo. Toccare Salva per salvare il gruppo. NOTA: Se si elimina un gruppo, i contatti assegnati a tale gruppo non andranno persi, ma resteranno memorizzati nei contatti.
  • Page 310: Email

    Email È possibile utilizzare l'applicazione E-mail per leggere i messaggi e-mail da servizi come Yahoo!, MSN e AOL. L'applicazione E-mail supporta i seguenti tipi di account: POP3, IMAP ed Exchange. Il provider di servizi o l'amministratore del sistema sono in grado di fornire le impostazioni dell'account necessarie. Gestione di un account e-mail Toccare l'Email sulla schermata iniziale. Alla prima apertura dell'applicazione E-mail, viene visualizzata l'installazione guidata che consente di configurare un account e-mail. Dopo l'installazione iniziale, viene visualizzato il contenuto della posta in arrivo. Se sono stati aggiunti più account, è possibile passare da un account all'altro. Per aggiungere un altro account e-mail: • Aprire l'applicazione Email e sfiorare il tasto Menu > Impostazioni > Aggiungi account. Per passare da un account all'altro: Se sono stati aggiunti più account, è possibile passare da un account all'altro in modo semplice. Da qualsiasi cartella email, selezionare l'account attuale (in alto allo schermo), quindi selezionare l'account a cui si desidera accedere. Modifica delle impostazioni generali e-mail: Aprire l'applicazione Email e sfiorare il tasto Menu > Impostazioni>...
  • Page 311: Attività Con Le Cartelle Account

    Per eliminare un account e-mail • Aprire l'applicazione Email e sfiorare il tasto Menu > Impostazioni> tasto Menu > Rimuovi account > toccare l'account che si desidera eliminare > Rimuovi > Sì. Attività con le cartelle Account Aprire l'applicazione Email e sfiorare il tasto Menu e selezionare Cartelle. Ogni account dispone delle cartelle Ricevuti, In uscita, Inviati e Bozze. A seconda delle funzioni supportate dal fornitore di servizi dell'account, sono disponibili cartelle aggiuntive. Composizione e invio di e-mail Mentre si è nell'applicazione Email, sfiorare Comporre Immettere un indirizzo per il destinatario finale del messaggio. Mentre si inserisce il testo, vengono proposti gli indirizzi corrispondenti dalla Rubrica. Separare più indirizzi tramite punto e virgola. Toccare Allega per allegare i file se richiesto. Immettere l'oggetto e il messaggio. Toccare Invia per inviare il messaggio. Se non si è collegati a una rete, ad esempio quando si lavora in modalità aereo, i messaggi inviati verranno memorizzati nella cartella In uscita finché non ci si connette nuovamente a una rete. Se ci sono messaggi in sospeso, la cartella Posta in uscita viene visualizzata sulla schermata Account.
  • Page 312: Ricezione E-Mail

    Ricezione e-mail Quando si riceve una nuova email nella casella di posta Ricevuti, viene segnalata una notifica tramite un segnale acustico o una vibrazione (in base alle impostazioni di suoneria e vibrazione) e l'icona delle notifiche viene visualizzata sulla barra di stato.
  • Page 313: Entertainment

    Entertainment Fotocamera Per aprire l'applicazione Fotocamera, toccare Fotocamera nella schermata iniziale. Introduzione al mirino V isualizzazione chiara – Toccare per mostrare o nascondere i menu nella finestra del mirino. P assa a fotocamera – Consente di passare dall'obiettivo posteriore a quello anteriore della fotocamera. È anche possibile cambiare fotocamera scorrendo lo schermo. M odo – Consente di impostare la modalità di scatto su Auto o Panorama. Impostazioni – Toccare questa icona per aprire il menu delle impostazioni. G alleria – Toccare per visualizzare l'ultima foto acquisita. Consente di accedere alla galleria e di visualizzare le foto salvate in modalità fotocamera. Modalità Video – Toccare questa icona per iniziare a registrare un video.
  • Page 314: Uso Delle Impostazioni Avanzate

    Cattura – Consente di scattare una foto. Esci – Toccare per chiudere la fotocamera. NOTA: Assicurarsi che l'obiettivo della fotocamera sia pulito prima di scattare foto. Uso delle impostazioni avanzate Nel mirino, premere per aprire le opzioni avanzate. Consente di selezionare la risoluzione della foto. Se si sceglie una risoluzione elevata, le dimensioni del file saranno maggiori e, di conseguenza, il numero di foto archiviabili nella memoria sarà minore. Scattare le foto con comando vocale. Consente di impostare un ritardo dopo aver premuto il pulsante di acquisizione. Ideale se si desidera includere nella foto anche chi scatta. Visualizza le linee della griglia a schermo per aiutare ad allineare le foto. Consente di aprire la guida per sapere il funzionamento di questa funzione. SUGGERIMENTO: Quando si esce dall'applicazione fotocamera, alcune impostazioni tornano ai valori predefiniti, come il timer. Prima di scattare la foto successiva, verificare le impostazioni.
  • Page 315: Scatto Di Una Foto

    Scatto di una foto Aprire l'applicazione Fotocamera. Puntare l'obiettivo verso il soggetto da ritrarre. Toccare per scattare la foto. È possibile scattare la foto anche toccando un punto qualunque dello schermo nella modalità Visualizzazione chiara. Per ingrandire o ridurre la visualizzazione Quando si scatta una fotografia o si registra un video, posizionare due dita sullo schermo e allontanarle per ingrandire. Per ridurla, riunire le dita sullo schermo. Scatto con gesture La funzione Scatto con gesture consente di scattare una foto con un movimento della mano utilizzando la fotocamera anteriore. Per scattare una foto, sollevare la mano tenendo il palmo aperto fino a quando la mano non viene rilevata dalla fotocamera anteriore e un riquadro compare sullo schermo. Quindi, chiudere la mano a pugno per consentire l'attivazione di un timer che inizierà il conto alla rovescia lasciando a disposizione tutto il tempo necessario per la foto.
  • Page 316: Dopo Avere Scattato Una Foto

    Dopo avere scattato una foto Toccare l'anteprima dell'immagine con il pulsante di acquisizione immagine per visualizzare l'ultima foto scattata. Toccare Galleria oppure Foto, quindi sfiorare OK. Toccare per modificare la foto. Toccare per scattare immediatamente un'altra foto. Toccare per inviare gli appunti o condividerli tramite servizi di social network. Toccare per eliminare la foto. Toccare per accedere a altre opzioni. Toccare per aggiungere la foto ai preferiti. SUGGERIMENTO: Se nel tablet è impostato l'account di un social network, è possibile condividere la foto con la corrispondente comunità. Toccare l'icona Menu per aprire le seguenti opzioni. SmartShare – Toccare per condividere la foto usando la funzione SmartShare. Usa immagine come – Toccare per utilizzare la foto come Sfondo schermata Home, Foto del contatto, Sfondo blocco schermo o Sfondo. Sposta – Toccare per spostare la foto in un altro album. Copia – Toccare per copiare la foto selezionata e salvarla in un altro album. Copia in Appunti – Toccare per copiare la foto e archiviarla in Clip Tray. Presentazione – Consente di visualizzare automaticamente le immagini nella cartella corrente in successione.
  • Page 317: Visualizzazione Delle Foto Salvate

    Ruota a sinistra/destra – Toccare per ruotare la foto verso sinistra o verso destra. Ritaglia – Consente di ritagliare la foto. Spostare il dito sullo schermo per selezionare l'area da ritagliare. Aggiungi località – Consente di aggiungere le informazioni sulla posizione. Rinomina – Toccare per modificare il nome della foto selezionata. Stampa – Consente di stampare la foto. Dettagli – Visualizza altre informazioni sulla foto. Visualizzazione delle foto salvate È possibile accedere alle foto salvate in modalità fotocamera. È sufficiente toccare l'anteprima con il pulsante di acquisizione e viene visualizzata la galleria. Scegliere l'applicazione da usare per visualizzare e/o modificare le fotografie. Toccare Galleria oppure Foto Toccare OK. • Per visualizzare altre foto, scorrere a sinistra o a destra. • Per ingrandire o ridurre, toccare due volte lo schermo oppure posizionare due dita e allontanarle (avvicinare le dita per ridurre). Registrazione di un video Aprire l'applicazione Fotocamera. Puntare l'obiettivo verso il soggetto desiderato nel video. Toccare l'icona di modalità video per avviare la registrazione. Verrà visualizzato un timer che mostra la durata del video. Toccare sul display per interrompere la registrazione.
  • Page 318: Per Guardare I Video Salvati

    SUGGERIMENTO: • Toccare per sospendere la registrazione. • Toccare per catturare uno screenshot durante la registrazione di un video. Per guardare i video salvati È possibile accedere ai video salvati in modalità videocamera selezionando l'anteprima dell'immagine tramite il pulsante di acquisizione. Nel mirino, toccare l'anteprima dell'immagine con il pulsante di cattura. La Galleria verrà visualizzata sullo schermo, mostrando il video più recente. Scorrere a destra per visualizzare gli altri video. Premere sull'icona di riproduzione di un video per riprodurlo automaticamente. NOTA: I video possono essere visualizzati nella applicazioni Galleria e Foto. NOTA: Non esercitare molta pressione, poiché lo schermo a sfioramento è abbastanza sensibile da rilevare un tocco leggero. Galleria È possibile memorizzare file multimediali in una scheda di memoria interna, in modo da poter accedere facilmente a tutti i file multimediali. Utilizzare questa applicazione per visualizzare file multimediali quali immagini e video. Nella schermata iniziale, premere Applicazioni > scheda Applicazioni > Galleria Consente di gestire e condividere file immagine e video all'interno della Galleria.
  • Page 319: Visualizzazione Delle Immagini

    NOTA: • A seconda del software installato sul dispositivo, alcuni formati non sono supportati. • A seconda della modalità in cui sono stati codificati, alcuni file potrebbero non essere riprodotti correttamente. • Se le dimensioni del file superano la memoria disponibile, all'apertura può verificarsi un errore. Visualizzazione delle immagini Avviando la Galleria , vengono visualizzate le cartelle disponibili. Quando un'immagine viene salvata da un'altra applicazione, ad esempio Email, la cartella di download viene automaticamente creata per contenere l'immagine. Analogamente, l'acquisizione di una screenshot crea automaticamente la cartella Schermate. Toccare una cartella da aprire. Le immagini vengono visualizzate per data di creazione. Selezionare un'immagine per visualizzarla a schermo intero. Scorrere verso sinistra o destra per visualizzare l'immagine precedente e successiva. Riproduzione dei video Aprire l'applicazione Galleria e scegliere un album. L'icona di Riproduzione viene visualizzata sui file video. Toccare un'immagine per selezionarla. Selezionare l'applicazione (sfiorare l'applicazione Foto l'applicazione Video ), quindi sfiorare OK e la riproduzione del video inizierà.
  • Page 320: Eliminazione Di Immagini E Video

    NOTA: • Durante la visualizzazione di un video, far scorrere il lato sinistro della schermata verso l'alto o verso il basso per regolare la luminosità. Far scorrere il lato destro della schermata verso l'alto o verso il basso per regolare il volume. • Durante la riproduzione, scorrere verso sinistra o verso destra per riavvolgere o procedere rapidamente nel video. Eliminazione di immagini e video Utilizzare uno dei metodi riportati di seguito: • In una cartella, sfiorare e selezionare le foto e i video da eliminare, quindi toccare Elimina e il tasto Sì per confermare. • Durante la visualizzazione di una foto o video, toccare , quindi toccare Sì per confermare. Uso come sfondo Durante la visualizzazione di una foto, toccare l'icona Menu > Usa immagine come e selezionare Sfondo schermata Home, Sfondo blocco schermo o Sfondo. Presentazione Consente di visualizzare le foto in una presentazione per album o per selezione di foto. Nella schermata iniziale, sfiorare Galleria • Selezionare l'album con le foto che si desidera visualizzare, quindi sfiorare l'icona Menu > Presentazione > scegliere le immagini che si desidera visualizzare > Avanti > verificare le impostazioni della presentazione > Inizio. Sfiorare il centro dello schermo per interrompere la riproduzione della presentazione.
  • Page 321: Video

    Video La galleria dispone di un lettore video integrato che consente di riprodurre i propri video preferiti. Riproduzione di un filmato Nella schermata iniziale, premere Applicazioni > scheda Applicazioni > Galleria > Video Selezionare il video da riprodurre. Toccare per aggiungere il video ai preferiti. Toccare per accedere a QSlide e visualizzare il video in una piccola finestra. Toccare per condividere il video mediante la funzione SmartShare. Toccare per accedere a altre opzioni. Toccare per gestire il volume del video. Toccare e tenere premuto per tornare indietro di 3 secondi alla volta. Toccare una volta per riavvolgere di 10 secondi.
  • Page 322: Musica

    Toccare per sospendere la riproduzione del video. Toccare e tenere premuto per avanzare di 3 secondi alla volta. Toccare una volta per andare avanti di 10 secondi. Toccare per bloccare/sbloccare la schermata di un video. Per modificare il volume durante la riproduzione di un video, premere i tasti volume sul lato destro del tablet. Sfiorare Galleria > (nell'angolo in alto a sinistra della barra del titolo) > Video, quindi toccare e tenere premuto un video nell'elenco per accedere alle seguenti opzioni: Condividi, Elimina, Ritaglia, Rinomina e Dettagli. SUGGERIMENTO: Durante la visualizzazione di un video, far scorrere lungo il lato sinistro della schermata verso l'alto o verso il basso per regolare la luminosità. Far scorrere il lato destro della schermata verso l'alto o verso il basso per regolare il volume. Musica Il tablet dispone di un lettore musicale che consente di riprodurre i propri brani preferiti. Per accedere al lettore musicale, nella schermata iniziale, premere Applicazioni > scheda Applicazioni > Musica Trasferimento di musica tramite la modalità Dispositivo Media (MTP) Collegare il tablet al computer utilizzando il cavo USB. Selezionare l'opzione Dispositivo Media (MTP). Il tablet verrà visualizzato sul computer come un altro disco rigido. Fare clic sull'unità per visualizzarla. Copiare i file da un PC sulla cartella dell'unità.
  • Page 323: Riproduzione Di Un Brano

    Riproduzione di un brano Nella schermata iniziale, premere Applicazioni > scheda Applicazioni > Musica Toccare la scheda Brani. Selezionare il brano da riprodurre. Toccare per condividere i brani musicali tramite la funzione SmartShare. Toccare per impostare il brano corrente come preferito Toccare per visualizzare la playlist in riproduzione. Toccare per accedere a altre opzioni. Toccare per impostare la modalità casuale.
  • Page 324 Toccare per impostare la modalità di ripetizione. Toccare per gestire il volume della musica. Toccare per tornare all'inizio del brano. Toccare due volte per tornare al brano precedente. Tenere premuto per riavvolgere 3 secondi. Toccare per sospendere la riproduzione. Toccare per passare al brano successivo dell'album o della playlist. Tenere premuto per avanzare di 3 secondi. Toccare per impostare l'effetto audio. Per modificare il volume durante l'ascolto di musica, premere i tasti volume sul lato destro del tablet. Toccare e tenere premuto un brano nell'elenco per accedere alle seguenti opzioni: Play, Aggiungi a playlist, Elimina, Condividi, Dettagli e Ricerca. NOTA: • A seconda del software del dispositivo, alcuni formati di file non sono supportati. • Se le dimensioni del file superano la memoria disponibile, all'apertura può verificarsi un errore. • I file musicali potrebbero essere protetti da copyright in base ai trattati internazionali e alle leggi nazionali in materia. È pertanto severamente vietato riprodurre o copiare i brani musicali senza autorizzazione o licenza. In alcuni paesi è vietata la duplicazione privata di materiale protetto da copyright. L'utente è tenuto a verificare le leggi nazionali che regolano l'uso di questo tipo di materiale, prima di scaricare o copiare file.
  • Page 325: Strumenti

    Strumenti QuickMemo+ La funzione QuickMemo+ consente di creare appunti e di acquisire schermate. Grazie alla funzione QuickMemo+, è possibile acquisire schermate, disegnarci sopra e condividerle con familiari e amici. Creazione di un memo Dalla schermata iniziale, sfiorare QuickMemo+ , quindi sfiorare per creare un nuovo memo. È possibile modificare i testi digitando le parole direttamente o selezionando il tipo di penna e il colore che si desidera usare inserendo il testo a mano. Aggiungere un promemoria sfiorando per impostare la notifica del promemoria per l'evento. Aggiungere informazioni su tempo e posizione al memo se è disponibile una rete dati. Uso delle opzioni di QuickMemo+ Nella barra degli strumenti QuickMemo+ sono disponibili le seguenti opzioni nella parte superiore dello schermo. Toccare per aprire il memo in QSlide. Consente di annullare e ripetere le azioni precedenti. Consente di modificare il testo, i relativi colori e l'allineamento.
  • Page 326 Consente di inserire il testo a mano libera. È possibile selezionare il tipo di penna da usare come anche spessore, trasparenza e colore. Cancella le modifiche apportate al memo. Salva il memo in QuickMemo+. Toccare per accedere a altre opzioni. Consente di impostare una notifica promemoria per un evento. Consente di inserire le informazioni relative al tempo nel memo. Consente di aggiungere le informazioni sulla posizione usando il GPS. Cattura di uno screenshot per QuickMemo Per accedere alla funzione QuickMemo+, trascinare la barra di stato verso il basso e toccare O PPURE Premere entrambi i tasti Volume contemporaneamente per un secondo. Selezionare l'opzione desiderata dalla barra dei menu e creare un memo. Toccare per salvare il memo. Per uscire da QuickMemo+ in qualsiasi momento, toccare il tasto Indietro...
  • Page 327: Quickremote

    NOTA: Utilizzare la punta delle dita quando si utilizza QuickMemo+. Non utilizzare le unghie. QuickRemote QuickRemote trasforma il tablet in un telecomando universale per la home TV, Blu-ray o DVD. NOTA: QuickRemote potrebbe non essere disponibile per alcuni dispositivi e aree. Per aprire e configurare QuickRemote Nella schermata iniziale, sfiorare la scheda Applicazioni > Applicazioni > QuickRemote È anche possibile eseguire la configurazione iniziale di QuickRemote dall'area delle notifiche. Trascinare la barra di stato verso il basso, premere , quindi sfiorare AGGIUNGI DISPOSITIVO l'icona QuickRemote REMOTO. Toccare per selezionare un tipo di stanza e toccare per aggiungere il dispositivo.
  • Page 328 Selezionare il tipo e la marca del dispositivo, quindi attenersi alle istruzioni visualizzate per configurare i dispositivi. NOTA: QuickRemote (telecomando rapido) funziona allo stesso modo dei segnali infrarossi (IR) di un normale telecomando del proprio paese. Quando si utilizza la funzione QuickRemote (telecomando rapido), fare attenzione a non coprire il sensore a raggi infrarossi nella parte superiore del tablet. A seconda del modello, del produttore o della società di assistenza, questa funzione potrebbe non essere supportata. Utilizzo di QuickRemote Aprire QuickRemote e scegliere la stanza in cui è stato configurato il telecomando. Selezionare il telecomando desiderato toccando il relativo tipo/nome nella parte superiore della barra QuickRemote lungo il lato sinistro dello schermo. Toccare i pulsanti sul telecomando visualizzato.
  • Page 329: Orologio

    NOTA: Quando si aggiunge il telecomando del televisore, QuickRemote potrebbe utilizzare il pulsante INPUT per configurare il telecomando appropriato. Durante la configurazione del pulsante INPUT, la sorgente di ingresso del televisore potrebbe essere modificata. Per ripristinare la sorgente di ingresso del televisore, toccare il pulsante INPUT su QuickRemote diverse volte (in base al numero di dispositivi connessi al televisore). Opzioni di QuickRemote Per accedere al menu delle opzioni di QuickRemote, toccare il tasto Menu per selezionare l'opzione desiderata. NOTA: Premendo il pulsante QuickRemote mentre si riproduce la musica in sottofondo, l'audio viene disattivato per un secondo. Orologio Impostazione della sveglia Nella schermata iniziale, sfiorare la scheda Applicazioni > Applicazioni > Orologio > Impostare l'ora della sveglia desiderata. Impostare Ripeti, Durata sospensione, Vibra quando suona l'allarme, Tono sveglia, Volume sveglia, Avvio automatico applicazione, Blocco puzzle e Appunti. Toccare Salva. NOTA: Per modificare le impostazioni della sveglia nella schermata di elenco delle sveglie, toccare l'icona Menu e selezionare Impostazioni.
  • Page 330: Calcolatrice

    Calcolatrice Uso della calcolatrice Nella schermata iniziale, premere Applicazioni Applicazioni > scheda Calcolatrice Premere i tasti numerici per immettere i numeri. Per calcoli semplici, premere la funzione che si desidera eseguire )) seguito da NOTA: • Per i calcoli più complessi, sfiorare l'icona Menu , selezionare Calcolatrice scientifica, quindi scegliere la funzione desiderata. • Per visualizzare la cronologia di calcolo, toccare l'icona Menu > Cronologia di calcolo. Calendario Gli eventi di ciascun account che sono stati aggiunti al tablet e configurati per sincronizzare i calendari vengono visualizzati nel Calendario. Aggiunta di un evento al Calendario Nella schermata iniziale, toccare Applicazioni > scheda Applicazioni > Calendario Toccare il menu nell'angolo in alto a sinistra per modificare la visualizzazione del calendario (Giorno, Settimana, Mese, Anno, Agenda). Toccare la data per la quale aggiungere un evento e toccare...
  • Page 331 Toccare il campo Nome evento ed immettere il nome dell'evento. Toccare il campo Posizione per inserire la posizione. Selezionare la data e immettere l'ora di inizio e di fine dell'evento. Per aggiungere una nota all'evento, toccare il campo Descrizione e inserire i dettagli. Se si desidera ripetere la sveglia, impostare RIPETI e PROMEMORIA, se necessario. Toccare Salva per salvare l'evento nel calendario. NOTA: Toccare e tenere premuto un punto sul calendario per salvare rapidamente un evento del calendario in tale data. Immettere il nome e l'ora dell'evento, quindi premere Salva. È possibile selezionare Details e immettere ulteriori informazioni, o aggiornare l'evento con ulteriori dettagli in seguito. Modifica della vista del calendario Non ha alcuna importanza in che punto ci si trova nell'applicazione Calendario, il tipo di vista del calendario può essere cambiata facilmente. Basta sfiorare i nell'angolo superiore sinistro della barra del titolo oppure sul lato sinistro dello schermo trascinare il dito da sinistra a destra per visualizzare un menu delle viste del calendario. Toccare Giorno, Settimana, Mese, Anno o Agenda.
  • Page 332: Attività

    Attività L'applicazione Attività può essere sincronizzata con l'account MS Exchange. È possibile creare e gestire le attività utilizzando il tablet, MS Outlook o MS Office Outlook Web Access. Dalla schermata iniziale, sfiorare Applicazioni > Attività Premere l'icona Aggiungi icona (nell'angolo superiore destro dello schermo). Immettere Oggetto, DATA INIZIO, SCADENZA, DESCRIZIONE, RIPETI e PROMEMORIA, in base alle esigenze. Toccare Salva. File Manager L'applicazione File Manager consente di gestire i file nella memoria interna/ esterna. File Manager rende semplice visualizzare e gestire i file. È sufficiente selezionare un tipo di file (Tutti i file, File musicali, File immagine, File video, File documenti o File di Cloud), quindi premere sulle cartelle necessarie per trovare i file. Per aprire l'applicazione File Manager • Nella schermata iniziale, premere Applicazioni > scheda Applicazioni > File Manager...
  • Page 333: Registratore

    Opzioni File Manager Aprire il l'applicazione File Manager > Tutti i file > Archivio interno per accedere alle seguenti opzioni (nella parte superiore dello schermo): Consente di aprire File Manager in una finestra QSlide. Consente di ricercare file o informazioni. Consente di creare una nuova cartella. Consente di spostare file e cartelle in un'altra posizione. Consente di copiare file e cartelle in un'altra posizione. Consente di eliminare file e cartelle. Consente di accedere a altre opzioni. Registratore Il registratore vocale consente di registrare memo vocali o altri file audio. Registrazione di un suono o di una voce • Nella schermata iniziale, premere Applicazioni > scheda Applicazioni > Registratore...
  • Page 334 Premere per scegliere la posizione in cui salvare la registrazione. Toccare per avviare la registrazione. Premere per un elenco Toccare per terminare la delle registrazioni. registrazione. NOTA: Il tempo di registrazione disponibile potrebbe differire dal tempo effettivo. Gestione dei memo vocali Dalla schermata Elenco registratore vocale: • Premere l'icona Condividi per condividere il memo vocale usando le opzioni disponibili. • Toccare l'icona Elimina per selezionare i memo vocali che si desidera eliminare. • Toccare e tenere premuto un memo per aprire un memo contestuale per selezionare Condividi, Elimina, Rinomina, Ritaglia o Dettagli.
  • Page 335: Polaris Office 5

    POLARIS Office 5 POLARIS Office 5 è una soluzione professionale per dispositivi mobili Office che consente agli utenti di visualizzare in modo semplice diversi tipi di documenti Office, tra cui Word, Excel e PowerPoint, ovunque e in qualsiasi momento, utilizzando dispositivi mobili. Per creare un nuovo documento Nella schermata iniziale, premere Applicazioni > scheda Applicazioni >POLARIS Office 5 Registrare il proprio indirizzo email nella pagina di registrazione dell'utente. NOTA: È possibile sfiorare Salta per ignorare le informazioni di registrazione. Premere per avviare un nuovo documento. Premere un tipo di documento dall'elenco a discesa quindi scegliere un modello. Inserire contenuti nel documento utilizzando gli strumenti nella parte superiore dello schermo e nella tastiera sullo schermo. Quando il lavoro sul documento è terminato, premere (nell'angolo superiore sinistro dello schermo), quindi premere Salva (o Salva come e immettere il nome del documento). Inserire il nome del documento e toccare Salva. Per visualizzare e modificare un documento sul dispositivo Gli utenti possono visualizzare e modificare facilmente un'ampia varietà di tipi di file, inclusi i documenti Microsoft Office e Adobe PDF, direttamente sul dispositivo mobile.
  • Page 336: Google

    Aprire POLARIS Office 5 e cercare il documento. Premere il documento che si desidera visualizzare o modificare. Durante la visualizzazione dei documenti con POLARIS Office 5, gli oggetti e il layout rimangono inalterati rispetto ai documenti originali. Per modificare il documento, toccare Google+ Utilizzare l'applicazione Google+ per restare connessi tramite il servizio di social networking di Google. Nella schermata iniziale, premere Applicazioni > scheda Applicazioni > Google > Google+ NOTA: Quest'applicazione potrebbe non essere disponibile su tutte le aree geografiche e può variare a seconda del provider di servizi. LG SmartWorld LG SmartWorld offre un'ampia gamma di incredibili contenuti: caratteri, temi, giochi, applicazioni. Come accedere a LG SmartWorld dal tablet Sfiorare > Applicazioni > scheda Applicazioni > sfiorare l'icona per accedere a LG SmartWorld. Sfiorare Accedi e immettere ID e password per LG SmartWorld. Se non è stata ancora effettuata la registrazione, toccare Registra per iscriversi a LG SmartWorld.
  • Page 337 Scaricare il contenuto desiderato. • LG SmartWorld potrebbe non essere disponibile con alcuni gestori o in alcuni Paesi. NOTA: Come procedere se non è disponibile alcuna icona Utilizzando un browser Web per dispositivi mobili, accedere a LG SmartWorld (www.lgworld.com) e selezionare il Paese. Scaricare l'App LG SmartWorld. Eseguire e installare il file scaricato. Accedere a LG SmartWorld sfiorando l'icona Vantaggi esclusivi disponibili in LG SmartWorld È possibile aggiungere stile allo tablet personalizzandolo con temi Home, temi, tastiera e caratteri offerti da LG SmartWorld. Tuttavia, il servizio è disponibile solo su determinati dispositivi. Verificare la disponibilità sul sito Web LG SmartWorld. È possibile usufruire dei servizi speciali di LG SmartWorld aderendo alle promozioni periodicamente disponibili.
  • Page 338: Il Web

    Il Web Browser Questa applicazione consente di navigare in Internet. Il browser consente di accedere rapidamente a un universo colorato di contenuti musicali, notizie, sport, giochi e molto altro, direttamente sul tablet, da qualsiasi luogo e in qualsiasi momento. Nella schermata iniziale, premere Applicazioni > scheda Applicazioni > Browser Toccare per eseguire QSlide. Toccare per tornare indietro di una pagina. Toccare per andare alla pagina successiva rispetto a quella corrente. Questa funzione consente di eseguire l'azione contraria rispetto a quando si tocca il tasto Indietro , che consente invece di tornare alla pagina precedente. Toccare per aggiornare o arrestare la pagina corrente. Toccare per passare alla pagina iniziale. Toccare per accedere ai preferiti. Toccare per accedere a altre opzioni. Apertura di una pagina • Per aprire una nuova pagina, toccare sulla parte superiore del browser. • Per andare a un'altra pagina web, sfiorare una scheda nella parte superiore della schermata per visualizzare la pagina.
  • Page 339: Preferiti

    Preferiti Per aprire una pagina Web salvata nei preferiti, sfiorare sulla barra degli strumenti del browser e selezionarne una. Cronologia Toccare sulla barra degli strumenti del browser e selezionare la scheda Cronologia per aprire una pagina Web dall'elenco delle pagine Web visitate recentemente. Per cancellare la cronologia, sfiorare per cancellare tutta la cronologia. Uso della Modalità lettura Il tablet visualizza pagina web semplificata per leggere più facilmente. Visualizzare le news o i post dei blog e altre pagine di articoli senza distrazioni – con la modalità lettura è possibile leggere una pagina senza confusione. Toccare o nella barra degli strumenti del browser. Utilizzo di QSlide Questa funzione consente di accedere a Internet senza chiudere l'applicazione corrente. Durante la visualizzazione dei contenuti sul browser, toccare  . Quindi, è possibile consultare altre informazioni sul tablet. Per visualizzare il browser a schermo intero, toccare Download dei file Utilizzare l'applicazione Download per vedere quali file sono stati scaricati. Nella schermata iniziale, premere Applicazioni > scheda Applicazioni > Download...
  • Page 340: Chrome

    Chrome Usare Chrome per ricercare le informazioni e navigare tra le pagine web. Nella schermata iniziale, premere Applicazioni > scheda Applicazioni > Chrome NOTA: Questa applicazione potrebbe non essere disponibile su tutte le aree geografiche e può variare a seconda del provider di servizi. Visualizzazione pagine web Toccare il campo dell'indirizzo (nella parte alta dello schermo), immettere l'indirizzo web o i criteri di ricerca e toccare sulla tastiera. Apertura di una pagina • Per aprire una nuova pagina, toccare sulla parte superiore del browser. • Per andare a un'altra pagina web, sfiorare una scheda nella parte superiore della schermata per visualizzare la pagina. Ricerca sul Web tramite voce Toccare il campo dell'indirizzo, toccare , pronunciare una parola chiave e selezionare una delle parole chiave suggerite. NOTA: Questa funzione potrebbe non essere disponibile su tutte le aree geografiche e può variare a seconda del provider di servizi. Sincronizzazione con altri dispositivi Sincronizzare preferiti e schede aperte da utilizzare con Chrome su un altro dispositivo se è stato effettuato l'accesso con lo stesso account Google.
  • Page 341: Aggiunta E Visualizzazione Dei Preferiti

    Per visualizzare schede aperte su altri dispositivi, toccare l'icona Menu > Schede recenti. È necessario registrare lo stesso account Google su tutti i dispositivi. Selezionare una pagina Web da aprire. Aggiunta e visualizzazione dei preferiti Per aggiungere preferiti, toccare nella barra degli URL. Per aprire una pagina web con segnalibri, toccare l'icona Menu > Preferiti e selezionare la pagina desiderata. Menu Opzioni Chrome Premere l'icona Menu per accedere alle seguenti opzioni. • Nuova scheda – Toccare per aprire una nuova scheda pagina web. • Nuova scheda in incognito – Toccare per creare una nuova scheda di navigazione in incognito. • Preferiti – Mostra le pagine web salvate nei segnalibri. • Schede recenti – Mostra le pagine web aperte su altri dispositivi. • Cronologia – Mostra i dati di ricerca (pagine web visitate). • Condividi... – Consente di condividere la pagina Web con altri utenti. • Stampa... – Selezionare per stampare l'immagine. Scegliere per cercare automaticamente una stampante sulla rete o di inserirne una manualmente. • Trova nella pagina – Permette di cercare parti di testo nella pagina web. • Aggiungi a schermata Home – Consente di aggiungere un collegamento rapido alla pagina corrente sulla schermata iniziale.
  • Page 342: Impostazioni

    Impostazioni Accesso al menu Impostazioni Nella schermata iniziale, premere Applicazioni > scheda Applicazioni > Impostazioni OPPURE N ella schermata iniziale, tenere premuto il tasto Applicazioni recenti > Impostazioni. Selezionare una categoria di impostazioni e impostare l'opzione desiderata. RETI WIRELESS Wi-Fi Wi-Fi – Attivare la funzione Wi-Fi per connettersi alle reti Wi-Fi disponibili. Verrà visualizzato un elenco di tutte le reti Wi-Fi disponibili. Premere una voce per connettersi ad essa. NOTA: Sfiorare Ricerca per eseguire la scansione delle reti Wi-Fi disponibili. Toccare l'icona Menu nel menu Wi-Fi per accedere alle seguenti opzioni. Aggiungi Wi-Fi – Permette di inserire manualmente una nuova rete Wi-Fi. Wi-Fi salvato – Consente di dimenticarsi della rete Wi-Fi salvata. Avanzate Wi-Fi – Permette di accedere alle seguenti impostazioni Wi-Fi. Tutorial interattivo – Mostra alcuni tutorial utili per la funzione Wi-Fi.
  • Page 343 SUGGERIMENTO: Come ottenere l'indirizzo MAC Per configurare una connessione in alcune reti wireless con filtri MAC, potrebbe essere necessario inserire l'indirizzo MAC del tablet nel router. È possibile trovare l'indirizzo MAC nella seguente interfaccia utente: nella schermata iniziale, premere Applicazioni > Impostazioni > Wi-Fi > > Avanzate Wi-Fi > Indirizzo MAC. icona Menu Bluetooth Attivare o disattivare la funzione wireless Bluetooth per utilizzare il Bluetooth. Attivando il Bluetooth consente di appaiare e collegarsi ad altri dispositivi Bluetooth. Premere l'icona Menu nel menu Bluetooth - per accedere alle seguenti opzioni. Modifica nome tablet – Consente di modificare il nome del tablet per una facile identificazione quando si esegue accoppiamento e connessione. Inserire il nuovo nome del tablet e toccare Salva. Timeout visibilità – Imposta la durata per cui gli altri dispositivi Bluetooth possono visualizzare il tablet per l'accoppiamento e la connessione. Scegliere tra 2 minuti, 5 minuti, 1 ora e Mai in time out. Mostra file ricevuti – Mostra un elenco di file ricevuti tramite Bluetooth. Tutorial interattivo – Mostra alcuni tutorial utili per la funzione Bluetooth.
  • Page 344: Dispositivo

    Modalità aereo – Consente di impostare la modalità Aereo. L'attivazione della modalità aereo disattiva tutte le connessioni wireless. Miracast – Con Miracast, è possibile eseguire in modalità wireless il mirroring dello schermo del tablet e dell'audio su un TV o dongle Miracast. SmartShare Beam – Attivare questa opzione per ricevere contenuti multimediali tramite SmartShare Beam da telefoni o tablet LG. LG PC Suite – Consente tramite connessione Wi-Fi di traferire musica e immagini tra un computer e il tablet. Server multimediale – Permette di condividere i contenuti multimediali con i dispositivi nelle vicinanze tramite DLNA. VPN – Consente di visualizzare l'elenco di reti private virtuali (VPN) precedentemente configurate. Consente di aggiungere diversi tipi di VPN. NOTA: È necessario impostare un PIN, Password o Sequenza di blocco schermo prima di poter utilizzare l'archivio delle credenziali. DISPOSITIVO Suono Profili Suono – Consente di impostare il profilo suono su Suono, Vibrazione o Non disturbare. Volume – Consente di gestire il volume per Suono di notifica, Feedback & Sistema touch e Musica, video, giochi e altri media. Potenza vibrazione – Consente di impostare l'intensità della vibrazione per chiamate, notifiche e feedback touch. Suono di notifica – Consente di impostare la suoneria predefinita delle notifiche.
  • Page 345 Non disturbare – Consente di impostare un'agenda per impedire le interruzioni causate dalle notifiche. Può essere impostata per consentire l'interruzione da parte di alcune funzioni quando è impostata la funzione Solo priorità. Blocca schermo – Consente di scegliere se mostrare o nascondere le notifiche sullo schermo bloccato. Applicazioni – Consente di impedire alle applicazioni di visualizzare le notifiche o di impostare le app affinché mostrino le notifiche con priorità quando la funzione Non disturbare è impostata su Solo priorità. Suono touch – Consente di impostare la riproduzione audio del tablet quando si toccano pulsanti, icone e altri elementi visualizzati che si attivano al tocco. Suoni di blocco schermo – Consente di impostare la riproduzione audio del tablet quando si blocca e si sblocca la tastiera. Vibrazione al tocco – Consente di impostare la vibrazione quando viene toccato lo schermo del tablet. Display Sfondo Tema – Consente di impostare il tema display del dispositivo. Sfondo – Imposta lo sfondo da utilizzare nella schermata iniziale. Effetto scorrimento schermo – Consente di impostare l'effetto quando si trascina per modificare le schermate. Scorrimento continuo – Selezionare per impostare le schermate iniziali per lo scorrimento continuo, eliminando la necessità di scorrere indietro nella direzione opposta quando si raggiunge un'estremità. Backup e ripristino della Home – Consente di eseguire il backup e ripristino delle applicazioni e dei widget e i rispettivi temi.
  • Page 346 Blocco schermo Seleziona il blocco dello schermo – Consente di impostare un tipo di blocco dello schermo per proteggere il tablet. NOTA: Dopo aver effettuato l'aggiornamento al sistema operativo Lollipop, la funzione Blocco schermo potrebbe non essere disponibile tranne che per Sequenza, PIN e Password. In tal caso, andare in Applicazioni > Impostazioni > Sicurezza > Cancella archivio per eliminare i certificati di protezione e, successivamente, per impostare un blocco schermo. Prestare attenzione durante la cancellazione dell'archivio perché tutti i certificati di protezione installati verranno eliminati. Smart Lock – Consente di tenere il tablet sbloccato quando è connesso a un dispositivo Bluetooth sicuro, quando si trova in un luogo sicuro, ad esempio a casa o in ufficio, o quando riconosce il viso dell'utente. Effetto scorrimento schermo – Consente di impostare le opzioni relative all'effetto del trascinamento dello schermo. Sfondo – Consente di impostare lo sfondo della schermata di blocco. Selezionare da Galleria o da Galleria sfondi. Collegamenti – Consente di modificare i tasti di scelta rapida sulla schermata di blocco. Info personalizzata – Consente di immettere le info sui contatti da visualizzare sulla schermata Blocco in caso di smarrimento del tablet. Blocco timer – Consente di impostare l'intervallo di tempo prima che lo schermo si blocchi automaticamente dopo il timeout.
  • Page 347 Blocco istantaneo con tasto accensione – Selezionare per bloccare istantaneamente lo schermo quando si preme il tasto di accensione/ blocco. Questa impostazione sovrascrive l'impostazione Blocco timer di protezione. Luminosità – Consente di regolare la luminosità dello schermo. Toccare Luminosità notturna per impostare automaticamente la luminosità a 0% tra mezzanotte e le 6:00. Timeout schermo – Imposta il tempo di accensione dello schermo fino allo spegnimento automatico. Effetto screen-off – Consente di impostare l'effetto di disattivazione dello schermo. Rotazione automatica – Consente di passare all'orientamento automaticamente quando si ruota il tablet. Daydream – Toccare l'interruttore Daydream per passare dall'attivazione alla disattivazione e viceversa. L'attivazione dell'opzione consente di impostare la visualizzazione dello salva schermo quando il tablet si trova in modalità di risparmio energetico durante la ricarica e/o il collegamento al dock. Scegliere tra Orologio e Google Foto. NOTA: Mentre lo screen saver è attivo, la ricarica potrebbe risultare lenta. Tipo carattere – Consente di modificare il tipo di carattere del display. Dimensioni carattere – Consente di modificare le dimensioni del carattere del display. Smart screen – Consente di mantenere lo schermo attivato quando il dispositivo rileva gli occhi su di esso. Pulsanti a sfioramento anteriori – Consente di impostare quali pulsanti a sfioramento della schermata iniziale vengono visualizzati e la loro posizione sulla barra. Inoltre è possibile selezionare colore e sfondo.
  • Page 348 Calibrazione del sensore di movimento – Consente di migliorare la precisione dell'inclinazione e della velocità del sensore. Archiviazione ARCHIVIO INTERNO – Consente di visualizzare lo spazio complessivo nella memoria del dispositivo ed elenca il tipo di dati che utilizza lo spazio. SCHEDA SD – Consente di visualizzare la quantità di memoria totale sulla scheda microSD. Installa/Smonta scheda SD – Consente di montare e smontare la scheda microSD dal tablet in modo che sia possibile accedere ai dati memorizzati, formattare la scheda o rimuoverla in modo sicuro. L'impostazione viene visualizzata opaca se non è installata alcuna scheda microSD, se è già stata smontata o se è stata montata la scheda microSD sul computer. Cancella scheda SD – Cancella in via permanente tutti i contenuti della scheda microSD e ne prepara l'uso con il tablet. Batteria INFORMAZIONI BATTERIA – Verificare quanta carica della batteria viene utilizzata per le attività del dispositivo. Il livello della batteria viene visualizzato in percentuale. Viene visualizzato anche il tempo rimanente di utilizzo. Utilizzo della batteria – Consente di visualizzare l'utilizzo della batteria. Percentuale della batteria sulla barra di stato – Consente di visualizzare la percentuale di carica della batteria sulla barra di stato.
  • Page 349: Dual Window

    • ATTIVARE RISPARMIO ENERGETICO: Impostare il livello della batteria al quale si desidera attivare il risparmio energetico. È possibile scegliere tra Immediatamente, 5% batteria e 15% batteria. Guida – Toccare per accedere ad alcuni suggerimenti sul risparmio energetico. Smart cleaning Per gestire le applicazioni non utilizzate, i file salvati o i file temporanei di Internet. Applicazioni Visualizza l'elenco delle applicazioni al momento in esecuzione o scaricate. Trascinare a destra e sinistra per selezionare una delle tre schede nella parte superiore dello schermo e visualizzare informazioni dettagliate sulle applicazioni SCARICATE, SULLA SCHEDINA SD, IN ESECUZIONE e TUTTE. Selezionare un elemento per visualizzare maggiori informazioni, selezionare Termina (o Stop), quindi OK per arrestarne l'esecuzione. Dual Window Dividi vista – Consente al dispositivo di aprire automaticamente una Dual Window quando si tocca un collegamento sulla schermata principale o un allegato e-mail (solo immagini). Guida – Visualizza informazioni di aiuto sulla funzione Dual Window.
  • Page 350: Personale

    PERSONALE Cloud Toccare Aggiungi account per aggiungere un account cloud. Da questo menu è possibile accedere a cloud. Toccare l'icona Menu per cariocare i file. Utenti Questo menu visualizza gli utenti correnti creati. Aggiungi utenti quando il tablet è bloccato – Consente di aggiungere un nuovo utente quando il tablet è bloccato. Aggiungi utente – consente di aggiungere un nuovo account per il tablet e usare la funzione Multiutente. Posizione Modo • Precisione elevata (GPS e reti) – Utilizza GPS e Wi-Fi per determinare la posizione. • Risparmio della batteria (solo reti) – Utilizza reti Wi-Fi per determinare la posizione. • Solo i sensori del dispositivo (Solo GPS) – Utilizza GPS per determinare la posizione.
  • Page 351 Sicurezza Effettua crittografia tablet – Consente di crittografare i dati presenti sul tablet per motivi di sicurezza. Per decodificare il tablet ad ogni accensione, sarà necessario inserire un PIN o una password. Cripta la Scheda SD – Consente di crittografare i dati presenti sulla scheda MicroSD per motivi di sicurezza. Digitazione visibile della password – Consente di visualizzare l'ultimo carattere della password nascosta durante la digitazione. Amministratori tablet – Consente di visualizzare o disattivare gli amministratori del tablet. Origini sconosciute – Consente di installare le applicazioni non Play Store. Verifica applicazioni – Impedisce l'accesso o avverte l'utente prima dell'installazione di applicazioni che potrebbero risultare dannose. Tipo di archiviazione – Consente di visualizzare il tipo di archiviazione per i certificati. Credenziali di fiducia – Consente di visualizzare i certificati CA attendibili. Installa dalla memoria – Consente di installare certificati criptati. Cancella archivio – Consente di rimuovere tutti i certificati. Trust agents – Consente di visualizzare o disattivare i Trust agents. Puntina schermo – Questa funzione consente di bloccare il dispositivo affinché l'utente corrente possa accedere solo all'app inserita. L'opzione è...
  • Page 352: Lingua E Immissione

    Account e sincronizzazione Consente alle applicazioni di sincronizzare i dati in background, indipendentemente dal fatto che vengano utilizzati o meno in modo attivo. Disattivando Aggiungi account, è possibile ridurre il consumo della batteria e limitare l'utilizzo dei dati, senza tuttavia eliminarli del tutto. Lingua e immissione Utilizzare le impostazioni Lingua e immissione per selezionare la lingua del testo sul tablet e per configurare la tastiera su schermo, incluse le parole aggiunte al dizionario. Backup e ripristino Backup dei miei dati – Impostare questa opzione per eseguire il backup delle impostazioni e dei dati delle applicazioni sul server di Google. Account di backup – Consente di impostare l'account sul quale si desidera eseguire il backup dei dati. Ripristino automatico – Impostare questa opzione per ripristinare le impostazioni e i dati dell'applicazione durante la reinstallazione delle applicazioni sul dispositivo in uso. Servizio LG Backup – Consente di eseguire il backup di tutte le informazioni presenti sul dispositivo e il ripristino in caso di perdita o sostituzione dei dati. Per ulteriori informazioni, fare riferimento a pagina 109. Ripristino dati di fabbrica – Consente di ripristinare le impostazioni predefinite di fabbrica ed eliminare tutti i dati. Se si ripristina il tablet in questa modalità, verrà richiesto di reinserire le stesse informazioni immesse durante il primo avvio di Android.
  • Page 353: Sistema

    SISTEMA Tasto di scelta rapida Consente di attivare e disattivare i tasti di scelta rapida. Data e ora Utilizzare le impostazioni Data e ora per impostare la modalità di visualizzazione delle date. È inoltre possibile utilizzare queste impostazioni per impostare l'ora e il fuso orario invece di ottenere l'ora corrente dalla rete mobile. Accesso facilitato Utilizzare le impostazioni di accesso facilitato per configurare i plug-in di accesso facilitato installati nel tablet. NOTA: Per essere selezionabile, richiede plug-in aggiuntivi. TalkBack – Consente di impostare la funzione Talkback che assiste le persone con problemi di vista fornendo il feedback verbale. Toccare l'interruttore TalkBack nell'angolo superiore destro dello schermo per attivarla. Toccare Impostazioni nella parte inferiore dello schermo per regolare le impostazioni di TalkBack. Dimensioni carattere – Selezionare per aumentare la dimensione del testo. Inverti colori – Selezionare per invertire i colori di schermo e contenuto. Regolazione del colore – Permette di visualizzare lo schermo con maggiore contrasto di colori. Toccare l'interruttore per attivarlo. Quindi toccare lo schermo e trascinare attraverso lo schermo in qualsiasi direzione fino a quando non si vede il contrasto colori che si desidera usare. Zoom touch – Consente di ingrandire e ridurre toccando tre volte lo schermo.
  • Page 354 Retroilluminazione schermo – Diminuisce la retroilluminazione dello schermo. Collegamento accessibilità – Attivare questa funzione per consentire di abilitare rapidamente le funzioni di accessibilità in due fasi. Uscita text-to-speech – Consente di impostare il programma di riconoscimento vocale e la velocità del parlato. Riproduce inoltre una breve dimostrazione della sintesi vocale. Viene visualizzato lo stato della lingua predefinita. Tipo di audio – Consente di impostare il tipo di audio. Scegliere Mono o Stereo. Bilanciamento del suono – Imposta il percorso audio. Spostare il cursore sulla barra di scorrimento per impostarlo. Disattiva tutti i suoni – Disattiva tutti i suoni. Didascalia – Consente di personalizzare le impostazioni delle didascalie per che ha problemi all'udito. Toccare l'interruttore per attivare questa funzione. Impostare la lingua, le dimensioni del testo e le opzioni di stile della didascalia come si desidera. Tempo di feedback tattile – Consente di impostare il ritardo della funzione tocco e del feedback. Scegliere tra Breve, Normale e Lunghi. Touch assistant – Fornisce un pannello touch per utilizzare facilmente i pulsanti o gesti generali per un accesso rapido. Timeout schermo – Consente di impostare l'intervallo di tempo prima del timeout dello schermo.
  • Page 355: Informazioni Sul Tablet

    Rotazione automatica – Selezionare per consentire al dispositivo di ruotare lo schermo in base all'orientamento del dispositivo (verticale o orizzontale). Conferma password voce – Selezionare per ricevere una conferma verbale durante l'immissione delle password. Scorciatoia alle impostazioni di Accessibilità – Imposta l'accesso rapido e semplice alle funzionalità selezionate facendo triplo tocco sul tasto Home. Input One-touch – Ogni tocco inserisce una lettera/carattere sulla tastiera Switch Access – Consente di interagire con il dispositivo utilizzando uno o più interruttori che funzionano come i tasti della tastiera. Questo menu può essere utile per gli utenti con problemi motori a causa dei quali non possono interagire direttamente con il dispositivo. Quick Cover Consente di attivare o disattivare automaticamene Quick Cover (copertura rapida). Stampa Consente di stampare il contenuto di alcune schermate (come ad esempio le pagine web visualizzate in Chrome) in una stampante collegata alla stessa rete Wi-Fi del dispositivo Android. Informazioni sul tablet Questo menu consente di gestire gli aggiornamenti software e visualizzare varie informazioni relative al tablet. Nome tablet – Consente di impostare il nome tablet corrente. Centro aggiornamenti – Consente di verificare gli aggiornamenti del software e delle applicazioni.
  • Page 356 Informazioni sull'hardware – Consente di visualizzare il numero di modello, l'indirizzo IP, il tempo di attività, CSN, l'indirizzo MAC Wi-Fi e l'indirizzo Bluetooth. Informazioni sul software – Consente di visualizzare la versione Android, la versione kernel, il numero di costruzione e la versione software. Informazioni legali – Consente di visualizzare gli accordi sui diritti delle applicazioni LG, le licenze open source e le informazioni legali su Google.
  • Page 357: Lg Backup

    LG Backup Informazioni sul backup e sul ripristino dei dati del dispositivo Si consiglia di creare e salvare regolarmente un file di backup su un archivio interno, soprattutto prima di eseguire l'aggiornamento di un qualsiasi software. Salvando un file di backup corrente nella memoria di archiviazione, è possibile ripristinare i dati del dispositivo nel caso in cui questo venga smarrito, rubato o danneggiato a causa di un problema imprevisto. Questa applicazione di Backup LG è supportata dagli smartphone e tablet LG, altre versioni software o altri sistemi operativi. Pertanto, quando si acquista un nuovo smartphone e tablet LG, è possibile eseguire il backup dei dati attualmente presenti nel dispositivo su quello nuovo. Se l'applicazione Backup è stata precaricata sullo smartphone e sul tablet, è possibile eseguire il backup e ripristinare la maggior parte dei dati, inclusi applicazioni scaricate e preinstallate, preferiti, calendario, registri chiamate, rubrica, impostazioni schermata iniziale e impostazioni di sistema. È possibile anche: • Eseguire un backup manuale dei dati del dispositivo. • Ripristinare i dati del dispositivo. Attenzione! Per evitare lo spegnimento imprevisto del tablet durante le operazioni di backup o ripristino a causa di un livello insufficiente della batteria, è necessario che la batteria sia sempre completamente carica.
  • Page 358: Backup Dei Dati Del Tablet

    Backup e ripristino > Servizio LG Backup > Backup. Nella schermata Posizione di backup, toccare Archivio interno o Scheda SD, quindi sfiorare Avanti. Selezionare la casella di controllo degli elementi di cui si desidera eseguire il backup, quindi selezionare Avanti. Leggere le informazioni sullo schermo, quindi premere Inizio. Una volta eseguito il backup di tutti i file selezionati, verrà visualizzato il messaggio Backup completato. Ripristino dei dati del tablet NOTA: Tutti i file archiviati sul tablet vengono eliminati prima che il file backup venga ripristinato. Assicurarsi di copiare il file di backup in un'altra posizione. Nella schermata iniziale, premere Applicazioni > Impostazioni > Backup e ripristino > Servizio LG Backup > Ripristino e gestione dei file. Nella schermata Ripristina, selezionare il file di backup che contiene i dati da ripristinare. Selezionare la casella di controllo accanto all'elemento che si desidera ripristinare, quindi selezionare Avanti per ripristinarlo sul tablet. NOTA: I dati del tablet verranno sovrascritti con i contenuti del backup. Se il file di backup è crittografato, digitare la password creata per la crittografia.
  • Page 359 Quando sono stati ripristinati tutti i file selezionati, il tablet verrà ripristinato automaticamente. NOTA: È possibile impostare l'opzione Blocca file di backup quando si crea un backup per codificare i file di backup per maggiore protezione. Nella schermata principale di Backup LG, toccare il tasto Menu > Imposta password e inserire una password e un suggerimento nel caso in cui venga dimenticata. Una volta configurata una password, è necessario immetterla ogni volta che si desidera eseguire un backup/ripristino.
  • Page 360: Aggiornamento Software Del Tablet

    Aggiornamento software del tablet Aggiornamento software del tablet Questa funzione consente di aggiornare rapidamente il firmware da Internet con l'ultima versione disponibile senza doversi recare in un Centro servizi. Per maggiori informazioni sull'uso di questa funzione, visitare il sito: http://www.lg.com L'aggiornamento del firmware per dispositivo mobile richiede la massima attenzione da parte dell'utente per tutta la durata della procedura, pertanto si consiglia di controllare tutte le istruzioni e le note visualizzate a ogni passaggio prima di procedere. La rimozione del cavo dati USB o della batteria durante la procedura di aggiornamento potrebbe danneggiare gravemente il tablet. Aggiornamento software per tablet LG tramite Over-the-Air (OTA) Questa funzione consente di aggiornare il firmware del tablet con la versione più recente disponibile comodamente con la tecnologia Over-the-Air (OTA) senza collegare il cavo dati USB. Questa funzione sarà disponibile soltanto se e quando LG rilascerà la versione più recente del firmware per il proprio dispositivo. Prima di tutto, è possibile verificare la versione software sul tablet: Dalla schermata iniziale, toccare Applicazioni > Impostazioni > Informazioni sul tablet > Informazioni sul software. Per eseguire l'aggiornamento del software del tablet, dalla schermata iniziale, toccare Applicazioni > Impostazioni...
  • Page 361 NOTA: LG si riserva il diritto, a sua discrezione, di rendere disponibili gli aggiornamenti del firmware solo per i modelli selezionati e non garantisce che sia resa disponibile la versione più recente del firmware per tutti i modelli di dispositivo. NOTA: I dati personali (incluse le informazioni dell'account Google e di altri account, i dati e le impostazioni del sistema/applicazione, le applicazioni scaricate e la licenza DRM) potrebbero andare persi durante l'aggiornamento del software del dispositivo. Pertanto, LG consiglia di eseguire il backup dei dati personali prima di aggiornare il software del tablet. LG non risponde in alcun modo per la perdita di dati personali.
  • Page 362: Accessori

    Accessori Di seguito sono riportati gli accessori disponibili per il tablet. (Gli articoli descritti di seguito potrebbero essere opzionali.) Caricabatterie da cavo USB viaggio Guida rapida di avvio NOTA: • Si raccomanda di utilizzare solo accessori opzionali prodotti da LG. L'uso di accessori non autorizzati potrebbe rendere nulla la garanzia. • Gli accessori sono diversi a seconda dei Paesi.
  • Page 363: Risoluzione Dei Problemi

    Messaggio Possibili cause Possibili misure correttive Non può Non è supportata dal essere gestore dei servizi o è impostata Rivolgersi al proprio operatore. necessario eseguire la alcuna registrazione. applicazione La batteria non è Caricare la batteria. caricata. La temperatura esterna Verificare che la carica è troppo alta o troppo avvenga in condizioni di bassa. temperatura normali. Verificare il caricabatterie e il Errore di Problema di contatto relativo collegamento al tablet. ricarica Inserire il caricabatterie in Nessuna alimentazione un'altra presa. Caricabatterie difettoso Sostituire il caricabatterie. Utilizzare solo accessori LG Caricabatterie errato originali.
  • Page 364 Messaggio Possibili cause Possibili misure correttive Impossibile Eliminare alcune immagini dal ricevere/ Memoria piena tablet. inviare foto I file non si Formato file non Verificare i formati dei file aprono supportato supportati. Controllare lo stato delle impostazioni del menu per Audio Modalità vibrazione l'audio per accertarsi di non assente essere in modalità Vibrazione o Silenziosa.
  • Page 365: Uporabniški Priročnik

    SLOVENŠČINA Uporabniški priročnik • Posnetki zaslonov in slike se lahko razlikujejo od tistih v napravi. • Del vsebine v tem priročniku glede na programsko opremo tablice ali ponudnika storitev za vašo tablico morda ne velja. Pridržujemo si pravico do spremembe vseh podatkov brez predhodnega opozorila. • Tablični računalnik ni primeren za slabovidne osebe, ker ima tipkovnico na zaslonu na dotik. • Copyright ©2015 LG Electronics, Inc. Vse pravice pridržane. LG in logotip LG sta registrirani blagovni znamki družbe LG Group in povezanih podjetij. Vse ostale blagovne znamke so v lasti njihovih lastnikov. • Google™, Google Maps™, Gmail™, YouTube™, Hangouts™ in Google Play™ so blagovne znamke družbe Google, Inc.
  • Page 366 Kazalo vsebine O priročniku za uporabo ......5 Dvotapkanje ............ 32 Približati za povečavo ........32 O priročniku za uporabo ......5 Zasuk zaslona ..........32 Blagovne znamke ........6 Osnovni zaslon .........32 DivX HD ............6 Prilagajanje osnovnega zaslona ....34 Smernice za varno in učinkovito Odpiranje, preklop in zaustavitev uporabo ............8...
  • Page 367 Nastavitev računa Google ....48 Imenik ............ 58 Iskanje stika ..........58 Povezovanje z omrežji in napravami .. 49 Dodajanje novega stika ......58 Wi-Fi ............49 Priljubljeni stiki .........58 Vzpostavljanje povezave z omrežji Ustvarjanje skupine .........59 Wi-Fi ..............49 Vklop funkcije Wi-Fi in povezava z E-pošta ..........
  • Page 368 ......106 Google+ ............84 Posodobitev programske opreme LG SmartWorld ........84 tabličnega računalnika ......106 Brezžična posodobitev programske Splet ............86 opreme tabličnega računalnika LG ..106 Internet .............86 Dodatna oprema ........108 Odpiranje strani ..........86 Zaznamki ............87 Odpravljanje težav ......109 Zgodovina ............87 Uporaba bralnega načina ......87...
  • Page 369: O Priročniku Za Uporabo

    O priročniku za uporabo O priročniku za uporabo • Pred uporabo naprave pozorno preberite ta priročnik. Tako boste zagotovili varno in pravilno uporabo naprave. • Nekatere slike in posnetki zaslona v tem priročniku so lahko na tablici videti drugače. • Vaša vsebina je lahko drugačna od končnega izdelka ali programske opreme, ki vam jo priskrbi ponudnik storitev ali operater. Vsebina se lahko spremeni brez predhodnega opozorila. Najnovejšo različico priročnika si lahko ogledate na LG-jevem spletnem mestu www.lg.com. • Aplikacije tablice in njihove funkcije se lahko razlikujejo glede na državo, regijo ali strojno opremo. LG ne bo odgovoren za manjšo učinkovitost delovanja, ki je posledica uporabe aplikacij, ki jih ni razvil LG. • LG ne bo odgovoren za težave z delovanjem ali združljivostjo, ki so posledica urejanja nastavitev registra ali spreminjanja operacijskega sistema. Vsak poskus prilagajanja operacijskega sistema lahko povzroči, da naprava ali njene aplikacije ne bodo delovale pravilno. • Programska oprema, zvok, ozadja, slike in druga predstavnost, ki je priložena napravi, ima licenco za omejeno uporabo. Če te materiale pridobite iz naprave in jih uporabite v komercialne ali druge namene, morda kršite zakone o avtorskih pravicah. Kot uporabnik ste popolnoma odgovorni za nezakonito uporabo predstavnosti. • Za podatkovne storitve, na primer pošiljanje sporočil, prenašanje podatkov, samodejno sinhroniziranje ali uporabo lokacijskih storitev, boste morda morali plačati dodatne stroške. Če se želite izogniti dodatnim stroškom, izberite podatkovni paket, ki ustreza vašim zahtevam. Za dodatne podrobnosti se obrnite na vašega ponudnika storitev.
  • Page 370: Blagovne Znamke

    Blagovne znamke • LG in logotip LG sta registrirani blagovni znamki družbe LG Electronics. • Vse ostale blagovne znamke in avtorske pravice so v lasti njihovih lastnikov. DivX HD VEČ O VIDEOPOSNETKIH DIVX: DivX® je digitalna oblika zapisa videoposnetka, ki jo je ustvarilo podjetje DivX LLC, podružnica družbe Rovi Corporation. To je naprava z uradnim potrdilom DivX Certified®, ki je prestala stroge preizkuse, s katerimi je bilo preverjeno, da predvaja video DivX. Dodatne informacije in programska orodja za pretvorbo datotek v obliko zapisa DivX si oglejte na spletni strani divx.com. VEČ O VIDEOPOSNETKIH DIVX NA ZAHTEVO: To napravo DivX Certified® morate registrirati, da lahko predvajate filme DivX na zahtevo (VOD), ki jih kupite. Registracijsko kodo poiščite v delu DivX VOD v meniju za nastavitev naprave. Za dodatne informacije o registraciji obiščite vod.divx.com. DivX Certified® za predvajanje videoposnetkov DivX® do visoke ločljivosti 720p, vključno s prvovrstnimi vsebinami. DivX®, DivX Certified® in povezani logotipi so blagovne znamke družbe Rovi...
  • Page 371 Informacije o obvestilu o odprtokodni programski opremi Če želite pridobiti izvorno kodo z licencami GPL, LGPL, MPL in z drugimi odprtokodnimi licencami, ki jo vsebuje ta izdelek, obiščite spletno mesto http://opensource.lge.com. Poleg izvorne kode so za prenos na voljo še vsi omenjeni licenčni pogoji, zavrnitve jamstva in obvestila o avtorskih pravicah. Družba LG Electronics vam bo priskrbela tudi izvorno odprto kodo na CD-ju za ceno, ki pokriva stroške distribucije (na primer stroške za medij, pošiljanje in obdelavo), če to zahtevate po e-pošti na naslov opensource@ lge.com. Ponudba velja tri (3) leta od datuma nakupa izdelka.
  • Page 372: Smernice Za Varno In Učinkovito Uporabo

    Smernice za varno in učinkovito uporabo Preberite te enostavne smernice. Neupoštevanje teh smernic je lahko nevarno ali nezakonito. Če pride do napake, je v napravo vgrajeno orodje programske opreme, ki bo ustvarilo dnevnik napak. To orodje zbira izključno podatke, značilne za napako, kot je na primer moč signala in naloženih aplikacij. Dnevnik se uporablja le kot pomoč pri ugotavljanje vzroka napake. Ti dnevniki so šifrirani, do njih pa lahko dostopajo le pooblaščeni LG-jevi servisi, če boste morali napravo vrniti v popravilo. Izpostavljenost radiofrekvenčni energiji Informacije o izpostavljenosti radijskim valovom in stopnji sevanja (SAR). Ta model tabličnega računalnika LG-V480 je skladen z veljavnimi varnostnimi zahtevami glede izpostavljenosti radijskim valovom. Zahteve temeljijo na znanstvenih smernicah, ki vključujejo varnostne meje za zagotovitev varnosti za vse ljudi, ne glede na starost in zdravstveno stanje. • Pri smernicah za izpostavljenost radijskim valovom je v uporabi merska enota, znana kot SAR (Specific Absorption Rate). Preizkusi za SAR se izvajajo po standardiziranih metodah, tako da naprava oddaja pri najvišji potrjeni ravni moči v vseh uporabljenih frekvenčnih pasovih. • Čeprav imajo lahko različni modeli naprav LG različne stopnje sevanja SAR, so vse v skladu z ustreznimi smernicami glede izpostavljenosti radijskim valovom. • Mejna vrednost SAR, ki jo priporoča Mednarodna komisija za varstvo pred neionizirnimi sevanji (ICNIRP), je 2 W/kg, porazdeljena po 10 g tkiva. • Najvišja vrednost SAR za to napravo, če jo nosite na telesu, kot je opisano v teh navodilih, je 0,497 W/kg.
  • Page 373 • Ta naprava izpolnjuje smernice glede izpostavljenosti radijski frekvenci pri uporabi v običajnem delovnem položaju pri ušesu ali pri uporabi z oddaljenostjo najmanj 0,00 cm od telesa. Če za nošenje na telesu uporabljate torbico, pasno zaponko ali držalo, ne sme vsebovati kovine in mora izdelek ohranjati najmanj 0,00 cm od telesa. Ta naprava potrebuje za prenos podatkovnih datotek ali sporočil kakovostno povezavo z omrežjem. V nekaterih primerih lahko pride do zakasnitve prenosa podatkovnih datotek ali sporočil, dokler ni na voljo taka povezava. Upoštevajte zgornja navodila o oddaljenosti, dokler prenos ni končan. Skrb za izdelek in vzdrževanje OPOZORILO Uporabljajte samo baterije, polnilnike in dodatke, odobrene za uporabo s tem določenim modelom naprave. Uporaba katerekoli druge vrste opreme lahko privede do razveljavitve odobritev ali garancij, ki veljajo za napravo, in je lahko nevarna. • Naprave ne razstavljajte. Ko je potrebno, naj za popravilo poskrbi usposobljen serviser. • Garancijska popravila lahko po presoji podjetja LG vključujejo nadomestne dele in plošče, ki so nove ali obnovljene, katerih funkcionalnost je enaka delom, ki bodo zamenjani. • Enote ne približujte električnim napravam, kot so televizorji, radijski sprejemniki ali osebni računalniki. • Enote ne smete približevati toplotnim virom, kot so radiatorji ali kuhalniki. • Pazite, da ne pade po tleh. • Enote ne izpostavljajte mehanskim tresljajem ali udarcem.
  • Page 374 • Napravo izklopite povsod, kjer to zahtevajo posebni predpisi. Na primer, naprave ne uporabljajte v bolnišnicah, ker lahko vpliva na delovanje občutljive medicinske opreme. • Med polnjenjem naprave ne držite z mokrimi rokami. Lahko pride do električnega udara in hudih poškodb naprave. • Naprave ne polnite v bližini vnetljivega materiala, ker se lahko segreje in pride do nevarnosti požara. • Zunanjost enote očistite s čisto krpo (ne uporabljajte topil, kot so benzen, razredčilo in alkohol). • Naprave ne polnite na mehki opremi. • Napravo je treba polniti v dobro prezračenem prostoru. • Enote ne izpostavljajte prekomernemu dimu ali prahu. • Naprave ne hranite v bližini plačilnih kartic ali vozovnic; lahko se poškodujejo informacije na magnetnem zapisu. • Zaslona se ne dotikajte z ostrimi predmeti, saj lahko poškodujete napravo. • Naprave ne izpostavljajte tekočini ali vlagi. • Dodatno opremo, kot so slušalke, uporabljajte previdno. • Če je steklo razbito, oškrbljeno ali počeno, telefona ne uporabljajte, se ga ne dotikajte in ne poskušajte odstraniti stekla ali popraviti zaslona. Garancija ne krije poškodb steklenega zaslona zaradi zlorabe ali napačne uporabe. • Vaš tablični računalnik je elektronska naprava, ki med običajnim delovanjem proizvaja toploto. Izjemno dolg neposreden stik s kožo brez primernega prezračevanja lahko povzroči neugodje ali blažje opekline. Zato z napravo med uporabo oziroma takoj po njej ravnajte previdno. • Če se naprava zmoči, jo takoj izklopite in popolnoma posušite. Sušenja ne poskušajte pospešiti z zunanjim toplotnim virom, kot je pečica, mikrovalovna pečica ali sušilnik za lase.
  • Page 375 • Tekočina v mokri napravi spremeni barvo oznake izdelka znotraj naprave. Poškodb naprave, ki so posledica izpostavljenosti tekočini, garancija ne pokriva. • Tablični računalnik uporabljajte pri temperaturah od 0 do 40 ºC, če je to mogoče. Če napravo izpostavite izjemno nizkim ali visokim temperaturam, se lahko poškoduje, pokvari ali celo eksplodira. Učinkovito delovanje naprave Elektronske naprave Pri vseh tabličnih napravah lahko pride do motenj, kar lahko poslabša delovanje. • Tabličnega računalnika brez dovoljenja ne uporabljajte v bližini medicinske opreme. Tablice ne nosite nad srčnim spodbujevalnikom, na primer v prsnem žepu. • Tablični računalniki lahko motijo nekatere slušne pripomočke. • Manjše motnje se lahko pojavijo pri delovanju televizorjev, radijskih sprejemnikov, osebnih računalnikov itd. Varnost na cesti Preverite zakone in predpise, ki veljajo glede uporabe tabličnih računalnikov med vožnjo. • Med vožnjo ne držite naprave. • Povsem se osredotočite na vožnjo. • Radiofrekvenčna energija lahko vpliva na nekatere elektronske sisteme v vozilu, kot je avtoradio ali varnostna oprema.
  • Page 376 • Če je v vozilo vgrajena zračna blazina, je ne ovirajte z nameščeno ali prenosno brezžično opremo. To lahko povzroči, da se blazina ne sproži, ali hude poškodbe zaradi nepravilnega delovanja. • Če med hojo poslušate glasbo, naj bo glasnost zmerna, tako da se zavedate okolice. To je posebej pomembno v bližini cest. Preprečevanje poškodb sluha OPOMBA: Premočna glasnost slušalk lahko poškoduje sluh. Morebitne poškodbe sluha preprečite tako, da visoke glasnosti ne poslušate dlje časa. • Če ste dlje časa izpostavljeni glasnim zvokom, si lahko poškodujete sluh. Zato priporočamo, da tablice ne vklapljate ali izklapljate v bližini ušes. Priporočamo tudi nastavitev glasnosti glasbe na zmerno jakost. • Pri uporabi slušalk znižajte glasnost, če ne slišite ljudi, ki se pogovarjajo v bližini, ali če oseba poleg vas sliši, kaj poslušate. Stekleni deli Nekateri deli tabličnega računalnika so stekleni. To steklo lahko poči, če naprava pade na trdo površino ali je močno udarjena. Če steklo poči, se ga ne dotikajte in ga ne poskušajte odstraniti. Naprave ne uporabljajte, dokler stekla ne zamenja pooblaščeni storitveni center. Območje razstreljevanja Tablice ne uporabljajte na območju razstreljevanja. Upoštevajte omejitve ter vse predpise in pravila.
  • Page 377 Potencialno eksplozivno okolje • Tablice ne uporabljajte na bencinski črpalki. • Ne uporabljajte ga v bližini goriva in kemikalij. • V predelu vozila, kjer imate tablični računalnik in dodatno opremo, ne prevažajte ali shranjujte vnetljivih plinov, tekočine ali eksplozivov. Na letalu Brezžične naprave lahko povzročijo motnje v letalu. • Pred vkrcanjem na letalo izklopite tablični računalnik. • Brez dovoljena posadke ga ne uporabljaje na tleh. Otroci Napravo hranite na varnem izven dosega majhnih otrok. Vsebuje majhne delce, ki lahko v primeru odstranitve predstavljajo nevarnost zadušitve. Ta naprava prav tako vsebuje notranjo baterijo, ki je lahko nevarna, ne naprave ne uporabljate ali vzdržujete pravilno. Informacije o bateriji in skrb zanjo • Baterije pred ponovnim polnjenjem ni treba povsem izprazniti. Za razliko od drugih baterijskih sistemov pri teh baterijah ni spominskega učinka, ki bi zmanjšal zmogljivost baterije. • Uporabljajte samo baterije in polnilnike LG. Polnilniki LG so zasnovani tako, da zagotavljajo najdaljšo možno življenjsko dobo baterije. • Baterije ne razstavljajte in ne povzročajte kratkega stika. • Če baterije dlje časa ne uporabljate, jo napolnite, da čim bolj povečate uporabnost.
  • Page 378 • Polnilnika ne izpostavljajte neposredni sončni svetlobi in ga ne uporabljajte v zelo vlažnih prostorih, kot je kopalnica. Naprave ne puščajte na vročih ali hladnih mestih, saj lahko to poslabša delovanje baterije. • Če baterijo zamenjate z baterijo napačne vrste, obstaja nevarnost eksplozije. • Uporabljene baterije odstranjujte v skladu s proizvajalčevimi navodili. Po možnosti jih reciklirajte. Ne zavrzite jih kot gospodinjske odpadke. • Ko se tablica popolnoma napolni, izključite polnilnik iz stenske vtičnice, da preprečite, da bi le-ta po nepotrebnem porabljal energijo. • Dejanska življenjska doba baterije je odvisna od konfiguracije omrežja, nastavitev izdelka, načina uporabe, baterije in okoljskih pogojev. • Preprečite, da bi domače živali baterijo zgrizle ali spraskale. To lahko povzroči požar.
  • Page 379 OPOZORILO! Obvestilo o menjavi baterije • Litij-ionska baterija je nevaren sestavni del, ki lahko povzroči poškodbe. • Če baterijo zamenja oseba, ki za to ni usposobljena, lahko poškoduje napravo. • Baterije ne menjajte sami. Baterija se lahko poškoduje, zato lahko pride do pregretja in telesne poškodbe. Baterijo mora zamenjati pooblaščeni ponudnik storitev. Baterijo reciklirajte ali odložite ločeno od gospodinjskih odpadkov. • Če izdelek vsebuje v izdelek vgrajene baterije in jih končni uporabnik ne more zlahka odstraniti, vam LG priporoča, da poiščete pomoč usposobljenega strokovnjaka, bodisi za zamenjavo baterije ali za recikliranje ob koncu delovne dobe tega izdelka. Za preprečevanje poškodb na izdelku in varnost uporabnika, ne odstranjujte baterij sami, ampak si poiščite pomoč servisa LG Service Helpline, ali drugega neodvisnega servisa, ki nudi takšne storitve. • Odstranitev baterije bo vključevala, v primeru odstranitve izdelka, prekinitev električnih kablov/kontaktov in previdno ostranitev baterije, z uporabo ustreznega specialnega orodja. Če potrebujete navodila za kvalificirane strokovnjake o tem, kako varno odstraniti baterijo, obiščite spletno stran http://www.lge.com/global/sustainability/environment/ take-back-recycling...
  • Page 380 Kako posodobite tablični računalnik Dostop do najnovejših izdaj vdelane programske opreme, novih funkcij programske opreme in izboljšav. • Posodobitev tabličnega računalnika brez osebnega računalnika: Izberite Središče za posodobitve > Posodobitev programske opreme > Preveri zdaj za posodobitev. • Posodobite tablico tako, da jo priklopite na računalnik. Za več informacij o uporabi te funkcije obiščite http://www.lg.com/common/index.jsp in izberite svojo državo in jezik. IZJAVA O SKLADNOSTI S tem LG Electronics izjavlja, da je ta izdelek LG-V480 v skladu z bistvenimi zahtevami in drugimi ustreznimi določili direktive 1999/5/EC. Izjavo o skladnosti si lahko ogledate na http://www.lg.com/global/declaration Za informacije o skladnosti izdelka se obrnite na pisarno LG Electronics Inc. EU Representative, Krijgsman 1, 1186 DM Amstelveen, The Netherlands...
  • Page 381 Odstranjevanje stare naprave Vse električne in elektronske izdelke odstranjujte ločeno od običajnih komunalnih odpadkov na namenskih zbirnih mestih, ki jih določi vlada ali krajevne oblasti. S pravilnim odstranjevanjem stare naprave pomagate preprečiti morebitne negativne posledice za okolje in zdravje ljudi. Podrobnejše informacije o odstranjevanju stare naprave poiščite pri mestnem uradu, komunalni službi ali prodajalni, kjer ste izdelek kupili. Odlaganje odpadnih baterij/akumulatorjev Simbolu so lahko dodane tudi kemične oznake za živo srebro (Hg), kadmij (Cd) ali svinec (Pb), če baterija vsebuje več kot 0,0005 % živega srebra, 0,002 % kadmija ali 0,004 % svinca. Vse baterije/akumulatorje odstranjujte ločeno od običajnih komunalnih odpadkov na namenskih zbirnih mestih, ki jih določi vlada ali krajevne oblasti. S pravilnim odlaganjem starih baterij/akumulatorjev pomagate preprečevati negativne posledice za okolje ter zdravje ljudi in živali. Podrobnejše informacije o odstranjevanju starih baterij/ akumulatorjev poiščite pri mestnem uradu, komunalni službi ali prodajalni, kjer ste izdelek kupili.
  • Page 382: Pomembno Obvestilo

    Pomembno obvestilo Preden začnete uporabljati tablico, preberite to. Preden tablico odnesete na servis ali pokličete pooblaščenega serviserja, preverite, ali so v tem razdelku morda opisane težave, ki jih imate s tablico. 1. Pomnilnik tabličnega računalnika Da bi imeli na voljo več pomnilnika, preverite pomnilnik svojega tabličnega računalnika in izbrišite nekaj podatkov, kot so na primer aplikacije. Odstranjevanje aplikacij: Tapnite > > zavihek Aplikacije > Nastavitve > Aplikacije. Ko se pojavijo vse aplikacije, izberite aplikacijo, ki jo želite odstraniti. Tapnite Odstrani in nato OK, da potrdite. 2. Pred nameščanjem odprtokodne aplikacije in operacijskega sistema (OS) OPOZORILO Če v tablico namestite odprtokodni operacijski sistem in ne uporabljate tistega, ki ga nudi proizvajalec, tablica morda ne bo pravilno delovala. Poleg tega za tablico garancija morda ne bo veljala več.
  • Page 383 OPOZORILO Za zaščito tablice in osebnih podatkov prenašajte aplikacije le iz zaupanja vrednih virov, kot je Play Store. Če imate v tablici nepravilno nameščene aplikacije, tablica morda ne bo delovala pravilno ali pa bo naletela na resno napako. Te aplikacije morate skupaj s povezanimi podatki in nastavitvami odstraniti iz tablice. 3. Uporaba zaklepa zaslona Za zaščito tablice nastavite zaklep zaslona. Tapnite > > zavihek Aplikacije > Nastavitve > Zaslon > Zakleni zaslon > Izberite zaslon zaklepa in izberite želen zaklep zaslona med Povleci, Knock Code, Vzorec, PIN in Geslo. Lahko ustvarite rezervno kodo PIN kot varnostno sredstvo v primeru, da pozabite način oklepa zaslona. Pozor: preden nastavite zaklep zaslona, ustvarite račun ali se prijavite v račun Google in si zapomnite rezervno kodo PIN, ki ste jo ustvarili med določanjem zaklepa zaslona. OPOZORILO Previdnostni ukrepi pri uporabi zaklepa zaslona. Zelo pomembno je, da si zapomnite, kakšen zaklep zaslona ste nastavili. Če 5-krat uporabite napačen zaklep zaslona, ne boste mogli dostopati v tablični računalnik. Imate 5 poskusov za vnos vzorca za odklepanje, PIN- številke ali gesla. Če ste porabili vseh 5 poskusov, lahko znova poskusite čez 30 sekund.
  • Page 384 Če v tablici niste ustvarili Googlovega računa ali ste pozabili rezervno kodo PIN, morate izvesti strojno ponastavitev. < Če ste pozabili PIN ali geslo > Če ste pozabili PIN ali geslo, morate izvesti strojno ponastavitev. Pozor: s strojno ponastavitvijo izbrišete vse aplikacije in uporabniške podatke. OPOMBA: če se niste prijavili v račun Google in ste pozabili vzorec, morate vnesti rezervno kodo PIN. 4. Uporaba strojne ponastavitve (ponastavitev na tovarniške nastavitve) Če se tablica ne ponastavi na prvotno stanje, uporabite strojno ponastavitev (ponastavitev na tovarniške nastavitve), da jo inicializirate. Izklopite tablični računalnik. Najprej pritisnite in zadržite tipko za znižanje glasnosti , nato pritisnite in zadržite tipko za vklop/izklop/zaklepanje na desni strani tabličnega računalnika, dokler se ne pojavi logotip LG. Spustite vse tipke, ko se prikaže logotip LG.
  • Page 385 Da, nato pritisnite tipko za vklop/izklop/zaklepanje za nadaljevanje. S pritiskanjem ene od tipki za glasnost znova pomaknite kazalko na možnost Da, nato pa pritisnite tipko za vklop/izklop/zaklepanje za potrditev. Naprava bo strojno ponastavljena. OPOZORILO S strojno ponastavitvijo izbrišete vse aplikacije, uporabniške podatke in licence DRM. Ne pozabite ustvariti varnostnih kopij vseh pomembnih podatkov, preden telefon strojno ponastavite. 5. Če zamrzne zaslon Če zaslon zamrzne ali se tablica ne odziva, ko jo želite upravljati: za več kot 8 sekund pritisnite in zadržite tipko za vklop/izklop , dokler se ne prikaže logotip LG za ponoven zagon tabličnega računalnika. Če še vedno ne deluje, se obrnite na servisni center.
  • Page 386: Spoznavanje Tabličnega Računalnika

    Spoznavanje tabličnega računalnika Pregled tabličnega računalnika Sprednji objektiv fotoaparata Tipka za vklop/izklop/zaklepanje Tipki za glasnost Vtičnica za slušalke Infrardeča (IR) luč LED Reža za kartico MicroSD Mikrofon Vrata za polnilnik/USB Zadnji objektiv fotoaparata Zvočniki OPOMBA: zaradi estetskih razlogov ima vaš tablični računalnik dva vhoda za zvočnik na zadnji strani. Dejanski zvok prihaja le iz enega zvočnika. To ni napaka v izdelku. OPOMBA: poskrbite, da med snemanjem videoposnetka ali zvočnega posnetka mikrofon ne bo blokiran.
  • Page 387 Uporabite, da slikate ali posnamete sami sebe. Prav Sprednji objektiv tako ga lahko uporabite za klepetanje. Za optimalno fotoaparata delovanje poskrbite, da bo čist. Pritisnite, da zaklenete/odklenete zaslon. Pritisnite Tipka za vklop/ in zadržite, da zaklenete/odklenete tablico, opravite izklop/zaklepanje ponoven zagon, vključite/izključite način V letalu in spremenite nastavitve zvoka. Prilagajate lahko glasnost medijev. Pritisnite in Tipki za glasnost zadržite obe tipki hkrati za dostop do funkcije QuickMemo+. Sem lahko vklopite dodatne slušalke za priročne, Vtičnica za prostoročne pogovore. Prav tako lahko vklopite slušalke slušalke za poslušanje glasbe. Infrardeča (IR) luč Uporablja se kot tipalo za aplikacijo QuickRemote. Reža za kartico Vstavite kartico MicroSD, da shranite datoteke, kot MicroSD so glasba, videoposnetki in fotografije. Snema vaš glas in omogoča uporabo za glasovno Mikrofon aktivirane funkcije. Tablični računalnik in kabel USB lahko uporabite Vrata za polnilnik/ skupaj s adapterskim polnilnikom, osebnim računalnikom ali drugimi združljivimi dodatki.
  • Page 388 Uporabite za fotografiranje in snemanje Zadnji objektiv videoposnetkov. Za optimalno delovanje poskrbite, fotoaparata da bo čist. Uporabite za poslušanje zvoka iz želene funkcije Zvočniki (npr. glasba, videoposnetek, zvočni posnetek itd.). OPOZORILO Če na tablico postavite težji predmet ali če sedete nanjjo, lahko poškodujete zaslon LCD in pokvarite zaslon na dotik. NASVET! • Ko odprete aplikacijo, tapnite tipko Meni , da se prikažejo možnosti, ki so na voljo. • Če je tablični računalnik zaklenjen in se ne odziva, za več kot 8 sekund pritisnite tipko za vklop/izklop/zaklepanje , dokler se ne pojavi logotip LG za vnovični zagon tabličnega računalnika.
  • Page 389: Polnjenje Tabličnega Računalnika

    Polnjenje tabličnega računalnika Polnite jo s priloženim napajalnikom USB. Pred prvo uporabo tablice se prepričajte, da je baterija napolnjena. OPOMBA: Vaša naprava ima notranjo akumulatorsko baterijo. Zaradi lastne varnosti ne odstranjujte baterije, ki je vdelana v izdelek. Opozorilo! Če zaslon na dotik med polnjenjem tablice ne deluje, je vzrok za to morda nestabilno napajanje. V tem primeru odklopite kabel USB iz naprave ali odklopite napajalnik USB iz napajalne vtičnice. Priklopite napajalnik in kabel USB. Priključite kabel USB (kot je prikazano spodaj) v vrata za polnilnik/USB. Vstavite polnilnik v električno vtičnico. OPOMBA: pri prvem polnjenju je treba baterijo popolnoma napolniti, da se tako zagotovi optimalna življenjska doba baterije.
  • Page 390: Optimiranje Življenjske Dobe Baterije

    Optimiranje življenjske dobe baterije Čas delovanja baterije lahko podaljšate tako, da izklopite funkcije v ozadju, ki jih ne potrebujete. Prav tako lahko nadzorujete, kako aplikacije in sistem porabljajo baterijo. Daljša življenjska doba baterije • Izklopite radijske povezave, ki jih ne uporabljate, na primer Wi-Fi, Bluetooth ali GPS. • Zmanjšajte svetlost zaslona in skrajšajte čas do zatemnitve zaslona. • Izklopite samodejno sinhronizacijo za Gmail™, koledar, imenik in druge aplikacije. • Nekatere aplikacije, ki ste jih prenesli, lahko skrajšajo trajanje baterije. • Ko uporabljate prenesene aplikacije, preverite raven napolnjenosti baterije. Ogled ravni napolnjenosti baterije Na osnovnem zaslonu tapnite Aplikacije > Nastavitve > O tablici > Baterija. V zgornjem meniju zaslona sta prikazana stanje baterije (ali se polni oziroma prazni) in raven napolnjenosti. Spremljanje in nadzor porabnikov baterije > O tablici Na osnovnem zaslonu tapnite Aplikacije > Nastavitve > Baterija > Poraba baterije. Na zaslonu je prikazan preostali čas delovanja baterije ter aplikacije ali storitve, ki porabljajo baterijo, od največjega porabnika do najmanjšega.
  • Page 391: Vstavljanje Kartice Microsd

    Vstavljanje kartice MicroSD Naprava podpira pomnilniške kartice MicroSD do največje kapacitete 32 GB. Na kartico MicroSD lahko tudi shranjujete večpredstavnostno vsebino. N oht vstavite v odprtino in rahlo potegnite pokrov reže spominske kartice, da ga odprete. V režo vstavite pomnilniško kartico, tako da so kontakti obrnjeni proti zaslonu. Pokrov reže spominske kartice pazljivo potisnite tablični računalnik, da ga zaprete.
  • Page 392: Odstranitev Kartice Microsd

    Odstranitev kartice MicroSD Če želite kartico MicroSD varno odstraniti iz tablice, jo morate najprej odpeti. Na osnovnem zaslonu tapnite Aplikacije > Nastavitve > Pomnilnik > Odpni kartico SD. Odprite ležišče kartice MicroSD in jo potisnite v tablico, da se kartica sprosti. Kartico MicroSD nežno izvlecite iz reže. Opozorilo! Ne odstranite kartice MicroSD, če je niste prej odpeli. Sicer lahko poškodujete tablico in kartico MicroSD ter izgubite podatke, shranjene na njej. Formatiranje kartice MicroSD Opozorilo! Pri formatiranju kartice MicroSD se izbrišejo vse datoteke, shranjene na njej. Na osnovnem zaslonu tapnite Aplikacije > Nastavitve > Pomnilnik. Tapnite Izbriši SD kartico (dvakrat). Če ste nastavili vzorec za odklep, ga vnesite in tapnite Izbriši vse. Kartica bo formatirana in pripravljena za uporabo. OPOMBA: če je na kartici MicroSD vsebina, se lahko struktura map po formatiranju spremeni, ker se vse datoteke izbrišejo.
  • Page 393: Zaklepanje In Odklepanje Zaslona

    Zaklepanje in odklepanje zaslona Če tablice nekaj časa ne uporabljate, se zaslon samodejno izklopi in zaklene. To preprečuje neželeno pritiskanje in varčuje z energijo baterije. Ko tablice ne uporabljate, jo zaklenite s pritiskom tipke za vklop/izklop/zaklepanje . Če se med zaklepom zaslona izvajajo programi, se morda izvajajo tudi v zaklenjenem načinu. Priporočamo, da pred prehodom v zaklenjeni način zaprete vse programe, da se izognete nepotrebnim stroškom (npr. dostop do spleta, podatkovna komunikacija). Tablico zbudite tako, da pritisnete tipko za vklop/izklop/zaklepanje . Pojavi se zaklenjeni zaslon. Pritisnite in s prstom potegnite v katero koli smer po zaklenjenem zaslonu, da odklenete osnovni zaslon. Odpre se zadnji odprti zaslon. Vklop zaslona s pomočjo funkcije KnockON Funkcija KnockON vam omogoča, da dvotapnete na zaslon in ga preprosto vklopite ali izklopite. • Hitro dvotapnite na sredo zaslona, da ga vklopite. • Za izklop zaslona hitro dvotapnite vrstico stanja, prazno območje na osnovnem zaslonu ali zaklenjeni zaslon.
  • Page 394: Odklep Zaslona S Pomočjo Funkcije Knock Code

    Odklep zaslona s pomočjo funkcije Knock Code Funkcija Knock Code vam omogoči, da ustvarite lastno kodo za odklep s pomočjo kombinacije krkov (ali tapov) na zaslonu. • Medtem ko je zaslon zaklenjen, kjer koli na zaslonu tapnite zaporedje, ki ste ga določili. Vstopili boste v domač zaslon. Aktiviranje funkcije Knock Code Na domačem zaslonu tapnite Aplikacije > Nastavitve > Zaslon > Zakleni zaslon > Izberite zaslon zaklepa > Knock Code. Odpre se zaslon, ki vas vodi skozi postopek izbire zaporedja za odklepanje. Rezervno kodo PIN morate ustvariti kot varnostno sredstvo v primeru, da pozabite zaporedje za odklepanje.
  • Page 395: Vaš Osnovni Zaslon

    Vaš osnovni zaslon Nasveti za uporabo zaslona na dotik Tukaj je nekaj namigov o premikanju po tablici. OPOMBA: • Če želite izbrati predmet, pritisnite sredino ikone. • Ne pritiskajte premočno; zaslon na dotik je dovolj občutljiv, da zazna že rahel, vendar čvrst dotik. • S konico prsta pritisnite želeno možnost. Pazite, da se ne dotaknete drugih tipk. Tapniti ali pritisniti Z enoprstnim tapkanjem na tipkovnici na zaslonu izbirate elemente, povezave, bližnjice in črke. Pritisk in držanje Element na zaslonu tapnete in držite tako, da ga tapnete in ne dvignete prsta, dokler se ne izvede dejanje. Če želite na primer odpreti razpoložljive možnosti kontakta, pritisnite in držite kontakt v imeniku, dokler se ne odpre priročni meni. Povleči in spustiti Za trenutek pritisnite in držite element ter ga, ne da bi dvignili prst, premaknite s prstom po zaslonu v želeni položaj. Na ta način lahko prestavljate elemente na osnovnem zaslonu.
  • Page 396: Povleči Ali Podrsati

    Povleči ali podrsati Povlečete ali podrsate tako, da prst hitro premaknete po površini zaslona brez premora od prvega dotika (v nasprotju z vlečenjem). Po seznamu se lahko na primer pomikate navzgor ali navzdol tako, da podrsate po zaslonu navzgor ali navzdol, ali pa brskate po različnih osnovnih zaslonih tako, da povlečete od leve proti desni in obratno. Dvotapkanje Z dvojnim tapom približate spletno stran ali zemljevid. Hitro dvotapnite na primer razdelek spletne strani, da ga prilagodite širini zaslona. Med ogledom slike ali zemljevida lahko pogled približate ali oddaljite tudi z dvojnim tapom. Besedo dvotapnite, da jo poudarite. Z dvojnim tapkanjem lahko tudi aktivirate funkcijo KnockON, s katero zaslon na dotik vklopite ali izklopite. Približati za povečavo Približajte ali razmaknite kazalec in palec za povečavo oziroma pomanjšavo pri uporabi brskalnika ali zemljevida ali brskanju po slikah. Zasuk zaslona V številnih aplikacijah in menijih se usmerjenost zaslona prilagodi fizični usmerjenosti naprave. Osnovni zaslon Za ogled različnih plošč se s prstom pomaknite v levo ali desno. Vsako ploščo lahko prilagodite z aplikacijami, prenosi, pripomočki in ozadji. Quick Keys so na voljo na spodnjem delu domačega zaslona in omogočajo preprost dostop z enim dotikom do funkcij, ki jih največ uporabljate.
  • Page 397 Vrstica stanja – Prikazuje informacije o stanju naprave, vključno z uro, močjo signala, stanjem baterije in ikonami obvestil. Ikone aplikacije – Tapnite ikono (aplikacije, pripomoček, mape itd.), če jo želite odpreti in uporabljati. Hitre tipke – Omogočajo preprost dostop do funkcij, ki jih najpogosteje uporabljate. Tipka Dual Window – Tapnite za spremembo načina dvojnega okna. Omogoča vam upravljanje z dvema različnima aplikacijama hkrati, tako da razdeli zaslon na pol. Tipka Nedavne aplikacije – Tapnite za prikaz nedavno uporabljanih aplikacij. Prav tako se ga lahko dotaknete in pridržite za prikaz možnosti menija v aplikacijah. Tipka Domov – Omogoča vrnitev na domač zaslon (ali se s katerega koli platna razširjenega domačega zaslona vrne na privzeto platno domačega zaslona). Pridržite jo za dostop do Google Now. Tipka Nazaj – Vrnitev na prejšnji zaslon. Prav tako zapre pojavne elemente, kot so meniji, pogovorna okna in tipkovnica na zaslonu. Dotaknite se in pridržite za dostop do okna Dual.
  • Page 398: Prilagajanje Osnovnega Zaslona

    Prilagajanje osnovnega zaslona Osnovni zaslon lahko prilagodite z dodajanjem aplikacij, prenosov, pripomočkov ali ozadij. Za udobnejšo uporabo tablice lahko na osnovni zaslon dodate svoje najljubše aplikacije in pripomočke. Dodajanje elementov na osnovni zaslon: Pritisnite in držite prazno območje osnovnega zaslona. Tapnite Apps ali zavihek Widgets. Izbran element povlecite na želeno mesto in dvignite prst. Odstranjevanje elementa z osnovnega zaslona: Pridržite ikono, ki jo želite odstraniti, jo povlecite na in dvignite prst. NASVET! Če želite ikono aplikacije na osnovni zaslon dodati z zaslona Aplikacije, pridržite aplikacijo, ki jo želite dodati, in jo povlecite na želeno mesto. NASVET! V mapo lahko dodate več ikon aplikacij. Na osnovnem zaslonu eno ikono spustite na drugo in ustvarila se bo mapa. Odpiranje, preklop in zaustavitev aplikacij Tapnite , da se prikažejo nedavno uporabljene aplikacije. Hkrati imate lahko delujočih več aplikacij in med več odprtimi aplikacijami tudi preklapljate. Prav tako lahko ročno zaustavite delovanje aplikacije. Uporaba dvojnega okna Funkcija dvojnega okna razpolovi zaslon, da omogoči večopravilnost, možnost, da povlečete in spustite elemente, samodejno povezovanje in nedavno uporabljene aplikacije.
  • Page 399 Dotaknite se , da razdelite zaslon ali pridržite , dokler je prikazan seznam aplikacij. Ikone aplikacije se dotaknite ali jo povlecite na želeno mesto. Tapnite za prikaz naslednjih možnosti. Prav tako lahko povlečete zavihke, da spremenite velikost oken. Preklop med dvema zaslonoma. Sprememba seznama aplikacij. Celozaslonski pogled. Zaprtje aplikacij. Kako onemogočiti funkcijo Dual Window > Dual window. Tapnite > Aplikacije > Nastavitve Tapnite na preklop za dvojno okno, da ga spremenite na OFF. NASVET! Hkrati lahko odprete dve aplikaciji Internet.
  • Page 400: Prilagajanje Ikon Aplikacij Na Osnovnem Zaslonu

    Prilagajanje ikon aplikacij na osnovnem zaslonu S slikami iz svoje Galerije lahko prilagodite vsako ikono aplikacije. Pridržite ikono aplikacije, dokler se ne sprosti s trenutnega položaja in jo spustite na zaslon. V zgornjem desnem kotu aplikacije se bo prikazala ikona za urejanje Znova tapnite ikono aplikacije, izberite želeno obliko ikone in tapnite OK. Lahko tudi tapnete možnost Dodaj novo, prilagodite velikost ikone in izberite sliko iz svoje galerije. Ogled drugih plošč osnovnega zaslona • S prstom povlecite (ali frcnite) levo ali desno po osnovnem zaslonu. • Stisnite osnovni zaslon, da se prikaže pogled mini plošče, nato tapnite ploščo osnovnega zaslona, ki si jo želite ogledati.
  • Page 401: Hiter Dostop

    Hiter dostop Za ogled elementov hitrega dostopa se dotaknite kjerkoli na območju sprednjih tipk in potegnite navzgor. Na voljo sta naslednji možnosti: Google Now. Obvestila Obvestila vas opozarjajo na prejem novih sporočil, dogodke na koledarju in alarme pa tudi na dogodke v teku, na primer prenose. Na plošči z obvestili si lahko ogledate trenutno stanje tablice in čakajoča obvestila. Ko prejmete obvestilo, se njegova ikona prikaže na vrhu zaslona. Ikone čakajočih obvestil so prikazane na levi, sistemske ikone, ki prikazujejo na primer stanje brezžične povezave ali napolnjenost baterije, pa so prikazane na desni. Čakajoča obvestila Sistemska obvestila...
  • Page 402: Dostop Do Obvestil

    Dostop do obvestil Če želite odpreti ploščo z obvestili in dostopati do obvestil, vrstico stanja povlecite navzdol. Če želite zapreti ploščo z obvestili, vrstico na dnu zaslona povlecite navzgor. Vrstica hitrih nastavitev – potegnite levo ali desno za pomikanje po seznamu. Tapnite ikono, da funkcijo aktivirate/deaktivirate. Aplikacija QSlide – tapnite aplikacijo QSlide, če jo želite odpreti kot majhno okno na zaslonu. Za odstranjevanje, dodajanje ali preurejanje aplikacij QSlide tapnite Potegnite v levo in desno, da prilagodite svetlost in glasnost zaslona. Gumb Počisti – tapnite ga, da počistite seznam obvestil o dogodkih. Obvestilo tapnite, da ga odprete. Hitre nastavitve na plošči z obvestili Uporabite Hitre nastavitve za hitro preklapljanje med nastavitvami funkcij, kot je Wi-Fi. Hitre nastavitve so na vrhu plošče z obvestili. OPOMBA: če si želite ogledati meni nastavitev funkcije, pridržite ikono v hitrih nastavitvah.
  • Page 403: Preurejanje Možnosti Hitrih Nastavitev Na Plošči Z Obvestili

    Preurejanje možnosti hitrih nastavitev na plošči z obvestili Odprite ploščo z obvestili, hitre nastavitve potegnite v levo in tapnite . Če želite elemente preurediti, potegnite na želeno lokacijo. Če želite dodati več ikon, označite želene funkcije. Aplikacija QSlide na plošči z obvestili Aplikacije QSlide so prikazane v vrstici na plošči z obvestili pod vrstico s hitrimi nastavitvami. Te ikone poskrbijo za hiter, priročen način večopravilnosti na enem zaslonu (podobno kot je pri televiziji funkcija slika v sliki). QSlide na zaslonu prikaže majhno okno aplikacije, ki ga lahko premaknete, mu spremenite velikost ali ga spremenite v prosojnega. OPOMBA: vrstico aplikacije QSlide lahko odstranite tako, da v vrstici hitrih nastavitev tapnete na ikono QSlide. Uporaba aplikacij QSlide V vrstici tapnite na katero koli od aplikacij QSlide, da jo aktivirate. Ko je aktivirana, funkcija QSlide odpre aplikacijo v oknu v ospredju in vam omogoči dostop do drugih aplikacij v ozadju. Hkrati lahko odprete dve okni QSlide. Ikone obvestil v vrstici stanja V spodnji tabeli so naštete najpogostejše ikone. Ikona Opis Letalski način Povezan z omrežjem Wi-Fi Priključene žične slušalke...
  • Page 404 Bluetooth je vključen Sistemsko opozorilo Vklopljen je način vibriranja Vklopljen je tihi način Baterija je polna Baterija se polni Vklopljena je skupna raba vsebine Prenos podatkov Nalaganje podatkov Nastavljen je alarm GPS je vklopljen Sinhroniziranje podatkov Novo sporočilo v Gmailu Novo sporočilo klepetalnice Hangouts Trenutno se predvaja skladba Tablični računalnik je povezan z računalnikom prek kabla USB Vključen je način varčevanja z energijo...
  • Page 405: Več Uporabnikov

    Več uporabnikov Ustvariti je mogoče identifikacijsko številko le enega lastnik, identifikacijske številke več uporabnikov lahko dodate, tako da se lahko drugi prijavijo in neodvisno uporabljajo tablični računalnik. Vsak uporabnik lahko nastavi lastne nastavitve tabličnega računalnika, uporablja lasten pomnilnik in ima dovoljenje za posodabljanje svojih aplikacij. Dovoljenja lastnika tabličnega računalnika • Samo identifikacijska številka lastnika tabličnega računalnika lahko med uporabniške številke doda novega uporabnika in odstrani uporabniške številke. Omejitve več uporabnikov tabličnega računalnika • Vsi uporabniki si delijo isto baterijo, notranji pomnilnik in porabo podatkov. • Nastavitve jezika, ki jih nastavi en uporabnik, veljajo pri vseh ostalih. • Vsak uporabnik lahko konfigurira in uporablja le lastno vsebino in podatke (npr. nastavitve osnovnega zaslona, zvoka itd.). • Vsak uporabnik lahko v imenu vseh ostalih uporabnikov potrdi posodobljena dovoljenja za aplikacije. • Sporočila in koledarski dogodki bodo poslani le izbrani uporabniški številki. • Ko začne uporabnik tiskati doument s programom Mobile Print, se bo opravilo nadaljevalo, tudi če se spremeni uporabniška številka. • Prenos podatkov, prenosi, večpredstavnostno predvajanje in komunikacijske storitve se bodo v trenutku zamenjave uporabniške številke zaustavili. Prenos podatkov prek trgovine Play Store pa se lahko nadaljuje tudi, če se ID uporabnika spremeni.
  • Page 406: Qslide

    Dodajanje novega uporabnika v tablični računalnik Na osnovnem zaslonu tapnite Aplikacije > Nastavitve > Uporabniki > Dodaj uporabnika. Izberite vrsto uporabnika, ki ga želite dodati. • Uporabnik: uporabniki imajo svoje aplikacije in vsebino. • Omejeni uporabnik: iz svojega računa lahko omejite dostop do aplikacij in vsebine. Čarovnik za nastavitev vam pomaga pri dodajanju novega uporabnika. Pritisnite Nastavi zdaj. • Ko ustvarite novega uporabnika, mora ta oseba ob prvi prijavi opraviti celoten postopek namestitve. Preklop med uporabniki Povlecite vrstico stanja na vrhu zaslona navzdol. Dotaknite se ikone uporabnika za prikaz plošče za preklapljanje uporabnikov. Dotaknite se ene od ikon uporabnikov na zaslonu. Izberite ime lastnika ali drugo uporabniško ime, ki ste ga ustvarili. QSlide Funkcija QSlide omogoča večplastno prekrivanje različnih oken na zaslonu za preprostejšo večopravilnost. Okna QSlide lahko odprete v vrstici aplikacije QSlide na plošči z obvestili ali neposredno v aplikacijah, ki podpirajo funkcijo QSlide.
  • Page 407: Uporaba Funkcije Qslide

    Odprite ploščo z obvestili in v delu aplikacije QSlide tapnite izbrano aplikacijo. Med uporabo aplikacije, ki podpira QSlide, tapnite . Funkcija bo za zaslonu stalno prikazana kot majhno okno. Uporaba funkcije QSlide Ko je aktivirana, funkcija QSlide odpre povezano aplikacijo v oknu v ospredju in vam omogoči dostop do drugih aplikacij v ozadju. Na zaslonu bo stalno prikazana, dokler je ne zaprete.
  • Page 408: Zajem Posnetka Zaslona

    Tapnite za zagon QSlide. Tapnite za izhod iz funkcije QSlide in povratek v celozaslonski način. Tapnite za prilagajanje prosojnosti. Tapnite za izhod iz QSlide. Tapnite za prilagajanje velikosti. OPOMBA: funkcija QSlide podpira največ dve hkrati odprti okni. QSlide podpira le naslednje aplikacije: Video, Internet, Koledar, E-pošta, Upravitelj datotek in Kalkulator. Zajem posnetka zaslona Hkrati za približno 2 sekundi pritisnite in držite pritisnjene tipki za znižanje glasnosti in tipko za vklop/izklop , da zajamete posnetek trenutnega zaslona. Za ogled zajete slike pojdite v Aplikacije > Galerija > mapa Posnetki zaslona. Uporaba QuickMemo+ za zajem posnetka zaslona Na zaslonu, ki ga želite zajeti, potegnite statusno vrstico navzdol in izberite QuickMemo+ Pritisnite in hkrati zadržite obe tipki za glasnost .
  • Page 409: Uporaba Capture Plus Za Zajem Posnetka Zaslona

    Tapnite tipko Meni > Capture plus. Modro okno prilagodite na želeno velikost in nato tapnite Shrani. Izbrano območje se shrani v mapo Capture plus v Galeriji. Načini vnosa besedila Ko je treba vnesti besedilo, se tipkovnica samodejno pojavi na zaslonu. Za ročni prikaz tipkovnice na zaslonu tapnite besedilno polje, v katerega želite vnesti besedilo. Predlaganje besed Prikaže besedo, ki ste jo vnesli. Predlaganje besed Pritisnite, da Tapnite enkrat, če izbrišete zadnji znak. želite, da je naslednja črka velika. Dvotapnite, Pritisnite, da se če želite, da so vse v polju za sporočilo črke velike. premaknete v novo vrstico. Tapnite, da preklopite med Tapnite za izbiro želene vrste številsko tipkovnico in tipkovnice. tipkovnico s simboli. Pritisnite, da vnesete presledek. Tapnite za izbiro jezika tipkovnice. Tapnite, da odprete nastavitve tipkovnice LG. Pritisnite in zadržite za dostop do pladnja izrezkov.
  • Page 410: Vpis Predlagane Besede S Pomočjo Kontrolnika Potez

    Vpis predlagane besede s pomočjo kontrolnika potez Prek tipkovnice vpišite besedilo in pojavile se bodo predlagane besede. Tapnite ali frcnite navzgor na levi strani tipkovnice, da izberete predlog na levi strani. Tapnite ali frcnite navzgor na desni strani tipkovnice, da izberete predlog na desni strani. Razdelitev tipkovnice s pomočjo poteze Funkcija razdeljene tipkovnice omogoča obojeročno tipkanje. Vsaka polovica tipkovnice se umakne v levo in desno stran zaslona. Sprememba višine tipkovnice Spremenite višino tipkovnice, da se prikaže več zaslona in da lažje nadzorujete tipkovnico. > Višina in postavitev tipkovnice > Višina tipkovnice pokončno • Tapnite > tapnite in potegnite ikono , da prilagodite višino tipkovnice. Sprememba tipk spodnje vrstice > Višina in postavitev tipkovnice > QWERTZ postavitev > • Tapnite tapnite in potegnite, da dodate ali izbrišete tipke oziroma spremenite vrstni red.
  • Page 411: Vpisovanje Posebnih Znakov

    Vpisovanje posebnih znakov Tipkovnica na zaslonu omogoča vnos posebnih znakov (npr. "á"). Pridržite na primer želeno tipko (na primer tipko "a"). Ko se prikaže želeni znak, podrsajte s prstom prek njega in dvignite prst, da vnesete znak. OPOMBA: simbol v zgornjem desnem kotu tipke pove, da so na voljo dodatni znaki.
  • Page 412: Nastavitev Računa Google

    Nastavitev računa Google Ob prvem vklopu tablice lahko aktivirate omrežje, se vpišete v Googlov račun in izberete, kako želite uporabljati nekatere Googlove storitve. Kako nastavite račun Google • Na pojavnem nastavitvenem zaslonu se prijavite v Googlov račun. ALI • Na osnovnem zaslonu tapnite Aplikacije > Zavihek Aplikacije > Nastavitve > Računi in sinhronizacija > Dodaj račun > Google. Če Googlov račun že imate, vnesite e-poštni naslov in tapnite NAPREJ. V nasprotnem primeru pritisnite ALI USTVARITE NOV RAČUN in vnesite zahtevane informacije, da ustvarite nov račun Google. Ko nastavite Googlov račun v tablici, se tablica samodejno sinhronizira z Googlovim računom v spletu. Vaš imenik, sporočila v nabiralniku Gmail, dogodki koledarja in druge informacije iz teh aplikacij in storitev v spletu se sinhronizirajo s tablico. (To je odvisno od vaših sinhronizacijskih nastavitev.) Ko se prijavite, lahko s tablico uporabljate Gmail™ in druge Googlove storitve.
  • Page 413: Povezovanje Z Omrežji In Napravami

    Povezovanje z omrežji in napravami Wi-Fi Prek omrežja Wi-Fi lahko uporabljate širokopasovno internetno povezavo znotraj pokritosti brezžične dostopne točke (AP). Prek omrežja Wi-Fi lahko brezplačno uporabljate brezžični internet. Vzpostavljanje povezave z omrežji Wi-Fi Če želite v tablici uporabljati Wi-Fi, potrebujete dostop do brezžične dostopne točke ali "dostopne točke". Nekatere dostopne točke so odprte in preprosto vzpostavite povezavo z njimi. Druge so skrite ali zaščitene; tablico morate za povezavo z njimi posebej konfigurirati. Ko omrežja Wi-Fi ne uporabljate, ga izklopite, da podaljšate vzdržljivost baterije. Vklop funkcije Wi-Fi in povezava z omrežjem Wi-Fi Na osnovnem zaslonu tapnite Aplikacije > zavihek Aplikacije > Nastavitve > Wi-Fi. Tapnite za vklop Wi-Fi in poiščite razpoložljiva omrežja Wi-Fi. Tapnite Išči, če si želite ogledati seznam aktivnih omrežij Wi-Fi v dosegu. • Zavarovana omrežja so označena z ikono ključavnice. Pritisnite omrežje, da vzpostavite povezavo z njim. • Če je omrežje zavarovano, morate vnesti geslo ali druge poverilnice. (Za podrobnosti se obrnite na skrbnika omrežja) Vrstica stanja prikazuje ikone, ki označujejo stanje vaše povezave z Wi-Fi- omrežjem.
  • Page 414: Bluetooth

    Bluetooth Prek povezave Bluetooth lahko pošiljate podatke tako, da zaženete ustrezno aplikacijo. Ni jih mogoče pošiljati iz menija Bluetooth kot pri večini drugih mobilnih telefonov in tabličnih računalnikov. OPOMBA: • Podjetje LG ne prevzema odgovornosti za izgubo podatkov, prestrežene podatke ali zlorabo podatkov, ki so bili poslani ali prejeti s pomočjo brezžične funkcije Bluetooth. • Za izmenjavo in prejemanje podatkov uporabljajte preverjene in ustrezno zaščitene naprave. Če so med napravami ovire, se lahko razdalja, na kateri je mogoč prenos podatkov, zmanjša. • Nekatere naprave, še posebej tiste, ki jih ni testiralo ali odobrilo podjetje Bluetooth SIG, morda niso združljive z vašo napravo. Vklop povezave Bluetooth in seznanjanje vaše tablice z napravo Bluetooth Preden lahko telefon povežete z drugo napravo, ju morate združiti. Na osnovnem zaslonu tapnite Aplikacije > Zavihek Aplikacije > Nastavitve > Bluetooth. Tapnite stikalo , da vklopite Bluetooth. Tapnite potrditveno polje ob imenu vašega tabličnega računalnika, da bo viden ostalim napravam Bluetooth. OPOMBA: e želite določiti časovno obdobje, v katerem naj bo naprava vidna, tapnite tipko Meni > Časovna omejitev za vidnost.
  • Page 415: Pošiljanje Podatkov Po Povezavi Bluetooth

    Prikazal se bo seznam naprav, ki so na voljo. Na seznamu tapnite napravo, s katero želite združiti tablični računalnik. OPOMBA: odvisno od vrste naprave boste morali vpisati enaki kodi, potrditi enaki kodi ali pa se bosta napravi samodejno združili. Ko je združevanje uspešno, bo vaš tablični računalnik vzpostavil povezavo z drugo napravo. OPOMBA: Vaša tablica ne podpira prostoročnega profila. Zato uporaba funkcij klicanja z nekaterimi pripomočki, kot so slušalke Bluetooth ali napravami z omogočeno povezavo Bluetooth hmorda ne bo na voljo. Pošiljanje podatkov po povezavi Bluetooth Odprite element in tapnite ALI Pridržite element in izberite Skupna raba. ALI Odprite element in tapnite tipko Meni > Skupna raba. Za izmenjavo prek Bluetootha tapnite Bluetooth. OPOMBA: način za izbiro možnosti se lahko razlikuje glede na vrsto podatkov. Iskanje in združevanje z napravo z omogočeno povezavo Bluetooth.
  • Page 416: Prejem Podatkov Po Povezavi Bluetooth

    Prejem podatkov po povezavi Bluetooth Kako pošljete datoteko v tablični računalnik si preberite v navodilih za uporabo naprave Bluetooth. Obe napravi morata biti združeni in Bluetooth mora biti vključen. Združite naprave in tapnite Sprejmi, ko prejmete zahtevo za avtorizacijo Bluetooth za prejem datotek. SmartShare Funkcijo SmartShare lahko enostavno uporabljate v aplikacijah Galerija, Glasba in drugih. Predvajanje vsebine v različnih napravah Vsebino svojega tabličnega računalnika lahko daste v skupno rabo z različnimi napravami. Tapnite ali > SmartShare, če želite deliti vsebino v aplikacijah Galerija, Glasba in POLARIS Office 5. Predvajanje/pošiljanje Predvajaj – predvajanje vsebine prek televizorja, zvočnika Bluetooth itd. Beam – pošiljanje vsebine v napravo, ki podpira Bluetooth in SmartShare Beam. • SmartShare Beam – omogoča hiter prenos izbrane vsebine preko Wi-Fi Direct. < Predvajaj > < Beam >...
  • Page 417: Predvajanje Vsebin Iz Naprav V Bližini

    Predvajanje vsebin iz naprav v bližini Vsebino iz bližnjih naprav (na primer osebnega računalnika, omrežnega pomnilnika, mobilnega telefona) lahko predvajate v aplikacijah Galerija, Glasba. Povezovanje naprav Telefon in druge naprave, ki jih podpira DLNA, povežite v isto omrežje Wi-Fi. Iskanje drugih naprav Tapnite Bližnje naprave. Prikažejo se naprave, ki jih podpira DLNA. Za ogled vsebine se povežite z napravo. Uporaba vsebine iz oblaka Vsebino iz oblaka (na primer Dropboxa) lahko uporabite v aplikacijah Galerija, Glasba. Uporaba oblaka OPOMBA: podprte funkcije se lahko razlikujejo glede na oblak. Pridobivanje podatkov lahko traja nekaj časa, odvisno od oblaka. V aplikacijah Galerija, Glasba izberite Oblak. Izberite oblak, ki ga želite uporabiti, in se prijavite. Po prijavi lahko uporabljate vsebino oblaka. Nastavitve oblaka nastavite za izbiro aplikacije, ki naj uporabi oblak.
  • Page 418: Qpair

    QPair Če tablico in mobilni telefon povežete s QPair, lahko med tablico in mobilnim telefonom sinhronizirate dohodne klice, sporočila in opozorila družabnega omrežja. in tapnite Kako začeti > Začni, nato Najprej na tablici zaženite QPair isto ponovite še na mobilnem telefonu. NASVET! Ni treba, da je QPair na telefonu predhodno nameščen. Pojdite v Google Play Store, poiščite QPair in ga namestite. OPOMBA: • QPair deluje s telefoni, ki imajo nameščen Android 4.1 ali več. Nekatere lastnosti so lahko omejene, odvisno od modela vašega telefona. • QPair uporablja funkcijo Bluetooth, zato morda ne bo več deloval normalno, če med njegovo uporabo spremenite nastavitve povezave Bluetooth. Povezava Bluetooth se bo samodejno vklopila.
  • Page 419 Funkcije QPair Obvestila klica – tablici pošlje obvestilo, ko telefon prejme klic. V obvestilu je prikazana klicateljeva številka in vam omogoča, da na klic odgovorite in ga zavrnete. Lahko tudi spreminjate nastavitve klicev, kot so melodija zvonjenja, njena glasnost, melodija z vibriranjem, ali zavrnete sporočilo, ko prejmete klic. OPOMBA: prejmete lahko samo klice, ki jih podpira tehnologija Bluetooth. Funkcija QPair ne podpira klicanja iz tabličnega računalnika. Obvestila o sporočilu – tablici pošlje obvestilo, ko telefon prejme sporočilo. Spreminjate lahko tudi nastavitve sporočil, kot so pojavno sporočilo, predogled sporočila, zvok obvestil in obveščanje z vibriranjem. Obvestila družabnega omrežja – v statusni vrstici tablice prikaže obvestilo družabnega omrežja, ko telefon prejme obvestilo družabnega omrežja. OPOMBA: to funkcijo omogočite tako, da v telefonu najprej vklopite Obvestila družabnega omrežja QPair (Nastavitve > Dostopnost > Obvestila družabnega omrežja QPair). Ta možnost vam omogoča, da ste obveščeni o obvestilih družabnega omrežja na vašem tabličnem računalniku. QuickMemo+ prenos – shrani trenuten QuickMemo+ v Galerijo tabličnega računalnika in jo nato sinhronizira z Galerijo v telefonu. Internetna povezava prek mobilnega telefona – prek mobilnega telefona samodejno poveže tablico z internetom (kot dostopne točke Wi-Fi). Uporaba te funkcije lahko povzroči stroške prenosa podatkov. Da bi telefon prihranil pri prenosu podatkov, se samodejno poveže s katero koli dostopno točko Wi-Fi na območju.
  • Page 420: Povezava Z Računalnikom Prek Kabla Usb

    Povezava z računalnikom prek kabla USB Svoj tablični računalnik lahko povežete z osebnim računalnikom, da ga napolnite, prenesete elemente iz osebnega računalnika v tablični računalnik in obratno. Prenašanje glasbe, fotografij in videoposnetkov v načinu Medijska naprava (MTP) Tablico povežite z računalnikom prek kabla USB. Če v računalnik niste namestili gonilnika za platformo LG Android, morate nastavitve spremeniti ročno. Nastavitve spremenite tako, da premaknete vrstico stanja navzdol in tapnete trenutni način povezave USB > Medijska naprava (MTP). V računalniku si lahko ogledate vsebino predstavnostne naprave in prenašate datoteke. OPOMBA: če želite spremeniti nastavitve povezave računalnika, premaknite vrstico stanja navzdol in izberite možnost Način povezave USB. Ta nastavitev je v vrstici stanja prikazana samo, če ste na tablični računalnik priključili kabel USB. Sinhronizacija s programom Windows Media Player Prepričajte se, da je Windows Media Player nameščen v računalniku. S kablom USB priklopite tablico na računalnik, v katerem je nameščen Windows Media Player.
  • Page 421 Izberite glasbene datoteke in jih povlecite na seznam za sinhronizacijo. Začnite sinhronizacijo. • Za sinhronizacijo s programom Windows Media Player morajo biti izpolnjene te zahteve. Elementi Zahteva Microsoft Windows XP SP2, Vista ali novejši Različica predvajalnika Windows Media Player 10 ali novejši Windows Media Player • Če imate različico programa Windows Media Player, starejšo od različice 10, namestite različico 10 ali novejšo. Priključitev računalnika s kablom USB za uporabnike sistema Mac OS X Če nastavite program Android File Transfer, lahko prenašate predstavnostno vsebino med tabličnim in osebnim računalnikom s sistemom Mac OS X. Prenesite in namestite program Android File Transfer s spletnega mesta android.com za uporabnike računalnika Mac (http://www.android.com/ filetransfer/). Tablični računalnik povežite z osebnim in dvokliknite aplikacijo AFT (program Android File Transfer), da jo zaženete. Ogledate si lahko predstavnostno vsebino ter vlečete in spuščate predstavnostne datoteke iz tabličnega ali osebnega računalnika in vanj.
  • Page 422: Imenik

    Imenik V tablico lahko dodate stike in jih sinhronizirate s stiki v svojem Googlovem računu ali v drugih računih, ki podpirajo sinhronizacijo stikov. Iskanje stika Na osnovnem zaslonu tapnite Imenik , da odprete imenik. Tapnite polje Iskanje kontakta in vpišite ime stika. Tapnete lahko tudi črko na levi strani zaslona, da se premaknete na imena, ki se začnejo z izbrano črko. Dodajanje novega stika Na osnovnem zaslonu tapnite Imenik Tapnite Nov stik . Izberite želen račun (če je ustrezno). Če želite novemu stiku dodati sliko, tapnite . Izberite Fotografiraj, če želite sliko zajeti s fotoaparatom, ali Izberite iz galerije. Nato poiščite in izberite sliko. Tapnite , da vnesete podrobnejše podatke o imenu. Vnesite podrobnosti o stiku. Tapnite Shrani. Priljubljeni stiki Kontakte, ki jih pogosto kličete, lahko dodate med priljubljene. Dodajanje stika med priljubljene Na osnovnem zaslonu tapnite Imenik , da ga odprete. Tapnite stik, da si ogledate podrobnosti.
  • Page 423: Ustvarjanje Skupine

    Tapnite zvezdico , ki je desno ob imenu stika. Zvezdica se obarva zlato in stik se doda med priljubljene. Odstranjevanje stika s seznama priljubljenih Na osnovnem zaslonu tapnite Imenik , da ga odprete. Tapnite zavihek Priljubljene, če si želite ogledati priljubljene kontakte. Tapnite stik, da si ogledate podrobnosti. Tapnite zlato zvezdico, ki je desno ob imenu stika. Zvezdica se obarva sivo in kontakt je odstranjen s seznama priljubljenih. Ustvarjanje skupine Na osnovnem zaslonu tapnite Imenik , da ga odprete. Pritisnite zavihek Skupine, nato Vnesite ime za novo skupino. • Tapnite Dodaj člane, da v novo skupino dodate stike. • Tapnite polje RAČUN, da spremenite račun(e), ki jih želite shraniti v novo skupino. Če želite shraniti skupino, pritisnite Shrani. OPOMBA: če skupino izbrišete, kontakti, dodeljeni tej skupini, ne bodo izgubljeni. Ostali bodo v imeniku.
  • Page 424: E-Pošta

    E-pošta E-poštno aplikacijo lahko uporabljate za branje e-pošte storitev, kot je Yahoo!, MSN in AOL. Aplikacija E-pošta podpira naslednje vrste računov: POP3, IMAP in Exchange. Nastavitve računa, ki jih morate vnesti, vam lahko posreduje ponudnik storitev ali skrbnik sistema. Upravljanje e-poštnega računa Na domačem zaslonu tapniteE-pošta . Ko prvič odprete aplikacijo E-pošta, se odpre čarovnik za dodajanje e-poštnega računa. Po prvi nastavitvi se prikaže vsebina vašega nabiralnika. Če ste dodali več računov, lahko med njimi preklapljate. Dodajanje e-poštnega računa: • Odprite aplikacijo E-pošta in tapnite tipko Meni > Nastavitve> Dodaj račun. Preklop med računi: Če ste dodali več računov, lahko med njimi brez težav preklapljate. V vsaki mapi za e-pošto tapnite trenutni račun (na vrhu zaslona), nato tapnite račun, ki ga želite odpreti. Spreminjanje splošnih nastavitev e-pošte: > Nastavitve > Splošne Odprite aplikacijo E-pošta in tapnite tipko Meni nastavitve za konfiguracijo nastavitev, ki veljajo za vse vaše račune. Tapnite posamičen račun, da konfigurirate nastavitve za izbrani račun.
  • Page 425: Upravljanje Map Računa

    Brisanje e-poštnega računa: • Odprite aplikacijo E-pošta in tapnite tipko Meni > Nastavitve> tipka Meni > Odstrani račun > tapnite račun, ki ga želite izbrisati > Odstrani > Da. Upravljanje map računa Odprite aplikacijo E-pošta in tapnite tipko Meni ter izberite Mape. Vsak račun ima mape Prejeto, Odpošlji, Poslano in Osnutki. Glede na funkcije, ki jih podpira ponudnik računa, imate lahko še druge mape. Sestavljanje in pošiljanje e-pošte V aplikaciji E-pošta tapnite Sestavi Vnesite naslov želenega prejemnika sporočila. Med vnašanjem besedila bodo prikazani ujemajoči se naslovi iz imenika. Več naslovov ločite s podpičji. Tapnite Priloži , da po potrebi priložite datoteke. Vnašanje zadeve in sporočila. Tapnite Pošlji , če želite poslati sporočilo. Če niste povezani z omrežjem in delate na primer v načinu V letalu, se poslana sporočila shranijo v mapo Odpošlji, dokler znova ne vzpostavite povezave z omrežjem. Če v mapi Odpošlji čakajo sporočila, se ta mapa prikaže na zaslonu Računi. Prejemanje e-poštnih sporočil Ko v mapo Prejeto prejmete novo e-poštno sporočilo, boste obveščeni z zvokom ali vibriranjem (odvisno od vaših nastavitev zvoka in vibriranja), njegova ikona pa se bo pojavila v vrstici stanja.
  • Page 426: Zabava

    Zabava Fotoaparat Če želite odpreti aplikacijo fotoaparata, tapnite Fotoaparat na osnovnem zaslonu. Spoznavanje iskala P rosti pogled – dotaknite se, da skrijete ali pokažete menije v iskalu. P reklopi fotoaparat – preklopi med sprednjim in zadnjim objektivom fotoaparata. Med fotoaparatoma lahko preklopite tudi tako, da podrsate po zaslonu. Način – omogoča nastavitev načina fotografiranja na Samodejno ali Panorama. Nastavitve – pritisnite to ikono, da odprete meni z nastavitvami. G alerija – pritisnite, da prikažete zadnjo fotografijo, ki ste jo posneli. Na ta način lahko v načinu fotoaparata odprete galerijo in prikažete shranjene fotografije. Video način – tapnite za začetek snemanja videoposnetka.
  • Page 427: Uporaba Naprednih Nastavitev

    Zajemi – zajem fotografije. Izhod – kamero zapustite z dotikom. OPOMBA: pred fotografiranjem preverite, ali je objektiv fotoaparata čist. Uporaba naprednih nastavitev V iskalu tapnite , da odprete napredne možnosti. Izbere ločljivost fotografije. Če izberete visoko ločljivost, bo velikost datotek večja, kar pomeni, da boste lahko v pomnilnik shranili manj fotografij. Fotografirajte z glasovnim ukazom. Nastavi zamik po pritisku gumba za zajem. Funkcije je zelo priročna, če želite biti na fotografiji tudi sami. Na zaslonu prikaže mrežo, s pomočjo katere lažje poravnate svoje fotografije. Odpre vodiča za pomoč, v katerem je opisano, kako funkcija deluje. NASVET! Ko zapustite kamero, se nekatere nastavitve vrnejo na privzeto vrednost, na primer časovnik. Preverite jih, preden posnamete naslednjo fotografijo. Fotografiranje Odprite aplikacijo Fotoaparat. Usmerite objektiv proti motivu, ki ga želite fotografirati.
  • Page 428: Povečevanje Ali Pomanjševanje

    Za zajem fotografije se dotaknite možnosti . Fotografijo lahko zajamete tudi tako, da se v načinu prostega pogleda kjer koli dotaknete zaslona. Povečevanje ali pomanjševanje Pri fotografiranju ali snemanju videoposnetka dva prsta položite kamor koli na zaslon in ju razprite, da sliko povečate. Če jo želite pomanjšati, ju stisnite skupaj. Posnetek s kretnjami Funkcija Posnetek s kretnjami omogoča, da s sprednjim fotoaparatom fotografirate s kretnjami. Fotografirate tako, da dvignete roko z odprto dlanjo, počakate, da jo sprednji fotoaparat zazna in da se na zaslonu prikaže okvir. Nato dlan stisnete v pest, da se sproži časovnik in se lahko pripravite. Po zajemu fotografije Z gumbom za zajemanje tapnite predogled slike in prikazala se bo zadnja zajeta fotografija. Tapnite Galerija ali Fotografije, nato tapnite OK.
  • Page 429 Pritisnite, če želite urediti fotografijo. Pritisnite, če želite takoj posneti novo fotografijo. Pritisnite to možnost, če želite beležko poslati drugim ali jo objaviti v družabnih omrežjih. Pritisnite, če želite izbrisati fotografijo. Pritisnite za dostop do več možnosti. Pritisnite, da fotografijo dodate med priljubljene. NASVET! Če imate račun za družabno omrežje in si ga nastavite tudi v tablici, lahko svoje fotografije delite s skupnostjo družabnega omrežja. Pritisnite ikono Meni, da odprete naslednje možnosti. SmartShare – pritisnite to možnost, če želite izmenjati fotografijo s funkcijo SmartShare. Sliko nastavi za – tapnite, če želite fotografijo uporabiti kot ozadje osnovnega zaslona, fotografijo za kontakt, ozadje zaklenjenega zaslona ali ozadje. Premakni – pritisnite, če želite fotografijo premakniti v drug album. Kopiraj – pritisnite, če želite izbrano fotografijo kopirati in jo shraniti v drug album. Kopiraj v pladenj izrezkov – pritisnite, če želite fotografijo kopirati in jo shraniti v pladenj izrezkov. Diaprojekcija – slike v trenutni mapi samodejno prikaže eno za drugo. Zavrti v levo/desno – dotaknite se, da fotografijo zasukate levo ali desno.
  • Page 430: Ogled Shranjenih Fotografij

    Izrez – za obrezovanje slike. Območje za obrezovanje izberete tako, da prste premaknete po zaslonu. Dodaj lokacijo – dodajanje informacij o lokaciji. Preimenuj – pritisnite, če želite urediti ime izbrane fotografije. Tiskaj – omogoča, da natisnete fotografijo. Podrobnosti – prikaže več informacij o vsebini. Ogled shranjenih fotografij Do shranjenih fotografij lahko dostopite v načinu fotoaparata. Z gumbom za zajemanje tapnite predogled slike in prikazala se bo galerija. Izberite aplikacijo za ogled in/ali urejanje vaših fotografij. Tapnite Galerija ali Fotografije Tapnite V redu. • Če želite videti več fotografij, se pomaknite levo ali desno. • Če želite pogled približati ali oddaljiti, dvotapnite zaslon ali nanj postavite dva prsta in ju razmaknite (ali približajte za oddaljevanje pogleda). Snemanje videoposnetka Odprite aplikacijo Fotoaparat. Usmerite objektiv proti motivu, ki ga želite posneti. Za začetek snemanja pritisnite ikono za način videoposnetka Prikazal se bo časovnik, ki kaže dolžino videoposnetka. Pritisnite na zaslonu, da ustavite snemanje.
  • Page 431: Predvajanje Shranjenih Videoposnetkov

    NASVET! • Tapnite , da prekinete snemanje. • Za zajem posnetka zaslona med snemanjem videoposnetka tapnite Predvajanje shranjenih videoposnetkov Do svojih shranjenih videoposnetkov lahko v načinu kamera dostopate tako, da s pritiskom na gumb za zajemanje tapnete predogled slike. V iskalu tapnite predogled slike s pritiskom na gumb za zajemanje. Na zaslonu se bo pojavila vaša Galerija s prikazanimi najnovejšimi videoposnetki. Povlecite na levo za pregled ostalih videoposnetkov. Na videoposnetku tapnite ikono Predvajaj , da jo samodejno predvajate. OPOMBA: svoje videoposnetke si lahko ogledate v aplikacijah Galerija in Fotografije. OPOMBA: ne pritiskajte premočno; zaslon na dotik je dovolj občutljiv, da zazna že rahel, vendar čvrst dotik. Galerija Večpredstavnostne datoteke lahko za preprost dostop shranite v notranji pomnilnik. S to aplikacijo si lahko ogledujete večpredstavnostne datoteke, kot so slike in videoposnetki. Na osnovnem zaslonu tapnite Aplikacije > zavihek Aplikacije > Galerija Z Galerijo lahko upravljate in dajete v skupno rabo vse svoje fotografije in videoposnetke.
  • Page 432: Ogled Slik

    OPOMBA: • Odvisno od programske opreme v napravi nekatere oblike zapisa datotek niso podprte. • Nekatere datoteke se zaradi načina kodiranja morda ne bodo predvajale pravilno. • Če je datoteka večja od razpoložljivega prostora v pomnilniku, lahko ob odpiranju pride do napake. Ogled slik Ko zaženete aplikacijo Galerija , se prikažejo razpoložljive mape. Ko druga aplikacija, na primer E-pošta, shrani sliko, se samodejno ustvari mapa za prenos, v katero se shrani slika. Podobno z zajemom posnetka zaslona samodejno ustvarite mapo za posnetke zaslona. Tapnite mapo, ki jo želite odpreti. Fotografije so prikazane po datumu, ko so bile ustvarjene. Izberite sliko, da jo prikažete na celem zaslonu. Če si želite ogledati naslednjo ali prejšnjo sliko, se pomaknite levo ali desno. Predvajanje videoposnetkov Odprite aplikacijo Galerija in izberite album. Na videodatoteki je ikona Predvajaj . Če jo želite izbrati, tapnite na sliko. Izberite aplikacijo za predvajanje (tapnite aplikacijo Fotografije ali Videoposnetki ), nato tapnite V redu in videoposnetek se bo začel predvajati.
  • Page 433: Brisanje Slik In Videoposnetkov

    OPOMBA: • Če aplikacijo Videoposnetki uporabljate za predvajanje videoposnetka, levo stran zaslona povlecite navzgor in navzdol, da prilagodite svetlost zaslona. Desno stran zaslona povlecite gor in dol, da prilagodite glasnost. • Če uporabljate aplikacijo Videoposnetki za predvajanje videa, za previjanje nazaj ali naprej podrsajte po zaslonu levo ali desno. Brisanje slik in videoposnetkov Uporabite enega od teh načinov: • V mapi tapnite in izberite fotografije ter videoposnetke, ki jih želite izbrisati, nato pa tapnite Izbriši, potrdite z Da. • Med ogledovanjem fotografije ali videoposnetka tapnite , nato tapnite Da, da potrdite. Nastavljanje slike za ozadje > Sliko nastavi za in Med ogledom fotografije pritisnite ikono Meni izberite Ozadje za začetni zaslon, zadje za zaklenjen zaslon ali Ozadje. Diaprojekcija Svoje fotografije si lahko ogledate kot diaprojekcijo albuma ali izbran niz fotografij. Na osnovnem zaslonu tapnite Galerija • Tapnite album s fotografijami, ki si jih želite ogledati, nato tapnite ikono Meni > Diaprojekcija > izberite fotografije, ki si jih želite ogledati > Naprej > potrdite nastavitve diaprojekcije > Začetek. Za ustavitev predvajanja diaprojekcije tapnite sredino zaslona.
  • Page 434: Video

    Video Galerija ima vgrajen predvajalnik videa, s katerim lahko predvajate vse svoje najljubše videoposnetke. Predvajanje videoposnetka Na osnovnem zaslonu tapnite Aplikacije > zavihek Aplikacije > Galerija > Video Izberite video, ki ga želite predvajati. Pritisnite, da videoposnetek dodate med priljubljene. Pritisnite za dostop do funkcije QSlide za prikaz videoposnetka v majhnem oknu. Pritisnite za izmenjavo videoposnetka s funkcijo SmartShare. Pritisnite za dostop do več možnosti. Pritisnite za nastavitev glasnosti videa. Dotaknite se in pridržite za previjanje nazaj v 3-sekundnih intervalih. Tapnite enkrat, da previjete nazaj 10 sekund.
  • Page 435: Glasba

    Pritisnite za prekinitev predvajanja videoposnetka. Dotaknite se in pridržite za previjanje naprej v 3-sekundnih intervalih. Tapnite enkrat, da hitro previjete naprej 10 sekund. Dotaknite se za zaklepanje/odklepanje zaslona z videom. Med ogledom videoposnetka lahko glasnost prilagajate s tipkama za glasnost, ki sta na desni strani tablice. Tapnite možnost Galerija > (v zgornjem levem kotu naslovne vrstice) > Videoposnetki, nato se dotaknite in pridržite videoposnetka na seznamu, da dostopite do možnosti Skupna raba, Izbriši, Obreži, Preimenuj in Podrobnosti. NASVET! Med ogledom videoposnetka povlecite gor in dol vzdolž leve strani zaslona, da prilagodite svetlost zaslona. Povlecite gor in dol vzdolž desne strani zaslona, da prilagodite glasnost. Glasba Tablica ima predvajalnik glasbe, s katerim lahko predvajate vse svoje najljubše skladbe. Odprete ga tako, da na osnovnem zaslonu tapnete Aplikacije > zavihek Aplikacije > Glasba Prenašanje glasbe v načinu Medijska naprava (MTP) Tablico s kablom USB priklopite na računalnik. Izberite možnost Medijska naprava (MTP). Tablica bo v računalniku prikazana kot dodaten trdi disk. Za ogled kliknite ta pogon. Kopirajte datoteke iz računalnika v mapo pogona.
  • Page 436: Predvajanje Skladbe

    Predvajanje skladbe Na osnovnem zaslonu tapnite Aplikacije > zavihek Aplikacije > Glasba Pritisnite zavihek Skladbe. Izberite skladbo, ki jo želite predvajati. Pritisnite za izmenjavo glasbe s funkcijo SmartShare. Pritisnite za nastavitev trenutne skladbe za priljubljeno. Pritisnite za ogled seznama predvajanja, ki se predvaja trenutno. Pritisnite za dostop do več možnosti. Pritisnite za nastavitev naključnega predvajanja. Pritisnite za nastavitev ponavljanja.
  • Page 437 Pritisnite za nastavitev glasnosti za glasbo. Pritisnite, da se vrnete na začetek skladbe. Dvakrat pritisnite, da se vrnete na prejšnjo skladbo. Dotaknite se in pridržite 3 sekunde za previjanje. Pritisnite za prekinitev predvajanja. Pritisnite za preskok na naslednjo skladbo albuma ali seznama predvajanja. Dotaknite se in pridržite 3 sekunde za previjanje naprej. Pritisnite za nastavitev zvočnega učinka. Med poslušanjem glasbe lahko glasnost prilagajate s tipkama za glasnost na desni strani tablice. Pritisnite in zadržite katero koli skladbo na seznamu, da vstopite v naslednje možnosti: Predvajaj, Dodaj na seznam predvajanja, Izbriši, Skupna raba, Podrobnosti in Išči. OPOMBA: • Nekatere oblike zapisa datotek niso podprte – odvisno od programske opreme naprave. • Če je datoteka večja od razpoložljivega prostora v pomnilniku, lahko ob odpiranju pride do napake. • Avtorske pravice za glasbene datoteke so lahko zaščitene z mednarodnimi pogodbami in državnimi zakoni o avtorskih pravicah. Zato je morda treba za razmnoževanje ali kopiranje glasbe pridobiti dovoljenje ali licenco. V nekaterih državah zakonodaja prepoveduje zasebno kopiranje avtorsko zaščitenega materiala. Pred prenosom ali kopiranjem datoteke preverite zadevno nacionalno zakonodajo o uporabi takega gradiva.
  • Page 438: Orodja

    Orodja QuickMemo+ (hitra beležka) Funkcija QuickMemo+ omogoča ustvarjanje beležk in zajemanje posnetkov zaslona. Ustvarite posnetke zaslonov, rišite po njih in jih delite z družino ter prijatelji s funkcijo QuickMemo+. Izdelava beležke Na osnovnem zaslonu tapnite QuickMemo+ , nato , da ustvarite novo beležko. Besedila lahko urejate z neposrednim vpisovanjem besed ali izberite vrsto in barvo pisala, ki ga želite uporabiti in besedilo vpišite ročno. Opomnik dodate s pritiskom , da nastavite opomnik za dogodek. Beležki dodajte informacije o vremenu in lokaciji, če so na voljo omrežni podatki. Uporaba možnosti QuickMemo+ V opravilni vrstici QuickMemo+ na vrhu zaslona so na voljo naslednje možnosti. Z dotikom odprite beležko v QSlide. Omogoča razveljavljanje in uveljavljanje preteklih dejanj. Omogoča urejanje besedila, njegove barve in poravnave. Omogoča, da besedilo vpišete ročno. Izberite vrsto pisala, ki ga boste uporabili, debelino, prosojnost in barvo. Izbriše popravke, ki ste jih vnesli v beležnico.
  • Page 439 Shrani beležko v QuickMemo+. Pritisnite za dostop do več možnosti. Omogoča nastavitev opomnika za dogodek. Omogoča, da v beležko vstavite informacije o vremenu. Omogoča, da s pomočjo GPS-a dodate informacije o lokaciji. Zajem posnetka zaslona s QuickMemo Odprite funkcijo QuickMemo+, vrstico stanja povlecite navzdol in pritisnite A LI Pritisnite tipki za glasnost hkrati za eno sekundo. V orodni vrstivi izberite želeno menijsko možnost in ustvarite beležko. Če želite shraniti beležko, tapnite . Za izhod iz funkcije QuickMemo+ kadarkoli pritisnite tipko Nazaj OPOMBA: QuickMemo+ uporabite s konico prsta. Ne uporabite nohta.
  • Page 440: Quickremote

    QuickRemote QuickRemote spremeni vašo tablico v univerzalni daljinski upravljalnik za domači televizor ali diskov Blu-ray ali predvajalnik DVD-jev. QuickRemote spremeni vašo tablico v univerzalni daljinski upravljalnik za domači televizor ali diskov Blu-ray ali predvajalnik DVD-jev. OPOMBA: QuickRemote za nekatere naprave in v nekaterih območjih morda ne bo na voljo. Odprtje in konfiguracija QuickRemote Na osnovnem zaslonu tapnite Aplikacije > zavihek Aplikacije > QuickRemote Prav tako lahko iz plošče z obvestili izvedete prvo nastavitev za vaš QuickRemote. Statusno vrstico potegnite navzdol, tapnite ikono QuickRemote , nato tapnite DODAJ DALJINEC. Pritisnite da izberete vrsto sobe, in , da dodate napravo. Izberite vrsto in blagovno znamko naprave, nato pa za konfiguracijo sledite navodilom na zaslonu.
  • Page 441 OPOMBA: QuickRemote deluje na enak način kot običajni daljinski upravljalniki z infrardečimi signali v vaši regiji ali državi. Ko uporabljate funkcijo QuickRemote, pazite, da ne prekrijete infrardečega senzorja na vrhu tabličnega računalnika. Funkcija glede na model, proizvajalca ali storitveno podjetje morda ne bo delovala. Uporaba funkcije QuickRemote Odprite QuickRemote in izberite prostor, kjer boste konfigurirali daljinec. Želeni daljinec izberite s tapom na njegov tip/ime v vrstici QuickRemote vzdolž leve strani zaslona. Tapnite gumbe na prikazanem daljinskem upravljalniku. OPOMBA: ko dodajate daljinski upravljalnik televizorja, lahko QuickRemote z gumbom VNOS konfigurira ustrezen daljinski upravljalnik. Med konfiguriranjem gumba VNOS lahko spremenite vhodni vir televizorja. Če želite ponastaviti vhodni vir televizorja, večkrat tapnite gumb VNOS na daljinskem upravljalniku QuickRemote (odvisno od števila naprav, priklopljenih na televizor). Možnosti funkcije QuickRemote Za dostop do menija možnosti QuickRemote tapnite ikono Meni , da izberete želeno možnost. OPOMBA: Ko se v ozadju predvaja glasba, pritisnite katerikoli gumb daljinskega upravljalnika QuickRemote, da za sekundo izklopite zvok.
  • Page 442: Ura

    Nastavitev alarma Na osnovnem zaslonu tapnite Aplikacije > zavihek Aplikacije > Ura > Nastavite želeni čas alarma. Izbirate lahko med možnostmi Ponovi, Trajanje dremeža, Vibriranje pri oglašanju alarma, Ton alarma, Glasnost alarma, Auto App Starter, Zaklep sestavljanka in Beležka. Pritisnite Shrani. OPOMBA: če želite spremeniti nastavitve alarma na zaslonu s seznamom alarmov, pritisnite ikono Menu in izberite Nastavitve. Kalkulator Uporaba kalkulatorja Na osnovnem zaslonu tapnite Aplikacije > zavihek Aplikacije > Kalkulator Za vnos številk tapnite tipke s številkami. Za preproste izračune tapnite želeno funkcijo ( ali ), ki ji sledi...
  • Page 443: Koledar

    OPOMBA: • Za zapletenejše računanje pritisnite tipko Meni , izberite Znanstveni kalkulator, potem izberite želeno funkcijo. • Za ogled zgodovine računanja tapnitetipko Meni > Zgodovina računanja. Koledar V vašem koledarju so prikazani dogodki iz vsakega računa, ki ste jih dodali v tablični računalnik in konfigurirali s sinhronizacijo koledarjev. Dodajanje dogodka v koledar Na osnovnem zaslonu tapnite Aplikacije > zavihek Aplikacije > Koledar Tapnite meni v levem zgornjem kotu, če želite spremeniti pogled koledarja (dan, teden, mesec, leto, urnik). Tapnite datum, ki ga želite dodati dogodku in nato tapnite Pritisnite Ime dogodka in vnesite ime dogodka. Pritisnite polje Lokacija in vnesite lokacijo. Preverite datum in vnesite začetek in konec dogodka. Če želite dogodku dodati opombo, pritisnite polje Opis in vnesite podrobnosti. Če želite, da se alarm ponavlja, nastavite možnost PONAVLJANJE in po potrebi tudi možnost OPOMNIKI. Pritisnite Shrani, da dogodek shranite v koledar.
  • Page 444: Opravila

    OPOMBA: dotaknite se mesta na koledarju in ga pridržite, da hitro shranite koledarski dogodek za tisti dan. Preprosto vnesite ime in čas dogodka in tapnite Shrani. Lahko tapnete Podrobnosti in vpišete več informacij ali z dodatnimi podrobnostmi dogodek dopolnite kasneje. Sprememba pogleda koledarja Ne glede na to, kjer v koledarju ste, lahko vedno spremenite pogled koledarja. Preprosto tapnite v zgornjem levem kotu naslovne vrstice ali s prstom povlecite od leve strani zaslona proti desni, da se prikaže meni koledarskih pogledaov. Tapnite dan, teden, mesec, leto ali urnik. Opravila Aplikacijo Opravila lahko sinhronizirate s svojim računom MS Exchange. S tabličnim računalnikom ali MS Outlookom ali MS Office Outlook Web Accessom lahko ustvarite in upravljate s svojimi opravili. Na osnovnem zaslonu tapnite Aplikacije > Opravila Tapnite ikono opravila Dodaj (v zgornjem desnem kotu zaslona). Vpišite predmet, datum začetka, datum zaključka opravila, opis, ponovitev in opomnik, če je potrebno. Tapnite Shrani.
  • Page 445: Upravitelj Datotek

    Upravitelj datotek Upravitelj datotek vam omogoča upravljanje datotek v notranjem ali zunanjem pomnilniku. Upravitelj datotek omogoča preprost vpogled in upravljanje vaših datotek. Preprosto tapnite vrsto datoteke (vse datoteke, glasbene datoteke, datoteke s fotografijami, videoposnetki, dokumenti, datoteke v oblaku), tapnite ustrezno mapo, da poiščete svoje datoteke. Odpiranje upravitelja datotek • Na osnovnem zaslonu tapnite Aplikacije > zavihek Aplikacije > Upravitelj datotek Možnosti upravitelja datotek Odprite aplikacijo Upravitelj datotek > Vse datoteke > Notranji pomnilnik, da pridete do naslednjih možnosti (na vrhu zaslona): V oknu QSlide lahko odprete Upravitelja datotek. Omogoča iskanje vaših datotek ali informacij. Omogoča ustvarjanje nove mape. Omogoča premikanje datotek in map na drugo lokacijo. Omogoča kopiranje datotek in map na drugo lokacijo. Omogoča brisanje datotek in map. Omogoča dostop do več možnosti.
  • Page 446: Diktafon

    Diktafon Z diktafonom lahko snemate glasovne beležke ali druge zvočne datoteke. Snemanje zvoka ali glasu • Na osnovnem zaslonu tapnite Aplikacije > zavihek Aplikacije > Diktafon Pritisnite, da izberete, kam želite shraniti posnetek. Pritisnite, da začnete snemanje. Pritisnite za ogled Pritisnite, da končate seznama posnetkov. snemanje. OPOMBA: razpoložljiv čas snemanja se lahko razlikuje od dejanskega. Upravljanje z glasovnimi beležkami Iz zaslona seznama diktafona: • Tapnite ikono Skupna raba , da z razpoložljivimi možnostmi daste glasovno beležko v skupno rabo. • Tapnite ikono Izbriši , da izberete glasovno beležko(-e), ki jo želite izbrisati.
  • Page 447: Polaris Office 5

    • Pritisnite in pridržite glasovno beležko, da odprete priročno beležko in izberete Skupna raba, Izbriši, Preimenuj, Obreži ali Podrobnosti. POLARIS Office 5 POLARIS Office 5 je profesionalna rešitev za mobilne pisarne, ki uporabnikom kjer koli in kadar koli omogoča nemoten ogled različnih dokumentov zbirke Office, vključno z datotekami Worda, Excela in PowerPointa, na mobilnih napravah. Ustvarite nov dokument Na osnovnem zaslonu tapnite Aplikacije > zavihek Aplikacije > POLARIS Office 5 Na strani Registracija uporabnika vnesite svoj e-poštni naslov. OPOMBA: preskočite lahko, da prezrete informacije o registraciji. Tapnite , da odprete nov dokument. V spustnem meniju izberite vrsto dokumenta, nato izberite predlogo. Z orodji na vrhu zaslona in tipkovnico na zaslonu vnesite vsebino v dokument. Ko končate delo z dokumentom ga shranite, tako da tapnete (v zgornjem levem kotu zaslona), nato tapnete Shrani (ali Shrani kot, da vnesete novo ime dokumenta). Vnesite ime dokumenta in pritisnite Shrani. Pregledovanje in urejanje dokumenta v napravi Zdaj si lahko enostavno ogledate in uredite širok nabor vrst datotek, vključno z dokumenti zbirke Microsoft Office in datotek Adobe PDF, neposredno na svojih napravah.
  • Page 448: Google

    Odprite POLARIS Office 5 in poiščite dokument. Dotaknite se dokumenta, ki si ga želite ogledati ali urediti. Pri ogledu datotek s programom POLARIS Office 5 so predmeti in postavitev enaki kot v izvirniku. Za urejanje dokumenta tapnite Google+ Uporabite aplikacijo Google+, da ohranite stike z osebami v Googlovem družabnem omrežju. Na osnovnem zaslonu tapnite Aplikacije > zavihek Aplikacije > Google > Google+ OPOMBA: razpoložljivost aplikacije je odvisna od regije ali ponudnika storitev. LG SmartWorld LG SmartWorld nudi široko paleto razburljivih vsebin – pisave, teme, igre in aplikacije. Dostop do aplikacije LG SmartWorld iz tabličnega računalnika Tapnite > Aplikacije > zavihek Aplikacije > tapnite ikono za dostop do aplikacije LG SmartWorld. Tapnite možnost Prijava in vnesite uporabniško ime in geslo za LG SmartWorld. Če se še niste prijavili, tapnite Registriraj, da prejmete članstvo v storitvi LG SmartWorld.
  • Page 449 Prenesite želeno vsebino. • LG SmartWorld morda ni na voljo pri vseh operaterjih in v vseh državah. OPOMBA: kaj storiti, če ni ikone Z brskalnikom mobilnega telefona obiščite spletno mesto aplikacije LG SmartWorld (www.lgworld.com) in izberite državo. Prenesite aplikacijo LG SmartWorld. Zaženite in prenesite preneseno datoteko. Tapnite ikono za dostop do aplikacije LG SmartWorld. Samo v aplikaciji LG SmartWorld Pametni telefon opremite v svojem slogu s temami osnovnega zaslona in tipkovnice ter pisavami, ki jo nudi LG SmartWorld. (Ta storitev je na voljo samo za določene naprave. Razpoložljivost preverite na spletnem mestu aplikacije LG SmartWorld.) Uživajte v posebni storitvi aplikacije LG SmartWorld tako, da izkoristite promocije, ki so vedno na voljo.
  • Page 450: Splet

    Splet Internet S to aplikacijo lahko brskate po internetu. Brskalnik vam kar prek tablice omogoča hiter dostop do barvitega sveta iger, glasbe, novic, športa, zabave in še česa – zadovolji vse okuse kjerkoli. Na osnovnem zaslonu tapnite Aplikacije > zavihek Aplikacije > Internet Tapnite za zagon QSlide. Tapnite za premik na prejšnjo stran. Tapnite za premik na naslednjo stran – tisto, ki ste jo obiskali po trenutni. Ta korak je nasproten pritisku tipke Nazaj , kjer se pomaknete na prejšnjo stran. Tapnite, da osvežite ali prekinete trenutno stran. Tapnite za premik na osnovno stran. Tapnite za dostop do svojih zaznamkov. Pritisnite za dostop do več možnosti. Odpiranje strani • Za odpiranje nove strani tapnite na vrhu brskalnika. • Če se želite pomakniti na drugo spletno stran, za ogled strani tapnite zavihek na vrhu zaslona.
  • Page 451: Zaznamki

    Zaznamki Če želite odpreti zaznamovano spletno stran, tapnite v orodni vrstici brskalnika in izberite eno stran. Zgodovina Tapnite v orodni vrstici brskalnika in izberite zavihek Zgodovina, da odprete spletno stran s seznama nedavno obiskanih spletnih strani. Če želite počistiti zgodovino, tapnite , da počistite vso zgodovino. Uporaba bralnega načina Vaš tablični računalnik za lažje branje prikaže poenostavljeno spletno stran. Če si želite preprosto in brez motenj ogledati novice ali objave na blogih ter druge strani s članki – z bralnim načinom, lahko berete stran na kateri ni odvečnih elementov. V orodni vrstici brskalnika tapnite Uporaba funkcije QSlide S to funkcijo lahko dostopate do interneta, ne da bi zaprli trenutno aplikacijo. Med ogledovanjem vsebine v brskalniku tapnite . Tako lahko s tablico brskate po drugi vsebini. Če si želite brskalnik ogledati na celotnem zaslonu, tapnite Prenos datotek Z aplikacijo Prenosi si lahko ogledate, katere datoteke ste prenesli. Na osnovnem zaslonu tapnite Aplikacije > zavihek Aplikacije > Prenosi Chrome Z brskalnikom Chrome lahko iščete informacije in brskate po spletnih straneh.
  • Page 452: Ogled Spletnih Strani

    Na osnovnem zaslonu tapnite Aplikacije > zavihek Aplikacije > Chrome OPOMBA: razpoložljivost aplikacije je odvisna od regije ali ponudnika storitev. Ogled spletnih strani Tapnite polje z naslovom (na vrhu zaslona), vpišite spletni naslov ali pogoje iskanja in na tipkovnici tapnite Odpiranje strani • Če želite na novo stran, na vrhu brskalnika tapnite • Če se želite pomakniti na drugo spletno stran, za izbiro strani tapnite zavihek na vrhu zaslona. Glasovno iskanje po spletu Tapnite polje z naslovom in nato še , izgovorite ključno besedo in izberite eno od ključnih besed, ki se prikažejo. OPOMBA: razpoložljivost funkcije je odvisna od regije ali ponudnika storitev. Sinhroniziranje z drugimi napravami Odprte zavihke in zaznamke lahko sinhronizirate z brskalnikom Chrome v drugi napravi, ko ste vpisani z istim računom Google. Če si želite ogledati odprte zavihke v drugih napravah, tapnite tipko Meni > Nedavni zavihki. V vseh napravah morate biti vpisani v isti Googlov račun. Izberite spletno stran, ki jo želite odpreti.
  • Page 453: Dodajanje In Ogled Zaznamkov

    Dodajanje in ogled zaznamkov Za dodajanje zaznamkov v vrstici URL tapnite Če želite odpreti zaznamovano spletno stran, tapnite tipko Meni > Zaznamki in izberite želeno stran. Meni Chrome Options Za dostop do teh možnosti tapnite tipko Meni • Nov zavihek – tapnite, da odprete zavihek z novo spletno stranjo. • Nov skrit zavihek – tapnite, da odprete nov skrit zavihek. • Zaznamki – prikaže spletne strani, ki jih imate med zaznamki. • Nedavni zavihki – prikaže vaše odprte spletne strani na ostalih napravah. • Zgodovina – prikaže podatke vašega brskanja (spletne strani, ki ste jih obiskali). • Skupna raba ... – omogoča skupno rabo spletne strani. • Tiskaj ... – tapnite, da natisnete spletno stran. Izberite, da samodejno poiščete tiskalnik v vašem omrežju ali ga vnesete ročno. • Poišči stran – vam omogoča, da na trenutni spletni strani poiščete besedilo. • Dodaj na osnovni strani – omogoča, da na osnovni zaslon dodate bližnjico trenutne strani. • Zahteva za namizno spletno mesto – potrdite, da omogočite dostop do spletne strani na namizju, če v tabličnem računalniku brskate po spletnih straneh.
  • Page 454: Nastavitve

    Nastavitve Dostop do menija z nastavitvami Na osnovnem zaslonu tapnite Aplikacije > zavihek Aplikacije > Nastavitve ALI N a osnovnem zaslonu pritisnite in pridržite tipko Nedavne aplikacije > Sistemske nastavitve. Izberite kategorijo nastavitev in nastavite želeno nastavitev. BREZŽIČNA OMREŽJA Wi-Fi Wi-Fi – vklopi Wi-Fi za vzpostavitev povezave z razpoložljivimi omrežji Wi-Fi. Prikaže se seznam razpoložljivih omrežij Wi-Fi. Tapnite na enega, da se z njim povežete. OPOMBA: tapnite Išči, da pregledate razpoložljiva omrežja Wi-Fi. Za dostop do teh možnosti v meniju Wi-Fi tapnite ikono Meni Dodaj Wi-Fi – omogoča vam, da ročno vnesete novo omrežje Wi-Fi. Shranjen Wi-Fi – shranjeno omrežje Wi-Fi lahko pozabite. Napredno Wi-Fi – omogoča dostop do naprednih nastavitev Wi-Fi. Interaktivna navodila – prikažejo uporabna navodila za funkcijo Wi-Fi.
  • Page 455 NASVET! Pridobivanje naslova MAC Za vzpostavitev povezave v nekaterih brezžičnih omrežjih s filtri MAC boste morda morali v usmerjevalnik vnesti naslov MAC tablice. Naslov MAC najdete v tem uporabniškem vmesniku: na osnovnem zaslonu tapnite Aplikacije > Nastavitve > Wi-Fi > ikona Meni > Napredno Wi-Fi > Naslov MAC. Bluetooth Funkcijo Bluetooth lahko vklopite ali izklopite. Vklop Bluetootha vam omogoča, da združite in povežete napravo z drugimi napravami Bluetooth. Tapnite tipko Meni v meniju Bluetooth, da pridete do naslednjih možnosti. Spremeni ime tabličnega računalnika – spremenite ime svojega tabličnega računalnika za lažje prepoznavanje v primeru združevanja in povezovanja. Vpišite novo ime tabličnega računalnika, nato tapnite Shrani. Časovna omejitev za vidnost – nastavite čas, v katerem lahko druge naprave Bluetooth vidijo vaš tablični računalnik za združevanje in povezovanje. Izberite med 2 minutama, 5 minutami, 1 uro in Nikoli naj ne poteče. Prikaz prejetih datotek – prikaže seznam datotek, prejetih preko Bluetootha. Interaktivna navodila – prikaže uporabna navodila za funkcijo Bluetooth. Uporaba podatkov Prikaže uporabo podatkov v izbranem časovnem obdobju. Tapnite aplikacijo na seznamu, da si ogledate porabo podatkov izbrane aplikacije.
  • Page 456: Naprava (Mtp)

    Miracast – omogoča, da zaslon in zvok tabličnega računalnika brezžično zrcalite na brezžični ključ Miracast ali televizor. SmartShare Beam – omogoča prejemanje večpredstavnostne vsebine iz telefonov in tabličnih računalnikov LG prek programa SmartShare Beam. LG PC Suite – omogoča povezavo Wi-Fi za prenos glasbe in fotografij med računalnikom in tabličnim računalnikom. Medijski strežnik – omogoča, da z bližnimi napravami prek DLNA delite svojo medijsko vsebino. VPN – prikaže seznam navideznih zasebnih omrežij (VPN), ki ste jih že konfigurirali. Omogoča dodajanje različnih vrst VPN-jev. OPOMBA: pred uporabo pomnilnika poverilnic morate nastaviti PIN, geslo ali vzorec za zaklep zaslona. NAPRAVA Zvok Zvočni profil – omogoča nastavitev možnosti zvočnega profila Zvok, Samo vibriranje ali Ne moti. Glasnost – upravljate lahko glasnost Zvok obvestil, Odziva dotika in sistema in Glasbe, videa, iger in druge predstavnosti. Moč vibriranja – omogoča nastavitev moči vibriranja za klice, obvestila in odziv na dotik. Zvok obvestila – nastavitev privzete melodije obvestila. Ne moti – Omogoča nastavitev časa, v katerem ne želite, da vas zmotijo obvestila. Z nastavitvijo Samo prednostno omogočite, da vas določene funkcije smejo zmotiti.
  • Page 457 Zakleni zaslon – Omogoča vam, da izberete, ali želite, da se na zaklenjenem zaslonu obvestila prikažejo ali skrijejo. Aplikacije – Omogoča vam, da aplikacijam preprečite prikazovanje obvestil oziroma da nastavite tako, da aplikacije prikažejo prednostna obvestila, kadar je funkcija Ne moti nastavljena na Samo prednostno. Zvok dotika – omogoča nastavitev predvajanja zvokov, ko pritiskate gumbe, ikone in druge zaslonske elemente, ki se odzivajo na dotik. Zvoki zaklepa zaslona – omogoča nastavitev predvajanja zvoka, ko odklenete ali zaklenete tablico. Vibriranje ob dotiku – omogoča vam, da nastavite odziv vibriranja, ko se dotaknete zaslona. Zaslon Osnovni zaslon Tema – nastavite temo zaslona vaše naprave. Ozadje – nastavite ozadje za osnovni zaslon. Učinek zaslona – nastavite učinek, kjer povlečete in tako spremenite zaslon. Omogoči krožno pomikanje osnovnih zaslonov – označite možnost in nastavite krožno pomikanje osnovnih zaslonov, ker se vam ni treba pomikati nazaj, ko dosežete en konec. Varnostno kopiranje in obnovitev doma – omogoča varnostno kopiranje in obnovitev aplikacij, pripomočkov ter tem. Pomoč – prikaže uporabne informacije o osnovnem zaslonu. Zaklep zaslona Izberite zaslon zaklepa – nastavi vrsto zaklepa zaslona za zaščito tabličnega računalnika.
  • Page 458 OPOMBA: Zaklepanje zaslona morda ne bo na voljo po nadgradnji na operacijski sistem Lollipop – razen možnosti Vzorec, PIN in Geslo. V tem primeru se pomaknite na Aplikacije > Nastavitve > Varnost > Počisti poverilnice, da izbrišete varnostna potrdila, in nato nastavite zaklepanje zaslona. Pri brisanju poverilnic bodite previdni, ker bodo izbrisana vsa varnostna potrdila, ki ste jih namestili. Smart Lock – s to nastavitvijo tablični računalnik ostane odklenjen, kadar je z njim povezana zaupanja vredna naprava Bluetooth, kadar je računalnik na znani lokaciji (na primer pri vas doma ali na delovnem mestu) ali kadar prepozna vaš obraz. Učinek zaslona – nastavi možnosti učinkov vlečenja po zaslonu. Ozadje – nastavi ozadje za zaklenjeni zaslon. Izberite ga v možnosti Galerija ali Galerija ozadij. Bližnjice – omogoča spreminjanje bližnjic na zaslonu Zaklepanje vlečenja. Podatki o lastniku – omogoča vnos kontaktnih informacij, ki so prikazane na zaklenjenem zaslonu v primeru izgube tabličnega računalnika. Časovnik zaklepa – nastavi čas pred trenutkom, ko se zaslon samodejno zaklene, potem ko je prišlo do časovne omejitve zaslona. Tipka za vklop se takoj zaklene – potrdite, da se takoj po pritisku tipke za vklop/izklop/zaklepanje zaklene zaslon. Ta nastavitev preglasi nastavitev Odštevalnik za varnostni zaklep. Svetlost – prilagodite svetlost zaslona. Pritisnite Nočna svetlost, da med 24.00 in 6.00 samodejno nastavite svetlost na 0 %. Čas zaslona iztekel – nastavite zapoznitev, preden se zaslon samodejno izklopi.
  • Page 459 Učinek Screen-off – nastavite učinek izklopljenega zaslona, ki se zaslon izklopi. Samodejno obrni zaslon – za nastavljanje samodejnega preklopa usmerjenosti ob obračanju tabličnega računalnika. Sanjarjenje – tapnite stikalo Sanjarjenje za preklop med Vklopom in Izklopom. Možnost Vklop omogoča prikaz nastavljenega ohranjevalnika zaslona, ko je tablični računalnik v načinu mirovanja, ko je na priključni postaji in/ali ko se polni. Izberete lahko možnost Ura in Googlove fotografije. OPOMBA: ko je vklopljen ohranjevalnik zaslona, se lahko polnjenje upočasni. Vrsta pisave – spreminjanje vrste prikazne pisave. Velikost pisave – spreminjanje velikosti prikazne pisave. Pametni zaslon – zaslon bo ostal vklopljen, ko bo naprava zaznala, da vaše oči zrejo vanj. Gumbi na začetnem zaslonu – omogočajo nastavitev, kateri gumbi na začetnem zaslonu se prikažejo in njihov položaj v vrstici. Prav tako lahko izberete barvo in ozadje. Umerjanje senzorja gibanja – omogoča vam, da izboljšate točnost nagiba in hitrost senzorja. Spomin NOTRANJI POMNILNIK – prikaže skupni prostor v pomnilniku tablice in vrste podatkov, ki uporabljajo prostor. SD KARTICA – prikaže skupni prostor pomnilnika na kartici microSD. Vpni/odpni kartico SD – vpne in odpne kartico microSD iz tablice, da lahko dostopate do podatkov na njej, jo formatirate ali varno odstranite.
  • Page 460 Izbriši kartico SD – trajno izbriše vse na kartici microSD in jo pripravi za uporabo v tablici. Baterija INFORMACIJE O BATERIJI – oglejte si porabo baterije pri posameznih dejavnostih naprave. Napolnjenost baterije je prikazana v odstotkih. Prikazan je tudi preostali čas uporabe. Poraba baterije – prikaz porabe baterije. Odstotek baterije v vrstici stanja – prikaže odstotek baterije v vrstici stanja. Varčevanje baterije – upravljanje elementov za varčevanje z energijo baterije. za vklop te funkcije. Tapnite Varčevanje baterije za Tapnite stikalo naslednje možnosti. • VKLOP VARČEVANJA Z ENERGIJO: nastavite stopnjo baterije, pri kateri želite, da se vklopi varčevanje z energijo. Izbirate lahko med možnostmi Takoj, 5% baterije in 15% baterije. Pomoč – pritisnite za prikaz namigov za varčevanje z energij. Pametno čiščenje S to funkcijo lahko upravljate neuporabljene aplikacije, shranjene datoteke ali začasne internetne datoteke. Aplikacije Prikaže seznam aplikacij, ki na primer trenutno delujejo ali se prenašajo. S prstom povlecite levo in desno, da si ogledate enega od treh zavihkov na vrhu zaslona s podrobnimi informacijami o PRENESENIH, NA KARTICI SD, V IZVAJANJU in VSEH aplikacijah.
  • Page 461: Zasebno

    Dvojno okno Razdelen pogled – omogoča, da naprava samodejno odpre dvojno okno, ko tapnete povezavo v celozaslonskem načinu ali tapnete priponko e-poštnega sporočila (samo slike). Pomoč – prikaže uporabne informacije o uporabi funkcije dvojnega okna. ZASEBNO Oblak Tapnite Dodaj račun, da v oblaku dodate račun. Iz tega menija dostopate do svojih računov v oblaku. Tapnite tipko Meni, da naložite datoteke. Uporabnik Ta meni prikaže trenutne uporabnike, ki ste jih ustvarili. Dodaj uporabnike, ko je tablica zaklenjena – dodajanje novega uporabnika, ko je tablični računalnik zaklenjen. Dodaj uporabnika – omogoča dodajanje novega računa za tablico in uporabo funkcije več uporabnikov. Lokacija Način • Velika natančnost – za določitev lokacije uporabite GPS in Wi-Fi. • Varčevanje z baterijo – za določitev lokacije uporabite Wi-Fi. • Samo senzorji naprave – za določitev lokacije uporabite GPS. ZAHTEVE ZA NEDAVNE LOKACIJE – prikaže aplikacije, ki so nedavno zahtevale informacije o vaši lokaciji.
  • Page 462 Preprečevanje migetanja – za prilagajanje frekvence, tako da zaslon predogleda fotoaparata ne migeta. Poročilo o Googlovi lokaciji – omogoča vam ogled nastavitev vaše Googlove lokacije. Varnost Šifriraj tablico – omogoča šifriranje podatkov v tablici za zaščito. Ob vsakem vklopu tablice boste morali vnesti PIN ali geslo za dešifriranje tablice. Šifriraj pomnilnik kartice SD – aomogoča šifriranje podatkov v MicroSD za zaščito. Vidno vnašanje gesla – med vnašanjem prikaže zadnji znak skritega gesla. Administratorji tablice – za ogled ali deaktiviranje administratorjev tablice. Neznani viri – dovolite namestitev aplikacij, ki niso prenesene iz trgovine Play Store. Dostop do obvestil – za prejemanje obvestil sistema in nameščenih aplikacij. Vrsta pomnilnika – prikaz vrste pomnilnika za certifikate. Poverilnice, ki jim zaupam – prikaže certifikate CA, ki jim zaupam. Namesti iz pomnilnika – izberite za namestitev šifriranih certifikatov. Počisti poverilnice – odstrani vse poverilnice. Trust agents – prikažite ali deaktivirajte posrednike zaupanja.
  • Page 463 Računi in sinhronizacija Aplikacijam omogoča sinhronizacijo podatkov v ozadju ne glede na to, ali aplikacije aktivno uporabljate ali ne. Z deaktivacijo nastavitve Samodejna sinhronizacija podatkov lahko varčujete z baterijo in zmanjšate (ampak ne popolnoma) uporabo podatkov. Jezik in vnos V nastavitvah Jezik in vnos izberite jezik za besedilo v tablici in za konfiguracijo tipkovnice na zaslonu, vključno z besedami, ki ste jih dodali v slovar. Varnostna kopija in ponastavitev Varnostno kopiraj moje podatke – nastavite, če želite nastavitve in podatke aplikacij varnostno kopirati v Googlov strežnik. Varnostni račun – nastavite račun, v katerega želite varnostno kopirati podatke. Samodejno povrni – nastavite, če želite ob ponovni namestitvi aplikacij v napravo obnoviti njihove nastavitev in podatke. Varnostno kopiranje LG – varnostno kopira vse podatke v napravi in jih obnovi v primeru izgube ali zamenjave podatkov. Za več informacij glejte stran 103. Ponastavitev na tovarniške podatke – ponastavi nastavitve na tovarniško privzete vrednosti in izbriše vse podatke. Če boste ttablico ponastavili na ta način, boste pozvani, da ponovno vnesete iste informacije kot pri prvem zagonu sistema Android.
  • Page 464: Sistem

    SISTEM Bližnjična tipka Za vklop in izklop bližnjičnih tipk. Datum in čas V nastavitvah datuma in časa določite, v kakšni obliki bo prikazan datum. V teh nastavitvah lahko nastavite tudi svoj čas in časovni pas, namesto da trenutni čas dobite iz mobilnega omrežja. Dostopnost Nastavitve dostopnosti uporabite za konfiguriranje vtičnikov za dostop, ki so nameščeni v tablici. OPOMBA: Da bi nastavitve lahko izbirali, so potrebni dodatni vtičniki. TalkBack – omogoča vam nastavitev funkcije TalkBack, ki slabovidnim osebam pomaga z zagotavljanjem govornih povratnih informacij. Tapnite stikalo TalkBack v zgornjem desnem kotu zaslona, da vklopite funkcijo. Tapnite Nastavitve na dnu zaslona, da prilagodite nastavitve funkcije TalkBack. Velikost črk – potrdite, da povečate velikost besedila. Obrni barve – otrdite, da obrnete barve zaslona in vsebine. Prilagoditev barve – nastavi ogled zaslona z večjim barvnim kontrastom. Tapnite stikalo , da ga vklopite. Nato tapnite zaslon in povlecite čez zaslon v kateri koli smeri, dokler ne dobite želenega barvnega kontrasta. Dotik za povečavo – s trikratnim tapom na zaslon omogoča povečevanje in pomanjševanje. Odtenki zaslona – zatemni osvetlitev ozadja zaslona.
  • Page 465 Bližnjica dostopnosti – to funkcijo aktivirajte, da lahko v dveh korakih hitro omogočite funkcije dostopnosti. Prebiranje besedila – nastavite želen mehanizem in hitrost branja. Prav tako predvaja kratek primer sinteze govora. Prikazana je tudi nastavitev privzetega jezika. Vrsta zvoka – nastavi vrsto zvoka. Izberite Mono ali Stereo. Uravnava zvoka – nastavi zvočno pot. Za nastavitev premaknite drsnik na drsni vrstici. Izklop vseh zvokov – izklopi vse zvoke. Podnapisi – omogoča prilagoditev podnapisov za osebe z okvarami sluha. Tapnite stikalo za vklop te funkcije. Nastavite želen jezik, velikost besedila in slog podnapisov. Čas odziva na dotik – nastavi čas dotika in odziva na dotik. Izbirate lahko med kratkim, srednjim in dolgim. Touch assistant – prikaz plošče na dotik s preprostim dostopom do pogostih dejanj. Čas zaslona iztekel – nastavi čas preden se zason izklopi. Območja nadzora z dotikom – za vklop te funkcije tapnite stikalo Omogoča, da na določenih območjih zaslona omejite nadzor z dotikom. Hkrati pritisnite tipko za znižanje glasnosti in tipko Domov , da funkcijo aktivirate in deaktivirate.
  • Page 466 Vnos z enim dotikom – omogoča vnos črk/znakov s posamičnimi dotiki tipkovnice LG. Preklop dostopa – omogoča, da komunicirate z napravo prek enega ali več stikal, ki delujejo kot tipke na tipkovnici. Ta meni lahko pomaga uporabnikom z omejenim gibanjem, ki jim preprečuje neposredno komuniciranje z napravo. Quick Cover Aktivirajte ta meni za samodejen vklop ali izklop hitre naslovnice, če uporabljate Quick Cover. Tiskanje Omogoča vam tiskanje vsebine določenih zaslonov (na primer spletnih strani v Chromu) na tiskalniku, povezanim z istim omrežjem Wi-Fi, kot je vaša naprava Android. O tablici V tem meniju lahko upravljate posodobitve programske opreme in si ogledate različne informacije, povezane z vašim tabličnim računalnikom. Ime tablice – omogoča nastavitev imena tablice. Središče za posodobitve – omogoča preverjanje posodobitev za aplikacije in programsko opremo. Baterija – omogoča vam, da si ogledate stanje baterije, raven baterije in informacije o porabi baterije. Informacije o strojni opremi – omogoča vam, da si ogledate številko modela, naslov IP, čas delovanja, CSN, naslov Wi-Fi MAC in naslov Bluetooth. Informacije o programski opremi – omogoča vam, da si ogledate različico operacijskega sistema Android, različico jedra, številko priprave in različico...
  • Page 467: Varnostno Kopiranje Lg

    Varnostno kopiranje LG O varnostnem kopiranju in obnavljanju podatkov naprave Priporočamo, da redno ustvarjate in shranjujete varnostno datoteko v notranji pomnilnik, še posebej pred posodabljanjem programske opreme. Če imate v pomnilniku vedno shranjeno aktualno varnostno datoteko, boste lahko obnovili podatke naprave, če jo izgubite, vam jo ukradejo ali pa se pokvari iz nepredvidenega razloga. Aplikacija LG Varnostno kopiraj deluje med pametnimi telefoni in tabličnimi računalniki LG, drugo programsko opremo in operacijskimi sistemi. To pomeni, da lahko ob nakupu novega pametnega telefona in tablice LG podatke s starega varnostno kopirate v novega. Če je aplikacija za varnostno kopiranje LG že naložena v pametnem telefonu in tablici, lahko varnostno kopirate in obnovite večino podatkov, vključno s prenesenimi in že nameščenimi aplikacijami, zaznamki, koledarskimi vnosi, stiki, nastavitvami osnovnega zaslona in sistemskimi nastavitvami. Lahko pa tudi: • Izvedete ročno varnostno kopiranje podatkov za vaš tablični računalnik. • Obnovite podatke naprave. Opozorilo! Za zaščito pred nepričakovanim izpadom električnega napajanja med postopki varnostnega kopiranja in obnavljanja zaradi prazne baterije jo pred postopkom vedno popolnoma napolnite.
  • Page 468: Varnostno Kopiranje Podatkov Tablice

    Na zaslonu Mesto varnostne kopije pritisnite Notranji pomnilnik ali SD kartica, nato tapnite Naprej. Potrdite polje ob podatkih, ki jih želite varnostno kopirati, in izberite Naprej. Preberite informacije na zaslonu in tapnite Začetek. Ko se vse izbrane datoteke varnostno kopirajo, se bo prikazalo sporočilo Varnostno kopiranje je končano. Obnovitev podatkov tabličnega računalnika OPOMBA: pred obnovitvijo datoteke varnostne kopije se izbrišejo vse datoteke, shranjene v tablici. Poskrbite, da boste varnostne kopije shranili na drugi lokaciji. Na osnovnem zaslonu tapnite Aplikacije > Nastavitve > Varnostna kopija in ponastavite > LG varnostno kopiranje > Obnovitev in upravljanje datotek. Na zaslonu Povrni izberite datoteko z varnostno kopijo s podatki, ki jih želite obnoviti. Potrdite polje ob elementu, ki ga želite obnoviti, in izberite Naprej, da ga obnovite v tablico. OPOMBA: zapomnite si, da bo vsebina varnostne kopije prepisala podatke v tablici. Če je datoteka z varnostno kopijo šifrirana, vnesite geslo, ki ste ga nastavili ob šifriranju.
  • Page 469 Ko se vse izbrane datoteke povrnejo, se bo tablica samodejno zagnala znova. OPOMBA: če želite datoteke z varnostnimi kopijami še dodatno zaščititi, jih lahko šifrirate z možnostjo Zakleni varnostne kopije. Na osnovnem zaslonu varnostnega kopiranja LG pritisnite tipko Meni > Nastavi geslo in vpišite geslo ter pomoč za primer, če geslo pozabite. Ko nastavite geslo, ga boste morali vnesti ob vsakem varnostnem kopiranju ali obnovitvi.
  • Page 470: Posodobitev Programske Opreme Tabličnega Računalnika

    Posodobitev programske opreme tabličnega računalnika Posodobitev programske opreme tabličnega računalnika Ta funkcija omogoča priročno posodobitev vdelane programske opreme tablice na najnovejšo različico prek interneta, zato vam ni treba obiskati servisnega centra. Za več informacij o uporabi te funkcije obiščite: http://www.lg.com Ker morate nenehno spremljati posodobitev vdelane programske opreme tabličnega računalnika, pred nadaljevanjem upoštevajte vsa navodila in opombe, ki se izpišejo pri vsakem koraku. Če med nadgradnjo odstranite kabel USB ali baterijo, lahko resno poškodujete tablico. Brezžična posodobitev programske opreme tabličnega računalnika LG Ta funkcija omogoča priročno brezžično posodobitev vdelane programske opreme tablice na novejšo različico, ne da bi morali priključiti USB-kabel. Ta funkcija je na voljo samo, če LG izda novejšo različico vdelane programske opreme za vašo napravo. Najprej lahko preverite različico programske opreme v tablici: > O tablici > na osnovnem zaslonu tapnite Aplikacije > Nastavitve Informacije o programski opremi. Če želite posodobiti programsko opremo tabličnega računalnika, na > O tablici >...
  • Page 471 OPOMBA: LG si pridržuje pravico, da po svoji presoji izda posodobitve vdelane programske opreme samo za izbrane modele in ne jamči, da bo novejša različica na voljo za vse modele tabličnih računalnikov. OPOMBA: med posodobitvijo programske opreme tablice lahko izgubite osebne podatke, vključno z informacijami o Googlovem in drugih računih, sistemu/aplikacijah in nastavitvah, prenesene aplikacije in licence DRM. Družba LG zato priporoča, da pred posodobitvijo programske opreme izdelate varnostne kopije osebnih podatkov. LG ne prevzema odgovornosti za izgubo osebnih podatkov.
  • Page 472: Dodatna Oprema

    Dodatna oprema Za tablico je na voljo ta dodatna oprema. (Spodaj prikazana oprema je lahko izbirna.) Potovalni adapter Kabel USB Vodnik za hiter začetek uporabe OPOMBA: • Vedno uporabljajte originalno dodatno opremo LG. V nasprotnem primeru lahko pride do razveljavitve garancije. • Dodatna oprema se lahko razlikuje glede na regijo.
  • Page 473: Odpravljanje Težav

    Sporočilo Možni vzroki Možni ukrepi Aplikacij Ponudnik storitev je Obrnite se na ponudnika ni mogoče ne podpira ali pa je storitev. nastaviti potrebna registracija. Baterija ni napolnjena. Napolnite baterijo. Zunanja temperatura je Tablica naj se polni pri previsoka ali prenizka. običajni temperaturi. Preverite polnilnik in njegovo Težava s kontakti. povezavo s tablico. Napaka pri polnjenju Vstavite polnilnik v drugo Ni napetosti. vtičnico. Polnilnik je okvarjen. Zamenjajte polnilnik. Uporabljajte samo originalno Napačen polnilnik dodatno opremo LG. Prejemanje/ pošiljanje Iz tablice izbrišite nekaj Pomnilnik je poln fotografij ni fotografij. mogoče...
  • Page 474 Sporočilo Možni vzroki Možni ukrepi Datotek ni Nepodprta oblika Oglejte si, katere oblike zapisa mogoče zapisa datoteke. so podprte. odpreti V nastavitvah menija zvoka preverite, ali je morda Ni zvoka Način vibriranja vklopljen načina vibriranja ali tihi način.
  • Page 475 ENGLISH User Guide • Screen displays and illustrations may differ from those you see on actual device. • Some of the contents of this guide may not apply to your device, depending on the software and your service provider. All information in this document is subject to change without notice. • This device is not suitable for people who have a visual impairment due to the touch screen keyboard. • Copyright ©2015 LG Electronics, Inc. All rights reserved. LG and the LG logo are registered trademarks of LG Group and its related entities. All other trademarks are the property of their respective owners. • Google™, Google Maps™, Gmail™, YouTube™, Hangouts™ and Google Play™ are trademarks of Google, Inc.
  • Page 476 Table of contents About this user guide ......5 Pinch-to-Zoom ...........31 Rotate the screen ........31 About this user guide ......5 Home screen .........31 Trademarks ..........5 Customizing the Home screen ..33 DivX HD ..........6 Opening, switching, and stopping Guidelines for safe and efficient use 7 apps ............33 Using Dual window ......34...
  • Page 477 Google account setup .......46 Contacts ..........56 Searching for a contact ......56 Connecting to Networks and Adding a new contact ......56 Devices ..........47 Favorite Contacts .........56 Wi-Fi .............47 Creating a group ........57 Connecting to Wi-Fi networks .....47 Email ...........58 Turning Wi-Fi on and connecting to a Wi-Fi network ..........47 Managing an email account ....58 Bluetooth ..........48...
  • Page 478 POLARIS Office 5 ......79 Google+..........80 Tablet software update ....102 LG SmartWorld ........80 Tablet software update ..... 102 The Web ..........82 LG tablet software update via Over-the-Air (OTA) ......102 Internet..........82 Opening a page ........82 Accessories ........104 Bookmarks ..........83 Troubleshooting .......105...
  • Page 479: About This User Guide

    About this user guide About this user guide • Before using your device, please carefully read this manual. This will ensure that you use your device safely and correctly. • Some of the images and screenshots provided in this guide may appear differently on your tablet. • Your content may differ from the final product, or from software supplied by service providers or carriers, This content may be subject to change without prior notice. For the latest version of this manual, please visit the LG website at www.lg.com. • Your device's applications and their functions may vary by country, region, or hardware specifications. LG cannot be held liable for any performance issues resulting from the use of applications developed by providers other than LG. • LG cannot be held liable for performance or incompatibility issues resulting from edited registry settings being edited or operating system software being modified. Any attempt to customize your operating system may cause the device or its applications to not work as they should. • Software, audio, wallpaper, images, and other media supplied with your device are licensed for limited use. If you extract and use these materials for commercial or other purposes is, you may be infringing copyright laws. As a user, you are fully are entirely responsible for the illegal use of media. • Additional charges may be applied for data services, such as messaging, uploading and downloading, auto-syncing, or using location services. To avoid additional charges, select a data plan to is suitable for your needs. Contact your service provider to obtain additional details. Trademarks • LG and the LG logo are registered trademarks of LG Electronics.
  • Page 480: Divx Hd

    DivX Certified® to play DivX® video up to HD 720p, including premium content. DivX®, DivX Certified® and associated logos are trademarks of Rovi Corporation or its subsidiaries and are used under license. OPEN SOURCE SOFTWARE NOTICE INFORMATION To obtain the source code under GPL, LGPL, MPL, and other open source licenses, that is contained in this product, please visit http://opensource.lge.com. In addition to the source code, all referred license terms, warranty disclaimers and copyright notices are available for download. LG Electronics will also provide open source code to you on CD-ROM for a charge covering the cost of performing such distribution (such as the cost of media, shipping, and handling) upon email request to opensource@lge.com. This offer is valid for three (3) years from the date on which you purchased the product.
  • Page 481: Guidelines For Safe And Efficient Use

    Guidelines for safe and efficient use Please read these simple guidelines. Not following these guidelines may be dangerous or illegal. Should a fault occur, a software tool is built into your device that will gather a fault log. This tool gathers only data specific to the fault, such as signal strength and applications loaded. The log is used only to help determine the cause of the fault. These logs are encrypted and can only be accessed by an authorized LG Repair centre should you need to return your device for repair. Exposure to radio frequency energy Radio wave exposure and Specific Absorption Rate (SAR) information. This tablet device model LG- V480 has been designed to comply with applicable safety requirements for exposure to radio waves. These requirements are based on scientific guidelines that include safety margins designed to assure the safety of all persons, regardless of age and health. • The radio wave exposure guidelines employ a unit of measurement known as the Specific Absorption Rate (SAR). Tests for SAR are conducted using standardised methods with the device transmitting at its highest certified power level in all used frequency bands. • While there may be differences between the SAR levels of various LG device models, they are all designed to meet the relevant guidelines for exposure to radio waves. • The SAR limit recommended by the International Commission on Non- Ionizing Radiation Protection (ICNIRP) is 2 W/kg averaged over 10 g of tissue.
  • Page 482: Product Care And Maintenance

    • The highest SAR value for this device when worn on the body, as described in this user guide, is 0.497 W/kg. • This device meets RF exposure guidelines when used either in the normal use position against the ear or when positioned at least 0.00 cm away from the body. When a carry case, belt clip or holder is used for body-worn operation, it should not contain metal and should position the product at least 0.00 cm away from your body. In order to transmit data files or messages, this device requires a quality connection to the network. In some cases, transmission of data files or messages may be delayed until such a connection is available. Ensure the above separation distance instructions are followed until the transmission is completed. Product care and maintenance WARNING Only use batteries, chargers and accessories approved for use with this particular device model. The use of any other types may invalidate any approval or warranty applying to the device and may be dangerous. • Do not disassemble this unit. Take it to a qualified service technician when repair work is required. • Repairs under warranty, at LG's discretion, may include replacement parts or boards that are either new or reconditioned, provided that they have functionality equal to that of the parts being replaced. • Keep away from electrical appliances such as TVs, radios and personal computers. • The unit should be kept away from heat sources such as radiators or cookers.
  • Page 483 • Do not drop. • Do not subject this unit to mechanical vibration or shock. • Switch off the device in any area where you are required to by special regulations. For example, do not use your device in hospitals as it may affect sensitive medical equipment. • Do not handle the device with wet hands while it is being charged. It may cause an electric shock and can seriously damage your device. • Do not charge a device near flammable material as the device can become hot and create a fire hazard. • Use a dry cloth to clean the exterior of the unit (do not use solvents such as benzene, thinner or alcohol). • Do not charge the tablet when it is on soft furnishings. • The device should be charged in a well ventilated area. • Do not subject this unit to excessive smoke or dust. • Do not keep the device next to credit cards or transport tickets; it can affect the information on the magnetic strips. • Do not tap the screen with a sharp object as it may damage the tablet. • Do not expose the device to liquid or moisture. • Use accessories like earphones cautiously. • Do not use, touch or attempt to remove or fix broken, chipped or cracked glass. Damage to the glass display due to abuse or misuse is not covered under the warranty. • Your tablet is an electronic device that generates heat during normal operation. Extremely prolonged, direct skin contact in the absence of adequate ventilation may result in discomfort or minor burns. Therefore, use care when handling your device during or immediately after operation.
  • Page 484: Road Safety

    • If your device gets wet, immediately unplug it to dry off completely. Do not attempt to accelerate the drying process with an external heating source, such as an oven, microwave or hair dryer. • The liquid in your wet device, changes the color of the product label inside your device. Damage to your device as a result of exposure to liquid is not covered under your warranty. • Use your tablet in temperatures between 0 ºC and 40 ºC, if possible. Exposing your device to extremely low or high temperatures may result in damage, malfunction, or even explosion. Efficient device operation Electronics devices All tablet device may receive interference, which could affect performance. • Do not use your tablet device near medical equipment without requesting permission. Avoid placing the tablet over pacemakers, for example, in your breast pocket. • Some hearing aids might be disturbed by tablet device. • Minor interference may affect TVs, radios, PCs etc. Road safety Check the laws and regulations on the use of tablet device in the area when you drive. • Do not use a hand-held device while driving. • Give full attention to driving. • RF energy may affect some electronic systems in your vehicle such as car stereos and safety equipment.
  • Page 485: Glass Parts

    • When your vehicle is equipped with an air bag, do not obstruct with installed or portable wireless equipment. It can cause the air bag to fail or cause serious injury due to improper performance. • If you are listening to music whilst out and about, please ensure that the volume is at a reasonable level so that you are aware of your surroundings. This is of particular importance when near roads. Avoid damage to your hearing NOTE: Excessive sound pressure from earphones and headphones can cause hearing loss. To prevent possible hearing damage, do not listen at high volume levels for long periods • Damage to your hearing can occur if you are exposed to loud sound for long periods of time. We therefore recommend that you do not turn on or off the tablet close to your ear. We also recommend that music volumes are set to a reasonable level. • When using headphones, turn the volume down if you cannot hear the people speaking near you, or if the person sitting next to you can hear what you are listening to. Glass Parts Some parts of your tablet device are made of glass. This glass could break if your device is dropped on a hard surface or receives a substantial impact. If the glass breaks, do not touch or attempt to remove it. Stop using your device until the glass is replaced by an authorised service provider.
  • Page 486 Blasting area Do not use the tablet where blasting is in progress. Observe restrictions and follow any regulations or rules. Potentially explosive atmospheres • Do not use your tablet at a refueling point. • Do not use near fuel or chemicals. • Do not transport or store flammable gas, liquid or explosives in the same compartment of your vehicle as your tablet device or accessories. In aircraft Wireless devices can cause interference in aircraft. • Turn your tablet off before boarding any aircraft. • Do not use it on the ground without permission from the crew. Children Keep the device in a safe place out of the reach of small children. It includes small parts which may cause a choking hazard if detached. This device also contains an internal battery that can be hazardous if the device is not used or maintained properly.
  • Page 487: Battery Information And Care

    Battery information and care • You do not need to completely discharge the battery before recharging. Unlike other battery systems, there is no memory effect that could compromise the battery's performance. • Use only LG batteries and chargers. LG chargers are designed to maximise the battery life. • Do not disassemble or short-circuit the battery. • Recharge the battery if it has not been used for a long time to maximise usability. • Do not expose the battery charger to direct sunlight or use it in high humidity, such as in the bathroom. Do not leave the device in hot or cold places, as this may deteriorate battery performance. • There is risk of explosion if the battery is replaced with an incorrect type. • Dispose of used batteries according to the manufacturer's instructions. Please recycle when possible. Do not dispose as household waste. • Always unplug the charger from the wall socket after the tablet is fully charged to save unnecessary power consumption of the charger. • Actual battery life will depend on network configuration, product settings, usage patterns, battery and environmental conditions. • Make sure that no sharp-edged items such as animal’s teeth or nails, come into contact with the battery. This could cause a fire.
  • Page 488 WARNING Notice for Battery replacement • Li-Ion Battery is a hazardous component which can cause injury. • Battery replacement by non-qualified professional can cause damage to your device. • Do not replace the battery by yourself. The battery can be damaged, which can cause overheat and injury. The battery must be replaced by the authorized service provider. The battery should be recycled or disposed separately from household waste. • In case this product contains a battery incorporated within the product which cannot be readily removed by end-users, LG recommends that only qualified professionals remove the battery, either for replacement or for recycling at the end of this product’s working life. To prevent damage to the product, and for their own safety, users should not attempt to remove the battery and should contact LG Service Helpline, or other independent service providers for advice. • Removal of the battery will involve dismantling of the product case, disconnection of the electrical cables/contacts, and careful extraction of the battery cell using specialized tools. If you need the instructions for qualified professionals on how to remove the battery safely, please visit http://www.lge.com/global/sustainability/environment/take-back- recycling.
  • Page 489 How to update your tablet Access to latest firmware releases, new software functions and improvements. • Update your tablet without a PC: Select Update Center > Software Update > Check now for update. • Update your tablet by connecting it to your PC. For more information about using this function, please visit http://www.lg.com/common/index.jsp and select the country and language. DECLARATION OF CONFORMITY Hereby, LG Electronics declares that this LG- V480 product is in compliance with the essential requirements and other relevant provisions of Directive 1999/5/EC. A copy of the Declaration of Conformity can be found at http://www.lg.com/global/declaration Contact office for compliance of this product LG Electronics Inc. EU Representative, Krijgsman 1, 1186 DM Amstelveen, The Netherlands...
  • Page 490 Disposal of your old appliance All electrical and electronic products should be disposed of separately from the municipal waste stream via designated collection facilities appointed by the government or the local authorities. The correct disposal of your old appliance will help prevent potential negative consequences for the environment and human health. For more detailed information about disposal of your old appliance, please contact your city office, waste disposal service or the shop where you purchased the product. Disposal of waste batteries/accumulators This symbol may be combined with chemical symbols for mercury (Hg), cadmium (Cd) or lead (Pb) if the battery contains more than 0.0005% of mercury, 0.002% of cadmium or 0.004% of lead. All batteries/accumulators should be disposed separately from the municipal waste stream via designated collection facilities appointed by the government or the local authorities. The correct disposal of your old batteries/accumulators will help to prevent potential negative consequences for the environment, animal and human health. For more detailed information about disposal of your old batteries/ accumulators, please contact your city office, waste disposal service or the shop where you purchased the product.
  • Page 491: Important Notice

    Important notice Please read this before you start using your tablet! Please check to see whether any problems you encountered with your tablet are described in this section before taking the tablet in for service or calling a service representative. 1. Tablet Memory You need to check your tablet memory and delete some data, such as applications, to make more memory available. To uninstall applications: Tap > > Apps tab > Settings > Apps. Once all of the applications appear, select the application you want to uninstall. Tap Uninstall and OK to confirm. 2. Before installing an open source application and operating system (OS) WARNING If you install and use an OS other than the one provided by the manufacturer it may cause your tablet to malfunction. In addition, your...
  • Page 492 WARNING To protect your tablet and personal data, only download applications from trusted sources, such as Play Store. If there are improperly installed applications on your tablet, the tablet may not work normally or a serious error may occur. You must uninstall those applications and all associated data and settings from the tablet. 3. Using a Screen Lock Set an screen lock to secure your tablet. Tap > > Apps tab > Settings > Display > Lock screen > Select screen lock and select a desired screen lock from Swipe, Knock Code, Pattern, PIN and Password. You can create a Backup PIN as a safety measure in case you forget your screen lock. Caution: Create or sign into a Google account before setting a screen lock and remember the Backup PIN you created when creating your screen lock. WARNING Precautions to take when using a screen lock. It is very important to remember the screen lock you set. You will not be able to access your tablet if you use an incorrect screen lock 5 times. You have 5 opportunities to enter your unlock pattern, PIN or password. If you have used all 5 opportunities, you can try again after 30 seconds.
  • Page 493 < If you have forgotten your PIN or Password > If you forget your PIN or Password, you will need to perform a hard reset. Caution: If you perform a hard reset, all user applications and user data will be deleted. NOTE: If you have not logged into your Google Account and have forgotten your Pattern, you will need to enter your Backup PIN. 4. Using the Hard Reset (Factory Reset) If your tablet does not restore to its original condition, use a Hard Reset (Factory Reset) to initialize it. Turn the tablet off. Press and hold the Volume Down Key first, then press and hold the Power/Lock Key on the right side of the tablet until the LG logo is displayed. Release all of the keys when the LG logo is displayed. Immediately press and hold the Power/Lock Key + Volume Down Key at the same time.
  • Page 494 Key to continue. Press either of the Volume Keys to move the cursor to Yes once again, then press the Power/Lock Key to confirm. Your device will perform a hard reset. WARNING If you perform a Hard Reset, all user applications, user data and DRM licenses will be deleted. Please remember to backup any important data before performing a Hard Reset. 5. When the screen freezes If the screen freezes or the tablet does not respond when you try to operate it: Press and hold the Power/Lock Key for over 8 seconds until the LG logo is displayed to restart your tablet. If it still does not work, please contact the service center.
  • Page 495: Getting To Know Your Device

    Getting to know your device Tablet Overview Front-facing camera Power/Lock key Volume keys Earphone jack IR LED microSD card slot Microphone Charger/USB port Rear-facing camera Speakers NOTE: Your tablet is designed to have two speaker openings on the back side for aesthetic reasons. However, the actual sound comes from only one speaker. Please note that it’s not a product defect. NOTE: Make sure that the microphone is not blocked when recording a video or audio clip.
  • Page 496 Use to take pictures and record videos of yourself. Front-facing You can also use this for video chatting. Keep it camera clean for optimal performance. Press to lock/unlock the screen. Press and hold to Power/Lock key turn the tablet on/off, restart it, activate/deactivate airplane mode, and change the sound settings. Allow you to adjust the media volumes. Press and Volume keys hold both keys at the same time to access the QuickMemo+ feature. Allows you to plug in an optional headset for Earphone jack convenient, hands-free conversations. You can also plug in headphones to listen to music. Infrared (IR) LED Used as a sensor for the QuickRemote app. Insert a microSD Card for storing files such as microSD card slot music, videos and photos. Records your voice and allows use for voice- Microphone activated functions. Allows you to connect the tablet and the USB cable Charger/USB port for use with the charger adapter, your PC, or other compatible accessories. Rear-facing Use to take photos and record videos. Keep it clean camera for optimal performance.
  • Page 497: Charging Your Tablet

    WARNING Placing a heavy object on the tablet or sitting on it can damage the LCD and touch screen functions. TIP! • Tap the Menu icon whenever you open an application to check what options are available. • If the device is locked and does not work, press and hold the Power/ Lock Key for over 8 seconds until LG logo is displayed to restart your tablet. Charging your tablet A USB adapter, which is included with your tablet, is used to charge the battery. Before using your tablet for the first time, make sure the battery is fully charged. NOTE: Your device has an internal rechargeable battery. For your safety, do not remove the battery incorporated in the product. Warning! If the touch screen does not function while the tablet’s in the process of charging, this may be due to an unstable power supply. If this occurs, disconnect the USB cable from the device or unplug the USB adapter from the power outlet.
  • Page 498: Optimizing Battery Life

    Connect the USB adapter and USB cable. Plug the USB cable (as shown below) into the tablet’s Charger/USB port. Plug the charger into an electrical socket. NOTE: The battery must be fully charged initially to improve battery lifetime. Optimizing Battery Life You can extend your battery’s life between charges by turning off features that you don’t need to run constantly in the background. You can also monitor how applications and system resources consume battery power. To extend the life of your battery • Turn off radio communications that you aren’t using, such as Wi-Fi, Bluetooth, or GPS. • Lower screen brightness and set a shorter screen timeout.
  • Page 499: To View The Battery Charge Level

    • Turn off automatic syncing for Gmail™, Calendar, Contacts, and other applications. • Some applications you have downloaded may cause your battery power to be reduced. • While using downloaded applications, check the battery charged level. To view the battery charge level > About tablet > From the Home screen, tap Apps > Settings Battery. The battery status (charging or discharging) and level are displayed on the top menu of the screen. To monitor and control what uses the battery > About tablet > From the Home screen, tap Apps > Settings Battery > Battery usage. The screen displays battery usage time and also lists applications or services using battery power from greatest amount to least. Inserting a microSD card Your device supports the use of microSD memory cards of up to 32 GB capacity. Multimedia contents can be saved in the microSD card. P lace your fingernail in the cutout and gently pull the memory card slot cover to remove it.
  • Page 500: Removing The Microsd Card

    I nsert the memory card into the slot with the contacts facing towards the screen. Carefully push the memory card slot cover into the tablet to close Removing the microSD card To safely remove the microSD card from your tablet, first you need to unmount it. From the Home screen, tap Apps > Settings > Storage > Unmount SD card. Open the microSD card tray and push the card in to release it. Gently pull the microSD card from the slot.
  • Page 501: Formatting The Microsd Card

    Warning! Do not remove the microSD card without unmounting it first. Otherwise, it may damage the microSD card as well as your tablet, and the data stored on the microSD card may be corrupted. Formatting the microSD card Warning! All files stored on your microSD card are deleted when you format the card. From the Home screen, tap Apps > Settings > Storage. Tap Erase SD card (twice). If you set an unlock pattern, enter it and tap Erase everything. The card will then be formatted and ready to use. NOTE: If there is content on your microSD card, the folder structure may be different after formatting since all the files will have been deleted. Locking and unlocking the screen If you do not use the tablet for a while, the screen will be automatically turned off and locked. This helps to prevent accidental touches and saves battery power. When you are not using the your tablet, press the Power/Lock Key to lock your tablet. If there are any programs running when you lock your screen, they may be still running in Lock mode. It is recommended that you exit all programs before entering Lock mode to avoid unnecessary charges (e.g. web access, data communications).
  • Page 502: Turning The Screen On Using The Knockon Feature

    To wake up your tablet, press the Power/Lock Key . The Lock screen will appear. Touch and slide the Lock screen in any direction to unlock your Home screen. The last screen you viewed will open. Turning the screen on using the KnockON feature The KnockON feature allows you to double-tap the screen to easily turn the screen on or off. • Quickly double-tap the center of the screen to turn the screen on. • Quickly double-tap the Status Bar, an empty area on the Home screen, or the Lock screen to turn the screen off. Unlocking your screen using the Knock Code feature The Knock Code feature allows you to create your own unlock code using a combination of knocks (or taps) on the screen. • While the screen is off, tap the same sequence you established anywhere on the screen. The Home screen will be accessed directly.
  • Page 503 To activate Knock Code feature From the Home screen, tap Apps > Settings > Display > Lock screen > Select screen lock > Knock Code. This opens a screen that will guide you through how to select the unlock sequence. You have to create a backup PIN as a safety measure in case you forget your unlock sequence.
  • Page 504: Your Home Screen

    Your Home screen Touch screen tips Here are some tips on how to navigate on your tablet. NOTE: • To select an item, touch the center of the icon. • Do not press too hard; the touch screen is sensitive enough to pick up a light, yet firm touch. • Use the tip of your finger to touch the option you want. Be careful not to touch any other keys. Tap or touch A single finger tap selects items, links, shortcuts and letters on the on-screen keyboard. Touch and hold Touch and hold an item on the screen by touching it and not lifting your finger until an action occurs. For example, to open a contact's available options, touch and hold the contact in the Contacts list until the context menu opens. Drag Touch and hold an item for a moment and then, without lifting your finger, move your finger on the screen until you reach the target position. You can drag items on the Home screen to reposition them.
  • Page 505: Swipe Or Slide

    Swipe or slide To swipe or slide, quickly move your finger across the surface of the screen, without pausing when you first touch it (so you don’t drag an item instead). For example, you can slide the screen up or down to scroll through a list, or browse through the different Home screen canvases by swiping from left to right (and vice versa). Double-tap Double-tap to zoom on a webpage or a map. For example, quickly double- tap a section of a webpage to adjust that section to fit the width of the screen. You can also double-tap to zoom in and out when viewing a picture and when using Maps. Double-tap a word to highlight it. Double-tap can also activate the KnockON feature to turn the touchscreen on or off. Pinch-to-Zoom Use your index finger and thumb in a pinching or spreading motion to zoom in or out when using the browser, Maps, or when browsing pictures. Rotate the screen From many applications and menus, the orientation of the screen adjusts to the device's physical orientation. Home screen Simply swipe your finger to the left or right to view the panels. You can customize each panel with apps, downloads, widgets and wallpapers. The Quick Keys are available at the bottom part of the Home screen and provide easy, one-touch access to the functions you use the most.
  • Page 506 Status Bar – Shows device status information, including the time, Wi-Fi signal strength, battery status, and notification icons. Application icons – Tap an icon (application, widget, folder, etc.) to open and use it. Quick Keys – Provide easy, one-touch access to the functions used most often. Dual window Key – Tap to change to dual window mode. It allows you to manage two different apps at the same time by splitting the screen in two. Recent Apps Key – Tap to display recently used applications. You can also touch and hold it to display the Menu options in applications. Home Key – Returns to the Home screen (or returns to your default Home screen canvas from any of the Home screen extension canvases). Touch and hold it to access Google Now. Back Key – Returns to the previous screen. Also closes pop-up items such as menus, dialog boxes, and the on-screen keyboard. Touch and hold it to access Dual window.
  • Page 507: Customizing The Home Screen

    Customizing the Home screen You can customize your Home screen by adding apps, downloads, widgets or wallpapers. For more convenience using your tablet, add your favorite apps and widgets to the Home screen. To add items on your Home screen: Touch and hold the empty part of the Home screen. Tap the Apps or Widgets tab. Drag the desired item to the desired location and lift your finger. To remove an item from the Home screen: Touch and hold the icon you want to remove, drag it to , and lift your finger. TIP! To add an application icon to the Home screen from the Apps screen, touch and hold the application you want to add and drag it to the desired location. TIP! You can add several app icons in a folder. Drop one app icon over another one on a Home screen, and a folder will be created. Opening, switching, and stopping apps Tap to display recently used applications. You can keep multiple apps running at the same time, and switch between several open apps. You can...
  • Page 508: Using Dual Window

    Using Dual window The Dual window feature splits the screen to enable multi-tasking, drag and drop interaction, auto-linking and recently used apps. Touch to split the screen or touch and hold the until the app list is displayed. Touch or drag an app icon to the desired space. Tap to display the following options. You can also drag the tabs to change the size of the windows. Switch two screens. Change the apps list. Full screen view. Close the apps. To disable the Dual window feature > Dual window. Tap > Apps > Settings Tap the Dual window switch to toggle it to OFF. TIP! You can launch two Internet apps at the same time.
  • Page 509: Customizing App Icons On The Home Screen

    Customizing app icons on the Home screen You can customize each application icon with images from your Gallery. Touch and hold an application icon until it’s unlocked from its current position. Then drop it on the screen. The editing icon will appear in the upper right corner of the application. Tap the application icon again and select the desired icon design and tap OK. Or tap Add new and adjust the icon size and select an image from your Gallery. To view other Home screen panels • Swipe (or flick) your finger left or right across the Home screen. • Pinch in on the Home screen to display the mini panel view, then tap the Home screen panel you want to view.
  • Page 510: Quick Access

    Quick access To view the quick access items, touch anywhere in the front key area and drag up. The following options are available: Google Now. Notifications Notifications alert you to the arrival of new messages, calendar events, and alarms, as well as to ongoing events, such as downloads. From the Notifications Panel, you can view your tablet’s current status and pending notifications. When a notification arrives, its icon appears at the top of the screen. Icons for pending notifications appear on the left, and system icons showing things like Wi-Fi or battery strength on the right. Pending notifications System notifications...
  • Page 511: Accessing Notifications

    Accessing notifications Swipe the Status Bar down to open the Notifications Panel and access notifications. To close the Notifications Panel, swipe the bar that is at the bottom of the screen upwards. Quick Settings Bar – Swipe to the right or left to scroll through the list. Tap an icon to activate/ deactivate the feature. QSlide Apps – Tap a QSlide app to open as a small window on your screen. Tap to remove, add, or rearrange QSlide apps. Slide to the left and right to adjust the screen brightness and volume. Clear Button – Tap here to clear your list of event- based notifications. Tap a notification to open it. Quick Settings on the Notifications Panel Use the Quick Settings to easily toggle function settings like Wi-Fi. The Quick Settings are located at the top of the Notifications Panel. NOTE: Touch and hold an icon in the Quick Settings Bar to view the function's settings menu.
  • Page 512: To Rearrange Quick Setting Options On The Notification Panel

    To rearrange Quick Setting options on the Notification Panel Open the Notifications Panel, swipe the Quick Settings to the left, and tap . To rearrange items, drag to the desired location. To add more icons, checkmark the desired functions. QSlide apps on the Notifications Panel QSlide apps are displayed in a bar on the Notifications Panel below the Quick Settings Bar. These icons provide a quick, convenient way to multi-task on the same screen (similar to picture-in-picture on a TV). QSlide displays a small application window on the screen that can be moved, resized, or made transparent. NOTE: You can remove the QSlide apps bar by tapping the QSlide icon in the Quick Settings bar. Using the QSlide apps Tap any of the QSlide apps in the bar to activate it. When activated, the QSlide feature opens the application in a window in the foreground, allowing you to access other applications in the background. You can open up to two QSlide windows at a time. Notification icons on the Status Bar The icons listed in the table below are some of the most common ones.
  • Page 513 Bluetooth is on System warning Vibrate mode is on Silent mode is on Battery fully charged Battery is charging Content sharing is on Downloading data Uploading data An alarm is set GPS is on Data is syncing New Gmail message New Hangouts message A song is currently playing Tablet is connected to PC via USB cable Battery saver mode is on...
  • Page 514: Multiple Users

    Multiple Users Only one tablet owner ID can be created, but multiple user IDs can be added so that others can log in and use the tablet independently. Each user can configure their own tablet settings, use their own storage space, and have their own app update privileges. Tablet owner privileges • Only the tablet owner ID can add a new user log in ID and remove user IDs. Multiple tablet user limitations • All users share the same battery, internal memory, and data usage with all of the other users. • The language settings set by one user apply to all of the other users. • Each user can configure and use only their own content and data (e.g., Home screen settings, Sound settings, etc.). • Any user can accept updated app permissions on the behalf of all of the other users. • Messages and scheduled calendar events will be sent to notify the specified user ID only. • Once a user starts printing a document using Mobile Print, the print job will continue even if the user ID is changed. • Data transfer, download, multimedia play, and communication services will stop if the user ID is changed. However, the data transfer through Play Store can be continued even if the user ID is changed.
  • Page 515: Qslide

    To add a new user on your tablet > Users > Add user. From the Home screen, tap Apps > Settings Select the type of user you want to add. • User: Users have their own apps and content. • Restricted user: You can restrict access to apps and content from your account. The setup wizard opens to help you add a new user. Touch Set up now. • After creating a new user, that person needs to go through the setup process upon their first login. To switch users Pull down the Status bar at the top of the screen. Touch the user icon to show user switching panel. Touch one of the user icons on the screen. Choose from the owner name or any other user names you created. QSlide The QSlide function enables an overlay window on your tablet’s display for easy multi-tasking. QSlide windows can be opened from the QSlide apps bar on the Notifications panel, or directly from the applications that support the QSlide function. Open the Notifications Panel and tap the desired app from the QSlide apps section.
  • Page 516: Using Qslide

    While using an application that supports QSlide, tap . The function will be displayed continuously as a small window on your screen. Using QSlide The QSlide function opens the associated app in a window in the foreground, allowing you to access other apps in the background. It’s displayed continuously on the screen until you close it. Tap to run QSlide. Tap to exit QSlide and return to full window. Tap to adjust the transparency. Tap to close QSlide. Tap to adjust the size.
  • Page 517: Capturing A Screenshot

    NOTE: The QSlide function can support up to two windows at the same time. QSlide only supports the following applications: Video, Internet, Calendar, Email, File Manager, and Calculator. Capturing a Screenshot Press and hold the Volume Down Key and Power/Lock Key at the same time for 2 seconds to capture a screenshot of the current screen. To view the captured image, go to Apps > Gallery > Screenshots folder. Using QuickMemo+ to capture a screenshot On the screen you want to capture, drag the Status Bar downward and select QuickMemo+ Press and hold both Volume Keys at the same time. Using Capture plus to capture a screenshot of the browser This feature allows you to capture a portion of the screen in the default Internet browser. Open the Internet app and navigate to the page you want to capture a screen shot of.
  • Page 518: Text Input Methods

    Word suggestions Word suggestions Displays the word you've entered. Tap to delete the Tap once to previous character. capitalize the next letter you type. Double- Tap to create a new tap for all caps. line in the message field. Tap to switch to the Tap to select one numbers and symbols of the desired keyboard keyboard. types. Tap to enter a space. Tap to select the keyboard language. Tap to access the LG keyboard settings. Touch and hold to access the Clip Tray. Enter suggested word using gesture control Enter text on the keyboard and the related word suggestions appear. Tap or flick upward on the left side of the keyboard to select the left-side suggestion. Tap or flick upward on the right side of the keyboard to select the right-side suggestion. Split keyboard using gesture The split keyboard feature allows you to use both hands to type. Each half of the keyboard withdraws to the left and right of the screen.
  • Page 519: Entering Special Characters

    To change the keyboard height Adjust height of keyboard to show more of the screen and to control keyboard more easily. • Tap > Keyboard height and layout > Keyboard height in portrait > Tap and drag the icon to adjust the keyboard height. To change the bottom row keys > Keyboard height and layout > QWERTY keyboard layout > Tap • Tap and drag to add or delete keys or change the order. NOTE: Only QWERTY, QWERTZ, AZERTY keyboards can be customized. This function dose not support some languages. Entering special characters The on-screen keyboard allows you to enter special characters (e.g. "á"). For example, touch and hold the desired key (for example, the "a" key). After the desired character appears, slide your finger over it and lift it off to enter NOTE: A symbol at the top right corner of a key indicates that additional characters are available.
  • Page 520: Google Account Setup

    Google account setup When you first turn on your tablet, you have the opportunity to activate the network, to sign into your Google Account and select how you want to use certain Google services. To set up your Google account • Sign into a Google Account from the prompted setup screen. OR • From the Home screen, tap Apps > Apps tab > Settings > Accounts & sync > Add account > Google. If you already have a Google account, enter your email address and tap NEXT. Otherwise, touch OR CREATE A NEW ACCOUNT and enter the necessary information to create a new Google Account. Once you have set up your Google account on your tablet, your tablet automatically synchronizes with your Google account on the Web. Your contacts, Gmail messages, Calendar events and other information from these applications and services on the Web are synchronized with your tablet. (This will depend on your synchronization settings.) After signing in, you can use Gmail™ and take advantage of Google services on your tablet.
  • Page 521: Connecting To Networks And Devices

    Connecting to Networks and Devices Wi-Fi With Wi-Fi, you can use high-speed Internet access within the coverage of the wireless access point (AP). Enjoy wireless Internet using Wi-Fi, without extra charges. Connecting to Wi-Fi networks To use Wi-Fi on your tablet, you need to access a wireless access point or ‘hotspot’ . Some access points are open and you can simply connect to them. Others are hidden or use security features; you must configure your tablet to be able to connect to them. Turn off Wi-Fi when you're not using it to extend the life of your battery. Turning Wi-Fi on and connecting to a Wi-Fi network From the Home screen, tap Apps > Apps tab > Settings > Wi-Fi. Tap to turn Wi-Fi on and start scanning for available Wi-Fi networks. Tap Search to see a list of active and in-range Wi-Fi networks. • Secured networks are indicated by a lock icon. Touch a network to connect to it. • If the network is secured, you are prompted to enter a password or other credentials. (Ask your network administrator for details) The Status Bar displays icons that indicate your Wi-Fi status.
  • Page 522: Bluetooth

    Bluetooth You can use Bluetooth to send data by running a corresponding application, but not from the Bluetooth menu as on most other mobile phones and tablets. NOTE: • LG is not responsible for the loss, interception or misuse of data sent or received via the Bluetooth wireless feature. • Always ensure that you share and receive data with devices that are trusted and properly secured. If there are obstacles between the devices, the operating distance may be reduced. • Some devices, especially those that are not tested or approved by Bluetooth SIG, may be incompatible with your device. Turning on Bluetooth and pairing up your tablet with a Bluetooth device You must pair your device with another device before you connect to it. From the Home screen, tap Apps > Apps tab > Settings > Bluetooth. Tap the Bluetooth switch to turn it on. Tap the check box next to your tablet's name to make your tablet visible to other Bluetooth devices. NOTE: To select the length of time that your device will be visible, tap the Menu icon > Visibility timeout. A list of available devices will be displayed. Tap the device you want to pair with from the list.
  • Page 523: Send Data Using The Bluetooth Feature

    NOTE: Depending on the type of device, you may have to enter matching codes, confirm matching codes, or the devices may automatically pair. Once pairing is successful, your tablet will connect to the other device. NOTE: Your tablet doesn't support Handsfree Profile. Therefore, the use of call features with some of accessories, such as Bluetooth headsets or Bluetooth-enabled devices, may not be available for this device. Send data using the Bluetooth feature Open the item and tap OR Touch and hold the item and select Share. OR Open the item and tap the Menu icon > Share. Tap Bluetooth to share via Bluetooth. NOTE: The method for selecting an option may vary by data type. Search for and pair with a Bluetooth-enabled device. Receive data using the Bluetooth feature Refer to the Bluetooth device's user guide to send a file to your tablet. Both devices must be paired and Bluetooth must be on. Pair the devices and tap Accept when you receive a Bluetooth Authorization Request to accept the file(s).
  • Page 524: Smartshare

    SmartShare You can use the SmartShare feature easily in the Gallery, Music apps, and others. Enjoying the content via a variety of devices You can share your tablet's content with a variety devices. Tap or tap > SmartShare to share the content in the Gallery, Music, POLARIS Office 5 apps. Playing/Sending Play – You can play the content via a TV, a Bluetooth speaker or etc. Beam – You can send the content to the device of Bluetooth and SmartShare Beam supported. • SmartShare Beam – This allows to transfer the content feature fast via Wi-Fi Direct. < Play > < Beam > Enjoying the content from Nearby devices You can enjoy the content from nearby devices (i.e. PC, NAS, Mobile) in the Gallery and Music apps. Connecting devices Connect your device and other devices supported by DLNA in the same Wi-Fi network.
  • Page 525: Searching Other Devices

    Searching other devices Tap Nearby devices, then you can see the DLNA-supported devices. Connect to the device to view the content. Using the content from the Cloud You can use the content from the cloud (i.e., Dropbox) in the Gallery and Music apps. Using the Cloud NOTE: The supported features may vary depending on the cloud. Retrieving data may take some time depending on the cloud. Select Cloud in the Gallery and Music apps. Select the cloud what you want to use and log in. You can use the content of the cloud after logging in. Set the cloud settings to select the app to use the cloud. QPair By connecting your tablet and mobile phone via QPair, you can sync incoming calls, messages, and social networking notifications between your tablet and mobile phone.
  • Page 526 and tap Get started > Start on your tablet first and then Run QPair run the same steps on your phone. TIP! QPair may not be pre-installed on the phone. Go to the Google Play Store and search for QPair and install it. NOTE: • QPair works with phones running Android 4.1 or later. Some features may be limited depending on your phone model. • Since QPair uses the Bluetooth function, it may not work normally if you change the Bluetooth settings while QPair is in use. Bluetooth connection will be turned on automatically.
  • Page 527 QPair features Call notifications – Sends the tablet a notification when the phone receives a call. The notification displays the caller's number and allows you to answer and decline the call. You can also change call settings, such as a ringtone, ringtone volume, ringtone with vibration, or send a decline message when you get a call. NOTE: You can only receive a call supported by Bluetooth technology. Dialing a call from the tablet using the QPair feature is not possible. Message notifications – Sends the tablet a notification when the phone receives a message. You can also change message settings, such as message pop-up, message preview, notification sound, and notification vibration. Social network notifications – Displays a social networking notification on your tablet's Status Bar when it arrives on your phone. NOTE: To enable this feature, turn the QPair social network notifications option on your phone (Settings > Accessibility > QPair social network notifications). This option allows you to be notified of social networking notifications on your tablet. QuickMemo+ transfer – Saves your current QuickMemo+ in the tablet's Gallery, and then syncs the tablet's Gallery with the Gallery on your phone. Internet via phone – Automatically connects your tablet to the Internet through your mobile phone (as a Wi-Fi hotspot). Using this feature may incur data charges. To save data usage on the phone, the phone automatically connects to any trusted Wi-Fi hotspots within range.
  • Page 528: Pc Connections With A Usb Cable

    PC connections with a USB cable You can connect your tablet to your PC to charge it, transfer items to the PC from the tablet and vice versa. Transferring music, photos and videos using the Media device (MTP) mode Connect your tablet to a PC using a USB cable. If you haven't installed the LG Android Platform Driver on your PC, you will need to manually change the settings. To change the settings, slide the Status Bar down and tap the current USB connection mode > Media device (MTP). You can now view the Media device content on your PC and transfer the files. NOTE: If you want to change the PC connection settings, slide the Status Bar down and select the USB connection mode option. This setting is visible on the Status Bar only when you connect a USB cable to your tablet. Synchronize with Windows Media Player Ensure that Windows Media Player is installed on your PC. Use the USB cable to connect the tablet to a PC on which Windows Media Player has been installed. Select the Media device (MTP) option.
  • Page 529: Pc Connections With A Usb Cable For Mac Os X Users

    Start synchronization. • The following requirements must be satisfied to synchronize with Windows Media Player. Items Requirement Microsoft Windows XP SP2, Vista or higher Window Media Player version Windows Media Player 10 or higher • If the Windows Media Player version is older than 10, install version 10 or newer. PC connections with a USB cable for Mac OS X users You can transfer media contents to your Mac OS X PC from the tablet and vice versa by setting up the Android File Transfer program. Download and install the Android File Transfer program from android.com website for Mac Users (http://www.android.com/filetransfer/). Connect your tablet to your computer, and double click the AFT (Android File Transfer program) application to start it up. You can view the media contents, drag and drop the media file to and from the tablet (or PC).
  • Page 530: Contacts

    Contacts You can add contacts on your tablet and synchronize them with the contacts in your Google Account or other accounts that support syncing contacts. Searching for a contact From the Home screen, tap Contacts to open your contact list. Tap the Search contacts box and enter the contact's name. You can also tap a letter along the left side of the screen to access names starting with the chosen letter. Adding a new contact From the Home screen, tap Contacts Tap New contact . Select the desired account (if applicable). If you want to add a picture to the new contact, tap . Choose from Take photo to take a picture using the camera or Select from Gallery. Then browse for an image and select it. Tap to enter more specific name information. Enter the details about your contact. Tap Save. Favorite Contacts You can classify frequently called contacts as favorites. To add a contact to your favorites From the Home screen, tap Contacts to open your contacts.
  • Page 531: Creating A Group

    Tap the star to the right of the contact’s name. The star turns gold and the contact is added to your favorites. To remove a contact from your favorites list From the Home screen, tap Contacts to open your contacts. Tap the Favorites tab to view your favorite contacts. Tap a contact to view its details. Tap the gold star to the right of the contact’s name. The star turns grey and the contact is removed from your favorites. Creating a group From the Home screen, tap Contacts to open your contacts. Touch the Groups tab, then touch Enter a name for the new group. • Tap Add members to add contact entries to your new group. • Tap the ACCOUNT field to change the account(s) you want to save the new group to. Touch Save to save the group. NOTE: If you delete a group, the contacts assigned to that group will not be lost. They will remain in your contacts.
  • Page 532: Email

    Email You can use the Email application to read emails from services like Yahoo!, MSN, and AOL. The Email application supports the following account types: POP3, IMAP and Exchange. Your service provider or system administrator can provide you with the account settings you need. Managing an email account Tap the Email on the Home screen. The first time you open the Email application, a set-up wizard opens to help you to set up an email account. After the initial setup, the contents of your inbox are displayed. If you have added more than one account, you can switch among accounts. To add another email account: • Open the Email application and tap the Menu icon > Settings > Add account. To switch between accounts: If you've added more than one account, you can easily switch between them. From any email folder, tap the current account (at the top of the screen), then tap the account you want to access. To change an email general settings: > Settings > General Open the Email application and tap the Menu icon settings to configure settings that apply to all of your accounts. Tap an individual account to configure settings only for that particular account.
  • Page 533: Working With Account Folders

    Working with account folders Open the Email application and tap the Menu icon and select Folders. Each account has an Inbox, Outbox, Sent and Drafts folder. Depending on the features supported by your account’s service provider, you may have additional folders. Composing and sending email While in the Email application, tap Compose Enter an address for the message’s intended recipient. As you enter text, matching addresses will be proposed from your Contacts. Separate multiple addresses using semicolons. Tap Attach to attach files, if required. Enter the subject and your message. Tap Send to send the message. If you aren’t connected to a network, for example, if you’re working in airplane mode, the messages that you send will be stored in your Outbox folder until you connect to a network again. If it contains any pending messages, the Outbox will be displayed on the Accounts screen. Receiving emails When a new email arrives in your Inbox, you'll be notified by a sound or vibration (depending on your sound and vibration settings) and its notification icon appears on the Status Bar.
  • Page 534: Entertainment

    Entertainment Camera To open the Camera application, tap Camera on the Home screen. Getting to know the viewfinder C lean view – Touch to show or hide menus on the view finder. S wap camera – Switch between the back-facing camera lens and the front–facing camera lens. You can also switch the camera by swiping the screen. M ode – Allows to set the shot mode to Auto or Panorama mode. Settings – Touch this icon to open the settings menu. G allery – Touch to view the last photo you captured. This enables you to access your Gallery and view saved photos while in camera mode. Video mode – Tap to start recording a video. Capture – Takes a picture. Exit – Touch to exit the camera.
  • Page 535: Using The Advanced Settings

    NOTE: Please ensure the camera lens is clean before taking pictures. Using the advanced settings In the viewfinder, tap to open the advanced options. Selects photo resolution. If you choose a high resolution, the file size will increase, which means you will be able to store fewer photos in the memory. Take photos by voice command. Sets a delay after the capture button is pressed. This is ideal if you want to be in the photo. Displays grid lines on the screen to help you align your photos. Opens the help guide to know how a function operates. TIP! When you exit the camera, some settings return to their defaults, such as timer. Check these before you take your next photo. Taking a photo Open the Camera application. Point the lens towards the subject you want to photograph. Touch to capture the photo. You can also capture the photo by touching anywhere on the screen on Clean view mode.
  • Page 536: To Zoom In Or Out

    To zoom in or out When taking a picture or recording a video, place two fingers anywhere on the screen and spread them apart to zoom in. To zoom back out, pinch them together. Gesture shot The Gesture shot feature allows you to take a picture with a hand gesture using the front camera. To take photo, raise your hand, with an open palm, until the front camera detects it and a box appears on the screen. Then close your hand into a fist and a timer will start, allowing you time to get ready. Once you've taken a photo Tap the image preview by the capture button to view the last photo you captured. Tap Gallery or Photos, then tap OK. Touch to edit the photo. Touch to take another photo immediately.
  • Page 537 Touch to send your memo to others or share it via social networking services. Touch to delete the photo. Touch to access more options. Touch to add the picture to your favorites. TIP! If you have a social networking account and set it up on your tablet, you can share your photo with your social networking community. Touch the Menu icon to open the following options. SmartShare – Touch to share your photo using the SmartShare function. Set image as – Touch to use the photo as a Home screen wallpaper, Contact photo, Lock screen wallpaper or Wallpaper. Move – Touch to move the photo to another album. Copy – Touch to copy the selected photo and save it to another album. Copy to Clip Tray – Touch to copy the photo and store in the Clip Tray. Slideshow – Automatically shows you the images in the current folder one after the other. Rotate left/right – Touch to rotate the picture to the left or right. Crop – Crop your photo. Move your finger across the screen to select the area to be cropped. Add location – To add the location information. Rename – Touch to edit the name of the selected photo. Print – Allows you to print the picture. Details – Displays more information about the picture.
  • Page 538: Viewing Your Saved Photos

    Viewing your saved photos You can access your saved photos when in camera mode. Just tap the image preview by the capture button and your Gallery will be displayed. Choose the app to use to view and/or edit your photos. Tap Gallery or Photos Tap OK. • To view more photos, scroll left or right. • To zoom in or out, double-tap the screen or place two fingers and spread them apart (move your fingers closer together to zoom out). Recording a video Open the Camera application. Point the lens towards the subject you wish to capture in your video. Touch the Video mode icon to start recording. A timer showing the length of the video will appear. Touch on the screen to stop recording. TIP! • Tap to pause the recording. • Tap to take a screen shot while recording a video. Watching your saved videos Access your saved videos from video camera mode by tapping the image preview by the capture button. In the viewfinder, tap the image preview by the capture button. Your Gallery will appear on the screen with your most recent recorded video displayed. Swipe to the left to scroll to your other videos. Tap the Play icon on a video to play it automatically.
  • Page 539: Gallery

    NOTE: You can view your videos in the Gallery and Photos apps. NOTE: Do not to press too hard; the touch screen is sensitive enough to pick up a light, but firm touch. Gallery You can store multimedia files in internal memory for easy access to all your multimedia files. Use this application to view multimedia files like pictures and videos. From the Home screen, tap Apps > Apps tab > Gallery You can manage and share all your image and video files with the Gallery. NOTE: • Some file formats are not supported, depending on the software installed on the device. • Some files may not play properly, depending on how they are encoded. • If the file size exceeds the available memory, an error can occur when you open files. Viewing pictures Launching the Gallery app displays your available folders. When another application, such as Email, saves a picture, the Downloads folder is automatically created to contain the picture. Likewise, capturing a screenshot automatically creates the Screenshots folder. Tap a folder to open it. Pictures are displayed in order by creation date. Select a picture to view it full screen. Scroll left or right to view the next or previous image.
  • Page 540: Playing Videos

    Playing videos Open the Gallery app and select an album. The Play icon is displayed on video files. Tap an image to select it. Select the app to play it (tap the Photos app or the Video app ), then tap OK and the video begins playback. NOTE: • When using the Videos app to play a video, slide the left side of the screen up and down to adjust the screen brightness. Slide the right side of the screen up and down to adjust the volume. • When using the Videos app to play a video, slide the screen left or right to rewind or fast-forward. Deleting images and videos Use one of the following methods: • In a folder, tap and select the photos and videos you want to delete, then tap Delete, the Yes to confirm. • When viewing a photo or video, tap , then tap Yes to confirm. Setting as wallpaper > Set image as and select When viewing a photo, touch the Menu icon Home screen wallpaper, Lock screen wallpaper or Wallpaper. Slideshow You can view your photos in a slideshow by album or by selecting all of your photos. From the Home screen, tap Gallery...
  • Page 541: Video

    • Tap the album with the photos you want to view, then tap the Menu icon > Slideshow > choose the images you want to view > Next > verify the slideshow settings > Start. Tap the center of the screen to stop playing the slideshow. Video Your Gallery has an integrated video player that lets you play all of your favorite videos. Playing a video From the Home screen, tap Apps > Apps tab > Gallery > Video Select the video you want to play. Touch to add the video to your favorites. Touch access QSlide and display the video in small window. Touch to share your video via the SmartShare function. Touch to access more options.
  • Page 542: Music

    Touch to manage the video volume. Touch and hold to rewind in 3 second increments. Tap once to rewind 10 seconds. Touch to pause video playback. Touch and hold to fast-forward in 3 second increments. Tap once to fast-forward 10 seconds. Touch to lock/unlock a video screen. To change the volume while watching a video, press the Volume Keys on the right side of the tablet. Tap Gallery > (in the upper left corner of the title bar) > Videos, then touch and hold a video in the list to access the following options: Share, Delete, Trim, Rename and Details. TIP! While watching a video, slide up and down along the left side of the screen to adjust the screen brightness. Slide up and down along the right side of the screen to adjust the volume. Music Your tablet has a music player that lets you play all your favorite tracks. To access the music player, from the Home screen, tap Apps > Apps tab > Music Transfer music using Media device (MTP) mode Connect the tablet to your PC using the USB cable. Select the Media device (MTP) option. Your tablet will appear as another hard drive on your computer. Click on the drive to view it. Copy the files from your PC to the drive folder.
  • Page 543: Playing A Song

    Playing a song From the Home screen, tap Apps > Apps tab > Music Touch the Songs tab. Select the song you want to play. Touch to share your music via the SmartShare function. Touch to set the current song as a favorite. Touch to see the Now playing playlist. Touch to access more options. Touch to set shuffle mode. Touch to set repeat mode.
  • Page 544 Touch to manage the music volume. Touch to go back to the beginning of the song. Touch twice to return to the previous song. Touch and hold to rewind 3 seconds. Touch to pause playback. Touch to skip to the next track on the album or in the playlist. Touch and hold to fast-forward 3 seconds. Touch to set the audio effect. To change the volume while listening to music, press the Volume Keys on the right side of the tablet. Touch and hold any song in the list to access the following options: Play, Add to playlist, Delete, Share, Details and Search. NOTE: • Some file formats are not supported, depending on the device software. • If the file size exceeds the available memory, an error can occur when you open files. • Music file copyrights may be protected by international treaties and national copyright laws. Therefore, it may be necessary to obtain permission or a licence to reproduce or copy music. In some countries, national laws prohibit private copying of copyrighted material. Before downloading or copying the file, check the national laws of the relevant country concerning the use of such material.
  • Page 545: Tools

    Tools QuickMemo+ The QuickMemo+ feature allows you to create memos and capture screen shots. Capture screens, draw on them, and share them with family and friends with QuickMemo+. Creating a memo From the Home screen, tap QuickMemo+ , then tap to create a new memo. You can edit texts by typing words directly or select the pen type and color you want to use and enter text by handwriting. Add a reminder by touching to set the reminder notification for the event. Add weather and location information to your memo if a data network is available. Using the QuickMemo+ options The following options are available in the QuickMemo+ toolbar at the top of the screen. Touch to open the memo in QSlide. Allows you to undo and redo previous actions. Allows you to edit the text, its color and its alignment. Allows you to enter text by handwriting. You can select the type of pen to use and its thickness, transparency, and color. Erases edits you've made to the memo.
  • Page 546 Saves the memo in QuickMemo+. Touch to access more options. Allows you to set a reminder notification for an event. Allows you to insert weather information into the memo. Allows you to add location information using GPS. Capturing a screen shot for your QuickMemo To access the QuickMemo+ feature, slide the Status Bar downwards and touch O R Press both of the Volume Keys at the same time for one second. Select the desired menu option from the toolbar and create a memo. Tap to save the memo. To exit QuickMemo+ at any time, tap the Back Key NOTE: Please use a fingertip while using the QuickMemo+. Do not use your fingernail.
  • Page 547: Quickremote

    QuickRemote QuickRemote turns your tablet into a Universal Remote for your home TV, Blu-ray or DVD. NOTE: QuickRemote may not be available for some devices and areas. To open and configure QuickRemote From the Home screen, tap the Apps > Apps tab > QuickRemote . You can also perform the initial set up of your QuickRemote from the Notifications Panel. Swipe the Status Bar downward, tap the QuickRemote , then tap ADD REMOTE. icon Touch to select a room type and touch to add the device. Select the type and brand of device, then follow the on-screen instructions to configure the device(s). NOTE: The QuickRemote operates the same way as an ordinary infrared (IR) remote control in your region or country. Be careful not to cover the infrared sensor at the top of the tablet when you use the QuickRemote function. This function may not be supported depending on the model, the manufacturer or service company.
  • Page 548: Clock

    Using QuickRemote Open QuickRemote and choose the room where you configured the remote. Select the remote you want by tapping its type/name on the QuickRemote bar along the left side of the screen. Tap the buttons on the displayed remote. NOTE: When adding the TV remote control, QuickRemote can use the INPUT button to configure appropriate remote control. When configuring the INPUT button, the TV input source can be changed. To reset the TV input source, tap the INPUT button on QuickRemote several times (depending on the number of devices connected to the TV). QuickRemote options To access the QuickRemote options menu, tap the Menu icon to select the desired option. NOTE: While playing music in the background, pressing any QuickRemote button will mute the sound for a second. Clock Setting your alarm From the Home screen, tap Apps > Apps tab > Clock > Set the desired alarm time. Set Repeat, Snooze duration, Alarm with vibration, Alarm sound, Alarm volume, Auto app starter, Puzzle lock and Memo. Touch Save.
  • Page 549: Calculator

    NOTE: To change alarm settings in the alarm list screen, touch the Menu icon and select Settings. Calculator Using your calculator From the Home screen, tap Apps > Apps tab > Calculator Tap the number keys to enter numbers. For simple calculations, tap the function you want to perform or ) followed by NOTE: • For more complex calculations, touch the Menu icon , select Scientific calculator, then choose the desired function. > Calculation history. • To view the calculation history, tap Menu icon Calendar Events from each account you’ve added to your tablet and configured to synchronize calendars is displayed in your Calendar. Adding an event to your calendar From the Home screen, tap Apps > Apps tab > Calendar Tap the menu at the top left corner to change the calendar view (Day, Week, Month, Year, Agenda). Tap the date you wish to add an event to and tap Touch the Event name field and enter the event name.
  • Page 550: Tasks

    Touch the Location field and enter the location. Check the date and enter the time you wish your event to start and finish. If you wish to add a note to your event, touch the Description field and enter the details. If you wish to repeat the alarm, set REPEAT and set REMINDERS, if necessary. Touch Save to save the event in the calendar. NOTE: Touch and hold a spot on the calendar to quickly save a calendar event on that date. Simply enter the event name and time, then tap Save. You can tap Details and enter more information, or update the event with additional details later. To change your calendar view No matter where you’re in the Calendar app, you can easily switch calendar views. Simply tap in the upper left corner of the title bar, or on the left side of the screen swipe your finger from left to right to display a menu of calendar views. Tap Day, Week, Month, Year, or Agenda. Tasks The Tasks app can be synchronized with your MS Exchange account. You can create and manage your tasks using your tablet or from MS Outlook or MS Office Outlook Web Access. From the Home screen, tap Apps > Tasks Tap the Add task icon (in the upper-right corner of the screen). Enter the Subject, START DATE, DUE DATE, DESCRIPTION, REPEAT and REMINDER as necessary. Tap Save.
  • Page 551: File Manager

    File Manager The File Manager application allows you to manage files in your internal/ external storage. File Manager makes it easy to view and manage your files. Simply tap a file type (All files, Music files, Image files, Video files, Document files, or Cloud files), then tap on the necessary folders to find your files. To open the File Manager application > Apps tab > File Manager • From the Home screen, tap Apps File Manager Options Open the File Manager app > All files > Internal storage to access to the following options (at the top of the screen): Allows you to open File Manager in a QSlide window. Allows you to search for your files or information. Allows you to create a new folder. Allows you to move files and folders to another location. Allows you to copy files and folders to another location. Allows you to delete files and folders. Allows you to access more options.
  • Page 552: Voice Recorder

    Voice Recorder Use the voice recorder to record voice memos or other audio files. Recording a sound or voice > Apps tab > Voice Recorder • From the Home screen, tap Apps Touch to select where to save your recording. Touch to begin recording. Touch to view a list of your Touch to end the recordings. recording. NOTE: The available recording time may differ from actual recording time. Managing your Voice memos From the Voice Recorder list screen: • Tap the Share icon to share the voice memo using the available choices. • Tap the Delete icon to select the voice memo(s) you want to delete. • Touch and hold a voice memo to open a context memo to select Share, Delete, Rename, Trim, or Details.
  • Page 553: Polaris Office 5

    POLARIS Office 5 POLARIS Office 5 is a professional mobile office solution that lets users conveniently view various types of office documents, including Word, Excel and PowerPoint files, anywhere or anytime, using their mobile devices. To create a new document > Apps tab > POLARIS Office 5 From the Home screen, tap Apps Register your email address on the Registration page. NOTE: You can tap Skip to ignore the registration information. Tap to start a new document. Tap a document type from the drop-down list, then choose a template. Enter contents in the document using the tools at the top of the screen and the on-screen keyboard. When you're done working on the document, tap (in the top left corner of the screen), then tap Save (or Save as to enter a new document name) to save. Enter the document name and touch Save. To view and edit a document on your device You can now easily view and edit a wide variety of file types, including Microsoft Office documents and Adobe PDF, right on their mobile devices. Open POLARIS Office 5 and search for a document. Touch the document that you want to view or edit.
  • Page 554: Google

    Google+ Use the Google+ app to stay connected with people via Google’s social network service. From the Home screen, tap Apps > Apps tab > Google > Google+ NOTE: This application may not be available depending on the region or service provider. LG SmartWorld LG SmartWorld offers an assortment of exciting content – fonts, themes, games, applications. How to Get to LG SmartWorld from Your Tablet Tap > Apps > Apps tab > tap the icon to access LG SmartWorld. Tap Sign in and enter ID/PW for LG SmartWorld. If you have not signed up yet, tap Register to receive your LG SmartWorld membership. Download the content you want. • LG SmartWorld may not be available for all carriers or in all countries.
  • Page 555 NOTE: What if there is no icon? Using a mobile Web browser, access LG SmartWorld (www.lgworld.com) and select your country. Download the LG SmartWorld App. Run and install the downloaded file. Access LG SmartWorld by tapping the icon. Special benefit only in LG SmartWorld Decorate your own style on your tablet by personalizing it with Home themes, keyboard themes, and fonts provided on LG SmartWorld. (However, this service is available only to specific devices. Please check the LG SmartWorld website to check availability). Enjoy LG SmartWorld's special service by joining promotions that are consistently provided.
  • Page 556: The Web

    The Web Internet Use this application to browse the Internet. Browser gives you a fast, full-color world of games, music, news, sports, entertainment and much more, right on your tablet wherever you are and whatever you enjoy. From the Home screen, tap Apps > Apps tab > Internet Tap to run QSlide. Tap to go back one page. Tap to go forward one page, to the page you connected to after the current one. This is the opposite of what happens when you touch the Back Key , which takes you to the previous page. Tap to refresh or stop the current page. Tap to go to the Home page. Tap to access your bookmarks. Touch to access more options. Opening a page • To open a new page, tap at the top of the browser. • To go to another web page, tap a tab at the top of the screen to view the page.
  • Page 557: Bookmarks

    Bookmarks To open a bookmarked web page, tap on the browser toolbar and select one. History Tap on the browser toolbar and select the History tab to open a web page from the list of recently-visited web pages. To clear the history, tap to clear all history. Using Reader mode Your tablet can display simplified web pages for easier reading. View news or blog posts and other article pages easily with no distractions – with Reader mode, you can read a clutter-free page. Tap on the URL web address bar to activate Reader mode. Using QSlide Use this feature to access the Internet without closing the current application. While viewing content on the browser, tap . You can then browse other information on your tablet. To view the browser in full screen, tap Download files Use the Downloads app to see what files have been downloaded. From the Home screen, tap Apps > Apps tab > Downloads Chrome Use Chrome to search for information and browse web pages. From the Home screen, tap Apps > Apps tab > Chrome...
  • Page 558: Viewing Web Pages

    NOTE: This application may not be available, depending on your region and service provider. Viewing web pages Tap the address field (at the top of the screen), enter a web address or search criteria, and tap on the keyboard. Opening a page • To go to a new page, tap at the top of the browser. • To go to another web page, tap the a tab at the top of the screen to select the page. Searching the web by voice Tap the address field, tap , speak a keyword and select one of the suggested keywords that appear. NOTE: This feature may not be available depending on the region or service provider. Syncing with other devices Sync open tabs and bookmarks to use with Chrome on another device when you are logged in with the same Google account. > Recent tabs. To view open tabs on other devices, tap the Menu icon You must be signed in to the same Google account on all devices. Select a web page to open.
  • Page 559: Adding And Viewing Bookmarks

    Adding and viewing bookmarks To add bookmarks, tap in the URL bar. To open a bookmarked web page, tap the Menu icon > Bookmarks and select the desired page. Chrome Options menu Tap the Menu icon to access the following options. • New tab – Tap to open a new web page tab. • New incognito tab – Tap to open a new incognito tab. • Bookmarks – Displays your bookmarked web pages. • Recent tabs – Displays your open web pages on other devices. • History – Displays your browsing data (web pages you've visited). • Share... – Allows you to share the web page. • Print... – Tap to print the web page. Choose to automatically find a printer on your network, or manually enter one to use. • Find in page – Allows you to search for text on the current web page. • Add to homescreen – Allows you to add a shortcut to the current page on your Home screen. • Request desktop site – Checkmark to access the desktop site when you view web pages on your tablet. • Settings – Allows you to change the settings specific to the Chrome app. • Help &...
  • Page 560: Settings

    Settings Access the Settings menu From the Home screen, tap Apps > Apps tab > Settings OR F rom the Home screen, touch and hold the Recent Apps Key > System settings. Select a setting category and set the desired option. WIRELESS NETWORKS Wi-Fi Wi-Fi – Turns on Wi-Fi to connect to available Wi-Fi networks. A list of all available Wi-Fi networks will be displayed. Tap one to connect to NOTE: Tap Search to scan for available Wi-Fi networks. Tap the Menu icon in the Wi-Fi menu to access the following options. Add Wi-Fi – Allows you to manually enter a new Wi-Fi network. Saved Wi-Fi – Allows you to forget saved Wi-Fi network. Advanced Wi-Fi – Accesses the advanced Wi-Fi settings. Interactive tutorial – Displays some useful tutorials for the Wi-Fi function.
  • Page 561: Data Usage

    TIP! How to obtain the MAC address To set up a connection in some wireless networks with MAC filters, you may need to enter the MAC address of your tablet in the router. You can find the MAC address in the following user interface: From the Home screen, tap Apps > Settings > Wi-Fi > Menu icon > Advanced Wi-Fi > MAC address. Bluetooth Turn the Bluetooth wireless feature on or off to use Bluetooth. Turning Bluetooth on allows you to pair and connect to other Bluetooth devices. Tap the Menu icon in the Bluetooth menu to access the following options. Edit tablet name – Changes your tablet name for easy identification when pairing and connecting. Enter your new tablet name, then tap Save. Visibility timeout – Sets the amount of time other Bluetooth devices can see your tablet for pairing and connection. Choose from 2 min, 5 min, 1 h, and Never time out. Show received files – Displays a list of your Bluetooth received files. Interactive tutorial – Displays some useful tutorials about Bluetooth features. Data usage Displays the data usage during the chosen periods of time. Tap an app from the list to view the app's data usage.
  • Page 562: Device

    Miracast – Allows you to wirelessly mirror your tablet screen and sound onto a Miracast dongle or TV. SmartShare Beam – Allows you to receive multimedia content via SmartShare Beam from LG phones or tablets. LG PC Suite – Allows Wi-Fi connection to transfer music and images between a computer and the tablet. Media server – Allows to share media contents with nearby devices via DLNA. VPN – Displays the list of Virtual Private Networks (VPNs) that you've previously configured. Allows you to add different types of VPNs. NOTE: You must set a lock screen PIN, Password or Pattern before you can use credential storage. DEVICE Sound Sound profile – Allows you to set the sound profile to Sound, Vibrate only or Do not disturb. Volume – Manage the volume for Notifications sound, Touch feedback & system, and Music, video, games & other media. Vibration strength – Allows you to set the vibrate strength for calls, notifications, and touch feedback. Notification sound – Allows you to set your default notification ringtone. Do not disturb – Allows you to set a schedule when to prevent interruptions from notifications. You can set to allow certain features to interrupt when Priority only is set.
  • Page 563 Lock screen – Allows you to choose if you want to show or hide notifications on the lock screen. Apps – Allows you to prevent apps from displaying notifications or set apps to show notifications with priority when Do not disturb is set to Priority only. Touch sound – Allows you to set your tablet to play a sound when you touch buttons, icons and other onscreen items that react to your touch. Screen lock sound – Allows you to set your tablet to play a sound when locking and unlocking the screen. Vibrate on tap – Allows you to set the vibration feedback when the tablet screen is touched. Display Home screen Theme – Sets the screen theme for your device. Wallpaper – Sets the wallpaper to use on your Home screen. Screen swipe effect – Sets the effect when you swipe to change screens. Allow Home screen looping – Checkmark to set the Home screens to scroll continuously, eliminating the need to scroll back in the opposite direction when you reach one end. Home backup & restore – Allows you to backup and restore app and widget configurations and themes. Help – Displays information about the Home screen. Lock screen Select screen lock – Set a screen lock type to secure your tablet.
  • Page 564 NOTE: After upgrading to Lollipop OS, your screen lock may not be available except for Pattern, PIN and Password. In this case, go to Apps > Settings > Security > Clear credentials to delete the security certificates, and then, set up a screen lock. Be careful when you clear credentials because all the security certificates you have installed will be deleted. Smart Lock – Sets to keep your tablet unlocked when you have a trusted Bluetooth device connected to it, when it's in a familiar location like your home or work, or when it recognizes your face. Screen swipe effect – Sets the screen swipe effect options. Wallpaper – Sets your Lock screen wallpaper. Select it from Gallery or Wallpaper gallery. Shortcuts – Allows you to change the shortcuts on the Swipe Lock screen. Owner info – Allows you to enter contact info to be displayed on the Lock screen in case the tablet is lost. Lock timer – Sets the amount of time before the screen automatically locks after the screen has timed-out. Power button instantly locks – Checkmark to instantly lock the screen when the Power/Lock Key is pressed. This setting overrides the Security lock timer setting. Brightness – Adjust the screen brightness. Touch Night brightness to set the brightness to 0% automatically between the hours of 12:00 am - 6:00 am. Screen timeout – Set the time delay before the screen automatically turns off. Screen-off effect – Sets the screen-off effect used when the screen turns off.
  • Page 565 Auto-rotate screen – Set to switch orientation automatically when you rotate the tablet. Daydream – Tap the Daydream switch to toggle it On or Off. On allows the set screen saver to be displayed when the tablet is sleeping while docked and/or charging. Choose from Clock and Google Photos. NOTE: Charging might be slow while the screen saver is on. Font type – Change the type of display font. Font size – Change the size of the display font. Smart screen – Keeps the screen on when the device detects your eyes looking at the screen. Home touch buttons – Allows you to set which Home touch buttons are displayed and their position on the bar. You can also select the color and the background. Motion sensor calibration – Allows you to improve the accuracy of the tilt and speed of the sensor. Storage INTERNAL STORAGE – Displays the total amount of space in the device’s memory and lists what type of data is using up space. SD CARD – Displays the total amount of memory space on the microSD card. Mount/Unmount SD card – Mounts and unmounts the microSD card from your tablet so that you can access the data stored in it, format the card, or safely remove it. This setting is dimmed if there’s no microSD card installed, if you’ve already unmounted it, or if you’ve mounted the microSD card on your computer.
  • Page 566 Erase SD card – Permanently erases everything on the microSD card and prepares it for use with your tablet. Battery BATTERY INFORMATION – See how much battery power is used for device activities. The battery level displays in a percentage. The remaining time of use is also displayed. Battery usage – Displays battery usage. Battery percentage on status bar – Displays the battery percentage on the Status Bar. Battery saver – Manage the battery for the power saving items. Tap the switch to turn this feature on. Tap Battery saver for the following options. • TURN BATTERY SAVER ON: Set the battery level at which you want Battery saver to turn on. Choose from Immediately, 5% battery and 15% battery. Help – Touch to access some tips for Power saver. Smart cleaning You can manage the unused apps, saved files or temporary internet files. Apps Display the list of applications such as currently running or downloaded. Swipe left and right to view one of the three tabs across the top of the screen to view detailed information for DOWNLOADED, ON SD CARD, RUNNING, and ALL applications.
  • Page 567: Personal

    Dual window Split view – Allows the device to automatically open Dual window when you tap a link on the full screen or tap an e-mail attachment (images only). Help – Displays help information about using the Dual window feature. PERSONAL Cloud Tap Add account to add a cloud account. You access your cloud accounts from this menu. Tap the Menu icon to upload files. Users This menu displays the current users you've created. Add users when tablet locked – Allows you to add a new user when your tablet is locked. Add user – Allows you to add new account for the tablet and use the Multi- user feature. Location Mode • High accuracy – Use GPS and Wi-Fi networks to estimate location. • Battery saving – Use Wi-Fi networks to estimate location. • Device sensors only – Use GPS to pinpoint your location. RECENT LOCATION REQUESTS – Displays apps that have recently requested your location information.
  • Page 568: Accounts & Sync

    Google Location Reporting – Allows you to view your Google location settings. Security Encrypt tablet – Allows you to encrypt data on the tablet for security. You will be required to enter a PIN or password to decrypt your tablet each time you power it on. Encrypt SD card storage – Allows you to encrypt data on the MicroSD for security. Password typing visible – Shows the last character of the hidden password as you type. Tablet administrators – View or deactivate tablet administrators. Unknown sources – Allows installation of apps from non-Play Store applications. Verify apps – Disallow or warn before installation of apps that may cause harm. Storage type – Displays the storage type for certificates. Trusted credentials – Displays trusted CA certificates. Install from storage – Choose to install encrypted certificates. Clear credentials – Remove all certificates. Trust agents – View or deactivate Trust agents. Screen pin – This feature allows you to lock your device so that the current user can only access the pinned app. This is useful for users with children. App usage access – Allows to view usage info of apps. Accounts &...
  • Page 569: Language & Input

    Language & input Use the Language & input settings to select the language for the text on your tablet and to configure the on-screen keyboard, including words you've added to its dictionary. Backup & reset Back up my data – Set to backup your settings and application data to the Google server. Backup account – Set the account to which you want to backup data to. Automatic restore – Set to restore your settings and application data when the applications are reinstalled on your device. LG Backup service – Backs up all information on the device and restores it in the event of data loss or replacement. Refer to page 99 for more information. Factory data reset – Reset your settings to the factory default values and delete all your data. If you reset the tablet this way, you are prompted to re-enter the same information as when you first started Android. SYSTEM Shortcut Key Allows you to turn the Shortcut keys on and off. Date & time Use Date & time settings to set how dates will be displayed. You can also use these settings to set your own time and time zone rather than obtaining the current time from the mobile network.
  • Page 570 Accessibility Use the Accessibility settings to configure accessibility plug-ins you have installed on your tablet. NOTE: Requires additional plug-ins to become selectable. TalkBack – Allows you to set up the TalkBack function which assists people with impaired vision by providing verbal feedback. Tap the TalkBack switch at the top right corner of the screen to turn it on. Tap Settings at the bottom of the screen to adjust the TalkBack settings. Font size – Checkmark to increase the size of the text. Invert colors – Checkmark to invert the colors of the screen and content. Color adjustment – Sets to view the screen with greater color contrast. Tap the switch to turn it on. Then tap the screen and drag across the screen in any direction until you see the color contrast you want to use. Touch zoom – Allows you to zoom in and out by triple-tapping the screen. Screen shade – Dims the screen's backlight. Accessibility shortcut – Activate this feature to allow you to quickly enable accessibility features in two steps. Text-to-speech output – Sets the text-to-speech preferred engine and speech rate setting. Also plays a short demonstration of speech synthesis. The default language status is also displayed. Audio type – Sets the audio type. Choose Mono or Stereo. Sound balance – Sets the audio route. Move the slider on the slide bar to set it. Turn off all sounds – Turns off all sounds.
  • Page 571 Touch feedback time – Sets the touch and feedback time. Choose from Short, Medium, and Long. Touch assistant – Show a touch board with easy access to common actions. Screen timeout – Sets the amount of time before the screen turns off. Touch control areas – Tap the switch to turn this feature on. Allows you to limit the touch control to selected areas of the screen. Press the Volume Down Key and Home Key at the same time to activate and deactivate the feature. Auto-rotate screen – Checkmark to allow the device to rotate the screen depending on the device orientation (portrait or landscape). Password voice confirmation – Checkmark to have verbal confirmation when inputting passwords. Accessibility settings shortcut – Sets quick and easy access to selected features when you triple-tap the Home Key. One-touch input – Each finger touch enters a letter/character on the LG keyboard. Switch Access – Allows you to interact with your device using one or more switches that work like keyboard keys. This menu can be helpful for users with mobility limitations that prevent them from interacting directly with the your device. Quick Cover Activate this menu to turn the screen on or off automatically when using the Quick Cover.
  • Page 572: About Tablet

    Printing Allows you to print the content of certain screens (such as web pages displayed in Chrome) to a printer connected to the same Wi-Fi network as your Android device. About tablet This menu allows you to manage your software updates and view various information relating to your tablet. Tablet name – Allows you to set your tablet name. Update Center – Allows you to check for app and software updates. Battery – Allows you to view battery status, battery level, and battery use information. Hardware info – Allows you to view the model number, IP address, up time, CSN, Wi-Fi MAC address and Bluetooth address. Software info – Allows you to view Android version, kernel version, build number, and software version. Legal info – Allows you to view legal documents for LG software, open source licenses and Google legal information.
  • Page 573: Lg Backup

    LG Backup About backing up and restoring device data It is recommended that you regularly create and save a backup file on the internal storage, especially before updating any software. Maintaining a current backup file in storage memory may allow you to recover device data if your device is lost, stolen, or corrupted by an unforeseen issue. This LG Backup application is supported between LG smartphones and tablets, other software or operating system versions. As a result, when you buy the new LG smartphones and tablets, you can backup the current device data to your new device. If you have the LG Backup application preloaded on your smartphones and tablets, you can backup and restore most of your data, including downloaded and pre-installed applications, bookmarks, calendar entries, contacts, home screen settings, and system settings. You may also: • Perform a manual backup of your device. • Restore your device data. Warning! To protect against an unexpected power off during backup or restore operations, due to insufficient battery power, you should always keep your battery fully charged.
  • Page 574: Backup Your Tablet Data

    From the Home screen, tap Apps > Settings LG Backup Service > Backup. On the Backup Location screen, touch Internal storage or SD card, then tap Next. Select the check box for the items you want to backup and select Next. Read the information presented on the screen, then tap Start. When all selected files have been backed up, you will see the message Back up completed. Restoring tablet data NOTE: All files that are stored on your tablet are deleted before the backup file is restored. Make sure to copy the backup file to another location. > Backup & reset > From the Home screen, tap Apps > Settings LG Backup Service > File restore & management. On the Restore screen, select a backup file that contains the data you wish to restore. Select the check box next to the item you wish to restore and select Next to restore it to your tablet. NOTE: Please note that your tablet data will be overwritten with the content of your backup. If the backup file is encrypted, type the password that you created to encrypt it.
  • Page 575 When all selected files have been restored, the tablet will automatically be restart. NOTE: You can set the Lock backup files option when creating a backup to encrypt your backup files for extra protection. > Set password On the LG Backup main screen, touch the Menu icon and enter a password and hint in case you forgot your password. Once you have set up a password, you need to enter it every time you want to do backup/restore.
  • Page 576: Tablet Software Update

    Tablet software update Tablet software update This feature allows you to update the firmware of your tablet to the latest version conveniently from the internet without the need to visit a service center. For more information on how to use this function, please visit: http://www.lg.com As the tablet firmware update requires the user’s full attention for the duration of the update process, please make sure to check all instructions and notes that appear at each step before proceeding. Please note that removing the USB cable or battery during the upgrade may seriously damage your tablet. LG tablet software update via Over-the-Air (OTA) This feature allows you to update the firmware of your tablet to the newer version conveniently via OTA without connecting the USB data cable. This feature is only available if and when LG makes the newer version of the firmware available for your device. First, you can check the software version on your tablet: From the Home screen, tap Apps > Settings > About tablet > Software info. To perform the tablet software update, from the Home screen, tap Apps > Settings >About tablet > Update Center > Software Update > Check now for update.
  • Page 577 NOTE: Your personal data—including information about your Google account and any other accounts, your system/application data and settings, any downloaded applications and your DRM licence —might be lost in the process of updating your device's software. Therefore, LG recommends that you back up your personal data before updating your tablet's software. LG does not take responsibility for any loss of personal data.
  • Page 578: Accessories

    Accessories These accessories are available for use with the your tablet. (Items described below may be optional.) Travel adaptor USB cable Quick Start Guide NOTE: • Always use genuine LG accessories. Failure to do this may void your warranty. • Accessories may vary in different regions.
  • Page 579: Troubleshooting

    Contact your service provider. can be set required. Battery is not charged. Charge battery. Outside temperature is Make sure tablet is charging at too hot or cold. a normal temperature. Check the charger and its Contact problem connection to the tablet. Charging error Plug the charger into a different No voltage socket. Charger defective Replace the charger. Use only original LG Wrong charger accessories. Impossible to Delete some images from your receive / send Memory full tablet. photos Files do not Check the supported file Unsupported file format open formats. Check the settings status in the sound menu to make sure No sound Vibration mode you are not in vibration or silent mode.
  • Page 581 Wi-Fi (WLAN) Dieses Gerät kann in allen europäischen Ländern verwendet werden. Der Frequenzbereich von 5150 bis 5350 MHz ist auf die Nutzung in Innenräumen beschränkt. Wi-Fi (WLAN) Ce périphérique peut être utilisé dans tous les pays européens. Les bandes de fréquences 5150 - 5350 MHz sont réservées à un usage en intérieur uniquement. Wi-Fi (WLAN) Il presente apparecchio può essere utilizzato in tutti i Paesi europei. La gamma di frequenza di 5150 - 5350 MHz è riservata all’uso in interni. Wi-Fi (WLAN) Opremo je mogoče uporabljati v vseh evropskih državah. 5150–5350 MHz pas je omejen na uporabo v zaprtih prostorih. Naprava se lahko uporablja v vseh državah članicah EU, v kolikor ima UKV oddajnik, ki je del opreme, razen v Grčiji in na Cipru. Wi-Fi (WLAN) This equipment may be operated in all European countries. The 5150 - 5350 MHz band is restricted to indoor use only.
  • Page 582 Allgemeine Anfragen <LG Informationscenter für Kunden> Service Hotline Österreich: 0810 144 131 (zum Ortstarif) Service Hotline Schweiz: 0848 543 543 (zum Ortstarif) * V ergewissern Sie sich, dass diese Rufnummer korrekt ist, bevor Sie anrufen. Informations générales <Centre d’information clientèle LG> Autriche: 0810 144 131 Suisse: 0848 543 543 * A vant d’appeler, vérifi ez que le numéro est correct. Informazioni generiche <LG Customer Information Center> Austria: 0810 144 131 Svizzera: 0848 543 543 * V erificare che il numero sia corretto prima di effettuare la chiamata.

Ce manuel est également adapté pour:

V480

Table des Matières