Allen + Roth Ellum-SC-TD-CH Manuel D'installation
Table des Matières
Liens rapides
ALLEN + ROTH and logo design are trademarks or registered trademarks of LF, LLC. All
rights reserved.
ALLEN + ROTH et le logo sont des marques de commerce ou des marques de commerce
déposées de LF, LLC. Tous droits réservés.
ALLEN + ROTH y el diseño del logotipo son marcas comerciales o marcas registradas de
LF, LLC. Todos los derechos reservados.
Vous pouvez aussi nous contacter à partsplus@lowes.com ou sur www.lowespartsplus.com.
También puede ponerse en contacto con nosotros en partsplus@lowes.com o visitar www.lowespartsplus.com.
SM21041
An installation video guide can be found on our Youtube channel:
Un guide d'installation video est disponible sur notre chaîne Youtube:
Una guía de instalación en vídeo está disponible en nuestro canal de Youtube:
https://tinyurl.com/s67wxbz3
Questions, problems, need help?
Call our customer service department at
1-866-439-9800, 8 a.m. - 8 p.m., EST, Monday - Sunday.
You could also contact us at partsplus@lowes.com or visit www.lowespartsplus.com.
English and French speaking representatives available
Vous avez des questions, des problèmes ou besoin d'aide?
Communiquez avec notre service à la clientèle au
1-866-439-9800, entre 8 h et 20 h (HNE), du lundi au dimanche. Des représentants
anglophones et francophones sont disponibles.
¿Preguntas, problemas, necesita ayuda?
Llame a nuestro Departamento de Servicio al Cliente al
1-866-439-9800, de lunes a domingo de 8 a.m. a 8 p.m., hora estándar del Este.
Representantes que hablan inglés y francés disponibles.
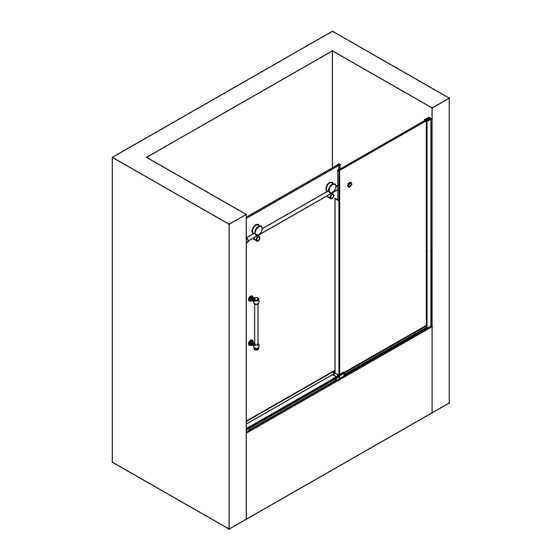
Ellum Tub Door Soft Close in Chrome
ITEM #/ARTICLE #/ARTÍCULO #: 3592195
MODEL#/MODÈLE#/MODELO #: Ellum-SC-TD-CH
Ellum Tub Door Soft Close in Satin Nickel
ITEM #/ARTICLE #/ARTÍCULO #: 3592191
MODEL#/MODÈLE#/MODELO #: Ellum-SC-TD-SN
INSTALLATION MANUAL
MANUEL D'INSTALLATION
MANUAL DE INSTALACIÓN
PAGE 1
Table des Matières

Manuels Connexes pour Allen + Roth Ellum-SC-TD-CH


Sommaire des Matières pour Allen + Roth Ellum-SC-TD-CH
- Page 1 ALLEN + ROTH and logo design are trademarks or registered trademarks of LF, LLC. All MODEL#/MODÈLE#/MODELO #: Ellum-SC-TD-SN rights reserved. ALLEN + ROTH et le logo sont des marques de commerce ou des marques de commerce INSTALLATION MANUAL déposées de LF, LLC. Tous droits réservés.
-
Page 2: Table Des Matières
TABLE OF CONTENT TABLE DES MATIÈRES TABLA DE CONTENIDOS Table Of Content ..........2 Table Des Matières ..........2 Índice ..............2 Shower Dimensions ..........3 Dimensions De La Douche .......3 Dimensiones de la ducha .........3 Wall-To-Wall Dimensions ........4 Mesures Mur-À-Mur ...........4 Dimensiones de pared a pared ......4 Package Content ..........5 Contenu De L’emballage ........5 Contenido del paquete ........5... -
Page 3: Shower Dimensions
SHOWER DIMENSIONS DIMENSIONS DE LA DOUCHE DIMENSIONES DE LA DUCHA Measurements Mesures Medidas Shower height Hauteur de la douche Altura de la ducha Shower width Largeur de la douche Ancho de la ducha Fixed panel width Largeur du panneau fixe Ancho del panel fijo Door panel width Largeur de la porte... -
Page 4: Wall-To-Wall Dimensions
WALL-TO-WALL DIMENSIONS MESURES MUR-À-MUR MEDIDAS DE PARED-A-PARED • Make sure to have a distance tile to tile (D) between 58 3/16 in (1478mm) min. and 60 3/16 in (1528mm) max. (see image). • Measure the thickness of your tiles on either side before installing the metal tracks. A thicker tile will limit your space to install the shower panels. -
Page 5: Package Content
PACKAGE CONTENT CONTENU DE L’EMBALLAGE CONTENIDO DEL PAQUETE PAGE 5... - Page 6 PACKAGE CONTENT CONTENU DE L’EMBALLAGE CONTENIDO DEL PAQUETE PAGE 6...
-
Page 7: Part List
PART LIST LISTE DES PIÈCES LISTA DE PIEZAS PART # DESCRIPTION QUANTITY CODE # DE PIÈCE DESCRIPTION QUANTITÉ CODE PIEZA # DESCRIPCIÓN CANTIDAD CÓDIGO Sliding door guide (with its rubber fitting) Chrome / Chrome / Cromo: 99SGC1053-WM Guide de porte (avec bande d’étanchéité) Guía de la puerta corrediza (con su conector de Satin Nickel / Satiné... -
Page 8: Supplied Hardware List
SUPPLIED HARDWARE LIST QUINCAILLERIE FOURNIE LISTA DE LOS ADITAMENTOS INCLUIDOS Wall Anchor Screw Screw Screw Fitting Screw Ancrage mural Capuchon Raccord Ancla de expansión para pared Tornillo Tornillo Tornillo Tapa Conector Tornillo ø8x30mm ST5x30mm ST4x20mm ST4x12mm ST5x40mm Allen key Mechanism reset tool Capuchon Capuchon Capuchon... -
Page 9: Preparation
PREPARATION PRÉPARATION PREPARACIÓN This instruction is drawn up for a door opening from right to left (see illustration A). For an installation for a door opening from left to right (see illustration B), use the same instructions, but switch around the panels: mirror effect. Utilisez ces instructions pour une ouverture de la porte de droite à... -
Page 10: Safety Information
SAFETY INFORMATION INFORMATION SUR LA SÉCURITÉ INFORMACIÓN DE SEGURIDAD CAUTION Please carefully read the following important safety information before handling or installing this shower. There is a risk of serious injury while handling this product. To minimize these risks, please note: •... -
Page 11: Safety Notice
SAFETY NOTICE AVIS DE SÉCURITÉ NOTA DE SEGURIDAD NOTICE Any modification or alteration from what is specified in this instruction manual will void any and all warranty on this product. The distributor is not responsible for any damage to the unit or personal property caused by improper installation. If you disregard instructional warnings, you will void your warranty and possibly deal with water damage. -
Page 12: Wall Track Installation
WALL TRACK INSTALLATION INSTALLATION DE LA GLISSIÈRE INSTALACIÓN DEL RIEL DE PARED 1.1-1.2. Position the wall track (B) as illustrated. Level the track (B) and mark the track holes positions. 1.3. Remove the track and drill pilot holes in the marked locations with a ø8mm (5/16 in) drill bit. 1.4. -
Page 13: Fixed Panel And Support Bar Installation
FIXED PANEL AND SUPPORT BAR INSTALLATION INSTALLATION DU PANNEAU FIXE ET DE LA BARRE DE SUPPORT INSTALACIÓN DEL PANEL FIJO Y LA BARRA DE SOPORTE 2.1. Insert the fixed panel bottom seal strip (N) on the base of the fixed panel (C). Cut the surplus part with a cutter, about 4 cm (1 9/16 in) from the panel’s edge. 2.2. - Page 14 FIXED PANEL AND SUPPORT BAR INSTALLATION INSTALLATION DU PANNEAU FIXE ET DE LA BARRE DE SUPPORT INSTALACIÓN DEL PANEL FIJO Y LA BARRA DE SOPORTE 3.1. Install the support bar anthors (D) onto the support bar (F). 3.2. Loosely mount the support bar (F) onto fixed panel (C) using the bracket and level it. 3.3.
- Page 15 FIXED PANEL AND SUPPORT BAR INSTALLATION INSTALLATION DU PANNEAU FIXE ET DE LA BARRE DE SUPPORT INSTALACIÓN DEL PANEL FIJO Y LA BARRA DE SOPORTE 4.1-4.2. Place the support bar (F) in order to align the bracket in front of the fixed panel’s hole. Position the support bar so that the A and B measurements in illustration 4.1 below match the A and B measurements in illustration 4.2 respectively.
- Page 16 FIXED PANEL AND SUPPORT BAR INSTALLATION INSTALLATION DU PANNEAU FIXE ET DE LA BARRE DE SUPPORT INSTALACIÓN DEL PANEL FIJO Y LA BARRA DE SOPORTE 5.1. Drill a pilot hole for the sliding door guide (A) using a ø3mm (1/8 in) drill bit. 5.2.
- Page 17 FIXED PANEL AND SUPPORT BAR INSTALLATION INSTALLATION DU PANNEAU FIXE ET DE LA BARRE DE SUPPORT INSTALACIÓN DEL PANEL FIJO Y LA BARRA DE SOPORTE 6.1. Install the support bar anthors (D) onto the support bar (F). 6.2. Insert the door bottom seal strip (O) onto the door panel (J). 6.1.
- Page 18 FIXED PANEL AND SUPPORT BAR INSTALLATION INSTALLATION DU PANNEAU FIXE ET DE LA BARRE DE SUPPORT INSTALACIÓN DEL PANEL FIJO Y LA BARRA DE SOPORTE 7.1-7.2. Place the fixed panel (C) into the wall track (B) and put back the sliding door guide (A). 7.3-7.4.
-
Page 19: Shower Door Installation
SHOWER DOOR INSTALLATION INSTALLATION DE LA PORTE DE DOUCHE INSTALACIÓN DE LA PUERTA DE DUCHA 8.1-8.4. The soft close mechanism can be reset using mechanism reset tool (KK). Correct starting position is toward the center of the support bar (F). Be sure to save this tool in case the soft close mechanism needs to be reset in the future. - Page 20 SHOWER DOOR INSTALLATION INSTALLATION DE LA PORTE DE DOUCHE INSTALACIÓN DE LA PUERTA DE DUCHA 9.1. Disassemble the door rollers (H). 9.2. Install the 2 door rollers (H) on the door panel (J). 9.3. Gently hang the door panel by its 2 rollers (H) on the support bar (F) and make sure to place the bottom of the door inside the guide (A). 9.1.
-
Page 21: Leveling The Glass Panel
LEVELING THE GLASS PANEL NIVELAGE DU PANNEAU DE VERRE NIVELACIÓN DEL PANEL DE VIDRIO After the wheels have been installed, adjust the level of the glass panel using the eccentric mechanism of the rollers. Fit the larger Allen key in the center of the inner roller, fit the smaller Allen key in the small hole located on the rim of the inner roller. - Page 22 SHOWER DOOR INSTALLATION INSTALLATION DE LA PORTE DE DOUCHE INSTALACIÓN DE LA PUERTA DE DUCHA Important: Once the door is adjusted correctly, only then resume to the next step. 11.1. Open the door (J). Install the 2 anti-jump pegs on the door panel (J). Use a ratchet to strongly tighten the bolts. 11.2.
-
Page 23: Seal Strips Installation
SEAL STRIPS INSTALLATION INSTALLATION DES BANDES D’ÉTANCHÉITÉ INSTALACIÓN DE LAS BANDAS PARA SELLADO 12.1-12.3. Install the 2 glass panel vertical seal strips (G). Install the 2 short seal strips (E) onto the glass panels. Install the door vertical seal strip (I) on the closing end. -
Page 24: Handle Installation
HANDLE INSTALLATION INSTALLATION DE LA POIGNÉE INSTALACIÓN DE LA MANIJA 13.1-13.2. Using silicone, install the decorative track (L) in front of the door panel. Slide the decorative caps (K) onto the track. 13.3-13.4. Secure the fixed panel (C) by drilling guide holes through the wall track (B) and screwing it in place using fittings (FF), screws (DD) and caps (EE). 13.5. -
Page 25: How To Change Your Soft Close Mechanism
HOW TO CHANGE YOUR SOFT CLOSE MECHANISM COMMENT CHANGER VOTRE MÉCANISME DE FERMETURE EN DOUCEUR CÓMO CAMBIAR EL MECANISMO DE CIERRE SUAVE 14.1-14.2. Loosen the set screws of the soft close mechanism (P), which can be accessed through the holes at the bottom of the support bar (F), then push the soft close mechanisms (P) out of the support bar (F). - Page 26 HOW TO CHANGE YOUR SOFT CLOSE MECHANISM COMMENT CHANGER VOTRE MÉCANISME DE FERMETURE EN DOUCEUR CÓMO CAMBIAR EL MECANISMO DE CIERRE SUAVE 15.1-15.2. The soft close mechanism can be reset using mechanism reset tool (KK). Correct starting position is toward the center of the door. Be sure to save this tool in case the soft close mechanism needs to be reset in the future.
-
Page 27: Sealing
SEALING SCELLAGE SELLAR Ensure that the door closes tightly and opens smoothly. Ensure that there is a firm connection between the fixed panel(s) and the support bar. Apply a clear silicone water sealant around the outside perimeter of any fixed shower components. Allow 24 hours for silicone to dry. Improper application of silicone sealant may cause your shower to leak. -
Page 28: Maintenance And Care
MAINTENANCE AND CARE ENTRETIEN ET MAINTENANCE MANTENIMIENTO Y CUIDADO For the daily maintenance, use a wet cloth and a soft liquid cleaner. Never use abrasive cleaners containing some acetone, chlorine or strong bleach, scrapers, metallic brushes, nor other objects or the products which can graze or tarnish surfaces. -
Page 29: Limited Product Warranty
LIMITED Product Warranty The DISTRIBUTOR is a distributor of the following products: • Shower Doors (warranty period 5 years). • Acrylic Surfaces (warranty period 5 years against blistering, cracking or chipping in the acrylic surface). • Acrylic Shell Structure (warranty period 5 years against loss of water through fiberglass laminate of the acrylic body). •...