
Manuels Connexes pour Beamz Panther 25 Led Spot


Sommaire des Matières pour Beamz Panther 25 Led Spot
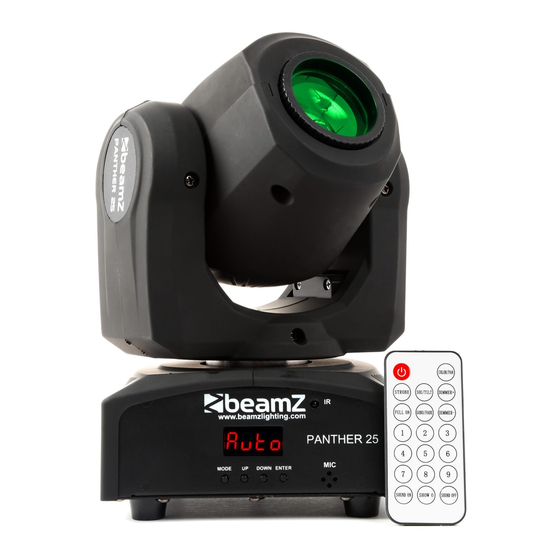
- Page 1 Panther 25 Led Spot Ref. nr.: 150.460 INSTRUCTION MANUAL GEBRUIKSAANWIJZING GEBRAUCHSANLEITUNG MANUAL DE INSTRUCCIONES MANUEL D'INSTRUCTIONS INSTRUKCJA OBSŁUGI V2.1...
- Page 3 ENGLISH Congratulations to the purchase of this Beamz light effect. Please read this manual thoroughly prior to using the unit in order to benefit fully from all features. Read the manual prior to using the unit. Follow the instructions in order not to invalidate the warranty. Take all precautions to avoid fire and/or electrical shock.
-
Page 4: Unpacking Instruction
UNPACKING INSTRUCTION CAUTION! Immediately upon receiving a fixture, carefully unpack the carton, check the contents to ensure that all parts are present, and have been received in good condition. Notify the shipper immediately and retain packing material for inspection if any parts appear damage from shipping or the package itself shows signs of mishandling. -
Page 5: Dmx-512 Connection
DISPLAY The control board offer several features: you can simple set the starting address, run the pre-programmed program or make a reset. The main menu is accessed by pressing the Mode/Esc-button, browse through the submenu by pressing Up or Down. Press the Enter-button in order to select the desired menu. -
Page 6: Auto Programs
AUTO PROGRAMS Show Mode: This mode allows either a single unit or several units linked together, to run one of seven shows that you choose. Press the up or Down button until one of seven programs is displayed, and press ENTER. The picture below details a proper DOWN ENTER ENTER... -
Page 7: Remote Control
MASTER SLAVE FIXTURE 1. Connect the (male) 3 pin connector side of the ENTER …. DMX cable to the output (female) 3pin connector of the first fixture. MODE 2. Connect the end of the cable coming from the first fixture which will have a (female) 3 pin DOWN connector to the input connector of the next ENTER... -
Page 8: Replacing The Fuse
One of the control DMX setup or DMX link See next section. channels is fault. Contact your Beamz by Tronios authorized unresponsive or only Damaged step motor or distributor or service center for assistance. responds cable connection intermittently. - Page 9 NEDERLANDS Hartelijk dank voor de aanschaf van dit Beamz lichteffect. Neemt U a.u.b. een paar momenten de tijd om deze handleiding zorgvuldig te lezen, aangezien wij graag willen dat u onze producten snel en volledig gebruikt. Lees deze handleiding eerst door alvorens het product te gebruiken. Volg de instructies op anders zou de garantie wel eens kunnen vervallen.
-
Page 10: Installatie
UITPAKKEN LET OP! Onmiddellijk na ontvangst, zorgvuldig uitpakken van de doos, controleer de inhoud om ervoor te zorgen dat alle onderdelen aanwezig zijn en zijn in goede staat zijn ontvangen. Bij transportschade of ontbreken van onderdelen onmiddellijk de verkopende partij inlichten. Bewaar de verpakking en het verpakkingsmateriaal. Indien het apparaat moet worden teruggestuurd, is het belangrijk dat de apparatuur in originele verpakking wordt geretourneerd. - Page 11 DISPLAY Het bedieningspaneel biedt verschillende mogelijkheden zoals: eenvoudige invoeren van het startadres, voorgeprogrammeerde programma selecteren of een reset. Het hoofdmenu wordt geopend door op de Mode/Esc-toets, blader door het submenu door Up of Down-toets. Druk op de Enter-toets om het gewenste menu te selecteren. U kunt de selectie wijzigen door te drukken op de Up of Down-toets.
- Page 12 AUTO PROGRAMMA’S Show Mode: In deze modus kan een enkel moving head, of meerdere aan elkaar gekoppelde, één van de zeven shows die u kiest. 1. Druk op de “UP of “DOWN” toets totdat één van de zeven programma's wordt weergegeven, en druk op ENTER. De foto hieronder DOWN ENTER ENTER...
- Page 13 MASTER SLAVE FIXTURE Moving head kunnen in serie worden geschakeld waar één unit als Master functioneert en alle ENTER …. anderen als Slaves. Slave units werken allemaal synchroon met de Master unit. MODE 1. Druk op de MODE toets in het display komt "SET"...
-
Page 14: Vervangen Zekering
Eén van de channels DMX setup of DMX Zie de volgende stap. reageert niet of met verbinding is slecht. Neem contact op met Beamz door Tronios erkende distributeur tussenpozen. Defecte stappenmotor of of service center voor assistentie. kabelverbinding tussen head en body. - Page 15 DEUTSCH Vielen Dank für den Kauf dieses Beamz gerat. Nehmen Sie sich einen Augenblick Zeit, um diese Anleitung sorgfältig durchzulesen, damit sie die Möglichkeiten, die unser Produkt bietet, sofort voll ausnutzen können. Lesen Sie erst die Anleitung vollständig vor der ersten Inbetriebnahme durch. Befolgen Sie die Anweisung, da sonst jeglicher Garantieanspruch verfällt.
- Page 16 AUSPACKEN Packen Sie das Gerät sofort nach Empfang aus und prüfen Sie den Inhalt. Wenn Teile fehlen oder beschädigt sind, benachrichtigen Sie sofort den Spediteur und bewahren Sie die Verpackung auf. Falls ein Gerät ins Werk zurückgeschickt werden muss, ist es wichtig, dass es in der Originalverpackung versandt wird. Das Gerät darf nicht in Betrieb genommen werden, nachdem es von einem kalten in einen warmen Raum gebracht wurde.
-
Page 17: Dmx-512 Anschluss
DISPLAY Die Konsole bietet verschiedene Funktionen wie: einfache Eingabe der Startadresse, wählen Sie Preset-Programm oder ein Reset. Das Hauptmenü wird durch Drücken der Mode/Esc-Taste aufgerufen, blättern Sie durch die Untermenüs durch Up oder Down-Taste. Drücken Sie die Enter-Taste, um das gewünschte Menü auszuwählen. Sie können die Auswahl mit der Taste Up oder Down, ändern. -
Page 18: Hauptfunktionen
AUTO PROGRAMME 1. Drücken Sie die "UP" oder "DOWN" Taste, bis einer von sieben Programme erscheint und bestätig mit "Enter" Taste. 2. Wenn Sie eine Programme ausgewählt habe, können Sie mit „ENTER“ DOWN ENTER ENTER Taste die Geschwindigkeit Dimmer und Strobe Veränderung. MODE MODE DOWN... -
Page 19: Master Slave
MASTER SLAVE 1. Schließen Sie den (männlichen) 3-Pin-Stecker ENTER …. Seite des DMX-Kabel mit dem Ausgang (weiblich) 3-Pin-Anschluss des ersten Gerätes. MODE 2.Verbinden Sie das Ende des Kabels von der ersten Geräte (Female) an den DOWN Eingangsanschluss des nächsten Gerätes ENTER (Male)und so weiter. -
Page 20: Reinigung Und Wartung
SICHERUNGSWECHSEL Wenn die Feinsicherung des Gerätes defekt ist, darf diese nur durch eine Sicherung gleichen Typs ersetzt werden. Vor dem Sicherungswechsel ist das Gerät allpolig von der Netzspannung zu trennen (Netzsteckerziehen). Vorgehensweise: Schritt 1: Öffnen Sie den Sicherungshalter an der Geräterückseite mit einem passenden schraubendreher. - Page 21 ESPAÑOL Enhorabuena por la compra de este efecto de luces Beamz. Por favor lea atentamente este manual antes de usar el aparato para disfrutar al completo de sus prestaciones. Seguir las instrucciones le permite no invalidar la garantía. Tome todas las precauciones para evitar que se produzca fuego o una descarga eléctrica.
-
Page 22: Instrucciones De Desembalaje
INSTRUCCIONES DE DESEMBALAJE ATENCIÓN! Inmediatamente después de recibir un dispositivo, desempaque cuidadosamente la caja de cartón, compruebe el contenido para asegurarse de que todas las partes están presentes, y se han recibido en buenas condiciones. Notifique inmediatamente al transportista y conserve el material de embalaje para la inspección por si aparecen daños causados por el transporte o el propio envase muestra signos de mal manejo. -
Page 23: Conexión Dmx-512
PANEL DE CONTROL (DISPLAY) The El panel de control ofrece varias características: puede simplemente asignar la dirección de inicio, ejecutar el programa de pre-programado o hacer un reset. Al menú principal se accede pulsando la tecla Esc/Modo, se navega por el submenú... -
Page 24: Funciones Principales
PROGRAMAS AUTO Modo show: Este modo permite a las unidades ya sea una sola unidad o varias unidas entre sí, ejecutar uno de los siete shows que elija. Pulse el botón hacia arriba o hacia abajo hasta que aparezca uno de los siete programas, y pulse ENTER. El cuadro DOWN ENTER ENTER... -
Page 25: Control Remoto
CONEXION MAESTRO ESCLAVO 1. Conectar el conector lateral 3 pin (macho) del cable DMX a la salida (hembra) 3 pines del primer aparato. ENTER …. MODE 2. Conectar el extremo del cable que viene del primer aparato que tendrá un conector de 3 pines (hembra), al conector de entrada del DOWN próximo aparato que consta de un conector de 3... -
Page 26: Solución De Problemas
Uno de los canales de Fallo en la configuración Véase la sección siguiente. control DMX o enlace Contacte a su distribuidor Beamz autorizado por Tronios no responde, o sólo Daños en el motor o el paso o centro de servicio de asistencia. responde conexión de cable... - Page 27 FRANÇAIS Nous vous remercions d’avoir acheté un appareil Beamz. Veuillez lire la présente notice avant l’utilisation afin de pouvoir en profiter pleinement. Veuillez lire la notice avant utilisation. Respectez impérativement les instructions afin de continuer à bénéficier de la garantie.
-
Page 28: Instructions De Deballage
INSTRUCTIONS DE DEBALLAGE ATTENTION ! Immédiatement après réception, vérifiez le contenu du carton et assurez-vous que tous les éléments sont bien présents et en bon état. Si besoin, faites les réserves nécessaires si le matériel ou les cartons sont endommagés. SI l’appareil doit être retourné, faites-le dans l’emballage d’origine. -
Page 29: Affichage
AFFICHAGE Le panneau de commande vous permet d’effectuer différents réglages : réglage de l’adresse de démarrage, gestion d’un programme pré-programmé, lancer un Reset. Le menu principal est accessible en appuyant sur la touche Mode/Esc, vous pouvez naviguer dans le sous-menu avec la touche Up ou Down. Appuyez sur la touche Enter pour choisir le menu souhaité. -
Page 30: Programmes Auto
PROGRAMMES AUTO Mode Show : Ce mode permet soit à un seul appareil soit à plusieurs appareils reliés entre eux de faire défiler un des sept programmes à choisir. Appuyez sur la touche Up ou Down jusqu'à ce qu'un des sept DOWN ENTER ENTER... - Page 31 APPAREIL MASTER SLAVE 1. Reliez le connecteur mâle 3 pôles du cordon DMX à la sortie femelle 3 pôles du premier appareil. ENTER …. MODE 2. Reliez l'extrémité du cordon venant du premier appareil avec le connecteur femelle à l'entrée de l'appareil suivant (connecteur mâle 3 pôles).
-
Page 32: Remplacement Du Fusible
REMPLACEMENT DU FUSIBLE Si le fusible est défectueux, il faut le remplacer par un fusible de même type et de même valeur. Avant de le remplacer, veillez à débrancher l’appareil. Procédure: Etape 1: Ouvrez le porte-fusible sur le panneau arrière avec un petit tournevis. Etape 2: Retirez l’ancien fusible. - Page 33 POLSKI Gratulujemy zakupu urządzenia marki BeamZ. Proszę o przeczytanie instrukcji przed użyciem urządzenia, aby jak najlepiej móc wykorzystać jego możliwości. Przeczytaj tę instrukcję przed pierwszym użyciem urządzenia. Postępuj zgodnie z instrukcją, aby nie utracić gwarancji. Zwróć uwagę na wszystkie ostrzeżenia, aby uniknąć pożaru lub/oraz porażenia prądem. Naprawy mogą być przeprowadzane jedynie przez autoryzowany serwis.
- Page 34 INSTRUKCJA ROZPAKOWYWANIA OSTRZEŻENIE! Natychmiast po odbiorze urządzenia, ostrożnie otwórz karton ochronny, oraz sprawdź zawartość i stan techniczny przedmiotu. Niezwłocznie powiadom kuriera oraz zachowaj opakowanie zewnętrzne do kontroli, jeśli jakikolwiek element zawartości wygląda na zniszczony w transporcie lub nosi objawy złego traktowania paczki. W takim wypadku należy niezwłocznie odesłać...
- Page 35 WYŚWIETLACZ Panel sterowania oferuje kilka funkcjonalności: możesz łatwo ustawić adresowanie DMX, włączyć gotowe programy lub zresetować urządzenie. Menu główne jest dostępne po naciśnięciu przycisku Mode. Możesz się poruszać w menu za pomocą przycisków Up oraz Down. Naciśnij Enter, aby wybrać pożądany tryb. Możesz zmienić...
-
Page 36: Programy Automatyczne
PROGRAMY AUTOMATYCZNE Tryb pokazu: Ten tryb pozwala na odtworzenie jednego z siedmiu wbudowanych pokazów pojedynczej jednostce oraz kilku połączonym ze sobą urządzeniom. Naciśnij UP oraz DOWN, aż na wyświetaczu pojawi się jeden z DOWN ENTER ENTER siedmiu programów. Obrazek pokazuje strukturę MENU. MODE MODE Po wybraniu programu oraz naciśnięciu przycisku ENTER... -
Page 37: Pilot Zdalnego Sterowania
POŁĄCZENIE MASTER-SLAVE 1. Podłącz męską końcówkę kabla DMX do ENTER …. wyjścia DMX w pierwszym urządzeniu. MODE 2. Podłącz drugą końcówkę (żeńską) kabla DMX wychodzącego z pierwszego urządzenia do wejścia DMX w kolejnym urządzeniu (gniazdo DOWN męskie). Podłączaj analogicznie kolejne ENTER urządzenia. -
Page 38: Rozwiązywanie Problemów
ROZWIĄZYWANIE PROBLEMÓW Ta sekcja opisuje kilka powszechnych problemów, które mogą nastąpić podczas użytkowania urządzenia oraz zawiera przydatne informacje na temat łatwego rozwiązywania tych problemów. Objawy Potencjalna przyczyna Rozwiązanie Brak światła, Problem z zasilaniem, np., Sprawdź, czy świeci się dioda zasilania. wentylatory nie pracują. - Page 39 DMX CHANNELS / DMX KANALEN / DMX-KANÄLE / CANALES DMX / CANAUX DMX / KANAŁÓW DMX 5 Channels Channel Function Value Description 000-255 Adjust Pan motor movement 000-255 Tilt Adjust Tilt motor movement 000-255 Speed Speed slow to fast 000-010 White 011-021 022-032...
-
Page 40: Channel Function
11 Channels Channel Function Value Description 000-255 Adjust Pan motor movement 000-255 Tilt Adjust Tilt motor movement Pan fine 000-255 Adjust Pan fine movement Tilt fine 000-255 Adjust Tilt fine movement Speed 000-255 Speed slow to fast 000-010 White 011-021 022-032 Orange 033-043... - Page 41 MENU / MENÜ / MENÚ Set Menu: ENTER ENTER Reld: Reloaded MODE MODE DOWN DOWN ENTER RST: Reset MODE DOWN DOWN Master/Slave ENTER Maal: MODE -mast: Master -Alon: Slave DOWN DOWN auto/sound set ENTER Auso: Auto mode MODE -auto: -sond: Sound DOWN DOWN...
- Page 42 Set Menu: ENTER ENTER Info: Info MODE MODE -Led fix: -Data: Date DOWN -Time: Time DOWN DOWN ENTER Mach: Use time MODE -This: This time -Totl: Total time DOWN -Ctot: Remove total time DOWN DOWN ENTER Rdis: Reverse display MODE DOWN DOWN Temp:...
- Page 43 Set Menu: ENTER ENTER ENTER MODE MODE MODE DOWN DOWN ENTER ENTER MODE MODE DOWN DOWN ENTER DOWN MODE DOWN DOWN ENTER MODE DOWN DOWN ENTER ENTER MODE MODE DOWN DOWN ENTER ENTER MODE MODE ENTER DOWN MODE DOWN DOWN ENTER MODE Mset:...
- Page 44 DMX Menu: ENTER ENTER ENTER DMX: DMX Menu MODE MODE MODE Addr: 1 - 502 Chs: Channel mode DOWN Brk: Mode if no DMX -Stop Stop running -Hold Keep running DOWN DOWN -Auto Auto running ENTER -Sond Sound running MODE Disp: DMX display -Addr...
- Page 45 UHI Menu: DOWN ENTER ENTER SCN: MODE MODE -Dim: Dimmer -Stb: Strobe DOWN -Pan: -Panf: Pan fine -Pans: Pan speed -Tilt: Tilt DOWN -Tiltf: Tilt fine -Tilts: Tilt speed -Colr: Color -Gobo: Gobo DOWN DOWN DOWN DOWN DOWN DOWN DOWN...
- Page 46 TECHNICAL SPECIFICATION / TECNISCHE SPECIFICATIE / TECHNISCHE DATEN / ESPECIFICACIONES TÉCNICAS / SPÉCIFICATIONS TECHNIQUES / SPECYFIKACJA TECHNICZNA Rated voltage : AC220~240V 50/60Hz Rated power : 40W : 12W CREE Control Signal : DMX signal DMX Channels : 5 / 9 or 11Channels Gobo’s : 7 Gobo’s + open Colours...
-
Page 47: Declaration Of Conformity
Manufacturer: TRONIOS BV Bedrijvenpark Twente 415 7602 KM – ALMELO +31(0)546589299 +31(0)546589298 The Netherlands Product number: 150.460 Product Description: Panther 25 Led Spot Trade Name: BEAMZ EN 55015:2013 Regulatory Requirement: EN 61547:2009 EN 61000-3-2:2006+A1:2009+A2:2009 EN 61000-3-3:2013 EN 60598-2-17:1989+A2:1991 EN 60598-1:2008+A11:2009... - Page 48 Specifications and design are subject to change without prior notice.. www.tronios.com Copyright © 2015 by TRONIOS the Netherlands...