Publicité

Les langues disponibles
  • FR

Les langues disponibles

Liens rapides

INSTALLATION GUIDE
AXIS M31 Network Camera Series
AXIS M3113-R Network Camera
AXIS M3113-R M12 Network Camera
AXIS M3114-R Network Camera
AXIS M3114-R M12 Network Camera
AXIS M3114-R M12 2MM Network
Camera

Publicité

Table des Matières
loading

Sommaire des Matières pour Axis M31 Serie

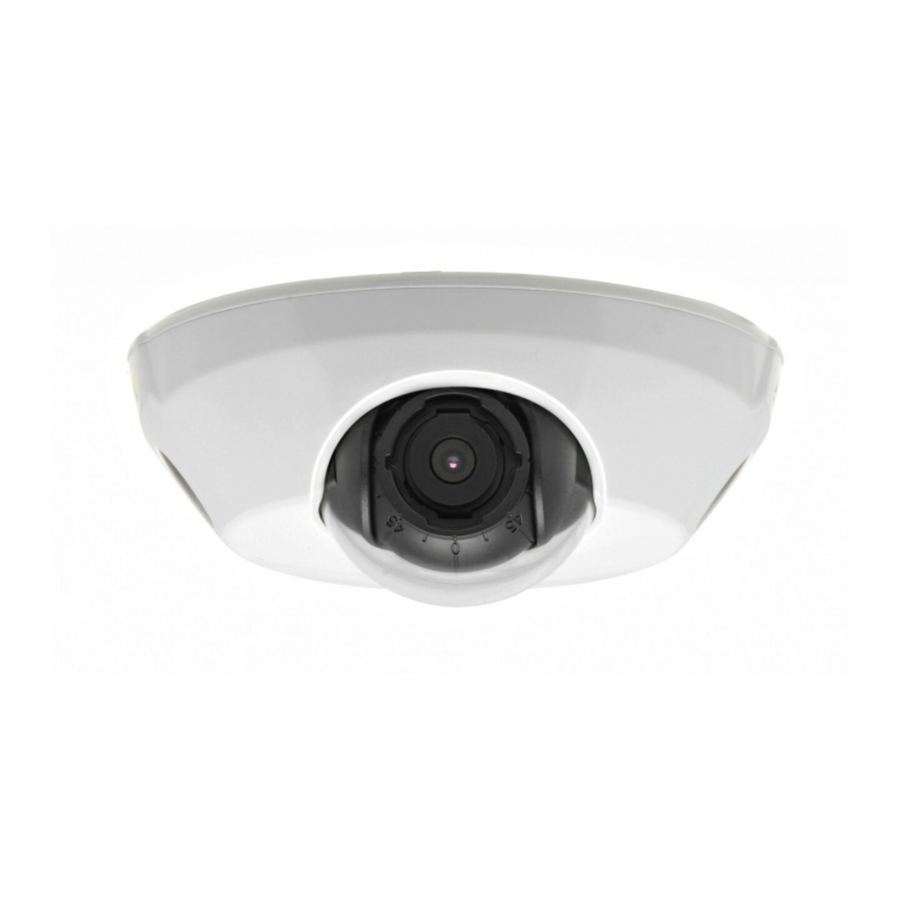
  • Page 1 INSTALLATION GUIDE AXIS M31 Network Camera Series AXIS M3113-R Network Camera AXIS M3113-R M12 Network Camera AXIS M3114-R Network Camera AXIS M3114-R M12 Network Camera AXIS M3114-R M12 2MM Network Camera...
  • Page 2: About This Document

    (STP) and found to comply with the limits for a Class B digital device, This document includes instructions pursuant to part 15 of the FCC Rules. for installing AXIS M31 Network These limits are designed to provide Camera Series on your network. reasonable protection against harmful...
  • Page 3: Weee Directive

    Every care has been taken in the product correctly, contact the product preparation of this document. Please supplier, or the local authority inform your local Axis office of any responsible for waste disposal in your inaccuracies or omissions. Axis area.
  • Page 4 • find answers to resolved problems in the FAQ database. Search by product, category, or phrases • report problems to Axis support by logging in to your private support area. • chat with Axis support staff (selected countries only) •...
  • Page 5 These can be provided by Axis or a third party. • Use only spare parts provided by or recommended by Axis. • Do not attempt to repair the product by yourself, contact Axis or your Axis reseller for service matters.
  • Page 6 • This Axis product shall be used in compliance with local laws and reg- ulations. • To use this Axis product outdoors, it shall be installed in an approved outdoor housing. • The Axis product should be installed by a trained professional. Observe relevant national and local regulations for the installation.
  • Page 7: Installation Steps

    AXIS M31 Network Camera Series Page 7 AXIS M31-R Series Installation Guide This installation guide provides instructions for installing the following network cameras: • AXIS M3113-R • AXIS M3113-R M12 • AXIS M3114-R • AXIS M3114-R M12 • AXIS M3114-R M12 2MM For all other aspects of using the product, please see the user manual, available from www.axis.com/techsup...
  • Page 8: Package Contents

    Lens tool, Allen key, Top cover tool, Drill template Optional Adaptor for flat surface with 4 screws accessories Adaptor for curved surface Installation and Management Software CD Printed AXIS Product Installation Guide (this document) Materials Extra serial number labels (2x) AVHS Authentication key Drill template...
  • Page 9: Hardware Overview

    AXIS M31 Network Camera Series Page 9 Hardware overview 180° mark (top of image) LED indicators Lens holder Control button Optic mount Optic holder Use screws here to mount camera Top cover tool Netzwerkkabel cable (0.5m/1.6ft.) Lens tool Lens tool...
  • Page 10: Led Indicators

    Page 10 AXIS M31 Network Camera Series LED indicators Color Indication Network Green Steady for connection to a 100 Mbit/s net- work. Flashes for network activity. Amber Steady for connection to 10 Mbit/s network. Flashes for network activity. Unlit No network connection.
  • Page 11 AXIS M31 Network Camera Series Page 11 Connectors Network connector (AXIS M3113-R/AXIS M3114-R) - Female RJ-45 Ethernet connector for 10BaseT/100BaseTX. Supports Power over Ethernet. Using shielded cables is recommended. Network connector (AXIS M3113-R M12/AXIS M3114-R M12/AXIS M3114-R M12 2MM - Rugged female, D-coded M12 connector.
  • Page 12: Install The Hardware

    Page 12 AXIS M31 Network Camera Series Install the hardware Remove top cover from the camera unit by loosening the 2 screws. Insert the top cover tool into the slit in the bottom cover and lift. Depending on the kind of installation required, follow the appropriate instructions below.
  • Page 13 AXIS M31 Network Camera Series Page 13 Mount on a curved surface with an adaptor Place the adaptor on the curved mounting surface, align the two curvatures, and mark the two screw adaptor holes if drilling is required. adhesive tab...
  • Page 14 Page 14 AXIS M31 Network Camera Series Mount on a flat surface with an adaptor Place the adaptor on the mounting surface and position the slot for the cable where appropriate. Fasten the adaptor with three screws appropriate to the surface material.
  • Page 15 AXIS M31 Network Camera Series Page 15 Adjust the direction of the lens Fit the lens tool to the lens holder, and adjust the position of the lens by pointing the lens tool handle in the preferred direction (See illustration on page 6).
  • Page 16: Complete The Installation

    Page 16 AXIS M31 Network Camera Series Adjust the focus lens tool Fit black rubber side to adjust focus Pull the lens tool from the lens tool holder, turn it around and fit the black rubber side to the lens. Adjust the focus. Check the image in the Live View page, and move the lens to the desired position using the transparent side of the lens tool.
  • Page 17: Resetting To The Factory Default Settings

    For more information, please see the online help or the user’s manual. Further Information The User Manual is available from the Axis Web site at www.axis.com Visit Axis learning center www.axis.com/academy for useful trainings, webinars, tutorials and guides.
  • Page 19: Mesures De Sécurité

    • Conservez le produit Axis dans un environnement sec et aéré. • N'utilisez que les outils applicables pour installer le produit Axis ; une force excessive pourrait endommager le produit. • Pour le nettoyage, n’utilisez ni produits chimiques, ni substances caustiques ou aérosols.
  • Page 20: Transport

    • Ce produit Axis doit être utilisé conformément aux lois et réglementa- tions locales en vigueur. • Pour pouvoir être utilisé à l'extérieur, ce produit Axis doit être placé dans un boîtier d'extérieur homologué. • Le produit Axis doit être installé par un professionnel qualifié. Veuillez vous conformer aux règlements nationaux et locaux relatifs à...
  • Page 21: Procédure D'installation

    Caméra réseau Axis série M31 Page 21 Série AXIS M31Guide d’installation Ce guide d’installation vous explique comment installer les caméras réseau suivantes : • AXIS M3113-R • AXIS M3113-R M12 • AXIS M3114-R • AXIS M3114-R M12 • AXIS M3114-R M12 2MM Pour toute autre question concernant l’utilisation du produit, reportez-...
  • Page 22: Contenu De L'emballage

    Adaptateur à 4 vis pour surface plane option Adaptateur pour surface courbe. Le CD d'installation et de gestion du logiciel, y compris les outils d'installation et autre logiciel. Documentation Guide d’installation de la Série des caméras imprimée réseau AXIS M31 (le présent document).
  • Page 23: Description Du Matériel

    Caméra réseau Axis série M31 Page 23 Description du matériel Marque 180 ° (haut de l’image) Témoins DEL Porte-objectif Bouton de Monture optique commande Support optique Utilisez les vis ici pour monter la caméra sur la surface de montage Outil du couvercle supérieur Câble Ethernet...
  • Page 24: Témoins Del

    Page 24 Caméra réseau Axis série M31 Témoins DEL Voyant Couleur Indication Con- Vert Continu en cas de connexion à un réseau necteur de 100 Mbits/s. Clignote en cas d’activité réseau réseau. Orange Continu en cas de connexion à un réseau de 10 Mbits/s.
  • Page 25: Connecteurs De L'unité

    Caméra réseau Axis série M31 Page 25 Connecteurs de l’unité Connecteur réseau (AXIS M3113-R/AXIS M3114-R) - Female RJ-45 Connecteur Femelle RJ-45 pour 10BaseT/ de réseau (AXIS M3113-R/AXIS M3114-R) - 100BaseTX. Prend en charge l’alimentation par Ethernet. Il est recommandé d’utiliser des câbles blindés..
  • Page 26: Installation Du Matériel

    Page 26 Caméra réseau Axis série M31 Installation du matériel Enlevez le couvercle supérieur de la caméra en desserrant les deux vis. Puis insérez l´outil du couvercle supérieur dans la fente du couvercle inférieur et soulevez-le. En fonction du type d’installation...
  • Page 27 Caméra réseau Axis série M31 Page 27 Montage sur une surface courbe avec un adaptateur Placez l’adaptateur sur une surface de montage courbe, alignez les deux adaptateur adaptateur courbures et marquez l’emplacement des deux patte dhésive patte dhésive trous pour les vis, si percer s’avère nécessaire.
  • Page 28 Page 28 Caméra réseau Axis série M31 Montage sur une surface plane avec un adap- tateur Placez l’adaptateur sur la surface de montage et positionnez la fente pour le câble à l’endroit approprié. Fixez l’adaptateur avec trois vis qui sont appropriées au matériau de la surface.
  • Page 29: Accéder Au Flux Video

    Caméra réseau Axis série M31 Page 29 Alignez les nervures horizontalement sur l'outil pour l’objectif pour que l’image soit aussi alignée horizontalement Remarque : La marque du ’0’ sur le porte-objectif Alignez les nervures indique le bas de l’image et la marque ’180’ indique horizontalement le haut de l’image (Voir Description du matériel ci-...
  • Page 30: Réglez La Mise Au Point

    Page 30 Caméra réseau Axis série M31 Réglez la mise au point dispositif de l’objectif Insérez le côté noir en caoutchouc pour régler la mise au point Enlevez l'outil pour l'objectif du porte-objectif, retournez-le et intégrez le côté noir en caoutchouc au porte-objectif. Réglez la mise au point.
  • Page 31 Caméra réseau Axis série M31 Page 31 Rétablissement des paramètres d’usine par défaut Procédez comme suit pour rétablir tous les paramètres par défaut définis en usine, y compris l’adresse IP : Débranchez le câble réseau de la caméra. Enlevez le couvercle supérieur en desserrant les deux vis imperdables.
  • Page 32: Plus D'informations

    Page 32 Caméra réseau Axis série M31 Plus d’informations Le manuel de l’utilisateur est disponible sur le site web d’Axis à l’adresse www.axis.com. Pour en savoir plus sur les produits et les technologies d’Axis, rendez- vous sur www.axis.com/academy, le centre de formation mondial pour la vidéo sur IP.
  • Page 33: Sicherheitsvorkehrungen

    Installation des Axis Produkts beginnen. Halten Sie die Installationsanleitung bereit, falls Sie darauf zurückgreifen müssen. • Lagern Sie das Axis-Produkt in einer trockenen und belüfteten Umge- bung. • Verwenden Sie bei der Installation des Axis Produkts nur geeignetes Werkzeug;...
  • Page 34 • Verwenden Sie dieses Axis-Produkt unter Beachtung der vor Ort gel- tenden rechtlichen Bestimmungen. • Um dieses Axis-Produkt im Freien verwenden zu können, muss es in einem zugelassenen Außengehäuse installiert werden. • Das Axis Produkt sollte nur von geschultem Fachpersonal installiert werden.
  • Page 35 Seite 35 AXIS M31 Network Camera Series Installationsanleitung AXIS M31 Serie Installationsanleitung In dieser Anleitung wird die Installation der folgenden Netzwerk- Kameras beschrieben: • AXIS M3113-R • AXIS M3113-R M12 • AXIS M3114-R • AXIS M3114-R M12 • AXIS M3114-R M12 2MM...
  • Page 36: Lieferumfang

    Seite 36 AXIS M31 Network Camera Series Installationsanleitung Lieferumfang Komponente Modell/Varianten/Anmerkungen Netzwerk- AXIS M3113-R, AXIS M3113-R M12 Kamera AXIS M3114-R, AXIS M3114-R M12 AXIS M3114-R M12 2MM Werkzeuge Objektivwerkzeug Bohrschablone Inbusschlüssel Hebelwerkzeug Optionales Adapter für flache Oberfläche mit 4 Schrauben Zubehör...
  • Page 37: Hardwareübersicht

    Seite 37 AXIS M31 Network Camera Series Installationsanleitung Hardwareübersicht 180°- Markierung (Bildoberseite) LED- Anzeigen Objektivhalter Steuertaste Optikanschluss Optikhalter Bringen Sie die Schrauben hier an, um die Kamera an der Montageoberfläche zu befestigen Hebelwerkzeug NetzwerkKabel Objektivwerkzeug Objektivwerkzeug (AXIS M3114-R M12 2MM) Schwarze Gummiseite (für das Einstellen der Bildschärfe)
  • Page 38: Led-Anzeigen

    Seite 38 AXIS M31 Network Camera Series Installationsanleitung LED-Anzeigen Farbe Bedeutung Netzwerk Grün Leuchtet konstant bei Verbindung mit einem 100-MBit/s-Netzwerk. Blinkt bei Netzwerkaktivität. Gelb Leuchtet konstant bei einer Netz- werkverbindung mit 10 MBit/s. Blinkt bei Netzwerkaktivität. Leuchtet Keine Netzwerkverbindung vorhan- nicht den.
  • Page 39 (AXIS M3113-R/AXIS M3114-R) Netzwerkanschluss - RJ-45-Ethernet- Buchse für 10BaseT/100BaseTX. Unterstützt Power over Ethernet. Die Verwendung von abgeschirmten Kabeln wird empfohlen. (AXIS M3113-R M12/AXIS M3114-R M12/AXIS M3114-R M12 2MM) Netzwerkanschluss - Robuste, D-codierte M12-Buchse. Unterstützt Power over Ethernet. Die Verwendung von abgeschirmten Kabeln wird empfohlen.
  • Page 40: Installieren Der Hardware

    Seite 40 AXIS M31 Network Camera Series Installationsanleitung Installieren der Hardware 1.¨Entfernen Sie die obere Abdeckung von Kameraeinheit, indem Sie zunächst die beiden Schrauben lösen. Führen Sie anschließend das Hebelwerkzeug in den Spalt der unteren Abdeckung ein und heben Sie die obere Abdeckung an.
  • Page 41 Seite 41 AXIS M31 Network Camera Series Installationsanleitung Montage auf einer gewölbten Oberfläche mit Adapter Platzieren Sie den Adapter auf der gewölbten Montageoberfläche, richten Sie die beiden Wölbungen aufeinander adaptor aus und markieren Sie die beiden Schraublöcher, sofern das Bohren von adhesive tab Löchern erforderlich ist.
  • Page 42 Seite 42 AXIS M31 Network Camera Series Installationsanleitung Montage auf einer flachen Oberfläche mit Adapter Platzieren Sie den Adapter auf der Montageoberfläche und positionieren Sie Aussparung für das Kabel an der richtigen Stelle. Befestigen Sie den Adapter mit drei, für das Oberflächenmaterial geeigneten Schrauben.
  • Page 43 Seite 43 AXIS M31 Network Camera Series Installationsanleitung Anpassen der Objektivausrichtung Bringen Sie das Objektivwerkzeug am Objektivhalter an und passen Sie die Position des Objektivs an, indem Sie den Griff des Objektivwerkzeugs in die gewünschte Richtung bewegen (Siehe Abbildung auf Seite 4). Der...
  • Page 44: Installation Abschließen

    Seite 44 AXIS M31 Network Camera Series Installationsanleitung Einstellen der Bildschärfe Objektivwerkzeug Befestigen der schwarzen Gummiseite zum Einstellen Ziehen Sie das Objektivwerkzeug aus dem Objektivwerkzeughalter, drehen Sie es um und befestigenSie die schwarze Gummiseite am Objektivhalter. Stellen Sie die Bildschärfe ein. Überprüfen Sie das Bild...
  • Page 45 Seite 45 AXIS M31 Network Camera Series Installationsanleitung Wechseln des Objektivs So wechseln Sie das Objektiv der Netzwerk-Kamera: Befestigen Sie die schwarze Gummiseite des Objektivwerkzeugs am Objektivhalter und schrauben Sie das Objektiv ab. Entfernen Sie das Objektiv vom Objektivwerkzeug und befestigen Sie das neue Objektiv daran.
  • Page 46 AXIS M31 Network Camera Series Installationsanleitung Weitere Informationen Das Benutzerhandbuch steht auf der Website von Axis unter „www.axis.com“ zur Verfügung. Um mehr über Produkte und Technologien von Axis zu erfahren, besuchen Sie uns unter „www.axis.com/academy“, dem globalem Lernzentrum für Netzwerk- Video.
  • Page 47 Queste possono essere fornite da Axis o da terze parti. • Utilizzare solo parti di ricambio fornite o raccomandate da Axis. • Non tentare di riparare il prodotto da soli, contattare Axis o il rivendi- tore di zona Axis per assistenza.
  • Page 48 • Questo prodotto Axis deve essere utilizzato in conformità alle leggi e alle disposizioni locali. • Per utilizzare questo prodotto Axis all'esterno, è necessario installarlo in un alloggiamento per esterni approvato. • Il prodotto Axis deve essere installato da un tecnico qualificato.
  • Page 49: Procedura Di Installazione

    Pagina Guida all'installazione di telecamera di rete serie AXIS M31 AXIS M31 Network Camera Series Guida all'installazione Nel presente documento vengono fornite le istruzioni per installare le seguenti telecamere di rete: • AXIS M3113-R • AXIS M3113-R M12 • AXIS M3114-R •...
  • Page 50: Contenuto Della Confezione

    Pagina Guida all'installazione di telecamera di rete serie AXIS M31 Contenuto della confezione Articolo Modelli/varianti/note Telecamera di rete AXIS M3113-R, AXIS M3113-R M12 AXIS M3114-R, AXIS M3114-R M12 AXIS M3114-R M12 2MM Strumenti Strumento per l'obiettivo Sagoma per la foratura...
  • Page 51: Panoramica Dell'hardware

    Pagina Guida all'installazione di telecamera di rete serie AXIS M31 Panoramica dell’hardware Segno a 180° (parte superiore dell'immagine) Indicatori LED Supporto per l'obiettivo Pulsante di Montaggio dell'ottica comando Supporto dell'ottica Inserire qui le viti per montare la telecamera sulla superficie di montaggio...
  • Page 52: Indicatori Led

    Pagina Guida all'installazione di telecamera di rete serie AXIS M31 Indicatori LED Color Indicazione Rete Verde Luce fissa: connessione di rete a 100 Mbit/ s. Luce lampeggiante: attività di rete. Giallo Luce fissa: connessione di rete a 10 Mbit/s. Luce lampeggiante: attività di rete.
  • Page 53: Connettori Dell'unità

    Pagina Guida all'installazione di telecamera di rete serie AXIS M31 Connettori dell'unità Connettore Ethernet Connettore di rete (AXIS M3113-R/AXIS M3114-R) - femmina RJ-45 per 10BaseT/100BaseTX. Supporta Power over Ethernet. Si consiglia l’uso di cavi schermati. Connettore di rete (AXIS M3113-R M12/AXIS M3114-R M12/AXIS M3114-R M12 2MM - Connettore femmina M12 codice D, per usi gravosi.
  • Page 54: Installazione Dell'hardware

    Pagina Guida all'installazione di telecamera di rete serie AXIS M31 Installazione dell'hardware Rimuovere la copertura inferiore della telecamera allentando le 2 viti. Inserire quindi lo strumento per la rimozione della cupola nella fessura del coperchio superiore e sollevarlo. A seconda del tipo di installazione richiesto, seguire le istruzioni appropriate che seguono.
  • Page 55 Pagina Guida all'installazione di telecamera di rete serie AXIS M31 Montaggio su una superficie curva con adattatore Collocare l'adattatore sulla adattatore superficie di montaggio curva, allineare le due piastrina adesiva curvature e contrassegnare i due fori per le viti, se devono essere praticati.
  • Page 56 Pagina Guida all'installazione di telecamera di rete serie AXIS M31 Montaggio su superficie piatta con un adattatore Collocare l'adattatore sulla superficie di montaggio e posizionare la fessura per il cavo nel punto appropriato. Fissare l'adattatore con tre viti adeguate al materiale della superficie.
  • Page 57 Pagina Guida all'installazione di telecamera di rete serie AXIS M31 Allineare orizzontalmente le nervature dello strumento per l'obiettivo in modo che anche l'immagine risulti allineata orizzontalmente. Nota: Il segno '0' sul supporto dell'obiettivo indica la parte inferiore dell'immagine e il segno ‘180’...
  • Page 58: Regolazione Della Messa A Fuoco

    Pagina Guida all'installazione di telecamera di rete serie AXIS M31 Regolazione della messa a fuoco Regolatore dell'obiettivo Adattare il lato in gomma nera per regolare la messa a fuoco Estrarre il regolatore dell'obiettivo dal suo supporto, ruotarlo e adattare il lato in gomma nera al supporto dell'obiettivo. Regolare la messa a fuoco.
  • Page 59: Sostituzione Dell'obiettivo

    Pagina Guida all'installazione di telecamera di rete serie AXIS M31 Sostituzione dell'obiettivo Per sostituire l'obiettivo della telecamera di rete, attenersi alla seguente procedura: Adattare il lato di gomma nera del regolatore dell'obiettivo al supporto dell'obiettivo e svitare l'obiettivo. Rimuovere l'obiettivo dal supporto e inserirvi il nuovo obiettivo.
  • Page 60: Ulteriori Informazioni

    Pagina Guida all'installazione di telecamera di rete serie AXIS M31 Ulteriori informazioni La Guida per l'utente è disponibile sul sito Web di Axis all'indirizzo www.axis.com Per maggiori informazioni sui prodotti e sulle tecnologie Axis visitare il sito www.axis.com/academy, centro di apprendimento globale per i video di rete.
  • Page 61: Medidas Preventivas

    Puede obtenerlos de Axis o de un tercero. • Utilice solo piezas de recambio suministradas o recomendadas por Axis. • No intente reparar el producto usted mismo, póngase en contacto con Axis o con el distribuidor de Axis para los temas de servicio técnico.
  • Page 62 • No gire el cable de red demasiado cerca de la cámara. Transporte • A la hora de transportar el producto Axis, utilice el embalaje original o uno equivalente para no dañar el producto.
  • Page 63 Página 63 Guía de instalación de las Cámaras de red AXIS M31 Guía de instalación de la serie de cámaras de red AXIS M31 Esta guía de instalación incluye las instrucciones necesarias para instalar las siguientes cámaras de red: • AXIS M3113-R •...
  • Page 64: Contenido Del Paquete

    Página 64 Guía de instalación de las Cámaras de red AXIS M31 Contenido del paquete Artículo Modelos/variantes/notas Cámara de red AXIS M3113-R, AXIS M3113-R M12 AXIS M3114-R, AXIS M3114-R M12 AXIS M3114-R M12 2MM Herramientas Herramienta de objetivo Plantilla de taladrado...
  • Page 65 Página 65 Guía de instalación de las Cámaras de red AXIS M31 Presentación del hardware Marca de 180° (parte superior de la imagen) Indicadores LED Soporte del objetivo Botón de contro Montura óptica Soporte óptico Utilice aquí los tornillos para fijar la cámara a la superficie de montaje...
  • Page 66: Indicadores Led

    Página 66 Guía de instalación de las Cámaras de red AXIS M31 Indicadores LED Color Indicación Verde Fijo para indicar la conexión a una red de 100 Mbits/s. Parpadea para indicar activ- idad en la red. Ámbar Fijo para indicar la conexión a una red de 10 Mbits/s.
  • Page 67 Página 67 Guía de instalación de las Cámaras de red AXIS M31 en línea. Connectores Conector Ethernet RJ-45 Conector de red (AXIS M3113-R/AXIS M3114-R) - hembra para 10BaseT/100 BaseTX. Compatible con PoE (alimentación a través de Ethernet). Se recomienda emplear cables blindados.
  • Page 68: Instalación Del Hardware

    Página 68 Guía de instalación de las Cámaras de red AXIS M31 Instalación del hardware Retire la cubierta superior de la cámara aflojando los 2 tornillos. Inserte a continuación la herramienta de cubierta superior en la ranura de la cubierta inferior y levántela.
  • Page 69 Página 69 Guía de instalación de las Cámaras de red AXIS M31 Montaje sobre una superficie curva con adaptador Coloque el adaptador sobre la superficie de montaje curva, haga coincidir las dos Adaptador curvaturas y marque los dos agujeros para los tornillos si es Pestaña...
  • Page 70 Página 70 Guía de instalación de las Cámaras de red AXIS M31 Montaje sobre una superficie plana con adaptador Coloque el adaptador sobre la superficie de montaje y sitúe la ranura para el cable donde corresponda. Fije el adaptador con tres tornillos adecuados al material de la superficie.
  • Page 71 Página 71 Guía de instalación de las Cámaras de red AXIS M31 Alinee las nervaduras de la herramienta de objetivo horizontalmente de forma que la imagen también se alinee horizontalmente. Nota: •La marca "0" del soporte del objetivo indica la parte inferior de la imagen y la marca ‘180’...
  • Page 72: Ajuste Del Enfoque

    Página 72 Guía de instalación de las Cámaras de red AXIS M31 Ajuste del enfoque Herramienta de objetivo Coloque el extremo de caucho negro para ajustar el enfoque Saque la herramienta de objetivo de su soporte, déle la vuelta y coloque el extremo de caucho negro en el soporte.
  • Page 73 Página 73 Guía de instalación de las Cámaras de red AXIS M31 Fije el nuevo objetivo a la cámara y ajuste el objetivo en su lugar. Ajuste el enfoque tal y como se ha descrito anteriormente. Restablecimiento de los valores iniciales Esta operación restaurará...
  • Page 74: Más Información

    Página 74 Guía de instalación de las Cámaras de red AXIS M31 Más información El manual del usuario está disponible en el sitio web de Axis en www.axis.com. Para obtener más información sobre los productos y tecnologías de Axis, visite www.axis.com/academy, centro de formación mundial para el vídeo en red.
  • Page 76 Installation Guide Ver. 2.4 AXIS M31 Network Camera Series Printed: November 2012 © Axis Communications AB, 2009-2012 Part No. 49585...

Ce manuel est également adapté pour:

M3113-rM3113-r m12M3114-rM3114-r m12M3114-r m12 2mm

Table des Matières