Table des Matières
Publicité
Les langues disponibles
Les langues disponibles
Liens rapides
OWNER'S MANUAL
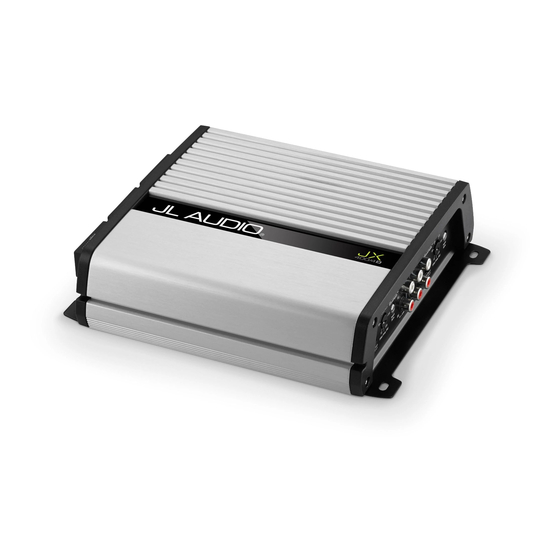
400W 4-Channel, Class D, 4 Channel Amplifier
Thank you for purchasing a JL Audio amplifier for
your automotive sound system.
Your amplifier has been designed and manufactured to exacting
standards in order to ensure years of musical enjoyment in your vehicle.
For maximum performance, we highly recommend that you have
your new amplifier installed by an authorized JL Audio dealer. Your
authorized dealer has the training, expertise and installation equipment
to ensure optimum performance from this product. Should you
decide to install the amplifier yourself, please take the time
to read this manual thoroughly so as to familiarize yourself
with its installation requirements and setup procedures.
If you have any questions regarding the instructions in this
manual or any aspect of your amplifier's operation, please contact your
authorized JL Audio dealer for assistance. If you need further assistance,
please call our Technical Support Department
at (954) 443-1100 during business hours.
Publicité
Table des Matières

Manuels Connexes pour JL Audio JX400/4D


Sommaire des Matières pour JL Audio JX400/4D
- Page 1 For maximum performance, we highly recommend that you have your new amplifier installed by an authorized JL Audio dealer. Your authorized dealer has the training, expertise and installation equipment to ensure optimum performance from this product.
- Page 2 (pg. 11) (pg. 6,7) (pg. 6) (pg. 9) Filter Input Filter Input Filter Mode Filter Mode Frequency Sensitivity Frequency Sensitivity Selector Selector Control Control Control Control (pg. 8) (pg. 8) (pg. 8) (pg. 8) (pg. 8) (pg. 8) JL Audio...
-
Page 3: Planning Your Installation
Stupid Mistakes to Avoid Cooling Efficiency Considerations: • Check before drilling any holes in your vehicle The outer shell of your JL Audio amplifier is to make sure that you will not be drilling designed to remove heat from the amplifier through a gas tank, brake line, wiring harness or circuitry. -
Page 4: Product Description
6) Find a good, solid metal grounding point technology for all channels. The JX400/4D can be operated with a wide close to the amplifier and connect the variety of source units and system configurations. negative power wire to it using appropriate For detailed specifications, please refer to hardware. -
Page 5: Power Connections
Aluminum", or "CCA" wire. voltage drops, these wires should be upgraded to 4 AWG copper wire when installing If you are installing the JX400/4D with other amplifiers and wish to use a single main power amplifier systems with main fuse ratings above 60A. - Page 6 TURN-ON LEAD INPUT SECTIONS The JX400/4D is turned on and off The JX400/4D’s has two input sections: one using a conventional +12V remote turn- for Channels 1&2 and another for Channels 3&4. on lead, typically controlled by the These input sections allows you to send signals to source unit’s remote turn-on output.
- Page 7 “Input Mode” Switch If you wish to send four discrete channels of input into the JX400/4D, simply use all four inputs (Channels 1 & 2 and Channels 3 & 4) and set the “Input Mode” switch to “4 Ch.”.
- Page 8 The controls labeled “Input Sens.” located in The active filter built into each channel each channel pair's control section can be used section of the JX400/4D can be used to eliminate to match the source unit’s output voltage to the potentially harmful and/or undesired frequencies...
- Page 9 This pass-through pre-amp output or both of the JX400/4D’s channel pairs in a delivers a summed stereo signal, combining the bi-amplified system. Ch 1 and 3 signals into a Left Preamp Output Signal and the Ch.
-
Page 10: Speaker Outputs
1) Left Channel Only or Right Channel Only the amplifier to enter a protection mode. Information: If you wish to send a left-only or right-only signal to a pair of the JX400/4D’s BRIDGING CONSIDERATIONS channels, use a “Y-Adaptor” to split the single... - Page 11 JL Audio dealer so control panel of the amplifier. that it may be sent in to JL Audio for service. There are no user serviceable parts or fuses inside the amplifier. The unique nature of the circuitry in the JL Audio amplifiers requires specifically trained service personnel.
-
Page 12: Necessary Equipment
(within the frequency range to be amplified) at 3/4 source unit volume. 7) Connect the AC voltmeter to the speaker output connectors of the amplifier. Make sure you test the voltage at the correct connectors (+ and –). JL Audio... -
Page 13: Amplifier Section
APPENDIX B: JX400/4D Specifications Amplifier Section: Amplifier Topology: Class D Power Supply: Unregulated PWM switching type Frequency Response: 20 Hz - 20 kHz +0/-1 dB Signal to Noise Ratio: >93 dBA referred to highest rated power per ch., >76 dBA referred to 1W (20 Hz - 20 kHz Bandwidth) Damping Factor: >60 @ 4 ohms per ch. - Page 14 Check the input connectors to ensure that they all are making good contact with the input jacks on the amplifier. JL Audio...
- Page 15 The speaker wire connectors are designed to accept up to 8 AWG wire. Make sure to strip the wire to allow for a sufficient connection with the metal inside the terminal block. JX400/4D...
-
Page 16: Installation Notes
INSTALLATION NOTES: Use this diagram to document your amplifier’s switch and control positions. JL Audio... - Page 17 JX400/4D...
- Page 18 LIMITED WARRANTY - AMPLIFIERS (USA) JL Audio warrants this product to be free of defects in materials and workmanship for a period of one (1) year from the original date of purchase. This warranty is not transferrable and applies only to the original purchaser from an authorized JL Audio dealer.
- Page 19 MANUAL DEL PROPIETARIO Amplificador Clase D de rango completo de 4 canales de 400 W Muchas gracias por adquirir un amplificador JL Audio para el sistema de audio de su automóvil. El amplificador se ha diseñado y fabricado de acuerdo con normas rigurosas a fin de asegurarle que disfrutará...
-
Page 20: Número De Serie
Control de Selector de modo de frecuencia ampli cación de frecuencia ampli cación de modo de ltro de ltro de entrada de ltro de entrada de ltro (pág. 8) (pág. 8) (pág. 8) (pág. 8) (pág. 8) (pág. 8) JL Audio... -
Page 21: Planificación De La Instalación
• Antes de perforar un agujero en el vehículo, de enfriamiento: compruebe que no perforará el tanque La carcasa externa de su amplificador JL Audio de gasolina, la línea de frenos, el arnés de se ha diseñado para eliminar el calor del circuito cableado u otro sistema esencial del vehículo. -
Page 22: Descripción Del Producto
DESCRIPCIÓN DEL PRODUCTO 5) Lleve los cables de los altavoces desde El JL Audio JX400/4D es un amplificador de rango completo y de cuatro canales que utiliza el sistema de altavoces hasta el lugar tecnología Clase A/B para todos los canales. -
Page 23: Conexiones De Alimentación
REQUISITOS DEL FUSIBLE y debe conectarse al JX400/4D con un cable de Es esencial usar un fusible apropiado en los cables alimentación de cobre calibre 4 AWG. - Page 24 (Entradas de bajo nivel) para la entrada de la señal de bajo nivel (nivel de preamplificación) El amplificador se encenderá cuando haya en el JX400/4D. Este es el método de +12 V en la entrada “Remote” (Remoto) conexión preferido cuando está disponible.
- Page 25 (izquierdo Si desea enviar cuatro canales de entrada discretos al JX400/4D, solo debe usar las cuatro y derecho). En caso contrario, se producirá distorsión audible. entradas (Canales 1 y 2 y Canales 3 y 4) y ajustar el control “Input Mode”...
- Page 26 (más bajo para un voltaje de entrada determinado). 1) Control “Filter Mode” (Modo de filtro): El JX400/4D utiliza un filtro de 12 dB por Para ajustar el amplificador para la salida octava para cada par de canales (un filtro nítida máxima, consulte el Apéndice...
- Page 27 SALIDAS DE BAJO NIVEL “Off ” (Apagado): Anula por completo El JX400/4D incorpora una sección de salida el filtro y permite que toda la gama de bajo nivel directa (Preouts), de manera que de frecuencias presente en las entradas se puedan añadir amplificadores adicionales llegue al amplificador.
- Page 28 Si desea enviar una señal solamente izquierda o solamente CONSIDERACIONES ACERCA DE LAS derecha a un par de canales del JX400/4D, use CONEXIONES PUENTEADAS un adaptador en Y para dividir la señal de un La conexión puenteada consiste en combinar...
- Page 29 Si el amplificador falla o no funciona DE PROTECCIÓN correctamente, devuélvalo al concesionario El panel de control del amplificador tiene dos autorizado de JL Audio para que lo envíe luces indicadoras de estado. al servicio técnico de JL Audio. No hay piezas ni fusibles que el usuario pueda reparar dentro del amplificador.
- Page 30 3/4 del volumen de la unidad fuente. 7) Conecte el voltímetro de CA en los conectores de salida de altavoces del amplificador. Asegúrese de probar el voltaje en los conectores adecuados (+ y –). JL Audio...
- Page 31 APÉNDICE B: Especificaciones del JX400/4D Sección de amplificador: Topología del amplificador: Clase D Fuente de alimentación: Tipo PWM conmutada no regulada Respuesta de frecuencia: 20 Hz - 20 kHz +0/-1 dB Relación señal/ruido: >93 dBA con referencia a la potencia nominal más alta por canal, >76 dBA con referencia a 1 W (ancho de banda de 20 Hz - 20 kHz)
- Page 32 Compruebe los conectores de entrada para asegurarse de que todos hagan buen contacto con los conectores de entrada del amplificador. JL Audio...
- Page 33 Los conectores de cable de los altavoces están diseñados para aceptar cables hasta calibre 8 AWG. Asegúrese de pelar el cable lo suficiente para que haya una buena conexión con el metal en el interior del bloque de terminales. JX400/4D...
- Page 34 NOTAS SOBRE LA INSTALACIÓN: Use el diagrama siguiente para documentar las posiciones de los interruptores y controles de su amplificador. JL Audio...
- Page 35 JX400/4D...
- Page 36 Los productos no defectuosos recibidos se devolverán con flete de pago contra reembolso. El cliente es responsable de los cargos de transporte y seguro cuando envíe el producto a JL Audio. Los daños durante el envío para devolución no están cubiertos por la garantía.
- Page 37 Installationsanweisungen und Einbauhinweisen vertraut. Falls Sie irgendwelche Fragen bezüglich dieses Benutzerhandbuchs oder zum Betrieb des Verstärkers haben, wenden Sie sich bitte an Ihren JL Audio Fachhändler. Falls Sie weitere Unterstützung zum Produkt benötigen, wenden Sie sich bitte an die Audio Design GmbH Support Hotline (JL Audio Vertrieb Deutschland) während der üblichen Geschäftszeiten:...
- Page 38 Ch. 3 & 4 Filter Eingangsemp nd- Eingangsemp nd- Wahlschalter Wahlschalter (S. 8,9) lichkeits-Regler lichkeits-Regler (S. 8,9) (S. 8) (S. 8) Ch. 1 & 2 Ch. 3 & 4 Filter -Freq. Filter-Freq. Regler Regler (S. 9) (S. 9) JL Audio...
-
Page 39: Planung Der Installation
• Verlegen Sie niemals elektrische Leitungen außerhalb oder unterhalb des Fahrzeugs. Dies Kühlung: ist extrem gefährlich und kann zu ernsthaften Ihr JL Audio Verstärker ist so entworfen, dass Schäden am Fahrzeug und zu Verletzungen der der Kühlkörper die enstehende Hitze optimal Insassen führen. - Page 40 PRODUKTBESCHREIBUNG 4) Verlegen Sie die Audio-Signalkabel und die Der JL Audio JX400/4D ist ein 4-Kanal-Vollbereichs-Verstärker mit A/B Remote-Steuerleitung vom Steuergerät zum Klassentechnologie. Einbauort des Verstärkers. 5) Verlegen Sie die Lautsprecherkabel vom Der JX400/4D Verstärker kann mit vielen System-Konfigurationen und Steuereinheiten Lautsprecher zum Einbauort des Verstärkers.
- Page 41 Sie die abisolierten Kabel in die dafür dazu Anhang A (Seite 12) für die korrekte vorgesehenen Verteilerblockspositionen am Anpassung der Eingangsempfindlichkeit. JX400/4D. Benutzen sie hierbei den gelieferten 2,5mm Innensechskantwinkelschraubenschlüssel STROMANSCHLÜSSE um das Kabel mithilfe der Schraube auf Bevor Sie mit der Installation beginnen, müssen der Oberfläche fest zu verbinden:...
- Page 42 Hilfe von zwei oder vier Eingängen in den angeschlossenen Geräten im Soundsystem. Falls Verstärker zu leiten. Jeder Verstärkereingang Sie nur einen JX400/4D benutzen, empfehlen bietet 2 Verbindungsmethoden an: einen für wir eine 40A Sicherung des Typs MAXI oder high-level (Lautsprecher-Level) und einen für AGU.
- Page 43 Rechts) mit Signalen versorgt werden. Eingangswahlschalter („Input Mode“) Diesbezügliche Fehler verursachen stark wahrnehmbare Verzerrungen. Beachten Sie Am Bedienfeld des JX400/4D befindet sich der Eingangswahlschalter „Input Mode“. Dieser hierzu bitte auch die Hinweise zum Brückenbetrieb auf Seite 10. Schalter bestimmt, ob der Betrieb aller vier Kanäle des Verstärkers mit einem oder zwei Paar...
- Page 44 Tonwiedergabe Ihres Audio Systems. Um die ideale Einstellung zu finden und somit ein klares Signal zu erhalten, beachten 1) „Filter Mode“ Schalter: Der JX400/4D bietet Sie bitte die Angaben in Anhang A (Seite 12). Danach können Sie die Eingangsempfindlichkeit einen 12 dB per Oktaven-Filter (je einen soweit herunterdrehen, bis die gewünschte...
- Page 45 VORVERSTÄRKER-AUSGANG „LP“: Aktiviert den Tiefpassfilter, der Der JX400/4D ist mit einem konfigurierbaren dafür sorgt, dass alle Frequenzen oberhalb Vorverstärker-Ausgang ausgestattet, welcher ein des eingestellten Bereichs in einer Rate von Stereo-Vorverstärker-Signal an einen weiteren 12 dB pro Oktave abgeschnitten werden. Dies angeschlossenen Verstärker leiten kann.
-
Page 46: Brücken-Betrieb
2) Linkes UND rechtes Kanalsignal: Falls Sie Ausgänge verdoppeln dann die Ausgangsleistung für den angeschlossenen Lautsprecher/Subwoofer. ein Stereo-Signal brücken möchten, wird das Der JX400/4D wurde für das Brücken an einem Signal automatisch am Lautsprecher-Kanalpaar oder beiden Kanalpaaren konzipiert, ohne einen summiert (Links + Rechts) ausgegeben. Dies Eingangsverpolungs-Adapter dafür zu benötigen. - Page 47 Sie sich bitte an einen Verstärkers. autorisierten JLAudio Händler, der ihn bei Bedarf zu JL Audio schicken kann. Es gibt keine endnutzerdienlichen Teile oder Sicherungen im Verstärker. Da es sich um eine einmalige Schaltung im Innern des Verstärkers handelt, kann nur speziell ausgebildetes Servicepersonal eventuelle Fehler beheben.
-
Page 48: Benötigte Ausrüstung
25.3 V 7) Verbinden Sie das Voltmeter mit den Lautsprecherausgängen des Verstärkers. Stellen Sie 3Ω 15,4 V nicht empfohlen sicher, dass Sie Sie die Spannung an den korrekten 2Ω 14,1 V nicht empfohlen Konnektoren messen (+ und - ). JL Audio... - Page 49 ANHANG B: JX400/4D Technische Daten Verstärker-Sektion: Verstärker-Topologie: Class D Netzteil: Ungerelte PWM-Schaltung Frequenzgang: 20 Hz - 20 kHz +0/-1 dB Signalrauschabstand: >93 dBA bei höchster Nennleistung pro Kanal >76 dBA bei 1W (20 Hz - 20 kHz Bandbreite) Dämpfungsfaktor: >60 @ 4 Ohm pro Kanal Leistungsabgabe bei Klirrfaktor: 1% Nennbelastbarkeit (RMS) @ 14.4 Volt:...
- Page 50 Überprüfen Sie alle Anschlüsse des Verstärkers und achten Sie auf eine feste Verbindung bei jedem der Anschlüsse und auf ausreichend abisolierte Kontaktfläche an den Kabeln im Innern der Anschlüsse. Überprüfen Sie die Verbindungen zum Verstärkereingang und achten Sie darauf, dass alle Kabel und Stecker der Audioverkabelung fest sitzen. JL Audio...
- Page 51 Überprüfen Sie die Lautsprecherverkabelung und sorgen Sie für eine gute Verbindung der Kontaktfläche der Kabel und der Metallfläche im Innern der Anschlussblöcke. Die Anschlüsse sind auf einen Kabelquerschnitt von bis zu 8 mm2 ausgelegt. Stellen Sie sicher, dass die Lautsprecherkabel fest in den Anschlussblöcken befestigt sind. JX400/4D...
- Page 52 INSTALLATIONSNOTZIEN: Benutzen Sie dieses Diagramm um die Schalterstellungen und Reglereinstellungen zu vermerken. JL Audio...
- Page 53 JX400/4D...
- Page 54 Einkäufe von Produkten, die außerhalb der Vereinigten Staaten von Amerika getätigt wurden, haben nur Anrecht auf Garantievereinbarungen, die mit dem jeweiligen Händler festgesetzt wurden, nicht mit JL Audio, Inc. JL Audio Vertrieb für Deutschland: Audio Design GmbH Am Breilingsweg 3, D-76709 Kronau Tel.
-
Page 55: Amplificateur Classe D Total, 4 Canaux 400 W
Si vous avez la moindre question relative aux instructions de ce manuel ou à tout aspect du fonctionnement de votre amplificateur, veuillez contacter votre revendeur JL Audio agréé pour obtenir de l’aide. Si vous avez besoin d’une aide supplémentaire, veuillez contacter notre Service... -
Page 56: Protégez Votre Audition
Filter Freq. (Hz) Preouts Low-Level Inputs Commande Contrôle de Commande Contrôle de Sélecteur Filter Sélecteur Filter de fréquence sensibilité de fréquence sensibilité Mode Mode d'entrée d'entrée (pg. 8) (pg. 8) (pg. 8) (pg. 8) (pg. 8) (pg. 8) JL Audio... -
Page 57: Applications D'installation
Dans des conditions normales, le refroidissement par ventilateur n’ e st pas nécessaire. • Ne montez pas l’amplificateur dans le compartiment moteur, sous le véhicule, sur le toit ou dans toute autre zone qui exposerait les circuits de l’amplificateur aux éléments. JX400/4D... -
Page 58: Description Du Produit
A/B pour tous les canaux. de montage de l’amplificateur. 6) Trouvez un point de masse métallique Le JX400/4D peut être utilisé avec une grande variété d’unités sources et de configurations solide près de l’amplificateur et connectez du système. Pour obtenir des détails sur le fil électrique négatif à... -
Page 59: Brides D'alimentation
CH. 3 ( L ) ( R ) ( L ) masse spéciale, telle que la JL Audio XB-MGLU. Tous les câbles courant sur des barrières Les connexions « +12 VCC » et « Ground » métalliques (comme des pare-feux) doivent être (Masse) du JX400/4D sont conçues pour protégés par un œillet d’isolation de haute qualité... -
Page 60: Exigences Concernant Les Fusibles
« Remote » (à Si le JX400/4D est le seul appareil connecté à ce fil distance) sur le connecteur d’alimentation. Serrez le principal, utilisez un fusible AGU ou MAXI® de connecteur vers le bas à... - Page 61 à la section « Considérations relatives au pontage » Si vous souhaitez envoyer quatre canaux d’ e ntrée à la page 10. discrets vers le JX400/4D, utilisez simplement les quatre entrées (Canaux 1 & 2 et Canaux 3 & 4) et réglez le contacteur « Input Mode » (Mode d’...
-
Page 62: Contrôles De Sensibilité D'entrée
CONTRÔLES DE SENSIBILITÉ D’ENTRÉE CONTRÔLES DU FILTRE Les fonctions portant la motion « Input Le filtre actif du JX400/4D intégré à chaque Sens. » (Sens. d’ e ntrée) dans chaque section section de canal permet d’ é liminer la transmission de commande d’une paire de canaux peuvent de fréquences potentiellement nocives et/ou... - Page 63 à l’une des deux paires de canaux du JX400/4D combinant les signaux des canaux 1 et 3 en ou aux deux dans un système bi-amplifié.
-
Page 64: Sorties De Haut-Parleur
à la sortie 2) Informations des canaux gauche et droit : d’un seul canal. Le JX400/4D a été conçu pour le pontage de ses paires de canaux sans nécessiter Avec une configuration à pont et une d’adaptateurs d’inversion d’... -
Page 65: Réparation De Votre Amplificateur
L’amplificateur ne contient aucune pièce ni aucun fusible pouvant être réparés par l’utilisateur. La nature unique du circuit des amplificateurs JL Audio exige que toute réparation soit faite par du personnel ayant reçu une formation adéquate. Ne tentez pas de réparer l’amplificateur vous- même ou de le faire réparer par des réparateurs... - Page 66 25,3 V parleurs avant de poursuivre. Lisez une piste présentant une onde sinusoïdale appropriée 3 Ω 15,4 V non conseillé (dans la plage de fréquence à amplifier) 2 Ω 14,1 V non conseillé au 3/4 du volume de l’unité source. JL Audio...
- Page 67 ANNEXE B : Caractéristiques du JX400/4D Section d’amplificateur : Topologie de l’amplificateur : Classe D Alimentation électrique : Type de commutation PWM non régulée Réponse de fréquence : 20 Hz - 20 kHz +0/-1 dB Taux signal/bruit : >93 dBA par rapport à la puissance nominale max par can., >76 dBA par rapport à 1 W (bande passante 20 Hz - 20 kHz) Facteur d’amortissement : >...
- Page 68 été suffisamment dénudée pour permettre une zone de contact correcte à l’intérieur du bloc de dérivation. Vérifiez les connecteurs d’ e ntrée pour vous assurer qu’ils sont correctement en contact avec les prises d’ e ntrée de l’amplificateur. JL Audio...
- Page 69 à l’intérieur du bloc de dérivation. Les connecteurs de câble du haut-parleur sont conçus pour accepter des câbles dont le diamètre va jusqu’à 3,26 mm. Veillez à bien dénuder le fil pour permettre une connexion suffisante avec le métal à l’intérieur du bloc de connexion. JX400/4D...
-
Page 70: Remarques D'installation
REMARQUES D’INSTALLATION : Utilisez ce schéma pour connaître les positions des commandes et des contacteurs de votre amplificateur. JL Audio... - Page 71 JX400/4D...
-
Page 72: Garantie Limitée - Amplificateurs (Usa)
Les articles non défectueux reçus seront renvoyés et les frais seront imputés au destinataire. Le client se verra imputer les frais d’ e xpédition et d’assurance pour l’ e nvoi du produit à JL Audio. Les dommages causés aux produits retournés lors du transport ne sont pas couverts par cette garantie.