Chapitres
Table des Matières
Dépannage

Manuels Connexes pour Rockford Fosgate POWER 1000


Sommaire des Matières pour Rockford Fosgate POWER 1000
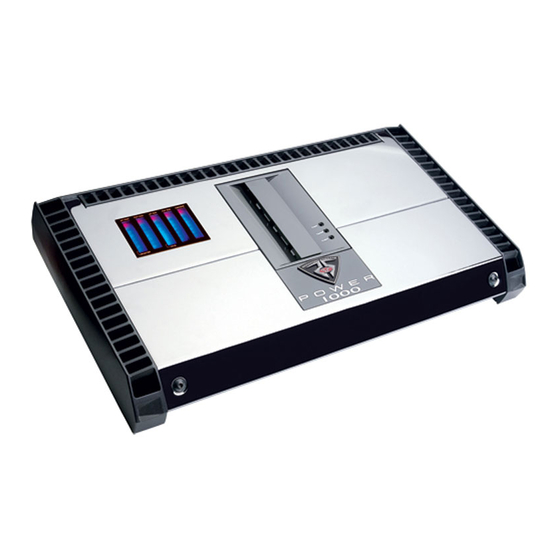
- Page 1 5-Channel A MPLIFIER POWER 1000 Installation & Operation Installation et fonctionnement Instalación y funcionamiento Einbau und Betrieb Installazione e funzionamento...
-
Page 2: Table Des Matières
NTRODUCTION Dear Customer, Congratulations on your purchase of the world's finest brand of car audio amplifiers. At Rockford Fosgate we are fanatics about musical reproduction at its best, and we are pleased you chose our product.Through years of engi- neering expertise, hand craftsmanship and critical testing procedures, we have created a wide range of products that reproduce music with all the clarity and richness you deserve. -
Page 3: Getting Started
Installation Section of this manual. Other information can be located by using the Table of Contents.We, at Rockford Fosgate, have worked very hard to make sure all the information in this manual is current. But, as we are constantly finding new ways to improve our product, this information is subject to change without notice. -
Page 4: Design Features
ESIGN EATURES Power LED (Top of unit) – This Blue LED illuminates when the unit is turned on. Thermal LED (Top of unit) – This Red LED illuminates if the amplifier reaches the third stage of thermal protection.The amplifier will shut down to cool if this occurs. Protect LED (Top of unit) –... -
Page 5: Installation
ESIGN EATURES 12. Infrasonic Filter (Sub Channel) – A 28Hz High Pass filter designed to prevent frequencies below the audio range from being applied to the subwoofer from the amplifier. Consequently improving subwoofer performance and power handling, particularly in vented enclosures. 13. -
Page 6: Mounting Locations
WIRING THE SYSTEM CAUTION:If you do not feel comfortable with wiring your new unit, please see your local Authorized Rockford Fosgate Dealer for installation. CAUTION:Before installation, disconnect the battery negative (-) terminal to prevent damage to the unit, fire and/or possible injury. -
Page 7: Power Connection
NSTALLATION Plan the wire routing. Keep RCA cables close together but isolated from the amplifier's power cables and any high power auto accessories, especially electric motors.This is done to prevent coupling the noise from radiated electrical fields into the audio signal.When feeding the wires through the firewall or any metal barrier, protect them with plastic or rubber grommets to prevent short circuits. - Page 8 NSTALLATION Connect the speakers. Strip the speaker wires 1/2" and insert into the speaker terminal and tighten the set screw to secure into place. Be sure to maintain proper speaker polarity. DO NOT chassis ground any of the speaker leads as unstable operation may result. 10.
- Page 9 NSTALLATION 4-Channel Wiring Stereo Bridged • RCA Inputs connect to FRONT and REAR inputs only. • 2/4/5 CH SWITCH positioned center to set to 4 CH. • Gain (Front, Rear & Sub) - is set independently to suit application. • Crossover (Front, Rear &...
- Page 10 NSTALLATION 5-Channel Wiring Stereo Bridged • 2/4/5 CH SWITCH positioned left to set to 5 CH. • Gain (Front, Rear & Sub) - is set independently to suit application. • Crossover (Front, Rear & Sub) - is set independently to suit application.
-
Page 11: Operation
Next, increase the amplifier gain setting until adequate volume is achieved. Rockford Fosgate source units do not distort, so the volume can be used at maximum setting. NOTE:Best signal to noise and dynamic range are realized with the gain at minimum. Most users find adequate gain and volume is achieved at about halfway in the adjustment range. -
Page 12: Adjusting Crossover Frequency
Do the following individually for the Front and Rear channels. Used to select between a 12dB/octave Butterworth or 24dB/octave Linkwitz-Riley filter. If you are unsure as to the correct setting of this feature, consult your local Authorized Rockford Fosgate dealer for the correct recommended setting for your specific system. -
Page 13: Troubleshooting
ROUBLESHOOTING NOTE:If you are having problems after installation follow the Troubleshooting procedures below. Procedure 1: Check Amplifier for proper connections. Verify that POWER light is on. If POWER light is on skip to Step 3, if not continue. Check in-line fuse on battery positive cable. Replace if necessary. Check fuse(s) on amplifier. -
Page 14: Specifications
PECIFICATIONS MODEL POWER 1000 Continuous Power Rating (RMS) - Measured at 14.4 Battery Volts Front and Rear Channels Load Per Channel 50 Watts x 4 Load Per Channel 100 Watts x 4 Load Per Channel 150 Watts x 4 Load Bridged... -
Page 15: Limited Warranty Information
Some states do not allow limitations on the length of an implied warranty, so this limitation may not apply. No person is authorized to assume for Rockford Fosgate any other liability in connection with the sale of the product. How to Obtain Service Contact the Authorized Rockford Fosgate Dealer you purchased this product from. -
Page 16: Introduction
Pour obtenir les meilleurs résultats, nous vous recommandons de faire installer votre nouvel appareil par un distributeur agréé Rockford Fosgate formé spécialement par notre Institut de formation technique Rockford (RTTI). Prenez soin de lire la garantie et conservez votre reçu ainsi que l’emballage d'origine pour usage ultérieur. -
Page 17: Avant De Commencer
AVANT DE COMMENCER Bienvenue à Rockford Fosgate ! Ce manuel vise à informer le propriétaire, le vendeur et l’installateur de l’appareil. Si vous désirez apprendre rapidement comment installer ce produit, consultez la section Installation du manuel. Reportez-vous à la Table des matières pour d’autres informations. Nous nous efforçons de faire en sorte que toutes les informations contenues dans ce manuel soient à... -
Page 18: Particularités Techniques
ARTICULARITÉS TECHNIQUES DEL d'alimentation (au-dessus de l'appareil) – Cette DEL bleue s'illumine lorsque l'appareil est allumé. DEL thermique (au-dessus de l'appareil) – Cette DEL rouge s'illumine si l'ampli atteint le troisième niveau de protection thermique. Si cela se produit, l'ampli s'éteint pour refroidir. DEL de protection (au-dessus de l'appareil) - Cette DEL jaune s'illumine si un court-circuit ou une impédance trop basse est détecté... -
Page 19: Installation
ARTICULARITÉS TECHNIQUES 11. Commutateur de canal 2/4/5 – Tournez le commutateur à droite pour régler les entrées sur 2 canaux et restreindre la connexion aux entrées avant seulement avec une sortie 5 canaux.Tournez le commutateur au centre pour régler les entrées sur 4 canaux et restreindre la connexion aux entrées avant et arrière seulement avec une sortie 5 canaux.Tournez le commutateur à... -
Page 20: Emplacements De Montage
à l’aise pour effectuer vous-même le MISE EN GARDE : câblage de votre nouvel appareil, veuillez confier l’installation à votre distributeur agréé Rockford Fosgate. avant d'entamer l'installation, déconnectez la broche négative (-) MISE EN GARDE : de la batterie pour éviter tout risque de blessures, d’incendie ou... -
Page 21: Connexion D'alimentation
NSTALLATION Planifiez l’acheminement des fils. Gardez les câbles RCA ensemble mais en les isolant des câbles d’alimentation de l’ampli et des autres accessoires automobiles de forte puissance, particulièrement les moteurs électriques, pour éviter que le signal audio ne subisse d'interférence de bruit provenant de champs de rayonnement électriques. - Page 22 NSTALLATION Connectez les haut-parleurs : dénudez les fils des haut-parleurs de 1/2 po et insérez la partie dénudée dans la borne du haut-parleur, puis serrez la vis sans tête pour fixer le tout.Veillez à respecter la polarité des haut- parleurs. NE mettez PAS les fils de haut-parleur à la masse sur le châssis car cela pourrait causer un fonctionnement instable.
- Page 23 NSTALLATION Câblage à 4 voies Ponté stéréo • Entrées RCA connectées aux entrées AVANT et ARRIÈRE seulement. • COMMUTATEUR DE CANAL 2/4/5 réglé au centre sur 4 canaux. • Gain (avant, arrière et sous-canal) - Réglé de façon indépendante selon l'application. •...
- Page 24 NSTALLATION Câblage à 5 voies Ponté stéréo • COMMUTATEUR DE CANAL 2/4/5 réglé à gauche sur 5 canaux. • Gain (avant, arrière et sous-canal) - Réglé de façon indépendante selon l'application. • Filtre passif (avant, arrière et sous-canal) - Réglé de façon indépendante selon l'application.
-
Page 25: Fonctionnement
Cela correspondant généralement au maximum du volume sur la plupart des unités source.Augmentez ensuite le gain de l'ampli jusqu'à ce que le volume soit adéquat. Les sources audio Rockford Fosgate ne produisent pas de distorsion, vous pouvez donc mettre le volume au maximum. -
Page 26: Réglage De La Fréquence Du Filtre Passif
Permet de choisir un filtre à 12 dB/octave Butterworth ou à 24 dB/octave Linkwitz-Riley. Si vous n'êtes pas sûr du réglage de cette fonction, consultez votre distributeur agréé Rockford Fosgate pour ce qui est du réglage recommandé pour votre système. -
Page 27: Dépannage
ÉPANNAGE si vous éprouvez des difficultés après l’installation, appliquez les procédures de dépannage ci-dessous. REMARQUE : Procédure 1 :vérifiez que les connexions de l’ampli sont bien mises. Vérifiez que le voyant POWER est allumé.Si c'est le cas,passez à l'étape 3,sinon poursuivez. 1. -
Page 28: Caractéristiques
ARACTÉRISTIQUES MODÈLE POWER 1000 Puissance nominale en continu (RMS) - Mesurée à 14,4 V (batterie) Canaux avant et arrière Charge de 4 par voie 50 watts x 4 Charge de 2 par voie 100 watts x 4 Charge de 1... -
Page 29: Informations Sur La Garantie Limitée
Certaines juridictions ne permettent pas de limitation sur la durée des garanties implicites. En conséquence, l'exclusion ci-dessus peut ne pas vous être applicable.Aucune personne n’est autorisée à assumer une quelconque autre responsabilité au nom de Rockford Fosgate relative à la vente de ce produit. -
Page 30: Introducción
¡Insista en ello! Después de todo, su nuevo sistema sólo merece lo mejor. Para darle el toque final a su nueva imagen Rockford Fosgate; pida sus accesorios Rockford, los cuales incluyen playeras, chaquetas, gorras y anteojos para sol. -
Page 31: Instrucciones De Seguridad
INICIO ¡Bienvenidos a Rockford Fosgate! Este manual ha sido creado para proporcionarle información al dueño, vendedor y técnico de instalación. Para quienes desean información rápida sobre cómo instalar este producto, por favor vean la Sección Instalación de este manual. El resto de la información puede encontrarse usando el Índice de Materias. -
Page 32: Características Del Diseño
ARACTERÍSTICAS DEL ISEÑO LED de alimentación (Parte superior de la unidad) – Este LED azul se ilumina cuando se enciende la unidad. LED de temperatura (Parte superior de la unidad) – Este LED rojo se ilumina si el amplificador llega a la tercera etapa de protección térmica. -
Page 33: Instalación
ARACTERÍSTICAS DEL ISEÑO 11. Interruptor de canal 2/4/5 – Mover el interruptor a la posición derecha ajusta las entradas a un modo de 2 canales, permitiendo al conexión a sólo las entradas delanteras con una salida de 5 canales. Si se mueve el interruptor a la posición central, ajusta las entradas a un modo de 4 canales, permitiendo conectar sólo a la entradas delantera y trasera con una salida de 5 canales. -
Page 34: Lugares De Montaje
PRECAUCIÓN: Si no se siente capaz de instalar el cableado de su nueva unidad, por favor consulte a su Distribuidor Autorizado Rockford Fosgate local sobre la instalación. PRECAUCIÓN: Antes de la instalación, desconecte el terminal negativo de la batería (-) para prevenir daño a la unidad, incendio o posibles lesiones. -
Page 35: Conexión De Corriente
NSTALACIÓN Planifique la ruta de cableado. Mantenga los cables RCA juntos pero aislados de los cables de alimentación del amplificador y de cualquier accesorio del automóvil de alta potencia, especialmente de motores eléctricos. Esto se hace para evitar ruido de acoplamiento de campos eléctricos irradiantes en la señal de audio. Cuando pase los cables por el muro contra fuego o por cualquier barrera metálica, protéjalos con anillos de plástico o goma para evitar cortos circuitos. - Page 36 NSTALACIÓN Conecte los altavoces. Pele 1/2 pulgada (1,3 cm) de los cables de los altavoces, insértelos en los terminales de los altavoces y ajuste el tornillo de fijación en su lugar.Asegúrese de mantener la polaridad correcta en los altavoces. NO conecte ninguno de los conductores de los altavoces a tierra, ya que esto puede resultar en un funcionamiento inestable.
- Page 37 NSTALACIÓN Cableado de 4 canales Estéreo ponteado • Las entradas RCA sólo se conectan a las entradas DELANTERAS y POSTERIORES. • INTERRUPTOR DE LOS CANALES 2/4/5 colocado en el centro para configurar a 4 CH. • Ganancia (delantera, trasera, subcanal) – se ajusta independientemente de acuerdo a la aplicación. •...
- Page 38 NSTALACIÓN Cableado para 5 canales Estéreo ponteado • INTERRUPTOR DE LOS CANALES 2/4/5 colocado a la izquierda, a la posición de 5 CH. • Ganancia (delantera, trasera, subcanal) – se ajusta independientemente de acuerdo a la aplicación. • Cruce (delantero, trasero y subcanal) – se ajusta independientemente de acuerdo a la aplicación.
-
Page 39: Funcionamiento
Esto será hasta arriba en la mayoría de las unidades fuentes. Luego, aumente el ajuste de ganancia del amplificador hasta que se obtenga un volumen adecuado. Las unidades fuentes. Rockford Fosgate no distorsionan, de manera que se puede usar el volumen con el ajuste máximo. -
Page 40: (Transición)
Se utliza para seleccionar entre un filtro de 12dB/octava Butterworth o 24dB/octava Linkwitz-Riley. Si no está seguro de la configuración correcta de esta característica, consulte con su distribuidor local autorizado de Rockford Fosgate para obtener la configuración recomendada para su sistema específico. Si tiene dudas, seleccione la configuración de 24 dB. -
Page 41: Solución De Problemas
OLUCIÓN DE ROBLEMAS NOTA: Si tiene problemas después de la instalación,siga los procedimientos de solución de problemas descritos a continuación. Procedimiento 1:Verifique que el amplificador esté bien conectado. Compruebe que esté encendida la luz de ALIMENTACIÓN (POWER).Si la luz de ALIMENTACIÓN (POWER) está... -
Page 42: Especificaciones
SPECIFICACIONES MODELO POWER 1000 Clasificación de potencia continua (Valor eficaz) – Medida a 14.4 voltios en la batería Canales Delantero y Trasero -Carga por canal 50 vatios x 4 -Carga por canal 100 vatios x 4 -Carga por canal 150 vatios x 4... -
Page 43: Información Sobre La Garantía Limitada
2. Cualquier costo o gasto relacionado con la desinstalación o nueva instalación del producto 3. Servicios prestados por alguien que no sea un Centro de Servicio Autorizado por Rockford Fosgate 4. Cualquier producto que tenga el número de serie borrado, alterado o removido 5. - Page 44 Stromkabeln und Batterieadaptern. Bestehen Sie darauf! Schließlich verdient Ihr neues System nur das Beste. Um Ihrem neuen Rockford Fosgate Image den letzten Schliff zu geben, bestellen Sie Ihre Rockford Accessoires. Dazu gehört alles von T-Shirts und Jacken zu Kappen und Sonnenbrillen.
-
Page 45: Sicherheitshinweise
Anleitung. Andere Informationen können Sie mithilfe des Inhaltsverzeichnisses auffinden. Wir bei Rockford Fosgate haben uns sehr darum bemüht, dass alle in dieser Anleitung enthaltenen Informationen auf dem neusten Stand sind. Da wir unsere Produkte jedoch ständig weiterentwickeln, können sich diese Informationen jedoch ohne Ankündigung ändern. -
Page 46: Designcharakteristiken
ESIGNCHARAKTERISTIKEN Betriebs-LED (Oberseite des Geräts) – Diese blaue LED leuchtet auf, wenn das Gerät betriebsbereit ist. Thermal-LED (Oberseite des Geräts) – Diese rote LED leuchtet auf, wenn der Verstärker die dritte Stufe des thermalen Schutzes erreicht hat.Wenn dies eintritt, schaltet sich der Verstärker zum Abkühlen aus. Schutz-LED (Oberseite des Geräts) –... -
Page 47: Einbau
Einstellungen vorzunehmen. Wenn Sie beim Einbau des Geräts unsicher sind, lassen Sie es bitte von einem VORSICHT: qualifizierten Rockford Fosgate Techniker einbauen. Entfernen Sie vor dem Einbau den negativen Batteriepol, um Schäden am Gerät, VORSICHT: Feuer bzw. mögliche Verletzungen zu vermeiden. -
Page 48: Befestigungsstellen
VERKABELUNG DES SYSTEMS Wenn Sie beim Einbau des Geräts unsicher sind, lassen Sie es bitte von einem VORSICHT: qualifizierten Rockford Fosgate Techniker einbauen. Entfernen Sie vor dem Einbau den negative Batteriepol, um Schäden am Gerät, VORSICHT: Feuer bzw. mögliche Verletzungen zu vermeiden. - Page 49 INBAU Planen Sie die Kabelrouten. Die RCA-Kabel sollen dicht zusammen bleiben, aber von den Stromkabeln des Verstärkers und anderem Hochleistungszubehör, insbesondere von elektrischen Motoren isoliert sein. Dies dient dazu, die Kupplung von Geräuschen aus elektrischen Strahlungsfeldern in das Audiosignal zu verhindern.Werden Kabel durch die Feuerwand oder andere Metallbarrieren geführt, die Kabel zur Vermeidung von Kurzschlüssen mit Plastik- oder Gummiringen schützen.
- Page 50 INBAU Die Lautsprecher anschließen.Von den Enden der Lautsprecherkabel 13 mm Isolation abziehen, dann die Kabel in das Lautsprecheranschlussstück einführen und die Befestigungsschraube fest anziehen. Die Lautsprecherkabel NICHT über das Fahrgestell erden, da dies zu unstabilem Betrieb führen kann. 10. Eine abschließende Prüfung des gesamten Kabelsystems durchführen, um zu gewährleisten, dass alle Verbindungen akkurat sind.Alle Strom- und Erdungsverbindungen auf durchgeriebene Kabel und lose Verbindungen prüfen, die Probleme verursachen könnten.
- Page 51 INBAU Vierkanalverkabelung Stereo überbrückt • RCA-Eingänge lassen sich nur an den FRONT- und REAR-Eingängen anschließen. • 2/4/5-KANALSCHALTER für VIERKANAL in die Mitte stellen. • Lautstärke (Front, Rear & Sub) – wird je nach Anwendung individuell eingestellt. • Crossover (Front, Rear & Sub) – wird je nach Anwendung individuell eingestellt.
- Page 52 INBAU Fünfkanalverkabelung Stereo überbrückt • 2/4/5-KANALSCHALTER für FÜNFKANAL nach links stellen. • Lautstärke (Front, Rear & Sub) – wird je nach Anwendung individuell eingestellt. • Crossover (Front, Rear & Sub) – wird je nach Anwendung individuell eingestellt.
-
Page 53: Betrieb
Lautstärke des Source-Geräts erhöhen,bis eine Verzerrung hörbar ist,dann ein wenig verringern,bis die Verzerrung nicht mehr hörbar ist.An den meisten Source-Geräten bedeutet dies ganz nach oben.Als Nächstes die Lautstärkeeinstellung des Verstärkers erhöhen,bis eine adäquate Lautstärke erreicht ist.Die Source-Geräte von Rockford Fosgate verzerren nicht, daher kann die Lautstärke in der Höchsteinstellung benutzt werden. -
Page 54: Crossover-Frequenz Einstellen
Dient dazu,zwischen einem 12 dB/Oktav Butterworth- oder einem 24 dB/Oktav Linkwitz-Riley-Filter zu wählen. Sind Sie sich nicht sicher,wie diese Funktion korrekt eingestellt wird,fragen Sie einen Vertragshändler von Rockford Fosgate hinsichtlich der empfohlenen Einstellung für Ihr spezielles System um Rat.Im Zweifelsfall wählen Sie die 24 dB Einstellung. -
Page 55: Fehlerbeseitigung
EHLERBESEITIGUNG Falls Sie nach dem Einbau Probleme haben,befolgen Sie die nachfolgenden Verfahren zur Fehlerbeseitigung: HINWEIS: Verfahren 1:Den Verstärker auf ordnungsgemäße Anschlüsse überprüfen. Prüfen,ob die BETRIEBS-LED aufleuchtet.Leuchtet die BETRIEBS-LED auf,bei Schritt 3 weitermachen,falls nicht, hier weitermachen. 1. Die Sicherung auf dem positiven Batteriekabel überprüfen und nach Bedarf ersetzen. 2. -
Page 56: Technische Daten
ECHNISCHE ATEN MODELL POWER 1000 Kontinuierliche Nennleistung (Mittelwert) - Bei 14,4 Batterie-Volt gemessen Front- und Rearkanäle -Belastung pro Kanal 50 Watt x 4 -Belastung pro Kanal 100 Watt x 4 -Belastung pro Kanal 150 Watt x 4 -Belastung überbrückt 200 Watt x 2 -Belastung überbrückt... -
Page 57: Informationen Zur Beschränkten Garantie
Einschränkung nicht in allen Fällen zu. Inanspruchnahme des Kundendienstes Kontaktieren Sie bitte den Rockford Fosgate Vertragshändler, bei dem Sie dieses Produkt gekauft haben. Benötigen Sie zusätzliche Hilfe, rufen Sie den Kundendienst von Rockford unter 1-800-669-9899 an. Sie erhalten dann eine RA# (Rücksendungsautorisierungsnummer), um jegliche Produkte an Rockford Fosgate zurückzusenden. -
Page 58: Introduzione
Per ottenere le massime prestazioni vi consigliamo di far installare il vostro nuovo prodotto Rockford Fosgate da un rivenditore autorizzato, in quanto noi forniamo un addestramento specializzato ai nostri tecnici attraverso il Rockford Fosgate Technical Training Institute (RTTI).Vi preghiamo di leggere con cura i termini della garanzia e di serbare sia la ricevuta che l’imballaggio... -
Page 59: Primi Passi
PRIMI PASSI Benvenuti alla Rockford Fosgate! Questo manuale è stato concepito per fornire ragguagli al proprietario, al rivenditore e all’installatore. Per coloro che desiderano informazioni rapide circa l’installazione di questo prodotto, vi preghiamo di consultare la sezione Installazione di questo manuale. Altri ragguagli sono disponibili attraverso l’Indice. -
Page 60: Caratteristiche Del Design
ARATTERISTICHE DEL ESIGN LED alimentazione (parte superiore dell'unità) – Questo LED blu si accende quando l'unità viene accesa. LED temperatura (parte superiore dell'unità) – Questo LED rosso si accende quando l'amplificatore raggiunge il terzo livello nella protezione dal surriscaldamento. In tal caso, l'amplificatore si spegne per raffreddarsi. LED di protezione (parte superiore dell'unità) –... -
Page 61: Installazione
ARATTERISTICHE DEL ESIGN 11. Interruttore 04/02/05 canali – Spostando l'interruttore nella posizione destra si impostano gli ingressi sulla modalità a 2 canali, permettendo il collegamento solo agli ingressi anteriori per le uscite a 5 canali. Spostando l'interruttore nella posizione centrale si impostano gli ingressi sulla modalità a 4 canali, permettendo il collegamento agli ingressi anteriori e posteriori per le uscite a 5 canali. -
Page 62: Posizionamento
CABLAGGIO DEL SISTEMA Se aveste dei dubbi circa l’installazione, rivolgetevi ad un tecnico qualificato della ATTENZIONE: Rockford Fosgate. Prima dell’installazione, scollegate il terminale negativo (-) della batteria per evitare ATTENZIONE: danni all’unità, pericoli d’incendio e/o potenziali lesioni personali. - Page 63 NSTALLAZIONE Programmate il cablaggio dei fili.Tenete i fili RCA insieme ma isolati dai cavi a tensione dell’amplificatore e da qualsiasi accessorio auto ad alta tensione, soprattutto i motori elettrici. Ciò è necessario per evitare che il rumore proveniente da campi elettrici irradiati possa accoppiarsi con il segnale audio. Quando fate scorrere i fili attraverso il parafiamma o attraverso qualsiasi barriera metallica, proteggeteli con delle guarnizioni di tenuta in gomma o in plastica per evitare i cortocircuiti.
- Page 64 NSTALLAZIONE Collegate gli altoparlanti. Spelate i fili degli altoparlanti di 1,27 cm e inseriteli nel terminale degli altoparlanti, stringendo la vite di arresto per fissarli.Assicuratevi di mantenere la corretta polarità per gli altoparlanti. NON collegate a massa nessuno dei cavi dell’amplificatore in quanto ciò potrebbe dar luogo ad un funzionamento instabile.
- Page 65 NSTALLAZIONE Cablaggio a 4 canali Stereo in parallelo • Gli ingressi RCA si collegano solo agli ingressi ANTERIORI e POSTERIORI. • Interruttore 04/02/05 canali al centro per selezionare 4 canali. • Guadagno (anteriore, posteriore e sub) - impostato in maniera indipendente a seconda dell'applicazione. •...
- Page 66 NSTALLAZIONE Cablatura a 5 canali Stereo in parallelo • Interruttore 04/02/05 canali a sinistra per selezionare 5 canali. • Guadagno (anteriore, posteriore e sub) - impostato in maniera indipendente a seconda dell'applicazione. • Crossover (anteriore, posteriore e sub) - impostato in maniera indipendente a seconda dell'applicazione.
-
Page 67: Funzionamento
Nella maggior parte delle unità, ciò avviene quasi al volume massimo. Quindi aumentare il guadagno dell'amplificatore fino a quando il volume è al livello desiderato. Nelle unità di fonte della Rockford Fosgate, il suono non è soggetto a distorsione e pertanto, il volume potrà essere alzato fino al massimo. -
Page 68: Regolazione Della Frequenza Di Incrocio
Permette di selezionare un filtro Butterworth da 12 dB per ottave o un filtro Linkwitz-Riley da 24 dB. Se non si è sicuri delle impostazioni corrette per questa funzionalità, consultare il proprio rivenditore autorizzato Rockford Fosgate per informazioni sulle impostazioni consigliate per il sistema specifico. In caso di dubbio, selezionar l'impostazione 24dB. -
Page 69: Individuazione/Riparazione Guasti
NDIVIDUAZIONE IPARAZIONE UASTI NOTA: Se incontraste dei problemi dopo l’installazione,seguite le procedure per la localizzazione e la riparazione dei guasti elencate di sotto. Procedura 1:Controllate che l’amplificatore abbia i collegamenti adeguati. Controllate che la spia dell’ACCENSIONE sia accesa.Se la spia di ACCENSIONE è accesa,passare al numero 3, altrimenti continuare 1. -
Page 70: Specifiche
PECIFICHE MODELLO POWER 1000 Potenza continua a regime (RMS) – Misurata a 14,4 volt da batteria Canali anteriore e posteriore Carico da 4 per canale 50 watt x 4 Carico da 2 per canale 100 watt x 4 Carico da 1... -
Page 71: Limitata
Prodotti rimessi a nuovo dalla fabbrica — 90 giorni (è necessaria la ricevuta) Ciò che è coperto dalla garanzia Questa garanzia è solamente applicabile ai prodotti della Rockford Fosgate venduti a clienti da parte di rivenditori autorizzati della Rockford Fosgate negli USA o nei suoi possedimenti. Prodotti acquistati da clienti presso un rivenditore autorizzato della Rockford Fosgate in paesi esteri saranno coperti solamente dal distributore di quel paese e non dalla Rockford Corporation. - Page 72 Rockford Fosgate Rockford Corporation 546 South Rockford Drive Tempe, Arizona 85281 U.S.A. In U.S.A., (480) 967-3565 In Europe, Fax (49) 8503-934014 In Japan, Fax (81) 559-79-1265 www.rockfordfosgate.com 08/05 B.M. Printed in U.S.A 1230-51615-03...