Table des Matières

Publicité

Les langues disponibles
  • FR

Les langues disponibles

  • FRANÇAIS, page 24

Liens rapides

TAD-D1 000TX
DISC PLAYER
LECTEUR DE DISQUE
DISC-PLAYER
LETTORE CD/SACD
REPRODUCTOR DE DISCOS
光碟播放機
OWNER'S MANUAL
MODE D'EMPLOI
BEDIENUNGSANLEITUNG
MANUALE D'ISTRUZIONI
MANUAL DE INSTRUCCIONES
用戶手冊

Publicité

Table des Matières
loading

Sommaire des Matières pour TAD D1000TX

  • Page 1 TAD-D1 000TX DISC PLAYER LECTEUR DE DISQUE DISC-PLAYER LETTORE CD/SACD REPRODUCTOR DE DISCOS 光碟播放機 OWNER’S MANUAL MODE D’EMPLOI BEDIENUNGSANLEITUNG MANUALE D’ISTRUZIONI MANUAL DE INSTRUCCIONES 用戶手冊...
  • Page 2: Operating Environment

    CAUTION CAUTION TO PREVENT THE RISK OF ELECTRIC SHOCK, DO NOT switch on this unit will not completely shut off REMOVE COVER (OR BACK). NO USER-SERVICEABLE all power from the AC outlet. Since the power plug PARTS INSIDE. REFER SERVICING TO QUALIFIED serves as the main disconnect device for the unit, SERVICE PERSONNEL.
  • Page 3: Important

    U.S. model only IMPORTANT CAUTION RISK OF ELECTRIC SHOCK DO NOT OPEN The lightning flash with arrowhead symbol, CAUTION: The exclamation point within an equilateral within an equilateral triangle, is intended to TO PREVENT THE RISK OF ELECTRIC triangle is intended to alert the user to the alert the user to the presence of uninsulated SHOCK, DO NOT REMOVE COVER (OR presence of important operating and...
  • Page 4: Information To User

    D8-10-3a_A1_En TAD-D1000TX CAUTION: USE OF CONTROLS OR ADJUSTMENTS OR PERFORMANCE OF PROCEDURES OTHER THAN THOSE SPECIFIED HEREIN MAY RESULT IN HAZARDOUS RADIATION EXPOSURE. CAUTION: THE USE OF OPTICAL INSTRUMENTS WITH THIS PRODUCT WILL INCREASE EYE HAZARD.
  • Page 5 U.S., Canada model only European model only...
  • Page 6: Precautions In Use

    PRECAUTIONS IN USE Installation Location Moving the unit If you must move the unit, first remove any disc loaded and For installation, select a stable location near the television or close the disc tray. Press the main unit’s  power button stereo system with which the unit will be used.
  • Page 7: Table Des Matières

    CONTENTS Thank you for buying this TAD product. Please read through these operating instructions so you will know how to operate your model properly. After you have finished reading the instructions, put them away in a safe place for future reference.
  • Page 8: Introduction

    Reduction of the total amount of master clock jitter has been previously suggested as a means of attaining even higher levels of sound quality, TAD Labs has taken this a step further, focusing on reduction of jitter in the low-frequency sideband ranges relative to the center frequencies, and to that end, a new Ultra-high-Precision Crystal Generator (UPCG) has been developed.
  • Page 9: Before You Start

    BEFORE YOU START Checking what’s in the box Please check that you have received the following supplied accessories in the accessory box. ' Remote control unit x 1 ' Power cord (U.S., Canada model) ' Operating Instructions DISC PLAYER OPEN/CLOSE (this document) TIME DISPLAY OFF...
  • Page 10: Usable Discs

    USABLE DISCS Types of discs that can be played on this unit Playable discs will feature one of the following marks either on the disc label, package, or jacket. SACD CD-R CD-RW “Super Audio CD” is a registered trademark. About SACD play SACD can be played in 2 channel sound only.
  • Page 11: Taking Care Of Your Player And Discs

    ' Do not use cracked, chipped, warped, or otherwise damaged discs as they may damage the player. ' This player is designed to be used only with conventional, fully circular discs. Do not use shaped discs. TAD disclaims all liability arising in connection with the use of shaped discs. Cleaning discs ' Fingerprints and dust on discs can affect playback performance.
  • Page 12: Names Of Parts And Their Functions

    NAMES OF PARTS AND THEIR FUNCTIONS Main unit front panel 1  Power button  Press to play or pause disc. When pressed during Use to set power to ON/standby mode. playback, enters pause mode. 2 Power indicator  Lights to indicate the unit’s power status. Press to return to beginning of currently playing track.
  • Page 13: Main Unit Rear Panel

    Main unit rear panel AC IN COAXIAL COAXIAL 12 V TRIGGER DIGITAL INPUT BALANCED UNBALANCED 1 ANALOG OUTPUT connectors 5 DIGITAL OUTPUT connectors Connect to Pre-Amplifier. Connect to a component equipped with a digital input • BALANCED XLR type connector. • UNBALANCED RCA type • XLR (balanced) type • COAXIAL type 2 USB port...
  • Page 14: Remote Control Unit

    2 TIME button 12 Amplifier operation buttons Press to display the disc’s elapsed and remaining These buttons can be used to operate a TAD amplifier. playing time. Each time the button is pressed, the display  AMP – Amplifier power ON/standby alternates as follows: [track remaining time] / [disc VOLUME (+/−) –...
  • Page 15: Installation And Connections

    INSTALLATION AND CONNECTIONS Installation WARNING ' Install the unit in a flat, level and stable location that provides fully sufficient strength to support the unit’s weight, since damage or personal injury may occur if the unit falls from its installation. When installing on a bookshelf or similar structure, be sure to confirm first that the shelf structure has sufficient strength.
  • Page 16 When connecting with a power amplifier In case of a power amplifier with a 12 V trigger input terminal. Commercially available 3.5Φ monaural Component with digital output connector Computer with USB port pin cable (without resistance) 1. Turn on power to both the unit and computer.
  • Page 17: Playing

    PLAYING To play a disc To play a disc on the unit, operate the unit as instructed below: Turn on the power by pressing the main unit’s front-panel  power button (or the  DISC PLAYER button on the remote control unit).
  • Page 18: Special Settings

    ' When using a Mac computer, set the unit’s input to U2, then use a USB cable to connect the unit to a computer; the proper driver will then be automatically installed. When using a Windows terminal device, consult the TAD website (http://tad-labs.com) and download the proper driver.
  • Page 19: Suppressing The Output Level Of Sacd And Usb Format Dsd Signals

    Consult the TAD website for driver installation instructions. • Manual driver installation is unnecessary for Mac users. The driver will be installed automatically when the unit is connected to a computer via USB cable. • To make use of internet connections, users must conclude a contract with an internet service provider and pay whatever fees are required.
  • Page 20: Troubleshooting

    Sometimes the trouble may lie in another component. Investigate the other components and electrical appliances being used. For information regarding computer settings, consult the TAD website (http://tad-labs. com). If the trouble cannot be rectified even after exercising the checks listed below, ask your dealer.
  • Page 21 USB, the computer’s sound setting may switch to a different input component. In this case, reselect TAD-USB1 ver2 or TAD-USB2 ver2 as the input. ' Check the connections again. The file format, OS, or playback software is not Confirm that the OS, software, and file sampling supported.
  • Page 22: Specifications

    SPECIFICATIONS g Body Model type ....................................Disc player Input connectors: Digital ....................XLR x 1; Coaxial x 2; Optical x 1; USB (Standard B type) x 1 Supported sampling frequency (XLR/Coaxial) ........44.1 kHz, 48 kHz, 88.2 kHz, 96 kHz, 176.4 kHz, 192 kHz Supported sampling frequency (Optical) ................
  • Page 24: Précaution De Ventilation

    ATTENTION ATTENTION POUR ÉVITER TOUT RISQUE D’ÉLECTROCUTION, NE L’interrupteur d’alimentation de cet appareil ne coupe pas PAS ENLEVER LE COUVERCLE (NI LE PANNEAU complètement le courant provenant de la prise secteur. Comme la prise d’alimentation fait office de dispositif de ARRIÈRE).
  • Page 25: La Protection De Votre Ouïe Est Entre Vos Mains

    CHOISISSEZ UN VOLUME SÉCURITAIRE: • Réglez d’abord le volume à un niveau inférieur. • Montez progressivement le volume jusqu’à un niveau d’écoute confortable ; le son doit être clair et exempt de distorsions. • Une fois que le son est à un niveau confortable, ne Modèle pour Etats-Unis et Canada seulement touchez plus au bouton du volume.
  • Page 26: Précautions À L'emploi

    PRÉCAUTIONS À L’EMPLOI Emplacement d’installation Déplacement du unité Pour l’installation, choisissez un endroit stable, proche du Si vous devez déplacer le unité, retirez d’abord le disque téléviseur ou de la chaîne audio avec lequel cet appareil sera du logement et refermez le plateau du disque. Appuyez sur utilisé.
  • Page 27 TABLE DES MATIÈRES Nous vous remercions de votre achat de cet appareil TAD. Nous vous demandons de lire soigneusement ce mode d’emploi ; vous serez ainsi à même de faire fonctionner l’appareil correctement. Après avoir bien lu le mode d’emploi, le ranger dans un endroit sûr pour pouvoir s’y référer ultérieurement.
  • Page 28: Introduction

    La réduction du degré total du scintillement de l’horloge maîtresse a été suggérée auparavant comme moyen d’atteindre des niveaux supérieurs de qualité sonore ; TAD Labs est allé plus loin en se concentrant sur la réduction du scintillement dans les plages de bande latérale à basses fréquences par rapport aux fréquences centrales et, à cette fin, un Générateur à cristal d’ultra-haute précision (UPCG) a été...
  • Page 29: Avant La Mise En Service

    AVANT LA MISE EN SERVICE Vérification du contenu de l’emballage Veuillez vérifier que les accessoires suivants se trouvent dans la boîte que vous avez acquise. ' Télécommande x 1 ' Cordon d’alimentation (Modèle pour Etats-Unis et Canada) ' Mode d’emploi DISC PLAYER OPEN/CLOSE (ce document)
  • Page 30: Disques Utilisables

    DISQUES UTILISABLES Types de disques utilisables dans cet appareil Les disques utilisables portent une des marques suivantes sur leur étiquette, leur emballage ou leur pochette. SACD CD-R CD-RW “Super Audio CD” est une marque de commerce déposée. A propos de la lecture d’un CD Super Audio Un CD Super Audio est lisible seulement en deux voies.
  • Page 31: Entretien Du Lecteur Et Des Disques

    ' Ce lecteur est conçu pour reproduire uniquement des disques ordinaires parfaitement circulaires. N’utilisez pas de disques de forme spéciale. TAD décline toute responsabilité en cas de problèmes, découlant de l’emploi de disques d’une forme particulière. Nettoyage des disques ' Des traces de doigts et de la poussière sur les disques peuvent réduire la qualité...
  • Page 32: Nomenclature Des Organes Et Leurs Fonctions

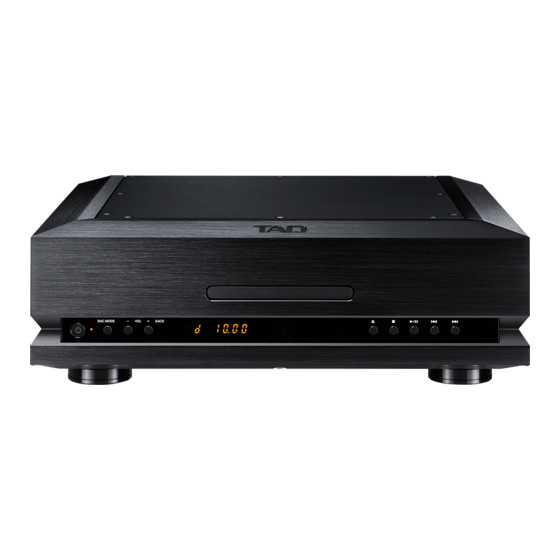
    NOMENCLATURE DES ORGANES ET LEURS FONCTIONS Panneau avant de l’unité principale 1 Bouton d’alimentation   Pour mettre l’appareil sous tension / en mode Veille. Appuyez pour lancer ou interrompre la lecture du disque. Une pression pendant la lecture fait passer au mode Pause. 2 Voyant d’alimentation ...
  • Page 33: Panneau Arrière De L'unité Principale

    Panneau arrière de l’unité principale AC IN COAXIAL COAXIAL 12 V TRIGGER DIGITAL INPUT BALANCED UNBALANCED 1 Connecteurs ANALOG OUTPUT 5 Connecteurs DIGITAL OUTPUT Raccordez au pré-amplificateur. Raccordez à un composant doté d’un connecteur d’entrée • Type BALANCED XLR numérique. • Type UNBALANCED RCA • Type XLR (symétrique) • Type COAXIAL 2 Port USB...
  • Page 34: Télécommande

    3 Bouton SACD/CD 12 Boutons d’utilisation d’amplificateur Appuyez pour passer d’une zone de lecture à l’autre sur Ils permettent de contrôler un amplificateur TAD. un disque hybride. Une pression sur ce bouton pendant  AMP – Mise sous tension/Veille d’amplificateur l’arrêt du disque permet de commuter entre la zone CD...
  • Page 35: Installation Et Branchements

    INSTALLATION ET BRANCHEMENTS Plage d’action de la télécommande Capteur du signal de télécommande Quand vous utilisez la télécommande pour contrôler le unité, orientez-la vers le capteur du signal de télécommande sur l’unité principale dans les plages indiqués sur cette illustration. ' La télécommande ne fonctionnera pas correctement si un obstacle se trouve entre 30°...
  • Page 36: Connexions

    Connexions ATTENTION ' N’allumez pas l’interrupteur d’alimentation du unité ou d’autres composants avant que tous les branchements ne soient terminés. ' Lors du branchement de composants ou d’un changement des connexions, réglez toujours l’interrupteur d’alimentation sur OFF (hors tension) et débranchez le cordon d’alimentation au niveau de la prise secteur. Lorsque vous effectuez les connexions, branchez le cordon d’alimentation en dernier lieu.
  • Page 37: Durant La Connexion Avec Un Amplificateur De Puissance

    Durant la connexion avec un amplificateur de puissance Pour le cas d’un amplificateur de puissance avec une borne d'entrée de déclenchement de 12 V. Câble à broche mono de 3,5Φ disponible Composant avec connecteur Ordinateur avec port USB dans le commerce (sans résistance) de sortie numérique 1.
  • Page 38: En Cours De Lecture

    EN COURS DE LECTURE Lecture d’un disque Pour lire un disque sur le unité, utilisez l’appareil comme expliqué ci-après : • Mettez l’appareil sous tension en appuyant sur le bouton  de son panneau avant (ou sur le bouton  DISC PLAYER de la télécommande). Confirmez que le voyant d’alimentation du panneau avant s’est allumé.
  • Page 39: Réglages Spéciaux

    à l’ordinateur ; le pilote adéquat sera alors automatiquement installé. Si vous utilisez un terminal Windows, consultez le site web de TAD (http://tad-labs.com) et téléchargez le pilote approprié. Consultez le site web de TAD pour les instructions relatives à l’installation du pilote.
  • Page 40: Suppression Du Niveau De Sortie Des Signaux Sacd Et Dsd De Format Usb

    • Pour utiliser les connexions internet, l’utilisateur doit conclure un contrat auprès d’un fournisseur de service internet et payer les frais requis. Quand l’appareil est en mode Veille, appuyez sur le bouton d’alimentation  tout en maintenant enfoncé le bouton DAC MODE de l’unité...
  • Page 41: Guide De Dépannage

    Examinez les autres composants et les appareils électriques utilisés. Pour des informations relatives aux réglages de l’ordinateur, consultez le site web de TAD (http://tad-labs.com). Si le problème ne peut pas être résolu malgré les indications ci-dessous, consultez votre revendeur.
  • Page 42 USB, il se peut que le réglage sonore de l’ordinateur passe à un composant d’entrée différent. Dans ce cas, sélectionnez à nouveau TAD-USB1 ver2 ou TAD-USB2 ver2 comme entrée. ' Vérifiez à nouveau les branchements. Le format de fichier, le système d’exploitation Confirmez que le système d’exploitation OS, le...
  • Page 43 Problème Cause possible Solution L’affichage n’est pas L’angle de vision de l’affichage doit être Regardez l’affichage en vous plaçant juste en visible. inférieur à 45° sur la gauche et la droite en face face de l’appareil. de l’appareil. L’affichage de l’appareil est désactivé. Appuyez sur le bouton DISP OFF sur l’appareil principal (ou sur le bouton DISPLAY OFF de la télécommande) pour annuler la fonction...
  • Page 44: Specifications

    SPECIFICATIONS g Coffret Type de modèle ................................Lecteur de disque Connecteurs d’entrée : Numérique ..................XLR x 1; Coaxial x 2; Optique x 1; USB (type Standard B) x 1 Fréquence d’échantillonnage acceptée (XLR/Coaxial) ......44,1 kHz, 48 kHz, 88,2 kHz, 96 kHz, 176,4 kHz, 192 kHz Fréquence d’échantillonnage acceptée (Optique) ..............
  • Page 46 ACHTUNG ACHTUNG UM SICH NICHT DER GEFAHR EINES ELEKTRISCHEN Der Netzschalter trennt dieses Gerät nicht SCHLAGES AUSZUSETZEN, DÜRFEN SIE NICHT DEN vollständig vom Stromnetz. Um das Gerät vollständig DECKEL (ODER DIE RÜCKSEITE) ENTFERNEN. IM vom Netz zu trennen, muss der Netzstecker aus der GERÄTEINNEREN BEFINDEN SICH KEINE VOM Netzsteckdose gezogen werden.
  • Page 47 Nur Modell für Europa...
  • Page 48: Vorsichtshinweise Zum Gebrauch

    VORSICHTSHINWEISE ZUM GEBRAUCH Aufstellungsort Transportieren des Einheit Achten Sie vor einem Transport des Einheit an einen Wählen Sie zur Aufstellung eine stabile Unterlage in der anderen Ort stets darauf, eine ggf. eingelegte Disc zu Nähe des Fernsehgerätes oder der Hi-Fi-Anlage, das bzw. die entfernen und das Disc-Fach zu schließen.
  • Page 49 INHALTSVERZEICHNIS Wir danken Ihnen, dass Sie sich für dieses Produkt von TAD entschieden haben. Lesen Sie sich bitte diese Bedienungsanleitung durch. Dann wissen Sie, wie Sie lhr Gerät richtig bedienen. Bewahren Sie sie an einem sicheren Platz auf, um auch zukünftig nachschlagen zu können.
  • Page 50: Einleitung

    Die Verringerung des Gesamtbetrags von Master-Taktgeber-Jitter wurde bereits früher als geeignete Maßnahme zur Erzielung einer noch höheren Klangqualität vorgeschlagen. TAD Labs hat diese Maßnahme noch verfeinert, indem sich die Ingenieure auf die Verringerung von Jitter im Seitenband des Tiefenbereichs relativ zu den Mittenfrequenzen konzentrierten, was zur Entwicklung eines neuen Ultrahochpräzisions-Kristallgenerators (UPCG) führte.
  • Page 51: Vor Der Inbetriebnahme

    VOR DER INBETRIEBNAHME Überprüfen des mitgelieferten Zubehörs Bitte vergewissern Sie sich nach dem Auspacken, dass alle nachstehend aufgeführten Zubehörartikel vollständig im Verpackungskarton enthalten sind. ' Fernbedienung x 1 ' Netzkabel (Modell für USA, Kanada) ' Bedienungsanleitung DISC PLAYER OPEN/CLOSE (dieses Dokument) TIME DISPLAY OFF SACD/CD...
  • Page 52: Abspielbare Discs

    ABSPIELBARE DISCS Mit diesem Gerät abspielbare Disc-Typen Discs, die mit diesem Player abgespielt werden können, sind durch eines der nachstehend aufgelisteten Symbole auf dem Etikett, der Verpackung oder dem Einband der Disc ausgewiesen. SACD CD-R CD-RW Bei „Super Audio CD“ handelt es sich um eine eingetragene Marke. Hinweise zur SACD-Wiedergabe SACDs können nur mit zweikanaligem Ton wiedergegeben werden.
  • Page 53: Reinigen Der Abtasterlinse Und Handhabung Von Discs

    Beschädigung des Players verursachen kann. ' Dieses Player ist ausschließlich zum Abspielen von normgerechten, kreisförmigen Discs bestimmt. Verwenden Sie keine unregelmäßig geformten Discs. TAD übernimmt keinerlei Haftung für Schäden, die auf den Gebrauch von nicht normgerechten Discs zurückzuführen sind.
  • Page 54: Anordnung Und Funktion Der Bedienelemente

    ANORDNUNG UND FUNKTION DER BEDIENELEMENTE Frontplatte 1 Netzschalter  Mit dieser Taste wird das Gerät eingeschaltet und in den Drücken Sie diese Taste, um die Wiedergabe zu beenden. Bereitschaftszustand umgeschaltet.  2 Betriebsanzeige Drücken Sie diese Taste, um die Wiedergabe zu starten. Durch Diese Anzeige kennzeichnet den aktuellen erneutes Drücken der Taste wird die Wiedergabe pausiert.
  • Page 55: Rückwand

    Rückwand AC IN COAXIAL COAXIAL 12 V TRIGGER DIGITAL INPUT BALANCED UNBALANCED 1 Analoge Ausgangsbuchsen ANALOG OUTPUT 5 Digitale Ausgangsbuchsen DIGITAL OUTPUT Diese Buchsen dienen zum Anschluss eines Verbinden Sie diese Buchsen jeweils mit der Vorverstärkers. entsprechenden digitalen Eingangsbuchse einer anderen • BALANCED: symmetrische XLR-Buchsen-Ausführung Komponente.
  • Page 56: Fernbedienung

    Auswahl zu bestätigen. Wiedergabe betätigt wird, kann abwechselnd zwischen 12 Tasten für Verstärkerbedienung dem CD-Bereich (CD area) und dem SACD-Bereich (SACD Diese Tasten können zur Bedienung eines TAD- area) der Disc umgeschaltet werden. Verstärkers verwendet werden. 4 Zifferntasten  AMP – Verstärker Ein/Aus (Bereitschaft) Diese Tasten dienen zur Eingabe der Nummer eines VOLUME (+/−) –...
  • Page 57: Aufstellung Und Anschlüsse

    AUFSTELLUNG UND ANSCHLÜSSE Wirkungsbereich der Fernbedienung Fernbedienungssignal-Sensor Um den Einheit zu betätigen, richten Sie den Geber der Fernbedienung auf den Fernbedienungssignal-Sensor an der Frontplatte des Gerätes, wobei der in der beigefügten Abbildung gezeigte Betriebsbereich einzuhalten ist. ' Wenn sich Hindernisse auf dem Signalübertragungsweg zwischen dem Geber 30°...
  • Page 58: Anschließen

    Anschließen ACHTUNG ' Achten Sie unbedingt darauf, den Einheit und die übrigen Komponenten erst dann einzuschalten, nachdem alle Anschlüsse hergestellt worden sind. ' Achten Sie stets darauf, den Netzschalter auszuschalten und den Netzstecker des Netzkabels von der Netzsteckdose zu trennen, bevor Sie irgendwelche Anschlüsse herstellen oder ändern. Schließen Sie das Netzkabel erst dann an, nachdem alle anderen Anschlüsse hergestellt worden sind.
  • Page 59 Bei Verbindung mit einem Leistungsverstärker Im Falle eines Leistungsverstärkers mit einem 12-V-Auslösereingang. Handelsübliches monaurales Komponente mit digitaler Ausgangsbuchse 3,5- Φ -Kabel (ohne Widerstand) PC mit USB-Anschluss 1. Schalten Sie das Gerät und den PC ein. 2. Schalten Sie den Eingang des Gerätes auf U1 um.
  • Page 60: Wiedergabe

    WIEDERGABE Abspielen einer Disc Um eine Disc mit dem Einheit abzuspielen, gehen Sie wie nachstehend beschrieben vor: • Drücken Sie den Netzschalter  an der Frontplatte (oder die Taste  DISC PLAYER an der Fernbedienung), um das Gerät einzuschalten. Vergewissern Sie sich, dass Einschaltanzeige an der Frontplatte des Gerätes aufleuchtet.
  • Page 61: Besondere Einstellungen

    BESONDERE EINSTELLUNGEN Passen Sie die Lautstärke an Passen Sie symmetrischen/asymmetrischen Line-Ausgang an Bei Verbindung mit einem Leistungsverstärker. Der Anfangswert beim Line-Ausgang ist 30. ' Nehmen Sie mit der Taste VOL (−/+) am Hauptgerät und der Taste VOLUME (+/−) in der Mitte der Fernbedienung Anpassungen vor.
  • Page 62: Reduzierung Des Ausgangspegels Von Dsd-Signalen Des Sacdund Usb-Formats

    Bei Verwendung eines Windows-Datenendgerätes laden Sie den geeigneten Treiber bitte von der TAD-Website (http:// tad-labs.com) herunter. Anweisungen zur Installation des Treibers finden Sie auf der TAD-Website. • Bei Verwendung eines Mac-Computers ist keine manuelle Installation eines Treibers erforderlich. Der Treiber wird automatisch installiert, sobald das Gerät über ein USB-Kabel mit dem Computer verbunden worden ist.
  • Page 63: Störungsbeseitigung

    Examinez les autres composants et les appareils électriques utilisés. Pour des informations relatives aux réglages de l’ordinateur, consultez le site web de TAD (http://tad-labs.com). Si le problème ne peut pas être résolu malgré les indications ci-dessous, consultez votre revendeur.
  • Page 64 Klangeinstellung des Computers auf eine andere Eingangskomponente umgeschaltet wird. Wählen Sie in einem solchen Fall TAD- USB1 ver2 oder TAD-USB2 ver2 als Eingang. ' Überprüfen Sie die Anschlüsse erneut. Das Dateiformat, das Betriebssystem oder die Vergewisssern Sie sich, dass das Betriebssystem, Wiedergabe-Software wird nicht unterstützt.
  • Page 65 Störung Mögliche Ursache Abhilfemaßnahme Die Displayanzeigen Der nutzbare Betrachtungswinkel des Displays Betrachten Sie das Display direkt von vorn aus. sind nicht ablesbar. beträgt jeweils 45° nach rechts und links von der Vorderseite des Gerätes aus. Das Display ist abgeschaltet worden. Drücken Sie die Taste DISP OFF an der Frontplatte (oder die Taste DISPLAY OFF an der Fernbedienung), um die Display-Abschaltung...
  • Page 66: Technische Daten

    TECHNISCHE DATEN g Gehäuse Modelltyp ....................................Disc-Player Eingangsbuchsen: Digital ....................XLR x 1; Coaxial x 2; Optical x 1; USB (Standard B type) x 1 Unterstützte Abtastfrequenzen (XLR/koaxial) ........44,1 kHz, 48 kHz, 88,2 kHz, 96 kHz, 176,4 kHz, 192 kHz Unterstützte Abtastfrequenzen (optisch) ................44,1 kHz, 48 kHz, 88,2 kHz, 96 kHz Unterstützte Abtastfrequenzen (USB) .................
  • Page 68: Condizioni Ambientali Di Funzionamento

    ATTENZIONE AVVERTENZA PER EVITARE IL RISCHIO DI SCOSSE ELETTRICHE, L'interruttore di accensione di questa unità non NON RIMUOVERE IL COPERCHIO (O IL RETRO). NON interrompe del tutto l'alimentazione dalla presa di CI SONO PARTI INTERNE LA CUI MANUTENZIONE corrente alternata. Dal momento che il cavo di POSSA ESSERE EFFETTUATA DALL’UTENTE.
  • Page 69 AVVERTIMENTO RIGUARDANTE IL FILO DI ALIMENTAZIONE Prendete sempre il filo di alimentazione per la spina. Non tiratelo mai agendo per il filo stesso e non toccate mai il filo con le mani bagnati, perchè questo potrebbe causare cortocircuiti o scosse elettriche. Non collocate l’unità, oppure dei mobili sopra il filo di alimentazione e controllate che lo stesso non sia premuto.
  • Page 70: Precauzioni Per L'uso

    PRECAUZIONI PER L’USO Posizione di installazione Spostamento del unità Se il unità deve venire spostato, prima togliere eventuali Per l’installazione scegliere una posizione stabile vicino al dischi e richiudere il cassetto portadisco. Premere il pulsante televisore o sistema stereo dove l’unità dovrà venire usata. di alimentazione ...
  • Page 71 INDICE Vi ringraziamo per avere acquistato questo prodotto TAD. Leggere attentamente questo manuale di istruzioni per familiarizzarsi con l’uso dell’apparecchio. Conservare poi il manuale per ogni eventuale futuro riferimento. PRECAUZIONI PER L’USO ............................4 Posizione di installazione .................................4 Manutenzione ....................................4 La condensa ......................................4 INTRODUZIONE ..............................6...
  • Page 72: Introduzione

    La riduzione del jitter dell’orologio principale era stata proposta in precedenza per ottenere audio di qualità ancora più alta. I TAD Labs hanno fatto di più, concentrandosi sulla riduzione del jitter nelle gamme di banda laterale di bassa frequenza in relazione alle frequenze centrali e ha sviluppato a tale fine un generatore a cristalli di precisione ultra-alta (UPGG).
  • Page 73: Prima Di Iniziare

    PRIMA DI INIZIARE Contenuto della confezione Controllare che la scatola degli accessori contenga tutti i seguenti accessori. ' Telecomando x 1 ' Cavo di alimentazione (modello per USA e Canada) ' Istruzioni per l’uso DISC PLAYER OPEN/CLOSE (questo documento) TIME DISPLAY OFF SACD/CD DAC MODE...
  • Page 74: Dischi Utilizzabili

    DISCHI UTILIZZABILI Tipi di disco riproducibili con questa unità I dischi riproducibili portano uno dei seguenti marchi sull’etichetta, sulla confezione o sulla copertina. SACD CD-R CD-RW “Super Audio CD” è un marchio di fabbrica depositato. Riproduzione di SACD Gli SACD possono venire riprodotti con solo 2 canali. CD protetti dalla duplicazione Questo lettore è...
  • Page 75: Cura Del Lettore E Del Disco

    ' Non usare dischi crepati, scheggiati, deformati o altrimenti danneggiati, dato che possono danneggiare il lettore. ' Questo lettore è progettato per usare solo dischi convenzionali e del tutto circolari. Non usare dischi di forma particolare. TAD non si assume alcuna responsabilità per danni dovuti all’uso di dischi di forma insolita. Pulizia dei dischi ' Le impronte e la polvere possono influenzare la riproduzione di dischi.
  • Page 76: Nome E Funzione Delle Varie Parti

    NOME E FUNZIONE DELLE VARIE PARTI Pannello anteriore dell’unità principale 1 Pulsante di alimentazione   Premerlo per riprodurre o portare in pausa il disco. Se Usarlo per accendere o portare in standby il lettore. premuto durante la riproduzione, subentra la modalità di 2 Indicatore di alimentazione pausa.
  • Page 77: Pannello Posteriore Dell'unità Principale

    Pannello posteriore dell’unità principale AC IN COAXIAL COAXIAL 12 V TRIGGER DIGITAL INPUT BALANCED UNBALANCED 1 Connettori ANALOG OUTPUT 5 Connettori DIGITAL OUTPUT Da collegare ad un preamplificatore. Collegare ad un componente dotato di connettore digitale • Tipo XLR bilanciato di ingresso. • Tipo RCA non bilanciato • Tipo XLR (bilanciato) • Tipo coassiale...
  • Page 78 Ad ogni pressione del pulsante, il display Questi pulsanti possono venire usati per controllare un cambia nel modo seguente: [track remaining time] / amplificatore TAD. [disc remaining time] / [elapsed time].  AMP – Accensione/standby dell’amplificatore VOLUME (+/−) – Usarlo per regolare il volume dell’audio.
  • Page 79: Telecomando

    INSTALLAZIONE E COLLEGAMENTI Campo di azione del telecomando Sensore di telecomando Per controllare il unità via telecomando, puntare quest’ultimo sul sensore di telecomando dell’unità principale entro le gamme indicate nell’illustrazione qui accanto. ' Il telecomando potrebbe non funzionare correttamente se degli ostacoli si frappongono fra di esso ed il sensore di telecomando o se l’angolo fra telecomando 30°...
  • Page 80: Collegamenti

    Collegamenti ATTENZIONE ' Non accendere il unità o altri componenti se non a collegamenti ultimati. ' Prima di collegare componenti o modificare i collegamenti, portare sempre l’interruttore di alimentazione su OFF e scollegare il cavo di alimentazione dalla presa di CA. Nel fare i collegamenti, collegare sempre il cavo di alimentazione per ultimo.
  • Page 81 Quando si effettua il collegamento con un amplificatore di potenza In caso di amplificatore di potenza con terminale di ingresso trigger da 12 V. Cavo a pin mono da 3,5 Φ disponibile Componente con connettore di uscita digitale Computer con porta USB in commercio (senza resistenza) 1.
  • Page 82: Riproduzione

    RIPRODUZIONE Lecture d’un disque Pour lire un disque sur le unità, utilisez l’appareil comme expliqué ci-après : • Mettez l’appareil sous tension en appuyant sur le bouton  de son panneau avant (ou sur le bouton  DISC PLAYER de la télécommande). Confirmez que le voyant d’alimentation du panneau avant s’est allumé.
  • Page 83: Regolazione Del Volume Audio

    ' Se si usa un Macintosh, scegliere l’ingresso U2 di questa unità e collegarla via cavo USB al computer. Il driver adatto verrà installato automaticamente. Se si usa un computer Windows, consultare il sito Web di TAD (http://tad-labs.com) e scaricare il driver necessario. Per istruzioni di installazione del driver, consultare il sito Web di TAD.
  • Page 84: Riduzione Del Livello Di Ingresso Di Sacd E Segnali Dsd Di Formato Usb

    Ad unità in modalità standby, premere il pulsante di accensione  mentre si tiene premuto il pulsante DAC MODE dell’unità principale. Il display dell’ingresso USB cambia da [ U1 ] a [ U2 ]. Accendere il computer. Collegare il dispositivo al computer con un cavo USB. Per cancellare la modalità...
  • Page 85: Diagnostica

    Controllare gli altri componenti e gli apparecchi elettrici usati. Per quanto riguarda le impostazioni per il computer, consultare il sito web di TAD (http://tad-labs.com). Se il problema non può venire eliminato neppure facendo i controlli che seguono, consultare il proprio negoziante.
  • Page 86 USB di questa unità, computer. il computer potrebbe collegarsi ad un componente in ingresso differente. In tal caso, scegliere di nuovo TAD-USB1 ver2 o TAD-USB2 ver2 come ingresso. ' Controllare di nuovo i collegamenti. Il formato del file, il sistema operativo o...
  • Page 87 L’elettricità statica e le influenze esterne possono far funzionare male questa unità. In tal caso, scollegare il cavo di alimentazione e ricollegarlo. Questo di solito normalizza il funzionamento di questa unità. Se questo non risolver il problema, consultare il proprio rivenditore. Questa unità...
  • Page 88: Caratteristiche Tecniche

    CARATTERISTICHE TECNICHE g Corpo Modello ..................................Lettore CD/SACD Connettori di ingresso: Digitali ..................XLR x 1; coassiali x 2; a fibre ottiche x 1; USB (tipo Standard B) x 1 Frequenze di campionamento supportate (XLR/coassiale) ....44,1 kHz, 48 kHz, 88,2 kHz, 96 kHz, 176,4 kHz, 192 kHz Frequenze di campionamento supportate (a fibre ottiche) ..........
  • Page 90: Entorno De Funcionamiento

    PRECAUCIÓN PRECAUCIÓN PARA PREVENIR EL PELIGRO DE CHOQUE ELÉCTRICO El interruptor de la alimentación de este aparato NO REMOVER LA TAPA NI LAS PARTES DENTRO NO no desconecta por completo la alimentación de la UTILIZADAS, LLAMAR UNA PERSONA CUALIFICADA. toma de corriente de CA. Puesto que el cable de alimentación hace las funciones de dispositivo de D3-4-2-1-1_B2_Es desconexión de la corriente para el aparato, para...
  • Page 91 Sólo el modelo para Europa...
  • Page 92: Precauciones Para La Utilización

    PRECAUCIONES PARA LA UTILIZACIÓN Lugar de instalación Traslado de unidad Si debe trasladar la unidad, saque primero el disco, si hay Para efectuar la instalación, seleccione un lugar estable alguno introducido, y cierre la bandeja del disco. Pulse en el que desee usar el aparato, cerca del televisor o del el botón de la alimentación ...
  • Page 93 ÍNDICE Muchas gracias por la adquisición de este producto TAD. Lea completamente este manual de instrucciones para aprender a operar correctamente el aparato. Después de haber terminado la lectura de las instrucciones, guarde el manual en un lugar seguro para poderlo consultar en el futuro.
  • Page 94: Introducción

    La reducción de la cantidad total de perturbaciones oscilatorias del reloj maestro ya se había considerado con anterioridad para lograr niveles incluso más altos de calidad de sonido y TAD Labs se propuso ir todavía más lejos, centrándose en la reducción de las perturbaciones oscilatorias de las gamas de banda lateral de bajas frecuencias con respecto a las frecuencias centrales, y con esta finalidad, desarrolló...
  • Page 95: Antes De Comenzar

    ANTES DE COMENZAR Comprobación del contenido de la caja Compruebe que se incluyan todos los accesorios siguientes en la caja de accesorios. ' Mando a distancia x 1 ' Cable de alimentación (modelo para EE.UU. y Canadá) ' Manual de Instrucciones DISC PLAYER OPEN/CLOSE (este manual)
  • Page 96: Discos Que Pueden Utilizarse

    DISCOS QUE PUEDEN UTILIZARSE Tipos de discos que pueden reproducirse en esta unidad Los discos que pueden reproducirse tienen una de las marcas siguientes en la etiqueta del disco, en el embalaje, o en su estuche. SACD CD-R CD-RW “Super Audio CD” es una marca comercial registrada. Acerca de la reproducción de SACD Los discos SACD sólo pueden reproducirse con sonido de 2 canales.
  • Page 97: Cuidados Del Reproductor Y De Los Discos

    ' No use discos rajados, desportillados, deformados o dañados de otra forma porque podrán estropear el reproductor. ' Este reproductor ha sido diseñado para usar sólo discos convencionales, circulares. No utilice discos de otras formas. TAD renuncia a cualquier responsabilidad relacionada con el uso de discos con otras formas. Limpieza de los discos ' Las huellas dactilares y el polvo de los discos pueden alterar la reproducción.
  • Page 98: Nomenclaturay Funciones De Las Partes

    NOMENCLATURA Y FUNCIONES DE LAS PARTES Panel frontal de la unidad principal 1 Botón de la alimentación   Púlselo para reproducir o pausar el disco. Si lo pulsa Utilícelo para conectar la alimentación/establecerlo en el durante la reproducción se establece el modo de pausa. modo de espera.
  • Page 99: Panel Posterior De La Unidad Principal

    Panel posterior de la unidad principal AC IN COAXIAL COAXIAL 12 V TRIGGER DIGITAL INPUT BALANCED UNBALANCED 1 Conectores ANALOG OUTPUT 5 Conectores DIGITAL OUTPUT Conéctelas al preamplificador. Se emplean para conectarlo a un componente equipado • BALANCED tipo XLR de un conector de entrada digital. • UNBALANCED tipo RCA • Tipo XLR (equilibrado) • Tipo COAXIAL...
  • Page 100: Mando A Distancia

    / [elapsed time]. 12 Boutons d’utilisation d’amplificateur 3 Botón SACD/CD Ils permettent de contrôler un amplificateur TAD. Púlselo para cambiar entre áreas de discos híbridos. Si  AMP – Mise sous tension/Veille d’amplificateur pulsa este botón mientras la reproducción del disco está...
  • Page 101: Instalación Y Conexiones

    INSTALACIÓN Y CONEXIONES Distancia de operación del mando a distancia Sensor remoto Para utilizar el mando a distancia para operar la unidad, oriente el mando a distancia al sensor remoto de la unidad principal dentro de las distancias indicadas en la ilustración de la derecha.
  • Page 102: Conexión

    Conexión PRECAUCIÓN ' No conecte el interruptor de la alimentación de la unidad ni de los demás componentes hasta que haya completado todas las conexiones. ' Cuando efectúe las conexiones y cuando desee cambiar las conexiones, desconecte siempre el interruptor de la alimentación y desenchufe el cable de alimentación de la toma de corriente de CA.
  • Page 103 Al conectar con un amplificador de potencia En el caso de un amplificador de potencia con un terminal de entrada de disparador de 12 V. Cable de clavija monoaural de 3,5Φ Componente con conector de salida digital disponible en el mercado (sin resistencia) Ordenador con puerto USB 1.
  • Page 104: Reproducción

    REPRODUCCIÓN Para reproducir un disco Para reproducir un disco en el unidad, opere la unidad como se indica a continuación: • Conecte la alimentación pulsando el botón de la alimentación  del panel frontal de la unidad (o el botón ...
  • Page 105: Ajustes Especiales

    Cuando emplee un dispositivo de terminal Windows, visite el sitio de TAD en la Web (http://tad-labs.com) y descargue el controlador adecuado. Consulte el sitio de TAD en la Web para ver las instrucciones para la instalación del controlador.
  • Page 106: Supresión Del Nivel De Salida De Las Señales Dsd De Los Formatos Sacd Y Usb

    • Para poder emplear las conexiones de Internet, el usuario deberá suscribir un contrato con un proveedor de servicios de Internet y pagar la tarifa correspondiente. Cuando la unidad esté en el modo de espera, pulse el botón de la alimentación  mientras mantiene pulsado el botón DAC MODE de la unidad principal.
  • Page 107: Solución De Problemas

    Inspeccione los otros componentes y los aparatos eléctricos que esté utilizando. Para encontrar más información acerca de los ajustes del ordenador, visite el sitio de TAD en la Web (http://tad-labs.com). Si no puede solucionar el problema después de haber realizado las comprobaciones que se enumeran a continuación, consulte a su distribuidor.
  • Page 108 Cuando no se haya ajustado a la entrada USB, Cambie a la entrada USB y restablezca el ajuste ajustado la entrada el ordenador no reconocerá la unidad. del sonido del ordenador al de TAD-USB1 ver2 o a una que no sea TAD-USB2 ver2. USB, la unidad no podrá...
  • Page 109 Síntoma Causa posible Solución El mando a distancia ' Las pilas del mando a distancia están ' Reemplace las pilas por otras nuevas. no funciona. descargadas. ' El mando a distancia se está usando ' Emplee el mando a distancia desde una demasiado lejos de la unidad principal.
  • Page 110: Especificaciones

    ESPECIFICACIONES g Cuerpo Tipo de modelo..............................Reproductor de discos Conectores de entrada: Digital ....................XLR x 1; Coaxial x 2; Óptica x 1; USB (Tipo B estándar) x 1 Frecuencia de muestreo soportada (XLR/Coaxial) ......44,1 kHz, 48 kHz, 88,2 kHz, 96 kHz, 176,4 kHz, 192 kHz Frecuencia de muestreo soportada (Óptica) ...............
  • Page 112 D3-4-2-1-1_B1_Zhtw D3-4-2-2-2a*_A1_Zhtw D3-4-2-1-3_A1_Zhtw D3-4-2-1-7a_A1_Zhtw D58-5-2-2a_A1_Zhtw D3-4-2-1-7b*_A1_Zhtw D3-4-2-1-7c*_A1_Zhtw...
  • Page 113 K041_A1_Zhtw S002*_A1_Zhtw...
  • Page 114 使用注意事項 安裝位置 維護 安裝時,請選擇靠近電視或立體聲音響系統的穩定位置,以 若要清潔本機,請使用拋光布輕輕擦拭本機表面來清除灰 利使用本機。 塵。若表面髒汙嚴重,請用軟布沾上稀釋五至六倍的中性清 潔劑,擰乾後擦拭。請勿使用揮發性的化學藥劑,如油漆稀 為確保長效產品壽命,請避免將本機安裝在下列位置: 釋劑或苯,因為這些藥劑會腐蝕面板表面。請勿在本機周圍 • 陽光直射處 使用如殺蟲劑等的噴霧劑。若您打算使用化學清潔布,請在 使用前詳閱化學清潔布的注意事項。 • 潮濕或通風不良的區域 • 極高或極低溫度的區域 關於凝結 • 經常震動的區域 在冬天或涼爽的季節,若將播放機從外面或其他寒冷的位置 • 多灰塵或煙霧的區域 攜至溫暖的室內,或是播放機所在房間的溫度上升太快,播 • 暴露於油煙、蒸汽或熱氣(如廚房)的區域 放機內部可能會出現凝結。當播放機內部出現凝結時,有可 能無法正確操作或完全無法操作。此時,請開啟本機電源, 讓待機持續1至2小時,以讓凝結揮發,因為播放機適應室內 請勿在本機上方放置物品 的溫度後,就可再次恢復播放。若室內空調方向直接吹向本 請勿在本機的上方放置物品。 機,在夏天也可能會出現凝結現象。若有此情況,請改變播 放機的位置,使其遠離空調氣流。 為防止熱能帶來的有害影響 請勿將本機安裝在擴大機頂部或其他會散熱的裝置上。安裝 在機架中時,請盡可能將本機安裝在擴大機或其他散熱裝置 下方的位置。 不使用時請關閉電源 視電視廣播的訊號狀況而定,若在本機已開啟時開啟電視,...
  • Page 115 目錄 感謝您購買本 TAD 產品。請詳閱操作手冊,以瞭解如何正確操作您所購的機型。閱畢手冊後,請妥善收藏,以便未來參考。 使用注意事項 ............................4 安裝位置 .................................... 4 維護 ....................................4 關於凝結 .................................... 4 簡介 ..............................6 ..............................6 激發聆聽的樂趣 ................................6 功能與特色 使用前 ..............................7 ..............................7 檢查包裝內容物 ................................7 裝入電池 可用光碟 ............................. 8 ............................. 8 可在本機上播放的光碟類型...
  • Page 116: 激發聆聽的樂趣

    在TADL,我們不斷地磨練技術,以建立能重現音樂音效的設備,並喚起現場音樂的能量和衝擊。 功能與特色 採用新開發的第三代 USB 引擎 大幅降低 FPGA 內部電路的運作延遲,改善低位準失真特性,且 PCM 訊號響應高達 384 kHz 的取樣頻率和高達 32 位元的位 元計數。DSD 訊號 DoP 系統傳輸響應 11.2 MHz 的最大取樣頻率。 配備線路輸出音量做為數位媒體中心 由於已安裝線路輸出音量,因此只需連接功率擴大機即可配置簡單的系統。由於支援各種媒體,故建議將此裝置當成數位媒 體中心使用,致力於追求享受最佳音質的樂趣。 超高C/N*比搭載UPCG**的主時脈 根據先前有關減少主時脈抖動總數來作為獲得更高水準音質之方法的建議,TAD Lab已進一步採取此步驟,專注在減少相關中 心頻率低頻率邊帶範圍中的抖動,最後,TAD Lab終於開發出全新的超高精度水晶振盪器(UPCG)。 採用專為高速數位基地台中繼設施開發的技術,搭載專用振盪器與高純度傳導性的主時脈,CD播放機要求的極致效果得以傳 遞,在烙印訊號的光碟上重現完美表演。 *C/N: 載波雜訊比 **UPCG: 超高精度水晶振盪器 雙差動D/A轉換器 雙Burr-Brown數位音訊轉換器皆採平行連接,可改善所有指標的音訊表現,包括訊噪比、線性、動態範圍和失真。這些功能 甚至可允許忠實播放細緻的音訊訊號,在音樂重現中創造更優異的廣度。 電源裝置...
  • Page 117: 使用前

    使用前 檢查包裝內容物 請檢查是否收到下列配件盒中的隨附配件。 ' 遙控器 x 1 ' 電源線(美國、加拿大機型) ' 操作手冊 DISC PLAYER OPEN/CLOSE (本手冊) TIME DISPLAY OFF SACD/CD DAC MODE ' 防刮片 x 3 (此防刮片用來防止隔離體刮傷地板, 等等。請依需要使用。 ) ' 電源線(歐洲、亞洲機型) 2極片插頭類型(適用於歐洲,英國 CLEAR ENTER 除外) 防刮片使用範例 REPEAT VOLUME 防刮片 MUTE 3極片插頭類型(適用於英國、 新加坡、馬來西亞、香港)...
  • Page 118: 可用光碟

    可用光碟 可在本機上播放的光碟類型 可播放光碟的光碟標籤、包裝或封套上會載有下列其中一項標記。 SACD CD-R CD-RW 「Super Audio CD」係一註冊商標。 關於播放SACD SACD只能以2聲道音效播放。 複製控制CD 本播放機的設計遵守音樂CD標準。播放的光碟未遵循音樂CD標準時,不保證有正確的操作或效能。 關於DualDisc播放 DualDisc是一種新的雙面光碟,一面包含DVD內容視訊、音訊等,而另一面則包含非DVD內容,例如數位音訊內容。非DVD、 光碟的音訊面並不符合CD音訊規格,因此無法播放。如需更多有關DualDisc規格的詳細資訊,請洽詢光碟製造商或零售商。 播放CD-R/CD-RW光碟 本機可播放格式化為音樂CD格式及包含音樂資料的CD-R/CD-RW光碟。不過,視光碟而定,部分光碟可能無法播放,或者會 出現雜訊或失真。 本機是專用的光碟播放機,無法在CD-R/CD-RW光碟上進行錄製。 尚未燒錄完的CD-R/CD-RW光碟無法在本播放機上播放。 * 如需詳細資訊,請參閱您光碟燒錄機的操作手冊。 小心 ' 部分以光碟燒錄機或個人電腦錄製的CD-R/CD-RW光碟,可能無法在本播放機上播放。原因可能包括光碟特性、刮傷、髒 汙、播放機讀寫頭髒汙、凝結等。 ' 以個人電腦錄製的光碟可能會因錄製設定或系統環境中的變化而無法播放。請務必以正確的格式錄製光碟(如需詳細資 訊,請向光碟燒錄應用程式的廠商洽詢)。 ' 以封包寫入格式錄製的光碟無法在本播放機上播放。 無法在本機上播放的光碟: BD、BD-ROM、DVD、CD-G、VCD、8 cm CD、DSD光碟...
  • Page 119: 維護您的播放機與碟片

    維護您的播放機與碟片 一般 ' 拿取光碟時請抓住邊緣或中心孔及邊緣。 ' 不使用光碟時,請放回盒內並直立擺放。避免將光碟留在過冷、過濕或過熱(包括直射陽光下)的環境中。 ' 請勿在光碟上黏貼紙張或貼紙。請勿使用鉛筆、原子筆或其他末端尖銳的書寫器具在光碟上書寫。 ' 請勿在光碟上使用自黏式光碟標籤,因為這些物品可能會在播放時造成光碟稍微變形,而導致聲音失真。 損壞及變形的光碟 ' 請勿使用破裂、有缺口、變形或其他受損光碟,因為這些光碟會損壞播放機。 ' 本播放機在設計上僅可使用傳統、正圓形狀的光碟。請勿使用其他形狀的光碟。TAD 對於所有因使用變 形光碟而產生的問題概不負責。 清潔光碟 ' 光碟上的指紋及灰塵會影響播放的效果。請使用柔軟的乾布清潔,由光碟中心至外緣輕輕擦拭,如下所 示。 ' 如有必要,請用沾了酒精的布或以市售的CD/DVD清潔工具徹底清潔光碟。切勿使用揮發油、稀釋劑或其 他種類的清潔劑,包括專門用來清潔黑膠唱片的產品。 清潔讀寫頭 ' 本播放機讀取頭在正常使用情況下應不致髒汙,但有時可能因沾附灰塵而故障,此時請洽經銷商。不建議在CD播放機上使 用市售的讀寫頭清潔劑。...
  • Page 120: 零件名稱及其功能

    零件名稱及其功能 主機前面板 1  電源按鍵  按下可播放或暫停光碟。在播放期間按下時將進入暫停模 用於將電源設為開啟/待機模式。 式。 2 電源指示燈  燈號係用於指出本機的電源狀態。 按下可返回目前播放曲目的開頭。 亮起黃色:開啟(可操作本機)。  關: 待機(代表電源線已連接且本機進入待機模式)。 按下可前進至下一首曲目的開頭。 3 操作按鍵 4 SACD 指示燈 用於操作播放機。 當裝入SACD光碟或選擇SACD/CD混合光碟的SACD層時, DAC MODE 此指示燈會亮起。 按下可切換為數位/類比轉換器輸入。此項操作可在停止 5 顯示幕 光碟播放時執行。 顯示幕會提供有關本機眾多操作和功能的圖形資訊。 VOL (−/+) 按鍵 6 碟盤 調整此裝置的線路輸出音量。 在此載入光碟。...
  • Page 121: 主機後面板

    主機後面板 AC IN COAXIAL COAXIAL 12 V TRIGGER DIGITAL INPUT BALANCED UNBALANCED 1 ANALOG OUTPUT 接頭 5 DIGITAL OUTPUT接頭 連接至前級擴大機。 連接至配備數位輸入接頭的裝置。 • BALANCED XLR類型 • XLR(平衡)類型 • UNBALANCED RCA類型 • COAXIAL類型 2 USB連接埠 附註 用於將USB纜線連接至電腦。 ' 播放 SACD 時,數位輸出為停用。 ' 播放 CD 時,以 44.1 kHz/16 位元輸出訊號。 3 DIGITAL INPUT接頭...
  • Page 122: 遙控器

    此項操作可在停止光碟播放時執行。 用於將電源設為開啟/待機模式。 11 ENTER按鍵 2 TIME按鍵 按下可確認設定及選擇。 按下以顯示光碟的經過與剩餘播放時間。每次按下按鍵, 12 擴大機操作按鍵 顯示幕就會如下交替顯示: [曲目剩餘時間] / [光碟剩餘時 這些按鍵皆可用於操作TAD擴大機。 間] / [經過時間]。  AMP – 擴大機電源開啟/待機。 3 SACD/CD按鍵 VOLUME (+/−) – 用於調整音量。 按下後可切換混合光碟的播放區域。若在停止光碟播放時 MUTE – 按下可暫時讓聲音靜音。 按下此按鍵,即可在光碟的CD區域和SACD區域之間執行 VOLUME (+/ − ) 和 MUTE 也可用於調整此裝置的線路輸出...
  • Page 123: 安裝及連線

    安裝及連線 安裝 警告 ' 若本機從安裝位置掉落,可能會導致受損或人員受傷,因此請將本機安裝在平坦、水平及穩固的位置,以提供完整足夠的 強度來支撐本機重量。安裝在書架或類似結構上時,請先確認書架結構的強度足夠。 ' 切勿在本機上方放置其他物品,或是以布或片材覆蓋本機,因為這會導致散熱不佳,而造成不自然的溫度上升及潛在損 害。 小心 ' 安裝本機時,請至少與鄰近牆壁或障礙保留10 cm的空隙。為協助散熱,本機應安裝在離其他電氣裝置有一段距離的 位置。將本機安裝在機架上時,應至少在本機上方、後方及兩側提供10 cm的空隙。若在本機周圍保留的通風空間不 足,可能會導致溫度大幅上升且可能起火。 ' 切勿將本機安裝在地毯、坐墊或其他柔軟的表面上,或安裝在可能阻礙本機周圍自然氣流的狹窄位置。 ' 此裝置的內部是由圓形尖峰結構組成。為了充分發揮絕緣體功能,絕緣體下部中心處的不固定突出部分會稍微移動。 請注意此不固定突出部分並非損壞或破損,此為正常。...
  • Page 124: 接線方式

    接線方式 小心 ' 在完成所有連線之前,請勿開啟本機或其他裝置的電源開關。 ' 連接裝置或變更連線時,請務必關閉電源開關並中斷連接與AC插座的電源線。在連線時,請最後再連接電源線。 連接其他裝置。 將隨附的電源線連接至本機的AC IN接頭。 將電源線連接至標準電源插座。 連接配備前級擴大功能的裝置時 如果是具有 12V 觸發輸入端子的功 率擴大機。 則使用市售的 3.5Φ 單聲道接腳纜線 含數位輸出接頭的元件 含 USB 連接埠的電腦 (無電阻) 1. 開啟本機與電腦的電源。 2. 將本機的輸入切換為 U1。 3. 使用 USB 纜線連接電腦與本機 ; 完成連接後,將自動安裝適合 的驅動程式(第 17 頁) 。 電源線 (隨附) AC IN COAXIAL 12 V...
  • Page 125 與功率擴大機連接時 如果是具有 12V 觸發輸入端子的功 率擴大機。 則使用市售的 3.5Φ 單聲道接腳纜線 含數位輸出接頭的元件 含 USB 連接埠的電腦 (無電阻) 1. 開啟本機與電腦的電源。 2. 將本機的輸入切換為 U1。 3. 使用 USB 纜線連接電腦與本機 ; 完成連接後,將自動安裝適合 的驅動程式(第 17 頁) 。 電源線 (隨附) AC IN COAXIAL COAXIAL 12 V 至 AC TRIGGER DIGITAL INPUT 電源插座...
  • Page 126: 播放光碟

    播放 播放光碟 若要在本機上播放光碟,請如以下說明操作本機: • 按下主機前面板  電源按鍵(或遙控器上的  DISC PLAYER 按鍵)來開啟電源。 確認主機前面板電源指示燈已亮起。 按下 h 按鍵。 碟盤開啟時,將光碟載入托盤上。 裝妥光碟後,按下 h 按鍵關閉碟盤。 按下主機的前面板  按鍵(或遙控器上的  按鍵)。 此時即會開始播放光碟。 • 若要暫停播放,請在播放期間按下主機的前面板  按鍵(或遙控器上的 e 按鍵)。 • 若要停止播放,請在播放期間按下 g 按鍵。 • 若要關閉主機(設為待機模式),請按下主機的前面板  電源按鍵(或遙 控器上的  DISC PLAYER按鍵)。 使用本機作為D/A轉換器...
  • Page 127: 特殊設定

    特殊設定 調整音量 調整平衡/非平衡線路輸出位準 與功率擴大機連接時使用。 線路輸出的初始值設定在 30。 ' 使用主機上的 VOL ( − /+) 按鍵和遙控器中心的 VOLUME (+/ − ) 按鍵進行調整。 操作期間,時間顯示或取樣頻率顯示切換至線路輸出音量顯示。 附註 ' 使用音量功能及直接連接功率擴大機(不使用前級擴大機)時,請務必在音量設為「 0 」 (零)後再進行連線。如果在音量 設定值較大的情況下建立連接,會產生過高音量而損害揚聲器或聽力。 將線路輸出位準固定在最大值 使用配備前級擴大功能的裝置、錄音機等時使用。 按主機的 VOL (+) 按鍵,直到顯示最大值 78。 在設為最大值的情況下,按住 VOL (+) 按鍵。 線路輸出位準將固定在最大值,主機的 VOL ( − /+)按鍵和遙控器的中心 VOLUME (+/ − ) 按鍵將停用。 此時,線路輸出音量顯示切換為時間顯示或取樣頻率顯示。...
  • Page 128: 抑制Sacd與Usb格式Dsd訊號的輸出位準

    使用Windows終端機裝置時,請查閱TAD網站(http://tad-labs.com)並下載適合的驅動程式。請查閱TAD網站以取 得驅動程式安裝說明。 • Mac使用者無需手動安裝驅動程式。當本機透過USB纜線連接電腦時,將自動安裝驅動程式。 • 若要利用網際網路連線,使用者必須與網際網路服務業者簽約,並支付必要費用。 本機進入待機模式時,請在按住主機DAC MODE按鍵的同時,按下  電源按鍵。 USB輸入顯示將從 [ U1 ] 變更為 [ U2 ] 。 開啟電腦電源。 使用 USB 線連接此裝置與電腦。 若要取消目前的模式並切換為待機模式,請在按住主機DAC MODE按鍵的同時,按下  電源按鍵。 USB 輸入顯示將從 [ U2 ] 變更為 [ U1 ] 。也可使用 ALL RESET 取消目前的模式。...
  • Page 129: 故障排除

    故障排除 人們經常錯將不正確的操作當成系統故障或異常。如果您認為本元件出現問題,請就以下各重點進行檢查。有時候問題可能 出在其他元件上。請仔細檢查其他使用中的裝置和電器設備。如需有關電腦設定的詳細資訊,請查閱 TAD 網站(http://tad- labs.com) 。若在實施下列檢查後仍無法改正問題,請洽詢您的經銷商。 問題 可能原因 解決方法 沒有聲音 確認音訊纜線插頭已確實連接。 確實連接音訊纜線。 連接的音訊纜線是否破損或斷線? 檢查音訊纜線和本機音訊輸出接頭上的插頭及插 或者接頭上是否有汙垢? 孔,以及其連接的擴大機音訊輸入接頭。如有必 要,請清潔接頭。 光碟是否髒汙? 請清潔光碟。 播放操作是否設為暫停? 請設為播放。 連接擴大機的音量是否設得太低? 在連接擴大機時,請檢查輸入設定及喇叭設定。 此裝置的線路輸出音量位準偏低。 調整音量。 此裝置已靜音(長條「 − 」閃爍)。 按遙控器的 MUTE 按鍵取消靜音狀態。 即使正確設定輸入,也 輸入接頭未正確連接。 檢查連線。 未發出聲音。 擴大機的靜音功能開啟。 按下擴大機的靜音按鍵以停用該功能。 聲音太低。 請調整音量。...
  • Page 130 問題 可能原因 解決方法 輸入不是設為USB時, 未設為USB輸入時,電腦識別不出本機。 切換為USB輸入,然後將電腦的聲音設定重設為 TAD-USB1 ver2或TAD-USB2 ver2。 本機無法在電腦的播放 軟體上播放音樂檔案。 電源自行關閉。 開啟ECO(省電)模式時,若未於30分鐘內在 將ECO(省電)模式設為OFF(第18頁)。 本機上執行操作,本機將自動進入待機模式。 看不見顯示幕。 顯示幕的觀看角度為從本機前方左/右側45° 從本機的正前方觀看顯示幕。 內。 按下主機(或遙控器上的 DISPLAY OFF 按鍵)上 本機設為顯示幕關閉。 的 DISP OFF 按鍵,取消顯示幕關閉功能。 遙控器無法使用。 ' 遙控器的電池電量用盡。 ' 更換為新的電池。 ' 在7 m的距離內及本機面板左/右30 ° 弧形處使 ' 使用遙控器時離主機太遠。...
  • Page 131 規格 g 本體 機型 ...................................光碟播放機 輸入接頭: 數位 ..................... XLR x 1;同軸 x 2;光纖 x 1;USB(標準 B 類型)x 1 支援的取樣頻率 (XLR/ 同軸) ............44.1 kHz, 48 kHz, 88.2 kHz, 96 kHz, 176.4 kHz, 192 kHz 支援的取樣頻率 (光纖) ....................44.1 kHz, 48 kHz, 88.2 kHz, 96 kHz 支援的取樣頻率...
  • Page 132 © 2021 TECHNICAL AUDIO DEVICES LABORATORIES, INC. All rights reserved. TECHNICAL AUDIO DEVICES LABORATORIES, INC. Bunkyo Green Court, 2-28-8, Honkomagome, Bunkyo-ku, Tokyo 113-0021, Japan http://tad-labs.com Printed in Japan <SKUZZ> <13I00001> <CRD5215-A>...

Table des Matières