Publicité

Les langues disponibles
  • FR

Les langues disponibles

  • FRANÇAIS, page 13

Liens rapides

ELPLX02S
ELPLX02WS
© 2021 Seiko Epson Corporation
User's Guide
使用说明书
取扱説明書
3
13
23
33
43
53
61
69
86

Publicité

Table des Matières
loading

Sommaire des Matières pour Epson ELPLX02S

  • Page 1: Table Des Matières

    User's Guide ELPLX02S Guide de l’utilisateur ELPLX02WS Bedienungsanleitung Manuale dell’utente Manual de usuario 中 文 使用说明书 简 体 中 文 使用說明書 繁 体 日 取扱説明書 本 語 External Dimensions © 2021 Seiko Epson Corporation...
  • Page 3: Included Items List

    Included Items List Check the following list to confirm that you have all of the supplied items. If by any chance there is anything missing or damaged, please contact your dealer. Lens unit (With lens covers (large and Decorative cover (the shape of the cover to small)) be attached depends on the projector you are using)
  • Page 4 This symbol indicates information that, if ignored, could possibly Warning result in death or personal injury due to incorrect handling. This symbol indicates information that, if ignored, could possibly re- Caution sult in personal injury or physical damage due to incorrect handling. Warning •...
  • Page 5 Caution • Do not attach the lens unit when the projector's lens insertion section is facing up. Dust or dirt could enter the projector. • Try not to touch the lens section with your hand or fingers. If fingerprints or oils are left on the surface of the lens, projection quality deteriorates.
  • Page 6 Removing and Attaching the Lens Unit Depending on the projector being used, procedures and illustrations may differ from the explanations. Make sure you read the User's Guide supplied with the projector. Attaching Remove the lens replacement cover. Keep the lens replacement cover in a safe place. *The shape of the lens replacement cover and how to remove it differs depending on the projector you are using.
  • Page 7 Make sure the lens unit is not at an angle, and insert it straight into the lens insertion section. While holding the lens unit firmly, hold the lock lever and turn it clockwise to lock the lens unit. Check that the lens cannot be detached. If it cannot be locked, the lens unit is at an angle.
  • Page 8: Adjusting The Image

    • Keystone correction *This product is a fixed focus lens. The zoom function is not supported. 日 The User's Guide is available from the following Web site. 本 epson.sn 語 Visit the following Web site to find the projection distance calculator. http://www.epson.com/...
  • Page 9 Removing Caution • If lens shift has been performed, move the lens position to the home position before replac- ing the lens unit. • Turn off the projector and then wait for a while (approximately 30 minutes) before removing the lens unit. If you touch the lens unit during projection or immediately after turning off the projector, it could cause a burn.
  • Page 10 Loosen the screws (4 points). Turn the screws by hand. While holding the lens unit firmly, hold the lock lever and turn it counterclockwise to unlock the lens unit. Pull the lens unit straight out as it is released. 中 Attach the lens cover (small).
  • Page 11 Specifications Product name ELPLX02S/ELPLX02WS Focal length 8.0 mm F number Operating temperature 0 to +50°C (No condensation) Storage temperature -10 to +60 °C (No condensation) Mass Approx. 5,000 g Contact your local dealer or the nearest address provided in the documentation supplied with the projector.
  • Page 12 中 文 简 体 中 文 繁 体 日 本 語...
  • Page 13: Liste Des Élément Fournis

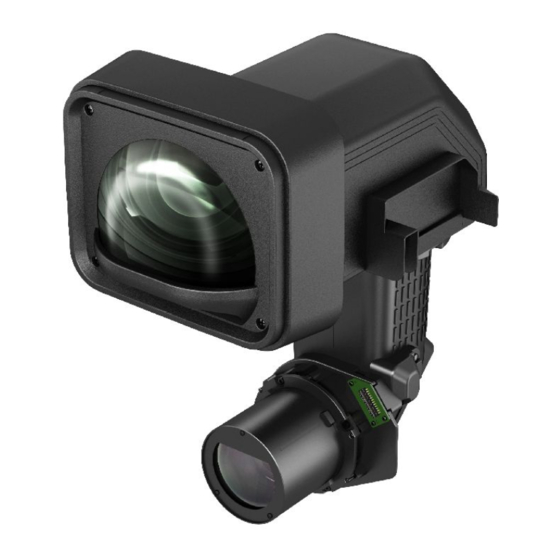
    Liste des élément fournis Vérifiez, à l'aide de la liste suivante, que vous disposez bien de tous les éléments fournis. Si un élément s'avérait manquant ou endommagé, contactez votre revendeur. Unité d'objectif (Avec couvercles d'objectif Couvercle décoratif (la forme du couvercle à (grand et petit)) fixer dépend du projecteur que vous utilisez) Fixation du couvercle (feuille séparée)
  • Page 14 Ce symbole indique des informations dont le non-respect Avertissement risquent d'entraîner des blessures graves, voire mortelles, en raison d'une manipulation incorrecte. Ce symbole indique des informations dont le non-respect Mise en garde risquent d'entraîner des dommages corporels ou matériels, en raison d'une manipulation incorrecte. Avertissement •...
  • Page 15 Mise en garde • Lorsque vous déplacez le projecteur, ne le tenez pas par l’unité d’objectif et le couvercle décoratif. Ceux-ci peuvent se détacher entrainant la chute du projecteur et des blessures. • Retirez l’unité d’objectif lors du transport du projecteur. Si vous transportez le projecteur alors que l’unité...
  • Page 16: Retrait Et Fixation De L'unité D'objectif

    Retrait et fixation de l'unité d'objectif Selon le projecteur utilisé, les procédures et les illustrations peuvent différer des explications. Veillez à lire le Guide de l'utilisateur fourni avec le projecteur. Fixation Retirez le couvercle de rechange de l'objectif. Conservez le couvercle de rechange de l'objectif en lieu sûr.
  • Page 17 Assurez-vous que l'unité d'objectif ne forme pas un angle et insérez-la directement dans la section d'insertion de l'objectif. Tout en maintenant fermement l'unité d'objectif, tenez le levier de verrouillage et tournez-le dans le sens horaire pour verrouiller l'unité d'objectif. Veillez à ce que l'objectif ne puisse pas être détaché. Si elle ne peut pas être verrouillée, l'unité...
  • Page 18: Après Avoir Remplacé L'unité D'objectif

    *Ce produit comprend un objectif à focale fixe. La fonction de zoom n'est pas prise en charge. 日 本 Le Guide de l'utilisateur est disponible sur le site Web suivant. 語 epson.sn Il existe également des outils permettant d'effectuer des simulations détaillées de la projection. http://www.epson.com/...
  • Page 19 Retrait Mise en garde • Si le décalage d'objectif a été effectué, replacez l'objectif à sa position d'origine avant de remplacer l'unité d'objectif. • Éteignez le projecteur et patientez un peu (environ 30 minutes) avant de retirer l'unité d'ob- jectif. Si vous touchez à l'unité d'objectif lors de la projection ou juste après avoir éteint le projecteur, vous risquez de vous brûler.
  • Page 20 Desserrez les vis (4 points). Tournez les vis à la main. Tout en maintenant fermement l'unité d'objectif, tenez le levier de verrouillage et tournez-le dans le sens antihoraire pour déverrouiller l'unité d'objectif. Une fois dégagé, retirez l'objectif en le tirant vers vous.
  • Page 21: Caractéristiques Techniques

    Caractéristiques techniques Nom du produit ELPLX02S/ELPLX02WS Distance focale 8,0 mm Valeur F Température de fonctionnement 0 à +50°C (Sans condensation) Température de stockage -10 à +60°C (Sans condensation) Masse Environ 5000 g Contactez votre revendeur local ou l'adresse la plus proche indiquée dans la documentation fournie avec le projecteur.
  • Page 22 中 文 简 体 中 文 繁 体 日 本 語...
  • Page 23: Liste Mitgelieferter Teile

    Liste mitgelieferter Teile Überprüfen Sie die folgende Liste, um sich zu vergewissern, dass alle Teile mitgeliefert wurden. Wenden Sie sich bitte an Ihren Händler, falls etwas fehlen oder beschädigt sein sollte. Objektiv (mit Abdeckungen (groß und Dekorative Abdeckung (die Form der klein)) anzubringenden Abdeckung hängt von dem Projektor ab, den Sie verwenden)
  • Page 24 Dieses Symbol verweist auf Informationen, deren Nichtbeachtung Warnung zu (tödlichen) Verletzungen wegen unsachgemäßen Gebrauchs füh- ren kann. Dieses Symbol verweist auf Informationen, deren Nichtbeachtung Achtung zu Verletzungen von Personen oder Sachschäden wegen unsachge- mäßen Gebrauchs führen kann. Warnung • Ziehen Sie das Netzkabel des Projektors ab, bevor Sie diesen aufstellen oder von der Stelle bewegen.
  • Page 25 Achtung • Der Projektor darf nicht an Orten, an denen Rauch von Ölfeuerungsanlagen oder Tabakrauch vorhanden ist, verwendet oder aufbewahrt werden, da dieser die Bildqualität beeinträchti- gen kann. • Nicht feucht werden lassen. • Nicht fallen lassen oder Stößen aussetzen. Nur auf einer ebenen und stabilen Fläche abstel- len.
  • Page 26 Objektiv entfernen und anbringen Je nach verwendetem Projektor können Schritte und Abbildungen von den Erläuterungen abweichen. Lesen Sie die mit dem Projektor gelieferte Bedienungsanleitung. Anbringen Entfernen Sie die Objektiversatzabdeckung. Bewahren Sie die Objektiversatzabdeckung an einem sicheren Ort auf. *Die Form der Objektiversatzabdeckung sowie die Methode zur Entfernung variieren je nachdem, wel- chen Projektor Sie verwenden.
  • Page 27 Stellen Sie sicher, dass das Objektiv nicht angewinkelt ist, und stecken Sie es gerade in den Objektivabschnitt. Während Sie das Objektiv festhalten, halten Sie den Verriegelungshebel und drehen ihn im Uhrzeigersinn, bis das Objektiv verriegelt ist. Stellen Sie sicher, dass sich das Objektiv nicht abneh- men lässt.
  • Page 28 Wenn Sie die Verzerrungsanpassung durchführen, ändert sich die Größe der Anzeige. 繁 体 • Objektivversatz • Trapezkorrektur *Dieses Produkt ist ein Fixfokusobjektiv. Die Zoomfunktion wird nicht unterstützt. 日 本 Die Bedienungsanleitung ist auf der folgenden Website verfügbar. 語 epson.sn Es gibt auch Werkzeuge zur Durchführung detaillierter Projektionssimulationen. http://www.epson.com/...
  • Page 29 Entfernen Achtung • Wenn der Objektivversatz ausgeführt wurde, schieben Sie das Objektiv vor dem Austau- schen in die Ausgangsposition. • Schalten Sie den Projektor aus und warten Sie eine Zeit lang (ca. 30 Minuten), bevor Sie das Objektiv herausnehmen. Wenn Sie das Objektiv während der Projektion oder unmittelbar nach dem Ausschalten des Projektors berühren, können Verbrennungen die Folge sein.
  • Page 30 Lösen Sie die Schrauben (4 Punkte). Drehen Sie die Schrauben von Hand. Während Sie das Objektiv halten, halten Sie den Verriegelungshebel und drehen ihn gegen den Uhrzeigersinn, bis das Objektiv entriegelt ist. Ziehen Sie das Objektiv in gerader Richtung ab, wenn es freigegeben ist.
  • Page 31: Technische Daten

    Technische Daten Produktname ELPLX02S/ELPLX02WS Brennweite 8,0 mm Blendenzahl Betriebstemperatur 0 bis 50 °C (nicht kondensierend) Aufbewahrungstemperatur -10 bis 60 °C (nicht kondensierend) Gewicht Ca. 5000 g Wenden Sie sich an Ihren Händler oder den nächstgelegenen Serviceanbieter, den Sie über die mit dem Projektor mitgelieferte Dokumentation ermitteln können.
  • Page 32 中 文 简 体 中 文 繁 体 日 本 語...
  • Page 33: Elenco Dei Componenti In Dotazione

    Elenco dei componenti in dotazione Controllare l'elenco seguente per confermare di disporre di tutti i componenti in dotazione. In caso di componenti mancanti o danneggiati, contattare il rivenditore di zona. Obiettivo (con copriobiettivo (grande e Copertura decorativa (la forma della copertura piccolo)) da fissare dipende dal proiettore in uso) Fissaggio della copertura (foglio a parte)
  • Page 34 Questo simbolo segnala informazioni che, se ignorate, possono Avvertenza causare decesso o lesioni personali dovuti a un uso non corretto. Questo simbolo segnala informazioni che, se ignorate, possono Precauzione causare lesioni personali o danni fisici dovuti a un uso non cor- retto.
  • Page 35 Precauzione • Non utilizzate o conservate il proiettore in luoghi in cui è presente fumo prodotto da olio o sigarette, in quanto la qualità della proiezione potrebbe risentirne. • Non lasciare che si bagni. • Non farlo cadere e non sottoporlo a colpi bruschi. Quando si colloca il prodotto a terra, accertarsi di posizionarlo su una superficie piana e stabile.
  • Page 36 Rimozione e fissaggio dell'unità obiettivo A seconda del proiettore utilizzato, le procedure e le illustrazioni potrebbero variare da quelle indicate. Assicurarsi di leggere il Manuale dell'utente fornito con il proiettore. Fissaggio Rimuovere il copriobiettivo. Conservare il copriobiettivo di ricambio in un posto sicuro.
  • Page 37 Accertarsi che l'obiettivo non sia inclinato e inserirlo direttamente nella sezione di inserimento dell'obiettivo. Tenendo saldamente l'unità obiettivo, tenere la leva di bloccaggio e ruotarla in senso orario fino a bloccare l'unità obiettivo. Verificare che l'obiettivo non possa staccarsi. Se non può essere bloccato, l'obiettivo è inclinato. Rimuoverle e installare di nuovo l'unità...
  • Page 38: Regolazione Dell'immagine

    *Questo prodotto è un obiettivo a focale fissa. La funzione zoom non è supportata. 日 Il Manuale dell’utente è disponibile sul seguente sito Web. 本 epson.sn 語 Sono disponibili anche strumenti in grado di eseguire simulazioni di proiezione dettagliate. http://www.epson.com/...
  • Page 39 Rimozione Precauzione • Se Scorrimento lente è stato effettuato, spostare l'obiettivo nella posizione iniziale prima di sostituire l'unità obiettivo. • Spegnere il proiettore e quindi attendere qualche tempo (circa 30 minuti) prima di rimuo- vere l'unità obiettivo. Se si tocca l'unità obiettivo durante la proiezione o immediatamente dopo lo spegnimento del proiettore, vi sono rischi di ustioni.
  • Page 40 Allentare le viti (4 punti). Girare le viti a mano. Tenendo saldamente l'unità obiettivo, tenere la leva di bloccaggio e ruotarla in senso antiorario fino a sbloccare l'unità obiettivo. Estrarre l'unità obiettivo mentre viene rilasciata. 中 Fissare il coprioobiettivo (piccolo). 文...
  • Page 41 Specifiche Nome del prodotto ELPLX02S/ELPLX02WS Lunghezza focale 8,0 mm Numero F Temperatura operativa da 0 a 50°C (senza condensa) Temperatura di stoccaggio da -10 a +60 °C (senza condensa) Peso Circa 5000 g Contattare il rivenditore locale o l'indirizzo più vicino riportato nella documentazione fornita unitamente al proiettore.
  • Page 42 中 文 简 体 中 文 繁 体 日 本 語...
  • Page 43: Lista De Elementos Incluidos

    Lista de elementos incluidos Compruebe la siguiente lista para confirmar que dispone de todos los elementos suministrados. Si faltara alguno de los elementos, o si estuvieran dañados, póngase en contacto con su distribuidor. Unidad de lente (con tapa para lentes Tapa decorativa (la forma de la tapa que se (grande y pequeña)) colocará...
  • Page 44 Este símbolo muestra una información que, si se ignora, podría Advertencia dar lugar a la muerte o a lesiones personales debido al manejo incorrecto. Este símbolo muestra una información que, si se ignora, podría Precaución dar lugar a lesiones personales o daños físicos debido al mane- jo incorrecto.
  • Page 45 Precaución • Cuando traslade el proyector, no lo sujete por la unidad de lente ni por la cubierta decorati- va, ya que pueden soltarse y el proyector puede caerse, lo que puede provocar lesiones. • Si va a transportar el proyector, extraiga el objetivo. Si no lo desinstala para transportar el proyector, podrían averiarse el proyector o el objetivo.
  • Page 46 Retirar e instalar el objetivo Dependiendo del proyector utilizado, los procedimientos y las ilustraciones pueden ser diferentes a las explicaciones. Asegúrese de leer detenidamente el Manual de usuario suministrado con el proyector. Instalar Quite la tapa de reemplazo de la lente. Guarde las tapas de sustitución en un lugar seguro.
  • Page 47 Asegúrese de que la unidad de lente no esté en ángulo, e insértela recta en la sección de inserción de la lente. Sujetando firmemente la unidad del lente, sostenga la palanca de bloqueo y gírela hacia la derecha hasta que dicha unidad se bloquee. Compruebe que el objetivo no puede retirarse.
  • Page 48: Ajuste De La Imagen

    *Este producto tiene una lente de enfoque fija. La función de zoom no se admite. 日 Encontrará el Manual de usuario en el siguiente sitio web. 本 epson.sn 語 También hay herramientas disponibles que pueden realizar simulaciones de proyección detalladas.
  • Page 49 Extraer Precaución • Si se ha realizado el desplazamiento del lente, mueva la posición de la lente a la posición de inicio antes de sustituir la unidad del lente. • Antes de extraer el objetivo, apague el proyector y espere un rato (alrededor de media hora). Si toca el objetivo durante la proyección, o justo después de apagar el proyector, podría quemarse.
  • Page 50 Aflojar los tornillos (4 puntos). Gire los tornillos con la mano. Sujetando firmemente la unidad del lente, sostenga la palanca de bloqueo y gírela hacia la izquierda hasta que dicha unidad se desbloquee. Tire de la unidad del objetivo directamente hacia fuera a medida que se suelte.
  • Page 51 Especificaciones Nombre del producto ELPLX02S/ELPLX02WS Distancia focal 8,0 mm Número F Temperatura de funcionamiento De 0 a +50°C (sin condensación) Temperatura de almacenamiento De -10 a +60 °C (sin condensación) Peso 5000 g aprox. Póngase en contacto con su distribuidor local o con la dirección más próxima de las enumeradas en la documentación proporcionada con el proyector.
  • Page 52 中 文 简 体 中 文 繁 体 日 本 語...
  • Page 53 随附项⽬列表 请检查以下列表以确认您具有所有随附项⽬。 如有任何项⽬丢失或损坏, 请与经销商联系。 镜头单元(带镜头盖(大和小) 装饰盖 (要安装的盖形状取决于所用投影机) 安装镜头盖(另页) 使用说明书(本手册) 安全使用须知 中 请认真阅读投影机随附的本⽂档和使用说明书以安全、正确地使用本镜头单元。为了能 文 够快 速解决任何不明⽩的问题,请将本说明书放在容易取阅的地⽅。 简 体 本说明书内和产品上都使用了符号,指出可能对用户或他⼈造成的伤害以及财产受损的 风 险,以便您能够安全、正确地使用本产品。指⽰及其含义如下。请确保在阅读本说明 中 书之前 正确理解这些指⽰。 文 繁 此符号指⽰⼀些信息,若忽视这些信息,则可能由于错误处理⽽ 体 警告 导致死亡或⼈⾝伤害。 此符号指⽰⼀些信息,若忽视这些信息,则可能由于错误操作⽽ 小心 日 导致⼈⾝伤害或物品损坏。 本 語...
  • Page 54 警告 • 连接或拆卸本产品之前,请断开投影机的电源线。 在连接电源线的情况下连接或拆卸本产品可能触电。 • 将本产品装到投影机时,确保其牢固安装,并且锁定到位。如果本产品安装不正确, 则可能会掉落,造成⼈⾝伤害或意外。 • 清除投影机上的脏污与灰尘时,请勿使用含易燃⽓体的喷剂。投影机内部产⽣的⾼ 温可能 会引起⽕灾。 小心 • 投影时,从镜头单元前⾯卸下镜头盖。 • 在连接镜头单元之前,请检查投影机的型号。如果此镜头单元连接到指定型号以外 的投影 机,镜头单元或投影机可能损坏。 • 将本产品连接到投影机上时,请小心不要夹着手指。不然可能造成⼈⾝伤害。 • 请勿将本产品拆开或改装。 • 请勿在可能出现极端⾼温或低温的地⽅使用或保管投影机。另外,避免温度出现任 何突变。 • 请勿在有油烟或⾹烟烟雾的地⽅使用或存放投影机,以免影响投影图像的质量。 • 请勿弄湿本产品。 • 请勿使其掉落或遭受撞击。放下本产品时,请确保将其放在平整、稳定的表⾯。 • 移动投影机时,请勿抓住镜头单元和装饰盖,否则它们可能会脱落,从⽽使投影机 掉落造成⼈员受伤。 • 在搬运投影机时,请拆卸镜头单元。如果在接有镜头单元的情况下搬运投影机,镜 中 文 头单元 或投影机可能损坏。 •...
  • Page 55 拆卸和连接镜头单元 根据所使用的投影机,具体步骤和插图可能与此处的解释不同。请务必阅读投影机随附 的使用说明书。 连接 拆卸镜头更换盖。 请将镜头更换盖放在安全的地⽅。 * 根据所用投影机的不同,镜头更换盖的形状和拆 卸⽅法也不同。查看投影机附带的“使用说明书” 。 抓住锁杆,逆时针转动。 中 文 从镜头单元取下镜头盖(小) 。 简 体 单独存放或运送镜头单元时,请使用镜头盖。请将 镜头盖妥善保管。 中 文 繁 体 日 本 語...
  • Page 56 确保镜头单元不偏斜,将其直接插⼊镜头插⼊ 节。 牢牢抓住镜头单元,抓住锁杆,顺时针转动以 锁定镜头单元。 检查镜头是否能拆卸下来。 如果无法锁定,则表明镜头单元出现偏斜。将镜头 单元拆下,然后重新连接。 拧紧螺丝(4 点) ,以固定镜头单元。 用手转动螺丝。 中 文 简 体 中 文 繁 体 日 本 語...
  • Page 57 查看提供的“安装镜头盖” 。 拆卸镜头盖(大) 。 请将镜头盖妥善保管。 更换镜头单元后 更换镜头单元后,校准镜头以使投影机可以正确获取镜头位置和调节范围。安装镜头单 元 时,投影机打开时会显⽰⼀条消息。选择 [ 是 ] 校准镜头。 中 调节图像 文 有关以下内容的详情,请参阅投影机随附的使用说明书。 简 • 焦距调节 体 • 失真调节 中 执⾏失真调节时,屏幕尺⼨会改变。 文 • 镜头移动 繁 • 梯形失真校正 体 * 此产品是固焦距镜头。不⽀持变焦功能。 使用说明书可从以下网站获得。 日 epson.sn 本 語 另外⼀些⼯具也可用于模拟投影细节。 http://www.epson.com/...
  • Page 58 拆卸 小心 • 如果完成镜头移动,在更换镜头单元之前,请将镜头移至原位置。 • 关闭投影机并等待⼀段时间 (大约 30 分钟) ,再拆卸镜头单元。如果您在投影过程 中或 关闭投影机之后⽴即触碰镜头单元,可能导致烫伤。 安装镜头盖(大) 。 拆卸装饰盖和减震器单元(根据所用型号) 查看提供的“安装镜头盖” 。 中 文 简 体 中 文 繁 体 日 本 語...
  • Page 59 拧松螺丝(4 点) 。 用手转动螺丝。 牢牢抓住镜头单元,抓住锁杆,逆时针转动以 解锁镜头单元。 将松开的镜头单元平直拉出。 中 安装镜头盖(小) 。 文 简 体 中 文 繁 体 日 本 語...
  • Page 60 规格 产品名称 ELPLX02S/ELPLX02WS 焦距 8.0mm 光圈数 ⼯作温度 0 到 +50℃(无凝结) 储存温度 -10 到 +60℃(无凝结) 质量 约 5,000 克 请与当地经销商或投影机随附⽂档中的最近地址联系。 中 文 简 体 中 文 繁 体 日 本 語...
  • Page 61: 使用說明書

    包含的項目清單 檢查下列清單, 確定您有所有隨附的項目。如發現任何項目欠缺或損壞, 請與經銷商聯絡。 鏡頭組件 ( 附有大、小鏡頭蓋 ) 裝飾護蓋 ( 要安裝的護蓋形狀取決於您使用 的投影機 ) 安裝護蓋 ( 附於另頁 ) 使用說明書 ( 本說明書 ) 中 文 安全使用須知 简 体 請仔細閱讀本文件與投影機隨附的使用說明書,以安全及正確地使用本組件。將本資訊 放在容易觸及的地方,可讓你快速解決疑難。 中 文 本說明書中和產品上都會標示符號,向用戶或其他人指出可能發生的傷害及造成財產損 繁 失的風險,讓您安全且正確地使用產品。使用須知及其意義說明如下。務必先正確了解 体 使用須知,再閱讀說明書。 日 本 警告 若忽略此符號,可能導致處理不當,造成傷亡。 語 小心...
  • Page 62 警告 • 安裝或拆卸本產品前,請先拔除投影機的電源線。 電源線連接時安裝或拆卸本產品,可能會導致觸電。 • 將產品安裝至投影機時, 務必確定產品已牢固安裝並鎖定至正確位置。 若未正確安裝, 本產品可能會掉落,造成人身傷害或發生意外。 • 清除本產品的髒汙與灰塵時,請勿使用含有可燃氣體的清潔劑。投影機內部所產生 的高溫可能會導致起火。 小心 • 投影時,請從鏡頭組件前方取下鏡頭蓋。 • 安裝鏡頭組件前,請檢查投影機的型號。如果將此鏡頭組件安裝到指定型號以外的 投影機,鏡頭組件或投影機可能會損壞。 • 安裝本產品至投影機時,小心勿夾住手指。否則可能會造成損傷。 • 請勿拆散或重組組件。 • 請勿在溫度過高或過低的地方使用和存放投影機,並請避免急遽的溫度變化。 • 請勿在有油煙或香菸煙霧的地方使用或存放投影機,因為這對投影影像的品質會產 生有害影響。 • 請勿將組件弄濕。 • 請勿使組件掉落或受到撞擊。放下本產品時,務必放在平滑穩定的表面上。 • 請勿握住鏡頭組件與裝飾蓋,移動投影機。它們有可能脫離,使投影機摔落而造成 受傷。 • 運送投影機時,請拆下鏡頭組件。如果運送投影機時連接著鏡頭組件,鏡頭組件或 中 文 投影機可能會損壞。 • 請勿在投影機鏡頭插入部位朝上時安裝鏡頭組件。灰塵或髒汙可能會進入投影機。 简...
  • Page 63 拆卸及安裝鏡頭組件 視使用的投影機而定,程序及圖例可能與說明內容有所差異。請務必閱讀投影機隨附的 使用說明書。 安裝 拆卸替換鏡頭蓋。 將替換鏡頭蓋存放在安全的地方。 * 替換鏡頭蓋的外型及拆卸方法會視使用的投影 機而有所不同。請參閱投影機隨附的「使用說明 書」 。 握住鎖桿並以逆時針方向旋轉。 中 文 拆卸鏡頭組件的鏡頭蓋 ( 小 )。 简 体 單獨存放或運送鏡頭組件時,請使用鏡頭蓋。將 鏡頭蓋存放在安全的地方。 中 文 繁 体 日 本 語...
  • Page 64 務必確定鏡頭組件沒有傾斜,並將其筆直插入 鏡頭插入部位。 托緊鏡頭組件, 抓住鎖桿並以順時針方向旋轉, 直到鎖緊鏡頭組件為止。 檢查鏡頭是否有未接合的縫隙。 如果有未接合的縫隙,表示鏡頭組件傾斜。拆下 鏡頭組件並重新安裝。 鎖緊螺絲(4 點)以固定鏡頭組件。 用手旋轉螺絲。 中 文 简 体 中 文 繁 体 日 本 語...
  • Page 65 移除鏡頭蓋 ( 大 )。 將鏡頭蓋存放在安全的地方。 更換鏡頭組件後 更換鏡頭組件後,請校正鏡頭,確保投影機能正確取得鏡頭位置與調整範圍。安裝鏡頭 組件後,投影機開機時會顯示一則訊息。選擇 [ 是 ] 以校正鏡頭。 中 調整影像 文 如需以下內容的詳細資訊,請參閱投影機隨附的使用說明書。 简 • 焦距調整 体 • 失真調整 中 執行失真調整時,畫面尺寸會改變。 文 • 鏡頭移動 繁 • 梯形修正 体 * 本產品配備定距鏡頭,不支援變焦功能。 使用說明書可從以下網站取得。 日 epson.sn 本 語 除此之外,也有可執行詳細投影模擬的工具。 http://www.epson.com/...
  • Page 66 拆卸 小心 • 如果已執行鏡頭移動作業,請先將鏡頭位置移動至起站位置,再更換鏡頭組件。 • 請關閉投影機電源,然後稍等一陣子 ( 大約 30 分鐘 ),再拆下鏡頭組件。如果您在 投影時或在關閉投影機電源之後立即觸摸鏡頭組件,可能會造成燙傷。 安裝鏡頭蓋 ( 大 )。 拆卸裝飾護蓋及吸震組件 ( 取決於您使用的機 型 )。 請參閱隨附的「安裝護蓋」 。 中 文 简 体 中 文 繁 体 日 本 語...
  • Page 67 鬆開螺絲(4 點) 。 用手旋轉螺絲。 托緊鏡頭組件, 抓住鎖桿並以逆時針方向旋轉, 直到鬆開鏡頭組件為止。 鏡頭組件鬆開後直接取下鏡頭組件。 中 安裝鏡頭蓋 ( 小 )。 文 简 体 中 文 繁 体 日 本 語...
  • Page 68 0 至 +50℃ ( 無凝結 ) 存放溫度範圍 -10 至 +60℃ ( 無凝結 ) 重量 約 5,000 g 請與經銷商聯絡,或按照投影機隨附說明文件中所提供的地址,與離您最近的維修據點 聯絡。 製造商及進口商 製造商:SEIKO EPSON CORPORATION 地址:3-5, Owa 3-chome, Suwa-shi, Nagano-ken 392-8502 Japan 電話:81-266-52-3131 進口商:台灣愛普生科技股份有限公司 地址:台北市信義區松仁路 100 號 15 樓 電話:(02)8786-6688 危害物質限制指令 中...
  • Page 69 同梱品一覧 下記のチェックリストをご覧になり、同梱品を確認してください。万一、不足や不良があり ましたら、お手数ですがお買い求めいただいた販売店までご連絡ください。 レンズユニット(レンズカバー • 化粧カバー(お使いのプロジェクターによっ (大・小) 付き) て取り付けるカバーの形状が異なります) カバーの取り付け(別紙) 取扱説明書(本書) 中 文 安全にお使いいただく ために 简 体 本ユニッ トを安全に正しくお使いいただくために、本書ならびにお使いのプロジェクター 中 に添付の『取扱説明書』をよくお読みください。不明な点はいつでも解決できるように、 文 その後はすぐに見られる場所に大切に保存してください。 繁 體 本書および製品には、製品を安全に正しくお使いいただき、お客様や他の人への危害や 財産への損害を未然に防止するために、絵表示が使われています。その表示と意味は次 のとおりです。内容をよく ご理解いただいた上で本文をお読みください。 日 本 語...
  • Page 70 この表示を無視して誤った取り扱いをすると、人が死亡または重 警告 傷を負う可能性が想定される内容を示しています。 この表示を無視して誤った取り扱いをすると、人が傷害を負う可 注意 能性が想定される内容および物的損害のみの発生が想定される 内容を示しています。 警告 • • 本製品をプロジェクターに着脱する際は、事前にプロジェクターから電源コードを外 してください。 • 電源コードを接続したままの状態で着脱を行うと感電の原因となります。 • • 本製品をプロジェクターに装着する際は確実に装着し、ロックされていることを確認 してください。万一、不完全な状態で装着していると本製品が落下し事故やけがの原 因となります。 • • 本製品に付着したゴミやホコリを除去するときに、可燃性ガスのスプレーを使用しな いでください。プロジェクター内部が高温になっているため、引火による火災の原因 となります。 注意 • • 投写をするときはレンズ面のカバーを外してください。 • • レンズユニッ トを取り付ける前に、プロジェクターの型番を確認してください。指定の プロジェクター以外に本レンズユニッ トを取り付けると、レンズユニッ トもしくはプロ ジェクターの故障の原因となります。 中 文 • • プロジェクターに本製品を装着する際は指を挟まないでください。けがの原因となり ます。...
  • Page 71 注意 • • プロジェクターを輸送するときは、 レンズユニッ トを取り外してください。レンズユニッ トを取り付けたままプロジェクターを輸送すると、レンズユニッ トもしくはプロジェク ターの故障の原因となることがあります。 • • プロジェクターのレンズ挿入部を上に向けた状態でレンズユニッ トを装着しないでく ださい。ホコリやゴミが入る原因となります。 • • レンズ部分に手や指が触れないように作業してください。レンズ面に指紋や皮脂が付 く と投写品質が劣化します。 • • コネクター部やケーブルは触ったり引っ張ったり しないでください。故障の原因となり ます。 • • お手入れの際は濡れた布やアルコール、ベンジン、シンナーなどの溶剤を使用しな いでください。感電・故障の原因となることがあります。 • • レンズユニッ トはカバーを付けて横向きに安定した状態で置いてください。立てて置 く とレンズユニッ トが倒れて故障や損傷の原因となります。 中 文 简 体 中 文...
  • Page 72 レンズユニッ トの取り付けと取り外し お使いのプロジェクターによっては、手順やイラストが説明と異なる場合があります。詳し くはお使いのプロジェクターに添付の『取扱説明書』をご覧ください。 取り付け方 レンズ交換カバーを取り外します。 取り外したレンズ交換カバーは保管願います。 ※お使いのプロジェクターによってレンズ交換カ バーの形状や取り外し方が異なります。プロジェ クターに添付の『取扱説明書』を参照ください。 ロックレバーをつまんで反時計回りに回しま す。 中 文 简 レンズユニッ トに付いているレンズカバー (小) 体 を外します。 中 レンズユニッ トを単体で保管・移動するときはレ 文 ンズカバーが必要となります。取り外したレンズ 繁 カバーは保管願います。 體 日 本 語...
  • Page 73 レンズユニッ トが傾かないようにして、レンズ 装着部にまっすぐ挿入します。 レンズユニッ トをしっかり支えた状態で、ロッ クレバーをつまんで時計回りに動かしてロック します。 ロック後は、レンズユニッ トが外れないことを確認 してください。 ロックできない場合は、レンズユニッ トが傾いて います。レンズユニッ トを抜いて入れ直してくださ い。 ネジ(4箇所)を締めて固定します。 中 ネジは手で回せます。 文 简 体 中 文 繁 體 日 本 語...
  • Page 74 後はレンズキャリブレーションを行ってください。レンズユニッ トを取り付けた後、 プロジェ クターの電源を入れるとメッセージが表示されます。 [はい]を選択し、キャリブレーショ ンを実行してください。 中 映像の調整 文 以下の情報はお使いのプロジェクターに添付の『取扱説明書』をご覧ください。 简 体 • • フォーカス調整 • • ディストーション調整• 中 ディストーション調整をすると画面の大きさが変わります。 文 • • レンズシフト 繁 • • ゆがみ補正 體 ※本製品は固定焦点レンズです。ズーム機能には対応していません。 日 『取扱説明書』は以下の Web サイトにも掲載されています。 本 http://www.epson.jp/download/ 語 弊社ホームページにて、より詳細な投写シミュレートが可能なツールを用意しております ので、あわせてご活用ください。 http://www.epson.jp/products/bizprojector/simulator/...
  • Page 75 取り外し方 注意 • • レンズシフトを行っているときは、レンズの位置をホームポジションに移動してからレ ンズユニッ トを交換してください。 • • レンズユニッ トの取り外しは、プロジェクターの電源を切って、しばらく してから行っ てください(目安:約 30•分) 。投写中や電源を切った直後にレンズユニッ トに触れる と、やけどの原•因となることがあります。 レンズカバー(大)を取り付けます。 化粧カバーを取り外します。 別紙「カバーの取り付け」を参照ください。 中 文 简 体 中 文 繁 體 日 本 語...
  • Page 76 ネジ(4箇所)を緩めます。 ネジは手で回せます。 レンズユニッ トをしっかり支えた状態で、ロッ クレバーをつまんで反時計回りに動かしてロッ クを外します。 レンズユニッ トが外れますので、まっすぐに引き 抜きます。 中 レンズカバー(小)を取り付けます。 文 简 体 中 文 繁 體 日 本 語...
  • Page 77 仕様一覧 商品名 ELPLX02S/ELPLX02WS 焦点距離 8.0mm F•ナンバー 動作温度範囲 0•~•+50•℃(結露しないこと) 保存温度範囲 -10•~•+60•℃(結露しないこと) 質量 約 5,000•g お問い合わせは、プロジェクターに添付の説明書に記載の連絡先にご連絡ください。 中 文 简 体 中 文 繁 體 日 本 語...
  • Page 84 Atención usuarios en la provincia de Buenos Aires, Argentina La etiqueta de un contenedor tachado que hallará en su producto indica que este producto no se puede tirar con la basura doméstica normal. Para impedir posibles daños medioambientales o para la salud, separe este producto de otros canales de desecho para garantizar que se recicle de una forma segura para el medio ambiente.
  • Page 85 Indication of the manufacturer and the importer in accordance with requirements of directive 2011/65/EU (RoHS) Manufacturer : SEIKO EPSON CORPORATION Address : 3-5, Owa 3-chome, Suwa-shi, Nagano-ken 392-8502 Japan Telephone : 81-266-52-3131 http://www.epson.com/ Importer : EPSON EUROPE B.V. Addres : Atlas Arena, Asia Building, Hoogoorddreef 5, 1101 BA Amsterdam Zuidoost...
  • Page 86: External Dimensions

    External Dimensions [Unit: mm] 203.9 336.4 203.9 171.6 72.7 164.9 * Screw holes for the optional external camera ELPEC01 * Trous de vis pour la caméra externe optionnelle ELPEC01 * Schraubenlöcher für optionale externe Kamera ELPEC01 * Fori per le viti per la telecamera esterna opzionale ELPEC01 * Orificios para tornillos para la cámara externa opcional ELPEC01 * 可选外置摄像头...
  • Page 87 203.9 364.9 239.1...

Ce manuel est également adapté pour:

Elplx02ws

Table des Matières