Masquer les pouces Voir aussi pour AO160WIT:

Publicité

Les langues disponibles

Les langues disponibles

Liens rapides

GEBRUIKSAANWIJZING
MODE D'EMPLOI
BEDIENUNGSANLEITUNG
INSTRUCTIONS FOR USE
AFZUIGKAP
HOTTE CHEMINÉE
DUNSTABZUGSHAUBE
COOKER HOOD
AO160WIT
AO160RVS
AO460WIT
AO460RVS
AO460ZT

Publicité

Table des Matières
loading

Sommaire des Matières pour ETNA AO160WIT

  • Page 1 GEBRUIKSAANWIJZING MODE D’EMPLOI BEDIENUNGSANLEITUNG INSTRUCTIONS FOR USE AFZUIGKAP HOTTE CHEMINÉE DUNSTABZUGSHAUBE COOKER HOOD AO160WIT AO160RVS AO460WIT AO460RVS AO460ZT...
  • Page 2 Gebruiksaanwijzing NL 3 - NL 15 Mode d’emploi FR 3 - FR 15 Bedienungsanleitung DE 3 - DE 15 Instructions for use EN 3 - EN 15 Gebruikte pictogrammen - Pictogrammes utilisés - Benutzte Piktogramme Pictograms used Belangrijk om te weten - Important à savoir - Wissenswertes - Important information Tip - Conseil - Tipp...
  • Page 3: Table Des Matières

    INHOUD Uw schouwkap Inleiding Beschrijving Afvoersystemen Gebruik Bediening Onderhoud Reinigen Vetfilters Koolstoffilter Verlichting Installatie Algemeen Elektrische aansluiting Voorbereidingen Recirculatie Montage Bijlage Verpakking en toestel afvoeren NL 3...
  • Page 4: Inleiding

    UW AFZUIGKAP Inleiding Als u deze gebruiksaanwijzing doorleest, bent u snel op de hoogte van alle mogelijk heden die dit toestel u biedt. U vindt informatie voor uw veiligheid en over het onderhoud van het toestel. Bewaar de gebruiksaanwijzing en het installatievoorschrift. Een eventueel volgende gebruiker van dit toestel kan daar zijn voordeel mee doen.
  • Page 5: Afvoersystemen

    UW AFZUIGKAP Afvoersystemen De afzuigkap kan, afhankelijk van het model, op twee manieren worden aangesloten: 1. Als afzuigkap op een afvoerkanaal. De aangezogen en gefilterde kookdampen worden naar buiten afgevoerd. Dit is de beste manier! 2. Als recirculatie afzuigkap. De vetdeeltjes en de geur uit de aangezogen kookdampen worden gefilterd.
  • Page 6: Bediening

    GEBRUIK Bediening Elektrische klep openen en sluiten (AO160) Schuif de regelaar naar stand 1. De elektrische klep wordt geopend. Schuif de regelaar naar stand 0. De elektrische klep wordt gesloten. Ventilator in- en uitschakelen (AO460) Schuif de regelaar naar stand 1, 2 of 3. De afzuigkap schakelt in op de corresponderende stand.
  • Page 7: Reinigen

    ONDERHOUD Reinigen Let op! Maak, voor ieder onderhoud, eerst de afzuigkap spanningsloos door de stekker te verwijderen uit het stopcontact of door de hoofdschakelaar van de woning uit te schakelen. De kap moet regelmatig schoon gemaakt worden, zowel binnen als buiten (tenminste met dezelfde regelmaat waarmee de vetfilters gereinigd worden).
  • Page 8: Vetfilters

    ONDERHOUD Vetfilters Reinig de vetfilters minimaal 1x per maand. Bij reiniging kunnen de aluminium delen van de filters dof worden door de gebruikte schoonmaakmiddelen, met name bij plaatsing in de vaatwasser. Dit is normaal en valt niet onder de garantie. Vetfilter verwijderen 1.
  • Page 9: Verlichting

    ONDERHOUD Verlichting Lampen vervangen De lamp in dit huishoudelijke apparaat is uitsluitend bedoeld voor verlichting van dit apparaat. De lamp is niet geschikt voor de verlichting van een huishoudelijke ruimte. Let op! Maak het toestel spanningsloos door de stekker uit het stopcontact te verwijderen voordat het lampje vervangen wordt.
  • Page 10: Installatie

    INSTALLATIE Algemeen De aansluiting van dit apparaat op het lichtnet moet worden uitgevoerd door een erkend installateur, die de juiste veiligheidsvoorschriften kent en toepast. Het apparaat voldoet aan de Europese voorschriften. Belangrijk om te weten: • De afstand tussen het laagste punt van de afzuigkap en een gaskookplaat moet minimaal 65 cm bedragen.
  • Page 11: Elektrische Aansluiting

    INSTALLATIE Aansluiting Elektrische aansluiting Dit is een (isolatie) klasse II (dubbel geïsoleerd) toestel. Het snoer hoeft derhalve niet op een geaard stopcontact aangesloten te worden. Controleer of de op het typeplaatje vermelde spanning overeen komt met de spanning van de huisinstallatie. De aansluiting op het elektriciteitsnet moet als volgt uitgevoerd worden: BRUIN = L fase leiding BLAUW = N nulleiding...
  • Page 12: Recirculatie

    INSTALLATIE Voorbereiding De afvoerpijp kan zowel aan de bovenzijde als aan de achterzijde worden bevestigd. Verwijder de afdichting (A). Sluit de afvoerpijp aan op de flens (D). Recirculatie Deze afzuigkap is geschikt voor recirculatie gebruik (zie ‘Afzuigsystemen’). Bouw de afzuigkap om voor recirculatie gebruik volgens de onderstaande tekeningen.
  • Page 13: Montage

    INSTALLATIE Montage NL 13...
  • Page 14 INSTALLATIE NL 14...
  • Page 15: Verpakking En Toestel Afvoeren

    BIJLAGE Afvoeren Verpakking en toestel afvoeren Bij de vervaardiging van dit toestel is gebruik gemaakt van duurzame materialen. Dit toestel moet aan het eind van zijn levenscyclus op verantwoorde wijze worden afgevoerd. De overheid kan u hieromtrent informatie verschaffen. De verpakking van het toestel is recyclebaar. Gebruikt kunnen zijn: •...
  • Page 16 NL 16...
  • Page 17 CONTENU Votre hotte cheminée Description Introduction Système d’évacuation Utilisation Commande Entretien Nettoyage Elimination des filtres Remplacement des filtres à charbon Changement d’ampoules Installation Généralités Connexion électrique Préparation Mode recyclage d’air Montage Annexe Mise au rebut de l’appareil et de l’emballage FR 3...
  • Page 18: Hotte De Cuisine

    HOTTE DE CUISINE Introduction Ce mode d’emploi offre une vue d’ensemble rapide de toutes les fonctions de l’appareil. Il contient des informations relatives aux consignes de sécurité et à l’entretien de l’appareil. Conservez ce mode d’emploi et le guide d’installation. Ils peuvent être utiles aux futurs utilisateurs de l’appareil.
  • Page 19: Système D'évacuation

    HOTTE DE CUISINE Système d’évacuation En fonction du modèle, la hotte aspirante peut être raccordée de deux manières : 1. Version canal d’évacuation. Les vapeurs de cuisson aspirées et filtrées sont évacuées vers l’extérieur via la partie de la hotte. C’est la meilleure manière ! 2.
  • Page 20: Utilisation

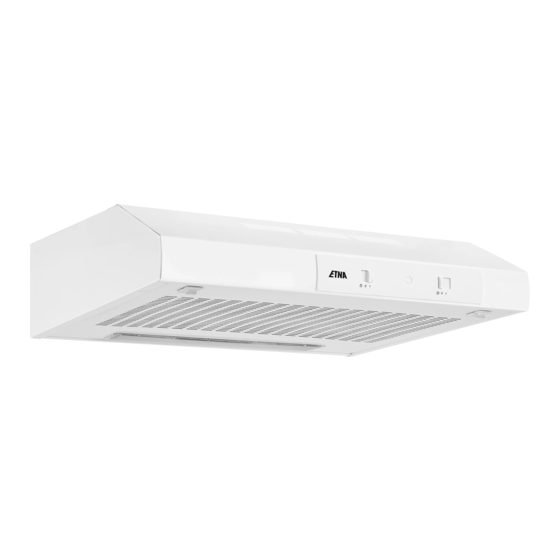
    UTILISATION Commande Ouvrir/fermer le clapet électrique (AO160) Placez le sélecteur sur la position 1. Le clapet électrique s’ouvre. Placez le sélecteur sur la position 0. Le clapet électrique se ferme. Activer et désactiver le ventilateur (AO460) Placez le sélecteur sur la position 1, 2 ou 3. La hotte aspirante se met en marche à...
  • Page 21: Entretien

    ENTRETIEN Nettoyage Attention ! Avant tout entretien, déconnectez l’alimentation électrique de la hotte, soit en débranchant la fiche d’alimentation, soit en coupant le courant au niveau de l’interrupteur principal du logement. La hotte doit être régulièrement nettoyée à l’intérieur et à l’extérieur (au moins à...
  • Page 22: Remplacement Des Filtres À Charbon

    ENTRETIEN Filtres Nettoyez les filtres anti graisse au moins 1x par mois. En raison des produits d’entretien utilisés lors de l’entretien, les éléments en aluminium des filtres peuvent perdre leur éclat, surtout si vous les placez dans le lave-vaisselle. C’est normal. La garantie ne couvre pas ce cas. Comment éliminer la cassette-filtre 1.
  • Page 23: L'éclairage

    ENTRETIEN • Les filtres à charbon actif ne sont pas lavables et donc pas réutilisables. Le charbon actif saturé est polluant, donc remplacez le filtre à temps. L’éclairage Changement d’ampoules La lampe intégrée à cet appareil ménager sert uniquement à l’éclairer. Elle n’est pas faite pour éclairer la pièce d’une maison.
  • Page 24: Généralités

    INSTALLATION Généralités Le raccordement électrique de cet appareil doit être effectué par un installateur agréé, qui connaît et applique les normes de sécurité en vigueur. Cet appareil est conformément aux directives Européens. Important: • La distance entre le point le plus bas de la hotte aspirante et la plaque de cuisson doit être d’au moins 65 cm.
  • Page 25: Connexion Électrique

    INSTALLATION Connexion Connexion électrique L’appareil est construit en classe II, pour cela aucun cable ne doit être connecté avec la prise terre. Il faut s’assurer que la tension du réseau correspond à la valeur indiquée à la plaque signalétique de la hotte. La connection avec le réseau électrique doit être éxécutée comme suit: BRUN = Phase L BLEU = Phase N...
  • Page 26: Préparation

    INSTALLATION Préparation La gaine d’évacuation peut être fixée sur le dessus ou à l’arrière de la hotte. Retirez la plaque d’obstruction (A). Raccordez la gaine d’évacuation à la bride (D). Mode recyclage d’air Cette hotte aspirante convient pour la recirculation (voir « Systèmes d’aspiration »).
  • Page 27: Montage

    INSTALLATION Montage FR 13...
  • Page 28 INSTALLATION FR 14...
  • Page 29: Annexe

    ANNEXE Mise au rebut Mise au rebut de l’appareil et de l’emballage Des matériaux solides ont été utilisés pour fabriquer cet appareil. Evacuez ces matériaux correctement et conformément aux dispositions administratives. Les autorités de votre pays pourront vous fournir des informations à...
  • Page 30 FR 16...
  • Page 31: Ihre Haube

    INHALT Ihre Haube Beschreibung Einleitung Abluftsystem Gebrauch Bedienung Pflege Reinigen Fettfilter entfernen Austausch der Kohlefilter Lampen auswechseln Installation Allgemein Elektroanschluss Vorbereitung Rezirkulation Montage Anlagen Entsorgung Gerät und Verpackung DE 3...
  • Page 32: Ihre Dunstabzugshaube

    IHRE DUNSTABZUGSHAUBE Einleitung Diese Bedienungsanleitung gibt Ihnen eine schnelle Übersicht aller Möglichkeiten, die das Gerät bietet. Sie erhalten Informationen zur Sicherheit und zur Wartung des Geräts. Bewahren Sie diese Bedienungsanleitung und die Installationsanweisungen sorgfältig auf. So stehen sie auch für eine zukünftige Nutzung des Geräts zur Verfügung.
  • Page 33: Abluftsystem

    IHRE DUNSTABZUGSHAUBE Abluftsysteme Die Dunstabzugshaube kann je nach Modell auf zwei verschiedene Weisen angeschlossen werden: 1. Als Dunstabzugshaube an einem Abluftkanal. Die angezogenen und gefilterten Küchendämpfe werden nach außen abgeführt. Dies ist die beste Methode! 2. Als Rezirkulations-Dunstabzugshaube. Die Fettteile der angezogenen Küchendämpfe werden gefiltert.
  • Page 34: Bedienung

    GEBRAUCH Bedienung Elektrische Klappe öffnen und schließen (AO160) Schieben Sie den Regler auf Position 1. Die elektrische Klappe wird geöffnet. Schieben Sie den Regler auf Position 0. Die elektrische Klappe wird geschlossen. Ventilator ein- und ausschalten (AO460) Schieben Sie den Regler auf Position 1, 2 oder 3. Die Abzugshaube wird auf die entsprechende Stufe gestellt.
  • Page 35: Reinigen

    PFLEGE Reinigen Achtung! Machen Sie das Gerät vor jeder Wartung spannungsfrei, indem Sie den Stecker aus der Steckdose ziehen oder den Hauptschalter der Wohnung ausschalten. Die Dunstabzugshaube muss sowohl innen als auch außen häufig gereinigt werden (etwa in denselben Intervallen, wie die Wartung der Fettfilter). Keine Produkte verwenden, die Scheuermittel enthalten.
  • Page 36: Austausch Der Kohlefilter

    PFLEGE Fettfilter Reinigen Sie die Fettfilter mindestens 1x monatlich. Bei der Reinigung können Aluminiumteile der Filter durch die benutzten Reinigungsmittel glanzlos werden, besonders dann, wenn sie im Geschirrspüler ausgewaschen werden. Das ist normal und fällt nicht unter die Garantieleistungen. Filter herausnehmen 1.
  • Page 37: Lampen Auswechseln

    PFLEGE • Kohlefilter sind nicht zur Wiederverwendung auswaschbar. Gesättigter Kohlenstoff ist nicht umwelt-freundlich, tauschen Sie den Filter rechtzeitig aus. Beleuchtung Lampen auswechseln Die Lampe in diesem Haushaltsgerät ist nur für die Beleuchtung dieses Geräts geeignet. Die Lampe ist nicht zur Raumbeleuchtung im Haushalt geeignet.
  • Page 38: Allgemein

    INSTALLATION Allgemein Der Anschluß dieses Gerätes an das Lichtnetz muß durch einen anerkannten Installateur geschehen, der die Sicherheitsvorschriften gut kennt und anwendet. Dieses Gerät entspricht den europäischen Vorschriften. Wichtig zu wissen: • Der Abstand zwischen dem niedrigsten Punkt der Dunstabzugshaube und einem Gaskochfeld muss mindestens 65 cm betragen.
  • Page 39: Elektroanschluss

    INSTALLATION Anschluss Elektroanschluss Die Küchenhaube gehört zur Geräteklasse II, daher muss keine der Leitungen geerdet werden. Kontrollieren Sie, dass die Spannung Ihres Hausanschlusses mit dem auf dem Typenschild angegebenen übereinstimmt. Der Anschluss an das Stromnetz ist folgendermassen durchzuführen: BRAUN = Phase L BLAU = Phase N Diese Dunstabzugshaube ist mit einem Stecker versehen.
  • Page 40: Vorbereitung

    INSTALLATION Vorbereitung Das Abluftrohr kann an der Ober- und an der Rückseite befestigt werden. Entfernen Sie die Dichtung (A). Schließen Sie das Abluftrohr an den Flansch (D) an. Rezirkulation Diese Dunstabzugshaube ist für die Rezirkulationsverwendung geeignet (siehe ‘Dunstabzugssysteme’). Bauen Sie die Dunstabzugshaube gemäß...
  • Page 41: Montage

    INSTALLATION Montage DE 13...
  • Page 42 INSTALLATION DE 14...
  • Page 43: Entsorgung Gerät Und Verpackung

    ANLAGEN Entsorgung Entsorgung Gerät und Verpackung Bei der Herstellung dieses Gerätes wurden dauerhafte Werkstoffe verwendet. Dieses Gerät ist am Ende seiner Nutzzeit ordnungsgemäß und gemäß den behördlichen Vorschriften zu entsorgen. Sie erhalten hierzu Informationen bei den zuständigen behörden. Die Verpackung des Gerätes ist wiederverwendbar. Verwendet können sein: •...
  • Page 44 DE 16...
  • Page 45 CONTENT Your canopy hood Description Introduction Extraction systems Controls Maintenance Cleaning Removing the grease filters Replacing the carbon filter Changing the light bulbs Installation General Electrical connection Preparation Recirculation Mounting Appendice Disposal of appliance and packaging EN 3...
  • Page 46: Your Cooker Hood

    YOUR COOKER HOOD Introduction This user manual gives you a quick overview of all the possibilities offered by the appliance. You will find information on safety measures and maintaining the appliance. Please retain this user manual and the installation guide. They may be of use to future users of the appliance.
  • Page 47: Extraction Systems

    YOUR COOKER HOOD Extraction systems Depending on the type, the cooker hoods be connected in one of two ways: 1. To a duct. To a duct, the cooking vapours extracted by suction are carried outside, once the grease particles have been filtered.
  • Page 48: Controls

    Controls Opening and closing the electric valve (AO160) Move the slider to position 1. The electric valve opens. Move the slider to position 0. The electric valve closes. Switching the fan on and off (AO460) Move the slider to position 1, 2 or 3. The cooker hood switches at the corresponding speed.
  • Page 49: Cleaning

    MAINTENANCE Cleaning Note! Before each servicing, first disconnect the cooker hood by removing the plug from the wall socket or by switching off the main switch of the residence. Or if the appliance has been connected through a plug and socket, then the plug must be removed from the socket. The cooker hood should be cleaned regularly (at least with the same frequency with which you carry out maintenance of the fat filters) internally and externally.
  • Page 50: Removing The Grease Filters

    MAINTENANCE Grease filters Clean the grease filters at least once a month. During cleaning, the aluminium parts of the filters may become dull as a result of the cleaning agents used, particularly when placed in the dishwasher. This is normal and is not covered by the warranty. Removing the grease filter 1.
  • Page 51: Changing The Light Bulbs

    MAINTENANCE Lighting Change the light bulbs The lamp in this household appliance is only suitable for illumination of this appliance. The lamp is not suitable for household room illumination. Please note! Disconnect the appliance from the mains by removing the plug from the socket before the changing the light.
  • Page 52: General

    INSTALLATION General This appliance should be connected to the power supply by a recognized fitter who is familiar with, and works according to the correct safety regulations. This appliance meets the European requirements. Important that you know: • The minimum distance between the supporting surface for the cooking vessels on the gashob and the lowest part of the range hood must be not less than 65 cm.
  • Page 53: Electrical Connection

    INSTALLATION Connection Electric connection The appliance has been manufactured as a class II, therefore no earth cable is necessary. Make sure the supply voltage ratings correspond with those stated on the appliance data plate. The connection to the mains is carried out as follows: BROWN = phase L BLUE = phase N...
  • Page 54: Preparation

    INSTALLATION Preparation The exhaust-air pipe can be mounted to the top or the rear of the cooker hood. Remove the lid (A). Connect the exhaust-air pipe to the flange (D). Recirculation This cooker hood is suitable for recirculation use (see ‘Cooker hood systems’).
  • Page 55: Mounting

    INSTALLATION Mounting EN 13...
  • Page 56 INSTALLATION EN 14...
  • Page 57: Disposal Of Appliance And Packaging

    APPENDICE Disposal Disposal of appliance and packaging By ensuring this product is disposed of correctly, you will help prevent potential negative consequences for the environment and human health, which could otherwise be caused by inappropriate waste handling of this product. The local authorities can provide you with the relevant information.
  • Page 58 EN 16...
  • Page 59 EN 17...
  • Page 60 *785702* 785702...

Ce manuel est également adapté pour:

Ao160rvsAo460witAo460rvsAo460zt

Table des Matières