Table des Matières
Publicité
Les langues disponibles
Les langues disponibles
Liens rapides
San-Ei Building, 22-2, Nishi Shinjuku 1-chome, Shinjuku-ku, Tokyo, Japan. Tel. 03-3340-2026
Two Corporate Center Drive, Melville, NY 11747-3157, U.S.A. Tel. 516-844-5000
OLYMPUS OPTICAL CO. (EUROPA) GMBH.
(Lieferadresse) Wendenstraße 14-16, 20097 Hamburg, Germany. Tel. 040-237730
(Postanschrift) Postfach 10 49 08, 20034 Hamburg, Germany.
2-8 Honduras Street, London EC1Y 0TX, United Kingdom, Tel 0171-253-2772
• "CE" mark indicates that this product complies with the European requirements for
safety, health, environment and customer protection.
• La marque "CE" indique que ce produit est conforme avec les exigences européennes en
malière de sécurité, santé, environnemnet et protection du consommateur.
• Das CE-Zeichen bestätigt, daß dieses Produkt mit den europäischen Bestimmungen für
Sicherheit, Gesundheit, Umweltschutz und Personenschutz übereinstimmt.
Printed in Japan
OLYMPUS OPTICAL CO., LTD.
OLYMPUS AMERICA INC.
OLYMPUS OPTICAL CO. (U.K.) LTD.
Publicité
Chapitres
Table des Matières
Dépannage

Manuels Connexes pour Olympus CAMEDIA P-300E


Sommaire des Matières pour Olympus CAMEDIA P-300E
- Page 1 San-Ei Building, 22-2, Nishi Shinjuku 1-chome, Shinjuku-ku, Tokyo, Japan. Tel. 03-3340-2026 OLYMPUS AMERICA INC. Two Corporate Center Drive, Melville, NY 11747-3157, U.S.A. Tel. 516-844-5000 OLYMPUS OPTICAL CO. (EUROPA) GMBH. (Lieferadresse) Wendenstraße 14-16, 20097 Hamburg, Germany. Tel. 040-237730 (Postanschrift) Postfach 10 49 08, 20034 Hamburg, Germany.
- Page 2 Digital color printer Imprimante couleur numérique Digitaler Farbdrucker Instructions • Thank you for purchasing this Olympus digital color printer. • Before using this product, read this manual carefully to ensure correct use. • Nous vous remercions d’avoir choisi cette imprimante couleur numéruque.
- Page 3 Introduction Precautions Thank you for purchasing this Before using the printer, read the OLYMPUS digital color printer. safety precautions given on pages 4 through 9 and follow them to ensure proper handling. Keep this manual Read this manual and warranty for handy for future reference.
-
Page 4: Table Des Matières
Inserting the print paper ............16 Inserting the print paper into the automatic feeder ............16 Installing the automatic feeder to the printer ....18 Printing Printing an image recorded by OLYMPUS Digital Cameras ..............19 CAMEDIA C-820L/C-420L Digital Cameras ..............19 CAMEDIA C-800L/C-410L/ C-400L Digital Cameras ........... -
Page 5: Safety Precautions
Safety precautions It is dangerous to tamper with the printer because this can cause fire or electric shock possibly resulting in death or serious injury. Before use, read the safety precautions thoroughly and follow them for proper handling. This manual uses the following icons to indicate hazardous situations. - Page 6 WARNING p If anything strange occurs with the printer, unplug the power cord. If the printer emits smoke, strange smells, or strange sounds, turn off and unplug the printer to prevent fire or electric shock. Then contact your dealer. p Should any liquid or foreign object penetrate the printer, unplug the power cord.
- Page 7 WARNING p Do not disassemble or modify the printer. The printer has both hot and high voltage parts on the inside. To prevent an electric shock or printer malfunction, do not attempt to disassemble or modify the printer. For service or repair, contact your dealer.
- Page 8 WARNING p Make sure that excessive dust and foreign matter do not accumulate on the power cord. Dust and foreign matter conduct electricity, which can cause fire and electric shock. If excessive dust and foreign matter accumulate on the cord, unplug the cord and remove them. p Immediately unplug the power cord when an electric storm starts outside.
- Page 9 NOTE p Do not block the vent. Doing so may cause the printer to heat up, possibly resulting in fire or electric shock. • Do not block the top or side vent. • Do not put the printer in the following places. –...
- Page 10 NOTE p Unplug the power cord from the power outlet before cleaning the printer. Accidentally touching a non-user-serviceable part may cause electric shock. p Unplug the printer if it is not used for an extended period of time, for example while you are on a long trip. Otherwise, deteriorated insulation or leakage current may cause fire or electric shock.
-
Page 11: Getting Started
Getting Started Unpacking the printer Make sure that the following accessories are supplied with your printer. • Automatic feeder (1) • Power cord (1) • CD-ROM (for Windows 95, 3.1 and Macintosh) (1) • Instruction Manual (1) • Installation Guide (1) •... -
Page 12: What You Can Do With The Digital Color Printer P-300E
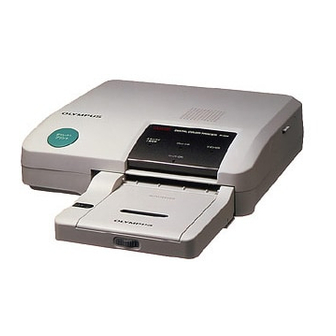
Color Printer P-300E The Digital Color Printer P-300E enables you to directly print the image you recorded using the OLYMPUS Digital Cameras. By connecting the P-300E to your PC or Macintosh, you can make prints of images from your computer. -
Page 13: Identifying The Parts
Identifying the parts See the pages given in parenthesis for use of the parts. 1 Paper outlet (p. 32) 2 Serial port (p. 19, 22, 27) 3 Parallel port (p. 25, 26) 4 Power switch (p. 18) 5 AC power connector (p. 18) 6 Direct print button (p. - Page 14 Automatic feeder 1 Connecting terminal 2 Window showing number of copies (number of copies) dial (p. 21, 24) 4 Cover (p. 16) 5 Spacer (p. 16) 6 Slide switch (p. 16) Getting Started...
-
Page 15: Loading The Ink Ribbon Cartridge
Loading the ink ribbon cartridge Insert the ink ribbon cartridge into the printer. Use only the ink ribbon cartridge supplied with the print paper packed in the same carton. While pressing down the lever, open the cartridge compartment lid. Wind up the ink ribbon to remove the slack. While pressing the center of the reel, wind the ink ribbon in the direction of... - Page 16 Caution If the cartridge compartment lid does not close Never put your hand into Remove the ink ribbon cartridge, and then reinsert it. the cartridge compartment. The thermal head reaches To remove the used ink ribbon cartridge high temperatures, Open the cartridge compartment lid and push up the especially after repeated printing.
-
Page 17: Inserting The Print Paper
• Insert the print paper automatic feeder with the glaring/shiny side facing up. Face down the side on which “OLYMPUS” is To open the cover, slide the front switch to the printed for stickers, and right. that the stamp mark is printed for standard papers. - Page 18 • Do not fold or bend the print paper. Printing surface Face down the side on which “OLYMPUS” is printed for stickers, and that the stamp mark is printed for standard papers. front Metal tabs Close the automatic feeder cover.
-
Page 19: Installing The Automatic Feeder To The Printer
Inserting the print paper (continued) Installing the automatic feeder to the printer Connect the supplied power cord to the printer, and then to the AC outlet. Power cord (supplied) Power switch to the AC outlet Push the automatic feeder compartment. The lid of the automatic feeder compartment opens. -
Page 20: Printing
The direct print cable CB-P82 is also available to connect these cameras. For details, please contact your nearest OLYMPUS representative office. Serial type cables supplied with the camera... - Page 21 Printing an image recorded by OLYMPUS Digital Cameras (continued) Press the LCD ON/OFF button of the digital camera to turn on the playback mode. Control panel LCD ON/OFF button Frame backward and forward buttons Select the photo to be printed using the frame backward and forward buttons on the digital camera.
- Page 22 Notes Turn the dial of the automatic feeder to set the • Press the direct print number of copies to be printed. button only after the You can set 1, 2, 3, 5, 10, 15 or 30 copies. image you had selected was displayed.
-
Page 23: Camedia C-800L/C-410L/C-400L Digital Cameras
Printing an image recorded by OLYMPUS Digital Cameras (continued) CAMEDIA C-800L/C-410L/C-400L Digital Cameras Note Check that the printer and digital camera are Before printing, be sure to turned off. close the lens barrier of Connect the serial port of the printer to the the digital camera. - Page 24 Press the LCD ON/OFF button of the digital camera to turn on the playback mode. Control panel LCD ON/OFF button Frame backward and forward buttons Select the photo to be printed using the frame backward and forward buttons on the digital camera.
- Page 25 Printing an image recorded by OLYMPUS Digital Cameras (continued) Notes Turn the dial of the automatic feeder to set the • Press the direct print number of copies to be printed. button only after the You can set 1, 2, 3, 5, 10, 15 or 30 copies.
-
Page 26: Camedia C-1400L/C-1000L Digital Cameras
CAMEDIA C-1400L/C-1000L Digital Cameras Check that the printer and digital camera are turned off. Connect the parallel port of the printer to the printer port of the digital camera with the supplied direct print cable. Direct print cable of the parallel type (supplied) Tips •... -
Page 27: Printing An Image From The Computer
Printing an image from the computer To print an image from the computer, first install the supplied printer driver to your computer. 1 Connect to the computer Connect the printer to your computer. Turn off the power to the computer and to the printer before connecting. - Page 28 Note on the power If you connect the printer to the computer via other devices (such as 3 Install the printer driver OLYMPUS ES-10 film scanner), turn on all See the supplied Installation Guide for the installation devices connected. procedure.
-
Page 29: Printing While Directly Inserting Print Paper
Printing while directly inserting print paper Send the print command from the computer or digital still camera. indicator ( ) is on, and then the indicator starts flashing. Left guide Less than 2 cm (13/16 inches) Notes Insert a sheet of print paper into the paper inlet •... -
Page 30: For Your Information
For Your Information Troubleshooting Use the following measures to solve problems you may experience with your printer. If the problem persists, contact your dealer for information on what to do next. • The power is not turned on. m Connect the AC power cord to an AC outlet securely. -
Page 31: If The Indicators Are On
Troubleshooting (continued) If the indicators are on If you cannot print, check the indicators on the front panel. • The indicator is on. m The ink ribbon cartridge is not loaded. m The ink ribbon has run out. Change the ink ribbon cartridge. - Page 32 • The indicator does not light or all indicators are flashing. m Print paper is jammed. Remove the jammed paper from the paper outlets on the front and rear panels. m Remove the automatic feeder from the printer and see if the paper jammed. •...
-
Page 33: If The Print Paper Is Jammed
Troubleshooting (continued) If the print paper is jammed Notes If the print paper is jammed, all indicators flash and • If the indicator printing stops. Turn off the power and remove the does not turn on after having removed the jammed paper. -
Page 34: Specifications
Specifications Printer Printing system Sublimation dye transfer printing (Yellow/Magenta/Cyan 3 pass) Effective pixels 1376 (H) x 1024 (V) dot Printing size 114 (H) x 85 (V) mm inches) Gradations 256 levels (8 bits), per color (24 bits) Approx. 16,770,000 colors Printing time (excluding data transmission time) Approx. -
Page 35: Precautions On The Ink Ribbon Cartridge And Print Paper
Precautions on the ink ribbon cartridge and print paper Notes on storing the ink ribbon cartridge • Avoid placing the cartridge in a location subject to: – high temperatures – high humidity – excessive dust – direct sunlight • When you are going to store a partially-used cartridge for an extended period of time, store it in its original bag. - Page 36 Furthermore, “™” and “®” are not mentioned in each case in this manual. © OLYMPUS OPTICAL CO., LTD. 1997. All rights reserved • No portion of this manual may be copied or reproduced by any means without the prior written permission of OLYMPUS.
- Page 37 Introduction Précautions OLYMPUS vous remercie d’avoir Avant d’utiliser l’imprimante, lisez les acheté cette imprimante couleur précautions de sécurité données en numérique. pages 4 à 9, et suivez-les pour éviter tout danger. Pour pouvoir consulter ce manuel en cas de nécessité, conservez-...
- Page 38 Insertion du papier d’impression dans le chargeur automatique ............... 16 Installation du chargeur automatique sur l’imprimante ..............18 Impression Impression d’une image prise sur une caméra numérique OLYMPUS ................19 Caméras numériques CAMEDIA C-820L/C-420L ..............19 Caméras numériques CAMEDIA C-800L/C-410L/C-400L ........... 22 Caméras numériques CAMEDIA C-1400L/C-1000L ..............
-
Page 39: Précautions De Sécurité
Précautions de sécurité Il est dangereux de tenter d’ouvrir l’imprimante, à cause du risque d’incendie ou d’électrocution, qui pourraient entraîner la mort ou de graves blessures. Avant l’utilisation, lisez les précautions à prendre avec attention et suivez-les pour éviter tout risque. Dans ce manuel, les images suivantes sont utilisées pour indiquer des situations dangereuses. - Page 40 ATTENTION p Si quoi que ce soit de bizarre survient sur l’imprimante, débranchez le câble d’alimentation. Si l’imprimante émet de la fumée, des odeurs ou des bruits étranges, éteignez-la et débranchez-la pour éviter un incendie ou une électrocution. Contactez immédiatement votre vendeur. p Si un liquide ou un objet étranger ont pénétré...
- Page 41 ATTENTION p Ne démontez pas ni ne modifiez l’imprimante. A l’intérieur, l’imprimante contient des pièces brûlantes et des pièces sous haute tension. Pour éviter une électrocution ou un dysfonctionnement de l’imprimante, ne tentez pas de la démonter ou de la modifier. Pour les entretiens ou une réparation, prenez contact avec votre vendeur.
- Page 42 ATTENTION p Vérifiez que de la poussière et des matières étrangères ne s’accumulent pas à l’excès sur le câble d’alimentation. La poussière et les matières étrangères conduisent l’électricité, ce qui risque de provoquer un incendie et une électrocution. Si une quantité excessive de poussières et de matières étrangères s’accumule sur le câble d’alimentation, débranchez le câble d’alimentation et enlevez-les.
- Page 43 REMARQUE p Ne colmatez pas les ouïes de ventilation. Cela pourrait provoquer une surchauffe de l’imprimante qui pourrait entraîner un incendie ou une électrocution. • Ne colmatez pas la partie supérieure de l’ouïe latérale de ventilation. • Ne placez pas l’imprimante aux endroits ci-dessous. –...
- Page 44 REMARQUE p Avant de nettoyer l’imprimante, débranchez le câble d’alimentation de la prise de courant. Le fait de toucher accidentellement une pièce non accessible à l’utilisateur risque de provoquer une électrocution. p Si vous prévoyez de ne pas utiliser l’imprimante pendant longtemps, par exemple si vous partez pour un long voyage, débranchez-la.
-
Page 45: Les Premières Opérations
Les premières opérations Déballage de l’imprimante Vérifiez que les accessoires indiqués ci-dessous ont bien été fournis avec votre imprimante. • Chargeur automatique (1) • Câble d’alimentation (1) • CD-ROM (pour Windows 95, 3.1 et Macintosh) (1) • Mode d’emploi (1) •... -
Page 46: Qu'est-Il Possible De Faire Avec L'imprimante Couleur Numérique P-300E
P-300E L’imprimante numérique couleur P-300E vous permet d’imprimer directement une image que vous avez prise sur une caméra numérique OLYMPUS. En raccordant la P-300E à votre PC ou à votre Macintosh, vous pourrez imprimer des images à partir de votre ordinateur. -
Page 47: Identification Des Pièces
Identification des pièces Pour l’utilisation des pièces, référez-vous aux pages indiquées entre parenthèses. 1 Sortie du papier (p. 32) 2 Port série (p. 19, 22, 27) 3 Port parallèle (p. 25, 26) 4 Interrupteur d’alimentation (p. 18) 5 Prise d’alimentation AC (p. 18) 6 Touche d’impression directe (p. -
Page 48: Chargeur Automatique
Chargeur automatique 1 Borne de raccordement 2 Fenêtre d’affichage du nombre de copies Cadran (nombre de copies) (p. 21, 24) 4 Couvercle (p. 16) 5 Ecarteur (p. 16) 6 Interrupteur à coulisse (p. 16) Les premières opérations... -
Page 49: Chargement De La Cartouche De Ruban Encré
Chargement de la cartouche de ruban encré Insertion de la cartouche d’impression dans l’imprimante. Utilisez uniquement la cartouche d’imprimante fournie avec le papier d’impression, emballés dans le même carton. Pour ouvrir le couvercle du compartiment de cartouche, abaissez le levier. Enroulez le ruban encré... - Page 50 Attention Si le couvercle du compartiment de cartouche ne se Ne placez pas votre main referme pas dans le compartiment de Enlevez la cartouche de ruban encré et réinsérez-la. cartouche. La tête thermique peut atteindre une température élevée, Enlèvement d’une cartouche d’impression épuisée en particulier après plusieurs copies.
-
Page 51: Insertion Du Papier D'impression
Orientez vers le Il est possible d’insérer le papier directement dans bas la face portant la l’imprimante. mention “OLYMPUS” pour les feuilles autocollantes ou la face portant le repère Insertion du papier d’impression dans estampillé pour les le chargeur automatique papiers standard. - Page 52 Orientez vers le bas la face types de papier dans le portant la mention chargeur automatique. “OLYMPUS” pour les • N’utilisez pas des feuilles autocollantes ou la feuilles de papier à face portant le repère étiquettes dont la estampillé...
-
Page 53: Insertion Du Papier D'impression (Suite)
Insertion du papier d’impression (suite) Installation du chargeur automatique sur l’imprimante Raccordez le câble d’alimentation à l’imprimante et ensuite à la prise murale (secteur). Câble d’alimentation (fourni) Interrupteur d’alimentation vers une prise murale (secteur) Poussez le compartiment du chargeur automatique. Le couvercle du compartiment du chargeur automatique s’ouvre. -
Page 54: Impression D'une Image Prise Sur Une Caméra Numérique Olympus
Impression Impression d’une image prise sur une caméra numérique OLYMPUS L’image prise sur une caméra numérique OLYMPUS peut être imprimée directement. L’opération d’impression varie en fonction du modèle - voir plus loin. Caméras numériques CAMEDIA C-820L/C-420L Remarque Vérifiez que l’imprimante et la caméra numérique Avant d’imprimer,... - Page 55 Impression d’une image prise sur une caméra numérique OLYMPUS (suite) Enfoncez la touche LCD ON/OFF de la caméra numérique pour passer en mode lecture (“playback”). Panneau de commande Touche LCD ON/OFF Touches d’avance/recul Choisissez la photo à imprimer à l’aide des touches d’avance/recul de la caméra numérique.
- Page 56 Pour interrompre une Si vous voulez n’imprimer qu’un seul exemplaire, impression en continu vous pouvez insérer directement le papier Réglez le bouton du d’impression dans l’imprimante (voir page 28). chargeur automatique sur 1. L’imprimante s’arrêtera après l’impression en Pour lancer l’impression, enfoncez la touche cours.
-
Page 57: Caméras Numériques Camedia C-800L/C-410L/C-400L
Impression d’une image prise sur une caméra numérique OLYMPUS (suite) Caméras numériques CAMEDIA C-800L/C-410L/C-400L Remarque Assurez-vous que l’imprimante et la caméra Avant d’imprimer, numérique sont éteintes. refermez l’obturateur de Raccordez le port série de l’imprimante sur le port l’objectif de la caméra de communication de la caméra numérique par le... - Page 58 Enfoncez la touche LCD ON/OFF de la caméra numérique pour vous placer en mode lecture (“playback”). Panneau de commande Touche LCD ON/OFF Touches d’avance/recul Choisissez la photo à imprimer à l’aide des touches d’avance/recul de la caméra numérique. suite Impression...
- Page 59 Impression d’une image prise sur une caméra numérique OLYMPUS (suite) Notes Tournez le bouton du chargeur automatique pour régler le nombre de copies à imprimer. • N’appuyez sur la touche d’impression directe que Les réglages possibles sont de 1, 2, 3, 5, 10, 15, ou 30 lorsque l’image que...
-
Page 60: Caméras Numériques Camedia C-1400L/C-1000L
Caméras numériques CAMEDIA C-1400L/C-1000L Assurez-vous que l’imprimante et la caméra numérique sont éteintes. Raccordez le port parallèle de l’imprimante au port imprimante de la caméra numérique par le câble d’impression directe fourni. Câble d’impression directe de type parallèle (fourni) Suggestion •... -
Page 61: Impression D'une Image Depuis L'ordinateur
Impression d’une image depuis l’ordinateur Pour imprimer une image depuis l’ordinateur, installez tout d’abord sur votre ordinateur le pilote fourni avec l’imprimante. 1 Raccordement à l’ordinateur Raccordez l’imprimante à l’ordinateur. Mettez l’ordinateur et l’imprimante hors tension avant de procéder au raccordement. Remarques à... -
Page 62: Allumez L'imprimante Et L'ordinateur
3 Installation du pilote d’imprimante l’ordinateur via d’autres appareils (comme un Pour la procédure d’installation, consultez le guide scanner à films d’installation fourni. OLYMPUS ES-10), mettez tous les appareils raccordés sous tension. 4 Introduisez les données par Suggestion l’ordinateur L’image de l’ordinateur Pour l’opération d’impression, consultez le guide... -
Page 63: Impression Avec Insertion Directe D'une Feuille De Papier
Impression avec insertion directe d’une feuille de papier Envoyez la commande d’impression depuis l’ordinateur ou depuis la caméra numérique. Le témoin ( ) est allumé et ensuite le témoin commence à clignoter. Guide gauche Moins de 2 cm Remarques Insérez une feuille de papier d’impression dans •... -
Page 64: Pour Votre Information
Pour votre information Dépistage des pannes Utilisez les dispositions décrites ci-dessous pour résoudre les problèmes que vous rencontrez avec votre imprimante. Si le problème persiste, contactez votre vendeur qui vous dira quoi faire ensuite. • L’alimentation n’est pas branchée. m Raccordez fermement le câble d’alimentation AC à une prise de courant AC. -
Page 65: Si Les Témoins Sont Allumés
Dépistage des pannes (suite) Si les témoins sont allumés Si l’impression n’est pas possible, vérifiez les témoins sur le panneau avant. • Le témoin est allumé. m La cartouche de ruban encré n’a pas été chargée. m Le ruban encré est épuisé. Remplacez la cartouche de ruban encré. - Page 66 • L’indicateur ne s’allume pas ou tous les indicateurs clignotent. m Bourrage de papier d’impression. Eliminez le bourrage de papier en retirant le papier des sorties situées sur les panneaux avant et arrière. m Retirez le chargeur automatique de l’imprimante et vérifiez s’il y a un bourrage de papier.
-
Page 67: Dépistage Des Pannes (Suite)
Dépistage des pannes (suite) En cas de bourrage du papier Remarques En cas de bourrage du papier, tous les témoins • Si le témoin clignotent et l’impression s’arrête. Débranchez s’allume pas lorsque le bourrage de papier a l’alimentation et éliminez le bourrage. été... -
Page 68: Spécifications
Spécifications Imprimante Système d’impression IImpression par sublimation du transfert d’encre (3 passages jaune/magenta/cyan) 1376 (H) × 1024 (V) points Pixels réels 114 (H) × 85 (V) mm (4 × 3 Dimension d’impression pouces) Gradations 256 niveaux (8 bits), par couleur (24 bits) Approx. -
Page 69: Précautions Concernant La Cartouche De Ruban Encré Et Le Papier D'impression
Précautions concernant la cartouche de ruban encré et le papier d’impression Remarques concernant la conservation des cartouches de ruban encré • Evitez de conserver la cartouche dans un local exposé à: – Des températures élevées – Une humidité élevée – Une poussière excessive –... - Page 70 En outre, “™” et “®” ne sont pas mentionnés partout dans ce manuel. © OLYMPUS OPTICAL CO., LTD. 1997. Tous droits réservés • Aucune partie de ce manuel ne peut être copiée ou reproduite d’aucune manière sans la permission écrite préalable de OLYMPUS.
- Page 71 Einführung Sicherheitsmaßnahmen Danke, daß Sie sich für diesen digitalen Bevor Sie das Gerät benutzen, lesen Sie Farbdrucker von OLYMPUS bitte die Sicherheitshinweise auf Seite 4 entschieden haben. bis 9. Beachten Sie diese Hinweise. So können Sie sicher sein, daß Ihr Drucker jederzeit bestmöglich funktioniert.
- Page 72 Zuführung ................16 Installieren der automatischen Zuführung am Drucker ................. 18 Drucken Drucken von Bildern, die mit einer digitalen Kamera von OLYMPUS aufgezeichnet wurden ......... 19 Digitale Kamera CAMEDIA C-820L/C-420L ..........19 Digitale Kamera CAMEDIA C-800L/C-410L/C-400L ......22 Digitale Kamera CAMEDIA C-1400L/C-1000L .........
-
Page 73: Sicherheitsmaßnahmen
Sicherheitsmaßnahmen Bitte versuchen Sie nicht, den Drucker zu zerlegen, selbst zu reparieren oder in irgendeiner Weise zu modifizieren. Andernfalls besteht Feuergefahr bzw. die Gefahr eines elektrischen Schlags. Schwere Verletzungen und Todesfälle können die Folge sein. Bevor Sie das Gerät benutzen, lesen Sie bitte die Sicherheitshinweise sorgfältig durch, und beachten Sie sie, wenn Sie mit dem Gerät arbeiten. - Page 74 ACHTUNG p Im Fall unerwarteter Fehlfunktionen lösen Sie bitte das Netzkabel des Druckers. Wenn vom Drucker Rauch, ungewöhnliche Gerüche oder Geräusche ausgehen, schalten Sie ihn aus, und lösen Sie das Netzkabel. Andernfalls besteht das Risiko eines Feuers oder eines elektrischen Schlags.
- Page 75 ACHTUNG p Zerlegen Sie den Drucker nicht, und nehmen Sie keine Veränderungen daran vor. Im Inneren des Druckers liegen hohe Spannungen an, und einige Teile können sehr heiß werden. Bitte versuchen Sie nicht, den Drucker zu zerlegen oder in irgendeiner Weise zu modifizieren. Andernfalls besteht das Risiko eines elektrischen Schlags oder einer Fehlfunktion.
- Page 76 ACHTUNG p Schließen Sie das Netzkabel korrekt an. Wenn Sie den Netzstecker zum Beispiel nur lose in die Steckdose stecken, besteht das Risiko eines Feuers oder eines elektrischen Schlags. Achten Sie daher darauf, den Netzstecker ganz in die Steckdose zu stecken.
- Page 77 HINWEIS p Blockieren Sie die Lüftungsöffnungen nicht. Andernfalls könnte sich im Inneren des Druckers ein Wärmestau bilden, und es bestünde das Risiko eines Feuers oder eines elektrischen Schlags. • Blockieren Sie die Lüftungsöffnungen oben und seitlich nicht. • Stellen Sie den Drucker nicht an folgenden Standorten auf: –...
- Page 78 HINWEIS p Trennen Sie das Netzkabel von der Netzsteckdose, bevor Sie den Drucker reinigen. Andernfalls kann es zu einem elektrischen Schlag kommen, wenn Sie ein Teil im Druckerinneren berühren. p Trennen Sie den Drucker vom Netzstrom, wenn Sie ihn für längere Zeit - zum Beispiel während einer Reise - nicht verwenden wollen.
-
Page 79: Vorbereitungen
Vorbereitungen Auspacken des Druckers Überprüfen Sie, ob das folgende Zubehör mit Ihrem Drucker geliefert wurde. • Automatische Zuführung (1) • Netzkabel (1) • CD-ROM (für Windows 95, 3.1 und Macintosh) (1) • Bedienungsanleitung (1) • Installationshandbuch (1) • Probe-Drucksatz (Farbband, 10 Blatt feinstes Papier) •... -
Page 80: Funktionen Des Digitaler Farbdruckers P-300E
Funktionen des Digitaler Farbdruckers P-300E Mit dem Digitalfarbdrucker P-300E können Sie Bilder, die Sie mit einer digitalen Kamera von OLYMPUS aufgenommen haben, direkt ausdrucken. Wenn Sie den P-300E an einen PC oder Macintosh anschließen, können Sie Bilder vom Computer ausdrucken. -
Page 81: Lage Und Funktion Der Teile Und Bedienelemente
Lage und Funktion der Teile und Bedienelemente Nähere Erläuterungen zu den Teilen und Bedienelementen finden Sie auf den in Klammern angegebenen Seiten. 1 Papierausgabe (S. 32) 2 Serieller Anschluß (S. 19, 22, 27) 3 Paralleler Anschluß (S. 25, 26) 4 Netzschalter (S. 18) 5 Netzanschluß... - Page 82 Automatische Zuführung 1 Verbindungsanschluß 2 Fenster zur Anzeige der Kopienzahl 3 Einstellscheibe für Anzahl der Kopien (S. 21, 24) 4 Abdeckung (S. 16) 5 Papierführung (S. 16) 6 Schiebeschalter (S. 16) Vorbereitungen...
-
Page 83: Einlegen Der Farbbandkassette
Einlegen der Farbbandkassette Zunächst muß die Farbbandkassette in den Drucker eingelegt werden. Verwenden Sie bitte immer die Farbbandkassette zusammen mit dem im gleichen Karton gelieferten Druckpapier. Halten Sie den Hebel gedrückt, und öffnen Sie den Deckel des Kassettenfachs. Spulen Sie das Farbband, so daß es gespannt ist. Drücken Sie auf die Mitte der Spule, halten Sie sie gedrückt, und... - Page 84 Vorsicht Wenn sich der Deckel des Kassettenfachs nicht Greifen Sie nie ins schließen läßt Kassettenfach. Der Nehmen Sie die Farbbandkassette heraus, und legen Thermokopf wird sehr Sie sie nochmals ein. heiß, besonders nach wiederholtem Drucken. So entnehmen Sie eine verbrauchte Farbbandkassette Öffnen Sie den Deckel des Kassettenfachs, und drücken Sie den Hebel nach oben.
-
Page 85: Einlegen Des Druckpapiers
Zunächst wird das Druckpapier in die mitgelieferte oben ein. Die Seite, die bei Aufklebern mit dem automatische Zuführung eingelegt, dann setzt man die Aufdruck “OLYMPUS” automatische Zuführung in den Drucker ein. und bei Normalpapier mit der Prägung Das Druckpapier kann auch direkt zugeführt werden. - Page 86 Zuführung Die Seite, die bei einlegen, achten Sie darauf, daß nie mehr Aufklebern mit dem als die genannte Aufdruck “OLYMPUS” Höchstzahl an und bei Normalpapier mit Druckblättern in der der Prägung versehen ist, Zuführung liegen. muß nach unten weisen.
-
Page 87: Installieren Der Automatischen Zuführung Am Drucker
Einlegen des Druckpapiers (Fortsetzung) Installieren der automatischen Zuführung am Drucker Schließen Sie das mitgelieferte Netzkabel an den Drucker und dann an eine Netzsteckdose an. Netzkabel (mitgeliefert) Netzschalter an eine Netzsteckdose Drücken Sie auf das Fach für die automatische Zuführung. Der Deckel des Fachs für die automatische Zuführung öffnet sich. -
Page 88: Drucken
über der Kamera gelieferten seriellen Kabel mit schließen. dem Datenein-/-ausgang der digitalen Kamera. Zum Anschließen dieser Kameras steht außerdem das Direktdruckkabel CB-P82 zur Verfügung. Einzelheiten dazu erfahren Sie in Ihrer OLYMPUS- Niederlassung. Mit der Kamera gelieferte serielle Kabel an Datenein-/-ausgang an seriellen Anschluß... - Page 89 Drucken von Bildern, die mit einer digitalen Kamera von OLYMPUS aufgezeichnet wurden (Fortsetzung) Drücken Sie die Taste LCD ON/OFF an der digitalen Kamera, um sie in den Wiedergabemodus zu schalten. Bedienfeld Taste LCD ON/OFF Tasten zum Vorwärts- und Zurückspulen Wählen Sie mit den Tasten zum Vorwärts- und Zurückspulen an der digitalen Kamera das Foto...
- Page 90 Beenden eines Wenn Sie die Kopienzahl ändern wollen, stellen Sie kontinuierlichen Drucks die Einstellscheibe auf 30. Nehmen Sie die Stellen Sie die automatische Zuführung vom Drucker ab, und Einstellscheibe an der legen Sie die benötigte Anzahl an Blättern (maximal automatischen Zuführung 30) ein.
-
Page 91: Digitale Kamera Camedia C-800L/C-410L/C-400L
Drucken von Bildern, die mit einer digitalen Kamera von OLYMPUS aufgezeichnet wurden (Fortsetzung) Digitale Kamera CAMEDIA C-800L/ C-410L/C-400L Hinweis Achten Sie darauf, daß Drucker und digitale Achten Sie darauf, vor Kamera ausgeschaltet sind. dem Drucken den Objektivverschluß der Verbinden Sie den seriellen Anschluß des Druckers digitalen Kamera zu über das Macintosh-Verbindungskabel... - Page 92 Drücken Sie die Taste LCD ON/OFF an der digitalen Kamera, um sie in den Wiedergabemodus zu schalten. Bedienfeld Taste LCD ON/OFF Tasten zum Vorwärts- und Zurückspulen Wählen Sie mit den Tasten zum Vorwärts- und Zurückspulen an der digitalen Kamera das Foto aus, das Sie ausdrucken wollen.
- Page 93 Drucken von Bildern, die mit einer digitalen Kamera von OLYMPUS aufgezeichnet wurden (Fortsetzung) Hinweise Stellen Sie mit der Einstellscheibe an der automatischen Zuführung die Anzahl der Kopien • Drücken Sie die Direktdrucktaste erst, ein, die gedruckt werden sollen. nachdem das Sie können 1, 2, 3, 5, 10, 15, oder 30 Kopien...
-
Page 94: Digitale Kamera Camedia C-1400L/C-1000L
Digitale Kamera CAMEDIA C-1400L/ C-1000L Achten Sie darauf, daß Drucker und digitale Kamera ausgeschaltet sind. Verbinden Sie den parallelen Anschluß des Druckers über das mitgelieferte Direktdruckkabel mit dem Druckeranschluß der digitalen Kamera. • Druck auf einem Blatt, Paralleles Indexdruck, Direktdruckkabel Mehrfachdruck, Alle (mitgeliefert) drucken, gespiegelter... -
Page 95: Drucken Eines Bildes Vom Computer
Drucken eines Bildes vom Computer Wenn Sie ein Bild vom Computer aus drucken wollen, installieren Sie bitte zuerst den mitgelieferten Druckertreiber auf dem Computer. 1 Schließen Sie den Drucker an den Hinweise zum Computer an. Anschließen • Verwenden Sie ein Schließen Sie den Drucker an den Computer an. - Page 96 2 Schalten Sie Drucker und Computer Hinweis zum Einschalten ein. Wenn Sie den Drucker über andere Geräte (z. B. Film-Scanner OLYMPUS ES-10) an den Computer 3 Installieren Sie den Druckertreiber. anschließen, müssen Sie alle angeschlossenen Anweisungen zum Vorgehen bei der Installation Geräte einschalten.
-
Page 97: Drucken Mit Manueller Papierzuführung
Drucken mit manueller Papierzuführung Senden Sie den Druckbefehl vom Computer oder der digitalen Kamera. Die Anzeige ( ) leuchtet, dann die Anzeige zu blinken. Linke Papierführung weniger als 2 cm Hinweise Führen Sie ein Blatt Druckpapier in den • Richten Sie das Papiereinzug ein, bis nur noch weniger als 2 cm des Druckpapier an der Druckpapiers aus dem Papiereinzug... -
Page 98: Weitere Informationen
Weitere Informationen Störungsbehebung Falls an Ihrem Drucker Probleme auftreten, versuchen Sie bitte, diese anhand der folgenden Abhilfemaßnahmen zu beheben. Läßt sich ein Problem auf diese Weise nicht beheben, wenden Sie sich bitte an Ihren Händler. • Das Gerät läßt sich nicht einschalten. m Schließen Sie das Netzkabel korrekt an eine Netzsteckdose an. -
Page 99: Wenn Anzeigen Leuchten
Störungsbehebung (Fortsetzung) • Direktdruck ist nicht möglich. m Bei der CAMEDIA C-820L/C-420L, C-800L/C- 410L/C-400L tritt ein Fehler auf, wenn Sie die Direktdrucktaste drücken, bevor Sie das LCD- Display der Kamera einschalten. Schalten Sie Drucker und Kamera aus. Überprüfen Sie die Verbindung, und versuchen Sie nach einigen Sekunden erneut zu drucken Wenn Anzeigen leuchten... - Page 100 • Die Anzeige blinkt. m Während des Druckens geht der nächste Druckbefehl ein. Bitte warten Sie, bis der Druckvorgang beginnt. m Es dauert eine Weile, bis der Druck beginnt bzw. der kontinuierliche Druck ausgeführt wird. Bitte warten Sie, bis der Druckvorgang beginnt. •...
-
Page 101: Wenn Sich Das Papier Staut
Störungsbehebung (Fortsetzung) Wenn sich das Papier staut Hinweise Wenn sich das Druckpapier staut, blinken alle • Wenn sich die Anzeige Anzeigen, und der Druckvorgang stoppt. Schalten Sie nicht einschaltet, das Gerät aus, und entfernen Sie das gestaute Papier. nachdem Sie das gestaute Papier entfernt Entfernen Sie das gestaute Papier aus der haben, schalten Sie den... -
Page 102: Technische Daten
Technische Daten Drucker Drucksystem Sublimations-Farbtransfer (3 Durchgänge Gelb/Magenta/Zyan) 1376 (h) × 1024 (v) Effektive Bildpunkte 114 (h) × 85 (v) mm Druckbereichsgröße Gradation 256 Stufen (8 Bit), je Farbe (24 Bit) ca. 16.770.000 Farben Druckdauer (ohne Zeit für Datenübertragung) ca. 100 Sekunden pro Blatt Eingänge/Ausgänge Parallele Centronics-Schnittstelle Serielle Schnittstelle (Mini-DIN, 8polig) - Page 103 Hinweise zu Farbbandkassette und Druckpapier Hinweise zum Lagern der Farbbandkassette • Lagern Sie die Kassette nicht an Orten, an denen sie folgenden Bedingungen ausgesetzt ist: – hohen Temperaturen – hoher Luftfeuchtigkeit – übermäßig viel Staub – direktem Sonnenlicht • Wollen Sie eine teilweise verbrauchte Farbbandkassette längere Zeit lagern, verpacken Sie sie in der Originalpackung.
- Page 104 Im Handbuch sind die Warenzeichen und eingetragenen Warenzeichen nicht ausdrücklich durch “™” bzw. “®” gekennzeichnet. © OLYMPUS OPTICAL CO., LTD. 1997. Alle Rechte vorbehalten. • Ohne die vorherige schriftliche Genehmigung von OLYMPUS darf dieses Handbuch weder ganz noch auszugsweise in irgendeiner Weise kopiert oder reproduziert werden.