Viking Range 5 Serie Manuel D'installation, D'utilisation Et D'entretien
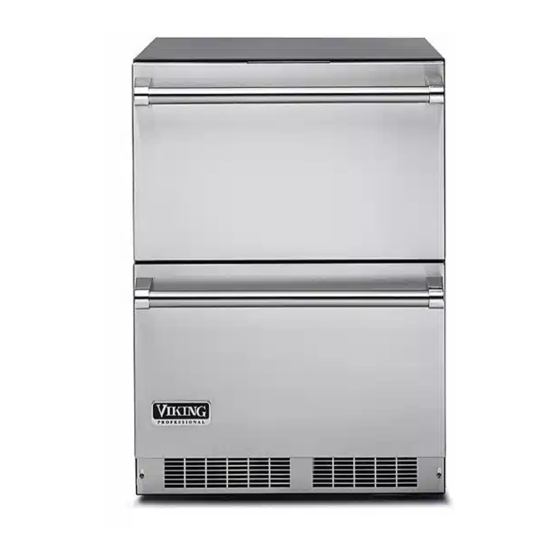
Tiroirs réfrigérés
Masquer les pouces
Voir aussi pour 5 Serie:
- Utilisation et entretien (132 pages) ,
- Mode d'emploi (72 pages) ,
- Manuel d'installation, d'utilisation et d'entretien (57 pages)

Manuels Connexes pour Viking Range 5 Serie

Sommaire des Matières pour Viking Range 5 Serie
- Page 1 Install / Use & Care MANUAL FR-D’installation/d’utilisation et d’entretien ES-De instalación/operación y mantenimiento 5 SERIES Refrigerated Drawers Tiroirs Réfrigérés Gavetas Refrogeradas VDUI5240...
- Page 19 Install / Use & Care MANUAL FR-D’installation/d’utilisation et d’entretien ES-De instalación/operación y mantenimiento 5 SERIES Refrigerated Drawers Tiroirs Réfrigérés Gavetas Refrogeradas CVDUI5240...
-
Page 20: Importantes Instructions De Sécurité
CONTENU Contenu : Importantes instructions de sécurité Informations de sécurité............2 Les avertissements et les instructions de sécurité qui ap- Déballage de votre appareil ..........3 paraissent dans ce guide n’ont pas la prétention de couvrir Enregistrement de la garantie ........3 toutes les conditions et situations possibles pouvant arriver. Installation de votre appareil ..........4 Il faut faire preuve de bon sens, de précautions et de soins, Dégagements par rapport à... -
Page 21: Déballage De Votre Appareil
été complètement inspecté et trouvé en bon état. S’il présentait des dommages, cet emballage serait nécessaire comme preuve qu’ils sont survenus durant le transit. Ensuite VIKING RANGE, LLC veuillez mettre tous ces matériaux d’emballage au rebut d’une GREENWOOD, MS 38930 façon responsable. -
Page 22: Installation De Votre Appareil
C’est pourquoi il est important que cette zone rayer. Avec l’aide d’une autre personne, inclinez vers l’arrière de ne soit pas obstruée et soit maintenue propre. Viking Range,LLC l’appareil pour accéder aux pieds de mise à niveau de l’avant. -
Page 23: Raccordement Électrique
INSTALLATION DE VOTRE APPAREIL AVERTISSEMENT Risque de commotion électrique N’enlevez pas la • N’utilisez pas de rallonge secteur avec cet appareil. Cela borne de terre de peut être dangereux et peut affecter la performance du la fi che du cordon produit. -
Page 24: Installation Du Dispositif Anti-Basculement
INSTALLATION DU DISPOSITIF ANTI-BASCULEMENT POUR DES INSTALLATIONS AUTONOMES Dispositif anti-basculement AVERTISSEMENT Pied de mise à niveau • TOUS LES APPAREILS PEU- VENT BASCULER. IL PEUT EN RÉSULTER DES BLESSURES ⁄ • INSTALLER LE DISPOSITIF ANTI- (54,6 cm) BASCULEMENT LIVRÉ AVEC Vue de dessous du L'APPAREIL réfrigérateur... - Page 25 INSTALLATION DU DISPOSITIF ANTI-BASCULEMENT POUR DES INSTALLATIONS AUTONOMES REMARQUE Quand la ferrure anti-basculement fi xée au sol est utilisée, la hau- teur minimale ajustée de l’armoire est augmentée de ⁄ (9 mm). Pied de mise à Encoches niveau arrière en V dans la Figure 8a ferrure ⁄...
-
Page 26: Dimensions Du Produit
DIMENSIONS DU PRODUIT DIMENSIONS D’OUVERTURE BRUTE DIMENSIONS D’ARMOIRE MODÈLE «A» «B» «C» «D» «E» «F» «G» «H» 24 po **34 po à 35 po ⁄ ⁄ po à 34 ⁄ ⁄ ⁄ ⁄ VDUI5240 (61 cm) (86,4 cm à 88,9 cm) (60,7 cm) (85,7 cm à... - Page 27 DIMENSIONS DU PRODUIT DONNÉES DE PRODUIT BESOINS POIDS DU MODÈLE ÉLECTRIQUES # PRODUIT 130 lb VDUI5240 115V/60Hz/15A (59 kg) # Un circuit secteur dédié avec liaison de terre supportant 15 A est nécessaire. Appliquez toutes les normes de construction locales à l’installation de l’électricité...
-
Page 28: Démarrage De Votre Appareil
UTILISATION DE VOTRE COMMANDE ÉLECTRONIQUE Diminution Augmentation Marche/ Indicateur de Verrouillage Zone d’affi chage Arrêt statut du système température température des touches Figure 12 Commandes électroniques Pour activer l’affi chage, appuyez sur n’importe quelle touche. Un signal sonore de confi rmation retentira, et la température actuelle du compartiment de conservation sera affi... -
Page 29: Réglage De La Température
UTILISATION DE VOTRE COMMANDE ÉLECTRONIQUE Mode d’affi chage de température : Réglage de la température : Le mode de température est préréglé en usine pour degrés Fahr- Pour déterminer ou contrôler le point de consigne de température enheit (°F), mais vous avez l’option de commuter l’affi chage en (avec la commande électronique sortie de son mode veille), ap- degrés Celsius (°C). -
Page 30: Alertes
UTILISATION DE VOTRE COMMANDE ÉLECTRONIQUE Alertes : La commande va vous alerter en cas de conditions pouvant nuire Power Failure ALARM RESET à la performance de l’appareil. Door Ajar • Alerte de température - Si la température du com- ALARM RESET partiment de conservation dévie excessivement du point de consigne pour une période de temps prolongée, l'indicateur •... -
Page 31: Mode Vacances
UTILISATION DE VOTRE COMMANDE L’ENTRETIEN ET LE NETTOYAGE ÉLECTRONIQUE Grille frontale Mode de vacances : Assurez-vous que rien n’obstrue les ouvertures pour fl ux d’air Ce mode de fonctionnement peut être utilisé pour économiser requises à l’avant de l’armoire. Au moins une à deux fois par an, de l’énergie durant les périodes où... -
Page 32: Conseils Pour L'économie D'énergie
(Sans partage avec d’autres appareils). proche ou si vos problèmes persistent, contactez Viking Range, Quand vous chargez initialement votre produit neuf, ou au LLC au (888) 845-4641 ou écrivez à : cas où... -
Page 33: Avant D'appeler Pour Du Service
DÉPANNAGE Avant d’appeler pour du service Si l’appareil semble présenter un dysfonctionnement, commencez ATTENTION par bien relire son manuel. Si le problème persiste, consultez le guide de dépannage qui suit. Identifi ez le problème dans ce Dans le cas improbable où vous perdriez de la capacité de re- guide et consultez les colonnes de causes et de remèdes avant froidissement sur votre appareil, ne le débranchez pas de son d’appeler pour du service. -
Page 34: Garantie De Produit À Usage Domestique
Tout composant de système scellé, comme indiqué ci-dessous, est garanti être exempt de matériaux défectueux ou de fabrication pour un usage résidentiel normal au cours de la troisième à la sixième année à compter de la date d’achat initiale du produit. Le garant, Viking Range, LLC, réparera ou remplacera, à sa discrétion, toute pièce en panne ou défectueuse pendant la période de garantie. - Page 35 Viking Range, LLC 111 Front Street Greenwood, Mississippi 38930 USA (662) 455-1200 Pour tout renseignement concernant les produits, appelez le 1-888-(845-4641) ou consultez le site web à l’adresse vikingrange.com 058187-000B FR (030118)
- Page 36 Install / Use & Care MANUAL FR-D’installation/d’utilisation et d’entretien ES-De instalación/operación y mantenimiento 5 SERIES Refrigerated Drawers Tiroirs Réfrigérés Gavetas Refrogeradas VDUI5240...