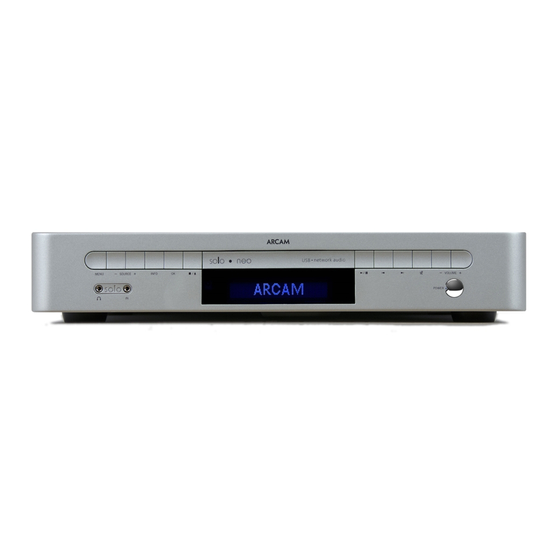
Arcam Solo Manuel
Masquer les pouces Voir aussi pour Solo:
Table des Matières

Publicité

Les langues disponibles

Les langues disponibles

Liens rapides

Handbook
Manuel
Handbuch
Handleiding

Publicité

Table des Matières
loading

Sommaire des Matières pour Arcam Solo

  • Page 1 Handbook Manuel Handbuch Handleiding...
  • Page 2: Safety Guidelines

    Take care that objects do not fall and liquids Solo. Solo must be installed in manner that makes C. the appliance has been exposed to rain, or are not spilled into the enclosure through any disconnection possible.
  • Page 3: Table Des Matières

    E6 using the radio ............E7 This handbook is intended to give you a detailed guide of the use of the Solo music system. Overleaf, you will find a ‘quick start’ guide that should be sufficient for most installation guidelines ..........
  • Page 4: Making Connections

    Radio aerial connections In Europe and Canada, Solo is usually fi tted with a combined FM/DAB (digital radio) receiver module; in the USA and the Far East, an AM/FM receiver module is usually supplied. In order to use either of these modules, you must connect an aerial to the unit –...
  • Page 5: Making Music

    MENU to select an option. See the panel ‘Navigating the menu system’ (above) for When Solo is in stand-by the light next to the power button on the front-panel further details, or turn to page 11. glows red, and the front-panel display shows the current time. Pressing...
  • Page 6: Remote Control

    If the light next to the power button is not illuminated, check that Solo is connected to the mains Please keep in mind the following when using supply and that the switch on the rear panel is on (the dot is depressed).
  • Page 7: Using The Radio

    If you wish, you can store your favourite radio station in one of the preset radio stations supported by Solo. This allows quick access to the station above). in the future, without the bother of having to re-tune. Solo provides for 30 To cycle through your preset stations, use the buttons on the remote...
  • Page 8: Installation Guidelines

    ‘explicitly’ when required. This is supply. to avoid unexpected output in the remote 2. Connect the outputs of Solo labelled ‘Zone 2’ to the audio inputs of the power location. amplifi er using the interconnect cables. 3. Connect the speakers to the speaker terminals of the power amp. The speakers should be connected in the same method as described in the panel on page 4, –...
  • Page 9: Audio Inputs

    3.5mm jack plug. Connect the audio output of the Solo is not fi tted with a phono pre-amplifi er. If you wish to connect a record device to one of the inputs of Solo, making sure that the plugs are pushed deck to Solo, then you will need an external pre-amplifi er.
  • Page 10 An AM loop aerial is supplied as an accessory to Solo. This should be attached to the AM base of the stand. Press until the tab clicks aerial inputs on the rear of Solo with one end connected to ‘AM’ and the other to ‘Ground’ (it home.
  • Page 11: Advanced Features

    You cannot damage any part of your system using this setting, so we suggest that you experiment with it, together with the bass and treble controls, until you find the combination you prefer. Sleep timer This timer allows you to specify a listening period, after which Solo will switch automatically into stand-by. Only if source is DAB The period can be set in 5-minute intervals, up to 120 minutes (2 hours).
  • Page 12: Setting The Clock

    MENU There are two options under this menu item – ‘Scan’ and ‘Erase settings’. Selecting ‘Scan’ causes Solo Use the left and right buttons on the remote control to select the item to change, then use the up and to search for new DAB stations.
  • Page 13: Technical Specification

    Instruction manual and registration card Radio interference AKM 96kHz 24-bit Delta-Sigma DAC Solo is an audio device containing microprocessors and other digital electronics. It has been designed to RF tuning range 174–240MHz (Band III) very high standards of electromagnetic compatibility.
  • Page 14: Product Guarantee

    Pembroke Avenue, Waterbeach, CAMBRIDGE, CB5 9QR, England. or www.arcam.co.uk. Problems? If your Arcam dealer is unable to answer any query regarding this or any other Arcam product please contact Arcam Customer Support at the above address and we will do our best to help you.
  • Page 15 Handbook Manuel Handbuch Handleiding...
  • Page 16: Instructions De Sécurité Importantes

    Tous les haut-parleurs doivent être connectés secteur risquerait de nuire à la ventilation du système. au Solo avec du câble de classe 2 (aucune mise Veillez à ce que les câbles d’alimentation ne se Pour permettre une ventilation appropriée, il est à...
  • Page 17: Bienvenue

    Ce manuel est un guide détaillé pour l’utilisation du système de diffusion musicale guide d’installation ..........F8 Solo. Vous trouverez à la page suivante un guide de démarrage rapide qui suffit à la fonctions avancées ..........F11 plupart des utilisateurs ; plus loin dans le manuel, vous trouverez des informations spécifications techniques ........
  • Page 18: Connexions

    Introduction Cette page offre une présentation rapide de l’installation du Solo. Pour plus d’informations sur chacun des éléments ci-dessous, reportez-vous à la section “Guide d’Installation” de ce manuel, page 8. connexions Antenne radio En Europe et au Canada, le Solo est généralement équipé d’un module de réception FM/RAN (radiodiffusion audionumérique) et d’un module de réception AM/FM aux États-Unis et en Extrême-...
  • Page 19: Faire De La Musique

    à certains endroits. Reportez-vous à la section Quand le Solo est en mode veille, le témoin lumineux situé à côté du bouton de mise sous tension du ‘Navigation dans les menus’ ci-dessus pour plus d’informations ou allez à la panneau avant s’illumine en rouge et le panneau avant affi che l’heure.
  • Page 20: Boutons De Télécommande

    Si le témoin lumineux situé à côté du bouton d’alimentation n’est pas illuminé, vérifi ez que le Solo est branché sur l’alimentation secteur et que l’interrupteur sur le panneau arrière est en position On commande Prenez en considération les points suivants lors...
  • Page 21: Utilisation De La Radio

    MENU Pour parcourir les stations présélectionnées, utilisez les boutons Solo (décrit en détail à la page 11), puis faites-le défiler jusqu’à l’affichage de la télécommande ( sur le panneau avant). Vous pouvez également de la commande de mémorisation des présélections («...
  • Page 22: Guide D'installation

    Zone 2 à l’arrière du Solo. 5. Rebranchez l’équipement sur l’alimentation électrique et mettez-le sous tension. Vous devriez pouvoir entendre la sortie audio du Solo à travers l’amplifi cateur de puissance et de contrôler le volume à l’aide de la télécommande.
  • Page 23: Entrées Audio

    être équipé d’un jack de 3,5 mm. Connectez Le Solo ne comporte pas de préamplifi cateur phono. Pour connecter la sortie audio de ce dispositif à l’une des entrées audio du Solo en une platine d’enregistrement au système, vous devez disposer d’un SERIAL NO.
  • Page 24: Antenne Radio

    Une antenne externe de boucle AM est fournie en tant qu’accessoire. Branchez-la sur les entrées antenne AM à l’arrière du Solo : reliez une extrémité à l’entrée AM et l’autre à l’entrée GND. La position de cette antenne est sans importance. Assurez-vous que l’antenne est placée loin du Solo, du téléviseur, des ordinateurs et autres sources de parasites de fréquence radio.
  • Page 25: Fonctions Avancées

    Ce paramètre n’a généralement pas besoin d’être utilisé (laissez-le au minimum). La correction des basses est utilisée quand le Solo est connecté à de (petits) haut-parleurs à plage de fréquence réduite qui ne peuvent reproduire les sons à très basse fréquence. Augmenter la valeur de ce paramètre permet d’atténuer progressivement les très basses fréquences (puisqu’elles ne peuvent pas...
  • Page 26: Configuration De L'horloge

    Cet élément de menu possède deux options : « Scan » [Recherche] et « Erase Settings » [Effacement des Arrêt ou pause d’une alarme paramètres]. Sélectionner « Scan » force le Solo à chercher de nouvelles stations RAN. S’il en trouve, elles Pour arrêter une alarme, appuyez sur le bouton du panneau avant ou de la télécommande.
  • Page 27: Spécifications Techniques

    Portée de syntonisation de fréquence radio 174–240MHz (Band III) Le Solo est un dispositif audio contenant des microprocesseurs et d’autres composants électroniques 1452–1490MHz (L-band) numériques. Il a été conçu pour répondre aux normes les plus strictes en matière de compatibilité...
  • Page 28: Garantie Du Produit

    Des problèmes ? Si votre revendeur ne peut répondre à votre demande pour ce produit Arcam ou tout autre produit Arcam, veuillez contacter le Service client d’Arcam, à l’adresse ci-dessus, où nous ferons de notre mieux pour vous aider.
  • Page 29 Handbook Manuel Handbuch Handleiding...
  • Page 30: Wichtige Sicherheitsanweisungen

    Netzstromversorgung sollte der Netzschalter auf Stellen Sie das Gerät nicht auf ein Bett, ein aufweist, oder der Rückseite des Geräts verwendet werden. Solo Sofa, einen Teppich oder eine andere weiche E. das Gerät zu Boden gefallen oder das muss so aufgestellt werden, dass eine Trennung Oberfläche, oder in ein abgeschlossenes...
  • Page 31: Willkommen

    Willkommen … Vielen Dank, dass Sie sich für ein Arcam Solo-Musiksystem entschieden haben. Inhalt Arcam stellt seit beinahe 30 Jahren hochwertige Audiokomponenten her. Während Sicherheits-richtlinien..........D2 dieser Zeit haben wir viel Wissen und Erfahrung über das Design und den Bau von Willkommen ............D3...
  • Page 32: Anschließen Von Geräten

    Einführung Auf dieser Seite erhalten Sie eine Kurzeinführung in die Installation von Solo. Ausführliche Informationen zu den im Folgenden aufgeführten einzelnen Geräteteilen fi nden Sie in diesem Handbuch im Abschnitt „Installation“ ab Seite 8. Anschließen Radioantenne von Geräten In Europa und Kanada wird Solo üblicherweise mit einem kombinierten Empfangsmodul für UKW und DAB (digitales Radio) ausgerüstet.
  • Page 33: Musik-Wiedergabe

    , um das Solo-Menü aufzurufen. Die Taste wird zur MENU Mit dieser Taste schalten Sie das Solo-System ein bzw. in den Stand-by-Modus. Auswahl von Menüpunkten verwendet. Weitere Informationen fi nden Sie Befi ndet sich das Gerät im Stand-by-Modus, leuchtet die LED neben dem Schalter rot und unter „Bedienen des Menüsystems“...
  • Page 34: Fern-Bedienung

    Stand-by-Modus, leuchtet die LED neben der Taste auf der Gerätevorderseite rot. Ist das Gerät Fern- eingeschaltet, leuchtet sie blau. Sollte die LED nicht leuchten, überprüfen Sie, ob Solo an der Hinweise zum Gebrauch der Fernbedienung: Stromversorgung angeschlossen ist und ob der Netzschalter auf der Rückseite eingeschaltet ist.
  • Page 35: Radio

    , um die Voreinstellung zu speichern. Beachten Sie, dass beim Speichern eines Radiosenders in einer erneut einstellen zu müssen. Bei Solo können Sie bis zu 30 voreingestellte Voreinstellung, die bereits für einen Sender vergeben ist, die alte durch die Radiosender verwenden, die zwischen DAB und FM oder AM und FM (je nach Produktkonfiguration) aufgeteilt werden.
  • Page 36: Installation

    4 0 c das Solo-System einschalten, und Sie die Stromversorgung getrennt sind. Stummschaltung entsprechend deaktivieren 2. Verbinden Sie die Ausgänge „Zone 2” von Solo mit den Audioeingängen der müssen. Dadurch wird vermieden, dass eine Endstufe. unerwünschte Ausgabe der Musik im zweiten 3.
  • Page 37 Aufnahmegerät (z. B. MiniDisc) verwendet werden. PRE OUT Sie mehr als die von Solo zur Verfügung gestellten 50 W pro Kanal Wird eine CD wiedergegeben, überträgt dieser Ausgang ein Signal mit wünschen, können Sie eine externe Endstufe oder einen Subwoofer einer Sample-Rate von 44,1 kHz, bei DAB-Radio beträgt die Sample-Rate...
  • Page 38 Anschlüssen „AM“ und „GND“ auf der Geräterückseite an. Es ist dabei egal, welche Leitung Sie wo anschließen. Stellen Sie die Antenne in einiger Entfernung vom Solo-System, Fernsehgeräten, Computern oder anderen Geräten auf, die „Funkrauschen“ erzeugen. Drehen Sie die Antenne, bis Sie den besten Empfang erhalten.
  • Page 39: Erweiterte Funktionen

    Sie verschiedene Tiefen- und Höheneinstellungen testen, bis Sie eine gut klingende „FM“ Kombination gefunden haben. Sleep Timer Mit diesem Zeitgeber können Sie einen Zeitraum festlegen, nach dem Solo automatisch in den Stand-by- Nur bei Quelle Modus schaltet. Sie können diesen Zeitraum in 5-Minuten-Schritten bis zu maximal 2 Stunden festlegen. „DAB“...
  • Page 40 Dieser Menüpunkt enthält zwei Optionen: „Scan“ und „Erase settings“. Wenn Sie „Scan“ wählen, Uhr-/Alarm-Menü aufzurufen. Jetzt können Sie mit den Tasten nach oben bzw. unten zwischen dem sucht Solo nach neuen DAB-Sendern. Werden Sender gefunden, werden sie automatisch in die Liste der Einstellen der Uhr- oder einer Alarmzeit wechseln.
  • Page 41: Technische Daten

    DAB-Empfänger (falls installiert) Bedienungsanleitung und Registrierungskarte Störungen (Funkinterferenzen) D/A-Wandler AKM 96 kHz 24-Bit Delta-Sigma DAC Solo ist ein Audiogerät, das Mikroprozessoren und andere digitale Elektronikbauteile enthält. Es Frequenz-Abstimmungsumfang 174–240MHz (Band III) entspricht höchsten Anforderungen hinsichtlich der elektromagnetischen Verträglichkeit. 1452–1490MHz (L-band) Sollte das Gerät Interferenzstörungen beim Radio- oder Fernsehempfang verursachen (was Sie durch Ein-...
  • Page 42: Produkt-Garantie

    Das Gerät sollte in der Originalverpackung an den Händler zurückgegeben werden, bei dem es erworben wurde. Ist dies nicht möglich, können Sie es auch direkt an den Arcam-Vertreter in Ihrem Land schicken. Der Versand sollte frei Haus durch einen angesehenen Kurier erfolgen – nicht mit der Post. Da keine Verantwortung für Schäden oder Verlust während des Transports zum Händler übernommen wird, sollten...
  • Page 43 Handbook Manuel Handbuch Handleiding...
  • Page 44: Belangrijke Veiligheidsvoorschriften

    C. Het apparaat werd aan regen blootgesteld. apparatuur gezet worden. De primaire methode om Solo van het lichtnet te D. Het apparaat lijkt niet normaal te 4. Ventilatie isoleren, is de schakelaar aan de achterkant van functioneren of het prestatievermogen is Solo te gebruiken.
  • Page 45: Welkom

    ..........N4 prijs kunnen leveren. Het ontwerp van Solo is een ontleding van deze kennis in een muziekmaken ............N5 gebruiksvriendelijk pakket dat bedoeld is voor jarenlang luistergenot, terwijl u het apparaat binnen enkele minuten kunt bedienen.
  • Page 46: Aansluitingen Maken

    Introductie Deze pagina geeft een kort overzicht van het installatieproces voor Solo. Voor meer gedetaileerde informatie over de hieronder vermelde items, verwijzen we u naar het hoofdstuk “Installatie-richtlijnen” op pagina 8 van dit handboek. aansluitingen Radioantenne maken In Europa en Canada is Solo meestal voorzien van een gecombineerde FM/DAB-ontvangermodule (digitale radio);...
  • Page 47: Muziekmaken

    Zie ‘Door Wanneer Solo in stand-by staat, brandt het lampje naast de Power-knop op het voorpaneel rood, het menusysteem navigeren’ hierboven voor meer informatie, of ga naar en geeft het display van het voorpaneel de huidige tijd weer. Wanneer u op...
  • Page 48: Afstands-Bediening

    Als het lampje naast de aan/uit-knop niet brandt, controleert u of Solo op het lichtnet is aangesloten en of de schakelaar op het achterpaneel is omgezet (de stip is ingedrukt). Houd het volgende in gedachten wanneer u de...
  • Page 49: De Radio Gebruiken

    Uw voorinstellingen worden bewaard ookal is Solo uitgeschakeld. Solo kan een totaal van 30 radiostations (zowel DAB en FM, of AM en FM Voorinstellingen selecteren - afhankelijk van uw productconfiguratie -) opslaan onder de voorinstellingen.
  • Page 50: Installatie-Richtlijnen

    4. Sluit de afstandsontvanger uit de tweede kamer aan op de connector In Zone 2 op het achterpaneel van Solo. 5. Sluit de apparatuur opnieuw op het lichtnet aan en schakel de stroom in. U moet nu de uitvoer van Solo via de eindversterker kunnen horen, en het volume met de afstandsbediening kunnen regelen.
  • Page 51 Drie ingangen bevinden zich samen met de tapelus op op Solo aan te sluiten. OUTPUT 50 – 60HZ CD OUT RS232 het achterpaneel, en één ingang zit op het voorpaneel van Solo. De labels – Sluit deze uitgangen aan op de ingangen TAPE OUT ���� ������ ����...
  • Page 52 ‘AM’ en het andere op ‘Ground’ [Aarde]. Het maakt niet uit welk uiteinde op welke ingang aangesloten wordt. Zorg ervoor dat de antenne zich zo ver mogelijk van Solo zelf, tv’s, computers en andere bronnen van RF-ruis bevindt. Roteer de antenne om uit te vinden welke stand de beste ontvangst geeft.
  • Page 53: Geavanceerde Functies

    Bass correction [Bascorrectie] – Deze instelling hoeft normaal niet gebruikt te worden (minimuminstelling handhaven). Deze instelling wordt gebruikt als Solo op (kleine) luidsprekers met een beperkt frequentiebereik is Alleen als aangesloten, waarmee geluiden met een zeer lage frequentie niet gereproduceerd kunnen worden.
  • Page 54: De Klok En Wekker Instellen

    Selecteer de optie die u wilt wijzigen met de knoppen links/rechts op de afstandsbediening, en wijzig u ‘Scan’ selecteert, zoekt Solo naar nieuwe DAB-stations. Als er stations worden gevonden, worden ze vervolgens de waarde met de knoppen omhoog/omlaag. Hebt u bijvoorbeeld het instellingenmenu voor automatisch aan de lijst met beschikbare stations toegevoegd.
  • Page 55: Technische Specificaties

    RF-afstembereik 174–240MHz (Band III) 1452–1490MHz (L-band) Als Solo de ontvangst van radio of televisie stoort, wat kan worden vastgesteld door Solo aan en uit te zetten, dient u de volgende maatregelen te nemen: Gevoeligheid (typisch) –98dBm (VHF meting tot EN50248) Oriënteer de ontvangende antenne opnieuw of leid de antennekabel van de ontvanger in kwestie zo...
  • Page 56: Product-Garantie

    Pembroke Avenue, Waterbeach, CAMBRIDGE, CB5 9QR, Engeland. of www.arcam.co.uk. Problemen? Als uw Arcam-dealer uw vragen betreffende dit of een ander Arcam-product niet kan beantwoorden, neemt u contact op met de Arcam-klantendienst op het bovenstaande adres, en wij zullen ons best doen om u te helpen.
  • Page 60 SH153 Pembroke Avenue, Waterbeach, CAMBRIDGE CB5 9QR, England Issue 2...

Table des Matières