Table des Matières
Publicité
Les langues disponibles
Les langues disponibles
Liens rapides
IS105 Rev.00
12/09/2014
IT -
EN -
FR -
Instructions et mises en garde pour l'installateur
PT -
Instruções e advertências para o instalador
ES -
Instrucciones y advertencias para el instalador
DE -
Anleitungen und Hinweise für den Installateur
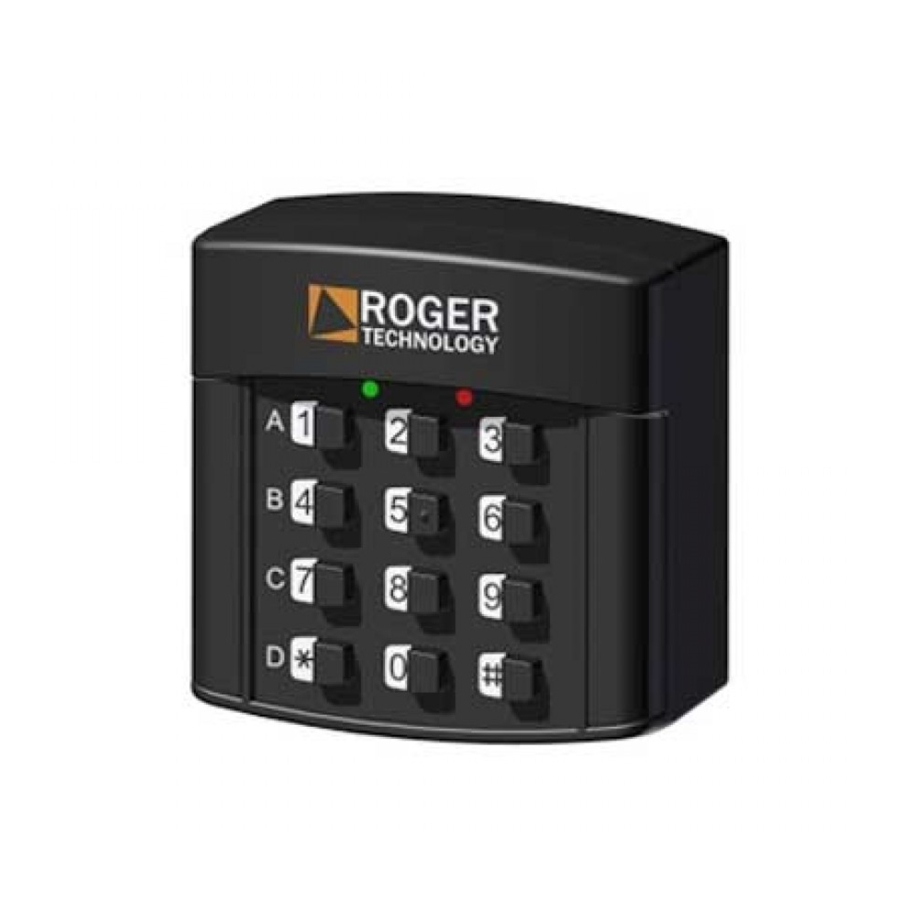
ROGER ACCESSORI
tastiere radio a codice numerico
Istruzioni e avvertenze per l'installatore
Instruction and warnings for the installer
|
serie H85/TDR
automazioni evolute
- pag.2
- pag.8
- page 14
- pág.20
- pág.26
- S.32
Publicité
Chapitres
Table des Matières

Manuels Connexes pour Roger Technology H85/TDR Serie

Sommaire des Matières pour Roger Technology H85/TDR Serie
- Page 1 IS105 Rev.00 12/09/2014 ROGER ACCESSORI tastiere radio a codice numerico serie H85/TDR IT - Istruzioni e avvertenze per l’installatore - pag.2 EN - Instruction and warnings for the installer - pag.8 FR - Instructions et mises en garde pour l’installateur - page 14 PT - Instruções e advertências para o instalador...
-
Page 2: Table Des Matières
“rolling code” H93/ 7 Segnalazione d’errore RX2RC/I e R93/RX2RC/U che adottano lo standard 8 Segnalazione di blocco della tastiera RTHSE (Roger Technology High Security Encryption). 9 Segnalazione di batteria scarica La trasmissione “rolling code” è consigliabile per 10 Sostituzione delle batterie... -
Page 3: Caratteristiche Tecniche
Caratteristiche tecniche NUMERO DI CODICI UTENTE MEMORIZZABILI MASSIMO NUMERO DI CIFRE PER CODICE UTENTE MINIMO NUMERO DI CIFRE PER CODICE UTENTE NUMERO BIT DEL CODICE IDENTIFICATIVO DELLA TASTIERA 16 (codice fisso) - 32 (“rolling code”) NUMERO COMBINAZIONI DI CODICE 65536 (codice fisso) - 4.294.967.296 (“rolling code”) NUMERO BIT TRASMESSI 28 (codice fisso) - 144 (“rolling code”) FREQUENZA DI TRASMISSIONE... -
Page 4: Cambio Password
posizionamento dell’antenna del ricevitore (o la Procedura andata a buon fine: si accende il LED sua installazione, se assente) verde LV e si attiva il buzzer per 2”. In caso contrario si ha la segnalazione di errore (5 lampeggi veloci Fatte queste operazioni è... -
Page 5: Memorizzazione Sul Ricevitore Radio
NOTA: se si vuole abilitare tutti i quattro tasti di Attivazione della trasmissione radio canale, è possibile evitare di premere in sequenza i tasti A,B,C,D passando direttamente alla digitazione Per attivare la trasmissione digitare il codice utente di #. seguito da tasto asterisco *. Se il codice digitato è presente in memoria si accende il LED verde LV, a ESEMPI questo punto premendo un tasto di canale (purché... -
Page 6: Funzioni Avanzate: Mascheramento Del Codice
• Si è digitato il numero troppo lentamente. Funzioni avanzate: mascheramento del • In modalità di cancellazione codice utente o codice di cambio password se sono differenti il primo ATTENZIONE! Questa funzione è abilitata numero inserito e quello che deve darne la automaticamente per i codici utente a 6 cifre. -
Page 7: Collaudo
polarità indicata sul porta batterie stesso (figura Smaltimento 6, dettaglio C). • Rimontare il pacco batterie fissandolo con Il prodotto deve essere disinstallato sempre l’apposita vite da personale tecnico qualificato utilizzando le • Ricollegare il connettore alla tastiera : a questo procedure idonee alla corretta rimozione del punto la tastiera si presenta come indicato in prodotto. -
Page 8: Introduction To The Instructions And Warnings
CONTENTS Page Product description 1 Introduction to the instructions and warnings 8 2 Product description The numeric code keypad allows for the activation 3 Technical specifications of the radio transmission only after having entered 4 Functioning of the keys and messages an enabled code, i.e. -
Page 9: Technical Specifications
Technical specifications NUMBER OF STORABLE USER CODES MAXIMUM NUMBER OF DIGITS PER USER CODE MINIMUM NUMBER OF DIGITS PER USER CODE BIT NUMBER OF THE IDENTIFICATION CODE OF THE 16 (fixed code) - 32 ("rolling code") KEYBOARD NUMBER OF CODE COMBINATIONS 65536 (fixed code) - 4.294.967.296 ("rolling code") NUMBER OF BITS TRANSMITTED 28 (fixed code) - 144 ("rolling code") -
Page 10: Changing The Password
attach the keyboard in the desired location, the paragraph 7). attachment is performed in the same way (see • To change the password and set the "rolling code" Figure 2, 3, 4). transmission mode: • Remove the trims that cover the housings of the mounting screws (Figure 2,3,4, detail B). -
Page 11: Storing On The Radio Receiver
EXAMPLES are employing a"rolling code", however, the green The password 432189, is used to store the user code LED flashes. 3474 enabling all the channel buttons, enter the The minimum duration of the transmission is pre- following sequence: set, you can continue to transmit (for example to activate a "dead-man"... -
Page 12: Error Message
any signal from the LEDs or buzzer. Keypad lock message We use <previous random digits> and <following random digits> to indicate the random number If you enter an incorrect user code 5 consecutive sequences typed by the user before the <6 digit times, the keyboard will start to flash the red and user code>, and after having pressed the asterisk key green LEDs (LR and LV) in an alternating manner and... -
Page 13: Maintenance
that the green LED flashes if set to "rolling code" transmission. Make sure that as you type your user code the red and green LEDs do not light up simultaneously (if so, the battery has no charge: assess if substitution is necessary). - Page 14 5.6 Effacement d'un code utilisateur “rolling code” H93/RX2RC/I et R93/RX2RC/U qui 6 Fonctions avancées : masquage du code adoptent le standard RTHSE (Roger Technology 7 Signalisation d'erreur High Security Encryption). La transmission "rolling code" est conseillée pour les installations où l'on 8 Signalisation de blocage du clavier souhaite avoir un très haut degré...
-
Page 15: Caractéristiques Techniques
Caractéristiques techniques NOMBRE DE CODES UTILISATEUR MEMORISABLES NOMBRE MAXIMUM DE CHIFFRES PAR CODE UTILISATEUR 6 NOMBRE MINIMUM DE CHIFFRES PAR CODE UTILISATEUR 3 NOMBRE BIT DU CODE D'IDENTIFICATION DU CLAVIER 16 (code fixe) - 32 (“rolling code”) NOMBRE COMBINAISONS DE CODE 65536 (code fixe) - 4 294 967 296 (“rolling code”) NOMBRE BIT TRANSMIS 28 (code fixe) - 144 (“rolling code”) -
Page 16: Changement Mot De Passe
positionnement de l'antenne du récepteur (ou la LED rouge LR s'allume fixe. Puis composer : son installation, si absente). <nouveau mot de passe> * Une fois ces opérations effectuées, il est possible de <nouveau mot de passe> * fixer le clavier dans le point qui vient d'être établi, en relation avec la version de produit à... -
Page 17: Mémorisation Sur Le Récepteur Radio
dessus. Le code qu'on transmet depuis le clavier est <nouveau code> # <A/B/C/D> # effacé dans le récepteur. la LED rouge LR s'éteint, la LED verte LV s'allume Activation de la transmission radio pendant 2", et le buzzer reste actif jusqu'à ce que la LED s'éteigne Pour activer la transmission, composer le code utilisateur suivi de la touche astérisque *. -
Page 18: Fonctions Avancées : Masquage Du Code
pendant 2" et le buzzer reste actif jusqu'à ce que la utilisateur non présent en mémoire). LED s'éteigne. • On tente de saisir un code ou mot de passe avec plus de 6 chiffres ou avec moins de 3 chiffres. •... -
Page 19: Essai
l'ouvrir (figure 6, détail E). • Remplacer les piles en faisant attention à la Elimination polarité indiquée sur le porte-pile lui-même (figure 6, détail C). Le produit doit être toujours désinstallé par le • Remonter le paquet piles en fixant la vis. personnel technique qualifié... - Page 20 INDICE Pagina Descrição do produto 1 Introdução às instruções e advertências 2 Descrição do produto Teclado com combinação numérica que permite 3 Características técnicas ativar a transmissão a rádio apenas após ter 4 Funcionalidade das teclas e sinalizações digitado um código habilitado, ou seja memorizado 5 Instalação anteriormente na memória do teclado: isso torna mais seguro o acionamento de automações, como...
-
Page 21: Características Técnicas
Características técnicas NÚMERO DE CÓDIGOS DO USUÁRIO MEMORIZÁVEIS MÁXIMO NÚMERO DE DÍGITOS PARA CÓDIGO DO USUÁRIO 6 MÍNIMO NÚMERO DE DÍGITOS PARA CÓDIGO DO USUÁRIO 3 NÚMERO DE BITS DO CÓDIGO IDENTIFICATIVO DO TECLADO 16 (código fixo) - 32 (“rolling code”) NÚMERO DE COMBINAÇÕES DE CÓDIGO 65536 (código fixo) - 4.294.967.296 (“rolling code”) NÚMERO DE BITS TRANSMITIDOS... -
Page 22: Troca De Senha
Feitas essas operações, é possível fixar o teclado rápidos do LED vermelho LR, acompanhado da ativação intermitente do buzzer; ver parágrafo 7). no ponto estabelecido, com relação à versão do produto à disposição, a fixação é executada do • Para alterar a senha e definir a modalidade de mesmo modo (ver figura 2, 3, 4). -
Page 23: Memorização No Receptor De Rádio
(desde que tenha sido combinado àquele código EXEMPLOS de usuário, em fase de memorização) ativa-se a Com a senha 432189, deseja-se memorizar o código transmissão via rádio: no caso de transmissão por de usuário 3474 habilitando todas as teclas de canal, código fixo, lampeja o LED vermelho, se ao contrário digitar a sequência: for “rolling code”, lampeja o LED verde. -
Page 24: Sinalização De Erro
inseridos ao acaso, na quantidade que desejar. O exemplo, for digitado um código, mas não código que será considerado será composto pelos for premido do caractere *, depois de alguns últimos 6 dígitos digitados antes da tecla asterisco *. segundos o teclado dará sinalização de erro. Premindo a tecla asterisco * não se tem nenhuma •... -
Page 25: Inspecção
Inspecção Verificar se a ativação da transmissão via rádio ativa todas as saídas correspondentes nos receptores. Verificar se durante a transmissão lampeja o LED vermelho, se estiver definida a transmissão com código fixo, ou o LED verde, se definida aquela com “rolling code”. -
Page 26: Descripción Del Producto
8 Aviso de bloqueo del teclado y R93/RX2RC/U que adoptan el estándar RTHSE 9 Aviso de batería agotada (Roger Technology High Security Encryption). Se 10 Sustitución de las pilas recomienda la transmisión “rolling code” para las instalaciones donde se desee un grado de seguridad... -
Page 27: Características Técnicas
Características técnicas NÚMERO DE CÓDIGOS DE USUARIO MEMORIZABLES NÚMERO MÁXIMO DE CIFRAS POR CÓDIGO DE USUARIO NÚMERO MÍNIMO DE CIFRAS POR CÓDIGO DE USUARIO NÚMERO DE BITS DEL CÓDIGO DE IDENTIFICACIÓN DEL 16 (código fijo) - 32 (“rolling code”) TECLADO NÚMERO DE COMBINACIONES DE CÓDIGO 65536 (código fijo) - 4.294.967.296 (“rolling code”) NÚMERO DE BITS TRANSMITIDOS... -
Page 28: Cambio De Contraseña
• Comprobar que el punto previsto para la * * <vieja contraseña> * instalación del teclado permita la activación a distancia del receptor colocando el teclado; si la distancia no garantiza una buena prestación, el led rojo LR se enciende fijo. Luego marcar: modificar el punto de instalación o evaluar <nueva contraseña>... -
Page 29: Memorización En El Receptor Radio
LR. Luego marcar: volver a entrar en el procedimiento de borrado de código en el receptor (ver el manual de instrucciones) <nuevo código> # <A/B/C/D> # y después actuar como se indica arriba. El código que se transmite mediante el teclado se borra en se apaga el LED rojo LR y se enciende el verde LV el receptor. -
Page 30: Funciones Avanzadas: Camuflaje Del Código
Si el código marcado es igual al anterior, el acompañado por la activación intermitente de la procedimiento se realiza, se enciende el LED verde alarma. El aviso de error se puede producir por los LV durante 2” y la alarma permanece activa hasta motivos siguientes: que se apaga el LED. -
Page 31: Ensayo
tornillos inferiores para extraer el teclado del Mantenimiento alojamiento (figuras 2,3,4, detalle B). • Extraer el conector del paquete de las baterías Realizar un mantenimiento programado cada (figura 6, detalle D) 6 meses comprobando el estado de limpieza y • Destornillar el tornillo que fija el paquete de las funcionamiento, como se indica en el apartado 11 baterías para poderlo abrir (figura 6, detalle E). - Page 32 ändern, um die Kompatibilität mit Empfängern mit 6 Erweiterte Funktionen: Code-Verschleierung 36 “Rolling Code” H93/RX2RC/I und R93/RX2RC/U zu 7 Fehlermeldung ermöglichen, die den RTHSE (Roger Technology High Security Encryption) Standard nutzen. Die "Rolling 8 Meldung einer Tastaturblockierung Code" Übertragung wird für all die Installationen...
-
Page 33: Technische Charakteristiken
Technische Charakteristiken ANZAHL DER SPEICHERBAREN BEDIENERCODES MAXIMALE ANZAHL DER ZIFFERN PRO BEDIENERCODE MINDESTANZAHL DER ZIFFERN PRO BEDIENERCODE ANZAHL DER BITS DES IDENTIFIZIERUNGSCODE DER 16 (festgelegter Code) - 32 (“Rolling Code”) TASTATUR ANZAHL DER CODEKOMBINATIONEN 65536 (festgelegter Code) 4,294,967,296 (“Rolling Code”) ANZAHL DER ÜBERTRAGENDEN BIT 28 (festgelegter Code) - 144 (“Rolling Code”) ÜBERTRAGUNGSFREQUENZ... -
Page 34: Passwort Ändern
dessen Nummernfolge und mit <neues Passwort> • Die genannten Kanaltasten auf dem Empfänger speichern (siehe Abschnitt 5.4 SPEICHERN AUF das Passwort das man einstellen möchte; dann die EMPFÄNGER) folgende Zeichenfolge eingeben: • Prüfen, dass der für die Installation vorgesehene Punkt die Fernbedienung des Empfängers •... -
Page 35: Speichern Auf Dem Funkempfänger
beliebige Kanaltastenfolge, die man dem Bediener, hingegen zeigt an, dass sich der Code bereits im der diesen Code verwendet, freigeben möchte, um Speicher befindet. zu ermöglichen, dass die gewünschte Anzahl der Das LED fährt in Erwartung neuer Speichervorgänge, Funktionen des Funkempfängers aktiviert werden mit 3 Mal langsamen Blinken fort. -
Page 36: Löschen Eines Bedienercodes
294862...308236 245672 * 057986…791964 * Löschen eines Bedienercodes Und letzlich die Kanaltasten A,B,C,D zur Aktivierung Mit <zu löschender Code> kennzeichnet man die der Übertragung. Nummernfolge des zu löschenden Codes; die ANMERKUNG: Die unbedeutenden Ziffern sind folgende Sequenz eingeben: unwichtig, die Aktivierung kann durch die folgende Eingabe 245672 * * erfolgen. -
Page 37: Ersetzen Der Batterie
Fährt man fort die Tastatur zu nutzen, kommt es Wartung zu der endgültigen Blockierung: Auch wenn die Eingabe des Bedienercodes erfolgreich verläuft, Alle 6 Monate die programmierte Wartung kommt es zur Blockiermeldung (rotes und grünes durchführen, dabei Reinigung LED blinken abwechselnd), die Funkübertragung ist Funktionstüchtigkeit prüfen, wie in Abschnitt 11 deaktiviert. - Page 38 Illustrazioni e schemi Pictures and schemes - Illustrations et schémas Ilustrações e esquemas - Ilustraciones y esquemas - Darstellungen und Schemen H85/TDR H85/TDR/E...
- Page 39 H85/TDR/C H85/TDR/I...
- Page 40 P1 P2 P1 P2 R93/RX12A/U H93/RX22A/I R93/RX12A/I H93/RX2RC/I R93/RX2RC/U...
- Page 43 DICHIARAZIONE DI CONFORMITA’ DECLARATION DE CONFORMITE Il sottoscritto, rappresentante il seguente costruttore Je soussigné, représentant du fabricant suivant Roger Technology Roger Technology Via Botticelli 8 Via Botticelli 8 31020 Bonisiolo di Mogliano V.to (TV) 31020 Bonisiolo di Mogliano V.to (TV) DICHIARA che l’apparecchiatura descritta in appresso:...
- Page 44 ROGER TECHNOLOGY Via S. Botticelli 8 • 31021 Bonisiolo di Mogliano Veneto (TV) • ITALIA P.IVA 01612340263 • Tel. +39 041.5937023 • Fax. +39 041.5937024 automazioni evolute info@rogertechnology.com • www.rogertechnology.com...