Table des Matières
Publicité
Les langues disponibles
Les langues disponibles
Liens rapides
KIT WAY con PROXIMIDAD
KIT WAY com a PROXIMIDADE
WAY-SET mit KARTENLESER
MANUAL DE INSTALADOR Y USUARIO
MANUAL DO INSTALADOR E DO UTILIZADOR
USER & INSTALLER'S MANUAL
INSTALLATIONS-UND BENUTZERHANDBUCH
MANUEL D'INSTALLATION ET UTILISATION
WAY KIT with PROXIMITY
KIT WAY avec PROXIMITÉ
ESPAÑOL
PORTUGUÊS
ENGLISH
DEUTSCH
FRANÇAIS
Publicité
Table des Matières

Manuels Connexes pour Fermax KIT WAY avec PROXIMITÉ


Sommaire des Matières pour Fermax KIT WAY avec PROXIMITÉ
- Page 1 KIT WAY con PROXIMIDAD KIT WAY com a PROXIMIDADE WAY KIT with PROXIMITY WAY-SET mit KARTENLESER KIT WAY avec PROXIMITÉ ESPAÑOL MANUAL DE INSTALADOR Y USUARIO PORTUGUÊS MANUAL DO INSTALADOR E DO UTILIZADOR ENGLISH USER & INSTALLER’S MANUAL DEUTSCH INSTALLATIONS-UND BENUTZERHANDBUCH FRANÇAIS MANUEL D’INSTALLATION ET UTILISATION...
-
Page 2: Botones Y Funciones
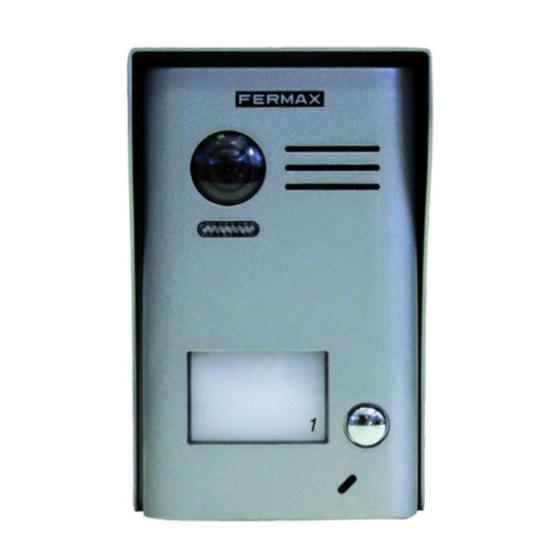
1. Monitor Botones y Funciones SD card Tarjeta SD Pantalla táctil LCD Digital TFT LCD Screen Botón ON/OFF ON/OFF Button Icono indicador mensaje Message Indicator Botón abrepuertas UNLOCK Button Botón AUTOENCENDIDO TALK/MON Button Micrófono Microphone Puntos anclaje Mounting Hook Altavoz Speaker Regleta conexión bus Connection Port... - Page 3 2. Placa Botones y Funciones Cámara Camera Lens Altavoz Speaker Leds Night Light iluminación nocturna ID card window Lector 30 mm proximidad Tarjetero Nameplate Llamada Call Button Micrófono Visera Microphone Rainy Cover (protección lluvia) 93 mm DT601/KP Descripción de terminales JP/LK JP/LK 1 2 3...
-
Page 4: Instalación Monitor
3. Instalación 3.1 Instalación Monitor 1. Utilice los tornillos para fi jar el soporte de montaje en la caja de montaje, (accesorios incluidos en el soporte). Se necesitan dos tornillos de 4x25 para la fi jación de dicho soporte. Conectar los conectores para la conexión del bus. 2. - Page 5 Attach the panel to the rainy cover Use the screwdriver and the screw Instalar la placa con la visera. Usar el tornillo para fi jar la placa. Instalación fi nalizada. to fix the panel 4. Situar la etiqueta en el tarjetero Retire la cubierta de plástico para abrir la parte transparente del tarjetero donde se situa la etiqueta, entonces colocar la etiqueta y volver a dejar el tarjetero en su posición original.
-
Page 6: Menu Principal
Instrucciones de Funcionamiento 5.1 Menu Principal 06:32 PM Estando el monitor en reposo, pulsar Monitor Interfono Reprod. Wed. 02/11/2015 en cualquier lugar de la pantalla del monitor y se mostrará el menú Registro Cerrar llamadas molestar principal como en la imagen. 5.2 Funcionamiento básico de abrepuertas 1. -
Page 7: Función Intercom
6. Función Intercom Pulsar el icono Intercom del menú principal para acceder a la función intercom. Esta función tiene 3 opciones: Difusión interna, Llamada interna y Llamada externa. 06:32 PM Difusión Llamada Llamada Monitor Interfono Reprod. interna interna externa Wed. 02/11/2015 Registro Cerrar... - Page 8 Reproducción de Video/Fotos Pulsar el icono Reprod. del menú principal para reproducir videos/fotos, éstos se visualizarán en la pantalla del monitor. En esta pantalla hay diferentes iconos táctiles para su manejo. Al pulsar el icono Inicio/Pausa se reproducen los videos. 06:32 PM Monitor Interfono Reprod.
-
Page 9: Función No Molestar
9. Función No molestar Pulsar el icono No molestar del menú principal para acceder to get into the don't a la función no molestar. Esta función tiene 4 opciones: Normal, En 1 hora, En 8 horas y Siempre. Seleccionar la opción adecuada en función de las necesidades. No molestar Normal 06:32 PM... -
Page 10: Ajustes De Fecha Y Hora
10.2 Ajustes de Fecha y Hora Pulsando el icono del menú principal se accede al menú de configuración. Seleccionar la opción "Fecha y hora" para acceder a los ajustes de tiempo. En esta opción se puede configurar la fecha y la hora, (pulsar el icono para salir de esta pantalla y regresar a la del menú... - Page 11 10.4 Monitor (Renombrar la placa y Ajustes de Tiempo del Monitor) Pulsando el icono del menú principal se accede al menú de configuración. Seleccionar la opción "Monitor". En esta opción se puede renombrar la placa y ajustar el tiempo de duración del autoencendido del monitor, (pulsar el icono para salir de esta pantalla y regresar a la del menú...
- Page 12 11. Restaurar a valores por defecto (Acerca de) Se dispone de la posibilidad de restaurar los parámetros del monitor a valores de fábrica por defecto, seleccionando la opción "Acerca de". La operación a parámetros predeterminados no cambiarán los ajustes y datos. Pulsando el icono del menú...
- Page 13 12. Ajustes Parámetros del Monitor 12.1 Cómo entrar en la página de confi guración de la instalación Acerca de 06:32 PM Dirección Local 00.00 Monitor Interfono Reprod. Wed. AUTO 02/11/2015 Video estándar 00.02.09 Versión sistema Driver pantalla Registro Cerrar llamadas molestar Fuente Interfaz usuario...
- Page 14 13. Esquemas de Instalación / Requerimientos del cableado 13.1.1 Kit 1 Línea BUS(IM) BUS(DS) Timbre L1 L2 PL S+ S- BUS (M) BUS (DS) puerta Monitor Placa Doorbell Button Switch La distancia máxima del cableado está limitada en el sistema (ver tabla de secciones/ distancias y esquema unifi...
-
Page 15: Conexión De Abrepuertas A Través De Relé Libre De Potencial
13.2 Conexión del abrepuertas 13.2.1 Conexión del abrepuertas con la fuente incluida en el kit 1 2 3 Nota: 1 2 3 Conexión del abrepuertas. La connect Electronic lock, the jumper position in 2-3. posición del puente en la placa 1. -
Page 16: Puesta En Marcha
14. Puesta en marcha 14.1 Registro de tarjeta ID: Introducción: • Pueden registrarse hasta 320 tarjetas de usuario en la estación de entrada. • Fácil gestión con LED de estado e indicaciones acústicas. • Existen dos tarjetas maestras: una tarjeta y una TARJETA MAESTRA AÑADIR tarjeta,... - Page 17 Añadir tarjetas de usuario: Muestre la tarjeta Muestre las tarjetas Muestre la tarjeta de usuario a añadir, TARJETA MAESTRA AÑADIR TARJETA MAESTRA AÑADIR en la ventana de tarjeta una a una. para salir. ID en modo de reposo. El color del El color del El color del indicador de fondo...
- Page 18 Nota: 1. Vuelve automáticamente a modo de reposo tras completarse el formato (FORMAT). 2. Volverá al modo de reposo si no se realiza ninguna acción en 20 segundos o pulsar el botón de llamada para salir del modo de ajustes. 14.2 Ajustar Tiempo de abrepuertas Desde el monitor: explicado en el capítulo 12.3 del manual.
-
Page 19: Características Técnicas
16. Características Técnicas ● Alimentación: 26Vdc +/- 2 ● Consumo: Reposo 12mA; Activado 350mA (monitor); ● Reposo 40mA; Activado 160mA (placa). ● Pantalla monitor: 7 Pulgadas LCD digital color ● Resolución Display: 800*3(R, G, B) x 480 pixels ● Señal video: 1Vp-p, 75Ω, CCIR standard ●... - Page 20 Publicación técnica de caracter informativo editada por FERMAX ELECTRÓNICA. FERMAX, en su politica de mejora constante, se reserva el derecho a modificar el contenido de este documento así como las características de los productos que en el se refi...
- Page 21 ENGLISH...
-
Page 22: Key Functions
1. Indoor Monitor Parts and Functions SD card Digital TFT LCD Screen ON/OFF Button Message Indicator UNLOCK Button TALK/MON Button Microphone Mounting Hook Speaker Connection Port Door bell Mounting Hook Key functions LCD screen Display the visitors' image ON/OFF Button Press to open/close screen Message indicator It will light when the monitor received the unread record... -
Page 23: Outdoor Station
2. Outdoor Station Parts and Functions Camera Lens Speaker Night Light ID card window 30 mm Nameplate Call Button Microphone Rainy Cover 93 mm DT601/KP Terminal Descriptions JP/LK 1 2 3 P L S + B U S Main Connect Port •... - Page 24 3. Mounting 3.1 Monitor Mounting 1. Use the screws to fi x the Mounting Bracket on the wall, (fi tting accesories includes a Bracket. Two pieces of 4X25 screws are needed for fastening the Mounting Bracket). 2. Connect the system correctly (see the later connection chapter) then hang the Monitor into the Mounting Bracket.
- Page 25 Attach the panel to the rainy cover Use the screwdriver and the screw to fix the panel 4. Placing Name Label Remove the plastic cover to open the transparent name label cover, insert a name label, then put the plastic cover back to the panel. STEP 1 STEP 2 Unscrew the panel.
- Page 26 Operation Instructions 5.1 Main Menu 06:32 PM Touch the screen anywhere on monitor Monitor Intercom Playback Wed. 02/11/2015 in standby mode, the main menu page will be shown as follows: Call Record D o n o t Close Disturb 5.2 Basic Door Release Operation 1.
-
Page 27: Intercom Function
6. Intercom Function Touch Intercom icon on main menu to get into the intercom mode, you have 3 items to select: Inner Broadcast, Inner Call and Name List Call (External Call). Inner Inner Name List 06:32 PM Monitor Intercom Playback Broadcast Call Call... - Page 28 Video/Picture Playback Touch Playback icon on main menu, the recorded videos/pictures will be played on screen, please note that touch icon to Start/Pause the videos recorded. 06:32 PM Monitor Intercom Playback Wed. 02/11/2015 Call Record Do not Close Disturb Image: 008/008 2015/02/11 19:23:28 Note: When the system without SD card: 1.
-
Page 29: Do Not Disturb Function
9. Do Not Disturb Function Touch Do Not Disturb icon on main menu to get into the don't disturb mode, you have 4 item to select: Normal, for 1 Hour, for 8 Hours and Always. You can select the appropriate item according to your needs. Do not Disturb Normal 06:32 PM... -
Page 30: Date & Time Settings
10.2 Date & Time Settings Touch icon on main menu page, then select "Date & Time" item to enter the date & time settings page.You can set the date & time on this page, (touch icon to exit the setting and return main menu page). 06:32 PM Monitor Intercom Playback... - Page 31 10.4 Monitor (Rename the outdoor panel & the Monitor Time Settings) Touch icon on main menu page, then select "Monitor" item to enter the rename & monitor time settings page.You can set door station rename and "Auto-on" duration (time) on this page, (touch icon to exit the setting and return main menu page).
- Page 32 11. Restore to Default (About) The restore to default function allows the user to recover the settings to factory setting. Note that the restore to default operation will not change any setting. Enter main menu page and touch icon, then select "About" item to enter the about settings page, touch icon, the default settings will be loaded.
- Page 33 12. Monitor Parameter Setting 12.1 How to enter the installation setting page About Local Address 00.00 Monitor Intercom Playback AUTO Video Standard 00.02.09 System Version Display Driver Call Record Do not Close Disturb Font 2. Touch UNLOCK button 1. Touch icon on main menu page, then select "About"...
- Page 34 13. System Wiring and Connections / Cables Requirements 13.1.1 One Way Connection BUS(IM) BUS(DS) Lock L1 L2 PL S+ S- BUS (M) BUS (DS) Doorbell Button Monitor Panel Switch The maximum distance of the wiring is limited. Using different cables will affect the maximum distance which the system can reach.
- Page 35 13.2 Electric Lock Connection 13.2.1 Door Lock Controlled with Internal Power Note: 1 2 3 1 2 3 connect Electronic lock, the jumper position in 2-3. 1-2. 1. Electronic lock fail secure type should be used. 2. The door lock is limited to 12Vdc, and holding current must be less than 250mA.
- Page 36 14. Setup / Cables Requirements 14.1 ID Card Registration Introduction: • Up to 320 user cards can be registered by the door station. • Easy management with LED status and sound hints. • There are two master cards, one card and one MASTER CARD ADD MASTER card, When registered new master cards, the old master cards...
- Page 37 Add User Cards: Show the Show user cards to be Show the MASTER CARD MASTER CARD card to ID card added, one by one. card to exit. window in standby mode. The color of The color of The color of background indicator background indicator background indicator...
- Page 38 Notice: 1. Automatically returns to standby mode after FORMAT completed. 2. It will return to standby mode if no operation within 20s. or press Call Button to exit the status of. 14.2 Unlock Time Setting From monitor: explained in section 12.3 of the manual. 15.
- Page 39 16. Specifi cation ● Power supply: 26Vdc +/- 2 ● Power consumption: Standby 12mA; Working 350mA (for monitor); ● Standby 40mA; Working status 160mA (for door station). ● Monitor screen: 7 Inch digital color LCD ● Display Resolutions: 800*3(R, G, B) x 480 pixels ●...
- Page 40 Technical document published for information purposes by FERMAX ELECTRÓNICA. FERMAX, in a policy of ongoing improvement, reserves the right to modify the contents of this document and the feature of the products referred to herein at any time and with no prior notice.
- Page 41 FRANÇAIS...
-
Page 42: Réglages Commutateurs Dip
1. Moniteur Boutons et fonctions SD card Carte SD Écran couleur LCD Digital TFT LCD Screen Bouton ON/OFF ON/OFF Button Icône indiquant un message Message Indicator Bouton gâche électrique UNLOCK Button Bouton AUTO-INSERTION TALK/MON Button Microphone Microphone Points de fi xation Mounting Hook Haut-parleur Speaker... -
Page 43: Boutons Et Fonctions
2. Platine Boutons et fonctions Caméra Camera Lens Haut-parleur Speaker Night Light éclairage nocturne Lecteur ID card window proximité 30 mm Nameplate Porte-étiquettes Call Button Appel Microphone Microphone Rainy Cover Visière de protection 93 mm (anti-pluie) DT601/KP Description des terminaux JP/LK JP/LK 1 2 3... -
Page 44: Installation Du Moniteur
3. Installation 3.1 Installation du moniteur 1. Utilisez les vis pour fixer le support de montage au boîtier (accessoires fournis avec le support). Pour la fi xation de ce support, il faut deux vis 4x25. Raccordez les connecteurs destinés au raccordement du bus. 2. -
Page 45: Mise En Place De L'étiquette Dans Le Porte-Étiquettes
Attach the panel to the rainy cover Use the screwdriver and the screw Installez la platine avec la visière de protection. Se servir de la vis pour fi xer le cache frontal. L’installation est terminée. to fix the panel 4. Mise en place de l'étiquette dans le porte-étiquettes Retirez le cache plastique afi... -
Page 46: Instructions Concernant Le Fonctionnement
Instructions concernant le fonctionnement 5.1 Menu principal 06:32 PM Le moniteur étant en veille, appuyez Moniteur Intercom Lecture Wed. 02/11/2015 n'importe où sur l'écran du moniteur ; le menu principal s'affi che comme sur Enregistrem- Ne pas Eteindre ent appel déranger l'image. -
Page 47: Fonction Intercom
6. Fonction Intercom Appuyez sur l'icône Intercom du menu principal afin d'accéder à la fonction Intercom. Cette fonction dispose de 3 options : Diffusion interne, Appel interne et Appeler le nom sur la liste.. 06:32 PM Diffusion Appel Appeler le nom Moniteur Intercom Lecture interne... - Page 48 Lecture vidéo / photos Appuyez sur l'icône Lecture du menu principal afi n de voir les vidéos/photos. Ces dernières apparaîtront sur l'écran du moniteur. Plusieurs icônes tactiles sont disponibles sur l'écran pour leur manipulation. En appuyant sur l'icône Démarrage/Pause , les vidéos sont lues.
-
Page 49: Fonction Ne Pas Déranger
9. Fonction Ne pas déranger Appuyez sur l'icône Ne pas déranger du menu principal pour accéder à la fonction Ne pas déranger. Cette fonction dispose de 4 options : Normal, pendant 1 heure, Pendant 8 heures et Permanent. Sélectionnez l'option appropriée en fonction des besoins. Ne pass déranger Normal 06:32 PM... -
Page 50: Réglages De La Date Et De L'heure
10.2 Réglages de la date et de l'heure On accède au menu de configuration en appuyant sur l'icône du menu principal. Sélectionnez l'option « Date&heure » pour accéder aux réglages de l'heure. Dans cette option, il est possible de confi gurer la date et l'heure (appuyez sur l'icône pour quitter cet écran et revenir à... -
Page 51: Réglages De L'écran Et Du Volume
10.4 Moniteur (renommer platine et contrôler réglage de l'heure du moniteur) On accède au menu de configuration en appuyant sur l'icône du menu principal. Sélectionnez l'option « Moniteur ». Dans cette option, il est possible de renommer la platine et d' ajuster la durée de l'auto-aluumage du moniteur (appuyez sur l'icône pour quitter cet écran et revenir à... -
Page 52: Rétablissement Des Valeurs Par Défaut (À Propos)
11. Rétablissement des valeurs par défaut (À propos) Il est possible de rétablir les paramètres du moniteur sur les valeurs usine par défaut en sélectionnant l'option « À propos ». Le retour aux paramètres prédéfi nis ne modifi era ni les réglages ni les données. -
Page 53: Réglages Des Paramètres Du Moniteur
12. Réglages des paramètres du moniteur 12.1 Comment accéder à la page de confi guration de l'installation À propos 06:32 PM Adresse locale 00.00 Moniteur Intercom Lecture Wed. AUTO Standard vidéo 02/11/2015 00.02.09 Version système Driver affi cheur Enregistrem- Ne pas Eteindre ent appel déranger... -
Page 54: Schéma Unifi Laire
13. Schémas d'installation / Conditions requises pour le câblage 13.1.1 Kit 1 ligne BUS(IM) BUS(DS) Sonnette L1 L2 PL S+ S- BUS (M) BUS (DS) porte Moniteur Platine Doorbell Button Switch Dans le système, la distance maximale du câble est limitée (voir tableau des sections- distances et schéma unifi... -
Page 55: Raccordement De La Gâche Électrique
13.2 Raccordement de la gâche électrique 13.2.1 Raccordement de la gâche à l'alimentation comprise dans le kit 1 2 3 1 2 3 REMARQUE : R a c c o r d e m e n t d e l a g â c h e connect Electronic lock, the jumper position in 2-3. -
Page 56: Mise En Marche
14. Mise en marche 14.1 Enregistrement du badge d'identifi cation Introduction : • 320 badges utilisateurs maximum peuvent être enregistrés au niveau de la platine de rue. • Gestion simple grâce à l'état des DEL et aux indications sonores. • Il y a deux badges master : un badge et un badge BADGE MASTER AJOUT BADGE... -
Page 57: Ajout De Badges Utilisateurs
Ajout de badges utilisateurs : Présentez, en mode veille, Présentez les badges Présentez le badge le badge utilisateurs devant être BADGE MASTER BADGE MASTER AJOUT à la fenêtre destinée ajoutés, un par un. pour sortir. AJOUT au badge d'identifi cation. Couleur de Couleur de Couleur de... -
Page 58: Réglages Du Temps D'activation De La Gâche
Remarque: 1. Retour automatique au mode veille une fois le FORMATAGE terminé. 2. Le dispositif retourne en mode veille s'il n'y a pas d'activité pendant 20 s. Ou appuyez sur le bouton d'appel pour quitter le mode de confi guration et commencer à appeler le moniteur. -
Page 59: Caractéristiques Techniques
16. Caractéristiques techniques ● Alimentation : 26 VCC +/- 2 ● Consommation : en veille 12 mA ; activé 350 mA (moniteur) en veille 40 mA ; activée 160 mA (platine) ● Écran moniteur : écran numérique couleur LCD 7 pouces ●... - Page 60 é. Elle doit ensuite être déposée dans le point de tri sélectif approprié. Publication technique à caractère informatif éditée par FERMAX ELECTRÓNICA. Conformément à sa politique de perfectionnement continu, FERMAX se réserve le droit de modifier, à tout moment et sans préavis, le contenu de ce document ainsi que les caractéristiques des produits auxquels il est fait référence.
- Page 61 DEUTSCH...
-
Page 62: Tasten Und Funktionen
1. Monitor Tasten und Funktionen SD card SD-Karte LCD-Tastbildschirm Digital TFT LCD Screen EIN/AUS Taste ON/OFF Button Nachrichtensymbol Message Indicator Türöffnungstaste UNLOCK Button EIGENSTARTTASTE TALK/MON Button Mikrofon Microphone Befestigungspunkte Mounting Hook Verstärker Speaker Leiste Bus-Anschluss Connection Port Etagenruf Befestigungspunkte Mounting Hook Funktionen LCD-Bildschirm Zeigt das Videobild der Kamera an der Türstation. - Page 63 2. Türstation Tasten und Funktionen Kamera Camera Lens Speaker Verstärker Night Light LEDs Nacht- beleuchtung Kartenleser ID card window 30 mm Infomodul Nameplate Call Button Anruf Microphone Mikrofon Rainy Cover Schutzblende 93 mm (Regenschutz) DT601/KP Beschreibung der Sprechstellen: JP/LK JP/LK 1 2 3 P L S + B U S...
-
Page 64: Monitorinstallation
3. Installation 3.1 Monitorinstallation 1. Verwenden Sie die mitgelieferten Schrauben zur Anbringung der Befestigung (im Lieferumfang enthalten). Zur Befestigung sind zwei Schrauben des Typs 4x25 zu verwenden. Die Stecker anschließen, um den Bus zu verbinden. 2. Den Bus richtig (Kabel) am Monitor anschließen (siehe Kapitel 13). Installationsschemata), anschließend den Monitor an der Wandbefestigung anbringen. - Page 65 Attach the panel to the rainy cover Use the screwdriver and the screw Die Türstation zusammen mit der Schraube zur Befestigung der Frontabdeckung Schutzblende installieren. verwende. Installation beendet. to fix the panel 4. Etikette im Infomodul einlegen Die Kunststoffabdeckung wegnehmen, um den durchsichtigen Teil des Infomoduls zu öffnen, in dem sich die Etiketten befi...
- Page 66 5. Betriebsanleitung 5.1 Hauptmenü 06:32 PM D u r c h D r ü c k e n a u f d e n Monitor Intercom Playback 02/11/2015 Bildschirm des Hauptmonitors im Bereitschaftszustand schaltet sich Anrufp- Nicht Schließen stören rotokoll dieser ein und zeigt das Hauptmenü...
- Page 67 6. Gegensprechanlagenfunktion (Intercom) Das Symbol Intercom des Hauptmenüs drücken, um die Gegensprechfunktion aufzurufen. Diese Funktion weist 3 Optionen auf: Interne Verbreitung, Interner Anruf und Externer Anruf. 06:32 PM Interne Internet Anruf aus Monitor Intercom Playback Übertragung Anruf Namensliste Wed. 02/11/2015 Anrufp- Schließen rotokoll...
- Page 68 Foto- und Videowiedergabe Das Symbol Wiederg. des Hauptmenüs zur Wiedergabe von Videos und Fotos drücken. Die Wiedergabe erfolgt am Bildschirm des Monitors. Auf dem Tastbildschirm sind mehrere Symbole abgebildet, die bei Bedarf benutzt werden können. Beim Drücken des Symbols Start/Pause werden die Videos abgespielt.
-
Page 69: Modus Nicht Stören
9. Modus Nicht stören Das Symbol Nicht stören des Hauptmenüs drücken, um die Funktion Nicht stören aufzurufen. Diese Funktion umfasst vier Optionen: Normal, In 1 Stunde, In 8 Stunden und Immer. Die geeignete Funktion gemäß Anforderungen auswählen. Nicht stören Normal 06:32 PM Monitor Intercom Playback... -
Page 70: Spracheinstellungen
10.2 Datum- und Uhrzeiteinstellungen D u r c h D r ü c k e n d e s S y m b o l s d e s H a u p t m e n ü s g e l a n g t m a n i n d a s Konfigurationsmenü. - Page 71 10.4 Monitor (Neubenennung der Türstation und Zeiteinstellungen am Monitor) D u r c h D r ü c k e n d e s S y m b o l s d e s H a u p t m e n ü s g e l a n g t m a n i n d a s Konfigurationsmenü.
- Page 72 11. Standardeinstellungen wiederherstellen (Über) Die werksseitigen Einstellungen des Monitors können wiederhergestellt werden, indem man die Option „Über“ wählt. Dabei werden aber weder die Einstellungen noch die Daten geändert. D u r c h D r ü c k e n d e s S y m b o l s d e s H a u p t m e n ü...
- Page 73 12. Parametereinstellungen des Monitors 12.1 Wie gelangt man auf die Konfi gurationsseite der Anlage Über 06:32 PM Lokale Adresse 00.00 Monitor Intercom Playback Wed. AUTO 02/11/2015 Videostandard 00.02.09 Systemversion Displaytreiber Anrufp- Nicht Schließen rotokoll stören Schriftart 2. Die Taste TÜRÖFFNER 1.
- Page 74 13. Installationsschemata / Verkabelungsanforderungen 13.1.1 Set mit 1 Linie BUS(IM) BUS(DS) L1 L2 PL S+ S- Klingelton BUS (M) BUS (DS) Tür Monitor Türstation Doorbell Button Switch Die maximale Länge der Verkabelung ist beschränkt (siehe Querschnitt- und Abstandstabelle sowie Installationsschema für Eindrahtanlagen). monitor Querschnitts-/Abstandstabelle Querschn./Abstände...
- Page 75 13.2 Anschluss des Türöffners 13.2.1 Anschluss des Türöffners an das mit dem Set mitgelieferte Netzgerät Hinweis: 1 2 3 Anschluss des Türöffners Die 1 2 3 connect Electronic lock, the jumper position in 2-3. Steckbrücke an der Türstation muss 1. Der installierte Türöffner muss unter bei 1 oder 2 eingesteckt sein.
- Page 76 14. Inbetriebnahme 14.1 Registrierung der ID-Karte Einführung: • An der Türstation können bis zu 320 Benutzer registriert werden. • Mittels LED-Statusanzeigen und Soundsignalen gestaltet sich die Verwaltung äußerst einfach. • Es gibt zwei Master-Karten, eine Karte und eine MASTER-KARTE HINZUFÜGEN Karte.
- Page 77 Benutzerkarten hinzufügen: Die Benutzerkarten MASTER-KARTE HINZU- MASTER-KARTE -Karte vor das ID- anzeigen, die -Karte FÜGEN HINZUFÜGEN Kartenfenster im Bereit- nacheinander hinzu- vorhalten, um das schaftsmodus vorhalten. gefügt werden sollen. Menü zu verlassen. Die Hintergrundfarbe Die Hintergrundfarbe Die Hintergrundfarbe der Anzeige der Anzeige der Anzeige (einmal grün...
-
Page 78: Türöffnungszeit Einstellen
Hinweis: 1. Kehrt nach der FORMATIERUNG automatisch in den Bereitschaftsmodus zurück. 2. Das System kehrt nach Ablauf von 20 Sek. in den Bereitschaftsmodus zurück, falls eine Eingabe erfolgt. Alternativ dazu kann die Klingeltaste gedrückt werden, um den Einstellungen-Status zu verlassen und den Monitor anzurufen. 14.2 Türöffnungszeit einstellen Über den Monitor: erläutert in Kapitel 12.3 des Handbuchs. -
Page 79: Technische Eigenschaften
16. Technische Eigenschaften ● Stromversorgung: 26 VDC +/- 2 ● Stromverbrauch: Bereitschaftsmodus 12 mA; Betrieb 350 mA (Monitor); ● Bereitschaftsmodus 40 mA; Betriebsmodus 160 mA (Türstation). ● Monitorbildschirm: Digitaler 7“ LCD-Farbbildschirm ● Display-Aufl ösung: 800*3 (R, G, B) x 480 Pixel ●... - Page 80 Technische Veröffentlichung zu Informationszwecken; Herausgeber: FERMAX ELECTRONICA. FERMAX behält sich das Recht vor, den Inhalt dieses Dokuments sowie die technischen Eigenschaften der erwähnten Produkte ohne vorherige Ankündigung zu ändern, um dadurch den ständigen Weiterentwicklungen und den damit in Verbindung stehenden Verbesserungen Rechnung zu tragen.
- Page 81 PORTUGUÊS...
-
Page 82: Botões E Funções
"ESTE KIT NÃO É COMPATÍVEL COM VERSÃO V1.0 1. Monitor Botões e funções SD card Cartão SD Ecrã tátil LCD Digital TFT LCD Screen Botão ON/OFF ON/OFF Button Ícone indicador de mensagem Message Indicator Botão de trinco UNLOCK Button Botão de LIGAÇÃO AUTOMÁTICA TALK/MON Button Microfone Microphone... - Page 83 2. Botoneira Botões e funções Câmara Camera Lens Speaker Altifalante Night Light LEDs de iluminação noturna Leitor de ID card window proximidade 30 mm Placa de Nameplate identifi cação Call Button Chamada Viseira Microphone Microfone Rainy Cover (proteção da 93 mm chuva) DT601/KP Descrição dos terminais...
-
Page 84: Instalação Do Monitor
3. Instalação 3.1 Instalação do monitor 1. Utilize os parafusos para fixar o suporte de montagem na caixa de montagem (acessórios incluídos no suporte). São necessários dois parafusos de 4x25 para a fi xação do suporte. Ligar os conectores para a ligação do bus. 2. - Page 85 Attach the panel to the rainy cover Use the screwdriver and the screw Instalar a botoneira com a viseira. Usar o parafuso para fi xar a a botoneira. Instalação concluída to fix the panel 4. Colocar a etiqueta no porta-cartões Retire a cobertura de plástico, para abrir a parte transparente do porta-cartões onde se situará...
-
Page 86: Instruções De Funcionamento
Instruções de funcionamento 5.1 Menu Principal 06:32 PM Com o monitor em repouso, tocando Monitor Intercom Reproduzir Wed. 02/11/2015 em qualquer ponto do ecrã do monitor, a b r e - s e o m e n u p r i n c i p a l c o m o Gravação de Não Fechar... - Page 87 6. Função Intercom Premir o ícone Intercom do menu principal para aceder à função Intercom. Esta função tem 3 opções: Difusão interna, Chamada interna e Chamada externa. Difusão Chamada Agenda interna interna : Se estiverem instalados vários monitores na mesma habitação, Difusão interna selecionando-se esta opção, todos os monitores ativam o altifalante ao mesmo tempo e ouve-se a mensagem difundida através dos seus altifalantes.
- Page 88 Reprodução de vídeo/fotos Premir o ícone Reprod. do menu principal para reproduzir vídeos ou fotos, que serão visualizados no ecrã do monitor. Este ecrã apresenta diversos ícones táteis para a sua operação. Premindo o ícone Início/Pausa , reproduzem-se os vídeos. 06:32 PM Monitor Intercom Reproduzir...
-
Page 89: Função Não Incomodar
9. Função Não incomodar Premir o ícone Não incomodar do menu principal para aceder à função Não incomodar. Esta função tem 4 opções: Normal, Em 1 hora, Em 8 horas e Sempre. Selecionar a função adequada em função das necessidades. Não Incomodar Normal 06:32 PM... - Page 90 10.2 Ajustes da data e hora Para aceder ao menu de confi guração, prime-se o ícone do menu principal. Selecionar a opção "Data e hora" para aceder aos ajustes de tempo. Esta opção permite confi gurar a data e a hora (premir o ícone para sair deste ecrã...
- Page 91 10.4 Monitor (Mudar o nome da botoneira e ajustes de tempo do monitor) Para aceder ao menu de configuração, prime-se o ícone do menu principal. Selecionar a opção "Monitor". Esta opção permite mudar o nome da botoneira e ajustar o tempo de duração da ligação automática do monitor (premir o ícone para sair deste ecrã...
- Page 92 11. Restaurar para valores predefi nidos (Acerca de) Está disponível a possibilidade de restaurar os parâmetros do monitor para valores predefi nidos de fábrica, selecionando a opção "Acerca de". A operação em parâmetros pré-determinados não modifi ca os ajustes nem os dados. Para aceder ao menu de confi...
-
Page 93: Ajustes De Parâmetros Do Monitor
12. Ajustes de parâmetros do monitor 12.1 Como entrar na página de confi guração da instalação Sobre 06:32 PM Edereço Local 00.00 Monitor Intercom Reproduzir Wed. AUTO Formato de imagem 02/11/2015 00.02.09 Versão sistema Driver ecrá Gravação de Não Fechar chamada Incomodar Tipo letra... - Page 94 13. Esquemas de Instalação / Requisitos da cablagem 13.1.1 Kit de 1 linha BUS(IM) BUS(DS) Campainha L1 L2 PL S+ S- BUS (M) BUS (DS) da porta Monitor Botoneira Doorbell Button Switch A distância máxima da cablagem está limitada no sistema (ver a tabela de secções- distâncias e esquema unifi...
- Page 95 13.2 Ligação do trinco 13.2.1 Ligação do trinco com a fonte incluída no kit 1 2 3 Nota: 1 2 3 Ligação do trinco. A posição da connect Electronic lock, the jumper position in 2-3. ponte na botoneira deve ser 1-2. 1.
-
Page 96: Colocação Em Funcionamento
14. Colocação em funcionamento 14.1 Registo de cartões de ID Introdução: • Podem registar-se até 320 cartões de utilizador na estação de porta. • Fácil gestão, com LED de estado e indicações sonoras. • Existem dois cartões mestre: um e outro CARTÃO MESTRE PARA ADICIONAR . - Page 97 Adicionar cartões de utilizador: Apresentar o Mostrar os cartões Mostrar o CARTÃO CARTÃO à de utilizador a MESTRE PARA ADICIONAR MESTRE PARA ADICIONAR janela de cartões de ID adicionar, um a um. para sair. no modo de espera. A cor do A cor do A cor do indicador de fundo...
- Page 98 Nota: 1. Regressa automaticamente ao modo de espera depois de concluído FORMATAR. 2. Regressará ao modo de espera, se não houver qualquer operação dentro de 20 s. ou prima o botão de Chamada para sair do modo de confi guração e iniciar a chamada ao monitor.
- Page 99 16. Características Técnicas ● Alimentação: 26 VDC +/- 2 ● Consumo: Em repouso: 12 mA; Ativado: 350 mA (monitor); ● Em repouso: 40mA; Ativado: 160 mA (botoneira). ● Ecrã do monitor: LCD digital de 7 polegadas a cores ● Resolução do display: 800*3 (R, G, B) x 480 pixels ●...
- Page 100 Publicação técnica de carácter informativo editada pela FERMAX ELECTRONICA. A FERMAX, na sua política de constante melhoria, reserva-se o direito de modificar o conteúdo deste documento, assim como as características dos produtos que nele são referidos, a qualquer momento e sem aviso prévio.