Table des Matières
Publicité
Les langues disponibles
Les langues disponibles
Liens rapides
Publicité
Chapitres
Table des Matières

Manuels Connexes pour Sonnenkonig SAHARA


Sommaire des Matières pour Sonnenkonig SAHARA
- Page 1 SAHARA Keramikheizlufter Bedienungsanleitung...
-
Page 2: Table Des Matières
INDEX 1 Warnhinweis ��������������������������������������������������������������������������������������������������� 3 2 Gerätefunktionen �������������������������������������������������������������������������������������������� 4 3 Gerätebeschreibung ���������������������������������������������������������������������������������������� 5 4 Bedienschaltflächen ���������������������������������������������������������������������������������������� 6 5 Installations- und Bedienungsanleitung ����������������������������������������������������������� 7 6 Fernbedienung ������������������������������������������������������������������������������������������������ 9 7 Sicherheitshinweise ����������������������������������������������������������������������������������������� 9 8 Reinigung und pflege �������������������������������������������������������������������������������������13 9 Technische Daten �������������������������������������������������������������������������������������������14 10 Elektrische Schaltpläne �����������������������������������������������������������������������������������14 11 Garantie / Entsorgung / Technische Änderung ������������������������������������������������15... -
Page 3: Warnhinweis
1. Warnhinweis Bitte lesen Sie vor erster Inbetriebnahme die Gebrauchsanweisung genau durch und beachten Sie die Sicherheitshinweise um Schäden durch falsche oder unsachgemässe Bedienung sowie unzulässige Umgebungsbedingungen zu vermeiden. Bewahren Sie diese zum späteren Nach- schlagen gut auf. Kontrollieren Sie das Gerät nach dem Entfernen der Verpackung auf Beschädigungen. Setzen Sie das Gerät bei Verdacht auf eine Beschädigung nicht in Betrieb und wenden Sie sich an einen Fachmann. -
Page 4: Gerätefunktionen
• Das Heizgerät darf nicht unmittelbar unter einer Steckdose platziert werden. 2 Gerätefunktionen • Hochleistungsfähiger Heizlüfter mit Keramikheizelement: Genaue Einstellung der Heizleis- tung. Keine Abnutzung durch Oxidation. Längere Lebensdaue. • Zwei wählbare Leistungsstufen (1300 W / 2000 W). • Timer, einstellbar zwischen 1 - 12 Stunden. •... -
Page 5: Gerätebeschreibung
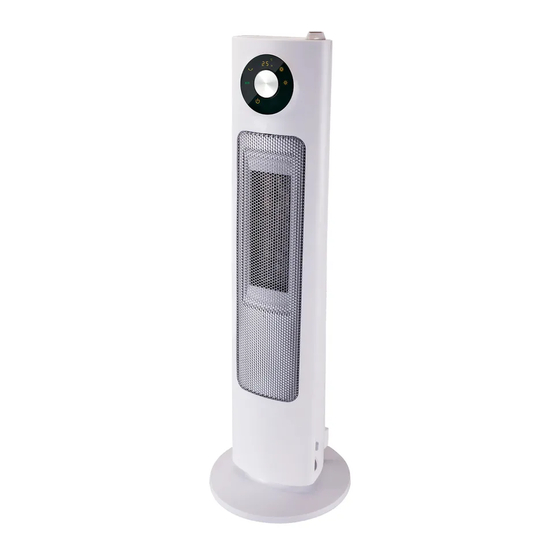
3 Gerätebeschreibung 11 12 9 10 1. Obere Abdeckung 9. Enthärter Box 2. Display 10. Wassertank 3. Sichtfenster 11. Stopfen für hintere Abdeckung 4. Gebläsegitter 12. Düse 5. Vordere Abdeckung 13. Hintere Abdeckung 6. Hintere Gitterabdeckung 14. Wasserablaufverschluss 7. Staubfilter 15.Standfuß... -
Page 6: Bedienschaltflächen
4 Bedienschaltflächen A. Durch Drücken der Taste A können Sie das Gerät einschal- ten, drückte sie erneut, um es auszuschalten. B. Der Wechsel von hoher Heizleistung zu gering Heizleistung. Niedrig Hoch C. Temperatur und Timer-Einstellungen. D / E. Drücken Sie zu erhöhen / verringern die Raumtempera- tur -Einstellungen und die Einstellung der Timer-Funktion. -
Page 7: Installations- Und Bedienungsanleitung
5 Installations- und Bedienungsanleitung 1. Installation Step 1: Öffnen Sie die Verpackung und nehmen Sie das Gerät heraus. Entfernen Sie die Plastik- verpackung. Step 2: Stellen Sie das Gerät ebenerdig hin, montieren Sie den Standfuß und schrauben Sie ihn fest. 2. - Page 8 6. Timer Einstellungen • Der Timer wird durch erneutes Drücken der Taste C, auf der die Timer-Anzeige zu sehen ist, eingestellt. Die LED-Anzeige flackert. Drücken Sie die Taste D / E, um den Timer einzustellen. • Zeitbereich: 1-12 Stunden. • Ist der Wert der Timer-Einstellung bei 0 wird die Zeitanzeige ausgeschaltet. Die LED-Anzeige zeigt nun die aktuelle Raumtemperatur.
-
Page 9: Fernbedienung
6 Fernbedienung 1. Ziehen Sie auf der Rückseite der Fernbedienung die Batteriehalterung heraus. 2. Achten Sie beim Einlegen der Batterie (CR2032) in die Halterung auf die richtige Polarität. 3. Schieben Sie die Halterung wieder in die Fernbedienung ein. Batterie-Tür Batterie 7 Sicherheitshinweise Um den sicheren und richtigen Umgang mit dem Gerät zu gewährleisten, bitte unbedingt folgende Symbolhinweise beachten. - Page 10 Bei Funktionsstörungen bitte an den Kundenservice wenden. Keinesfalls ver- suchen, das Gerät selber zu demontieren oder defekte Teile zu ersetzen, da dies zur Beschädigung des Gerätes führen kann. Stecker oder Gerät nicht mit nassen Hän- den anfassen. Stromschlaggefahr. Keine Stecker, Metall- oder sonstige Ge- genstände in das Gerät stecken, da dies zu einem Kurzschluss oder zur Beschädigung des Gerätes führen kann.
- Page 11 Darauf achten, dass sich keine Fremdkörper an dem Kabel befinden und der Netzste- cker richtig eingesteckt ist. Bei ungewöhnlicher Geruchsbildung oder ungewöhnlichen Geräuschen Gerät sofort ausschalten und den Netzstecker ziehen. Bei defektem Stromkabel Gerät nicht weiter benutzen. Kurzschluss- oder Brandgefahr. Bitte kontaktieren Sie den Kundenservice.
- Page 12 Bei längerer Nichtnutzung Gerät ausschal- ten und den Netzstecker ziehen. Das Gerät nach Möglichkeit nicht in Anwesenheit von Kindern, sonstigen schutzbedürftigen Menschen oder Tieren benutzen. Nur fachgerecht montierte Steckdosen ver- wenden. Darauf achten, dass die Lastkapa- zität nicht weniger als 10A/240V beträgt. Die Nennspannung muss der angegebe- nen Spannung des Gerätes entsprechen.
-
Page 13: Reinigung Und Pflege
8 Reinigung und Pflege Vor Reinigung des Gerätes bitte den Netzstecker ziehen. Der Heizlüfter muss abgekühlt sein. 1. Reinigung und Pflege des Heizlüfters Reinigung der Oberfläche: mit einem sauberen und trockenen Lappen. Bei starker Ver- schmutzung mit ein wenig lauwarmem Wasser und einem milden Reinigungsmittel abwischen. Anschließend abtrocken. -
Page 14: Technische Daten
9 Technische Daten Modell ..............Sahara Netzspannung ...........220-240V Frequenz ..............50 Hz Leistung ..Heizgebläse: 2000 W - Luftbefeuchter: 25 W Geräuschpegel ............≤50 dB Abmessungen ........ø 278mm×848mm 10 Elektrische Schaltpläne... -
Page 15: Garantie / Entsorgung / Technische Änderung
11 Garantie / Entsorgung / Technische Änderung Garantie Die Geräte werden vor der Auslieferung genau kontrolliert. Sollte trotzdem einmal ein Mangel an Ihrem Gerät auftreten, wenden Sie sich vertrauensvoll an Ihren Verkäufer. Bitte bringen Sie den Kaufbeleg mit, denn dieser ist für jede Garantieleistung vorzulegen. Die Garantie beträgt 24 Monaten ab dem Kaufdatum. - Page 16 Firma Armin Schmid Olensbachstrasse 9-15 CH-9631 Ulisbach Tel. Int. +41 71 987 60 60 Tel. Nat. 0848870850 www.sonnenkoenig.ch Firma Armin Schmid Peter-Henlein-Strasse 5 D-89331 Burgau Tel: 0180 500 64 35 info@sonnenkoenig.ch www.sonnenkoenig.ch Festnetz 14 Cent/Minute Mobilnetz bis 42 Cent/Minute...
- Page 17 SAHARA Chauffage céramique Notice d‘utilisation...
- Page 18 SOMMAIRE 1 Avertissement �����������������������������������������������������������������������������������������������19 2 Caractéristiques du produit ����������������������������������������������������������������������������20 3 Product structure diagram ������������������������������������������������������������������������������21 4 Panneau de commande ���������������������������������������������������������������������������������22 5 Mode d‘emploi �����������������������������������������������������������������������������������������������23 6 Télécommande �����������������������������������������������������������������������������������������������25 7 Avertissements et précautions de sécurité ������������������������������������������������������25 8 Maintenance et nettoyage ������������������������������������������������������������������������������29 9 Détails techniques ������������������������������������������������������������������������������������������30 10 Schémas électriques ���������������������������������������������������������������������������������������30 11 Garantie / élimination / modifications techniques �������������������������������������������31...
-
Page 19: Avertissement
1 Avertissement Avant la première mise en service, veuillez lire scrupuleusement le mode d‘emploi dans son Intégralité et tenir compte des consignes de sécurité afin d‘éviter les dommages liés à une com- mande mauvaise ou non conforme ainsi qu‘à des conditions d‘environnement non autorisées. Conservez ce mode d‘emploi afin de pouvoir le consulter de nouveau ultérieurement. -
Page 20: Caractéristiques Du Produit
• Ce chauffage n’est pas équipé d’un dispositif de contrôle de la température de la pièce. • N’utilisez pas ce chauffage dans une pièce étroite occupée par des personnes qui ne pas capables de quitter elles-mêmes la pièce, à moins qu’une surveillance constante n’ait lieu. •... -
Page 21: Product Structure Diagram
3 Product structure diagram 11 12 9 10 1. Partie supérieure du boîtier 9. Boîte de assouplissant 2. Ecran 10. Réservoir 3. Fenêtre transparente 11. Couverture arrière branchez 4. Grille 12. Embout 5. Partie frontale du boîtier 13. Partie arrière du boîtier 6. -
Page 22: Panneau De Commande
4 Panneau de commande A. En appuyant sur le bouton, vous allumez l‘appareil, pressé à nouveau pour l‘éteindre. B. Le changement de la puissance élevée de chauffage à faible puissance de chauffage: Élevée Faible C. Les réglages de température et de la minuterie. D / E. -
Page 23: Mode D'emploi
5 Mode d‘emploi 1.Installation du produit Step 1: Ouvrez l’emballage et sortez l’appareil. Retirez l‘emballage en plastique. Step 2: Posez l’appareil au sol, montez le pied et vissez-le fermement. 2. Mode d’emploi Insérez la fiche dans la prise et appuyez sur l‘interrupteur situé au dos de l’appareil. 3. - Page 24 6. Réglage de la minuterie • Appuyez sur la touche C pour accéder à la fonction minuterie. La LED se met à clignoter. Appuyez sur la touche D/E pour régler la minuterie. • Durée de la minuterie : de 1 à 12 heures. •...
-
Page 25: Télécommande
6 Télécommande 1. Ouvrez le compartiment de la pile au dos de la télécommande. 2. Respectez la polarité de la pile et insérez la pile (CR2032) dans l’ouverture du compartiment. 3. Refermez le compartiment de la pile de la télécommande en pressant. Porte de la batterie Batterie 7 Avertissements et précautions de sécurité... - Page 26 En cas de dysfonctionnement, quel qu`il soit, veuillez contacter le service de répara- tion. Ne tentez pas de démonter l`appareil ou de remplacer les pièces défectueuses avec des pièces non autorisées. Vous risqueriez d`endommager l`appareil. Ne pas manipuler la fiche électrique ou l`appareil avec des mains humides.
- Page 27 Assurez vous qu`aucun objet anormal ne se trouve sur le câble et que la fiche est bien enfoncée dans la prise de courant. Sinon, cela pourrait provoquer un risque d’électrocution Si l`appareil dégage une odeur inhabitu- elle ou émet un son inhabituel, cessez de l`utiliser et débranchez-le de la prise de courant.
- Page 28 Éteignez l`appareil et débranchez-le si vous ne l`utilisez pas pendant une longue période. Évitez d`utiliser l`appareil en présence d`un enfant, d`un animal ou d`une personne handicapée manquant de maîtrise de soi. Utilisez une prise de courant répondant aux exigences d`inspection et ayant une capacité...
-
Page 29: Maintenance Et Nettoyage
8 Maintenance et nettoyage Avant de procéder à des opérations de maintenance, débranchez l’appareil et assurez-vous que le chauffage a refroidi. 1. Maintenance & nettoyage du chauffage Nettoyage de la surface: utilisez un chiffon propre et sec. Si l‘appareil est trop sale, essuyez- le avec un chiffon imprégné... -
Page 30: Détails Techniques
9 Détails techniques Modèle ..................Sahara Voltage ..................220-240V Fréquence ..................50 Hz Puissance ....chauffage à ventilation: 2000 W - humidificateur: 25 W Niveau sonore ................≤50 dB Dimensions ..............ø278mm×848mm 10 Schémas électriques... -
Page 31: Garantie / Élimination / Modifications Techniques
11 Garantie / élimination / modifications techniques Garantie L‘appareil sont contrôlés de manière précise avant la livraison. Si malgré tout un vice devait être constaté sur votre appareil, adressez-vous en toute confiance à notre revendeur. Veuillez joindre la preuve d‘achat, car celle-ci doit être présentée pour la prestation de garantie. La période de garantie est de 24 mois à... - Page 32 Maison Armin Schmid Olensbachstrasse 9-15 CH-9631 Ulisbach Tel. Int. +41 71 987 60 60 Tel. Nat. 0848870850 www.sonnenkoenig.ch Maison Armin Schmid Peter-Henlein-Strasse 5 D-89331 Burgau Tel: 0180 500 64 35 info@sonnenkoenig.ch www.sonnenkoenig.ch Téléphone Fixe 14 Cent/Minute Réseau mobile bis 42 Cent/Minute...
- Page 33 SAHARA Stufa ceramica Manuale dell’utente...
- Page 34 INDICE 1 Avvertenze �����������������������������������������������������������������������������������������������������35 2 Caratteristiche del prodotto ���������������������������������������������������������������������������36 3 Parti del prodotto �������������������������������������������������������������������������������������������37 4 Tasti di controllo e display ������������������������������������������������������������������������������38 5 Istruzioni operative ����������������������������������������������������������������������������������������39 6 Telecomando ��������������������������������������������������������������������������������������������������41 7 Instruzioni di sicurezza �����������������������������������������������������������������������������������41 8 Pulizia e manutenzione �����������������������������������������������������������������������������������45 9 Parametri tecnici ��������������������������������������������������������������������������������������������45 10 Diagramma del circuito ���������������������������������������������������������������������������������...
-
Page 35: Avvertenze
1 Avvertenze Prima di mettere in funzione per la prima volta il prodotto, si raccomanda di leggere con cura le istruzioni d’uso e di rispettare le avvertenze di sicurezza al fine di evitare un utilizzo improprio o sbagliato come pure condizioni ambientali non idonee. Si raccomanda di conservare le istruzioni per futura consultazione. -
Page 36: Caratteristiche Del Prodotto
• Non usare il prodotto in esterni, esso è stato rpogettato esclusivamente per uso domestico. • Per scollegare il riscaldatore, premere il tasto off, poi staccare la spina dalla presa di corrente. • L’apparecchio non deve essere collocato sotto la presa di corrente elettrica. 2 Caratteristiche del prodotto •... -
Page 37: Parti Del Prodotto
3 Parti del prodotto 11 12 9 10 1. Parte superiore 9. Ammortizzatore 2. Display 10. Vaschetta 3. Finestrella transparente 11. Presa di copertura posteriore 4. Griglia 12. Ugello 5. Parte frontale 13. Parte posteriore 6. Griglia posteriore 14. Copertura dell‘uscita dell‘acqua 7. -
Page 38: Tasti Di Controllo E Display
4 Tasti di controllo e display A. Premendo questo pulsante si accende il prodotto, ripremendo- lo si spegne. B. Per cambiare da bassa ad alta potenza di calore alla funzione ECO. bassa Alta C. Per impostare la temperatura e il timer D / E. -
Page 39: Istruzioni Operative
5 Istruzioni operative 1. Installazione del prodotto Step 1: Aprire la confezione, estrarre il prodotto, e smaltire il sacchetto di plastica. Step 2: Installare la base fissandola al prodotto con le apposite viti. 2. Instruzioni operative Collegare il cavo di alimentazione alla presa elettrica ed accendere l‘interruttore di accensione sul retro del prodotto. -
Page 40: Impostazione Del Timer
6. Impostazione del timer • Premendo il tasto C l‘indicatore del timer sarà acceso e inizièrà a lampeggiare. premendo i tasti D/E si imposta il timer. • Timer: 1-12 ore. • Se il valore mostrato è pari a 0 nell‘impostazione del timer, l‘indicatore sarà spento, il display LED mostrerà... -
Page 41: Telecomando
6 Telecomando 1. Estrarre la linguetta della batteria. 2. Prestare attenzione alla polarità della batteria (CR2032) ed inserirla nell‘apposito spazio. 3. Reinserire la linguetta della batteria. Linguetta della batteria Batteria 7 Instruzioni di sicurezza Per poter utilizzare il prodotto più comodamente ed evitare pericoli di funzionamento errato, si prega di prestare molta attenzione alle note indicate dai seguenti segni. - Page 42 Se presenta malfunzionamento, contattare il servizio di riparazione. Non tentare di smontare il prodotto o sostituire le parti difettose con componenti non autorizzati perché potrebbe danneggiarsi l´unità. Non maneggiare il prodotto o il cavo con le mani bagnate in quanto si incorre in rischio di scossa elettrica.
- Page 43 Se c´è qualche malfunzionamento, contat- tare il centro di assistenza per le riparazi- oni. Non tentare di smontare il prodotto o sostituire le parti difettose con componenti non autorizzate poiché si rischia di danneg- giare l᾽unità. Non maneggiare il prodotto nè tantomeno la presa elettrica con le mani bagnate, in quanto si potrebbe prendere una scossa elettrica.
- Page 44 Spegnere il dispositivo e scollegare il cavo di alimentazione quando non si utilizza per un lungo periodo. Si dovrebbe evitare di utilizzare il dispositivo in presenza di bambini o animali o persone con mancanza di autocontrollo. Utilizzare una presa di corrente che soddisfi i requisiti di ispezione, con una capacità...
-
Page 45: Pulizia E Manutenzione
• Durante la pulizia del serbatoio,utilizzare un detergente delicato e una spazzola morbida. • Per la superficie del corpo, utilizzare un panno bagnato per pulire. Non lavare direttamente con acqua. 9 Parametri tecnici Modello ..............Sahara Voltaggio ............220-240V Frequenza ............... 50 Hz Potenza ..... Stufa: 2000 W - Umidificatore: 25 W Rumorosità... -
Page 46: Diagramma Del Circuito
10 Diagramma del circuito... -
Page 47: Garanzia / Smaltimento / Modifiche Tecniche
11 Garanzia / Smaltimento / Modifiche tecniche Garanzia I prodotti vengono controllati attentamente prima della spedizione. Se dovesse comunque pre- sentarsi un vizio sul vostro apparecchio, vi invitiamo a rivolgervi in tutta tranquillità al vostro rivenditore. Vi rammentiamo di portare appresso la ricevuta d’acquisto, che deve essere presen- tata per ogni prestazione in garanzia. - Page 48 Ditta Armin Schmid Olensbachstrasse 9-15 CH-9631 Ulisbach Tel. Int. +41 71 987 60 60 Tel. Nat. 0848870850 www.sonnenkoenig.ch Ditta Armin Schmid Peter-Henlein-Strasse 5 D-89331 Burgau Tel: 0180 500 64 35 info@sonnenkoenig.ch www.sonnenkoenig.ch Telefono fisso 14 Cent/Minute Telefono mobile fino a 42 Cent/Minute...
- Page 49 SAHARA Ceramic heating User's manual...
- Page 50 INDEX 1 Safety instructions �����������������������������������������������������������������������������������������51 2 Product features ���������������������������������������������������������������������������������������������52 3 Product structure diagram �����������������������������������������������������������������������������53 4 Control buttons & display panel �������������������������������������������������������������������� 54 5 Operating instructions ������������������������������������������������������������������������������������55 6 Remote control �����������������������������������������������������������������������������������������������57 7 Safety warning & safety precautions ��������������������������������������������������������������57 8 Maintenance & cleaning ���������������������������������������������������������������������������������61 9 Technical specifications ����������������������������������������������������������������������������������62 10 Schematic diagram �����������������������������������������������������������������������������������������62 11 Warranty / disposal / technical change �����������������������������������������������������������63...
-
Page 51: Safety Instructions
1 Safety instructions Please read before first commissioning the safety instructions carefully and observe the safety instructions to prevent damage due to misuse, improper operation, and improper environmental conditions to be avoided. Keep these for later reference. Check the device after removing the packaging for damage . Do not put the unit in case of suspected corruption in operation and consult a specialist. -
Page 52: Product Features
• To disconnect heater, set controls to OFF, then remove plug from outlet. • The heater must not be located immediately below a socket outlet. 2 Product features • PTC high-efficient ceramic heater: fine-tuned power according to environment temperature; longer service life due to no oxidation. •... -
Page 53: Product Structure Diagram
3 Product structure diagram 11 12 9 10 1. Top Cover 9. Softener box 2. Display 10. Tank 3. Transparent Window 11. Back Cover Plug 4. Grill 12. Nozzle 5. Front Cover 13. Back Cover 6. Back Net 14. Water Outlet Cover 7. -
Page 54: Control Buttons & Display Panel
4 Control buttons & display panel A. By pressing this button, you turn on the device, pressed it again to turn it off. B. Shift from high heating power to low heating power: High C. Temperature and timer settings. D / E. Press to increase/decrease the room temperature settings and setting the timer function. -
Page 55: Operating Instructions
5 Operating instructions 1. Product installation Step 1: Open the packing, take the product out and take off the poly-bag. Step 2: Set the machine up, install base and fix screw on the smooth surface. 2. Operating instruction Connect the power cord with correct power supply and turn on the power switch on the back of the product. -
Page 56: Timer Settings
6. Timer settings: • By pressing the button C the timer indicator will be on, the LED light flickers. Press the button D/E to set the timer. • Timer range 1-12 hours. • If the value shows 0 in timer setting, the time indicator will be off, LED display will show the current room temperature. -
Page 57: Remote Control
6 Remote control 1. Pull out the battery door at the back side of remote control. 2. Pay attention to the battery polarity, and insert the battery (CR2032) in the battery box. 3. Push the battery door into the remote control. Battery door Battery 7 Safety warning &... - Page 58 With any indication of malfunction, contact service center repairs. Do not attempt to disassemble the product or replace faulty parts with unauthorized components because it will damage the unit. Do not hand the plug or product with wet hands. Or it may cause electric shock. Do not stick sticks, metal or other object into the outlet, because it will cause creepage or short circuit or even damage...
- Page 59 Make sure there is no abnormal items in the wire, and the plug is absolutely plugged in. Otherwise it will cause cree- page. When there is unusual smell or unusual sound from the device, stop operating the device, and unplug the plug. Do not broken power cord, or it can result in creepage, short circuit and fire, please contact service center for repairs.
- Page 60 Power off the device and unplug the power cord when not using for a long time. Should avoid using the device, if there is any child or animal or disable people or people who is lack of self- control. Using the power outlet that meet the inspection requirements, and the carry- ing capacity of the socket is no less than 10A/220V.
-
Page 61: Maintenance & Cleaning
8 Maintenance & cleaning Before maintaining, please pull out the plug and make sure the heater has cooled. 1. Maintenance & Cleaning of heater Surface cleaning: use a clean and dry wipe. If it is too dirt please wipe it with some water under 50°C and add little neutral detergent, then make it dry. -
Page 62: Technical Specifications
9 Technical specifications Model ..............Sahara Voltage .............220-240V Frequency ............... 50 Hz Power ....Fan heater: 2000 W - Humidifier: 25 W Noise level ............≤50 dB Dimension ..........ø278mm×848mm 10 Schematic diagram... -
Page 63: Warranty / Disposal / Technical Change
11 Warranty / Disposal / Technical change Warranty The Products are controlled just before delivery. If despite a lack of your product, try trustfully your seller. Please bring your receipt, as this is to be submitted for each warranty. The guarantee period is 24 months from date of purchase. - Page 64 Firma Armin Schmid Olensbachstrasse 9-15 CH-9631 Ulisbach Tel. Int. +41 71 987 60 60 Tel. Nat. 0848870850 www.sonnenkoenig.ch Firma Armin Schmid Peter-Henlein-Strasse 5 D-89331 Burgau Tel: 0180 500 64 35 info@sonnenkoenig.ch www.sonnenkoenig.ch Landline 14 Cent/Minute Mobiel network 42 Cent/Minute...