Table des Matières

Publicité

Les langues disponibles
  • FR

Les langues disponibles

Liens rapides

2in1 bladeless
Tower Fan
& Air Cleaner
For refreshing
the air in your
home with a
cooling effect.
English
Deutsch
Français
Español
Italiano

Publicité

Table des Matières
loading

Sommaire des Matières pour djive Flowmate Tower One DJ50000

  • Page 1 2in1 bladeless Tower Fan & Air Cleaner For refreshing the air in your home with a cooling effect. English Deutsch Français Español Italiano...
  • Page 2: Table Des Matières

    Contents Notice before use Product overview Prior to first use Operating instructions Care & Maintenance Troubleshooting Technical specifications Smartphone and Alexa operation...
  • Page 3 If you have any questions, please contact our customer service. Enjoy every day fresh clean air with cooling effect with your Flowmate. Customer care Phone +49 (0) 209 5130340 support@djive.eu www.djive.eu flowmate Robovox Distributions GmbH | Hamburger Straße 11, D - 45889 Gelsenkirchen...
  • Page 4: Notice Before Use

    NOTICE BEFORE USE \\\ ATTENTION To avoid fire, electric shock and personal injury, please be sure to observe the following requirements. Please follow the relevant national and local electrical regulations: The appliance is not intended for use by children, elderly or disabled people, or any individual lacking experience and knowledge concerning the use of the fan, unless they have been given supervision or instruction by a person responsible for their safety.
  • Page 5 Turn off all functions before unplugging the fan. When it is not in use for a long time, unplug it from the socket. To avoid the risk of tripping, securely store the wires. 10. Do not put any object on the air inlet or outlet to make sure the air inlet and outlet are free from dust, lint, hair, and any obstacle that may reduce airflow.
  • Page 6: General Safety Information

    NOTICE BEFORE USE \\\ ATTENTION To ensure proper usage and maintenance of the fan, please read the instruction manual carefully before use and take good care of this manual for future reference. DANGER If the dangerous situation is not avoided, this can lead to death or serious injuries.
  • Page 7 DANGER Only qualified electricians, who have been trained by the manufacturer, may carry out any repairs that may be needed. This appliance is used in the household only. Please use a separate outlet in accordance with the appliance current/voltage. Don’t use more than one electrical appliance at the same time on the same outlet.
  • Page 8 NOTICE BEFORE USE \\\ DANGER – RISK OF FIRE Never cover the appliance when it is in operation. Do not put the appliance in the vicinity of easily inflammable materials such as paint, varnish or gas. Allow a gap of at least 1 m between the fan and all flammable and heatsensitive materials (furniture, curtains, paper, clothes etc.).
  • Page 9 ATTENTION Place the appliance on a firm, dry, flat and waterproof surface. Do not install the appliance in a hot, wet or very humid environment. Never place the appliance or parts of the appliance in the vicinity of strong heat sources and hot surfaces (e.g., heating, oven, and grill). Do not place the fan in a narrow place, a corner or in narrow areas between furnitures.
  • Page 10: Product Overview

    PRODUCT OVERVIEW \\\ Front side Back side Air outlet LED touch display Filter case Power Inlet...
  • Page 11: Remote Control

    Remote control HEPA 12 filter (please refer to page 15 for remote operation) Power cord CR2025 button cell (please refer to page 13 for cell assemble)
  • Page 12: Prior To First Use

    PRIOR TO FIRST USE \\\ Place of operation The fan shall be put in a leveled place. Please don’t place the fan in unstable places, such as slope, soft surface to prevent the fan from tipping over and causing damage or malfunction. 2.
  • Page 13 Battery replacement for the remote control Please pay attention to the direction the battery faces while replacing it. CR2025 CR2025 CR2025...
  • Page 14: Operating Instructions

    OPERATING INSTRUCTIONS \\\ When operating the fan with a remote control, we suggest to aim the remote at the receiver on the front side of the fan to achieve the best control signal. The following cases may occur when operating the fan This fan may work when using remote control of other electrical appliances.
  • Page 15 Remote control All available functions can be operated with the remote control. ON / OFF Turn the power on/off Speed levels Increase (+) or decrease (-) the air speed to 9 levels in total Timer function Set a shutdown timer (1 - 8 h) Sleep mode Change to a very slow air speed MAX mode...
  • Page 16: Operating Functions

    OPERATING INSTRUCTIONS \\\ Operating functions ON / OFF Turn the power on/off Press the LED display while the device is turned off to start it with the initial settings. OFF: Press the LED display for 2 seconds and remove the finger after hearing two notification sounds to turn if off.
  • Page 17: Sleep Mode

    Sleep mode Change to a very slow air speed Press the button on the remote control to start/stop the Sleep mode. A notification (L) will appear/disappear on the LED display. Pressing either the (+) or minus (-) button will cancel the Sleep mode. MAX mode Set the air speed to maximum output.
  • Page 18: Care & Maintenance

    CARE & MAINTENANCE \\\ ATTENTION Don’t splash water on the fan. It may damage the fan. Please don’t use banana oil, gasoline, alcohol, bleach or metal object to clean the surface of the fan. Otherwise it may discolor or deteriorate the surface of the fan. Cleaning the appliance Fan Surface Please gently wipe the surface with a clean soft cloth.
  • Page 19 Changing the HEPA filter Make sure your appliance is switched off unplugged. Press gently on the far left side of the filter case cover to remove it. Remove the old filter and replace it with a new one. (Sold separately) Put the cover back on the filter case.
  • Page 20: Troubleshooting

    TROUBLESHOOTING \\\ ATTENTION If an abnormal situation occurs, please check the following instructions and contact customer service if the problem remains. DANGER Please don’t disassemble and repair the fan without authorization. Problem Possible cause and solution • Is the power plug properly connected? The device is plugged in Is the power indicator on? but won't function.
  • Page 21: Technical Specifications

    App and Alexa This device can be operated via Smartphone and Amazon Alexa. For instructions how to download and operate the app, please visit www.djive.eu Support service If the device should ever completely fail to operate, please contact us via mail first. (refer to page 3) We will try our hardest to either fix your appliance or to provide a new Flowmate Tower one to you.
  • Page 22 Inhalt Wichtige Warnhinweise Bestandteile Vor Inbetriebnahme Bedienung Pflege & Wartung Problembehandlung Technische Spezifikationen Smartphone und Alexa-Bedienung...
  • Page 23 Sollten Sie Fragen haben, dann kontak- tieren Sie bitte unseren Kundenservice. Genießen Sie mit Ihrem Flowmate jeden Tag frische, saubere Raumluft mit ange- nehmen Kühlungseffekt. Kundendienst Telefon +49 (0) 209 5130340 support@djive.eu www.djive.eu flowmate Robovox Distributions GmbH | Hamburger Straße 11, D - 45889 Gelsenkirchen...
  • Page 24: Wichtige Warnhinweise

    WICHTIGE WARNHINWEISE \\\ ACHTUNG Um Brandgefahr, Stromschläge und körperliche Verletzungen zu vermeiden, beachten Sie bitte folgende Sicherheitshinweise und internationale Regulierungen: Dieses Gerät sollte nicht von Kindern, älteren Personen mit fehlender Erfahrung im Umgang mit ähnlicher Elektronik, sowie beeinträchtigten Personen ohne die Aufsicht eines Schutzbeauftragten bedient werden. Bei diesem Gerät handelt es sich nicht um Spielzeug! Bitte nutzen Sie für das Gerät eine seperate Steckdose, die den techni- schen Anforderungen des Gerätes entspricht und verzichten Sie auf eine...
  • Page 25 Bitte stellen Sie das Gerät so auf, dass keine Kinder, Haustiere oder andere Personen über das Gerät bzw. das Stromkabel stolpern. Schalten Sie das Gerät bitte immer aus, bevor Sie das Stromkabel aus der Steckdose herausziehen. Sollte Sie das Gerät längere Zeit nicht benöti- gen, ziehen sie das Stromkabel aus der Steckdose und lagern Sie es an einem sicheren Ort.
  • Page 26 WICHTIGE WARNHINWEISE \\\ ACHTUNG Um einen sicheren Betrieb des Gerätes zu gewährleisten, lesen Sie bitte vor der ersten Inbetriebnahme des Gerätes diese Anleitung sorgfältig durch und bewahren Sie sie für spätere Fragen auf. GEFAHR Missachten des Hinweises kann zu Unfällen und schweren Verletzungen führen.
  • Page 27 GEFAHR Nur qualifizierte Fachkräfte, die vom Hersteller eingewiesen wurden, dürfen Reparaturen am Gerät vornehmen. Dieses Gerät darf nur in trockenen, überdachten Orten betrieben werden. Es darf nicht bei Nässe oder im Freien betrieben werden. Bitte nutzen Sie für das Gerät eine seperate Steckdose, die den techni- schen Anforderungen des Gerätes entspricht und verzichten Sie auf eine gleichzeitige Benutzung der Steckdose mit anderen Geräten.
  • Page 28 WICHTIGE WARNHINWEISE \\\ BRANDGEFAHR Bedecken Sie niemals das Gerät während des Betriebs. Stellen Sie das Gerät nicht in der Nähe von leicht enzündlichen Objekten auf. Sorgen Sie für einen Abstand von mind. 1 Meter zwischen dem Gerät und hitzeempfindlichen Objekten. Schalten Sie bei Anzeichen wie Rauchentwicklung, -geruch o.ä.
  • Page 29 VORSICHT Stellen Sie bitte das Gerät auf eine flache, trockene und feste Fläche. Betreiben Sie das Gerät nicht an besonders feuchten oder heißen Orten. Stellen Sie das Gerät niemals in der Nähe von Objekten auf, die große Hitze erzeugen (z.B. Öfen, Heizungen, Grille) Stellen Sie das Gerät nicht an eingeengten Orten auf.
  • Page 30: Bestandteile

    BESTANDTEILE \\\ Vorderseite Rückseite Luftauslass LED - Touchdisplay Filtergehäuse Netzteil-Anschluss...
  • Page 31 Fernbedienung HEPA 12 Filter (Auf Seite 35 finden Sie die Anleitung für die Fernbedienung) Netzteil CR2025 Knopfzelle (Auf Seite 33 finden Sie die Anleitung wie Sie die Batterie einsetzen)
  • Page 32: Vor Dem Erstgebrauch

    VOR DEM ERSTGEBRAUCH \\\ Einsatzort Der Ventilator sollte auf einer ebenen Fläche stehen. Bitte stellen Sie den Ventilator nicht auf unebene oder schiefe Flächen oder auf weichen Untergrund. Damit vermeiden Sie, dass der Ventilator umkippt und Schäden oder Fehlfunktionen entstehen können. 2.
  • Page 33: Batteriewechsel Der Fernbedienung

    Batteriewechsel der Fernbedienung Achten Sie auf den korrekten Einsatz der Batterie. CR2025 CR2025 CR2025...
  • Page 34: Bedienung

    BEDIENUNG \\\ Wenn der Lüfter mit einer Fernbedienung betrieben wird, empfehlen wir, die Fern- bedienung auf den Empfänger an der Vorderseite des Lüfters zu richten, um das beste Steuersignal zu erhalten. Die folgenden Fälle können beim Betrieb des Ventilators auftreten Dieser Ventilator kann bei der Verwendung einer Fernbedienung anderer elektrischer Geräte funktionieren.
  • Page 35: Schlafmodus

    Fernbedienung Alle Funktionen können auch per Fernbedienung gesteuert werden. AN / AUS Zum Ein- / Ausschalten des Ventilators Geschwindigkeitsregler Geschwindigkeitserhöhung (+) oder -reduzierung (-) mit insgesamt 9 Stufen Zeitschaltuhr Schaltet das Gerät nach Ablauf aus (1 - 8 h) Schlafmodus Wechsel auf sanften Luftstrom MAX-Modus Setzt Geschwindigkeit...
  • Page 36: Timer Function

    BEDIENUNG \\\ Bedienfunktionen EIN / AUS Schaltet das Gerät EIN / AUS EIN: Das Gebläse beginnt beim Berühren der LED-Anzeige mit der Funktion gemäß den ursprünglichen Einstellungen. AUS: Drücken Sie erneut für 2 Sekunden. Nachdem Sie zwei akustische Signale gehört haben, stoppt der Ventilator den Betrieb. Der Ventilator kann auch per Fernbedienung ein- und ausgeschaltet werden.
  • Page 37 Schlafmodus Wechsel auf sanften Luftstrom Drücken Sie die Taste auf der Fernbedienung um den Schlafmodus ein- / auszuschalten. Es erscheint/erlischt ein Hinweis (L) auf dem LED Display. Durch drücken der (+) / (-) Taste wird der Schlafmodus beendet. MAX-Modus Setzt Geschwindigkeit auf das Maximum Drücken Sie die Taste auf der Fernbedienung um den Schlafmodus ein- / auszuschalten.
  • Page 38: Pflege & Wartung

    PFLEGE & WARTUNG \\\ ACHTUNG Spritzen Sie kein Wasser auf den Ventilator. Es kann den Ventilator beschädigen. Bitte verwenden Sie kein Lösungsmittel, Benzin, Alkohol, Bleichmittel oder Metallgegenstände, um die Oberfläche des Ventilators zu reinigen. Andernfalls kann sich die Oberfläche des Ventilators verfärben oder beschädigt werden.
  • Page 39 Wechsel des HEPA-Filters Vergewissern Sie sich, dass Ihr Gerät ausgeschaltet und ausgesteckt ist. Drücken Sie leicht auf die linke Seite des Filtergehäusedeckels, um ihn zu öffnen. Entfernen Sie den alten Filter und ersetzen Sie ihn durch einen neuen. (separat erhältlich) Legen Sie den Deckel wieder auf das Filtergehäuse.
  • Page 40 FEHLERBEHEBUNG \\\ ACHTUNG Sollten Sie Probleme mit Ihrem Ventilator haben befolgen Sie bitte zuerst diese einfache Checkliste und wenden Sie sich bitte an den Kundendienst und das Reparaturzentrum, falls die Probleme bestehen. GEFAHR Bitte zerlegen und reparieren Sie den Ventilator nicht selbstständig. Problem Mögliche Ursache und Lösung •...
  • Page 41: Technische Spezifikationen

    Dieses Gerät kann auch mit App und Alexa gesteuert werden. Die Anleitung, wie Sie die App laden und das Gerät damit steuern können , finden Sie unter www.djive.eu Support-Service Sollte es wirklich einmal so weit sein, dass Ihr Flowmate nicht mehr funktioniert, dann nehmen Sie bitte zuerst per eMail Kontakt zu uns auf.
  • Page 42 Sommaire Avertissements importants Composants Avant la mise en service Utilisation Entretien et maintenance Résolution des problèmes Spécifications techniques Contrôle via Smartphone et Alexa...
  • Page 43 Profitez chaque jour d'un air intérieur frais et propre avec un effet rafraîchis- sant agréable grâce à votre Flowmate. Service clientèle Téléphone +49 (0) 209 5130340 support@djive.eu www.djive.eu flowmate Robovox Distributions GmbH | Hamburger Straße 11, D - 45889 Gelsenkirchen...
  • Page 44: Avertissements Importants

    AVERTISSEMENTS IMPORTANTS \\\ ATTENTION Afin d’éviter le risque d’incendie, les chocs électriques et les blessures physiques, veuillez respecter les consignes de sécurité suivantes et les régulations internationales: Cet appareil ne doit pas être utilisé par des enfants, des personnes âgées avec un manque d’expérience dans la manipulation de dispositifs élec- troniques similaires, ni des personnes avec des déficiences, hors de la surveillance d’une personne chargée de leur protection.
  • Page 45 Veuillez toujours éteindre l’appareil avant de débrancher le câble de la prise. Si vous n’utilisez pas l’appareil pendant une période prolongée, débranchez le câble de la prise et entreposez-le à un endroit sûr. 10. Ne pas introduire d'objets dans les ouvertures d'aération. Veillez toujours à...
  • Page 46: Consignes De Sécurité Générales

    AVERTISSEMENTS IMPORTANTS \\\ ATTENTION Afin de garantir une utilisation de sécurité de l’appareil, veuillez lire attentivement ce manuel avant la première mise en service de l’appareil et le conserver en cas de questions futures. DANGER Le non-respect de cette remarque peut entraîner des accidents et des blessures graves.
  • Page 47 DANGER Cet appareil ne doit être utilisé qu’à des emplacements secs et couverts. Il ne doit pas être utilisé dans des endroits humides ou à l’extérieur. Veuillez utiliser pour l’appareil une prise séparée qui satisfait aux exigen- ces techniques de l’appareil et n’utilisez pas la prise simultanément avec d’autres appareils.
  • Page 48: Danger - Risque D'incendie

    AVERTISSEMENTS IMPORTANTS \\\ DANGER – RISQUE D’INCENDIE: Ne recouvrez jamais l’appareil pendant le fonctionnement. N’installez pas l’appareil à proximité d'objets facilement inflammables. Veillez à un espace d’au moins un mètre entre l’appareil et les objets sensibles à la chaleur. En cas de signe de développement ou d’odeur de fumée ou similaire, éteignez immédiatement l’appareil et débranchez-le du secteur.
  • Page 49 ATTENTION Installez l’appareil sur une surface plane, sèche et solide. N’utilisez pas l’appareil à des emplacements particulièrement humides ou chauds. N’installez jamais l’appareil à proximité d’objets qui génèrent une forte chaleur (par ex. poêles, chauffages, grils) N'installez pas l’appareil dans des endroits exigus. Veillez à une possibilité suffisante de circulation d’air autour de l’appareil.
  • Page 50: Composants

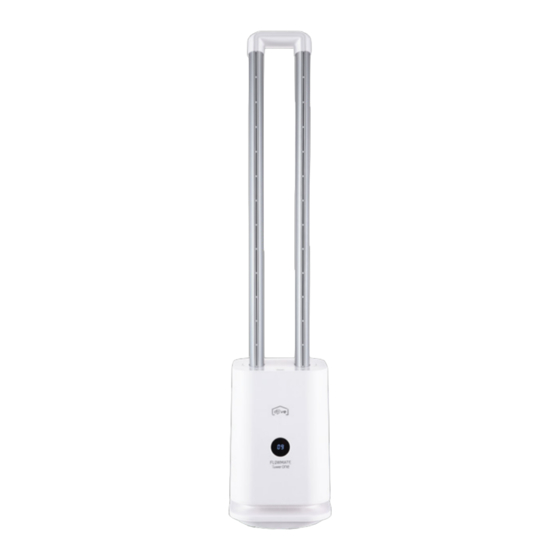
    COMPOSANTS \\\ Face avant Face arrière Sortie d’air Affichage Boîtier de filtre Entrée d'alimentation...
  • Page 51: Télécommande

    Télécommande Filtre HEPA 12 (Vous trouverez les instructions concer- nant la télécommande à la page 55) Câble d'alimentation Pile bouton CR2025 (Vous trouverez les instructions concernant la batterie à la page 53)
  • Page 52: Avant La Première Utilisation

    AVANT LA PREMIÈRE UTILISATION \\\ Lieu d'utilisation Le ventilateur doit être placé sur une surface plane. Ne placez pas le ventilateur sur des surfaces irrégulières ou penchées ou sur un sol souple. Vous évitez ainsi que le ventilateur se renverse et que des dommages ou des dysfonctionnements apparaissent.
  • Page 53 Remplacement de la pile de la télécommande Veillez à l’utilisation correcte de la batterie. CR2025 CR2025 CR2025...
  • Page 54 INSTRUCTIONS D’UTILISATION \\\ Si le ventilateur est utilisé avec une télécommande, nous recomman- dons d’orienter la télécommande sur le récepteur à l’avant du ventilateur afin de recevoir le meilleur signal de commande possible. Les cas suivants peuvent se produire pendant le fonctionnement du ventilateur Ce ventilateur peut fonctionner avec l’utilisation d’une télécommande d’autres appareils électriques.
  • Page 55: Mode Panoramique

    Télécommande Toutes les commandes peuvent être contrôlées avec la télécommande. MARCHE / ARRÊT Pour allumer / éteindre le ventilateur Contrôleur de vitesse Augmenter (+) ou réduction (-) de la vitesse avec un total de 9 étapes Minuterie Minuterie de 1 à 8 heures au total Mode veille Passage à...
  • Page 56: Fonctionnement

    INSTRUCTIONS D’UTILISATION \\\ Fonctionnement MARCHE / ARRÊT Pour allumer / éteindre le ventilateur MARCHE: Le ventilateur démarre au toucher de l’affichage LED avec la fonction correspondant aux réglages initiaux. ARRÊT: Appuyez à nouveau pendant 2 secondes. Après avoir entendu deux signaux sonores, le ventilateur cesse de fonctionner. Le ventilateur peut aussi être arrêté...
  • Page 57: Mode Veille

    Mode veille Passage à un flux d’air doux Appuyez sur cette touche de la télécommande, l’affichage LED indique alors (L) et le flux d’air est réduit. Appuyez sur la touche de vitesse du flux (+) (-) pour quitter ce mode. Mode max Fixe la vitesse au maximum Appuyez sur cette touche de...
  • Page 58: Entretien Et Maintenance

    ENTRETIEN ET MAINTENANCE \\\ ATTENTION Ne projetez pas d’eau sur le ventilateur. Cela peut endommager le ventilateur. N’utilisez pas de produit solvant, d’essence, d’alcool, de produit de blanchiment ou d'objet métallique pour nettoyer la surface du ventilateur. Cela pourrait décolorer la surface du ventilateur ou même l’endommager. Nettoyage de l'appareil Surface du ventilateur Essuyez la surface délicatement avec un chiffon propre et...
  • Page 59: Remplacement Du Filtre Hepa

    Remplacement du filtre HEPA Assurez-vous que votre application est désactivée et débranchée. Appuyez délicatement sur le côté gauche du couvercle du boîtier de filtre pour l’enlever. Retirez l’ancien filtre et remplacez-le par le nouveau filtre. (Filtre vendu séparément) Refermez le couvercle sur le boîtier du filtre. Merci de vous assurer que les aimants du couvercle et le boîtier soient correctement alignés.
  • Page 60: Résolution Des Erreurs

    RÉSOLUTION DES ERREURS \\\ ATTENTION Si vous rencontrez des problèmes avec votre ventilateur, suivez tout d’abord cette liste de contrôle simple. Adressez-vous au service après-vente et au centre de réparation en cas de problème. DANGER Ne démontez pas et ne réparez pas le ventilateur vous-même. Problème Cause possible et remède •...
  • Page 61: Spécifications Techniques

    Cet appareil peut aussi être contrôlé avec une application et Alexa. Vous trouverez les instructions pour le téléchargement de l’application et pour l’utilisation de l’appareil avec l’application sur www.djive.eu Service d’assistance Si votre Flowmate ne fonctionne plus du tout, veuillez tout d’abord prendre contact avec nous par e-mail.
  • Page 62 Índice Indicaciones de advertencia importantes Componentes Antes de la puesta en funcionamiento Manejo Limpieza y mantenimiento Resolución de problemas Especificaciones técnicas Operación del Smartphone y de Alexa...
  • Page 63 Disfruta de un aire interior fresco y lim- pio con un agradable efecto refrescan- te cada día con tu Flowmate. Atención al cliente Teléfono +49 (0) 209 5130340 support@djive.eu www.djive.eu flowmate Robovox Distributions GmbH | Hamburger Straße 11, D - 45889 Gelsenkirchen...
  • Page 64: Indicaciones De Advertencia Importantes

    INDICACIONES DE ADVERTENCIA IMPORTANTES \\\ ADVERTENCIA Para evitar riesgo de incendio, descarga eléctrica y lesiones, respete las siguientes indicaciones de seguridad y las reglamen- taciones internacionales: Este dispositivo no debe ser manejado por niños, personas mayores sin experiencia en el uso con dispositivos electrónicos similares ni personas con impedimentos físicos sin la supervisión de una persona encargada de la seguridad.
  • Page 65 Apague siempre el dispositivo antes de sacar el cable eléctrico de la toma eléctrica. Si no necesita el dispositivo por un periodo de tiempo prolongado, saque el cable eléctrico de la toma eléctrica y guarde el dispositivo en un lugar seguro. 10.
  • Page 66 INDICACIONES DE ADVERTENCIA IMPORTANTES \\\ ATENCIÓN Para garantizar un funcionamiento seguro del dispositivo, lea detenidamente estas instrucciones antes de la primera puesta en funcionamiento y consérvelas para consultas posteriores. PELIGRO El incumplimiento de las indicaciones puede provocar accidentes y lesiones graves. ATTENTION El incumplimiento de las indicaciones puede provocar accidentes y lesiones graves.
  • Page 67 PELIGRO Las reparaciones del dispositivo únicamente puede realizarlas personal especializa- do debidamente instruido por el fabricante. Este dispositivo únicamente se puede utilizar en lugares secos y cubiertos. No se puede utilizar en condiciones de humedad o al aire libre. Utilice una toma eléctrica por separado para el dispositivo que cumpla con los requisitos técnicos de este y no utilice la toma eléctrica simultáneamente con otros dispositivos.
  • Page 68 INDICACIONES DE ADVERTENCIA IMPORTANTES \\\ PELIGRO DE INCENDIO No cubra nunca el dispositivo mientras esté funcionando. No coloque el dispositivo cerca de objetos fácilmente inflamables. Deje un espacio de al menos 1 metro entre el dispositivo y los objetos sensibles al calor. Desconecte inmediatamente el dispositivo ante cualquier indicio de presencia de humo, olor o similar y desenchúfelo de la red eléctrica.
  • Page 69 PRECAUCIÓN Coloque el dispositivo sobre una superficie plana, seca y firme. No utilice el dispositivo en lugares especialmente húmedos o excesivamente calientes. No coloque nunca el dispositivo cerca de objetos que generen altas temperaturas (p. ej., hornos, calefacciones, parrillas). No coloque el dispositivo en lugares inapropiados. Asegúrese de que haya una circulación de aire suficiente alrededor del dispositivo.
  • Page 70: Componentes

    COMPONENTES \\\ Lado frontal Lado posterior Salida de aire Indicador Caja de filtro Entrada de energía...
  • Page 71 Mando a distancia Filtro HEPA 12 (En la página 75 se encuentran las instrucciones del mando a distancia) Cable de alimentación Pila de botón CR2025 (En la página 73 se encuentran las instrucciones para colocar la pila)
  • Page 72: Antes Del Primer Uso

    ANTES DEL PRIMER USO \\\ Lugar de utilización El ventilador debe estar sobre una superficie plana y nivelada. No coloque el ventilador en una superficie irregular o inclinada ni sobre una base blanda. Con ello se evita que el ventilador se vuelque o que puedan producirse fallos de funcionamiento.
  • Page 73 Método de cambio de la pila Asegúrese de colocar la pila correctamente. CR2025 CR2025 CR2025...
  • Page 74 MANUAL DE INSTRUCCIONES \\\ Si se usa el ventilador con un mando a distancia, recomendamos dirigir este último al lado frontal del ventilador para conseguir la mejor señal de control posible. Los siguientes casos pueden darse al utilizar el ventilador Este ventilador puede funcionar al utilizar un mando a distancia de otros dispositivos eléctricos.
  • Page 75 Mando a distancia Todas las funciones se pueden controlar también con el mando a distancia. ON / OFF Para conectar/desconectar el ventilador Niveles de velocidad Incremento (+) o reducción (-) de la velocidad con 9 niveles de velo- cidad en total Temporizador De 1 a 8 horas de temporización en total...
  • Page 76: Manejo

    MANUAL DE INSTRUCCIONES \\\ Manejo ON / OFF Para conectar/desconectar el ventilador El ventilador se pone en marcha al tocar el indicador LED con la función correspondiente a los ajustes originales. OFF: Pulse nuevamente durante 2 segundos. Tras escuchar dos señales acústicas, el ventilador detiene el funcionamiento.
  • Page 77: Señal Acústica

    Modo de reposo Cambio a corriente de aire suave Pulse esta tecla en el mando a distancia : el indicador LED muestra (L) y la corriente de aire se reducir. Pulse la tecla de velocidad del aire (+ -) para salir de este modo. Modo MAX Ponga la velocidad del aire a máxima salida Pulse esta tecla en el mando a distancia...
  • Page 78: Limpieza Y Mantenimiento

    LIMPIEZA Y MANTENIMIENTO \\\ PRECAUCIÓN No rocíe agua sobre el ventilador. Puede dañar el ventilador. No utilice disolventes, gasolina, alcohol, lejía ni objetos metálicos para limpiar la super- ficie del ventilador. De lo contrario, la superficie del ventilador puede resultar dañada o perder color.
  • Page 79 Cambiar el filtro HEPA Asegúrate de que tu dispositivo está apagado y desenchufado. Presione ligeramente el lado izquierdo de la tapa del alojamiento del filtro para abrirla. Quita el filtro viejo y cámbialo por uno nuevo. (Se vende por separado) Vuelve a poner la tapa en el alojamiento del filtro.
  • Page 80: Resolución De Errores

    RESOLUCIÓN DE ERRORES \\\ PRECAUCIÓN Si tiene problemas con el ventilador, consulte primero esta sencilla lista de comprobación. En caso de problemas, diríjase al servicio de atención al cliente y al centro de reparaciones. PELIGRO No desarme ni repare el ventilador por su cuenta. Problema Posible causa y solución •...
  • Page 81: Especificaciones Técnicas

    Este dispositivo también se puede manejar mediante una aplicación y Alexa. Las instrucciones sobre cómo descargar la aplicación para poder manejar el dispositivo se encuentran en www.djive.eu Servicio de asistencia técnica Si su Flowmate dejara realmente de funcionar, póngase en contacto con nosotros primero por correo electrónico.
  • Page 82 Contenuto Avvertenze importanti Componenti Prima della messa in funzione Comando Cura e manutenzione Risoluzione dei problemi Specifiche tecniche Funzionamento dello Smartphone e di Alexa 101...
  • Page 83 Godetevi l'aria fresca e pulita a casa vostra con un piacevole effetto rinfre- scante ogni giorno con il vostro Flow- mate. Assistenza clienti Telefono +49 (0) 209 5130340 support@djive.eu www.djive.eu flowmate Robovox Distributions GmbH | Hamburger Straße 11, D - 45889 Gelsenkirchen...
  • Page 84: Avvertenze Importanti

    AVVERTENZE IMPORTANTI \\\ AVVERTIMENTO Per evitare il rischio di incendio, scosse elettriche e lesioni fisiche osservare le seguenti avvertenze sulla sicurezza e le normative internazionali: Questo dispositivo non deve essere utilizzato da bambini, persone an- ziane con scarsa esperienza con dispositivi elettrici simili e da persone con disabilità...
  • Page 85 Spegnere sempre il dispositivo prima di estrarre il cavo dalla presa di corrente. Se non si ha bisogno di utilizzare il dispositivo per molto tempo, estrarre il cavo dalla presa di corrente e riporlo in un luogo sicuro. 10. Non infilare oggetti nelle aperture di ventilazione. Fare sempre atten- zione che polvere, capelli o altri oggetti non ostruiscano le aperture di ventilazione.
  • Page 86: Indicazioni Generali Sulla Sicurezza

    AVVERTENZE IMPORTANTI \\\ ATTENZIONE Per garantire la sicurezza del dispositivo, prima della messa in servizio leggere attentamente questo manuale di istruzioni e conservarlo per una futura consultazione. PERICOLO La mancata osservanza delle avvertenze di sicurezza può provocare incidenti o lesioni gravi. ATTENZIONE La mancata osservanza delle avvertenze di sicurezza può...
  • Page 87 PERICOLO Questo dispositivo deve essere utilizzato in luoghi asciutti e coperti. Non deve essere utilizzato in luoghi umidi o all’aperto. Utilizzare per il dispositivo una presa di corrente separata che soddisfi i requisiti tecnici del dispositivo e rinunciare all’utilizzo contemporaneo della stessa presa di corrente con altri dispositivi.
  • Page 88 AVVERTENZE IMPORTANTI \\\ PERICOLO DI INCENDIO Non coprire mai il dispositivo durante il funzionamento, Non posizionare il dispositivo nelle vicinanze di oggetti facilmente infiammabili. Garantire una distanza minima di 1 metro tra il dispositivo e oggetti sensibili al calore. Spegnere immediatamente il dispositivo se emana fumo o odori e scollegare il cavo dalla presa di corrente.
  • Page 89 ATTENZIONE Posizionare il dispositivo su una superficie piana, asciutta e stabile. Non azionare il dispositivo in luoghi particolarmente umidi o caldi. Non posizionare mai il dispositivo nelle vicinanze di oggetti che producono grande calore (ad es. forni, riscaldamenti, griglie). Non posizionare il dispositivo in luoghi troppo stretti. Garantire una buona circolazione dell'aria intorno al dispositivo.
  • Page 90: Componenti

    COMPONENTI \\\ Lato anteriore Lato posteriore Uscita dell'aria Display a LED Caso del filtro Ingresso di potenza...
  • Page 91: Comando

    Telecomando Filtro HEPA 12 (le istruzioni per il telecomando si trovano a pagina 95) Cavo di alimentazione CR2025 Batteria a bottone (Le istruzioni per inserire la batteria si trovano a pagina 93)
  • Page 92: Prima Del Primo Utilizzo

    PRIMA DEL PRIMO UTILIZZO \\\ Luogo di utilizzo Il ventilatore deve essere posizionato su una superficie piana. Non posizionare il ventila- tore su una superficie non piana o inclinata o su uno sfondo morbido. In questo modo si evita che il ventilatore si ribalti o che possa causare danni o malfunzionamenti.
  • Page 93 Metodo di sostituzione della batteria Non ricaricare questa batteria. CR2025 CR2025 CR2025...
  • Page 94 ISTRUZIONI PER L’USO \\\ Quando il ventilatore viene azionato con un telecomando, orientare il telecomando verso il ricevitore che si trova sulla parte anteriore del ventilatore affinché possa ricevere corretta- mente il segnale. Durante il funzionamento del ventilatore possono verificarsi i seguenti casi Questo ventilatore può...
  • Page 95: Livelli Di Velocità

    Mando a distancia Tutte le funzioni possono essere comandate anche con il telecomando. ON / OFF Per accendere/spegnere il ventilatore Livelli di velocità Aumento (+) o diminuzione (-) di velocità con 9 livelli di velocità in totale Timer Possibilità di regolare il timer da 1 a 8 ore Modalita SLEEP Per passare al flusso...
  • Page 96 ISTRUZIONI PER L’USO \\\ Funzionamento ON / OFF Per accendere/spegnere il ventilatore Il ventilatore si avvia toccando il display a LED in base alle configurazioni originali. OFF: Premere nuovamente il pulsante per 2 secondi. Dopo aver udito due volte il segnale acustico, il ventilatore si arresta. Il ventilatore può...
  • Page 97: Segnale Acustico

    Modalita SLEEP Per passare al flusso d’aria leggero Premere questo pulsante sul telecomando, il display a LED visualizza (L) e il flusso d’aria diventa si riduce. Premere il pulsante di velocità dell’aria (+ -) per abbandonare questa modalità. MAX mode Impostare la velocità...
  • Page 98: Cura E Manutenzione

    CURA E MANUTENZIONE \\\ ATTENZIONE Non spruzzare acqua sul ventilatore. Può danneggiare il ventilatore. Non utilizzare solventi, benzina, alcol, candeggina o oggetti di metallo per pulire la superficie del ventilatore. La superficie del ventilatore potrebbe scolorirsi o danneggiarsi. Pulizia dell'apparecchio Superficie del ventilatore Lavare accuratamente la superficie con un panno mor- bido e pulito.
  • Page 99: Sostituzione Del Filtro Hepa

    Sostituzione del filtro HEPA Assicuratevi che l’apparecchio sia spento e scollegato dalla corrente . Premete delicatamente il lato sinistro del coperchio dell’alloggiamento del filtro per rimuoverlo. Rimuovete il vecchio filtro e sostituitelo con il nuovo. (venduto separatamente) Richiudete il coperchio dell‘alloggiamento del filtro. Accertatevi che i magneti sul coperchio e sull’alloggiamento siano allineati correttamente.
  • Page 100: Risoluzione Degli Errori

    RISOLUZIONE DEGLI ERRORI \\\ ATTENZIONE In caso di problemi con il ventilatore, seguire questa semplice lista di controllo. Rivolgersi al servizio clienti e al centro riparazioni se si riscontrano problemi. PERICOLO Non smontare e non riparare il ventilatore autonomamente. Problema Possibile causa e soluzione •...
  • Page 101: Specifiche Tecniche

    Questo dispositivo può essere comandato anche tramite App o Alexa. La guida per scaricare l’App e per comandare il dispositivo con l’App è disponibile all’indirizzo www.djive.eu Servicio de asistencia técnica Se il tuo apparecchio Flowmate dovesse smettere di funzionare, ti invitiamo a contattare il nostro Servizio Clienti per e-mail.
  • Page 104 AN#: DJ50000; DJ50001; DJ50002 \\\ Product: DC 24, 35 W \\\...

Table des Matières