Table des Matières

Publicité

Les langues disponibles
  • FR

Les langues disponibles

  • FRANÇAIS, page 13

Liens rapides

Publicité

Table des Matières
loading

Sommaire des Matières pour Indesit EWE 71252 W EU

  • Page 1: Table Des Matières

    Instructions for use WASHING MACHINE Contents Installation, 2-3 Unpacking and levelling Connecting the electricity and water supplies The first wash cycle English, 1 Français,13 Deutsch,25 Technical data Care and maintenance, 4 Cutting off the water or electricity supply Cleaning the washing machine Polski,37 Română,61 Magyar,49...
  • Page 2: Installation

    Installation ! This instruction manual should be kept in a safe Levelling the machine correctly will provide it with place for future reference. If the washing machine stability, help to avoid vibrations and excessive is sold, transferred or moved, make sure that the noise and prevent it from shifting while it is ope- instruction manual remains with the machine so rating.
  • Page 3: The First Wash Cycle

    Connecting the drain hose ! Do not use extension cords or multiple sockets. Connect the drain ! The cable should not be bent or compressed. hose, without bending it, to a drainage duct or ! The power supply cable must only be replaced a wall drain located at a by authorised technicians.
  • Page 4: Care And Maintenance

    Care and maintenance Cutting off the water and electri- Caring for the door and drum of city supplies your appliance • Turn off the water tap after every wash cycle. • Always leave the porthole door ajar in order This will limit wear on the hydraulic system to prevent unpleasant odours from forming. inside the washing machine and help to pre- Cleaning the pump vent leaks.
  • Page 5: Precautions And Tips

    Precautions and tips the appliance it must be separately collected. Consumers This washing machine was designed and constructed in should contact their local authority or retailer for information accordance with international safety regulations. The fol- concerning the correct disposal of their old appliance. lowing information is provided for safety reasons and must therefore be read carefully.
  • Page 6: Description Of The Washing Machine

    Description of the washing machine Control panel Button with indicator light KEYPAD LOCK OPTION TEMPERATURE ON/OFF START/PAUSE buttons with Button button button with indicator light indicator lights DISPLAY Detergent dispenser drawer DELAYED START SPIN SPEED Button WASH CYCLE Button knob Detergent dispenser drawer: used to dispense deter- TEMPERATURE button : press to decrease or comple-...
  • Page 7: Display

    Display The display is useful when programming the machine and provides a great deal of information. The duration of the available programmes and the remaining time of a running cycle appear in section A; if the DELAY START option has been set, the countdown to the start of the selected programme will appear. Pressing the relative button, the machine automatically displays the maximum temperature and spin speed values set for the selected cycle, or the most recently-used settings if they are compatible with the selected cycle.
  • Page 8: Running A Wash Cycle

    Running a wash cycle 1. SWITCH THE MACHINE ON. Press the button; The options may affect the recommended load value the START/PAUSE indicator light will flash slowly in a and/or the duration of the cycle. green colour. 7. START THE PROGRAMME. Press the START/ 2.
  • Page 9: Wash Cycles And Options

    Wash cycles and options Table of wash cycles Detergents Max. Max. Description of the wash cycle temp. speed (°C) (rpm) Fabric Pre-wash Wash softener EVERYDAY FAST Colour Mix 59’ 40° 1000   59’ Cotton 59’ 60° 1000   59’...
  • Page 10: Detergents And Laundry

    Detergents and laundry Detergent dispenser drawer Mix 30’: short cycle designed to wash a mixed load of cotton and synthetic fabrics - white and coloured items together. Good washing results also depend on the correct dose of Express 20’: this programme refreshes your items, making detergent: adding too much detergent will not necessarily them perfumed again in just 20 minutes.
  • Page 11: Troubleshooting

    Troubleshooting Your washing machine could fail to work. Before contacting the Technical Assistance Centre (see “Assistance”), make sure that the problem cannot be solved easily using the following list. Problem: Possible causes / Solutions: The washing machine does not • The appliance is not plugged into the socket fully, or is not making contact. switch on.
  • Page 12: Service

    Service Before calling for Assistance: • Check whether you can solve the problem alone (see “Troubleshooting”); • Restart the programme to check whether the problem has been solved; • If this is not the case, contact an authorised Technical Assistance Centre using the telephone number provided on the guarantee certificate. Always request the assistance of authorised technicians. Have the following information to hand: • the type of problem; • the appliance model (Mod.); • the serial number (S/N). This information can be found on the data plate applied to the rear of the washing machine, and can also be found on the front of the appliance by opening the door.
  • Page 13 Mode d’emploi LAVE-LINGE Sommaire Installation, 14-15 Déballage et mise à niveau Raccordements eau et électricité Français Premier cycle de lavage Caractéristiques techniques Entretien et soin, 16 Coupure de l’arrivée d’eau et du courant Nettoyage du lave-linge Nettoyage du tiroir à produits lessiviels. Entretien du hublot et du tambour Nettoyage de la pompe Contrôle du tuyau d’arrivée de l’eau...
  • Page 14: Installation

    Installation ! Conserver ce mode d’emploi pour pouvoir le Une bonne mise à niveau garantit la stabilité consulter à tout moment. En cas de vente, de de l’appareil et évite qu’il y ait des vibrations, cession ou de déménagement, veiller à ce qu’il du bruit et des déplacements en cours de suive toujours le lave-linge pour que son nou- fonctionnement.
  • Page 15: Raccordement Du Tuyau De Vidange

    Raccordement du tuyau de vidange courant doit être facilement accessible. ! N’utiliser ni rallonges ni prises multiples. Raccorder le tuyau d’évacuation, sans ! Le câble ne doit être ni plié ni trop écrasé. le plier, à un conduit d’évacuation ou à une ! Le câble d’alimentation ne doit être remplacé...
  • Page 16: Entretien Et Soin

    Entretien et soin Coupure de l’arrivée d’eau et du Entretien du hublot et du tambour courant • Il faut toujours laisser le hublot entrouvert pour • Fermer le robinet de l’eau après chaque lavage. éviter la formation de mauvaise odeurs. Cela réduit l’usure de l’installation hydraulique Nettoyage de la pompe du lave-linge et évite tout danger de fuites. • Débrancher la fiche de la prise de courant lors Le lave-linge est équipé...
  • Page 17: Précautions Et Conseils

    Précautions et conseils Le symbole de la ‘’poubelle barrée’’ est apposée sur Ce lave-linge a été conçu et fabriqué conformément aux tous les produits pour rappeler les obligations de collecte normes internationales de sécurité. Ces consignes sont séparée. Les consommateurs devront contacter les au- fournies pour des raisons de sécurité, il faut les lire attenti- torités locales ou leur revendeur concernant la démarche vement.
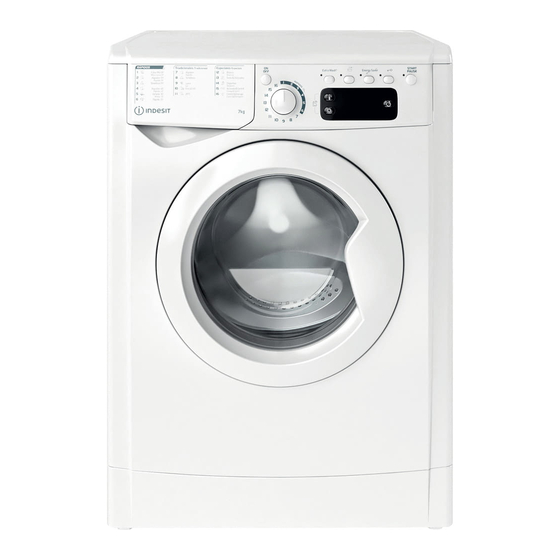
  • Page 18: Description Du Lave-Linge

    Description du lave-linge Bandeau de commandes Touche avec voyant VERROUILLAGE DES TOUCHES Touches Touche avec voyant Touche Touche avec voyants START/PAUSE TEMPÉRATURE ON/OFF FONCTION Écran Bouton Touche Touche Tiroir à produits lessiviels PROGRAMMES DÉPART DIFFÉRÉ ESSORAGE Tiroir à produits lessiviels: pour charger les produits Touche DÉPART DIFFÉRÉ...
  • Page 19: Écran

    Écran L’écran est utile pour programmer la machine et fournit de multiples renseignements. La section A affiche la durée des différents programmes disponibles et, une fois le cycle lancé, le temps restant jusqu’à la fin du programme ; si un DÉPART DIFFÉRÉ a été sélectionné, le temps restant avant le démarrage du programme sélectionné est affiché.
  • Page 20: Comment Faire Un Cycle De Lavage

    Comment faire un cycle de lavage la fonction n’est pas activée. 1. METTRE L’APPAREIL SOUS TENSION. Appuyer sur la touche ; le voyant de START/PAUSE passe au Si la fonction sélectionnée est incompatible avec une vert et clignote lentement. autre fonction précédemment sélectionnée, le voyant correspondant à...
  • Page 21: Programmes Et Fonctions

    Programmes et fonctions Tableau des programmes Vitesse Lessive Temp. maxi Description du Programme maxi. (tours (°C) Pré- Assou- minute) Lavage lavage plissant EVERYDAY FAST 1 Mix Colorés 59 min 40° 1000 59’   2 Coton 59 min 60° 1000 59’...
  • Page 22: Produits Lessiviels Et Linge

    Produits lessiviels et linge Tiroir à produits lessiviels Express 20 min : le programme qui rafraîchit vos vêtements et leur redonne un bon parfum en à peine 20 minutes. Un bon résultat de lavage dépend aussi d’un bon dosage de produit lessiviel: un excès de lessive ne lave pas mieux, Linge ou vêtements particuliers il incruste l’intérieur du lave-linge et pollue l’environnement.
  • Page 23: Anomalies Et Remèdes

    Anomalies et remèdes Il peut arriver que le lave-linge ne fonctionne pas bien. Avant d’appeler le Service de dépannage (voir “Assistance”), contrôler s’il ne s’agit pas par hasard d’un problème facile à résoudre à l’aide de la liste suivante. Anomalies: Causes / Solutions possibles: Le lave-linge ne s’allume pas.
  • Page 24: Assistance

    Assistance Avant d’appeler le service après-vente: • Vérifier si on ne peut pas résoudre l’anomalie par ses propres moyens (voir “Anomalies et Remèdes”); • Remettre le programme en marche pour contrôler si l’inconvénient a disparu; • Autrement, contacter le Centre d’Assistance technique agréé au numéro de téléphone indiqué sur le certificat de garantie. Ne jamais s’adresser à des techniciens non agréés. Communiquer: • le type de panne; • le modèle de l’appareil (Mod.); • son numéro de série (S/N). Ces informations se trouvent sur la plaque signalétique apposée à l’arrière du lave-linge et à l’avant quand on ouvre la porte hublot.
  • Page 25 Bedienungsanleitungen WASCHVOLLAUTOMAT INHALTSVERZEICHNIS Installation, 26-27 Auspacken und Aufstellen Wasser- und Elektroanschlüsse Erster Waschgang Deutsch Technische Daten Reinigung und Pflege, 28 Abstellen der Wasser- und Stromversorgung Reinigung des Gerätes Reinigung der Waschmittelschublade Pflege der Gerätetür und Trommel Reinigung der Pumpe Kontrolle des Wasserzulaufschlauchs Vorsichtsmaßregeln und Hinweise, 29 Allgemeine Sicherheit Entsorgung...
  • Page 26: Installation

    Installation ! Es ist äußerst wichtig, diese Bedienungsanlei- Eine präzise Nivellierung verleiht dem Gerät die tung sorgfältig aufzubewahren, um sie jederzeit erforderliche Stabilität, durch die Vibrationen, zu Rate ziehen zu können. Sorgen Sie dafür, Betriebsgeräusche und ein Verrücken des dass sie im Falle eines Umzugs oder einer Über- Gerätes vermieden werden.
  • Page 27: Erster Waschgang

    Anschluss des Ablaufschlauches ! Verwenden Sie bitte keine Verlängerungen oder Mehrfachstecker. Schließen Sie den Ablaufschlauch ohne ! Das Netzkabel darf nicht gebogen bzw. ein- ihn dabei abzuknicken geklemmt werden. an einen geeigneten ! Das Versorgungskabel darf nur durch autori- Abfluss an. Die Minde- sierte Fachkräfte ausgetauscht werden.
  • Page 28: Reinigung Und Pflege

    Reinigung und Pflege Abstellen der Wasser- und Strom- Pflege der Gerätetür und Trommel versorgung • Lassen Sie die Gerätetür stets leicht offen ste- • Drehen Sie den Wasserhahn nach jedem hen, um die Bildung unangenehmer Gerüche Waschvorgang zu. Hierdurch wird der Ver- zu vermeiden.
  • Page 29: Vorsichtsmaßregeln Und Hinweise

    Vorsichtsmaßregeln und Hinweise Das Symbol „durchgestrichene Mülltonne“ auf jedem Der Waschvollautomat wurde nach den strengsten internationa- Produkt erinnert Sie an Ihre Verpflichtung, dass Elektrohau- len Sicherheitsvorschriften entworfen und gebaut. Nachstehende shaltsgeräte gesondert entsorgt werden müssen. Endver- Hinweise werden aus Sicherheitsgründen geliefert und sollten braucher können sich an Abfallämter der Gemeinden wen- aufmerksam gelesen werden.
  • Page 30: Beschreibung Ihres Waschvollautomaten

    Beschreibung Ihres Waschvollautomaten Bedienblende Taste mit Kontrollleuchte Taste TASTENSPERRE TEMPERATUR Taste mit Tasten mit Kontrollleuchte Kontrollleuchten ON/OFF Taste START/ FUNKTIONEN PAUSE DISPLAY Taste Wählschalter Taste Waschmittelschublade STARTZEITVORWAHL PROGRAMMWAHL SCHLEUDERN Taste TEMPERATUR : Drücken Sie, um die Temperatur Waschmittelschublade: für Waschmittel und Zusätze herabzusetzen oder auszuschließen;...
  • Page 31: Display

    Display Das Display dient nicht nur zur Programmierung des Gerätes, sondern liefert auch zahlreiche Informationen. Im Abschnitt A werden die Dauer der verschiedenen verfügbaren Programme sowie die Restzeit nach Zyklusstart angezeigt; wurde eine STARTZEITVORWAHL eingestellt, dann wird die bis zum Start des ausgewählten Programms verbleibende Zeit angezeigt.
  • Page 32: Durchführung Eines Waschprogramms

    Durchführung eines Waschprogramms 1. EINSCHALTEN DES GERÄTES. Drücken Sie auf Ist die gewählte Funktion mit einer anderen bereits die Taste ; die Kontrollleuchte START/PAUSE blinkt eingestellten nicht kompatibel, schaltet die der langsam grün. ersten Funktion entsprechende Kontrollleuchte auf Blinklicht und nur die zweite Funktion wird aktiviert, die 2.
  • Page 33: Programme Und Funktionen

    Programme und Funktionen Programmtabelle Waschmittel Max. Max. Schleuder Beschreibung des Programms Temp. Geschwin- (C°) digkeit Hauptwä- Weich- Vorwäsche (U/min) sche spüler EVERYDAY FAST 1 Mix Bunt 59’ 40° 1000   59’ 2 Baumwolle 59’ 60° 1000 59’   3 Baumwolle 45’...
  • Page 34: Waschmittel Und Wäsche

    Waschmittel und Wäsche Waschmittel und Wäsche Mix 30’: kurzer Zyklus für gemischte Wäsche aus Baumwolle und Kunstfaser, weiß und bunt zusammen. Ein gutes Waschergebnis hängt auch von einer korrekten Express 20’: das Programm frisch ihre Wäsche auf und Waschmitteldosierung ab: Eine zu hohe Dosierung bedeu- verleiht ihr einen frischen Duft in nur 20 Minuten.
  • Page 35: Störungen Und Abhilfe

    Störungen und Abhilfe Bei Funktionsstörung: Bevor Sie sich an den Technischen Kundendienst wenden (siehe „Kundendienst“), vergewissern Sie sich zuerst, ob es sich nicht um eine Kleinigkeit handelt, die Sie selbst beheben können. Ziehen Sie hierzu nachstehendes Verzeichnis zu Rate. Störungen: Mögliche Ursachen / Lösungen: Der Waschvollautomat schaltet sich •...
  • Page 36: Kundendienst

    Kundendienst Bevor Sie sich an den Kundendienst wenden: • Sollten einige Kontrollen vorab selbst durchgeführt werden (siehe „Störungen und Abhilfe“); • Starten Sie daraufhin das Programm erneut, um sicherzustellen, dass die Störung auch wirklich behoben wurde; • Ist dies nicht der Fall, dann kontaktieren Sie den autorisierten Kundendienst unter der auf dem Garantieschein befindlichen Telefonnummer.
  • Page 37: Instrukcja Obsługi

    Instrukcja obsługi PRALKA Spis treści Instalacja, 38-39 Rozpakowanie i wypoziomowanie Podłączenia hydrauliczne i elektryczne Polski Pierwszy cykl prania Dane techniczne Utrzymanie i konserwacja, 40 Odłączenie wody i prądu elektrycznego Czyszczenie pralki Czyszczenie szufladki na środki piorące Konserwacja okrągłych drzwiczek i bębna Czyszczenie pompy Kontrola przewodu doprowadzającego wodę...
  • Page 38: Instalacja

    Instalacja Staranne wypoziomowanie pralki zapewnia ! Należy zachować niniejszą książeczkę, aby móc z niej skorzystać w każdej chwili. W pr- jej stabilność i zapobiega wibracjom, hałasowi zypadku sprzedaży, odstąpienia lub przeniesie- oraz przesuwaniu się maszyny w czasie pracy. W razie ustawienia na dywanie lub wykładzinie nia pralki w inne miejsce należy zadbać...
  • Page 39: Pierwszy Cykl Prania

    Podłączenie przewodu odpływowego ! Przewód nie powinien być pozginany ani przygnieciony. Podłączyć przewód ! Przewód zasilania elektrycznego może być odpływowy, nie wymieniany wyłącznie przez autoryzowanych zginając go, do rury techników. ściekowej lub do ot- Uwaga! Producent nie ponosi żadnej woru odpływowego w odpowiedzialności w przypadku nieprzestrze- ścianie, które powin- gania powyższych zasad.
  • Page 40: Utrzymanie I Konserwacja

    Utrzymanie i konserwacja Odłączenie wody i prądu elektrycz- Konserwacja okrągłych drzwiczek i nego bębna • Zamknąć kurek dopływu wody po każdym • Drzwiczki pralki należy zawsze pozostawiać praniu. W ten sposób zmniejsza się zużycie uchylone, aby zapobiec tworzeniu się niepr- instalacji hydraulicznej pralki oraz eliminuje zyjemnych zapachów.
  • Page 41: Zalecenia I Środki Ostrożności

    Zalecenia i środki ostrożności Pozwala to ograniczyć zanieczyszczenie środowiska i Pralka została zaprojektowana i wyprodukowana zgodnie pozytywnie wpływa na ludzkie zdrowie. Przekreślony z międzynarodowymi normami bezpieczeństwa. Niniej- sze ostrzeżenia zostały tu zamieszczone ze względów symbol „kosza” umieszczony na produkcie przypomina bezpieczeństwa i należy je uważnie przeczytać.
  • Page 42: Opis Pralki

    Opis pralki Panel sterowania Przycisk z kontrolką BLOKADA KLAWISZY Przycisk Przycisk z Przyciski z Przycisk TEMPERATURY kontrolką kontrolkami ON/OFF START/PAUSE FUNKCJI Wyświetlacz Szufladka na środki piorące Przycisk Pokrętło Przycisk URUCHOMIENIE PROGRAMÓW WIROWANIA OPÓŹNIONE Szufladka na środki piorące: do dozowania środków Przycisk TEMPERATURY : nacisnąć...
  • Page 43: Wyświetlacz

    Wyświetlacz Wyświetlacz potrzebny jest w celu programowania maszyny i dostarcza wielu informacji. W sekcji A wyświetlany jest czas trwania dostępnych programów oraz - w przypadku uruchomionego cyklu - czas pozostały do jego zakończenia; jeśli został ustawiony URUCHOMIENIE OPÓŹNIONE, zostanie wyświetlony czas brakujący do włączenia wybranego programu.
  • Page 44: W Jaki Sposób Wykonać Cykl Prania

    W jaki sposób wykonać cykl prania 1. WŁĄCZENIE MASZYNY. Nacisnąć przycisk Funkcje mogą zmieniać zalecane obciążenie i/lub kontrolka START/PAUSE zacznie powoli pulsować w czas trwania cyklu. kolorze zielonym. 7. URUCHOMIENIE PROGRAMU. Nacisnąć przycisk 2. WKŁADANIE BIELIZNY. Otworzyć szklane drzwiczki. START/PAUSE. Odpowiednia kontrolka zaświeci się Włożyć...
  • Page 45: Programy I Funkcje

    Programy i funkcje Tabela programów Prędkość Środki piorące Temp. Opis programu max (°C) (obrotów na Pranie Wybie- Pranie minutę) Wstępne lacz EVERYDAY FAST 1 Mix Kolorowe 59’ 40° 1000 59’   2 Bawełna 59’ 60° 1000 59’   3 Bawełna 45’...
  • Page 46: Środki Piorące I Bielizna

    Środki piorące i bielizna Szufladka na środki piorące Tkaniny syntetyczne 59’: przeznaczony do prania odzieży syntetycznej. W przypadku bardziej uporczywych Dobry rezultat prania zależy również od prawidłowego zabrudzeń można zwiększyć temperaturę do 60° i użyć dozowania środka piorącego: użycie jego nadmiernej ilości także detergentu w proszku.
  • Page 47: Nieprawidłowości W Działaniu I Sposoby Ich Usuwania

    Nieprawidłowości w działaniu i sposoby ich usuwania Może się zdarzyć, że pralka nie działa. Przed wezwaniem Serwisu Technicznego (patrz „Serwis Techniczny”) należy sprawdzić, czy problemu nie da się łatwo rozwiązać przy pomocy poniższego wykazu. Nieprawidłowości w działaniu: Możliwe przyczyny / Rozwiązania: Pralka nie włącza się.
  • Page 48: Serwis Techniczny

    Serwis Techniczny Przed skontaktowaniem się z Serwisem Technicznym: • Sprawdzić, czy problemu nie można rozwiązać samodzielnie (patrz„Nieprawidłowości w działaniu i sposoby ich usuwania”); • Ponownie uruchomić program i sprawdzić, czy problem nie zniknął; • Jeśli nie, zwrócić się do autoryzowanego Serwisu Technicznego, dzwoniąc pod numer podany w karcie gwarancyjnej. Nigdy nie wzywać...
  • Page 49 Használati utasítás MOSÓGÉP Összefoglalás Üzembe helyezés, 50-51 Kicsomagolás és vízszintbe állítás Víz- és elektromos csatlakozás Magyar Első mosási ciklus Műszaki adatok Karbantartás és ápolás, 52 A víz elzárása és az elektromos áram kikapcsolása A mosógép tisztítása A mosószer-adagoló fiók tisztítása Az ajtó...
  • Page 50: Üzembe Helyezés

    Üzembe helyezés A pontos vízszintezés biztosítja a gép sta- ! Fontos, hogy megőrizze ezt a kézikönyvet, hogy mindig kéznél legyen. Ha a mosógépet bilitását, így az a működés során nem fog eladná, átadná vagy másnál helyezné el, rezegni, zajt okozni, illetve elmozdulni. Szőnyegpadló...
  • Page 51: Első Mosási Ciklus

    A leeresztőcső csatlakoztatása ! Ne használjon hosszabbítót vagy elosztót. ! A kábel ne legyen se megtörve, se összen- Csatlakoztassa a yomva. leeresztőcsövet a lefolyóhoz vagy a pa- ! A tápkábelt csak engedéllyel rendelkező sza- dlótól 65 és 100 cm kember cserélheti. közötti magasságban Figyelem! A fenti előírások figyelmen kívül lévő...
  • Page 52: Karbantartás És Ápolás

    Karbantartás és ápolás A víz elzárása és az elektromos áram Az ajtó és a forgódob ápolása kikapcsolása • Az ajtót hagyja mindig résre nyitva, nehogy • Minden mosás után zárja el a vízcsapot. Így rossz szagok keletkezzenek. kíméli a mosógép vízrendszerét és megszün- A szivattyú...
  • Page 53: Óvintézkedések És Tanácsok

    Óvintézkedések és tanácsok Az áthúzott “szemeteskuka” jele emlékezteti Önt arra, A mosógép a nemzetközi biztonsági szabványoknak hogy kötelessége ezeket a termékeket szelektíven megfelelően lett tervezve és gyártva. Ezeket a figyel- összegyűjteni. A fogyasztóknak a helyi hatóságot vagy meztetéseket biztonsági okokból írjuk le, kérjük, olvassa kereskedőt kell felkeresniük a régi háztartási gépek el őket figyelmesen! helyes elhelyezését illetően.
  • Page 54 A mosógép leírása Kezelőpanel Jelzőlámpás gomb BILLENTYŰ BLOKK START/PAUSE FUNKCIÓ HŐMÉRSÉKLET ON/OFF gomb jelzőlámpás gomb jelzőlámpás gomb gombok Kijelző KÉSLELTETETT INDÍTÁS Mosószer-adagoló fiók PROGRAMOK gomb CENTRIFUGÁLÁS tekerőgomb gomb Mosószer-adagoló fiók: a mosószerek és adalékanyagok HŐMÉRSÉKLET gomb: a homérséklet csökkentéséhez betöltésére szolgál (lásd „Mosószerek és mosandók”). vagy mellozéséhez nyomja meg ezt a gombot - az érték megjelenik a kijelzon.
  • Page 55 Kijelző A kijelző a készülék programozásához nyújt segítséget, és számos információt szolgáltat. Az A feliratmezőben a rendelkezésre álló programok hossza, illetve elindított ciklus esetén a program végéig hátralévő maradékidő látható. KÉSLELTETETT INDÍTÁS beállítása esetén a kiválasztott program elindulásáig hátralévő időt jeleníti meg.
  • Page 56 A mosási ciklusok végrehajtása 1. A KÉSZÜLÉK BEKAPCSOLÁSA. Nyomja meg a A funkciók megváltoztathatják az ajánlott ruhatöltet- gombot, az START/PAUSE lámpa pedig lassan, zöld mennyiséget és/vagy a ciklusidőt. fénnyel villogni kezd. 7. A PROGRAM INDÍTÁSA. Nyomja meg az START/ PAUSE gombot. A megfelelő jelzőlámpa állandó zöld 2.
  • Page 57 Programok és funkciók Programtáblázat Max. Mosószerek Max. ru- Max. sebes- hamen- Programleírás hom. ség nyiség (°C) (ford./ Elomo- (kg) Öblíto perc) sás sás EVERYDAY FAST 1 Vegyes színes ruhaneműk 59 perc alatt 40° 1000 59’   2 Pamut ruhaneműk 59 perc alatt 60°...
  • Page 58: Mosószerek És Mosandók

    Mosószerek és mosandók Mosószer-adagoló fiók Vegyes ruhaneműk 30 perc alatt: Fehér és színes, szinte- tikus és pamut ruhaneműk együttes mosásához tervezett A mosás eredményessége függ a mosószer helyes adago- rövid ciklus. lásától is: ha túl sokat adagol belőle, a mosás nem lesz ha- Expressz 20 perc alatt: a program felfrissíti és illatosítja tékonyabb, de hozzájárul ahhoz, hogy lerakódás képződjön a ruhaneműket csupán 20 perc alatt.
  • Page 59: Rendellenességek És Elhárításuk

    Rendellenességek és elhárításuk Előfordulhat, hogy a mosógép nem működik. Mielőtt felhívná a szervizt (lásd „Szerviz”), ellenőrizze, hogy nem olyan problémáról van-e szó, amely a következő lista segítségével egyszerűen megoldható! Rendellenességek: Lehetséges okok / megoldás: A mosógép nem kapcsol be. • A hálózati csatlakozódugó nincs bedugva az aljzatba, vagy nem eléggé ahhoz, hogy jól érintkezzen.
  • Page 60 Szerviz Mielőtt a szervizhez fordulna: • Győződjön meg arról, hogy a hibát nem tudja saját maga is elhárítani (lásd „Rendellenességek és elhárításuk”); • Indítsa újra a programot, hogy lássa, elhárította-e a hibát; • Ellenkező esetben forduljon az engedéllyel rendelkező szakszervizhez a garanciajegyen található telefonszámon. Soha ne forduljon engedéllyel nem rendelkező...
  • Page 61: Instrucţiuni De Folosire

    Instrucţiuni de folosire MAŞINĂ DE SPĂLAT RUFE Sumar Instalare, 62-63 Despachetare şi punere la nivel Racorduri hidraulice şi electrice Română Primul ciclu de spălare Date tehnice Întreţinere şi curăţare, 64 Întreruperea alimentării cu apă şi curent electric Curăţarea maşinii de spălat Curăţarea compartimentului pentru detergent Îngrijirea uşii şi a tamburului Curăţarea pompei...
  • Page 62: Instalare

    Instalare O nivelare precisă conferă stabilitate maşinii ! Este important să păstraţi acest manual pentru a-l putea consulta în orice moment. În caz de vân- şi evită vibraţii, zgomote şi deplasări pe zare, de cesiune sau de schimbare a locuinţei, timpul funcţionării.
  • Page 63: Primul Ciclu De Spălare

    Conectarea furtunului de golire ! Cablul nu trebuie să fie îndoit sau comprimat. Conectaţi furtunul de ! Cablul de alimentare trebuie să fie înlocuit golire - fără a-l îndoi doar de tehnicieni autorizaţi ai centrului de - la canalizare sau service ce apare scris pe certificatul de ga- la racordul de golire rantie emis de producator.
  • Page 64: Întreţinere Şi Curăţare

    Întreţinere şi curăţare Întreruperea alimentării cu apă şi cu- Îngrijirea uşii şi a tamburului rent electric • Lăsaţi mereu uşa întredeschisă pentru a evita • Închideţi robinetul de apă după fiecare formarea de mirosuri neplăcute. spălare. Se limitează astfel uzura instalaţiei Curăţarea pompei hidraulice a maşinii de spălat şi se elimină...
  • Page 65: Precauţii Şi Sfaturi

    Precauţii şi sfaturi Maşina de spălat a fost proiectată şi construită conform normelor internaţionale de protecţie. Aceste avertizări sunt fur- nizate din motive de siguranţă şi trebuie să fie citite cu atenţie. Norme de protecţie şi siguranţă generale • Acest aparat a fost conceput exclusiv pentru utilizarea în locuinţe unifamiliale.
  • Page 66: Descrierea Maşinii De Spălat

    Descrierea maşinii de spălat Panoul de control Tastă cu led BLOCARE TASTE Tastă TEMPERATURĂ Tastă Tastă cu led Taste cu led ON/OFF START/PAUSE FUNCŢII DISPLAY Sertarul detergenţilor Tastă CENTRIFUGARE Tastă Selector PORNIRE ÎNTÂRZIATĂ PROGRAME Sertarul detergenţilor: pentru a introduce detergenţi sau Tastă...
  • Page 67: Display

    Display Ecranul este util pentru a programa maşina şi a furniza numeroase informaţii. În secţiunea A este afişată durata diferitelor programe la dispoziţie şi a celui rămas, în cazul unui ciclu de spălare deja în desfăşurare; dacă a fost programat un interval de PORNIRE ÎNTÂRZIATĂ, este afişat intervalul rămas până la pornirea programului selectat.
  • Page 68: Cum Se Desfăşoară Un Ciclu De Spălare

    Cum se desfăşoară un ciclu de spălare 1. PUNEREA ÎN FUNCŢIUNE A MAŞINII. Apăsaţi tasta Cantitatea de rufe admisă precum şi durata ciclului pot ; Indicatorul START/PAUSE va emite un semnal varia în funcţie de funcţia aleasă. intermitent de culoare verde. 7.
  • Page 69: Programe Şi Funcţii

    Programe şi funcţii Tabel de programe Viteza Detergenþi max. Temp. Descrierea Programului (ro- max. (°C) taþii pe Pres- Spãla- Balsam minut) pãlare rufe EVERYDAY FAST 1 Mix Colorate 59’ 40° 1000 59’   2 Bumbac 59’ 60° 1000 59’ ...
  • Page 70: Detergenţi Şi Rufe Albe

    Detergenţi şi rufe albe Compartimentul pentru detergenţi Sintetice 59’: specific pentru a spăla rufe sintetice. În prezenţa unei murdării mai rezistente, se poate mări tem- Un rezultat bun la spălare depinde şi de dozarea corectă a peratura până la 60° şi se poate utiliza şi un detergent praf. detergentului: excesul de detergent nu garantează...
  • Page 71: Anomalii Şi Remedii

    Anomalii şi remedii Se poate întâmpla ca maşina de spălat să nu funcţioneze. Înainte de a apela serviciul de Service (a se vedea “Asistenţă”), verificaţi dacă nu este vorba de o problemă uşor de rezolvat: Anomalii: Cauze posibile / Rezolvare: Maşina de spălat nu porneşte.
  • Page 72: Asistenţă

    Asistenţă Înainte de a lua legătura cu Service-ul: • Verificaţi dacă puteţi rezolva singuri problema (a se vedea “Anomalii şi remedii”); • Porniţi din nou programul pentru a controla dacă inconvenientul a fost eliminat; • În caz negativ, luaţi legătura cu asistenţa tehnică autorizată la numărul telefonic indicat pe certificatul de garanţie. Nu apelaţi niciodată...
  • Page 73: Instruções Para Utilização

    Instruções para utilização MÁQUINA DE LAVAR ROUPA Sumário Instalação, 74-75 Desembalar e nivelar Ligações hidráulicas e eléctricas Português Primeiro ciclo de lavagem Dados técnicos Manutenção e cuidados, 76 Interromper a alimentação de água e de corrente eléctrica Limpar a máquina de lavar roupa Limpar a gaveta dos detergentes Cuidados com a porta de vidro e o tambor Limpar a bomba...
  • Page 74: Instalação

    Instalação ! É importante guardar este manual para Um cuidadoso nivelamento dá estabilidade à poder consultá-lo a qualquer momento. Se a máquina e evita vibrações, ruídos e desloca- máquina for vendida, cedida ou transferida, mentos durante o funcionamento. Se houver certifique-se que este manual permaneça com tapete ou alcatifa, regule os pés em modo que a máquina para informar o novo proprietário...
  • Page 75: Primeiro Ciclo De Lavagem

    Ligação do tubo de descarga ! Não empregue extensões nem fichas múltiplas. ! O cabo não deve ser dobrado nem apertado. Ligue o tubo de de- scarga, sem dobrá- ! O cabo de alimentação deve ser substituído lo, a um conduto de somente por técnicos autorizados.
  • Page 76: Manutenção E Cuidados

    Manutenção e cuidados Cuidados com a porta de vidro e o Interromper a alimentação de água tambor e de corrente eléctrica • Deixe a porta sempre entreaberta para evitar • Feche a torneira da água depois de cada lava- que se formem odores desagradáveis. gem. Desta maneira diminuiu-se o desgaste do sistema hidráulico da máquina de lavar roupa e Limpar a bomba elimina-se o risco de inundação.
  • Page 77: Precauções E Conselhos

    Precauções e conselhos o correcto desmantelamento dos electrodomésticos, Esta máquina de lavar roupa foi projectada e fabricada contacte o serviço público especializado ou os revende- em conformidade com os regulamentos internacionais de dores. segurança. Estas advertências são fornecidas por razões de segurança e devem ser lidas com atenção.
  • Page 78: Descrição Da Máquina De Lavar Roupa

    Descrição da máquina de lavar roupa Painel de comandos Tecla com indicador luminoso BLOQUEIO DAS TECLAS Teclas com Tecla com indicador indicadores ON/OFF luminoso Tecla Tecla de luminosos de TEMPERATURA START/PAUSE FUNÇÕES VISOR Tecla Gaveta dos detergentes INÍCIO POSTERIOR Tecla CENTRIFUGAÇÃO Selector de PROGRAMAS...
  • Page 79: Visor

    Visor O visor é útil para programar a máquina e fornece muitas informações. Na secção A é visualizada a duração dos vários programas à disposição e com o ciclo iniciado o tempo faltante para o fim do mesmo; no caso em que tenha sido programado um INÍCIO POSTERIOR, será visualizado o tempo faltante ao início do programa seleccionado.
  • Page 80: Como Efectuar Um Ciclo De Lavagem

    Como efectuar um ciclo de lavagem 1. LIGAR A MÁQUINA. Carregue no botão As funções podem variar a carga recomendada e/ou indicador luminoso START/PAUSE irá piscar lentamente a duração do ciclo. com a cor verde. 7. INICIAR O PROGRAMA. Carregar no botão START/ PAUSE.
  • Page 81: Programas E Funções

    Programas e funções Tabela dos programas Veloci- tà max. Detergentes Temp. (ro- Descrição do Programa max. tações (°C) Prélava- Lava- Ama- ciador minuto) EVERYDAY FAST 1 Mix Cores 59’ 40° 1000 59’   2 Algodão 59’ 60° 1000 59’ ...
  • Page 82: Detergentes E Roupa

    Detergentes e roupa Gaveta dos detergentes Express 20’: o programa que refresca as suas peças de roupa tornando-as novamente perfumadas em apenas 20 O bom resultado da lavagem depende também do emprego minutos. da dose certa de detergente: com excessos não se lava de maneira mais eficaz, mas contribui-se para formar crostas nas peças internas da máquina de lavar roupa e poluir o Programas especiais...
  • Page 83: Anomalias E Soluções

    Anomalias e soluções Pode acontecer que a máquina de lavar roupa não funcione. Antes de telefonar para a Assistência Técnica (veja “Assistên- cia”), verifique se não se trata de um problema fácil de resolver com ajuda da seguinte lista. Anomalias: Possíveis causas / Solução: A máquina de lavar roupa não liga.
  • Page 84: Assistência

    • o número de série (S/N). Estas informações encontram-se na placa colocada na parte traseira da máquina de lavar roupa e na parte anterior abrindo a porta de vidro. Üretici Firma: Indesit Company Beyaz Eşya PAZARLAMA A.Ş. Üretici Firma: Balmumcu Cad. Karahasan Sok. Whirlpool EMEA S.p.A.

Table des Matières