Table des Matières
Publicité
Les langues disponibles
Les langues disponibles
Liens rapides
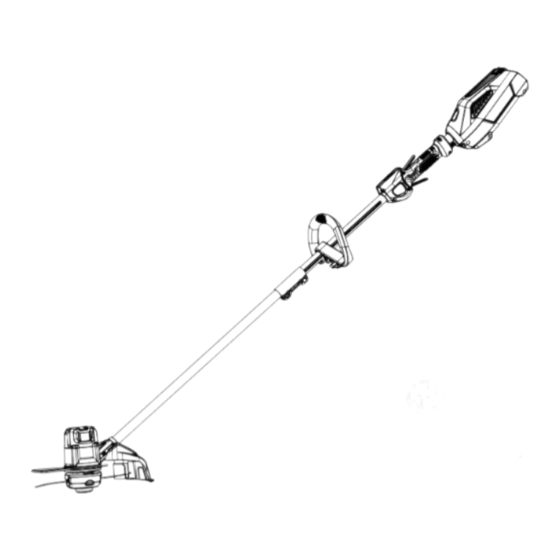
ITEM #0837885
40 V STRING TRIMMER
MODEL #KST 130X-06
Français p. 20
ATTACH YOUR RECEIPT HERE
Serial Number
Purchase Date
Questions, problems, missing parts? Before returning to your retailer, call our customer
service department at 1-866-456-8934, 9 a.m. - 8 p.m. , EST, Monday - Thursday,
9 a.m. - 5 p.m., EST, Friday - Saturday.
AB17941
1
Publicité
Chapitres
Table des Matières
Dépannage

Manuels Connexes pour Kobalt KST 130X-06


Sommaire des Matières pour Kobalt KST 130X-06
- Page 1 ITEM #0837885 40 V STRING TRIMMER MODEL #KST 130X-06 Français p. 20 ATTACH YOUR RECEIPT HERE Serial Number Purchase Date Questions, problems, missing parts? Before returning to your retailer, call our customer service department at 1-866-456-8934, 9 a.m. - 8 p.m. , EST, Monday - Thursday, 9 a.m.
-
Page 2: Table Des Matières
TABLE OF CONTENTS Package Contents......................... Hardware Contents....................... Symbols..........................Safety Information......................... Preparation ........................... Assembly Instructions ......................Operating Instructions ......................Care and Maintenance ......................Troubleshooting........................Warranty..........................Replacement Parts List ......................PRODUCT SPECIFICATIONS SPECIFICATIONS Type Cordless, battery-powered Speed 6,800 / 7,800 RPM Cutting path 11 / 13 in. -
Page 3: Package Contents
PACKAGE CONTENTS PART DESCRIPTION QUANTITY PART DESCRIPTION QUANTITY Spool Trigger (preassembled to Spool Lock-off Lever Housing) Speed Switch Opening Front/Auxiliary Handle (preassembled to Spool Coupler Housing) Edge Guard Spool Housing Guard (preassembled to Lower Upper Tube Tube) Lower Tube Bump Knob Spool Cover Battery (preassembled to Spool... -
Page 4: Hardware Contents
HARDWARE CONTENTS (not shown actual size) Bolt Fastening Knob Qty. 1 Qty. 1 Screw (preassembled to the Guard (H)) Qty. 2 Hex Wrench Qty. 1... -
Page 5: Symbols
SYMBOLS Some of the following symbols may be used on this product. Please study them and learn their meaning. Proper interpretation of these symbols will allow you to operate the product better and safer. SYMBOLS DESIGNATION EXPLANATION Volts Voltage Amperes Current Hertz Frequency (cycles per second) - Page 6 SYMBOLS Save these Instructions The following signal words and meanings are intended to explain the levels of risk associated with this product. SYMBOL SIGNAL MEANING Indicates an imminently hazardous situation, which, if not avoided, will DANGER result in death or serious injury. Indicates a potentially hazardous situation, which, if not avoided, could WARNING result in death or serious injury.
-
Page 7: Safety Information
‡ Remove or disconnect battery before servicing, cleaning or removing material from the gardening appliance. ‡ Use only 40 V Kobalt batteries (KB 240-06, KB 440-06, KB 245-06, KB 540-06). ‡ Store idle appliances - When not in use, the string trimmer should be stored indoors in a dry,... - Page 8 SAFETY INFORMATION • special disposal instructions. Do not open or mutilate the batteries. Released electrolyte is corrosive and may cause damage to the eyes or skin. It may be toxic if swallowed. Do not place injury. • Batteries can explode in the presence of a source of ignition, such as a pilot light. To reduce the •...
-
Page 9: Preparation
SAFETY INFORMATION Child safety Tragic accidents can occur if the operator is not aware of the presence of children. ‡ Keep children out of the working area and under the watchful care of a responsible adult. ‡ Do not allow children under the age of 14 to operate this trimmer. Children who are 14 years of age or older must read and understand the operating instructions and safety rules in this manual and must be trained and supervised by a parent. -
Page 10: Assembly Instructions
ASSEMBLY INSTRUCTIONS WARNING • Replace the battery or charger immediately if the battery case or charger cord is damaged. • Always make sure the string trimmer switch is OFF before inserting or removing the battery. • Always make sure the battery is removed and the switch turned OFF before inspecting, adjusting, or maintaining any other part of the string trimmer. - Page 11 ASSEMBLY INSTRUCTIONS WARNING To avoid injury, adjust the auxiliary handle for optimum control and balance. Do not overreach when operating grass trimmer/edger. Keep proper balance at all times for better control of the tool in unexpected situations. 2. Front handle a.
- Page 12 ASSEMBLY INSTRUCTIONS Cutting line on the string trimmer. When the cutting line needs replacing, insert a new spool (not included) or rewind new line onto existing spool. CAUTION: To avoid injury, always remove the battery before installing the guard, changing a cutting line, or making any adjustments.
-
Page 13: Important
ASSEMBLY INSTRUCTIONS 5. Battery IMPORTANT: The battery is not charged when it is purchased. Before using the trimmer for Battery release button and charge. 5a. To install: Align the battery with the cavity in the string trimmer housing. Insert the battery into the handle until the battery release button locks into place. -
Page 14: Operating Instructions
OPERATING INSTRUCTIONS WARNING To avoid injury: • Do not squeeze the trigger while the string trimmer is inverted. Do not carry the string trimmer with your finger on the switch. Avoid unintentional starting. • 1. To turn on/off: a. Slide the speed switch (D) to the desired operating speed. - Page 15 OPERATING INSTRUCTIONS During use: • Trim only when the grass and weeds are dry. • Do not trim grass at night. Always make sure you have adequate lighting. • Hold the string trimmer by both the switch handle and the auxiliary handle for best control and balance. •...
-
Page 16: Care And Maintenance
CARE AND MAINTENANCE Trimmer Guard and Motor Maintenance Note: Before performing maintenance, remove battery from the tool. 1. Remove dirt and debris from guard using a paint brush (not included). 2. Clean dirt and debris off of motor cover and connection joints. -
Page 17: Troubleshooting
TROUBLESHOOTING If you still have questions or an unresolved issue after going through this troubleshooting guide, or just want to speak to a Kobalt product expert, please call our customer service department at 1-866-456-8934. PROBLEM POSSIBLE CAUSE CORRECTIVE ACTION 1. -
Page 18: Warranty
5-YEAR REPAIR WARRANTY This Kobalt 40 V String Trimmer is warranted to the original purchaser from the original purchase date This Kobalt 40 V String Trimmer is warranted for the original user to be free from defects in material and workmanship. -
Page 19: Replacement Parts List
REPLACEMENT PARTS LIST For replacement parts, call our customer service department at 1-866-456-8934, 9 a.m. - 8 p.m., EST, Monday - Thursday, 9 a.m. - 5 p.m., EST, Friday - Saturday. PART DESCRIPTION PART # 341111437AB Fastening knob Bolt 322041444 Hex wrench 329011444 341131444... -
Page 20: Joignez Votre Reçu Ici
ARTICLE # 0837885 TAILLE-BORDURE DE 40 V MODÈLE # KST 130X-06 JOIGNEZ VOTRE REÇU ICI Numéro de série Date d’achat Des questions, des problèmes, des pièces manquantes? Avant de retourner l’article au détaillant, appelez notre service à la clientèle au 1 866 456-8934, entre 9 h et 20 h (HNE),... - Page 21 TABLE DES MATIÈRES Caractéristiques de l’article Contenu de l’emballage......................Quincaillerie incluse......................Symboles..........................Informations relatives à la sécurité ..................Préparation ........................... Instructions pour l’assemblage..................... Mode d’emploi ........................Entretien ..........................Dépannage..........................Garantie ..........................Liste des pièces de rechange ..................... CARACTÉRISTIQUES DE L’ARTICLE CARACTÉRISTIQUES Type Sans fil, alimenté...
-
Page 22: Contenu De L'emballage
CONTENU DE L’EMBALLAGE PIÈCE DESCRIPTION QUANTITÉ PIÈCE DESCRIPTION QUANTITÉ Bobine Gâchette (préassemblée au boîtier Levier de blocage de la bobine) Sélecteur de vitesse Ouverture Poignée avant ou auxilliaire (préassemblée au boîtier Coupleur de la bobine) Protège-bordures Boîtier de la bobine Protecteur (préassemblé... -
Page 23: Quincaillerie Incluse
QUINCAILLERIE INCLUSE (non illustrée à la grandeur réelle) Boulon Écrou de fixation Qté : 1 Qté : 1 (préassemblée au déflecteur d’herbe [H]) Qté : 2 Clé hexagonale Qté : 1... -
Page 24: Symboles
SYMBOLES Certains des symboles suivants peuvent figurer sur cet article. Familiarisez-vous avec eux et apprenez leur signification. En comprenant ces symboles, vous serez en mesure de faire fonctionner cet article de façon adéquate et sécuritaire. SYMBOLES DÉFINITION DÉFINITION Volts Tension Ampères Courant Hertz... - Page 25 SYMBOLES Conservez ces instructions Les mots indicateurs suivants et leurs significations servent à expliquer les niveaux de risque associés à cet appareil. SYMBOLE MOT INDICATEUR SIGNIFICATION Indique une situation extrêmement dangereuse qui, si elle n’est pas DANGER évitée, peut causer des blessures graves ou mortelles. Indique une situation potentiellement dangereuse qui, si elle n’est AVERTISSEMENT pas évitée, pourrait entraîner la mort ou des blessures graves.
-
Page 26: Informations Relatives À La Sécurité
INFORMATIONS RELATIVES À LA SÉCURITÉ AVERTISSEMENT Assurez-vous de lire et de comprendre toutes les instructions avant d’utiliser cet article. Le non-respect des instructions ci-dessous peut entraîner une décharge électrique, un incendie ou des blessures graves. N’utilisez pas d’outils électriques dans un milieu explosif, par exemple où il y a présence de liquides, •... - Page 27 Enlevez ou débranchez le bloc-piles avant de procéder à l’entretien ou au nettoyage de l’outil de • jardinage ou de retirer des pièces. Utilisez seulement avec un bloc-piles Kobalt de 40 V (KB 240-06, KB 440-06, KB 245-06, • KB 540-06).
-
Page 28: Préparation
INFORMATIONS RELATIVES À LA SÉCURITÉ • N’exposez pas le bloc-piles ou l’outil au feu ou à une chaleur excessive. L’exposition au feu ou à une chaleur supérieure à 129,4°C (265°F) peut causer une explosion. • Suivez toutes les instructions pour le chargement et ne chargez pas le bloc-piles ou l’outil en dehors de la plage de température précisée dans les instructions. -
Page 29: Instructions Pour I'assemblage
INSTRUCTIONS POUR I’ASSEMBLAGE AVERTISSEMENT Afin d’éviter les blessures et de réduire les risques de décharge électrique ou d’incendie : • Remplacez le bloc-piles ou le chargeur immédiatement si le boîtier du bloc-piles ou le cordon du chargeur est endommagé. • Assurez-vous toujours que l’interrupteur du taille-bordure est à... - Page 30 INSTRUCTIONS POUR I’ASSEMBLAGE ADVERTENCIA Para evitar lesiones, ajuste el mango auxiliar para tener un control y un equilibrio óptimos. No se extienda demasiado cuando utilice la orilladora/bordeadora de césped. Mantenga el equilibrio adecuado en todo momento para un mejor control de la herramienta en situaciones inesperadas 2.
- Page 31 INSTRUCTIONS POUR I’ASSEMBLAGE Fil de coupe Une bobine de fil de coupe est préinstallée sur le taille-bordure. Lorsque le fil de coupe doit être remplacé, insérez une nouvelle bobine (non incluse) ou rembobinez un nouveau fil sur la bobine existante. ATTENTION : Pour éviter toute blessure, retirez toujours le bloc-piles avant d’installer le protecteur, de changer un fil de coupe ou d’effectuer des réglages.
- Page 32 INSTRUCTIONS POUR I’ASSEMBLAGE 5. Bloc-piles IMPORTANT : Le bloc-piles n’est pas chargé à l’achat. Avant d’utiliser le taille-bordure pour la première fois, placez le bloc-piles dans le chargeur et Bouton de déverrouillage chargez-le. du bloc-piles 5a. Installation : Alignez le bloc-piles sur la cavité dans le boîtier du taille-bordure.
-
Page 33: Mode D'emploi
MODE D’EMPLOI AVERTISSEMENT Pour éviter les blessures : • Ne serrez pas la gâchette lorsque le taille-bordure est retourné. • Ne transportez pas le taille-bordure en laissant le doigt sur l’interrupteur. Évitez de mettre l’outil en marche accidentellement. 1. Pour mettre l’outil en marche ou l’arrêter : a. - Page 34 MODE D’EMPLOI Pendant l’utilisation : • Coupez l’herbe seulement lorsqu’elle est sèche. • Ne coupez pas l’herbe la nuit. Assurez-vous toujours d’avoir un éclairage adéquat. • Tenez le taille-bordure à la fois par la poignée de l’interrupteur et par la poignée auxiliaire pour une maîtrise et un équilibre optimaux.
-
Page 35: Entretien
ENTRETIEN Entretien du protecteur et du moteur Remarque : Avant d’effectuer tout entretien, retirez le bloc-piles. 1. Retirez la saleté et les débris du protecteur à l’aide d’un pinceau (non inclus). 2. Retirez la saleté et les débris du couvercle du moteur et des joints de raccord. -
Page 36: Dépannage
Si vous avez toujours des questions ou si un problème persiste après que vous avez lu l’intégralité de ce guide de dépannage ou si vous souhaitez parler à un expert en produits Kobalt, veuillez communiquer avec notre service à la clientèle Kobalt au 1 866 456-8934. -
Page 37: Garantie
GARANTIE GARANTIE DE 5 ANS POUR LES RÉPARATIONS Le fabricant offre à l’acheteur initial de ce taille-bordure Kobalt de 40 V une garantie de cinq (5) ans à partir de la date d’achat, selon les modalités décrites aux présentes. Ce taille-bordure Kobalt de 40 V est garanti contre les défauts de matériaux et de fabrication. -
Page 38: Liste Des Pièces De Rechange
LISTE DES PIÈCES DE RECHANGE Pour obtenir des pièces de rechange, communiquez avec notre service à la clientèle au 1 866 456-8934, entre 9 h et 20 h (HNE), du lundi au jeudi, ou entre 9 h et 17 h (HNE), vendredi et samedi. PIÈCE DESCRIPTION N°...