GYS M1 AUTO Mode D'emploi
Masquer les pouces
Voir aussi pour M1 GYS AUTO:
- Mode d'emploi (85 pages) ,
- Mode d'emploi (36 pages) ,
- Mode d'emploi (44 pages)
Table des Matières
Publicité
Les langues disponibles
Les langues disponibles
Liens rapides
Publicité
Table des Matières

Manuels Connexes pour GYS M1 GYS AUTO


Sommaire des Matières pour GYS M1 GYS AUTO
- Page 1 Taal: Engels Handleiding GYS Lasapparaat CO2 T1 Auto 380V GY 032910 MSH equipment Appelmarkt 7 1681 PE Zwaagdijk-Oost Tel: 0228-561100 Fax: 0228-561112 Mail: info@msh-equipment.nl Website: www.msh-equipment.nl...
- Page 2 M1 GYS AUTO 6-10 / 27-36 T1 GYS AUTO T1 GYS AUTO DV 11-14 / 27-36 T3 GYS AUTO T3 GYS AUTO DV 15-18/ 27-36 19-22 / 27-36 23-26 / 27-36 www.gys.fr 75560 - V5 - 12/03/2014...
- Page 3 M1 - T1 & T3 GYS AUTO I - M1 & T1 II - T3 Fig 4-B : Fig 4-C :...
- Page 4 M1 - T1 & T3 GYS AUTO...
- Page 5 M1 - T1 & T3 GYS AUTO T3 GYS AUTO • Prémonter les vis manuellement sans les bloquer • Pre-install the screws manually without blocking them Vis/Screws M5x12 (x8) Ecrous/Nuts M5x8 (x8) M1 - T1 - T3 GYS AUTO Visser toutes les vis du support bouteilles...
- Page 6 M1 - T1 & T3 GYS AUTO M5x12 (x4) T3 GYS AUTO (option ref. 032958 / 032972)
-
Page 7: Electricity Supply
30mA. - The T1 GYS auto, T3 GYS auto, T1 GYS auto DV and T3 GYS auto DV have to be connnected to a 380 V (50Hz) ear- thed power supply with a a circuit breaker 10A and 1 differential 30mA. Do not use an extension cord which has a wire section inferior to 2.5 mm². - Page 8 M1 - T1 & T3 GYS AUTO - Contact Tip: Use a contact tip SPECIAL aluminium corresponding to the diameter of the wire. - Contact Tip: Use the specific Aluminium contact tip corresponding to the diameter of the wire. SEMI-AUTOMATIC BRAZING WELDING FOR HIGH-TENSILE STRENGTH STEELS These welding are recommended by car manufacturers to braze-weld high-tensile strength plates with a cuprosilicium CusI3 wire or cuproaluminium CuAl8 wire (Ø...
- Page 9 M1 - T1 & T3 GYS AUTO «MANUAL» MODE (FIG 5) 1-welding mode choice: - Normal (2T): standard two-stage welding 5- Synergic mode: position the potentiometer (2) in the - Delay: intermittent welding modes for an optimised middle of the «optimal synergic» zone. In this mode, the operating procedure.
- Page 10 M1 - T1 & T3 GYS AUTO SPOOL GUN (OPTION) Spool gun description and functionning - The spool on gun torch must be installed on the torch T1 connector. - The spool on gun works either in « Manual » mode or either in « Synergic » mode.
- Page 11 M1 - T1 & T3 GYS AUTO PIECES DETACHEES / SPARE PARTS / ERSATZTEILE/ PIEZAS DE RECAMBIO/ ЗАПЧАСТИ N° désignation M1 GYS T1 GYS T3 GYS Chaîne de 80cm / 80cm chain / 80cm Kette / cadena de 35067 80cm / Цепь 80 см...
- Page 12 M1 - T1 & T3 GYS AUTO N° désignation M1 GYS T1 GYS T3 GYS Motodévidoir (sans galet) / Wire feeder (without roller) / Drahtvorschub (ohne Drahtförderrollen) / Devanadera 51135 sin rodillos (sin rodillo) / Подающее устройство (без роликов) Cable de masse + cosse / Earth cable + cable lugs / Mas- 95364 sekabel + Kabelschuh / Cable de masa / Кабель...
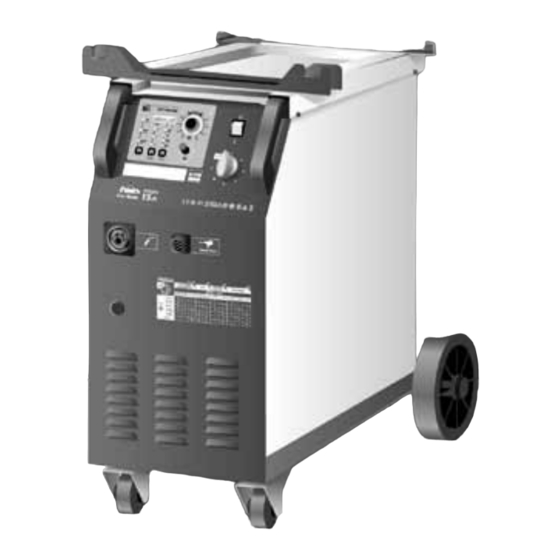
- Page 13 M1 - T1 & T3 GYS AUTO M1 GYS AUTO...
- Page 14 M1 - T1 & T3 GYS AUTO T1 GYS AUTO...
- Page 15 M1 - T1 & T3 GYS AUTO T1 GYS AUTO DV...
- Page 16 M1 - T1 & T3 GYS AUTO T3 GYS AUTO...
- Page 17 M1 - T1 & T3 GYS AUTO T3 GYS AUTO DV...
-
Page 18: Konformitätserklärung
M1 - T1 & T3 GYS AUTO DÉCLARATION DE CONFORMITÉ Gys atteste que les postes de soudure M1, T1 et T3 GYS AUTO sont fabriqués conformément aux exigences des direc- tives Basse tension 2006/95/CE du 12/12/2006, et aux directives CEM 2004/108/CE du 15/12/2004. Cette conformité... -
Page 19: Condition De Garantie France
La garantie ne couvre pas l’usure normale des pièces (Ex. : câbles, pinces, etc.). En cas de panne, retournez l’appa- reil à la société GYS (port dû refusé), en y joignant : Le présent certificat de garantie validé par le vendeur Une note explicative de la panne. - Page 20 M1 - T1 & T3 GYS AUTO ACCESSOIRES/ACCESORIES/ZUBEHÖR/ACCESORIOS/AKCECCYAPBI M1 GYS AUTO / T1 GYS AUTO / T3 GYS AUTO ø 200 ø 300 0.6 - 1.0 ø 100 041905 (ø0.6) 086593 (ø0.6) 086111 (ø0.6) 086166 (ø0.6) Acier/Steel/Stahl 041912 (ø0.8) 086609 (ø0.8) 086128 (ø0.8)
-
Page 21: Généralités
généralitéS entretien • L'entretien ne doit être effectué que par une personne qualifiée. • Couper l'alimentation en débranchant la prise, et attendre l’arrêt du ventilateur avant de travailler sur l'appareil. A l’intérieur, les tensions et intensités sont élevées et dangereuses. •... - Page 22 généralitéS recommandation PoUr rédUire leS émiSSionS électro-magnétiqUeS généralité L’utilisateur est responsable de l’installation et de l’utilisation de l’appareil suivant les instructions du fabricant. Si des perturbations électromagnétiques sont détectées, il est de la responsabilité de l’utilisateur de résoudre la situation suivant les recommandations données dans la notice ou avec l’assistance technique du fabricant.
-
Page 23: Anomalies, Causes, Remèdes
mma - tig anomalieS, caUSeS, remèdeS Symptome causes possibles remèdes L’appareil ne délivre pas de courant Attendre la fin de la période de La protection thermique du poste et le voyant de défaut thermique est refroidissement, environ 2 min. Le s’est enclenchée. - Page 24 mig-mag anomalieS, caUSeS, remèdeS Symptome causes possibles remèdes Nettoyer le tube contact ou le changer Des grattons obstruent l’orifice. et remettre du produit anti-adhésion. Réf. 041806 Le débit du fil de soudage n’est pas Contrôler la pression des galets ou les constant.
- Page 25 generalitieS maintenance • Maintenance should only be carried out by a qualified person. • Ensure the machine is unplugged, and that the ventilator inside has stopped before carrying out maintenance work. (DANGER High Voltage and Currents). • JBDC recommends removing the steel cover 2 or 3 times a year to remove any excess dust. Take this opportunity to have the electrical connections checked by a qualified person with an insulated tool.
- Page 26 generalitieS recommendation to redUce electro-magnetic emiSSionS general The user is responsible for installing and using the arc welding equipment according to the manufacturer’s instructions. If electromagnetic disturbances are detected, then it shall be the responsibility of the user of the arc welding equipment to resolve the situation with the technical assistance of the manufacturer.
- Page 27 mma-tig troUBleShooting anomalies causes remedies The machine does not deliver any Wait for the end of the cooling time, The welder thermal protection has current and the thermal overload around 2 minutes. The indicator turned on. indicator lamp lights up. lamp turns off.
- Page 28 mig-mag troUBleShooting Symptoms Reasons Solutions Clean out the contact batch or change Cracklings block up the opening. it and replace the anti-adherence product. Ref.041806 Control the roller pressure or replace The welding wire speed is not constant. Wire diameter non-consonant with The wire skids in the rollers.
-
Page 29: Allgemeine Informationen
allgemeine informationen inStandhaltUng • Die Instandhaltung sollte nur von qualifiziertem Fachpersonal durchgeführt werden • Trennen Sie die Stromversorgung des Gerätes und warten Sie bis der Ventilator sich nicht mehr dreht. Im Gerät sind die Spannungen sehr hoch und deshalb gefährlich. •... - Page 30 allgemeine informationen hinWeiSe ZUr redUZierUng Von eleKtromagnetiSchen StÖrUngen allgemein Es liegt in der Verantwortung des Anwenders dafür Sorge zu tragen, dass die Schweißausrüstung nach den Vorgaben des Herstellers angeschlossen und verwendet wird. Liegen elektromagnetische Störungen vor, ist der Anwender dafür verantwortlich dieses Problem mithilfe des technischen Supports des Herstellers zu beheben.
- Page 31 mma-tig fehler, UrSache, lÖSUng fehler Ursache lösungen Das Gerät liefert keinen Strom Warten Sie ca. 2 min bis der Der Übertemperaturschutz wurde und die Überhitzungsschutz-LED Kühlvorgang abgeschlossen ist. Die ausgelöst. leuchtet. Anzeige erlischt danach. Masseklemme oder Die Anzeige ist an, das Gerät liefert Elektrodenhalter- Kabel sind nicht Überprüfen Sie die Anschlüsse.
- Page 32 mig-mag fehler, UrSache, lÖSUng Fehler Ursache Lösung Reinigen Sie das Kontaktrohr oder Das Kontaktrohr ist verstopft. tauschen Sie es aus und benutzen Sie Antihaftspray (Art. Nr. 041806). Prüfen Sie den Druck des Drahtgeschwindigkeit nicht konstant. Rollenantriebes oder ändern die Antriebsnut auf die korrekte Der Draht rutscht im Antrieb durch.
- Page 33 generalidadeS mantenimiento • El mantenimiento debe ser efectuado por una persona cualificada. • Parar la alimentación desconectando la toma, y esperar el paro del ventilador antes de trabajar sobre el equipo. Al interior, las tensiones e intensidades son elevadas y peligrosas. •...
- Page 34 generalidadeS recomendaciÓn Para redUcir laS emiSioneS electro-magneticaS generalidad El usuario es responsable de la instalación y del uso del equipo según las instrucciones del fabricante. Si se detectan perturbaciones electromagneticas, es de la responsabilidad del usuario de resolver la situación según las recomendaciones dadas en el manual de uso o con la asistencia tecnica del fabricante.
- Page 35 mma-tig SintomaS, caUSaS PoSiBleS, remedioS anomalias causas remedios El aparato no libera ninguna Esperar el final del enfriamiento La protección térmica del aparato se corriente y el indicador luminoso de (más o menos 2 mn). El indicador ha puesto en marcha. defecto térmico está...
- Page 36 SintomaS, caUSaS PoSiBleS, remedioS sintomas causas posibles remedios Limpiar el tubo de contacto o Residuos obstruyen el orificio. cambiarlo. supervisar la presión de los rodillos o La salida del hilo de soldadura no es reemplazarlos. constante. diámetro del hilo no conforme al El hilo desliza en los rodillos.
-
Page 37: Общие Сведения
общие сведения обсЛУЖивание • Техническое обслуживание должно производиться только квалифицированным персоналом. • Отключите питание, выдернув вилку из розетки, и дождитесь остановки вентилятора перед тем, как приступить к тех. обслуживанию. Внутри аппарата высокие и опасные напряжение и ток. • Два-три раза в год открывайте аппарат и продувайте его, чтобы очистить от пыли. Необходимо также проверять все... - Page 38 общие сведения РекоМендаЦии дЛя сниЖения ЭЛектРоМаГнитноГо изЛУЧения общие сведения Пользователь несет ответственность за установку и использование аппарата в соответствие с указаниями производителя. При обнаружении электромагнитных излучений пользователь должен разрешить проблему, следуя рекомендациям, указанным в инструкции, или с помощью технической поддержки производителя. оценка...
- Page 39 mma-tig неиспРавности, пРиЧинЫ, УстРанение аномалии возможные причины Решения Ждите охлаждения в течение Аппарат не выдает сварочный Сработала тепловая защита приблизительно 2 минут, до ток, при этом горит желтая аппарата. выключения лампы индикатора. лампа индикатора термозащиты. Лампочка † выкличится. Кабель зажима массы или Дисплей...
-
Page 40: Устранение Неисправности
неиспРавности, пРиЧинЫ, УстРанение НЕИСПРАВНОСТЬ ВОЗМОЖНЫЕ ПРИЧИНЫ УСТРАНЕНИЕ НЕИСПРАВНОСТИ Очистите контактную трубку или Наплавы металла забивают отверстие. поменяйте ее и смажте составом против прилипания. Арт. : 041806 Проверьте давление роликов или Подача сварочной проволоки замените их. неравномерна. Диаметр проволоки не соответствует Проволока... - Page 41 iconeS / SymBolS / ZeichenerKlÄrUng / iconoS / CиMBOЛЫ Ampères - Amps - Ampere - Amperios - Ампер Volt - Volt - Volt - Voltios - Вольт Hertz - Hertz - Hertz - Hertz - Герц Soudage MIG/MAG (MIG: Metal Inert Gas / MAG: Metal Active Gas) - MIG/MAG Welding (MIG: Metal Inert Gas / MAG: Metal Active Gas) - MIG/MAG Schweißen (MIG: Metal Inert Gas/ MAG: Metal Active Gas) - Soldadura MIG/MAG (MIG: Metal Inert Gas / MAG: Metal Active Gas) - Полуавтоматическая...
- Page 42 iconeS / SymBolS / ZeichenerKlÄrUng / iconoS / CиMBOЛЫ U2: Tensions conventionnelles en charges correspondantes. - U2: conventional voltages in corresponding U2 ...% load. - U2: entsprechende Arbeitsspannung. - U2: Tensiones convencionales en carga. - U2: соответствующие сварочные напряжения*. Appareil conforme aux directives européennes. - The device complies with European Directive. - Gerät entspricht europäischen Richtlinien.
- Page 43 iconeS / SymBolS / ZeichenerKlÄrUng / iconoS / CиMBOЛЫ Identification polarité négative - Negative pole - Minuspol - Polaridad negativa - отрицательная полярность Terre - Earth ground - Erdung - Tierre - Заземление Ne pas utiliser en zones résidentielles (CEM) - Not for use in residential areas (EMC) - Nicht für die Benutzung in Wohnräumen geeignet.