Publicité

Les langues disponibles

Les langues disponibles

Liens rapides

Item # 1004 552 791
1004 552 804
1004 552 801
Model # 7982HDCBN
7982HDCGL
7982HDCVB
USE AND CARE GUIDE
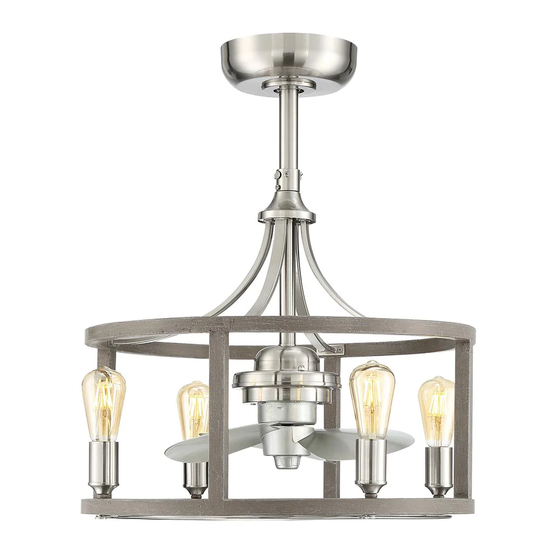
21.5 IN. INDOOR / COVERED OUTDOOR CEILING FAN
Questions, problems, missing parts? Before returning to the store,
call Home Decorators Collection Customer Service
8 a.m. – 7 p.m., EST, Monday – Friday, 9 a.m. – 6 p.m., EST, Saturday
1-800-986-3460
HOMEDEPOT.COM/HOMEDECORATORS
THANK YOU
We appreciate the trust and confidence you have placed in Home Decorators Collection through the purchase of this ceiling fan. We strive to
continually create quality products designed to enhance your home. Visit us online to see our full line of products available for your home
improvement needs. Thank you for choosing Home Decorators Collection!

Publicité

Table des Matières
loading

Sommaire des Matières pour Home Decorators Collection 7982HDCBN

  • Page 1 THANK YOU We appreciate the trust and confidence you have placed in Home Decorators Collection through the purchase of this ceiling fan. We strive to continually create quality products designed to enhance your home. Visit us online to see our full line of products available for your home...
  • Page 2: Table Des Matières

    Table of Contents   Table of Contents ............2 Installation – Mounting Options ………………..…………   Safety Information ............2 Installation ………………..………………………………………..    Specifications ..............3 Operation ..............10   Warranty ................. 3 Preparing the Remote Control ........11   Pre-installation .............. 3  ...
  • Page 3: Specifications

    Specifications Airflow Fan Power Efficiency Volt Consumption Airflow Gross Size Speed (Higher Is Cubic Feet (without Weight Weight Better) lights) WATT CFM/WATT 23.39 16.11 lbs 27.89 lbs 21.5 in. 31.50 1076 34.15 7.37 cu. ft. (7.31 kgs) (12.65 kgs) 39.72 1309 32.75 High...
  • Page 4: Tools Required

    Pre-Installation (continued) TOOLS REQUIRED Electrical Phillips Step ladder Wire cutter tape screwdriver Safety glasses Drill Wire stripper HARDWARE INCLUDED NOTE: Hardware not shown to actual size. Part Description Quantity #8-32 x 1-1/2 Screw Lock washer, #8-32 #8 X 1-1/2 Screw Spring washer,1/8IP Flat washer #8-32 x 1/4 Screw...
  • Page 5: Package Contents

    Pre-installation (continued) PACKAGE CONTENTS Part Description Quantity Mounting bracket (inside canopy) Downrod Canopy Cover Cage LED bulbs Metal grill Knurled screws Hanger ball Remote control Fan blade Receiver Bottom plastic cover Filter HOMEDEPOT.COM/HOMEDECORATORS Please contact 1-800-986-3460 for further assistance.
  • Page 6: Installation- Mounting Options

    Installation- Mounting options WARNING: To reduce the risk of fire, electric shock or personal injury, mount to outlet box marked “Acceptable for fan support of 35 lbs. (15.9 Kg) or less”, and use screws provided with the outlet box. An outlet box commonly used for the support of lighting fixtures may not be acceptable for fan support and may need to be replaced.
  • Page 7: Installation

    Installation Preparing the canopy and hanger Preparing for mounting ball Insert the end of downrod (B) through the connector (PP), Insert the canopy (C) and metal cover (D) through the   and align the two holes in the downrod (B) and the downrod (B).
  • Page 8: Making The Electrical Connection

    Installation (continued) Hanging the fixture on the ceiling Making the electrical connection Install the ceiling mounting bracket (A) on the outlet box by The fan comes with 36 in. lead wires for use with an extended   using the washer and the mounting screws provided with the ball/downrod assembly.
  • Page 9 Installation (continued) Installing the canopy Installing metal mesh and bulbs Push the receiver (M) and filter (O) into the ceiling mounting bracket Insert the fan blades (L) though the shaft (U), install bottom plastic   (A). (See below detail) cover (N) onto the fan shaft after the blade assembly (L) is installed Align the locking slots of the canopy (C) with the two screws (FF) in Align the locking slots of the metal grill (G) with three knurled screws...
  • Page 10: Operation

    Operation REMOTE CONTROL Your fan is equipped with a remote control to operate the speed, direction, and light for your new ceiling fan. Speed setting for warm or cool weather depends on factors such as the room size, ceiling height, number of fans and so on.
  • Page 11: Preparing The Remote Control

    Preparing the Remote Control IMPORTANT POINTS TO REMEMBER Please note that all fixed wiring appliances should be installed by a qualified electrician.  The supply to the remote control receiver should be connected through a mains switch, i.e.  existing wall switch. Disconnect from power supply at the wall switch before working on the remote control ...
  • Page 12 Questions, problems, missing parts? Before returning to the store, call Home Decorators Collection Customer Service 8 a.m. – 7 p.m., EST, Monday – Friday, 9 a.m. – 6 p.m., EST, Saturday 1-800-986-3460 HOMEDEPOT.COM/HOMEDECORATORS Retain this manual for future use.
  • Page 13: Ventilateur De Plafond D'intérieur/Couvert Extérieur 21,5 Po

    MERCI Nous apprécions la confiance que vous avez témoignée à Home Decorators Collection en ayant acheté ce ventilateur de plafond. Nous nous efforçons de créer sans cesse des produits de qualité destinés à améliorer votre cadre de vie. Allez voir en ligne notre gamme complète de produits faits pour...
  • Page 14: Consignes De Sécurité

    Table des matières     Table des matières ............2 Quincaillerie fournie ..............4   Consignes de sécurité ..........2   Contenu du paquet ..............5 Caractéristiques techniques ........3 Installation – Options de montage ………………..……...   Garantie ................3 Installation ………………..………………………………………...  ...
  • Page 15: Caractéristiques Techniques

    « tremblement » est normal et ne doit pas être considéré comme un défaut. Une réparation effectuée par une personne non autorisée invalidera la garantie. Il n’y a pas d’autre garantie expresse. Home Decorators Collection se dégage par les présentes de toutes garanties, y compris celles visant la qualité...
  • Page 16: Avant L'installation (Suite)

    Avant l’installation (suite) OUTILS REQUIS Tournevis Pince Ruban isolant Escabeau cruciforme coupante Lunettes de sécurité Perceuse Pince à dénuder QUINCAILLERIE FOURNIE REMARQUE : Quincaillerie non représentée à l’échelle. Pièce Description Quantité Vis #8-32 x 1-1/2 Rondelle d’arrêt, #8-32 Vis #8 x 1-1/2 Rondelle élastique, 1/8 IP Rondelle plate Vis #8-32 x 1-1/4...
  • Page 17: Contenu Du Paquet

    Avant l’installation (suite) CONTENU DU PAQUET Pièce Description Quantité Support de fixation (sous le couvercle) Tige Couvercle Cache-vis Cage Ampoules DEL Grille métallique Vis moletées Boule de suspension Télécommande Pale de ventilateur Récepteur Couvercle en plastique du bas Filtre HOMEDEPOT.COM/HOMEDECORATORS Pour obtenir de l’aide, appeler le 1-800-986-3460.
  • Page 18: Installation - Options De Montage

    Installation – Options de montage AVERTISSEMENT : Pour réduire le risque de départ de feu, de choc électrique ou de blessures, monter sur une boîte de sortie marquée « Acceptable for fan support of 35 lbs. (15.9 kg) or less » et utiliser seulement les vis Barre de suspension fournies avec la boîte de sortie.
  • Page 19: Installation

    Installation Préparation du couvercle et de la Préparation au montage boule de suspension Enfiler l’extrémité de la tige (B) dans le connecteur (PP) et Enfiler le couvercle (C) et le couvercle métallique (D) dans la   aligner les deux trous de la tige (B) et du connecteur (PP). tige (B).
  • Page 20: Installation (Suite)

    Installation (suite) Suspension du luminaire au Branchements électriques plafond Monter le support de montage au plafond (A) sur la boîte de Le ventilateur est fourni avec des fils conducteurs de 91,4 cm   sortie à l’aide de la rondelle et des vis de fixation fournies avec à...
  • Page 21: Installation Du Couvercle

    Installation (suite) Installation de la grille métallique Installation du couvercle et des ampoules Poussez le récepteur (M) et le filtre (O) dans le support de fixation (A) Insérer les pales de ventilateur (L) dans l’arbre (U), puis installer le  ...
  • Page 22: Mode D'emploi

    Mode d’emploi TÉLÉCOMMANDE Le ventilateur est équipé d’une télécommande permettant de régler la vitesse, le sens de rotation et l’allumage des lampes. Le réglage de vitesse pour temps chaud ou frais dépend de facteurs tels que la taille de la pièce, la hauteur de plafond, le nombre de ventilateurs, etc.
  • Page 23: Préparation De La Télécommande

    Préparation de la télécommande POINTS IMPORTANTS À NE PAS PERDRE DE VUE Noter que tous les appareils à câblage fixe doivent être installés par un électricien qualifié.  Le récepteur de la télécommande doit être connecté par un interrupteur général, à savoir un ...
  • Page 24 Des questions, des problèmes ou des pièces manquantes? Avant de retourner au magasin, appelez le service clientèle Home Decorators Collection entre 8 et 19 h (heure de l’Est), du lundi au vendredi; 9 et 18 h (heure de l’Est), le samedi 1-800-986-3460 HOMEDEPOT.COM/HOMEDECORATORS...
  • Page 25 GRACIAS Apreciamos la confianza depositada en Home Decorators Collection al comprar este ventilador de techo. Nos esforzamos continuamente para crear productos de calidad diseñados para mejorar su hogar. Visítenos en línea para ver nuestra línea completa de productos disponibles para sus...
  • Page 26: Índice

    Índice     Herraje incluido ................4 Índice ................2   Información de seguridad ..........2   Contenido del paquete .............5 Especificaciones ............3 Instalación – Opciones de montaje ………………..……   Garantía ................3 Instalación ………………..………………………………………   Antes de la instalación ..........3  ...
  • Page 27: Especificaciones

    Si una persona no autorizada repara este artículo, se anulará la garantía. No existe otra garantía expresa. Por la presente, Home Decorators Collection renuncia a todas las garantías, incluidas, entre otras, las garantías de comerciabilidad o idoneidad para un propósito determinado, en la medida en que las leyes lo permitan.
  • Page 28: Herramientas Requeridas

    Antes de la instalación HERRAMIENTAS REQUERIDAS Escalera de Destornillador Cortadores Cinta eléctrica mano Phillips de cable Gafas de seguridad Taladro Alicates pelacables HERRAJE INCLUIDO NOTA: El herraje no se muestra en su tamaño real. Pieza Descripción Cantidad Tornillo #8-32 x 1-1/2 Arandela de seguridad, #8-32 Tornillo #8 x 1-1/2 Arandela de presión, 1/8IP...
  • Page 29: Contenido Del Paquete

    Antes de la instalación (continuación) CONTENIDO DEL PAQUETE Pieza Descripción Cantidad Soporte de montaje (dentro de la cubierta) Varilla de bajada Cubierta Tapa Jaula Bombilla LED Rejilla de metal Tornillos estriados Bola colgante Control remoto Aspa del ventilador Receptor Tapa plástica inferior Filtro HOMEDEPOT.COM/HOMEDECORATORS Póngase en contacto con el 1-800-986-3460 para obtener más ayuda.
  • Page 30: Instalación - Opciones De Montaje

    Instalación - Opciones de montaje ADVERTENCIA: Para reducir el riesgo de incendio y descarga eléctrica o lesiones, montar a una caja de Barra de soporte colgante tomacorriente con la etiqueta "Aceptable para soporte de ventilador de 35 lb (15.9 kg) o menos" y use los tornillos incluidos con la caja del tomacorriente.
  • Page 31: Instalación

    Instalación Cómo preparar la cubierta y la Cómo preparar el montaje bola colgante Inserte el extremo de la varilla de bajada (B) a través del Inserte la cubierta (C) y la tapa de metal (D) a través de la  ...
  • Page 32: Conexiones Eléctricas

    Instalación (continuación) Para colgar la lámpara en el techo Conexiones eléctricas Instale el soporte de montaje en el techo (A) en la caja del El ventilador incluye cables de 36 pulgadas para permitir el uso   tomacorriente utilizando la arandela y los tornillos de montaje con un conjunto extendido de bola/varilla de bajada.
  • Page 33 Instalación (continuación) Instalación de la malla de metal y Instalación de la cubierta las bombillas Empuja el receptor (M) y el filtro (O) dentro del soporte de montaje en Inserte las aspas del ventilado (L) a través del eje (U), instale la tapa ...
  • Page 34: Funcionamiento

    Funcionamiento CONTROL REMOTO Su ventilador está equipado con un control remoto para operar la velocidad, dirección y luz de su nuevo ventilador de techo. Los ajustes de velocidad para climas cálidos o fríos dependen de factores tales como el tamaño de la habitación, la altura del techo, la cantidad de ventiladores, etc.
  • Page 35: Cómo Preparar El Control Remoto

    Cómo preparar el control remoto PUNTOS IMPORTANTES A RECORDAR Tenga en cuenta que todos los aparatos cableados fijos deben ser instalados por un electricista autorizado.  El suministro al receptor del control remoto debe conectarse a través de un interruptor de ...
  • Page 36 ¿Tiene preguntas o problemas, o le faltan piezas? Antes de devolver a la tienda, llame a Atención al Cliente de Home Decorators Collection Lunes a viernes de 8:00 a.m. a 7:00 p.m., EST, y los sábados de 9:00 a.m. a 6:00 p.m., EST 1-800-986-3460 HOMEDEPOT.COM/HOMEDECORATORS...

Ce manuel est également adapté pour:

7982hdcgl7982hdcvb1004 552 7911004 552 8041004 552 801

Table des Matières