Table des Matières

Publicité

Les langues disponibles
  • FR

Les langues disponibles

Liens rapides

Publicité

Table des Matières
loading

Sommaire des Matières pour auna Wallie

  • Page 3: Table Des Matières

    Sehr geehrter Kunde, wir gratulieren Ihnen zum Erwerb Ihres Gerätes. Lesen Sie die folgenden Hinweise sorgfältig durch und befolgen Sie diese, um möglichen Schäden vorzubeugen. Für Schäden, die durch Missachtung der Hinweise und unsachgemäßen Gebrauch entstehen, übernehmen wir keine Haftung. Scannen Sie den folgenden QR-Code, um Zugriff auf die aktuellste Bedienungsanleitung und weitere Informationen rund um das Produkt zu erhalten:...
  • Page 4: Technische Daten

    TECHNISCHE DATEN Artikelnummern 10033227 10033228 Stromversorgung 220-240 V ~ 50/60 Hz Tuner: Frequenzbereich: FM 87.5 – 108 MHz CD-Player: Typ: Single-Disc-Multiplayer-Compact-Disc-Player Signal-Auslesung: Berührungslose 3-Strahl-Halbleiter- Laserabtastung D/A-Wandler: Multi-Bit-D/A-Wandler Frequenzgang: 20 – 20.000 Hz USB Host Schnittstelle: Entspricht der USB 1.1 (Full Speed)/2.0 Massenspeicherklasse.
  • Page 5: Sicherheitshinweise

    SICHERHEITSHINWEISE • Diese Bedienungsanleitung dient dazu, Sie mit der Funktionsweise dieses Produktes vertraut zu machen. Bewahren Sie diese Anleitung daher stets gut auf, damit Sie jederzeit darauf zugreifen können. • Sie erhalten bei Kauf dieses Produktes zwei Jahre Gewährleistung auf Defekt bei sachgemäßem Gebrauch.
  • Page 6: Geräteübersicht

    GERÄTEÜBERSICHT...
  • Page 7: Lcd-Display

    ÜBERSPRINGEN / SUCHEN SPEICHERTASTE, PROG-TASTE RÜCKWÄRTS, TUNER - TASTE STANDBY-TASTE FERNBEDIENUNGSSENSOR ÜBERSPRINGEN/SUCHEN 10 LCD-DISPLAY VORWÄRTS, TUNER + TASTE SLEEP/SNOOZE-TASTE FUNKTION-TASTE (SCHLAF-/ SCHLUMMERTASTE) PLAY/PAUSE, FM SCAN- 12 AL SET, EQ TASTE TASTE REPEAT-TASTE RANDOM-TASTE (WIEDERHOLEN-TASTE) STOP-TASTE, BT VERBINDEN- 14 ZEITEINSTELLUNGSTASTE TASTE...
  • Page 8 PRESET +, ORDNER + TASTE 24 BATTERIEKLAPPE L-LAUTSPRECHER- PRESET -, ORDNER - TASTE TRAGRAHMEN LAUTSTÄRKE + TASTE 26 AUFHÄNGELÖCHER LAUTSTÄRKE - TASTE AUDIO-IN-BUCHSE L-LAUTSPRECHER 28 TELEFONBUCHSE 20 CD FACH 29 L-LAUTSPRECHERAUSGANG R-LAUTSPRECHER 30 R-LAUTSPRECHERAUSGANG R-LAUTSPRECHER- STROMBUCHSE (DC IN) TRAGRAHMEN 23 GERÄTERAHMEN 32 USB-BUCHSE...
  • Page 9: Fernbedienung

    FERNBEDIENUNG Tastenfunktionen STANDBY-TASTE PLAY/PAUSE/FM SCAN-TASTE STOP/MEM.-TASTE LAUTSTÄRKE - TASTE REPEAT (WIEDERHOLEN)/RANDOM (ZUFALL)/PRESET - TASTE NUMERISCHE TASTEN MODE-TASTE MUTE-TASTE (STUMM-TASTE) ÜBERSPRINGEN/SUCHEN VORWÄRTS, TUNER + TASTE ÜBERSPRINGEN/SUCHEN RÜCKWÄRTS, TUNER - TASTE LAUTSTÄRKE + TASTE PROG/PRESET + TASTE HINWEIS: Für den Betrieb der Fernbedienung ist eine CR2025-Batterie erforderlich.
  • Page 10: Installation

    INSTALLATION Montage der Lautsprecher Wandmontage...
  • Page 11: Stromanschluss Und Batteriebetrieb

    STROMANSCHLUSS UND BATTERIEBETRIEB • Ziehen Sie das Netzkabel aus der Steckdose, bevor Sie die Lautsprecher anschließen. Rechter Lautsprecher Linker Lautsprecher WANDSTECKDOSE GLEICHSTROM- AC 230V BUCHSE (DC 5V MAX 2A) AC-ADAPTER Stromquellen • Dieses Soundsystem ist für 230 V ~ 50 Hz ausgelegt. Versuchen Sie nicht, das Gerät an eine andere Stromquelle anzuschließen.
  • Page 12: Erste Schritte

    ERSTE SCHRITTE 1) Einlegen der Backup-Batterien in die Anlage Entfernen Sie den BATTERIEFACHDECKEL. 2. Legen Sie 2 x „AA“ (UM-3) Batterien (nicht im Lieferumfang enthalten) gemäß der Polarität in das Batteriefach ein. 3. Schließen Sie das BATTERIEFACH. HINWEIS: Die Backup-Batterie ist nur für die Uhrzeiteinstellungen vorgesehen und kann die Weckereinstellung nicht absichern.
  • Page 13 HINWEIS: Vergewissern Sie sich, dass die Batterien richtig eingesetzt sind. Eine falsche Polarität kann das Gerät beschädigen. Wir empfehlen die Verwendung von qualitativ hochwertigen Alkalibatterien, um eine optimale Leistung und längere Betriebsdauer zu erzielen. Batterie-Pflege • Mischen Sie keine alten und neuen Batterien. •...
  • Page 14: Bedienung Und Funktionen

    BEDIENUNG UND FUNKTIONEN FM-RADIO Automatische Sendersuche (SCAN) Sie können die Suchfunktion (Auto-Scan) verwenden, um automatisch nach neuen digitalen Radiosendern zu suchen und inaktive Sender zu entfernen. Halten Sie die PLAY/PAUSE/FM SCAN-Taste (5) am Gerät oder (2) auf der Fernbedienung 2 Sekunden lang gedrückt, um „Scan“ zu wählen. Die Anzahl der gefundenen Sender wird während des automatischen Sendersuchlaufs angezeigt.
  • Page 15 CD abspielen Drücken Sie die  STANDBY-Taste (2) am Gerät oder (1) auf der Fernbedienung, um das Gerät einzuschalten. 2. Drücken Sie die SOURCE-Taste auf der Fernbedienung oder die CD/ USB-Taste, um den CD-Modus zu aktivieren. 3. Ziehen Sie mit einem Finger am CD-Fach, um es zu öffnen. 4.
  • Page 16 Wiedergabemodus • Wiederholen 1: Wenn die Taste REPEAT (WIEDERHOLEN) einmal gedrückt wird, (13) auf dem Gerät oder (5) auf der Fernbedienung, erscheint auf dem LCD- Display die Meldung „REPEAT 1“. Der aktuelle Titel wird wiederholt abgespielt. • Alle wiederholen: Wenn die REPEAT-Taste zweimal gedrückt wird, leuchtet die Anzeige „REPEAT ALL“...
  • Page 17 Überspringen und Suchen-Modus Tippen Sie im Wiedergabe- oder Pausenmodus auf die Tasten    ÜBERSPRINGEN VORWÄRTS oder  ÜBERSPRINGEN RÜCKWÄRTS (3/1) am Gerät oder (9/10) auf der Fernbedienung, um zum nächsten Titel oder zum Anfang des aktuellen Titels zurückzukehren.  2. Halten Sie während der Wiedergabe die Tasten  SUCHEN ...
  • Page 18 Das Gerät verfügt über eine BT-Funktion, die ein Signal innerhalb von 8 Metern empfangen kann. So verbinden Sie das Gerät mit einem BT-Gerät, um Musik zu hören: Drücken Sie die die  STANDBY-Taste (2) am Gerät oder (1) auf der Fernbedienung, um das Gerät einzuschalten. 2.
  • Page 19: Usb

    An der Vorderseite des Gerätes befindet sich eine USB-Buchse (32). Wenn ein USB-Gerät an das Gerät angeschlossen ist, drücken Sie wiederholt die FUNKTION-Taste (4) am Gerät oder die MODE-Taste (7) auf der Fernbedienung, um den USB-Modus auszuwählen. 2. Das Gerät zeigt automatisch die Gesamtzahl der Titel an. 3.
  • Page 20: Aux-In

    AUX-IN Mit einem Anschlusskabel können Sie einen portablen Audio-Player usw. an die AUDIO IN-Buchse (27) anschließen. Wenn Sie ein Videogerät anschließen möchten, schließen Sie den Audioausgang an dieses Gerät und den Videoausgang an ein Fernsehgerät an. 2. Drücken Sie die  STANDBY-Taste (2) am Gerät oder (1) auf der Fernbedienung, um das Gerät einzuschalten.
  • Page 21: Alarm-Funktionen

    ALARM-FUNKTIONEN Wecker einstellen Mit dieser Funktion schaltet sich das System automatisch ein und weckt Sie mit einem Signalton oder der Musik von einer CD, einem USB-Gerät oder einem Radio. Halten Sie im Standby-Modus die AL SET-Taste (12) am Gerät drei Sekunden lang gedrückt, dann erscheint im Display die Weckzeit „00:00“.
  • Page 22 Mit CD, USB, Radio oder Piepton-Alarm aufwachen • Wenn die Weckzeit erreicht ist, ertönt der CD-, Radio- oder Piepton- Alarm für die eingestellte Zeit und schaltet sich dann für den nächsten Tag selbst zurück – ohne Drücken der SNOOZE-Taste (11). •...
  • Page 23: Reinigung Und Pflege

    REINIGUNG UND PFLEGE Pflege von CDs CDs sind relativ widerstandsfähig gegen Beschädigungen, jedoch kann es durch eine Verschmutzung der Disc-Oberfläche zu Beschädigungen kommen. Befolgen Sie die folgenden Richtlinien für einen maximalen Musikgenuss Ihrer CD-Sammlung und Ihres Players. • Schreiben Sie nicht auf beide Seiten der Disc, insbesondere nicht auf die unbeschriftete Seite, von der die Audiosignale gelesen werden.
  • Page 24: Fehlersuche Und Fehlerbehebung

    FEHLERSUCHE UND FEHLERBEHEBUNG Problem Mögliche Ursache • Ist das Gerät in der Nähe des Fernsehers oder Computers aufgestellt? Das Radio gibt ungewöhnliche • Ist die FM-Antenne richtig Geräusche von sich. platziert? Bewegen Sie die Antenne vom Netzkabel weg, wenn es sich in der Nähe von diesem befindet.
  • Page 25 Problem Mögliche Ursache • Gibt es irgendeine MP3/WMA- Datei auf dem Gerät? • Ist das Gerät richtig USB-Gerät kann nicht erkannt angeschlossen? werden. • Ist es ein MTP-Gerät? • Enthält das Gerät nur AAC- Dateien? • Ist es eine urheberrechtlich geschützte WMA-Datei? Die USB-Wiedergabe startet nicht •...
  • Page 26: Hinweise Zur Entsorgung

    HINWEISE ZUR ENTSORGUNG Befindet sich die linke Abbildung (durchgestrichene Mülltonne auf Rädern) auf dem Produkt, gilt die Europäische Richtlinie 2012/19/EU. Diese Produkte dürfen nicht mit dem normalen Hausmüll entsorgt werden. Informieren Sie sich über die örtlichen Regelungen zur getrennten Sammlung elektrischer und elektronischer Gerätschaften.
  • Page 27 Dear Customer, Congratulations purchasing this equipment. Please read this manual carefully and take care of the following hints to avoid damages. Any failure caused by ignoring the items and cautions mentioned in the instruction manual is not covered by our warranty or any liability.
  • Page 28: Technical Data

    TECHNICAL DATA Item number 10033227 10033228 Power supply 220-240 V ~ 50/60 Hz Tuner: Frequency range: FM 87.5 – 108 MHz CD player: Type: Single disc multi-play compact disc player Signal readout: Non-contact, 3-beam semiconductor laser pickup D/A converter: Multi bit D/A converter Frequency response: 20 –...
  • Page 29: Safety Instructions

    SAFETY INSTRUCTIONS • This instruction manual is intended to familiarize you with the operation of this product. Always keep this manual in a safe place so that you can access it at any time. • When you purchase this product, you receive a two-year warranty for defects if the unit is used as intended.
  • Page 30: Device Overview

    DEVICE OVERVIEW...
  • Page 31: Random Button

    SKIP/SEARCH BACKWARD, MEMORY BUTTON, PROG TUNER - BUTTON BUTTON STANDBY BUTTON REMOTE SENSOR SKIP/SEARCH FORWARD, 10 LCD DISPLAY TUNER + BUTTON FUNCTION BUTTON SLEEP/SNOOZE BUTTON PLAY/PAUSE, FM SCAN 12 AL SET, EQ BUTTON BUTTON RANDOM BUTTON 13 REPEAT BUTTON STOP BUTTON, BT PAIR 14 TIME SET BUTTON BUTTON...
  • Page 32 PRESET +, FOLDER + BUTTON 24 BATTERY DOOR L-SPEAKER SUPPORT PRESET - , FOLDER - BUTTON FRAME VOLUME + BUTTON 26 HANGER HOLES VOLUME - BUTTON AUDIO IN JACK L-SPEAKER 28 PHONE JACK 20 CD DOOR 29 L-SPEAKER OUT JACK R-SPEAKER 30 R-SPEAKER OUT JACK 22 R-SPEAKER SUPPORT FRAME...
  • Page 33: Remote Control

    REMOTE CONTROL Key functions STANDBY BUTTON PLAY/PAUSE/FM SCAN BUTTON STOP/MEM. BUTTON VOL - BUTTON REPEAT/RANDOM/PRESET - BUTTON NUMERIC BUTTONS MODE BUTTON MUTE BUTTON SKIP/SEARCH FORWARD/TUNING + BUTTON SKIP/SEARCH BACKWARD/TUNING - BUTTON VOL + BUTTON PROG / PRESET + BUTTON NOTE: The remote control unit is designed to operate on 1 x CR2025 battery.
  • Page 34: Installation

    INSTALLATION Installing the speakers Wall mounting...
  • Page 35: System Connections & Battery Operation

    SYSTEM CONNECTIONS & BATTERY OPERATION • Make sure to unplug the AC/DC power lead before making any connections: Right speaker Left speaker TO DJ JACK WALL SOCKET (DC 5V MAX 2A) AC 230V AC-ADAPTER Power sources • This Music System operates on 230 V ~ 50 Hz. Do not attempt to operate the radio on any other power source.
  • Page 36: Getting Started

    GETTING STARTED 1) Installing backup batteries in the system Remove the BATTERY DOOR. 2. Install 2 x “AA” (UM-3) batteries (not included) according to the polarity diagram inside the battery compartment. 3. Close the BATTERY DOOR. NOTE: The backup battery is only for the Clock Setting and cannot back up the Alarm Setting.
  • Page 37 NOTE: Be sure that the batteries are installed correctly. Wrong polarity may damage the unit. For best performance and longer operating time, we recommend the use of good quality alkaline type batteries. Battery care • Do not mix old and new batteries. •...
  • Page 38: Operation And Functions

    OPERATION AND FUNCTIONS FM RADIO AUTO Scan (SCAN) You can use the scan (auto tune) function to automatically scan for new digital radio stations and remove inactive ones. Press and hold the PLAY/PAUSE/FM SCAN button (5) on main unit or (2) on remote control for 2 seconds to choose “Scan”.
  • Page 39: Cd Player

    CD PLAYER Disc play mode Press the  STANDBY button (2) on the main unit or (1) on the remote control to turn the power on. 2. Press the SOURCE button on the remote control or CD/USB button to turn on the CD mode. 3.
  • Page 40 • To cancel repeat function: Press the REPEAT button until the repeat indicator is off. • Random play: When the RANDOM button (6) is pressed three times, the “RAND“ indicator will appear on the LCD display. The tracks on the disc will be played in random order automatically.
  • Page 41 The unit has a BT function that can receive a signal within 8 metres. Pairing the unit with a BT device to listen to music: Press the  STANDBY button (2) on the main unit or (1) on the remote control. 2.
  • Page 42: Usb

    There is an USB socket (32) located at the front of the unit. When a USB device is connected to the unit, repeatedly press the FUNCTION button (4) on the unit or the MODE button (7) on the remote control to select USB mode.
  • Page 43: Aux In

    AUX IN Use a connection lead to connect a portable audio player etc. to the AUDIO IN socket (27). When using video equipment, connect the audio output to this unit and the video output to a television. 2. Press the  STANDBY button (2) on the main unit or (1) on the remote control to turn the power on.
  • Page 44: Alarm Operation

    ALARM OPERATION Setting the alarm clock This function allows the system to turn on automatically and wake you using a beeping alarm, a CD, USB, BUZZER or RADIO. In standby mode, hold the AL SET button (12) on the main unit for three seconds, then alarm time “00:00“...
  • Page 45 Wake to CD, USB, Radio or Beeping Alarm • When the alarm time is reached, the CD, radio or beeping alarm will sound for the time you set then shut off and reset itself for the following day – without you having to press the SNOOZE button (11). •...
  • Page 46: Cleaning And Care

    CLEANING AND CARE Care of compact discs Compact discs are fairly resistant to damage, however mistracking can occur due to an accumulation of dirt on the disc surface. Follow the guidelines below for maximum enjoyment from your CD collection and player.
  • Page 47: Troubleshooting

    TROUBLESHOOTING Problem Possible Cause • Is the unit placed near the TV or computer? The radio makes unusual noises • Is the FM antenna placed continuously. properly? Move the antenna away from the AC power lead if it is located nearby. •...
  • Page 48 Problem Possible Cause • Is it a copyright protected WMA file? USB playback does not start. • Is it a false MP3 file? • Is the unit too near to a device that generates electromagnetic radiation? BT sound is interrupted or distorted.
  • Page 49: Hints On Disposal

    HINTS ON DISPOSAL According to the European waste regulation 2012/19/ EU this symbol on the product or on its packaging indicates that this product may not be treated as household waste. Instead it should be taken to the appropriate collection point for the recycling of electrical and electronic equipment.
  • Page 51 Estimado cliente: Le felicitamos por la adquisición de este producto. atentamente siguiente manual siga cuidadosamente las instrucciones de uso con el fin de evitar posibles daños. La empresa no se responsabiliza de los daños ocasionados por un uso indebido del producto o por haber desatendido las indicaciones de seguridad.
  • Page 52: Datos Técnicos

    DATOS TÉCNICOS Número de artículo 10033227 10033228 Suministro eléctrico 220-240 V ~ 50/60 Hz Sintonizador: Rango de frecuencia: FM 87.5 – 108 MHz Reproductor de CD: Tipo: Reproductor de discos compactos, reproductor multimedia de monodisco Lectura de señal: Captador de láser semiconductor de 3 haces sin contacto Convertidor D/A: Convertidor D/A multibit...
  • Page 53: Indicaciones De Seguridad

    INDICACIONES DE SEGURIDAD • Este manual de instrucciones tiene como objetivo familiarizarle con el funcionamiento del aparato. Conserve este manual para que pueda realizar futuras consultas. • Con la compra de este producto obtiene dos años de garantía en caso de defecto o avería provocados por un uso normal del aparato.
  • Page 54: Vista General Del Aparato

    VISTA GENERAL DEL APARATO...
  • Page 55 BOTÓN ATRÁS/ REBOBINAR HACIA ATRÁS, BOTÓN MEMORIA, PROG SINTONIZADOR - SENSOR DEL MANDO A BOTÓN STANDBY DISTANCIA BOTÓN SIGUIENTE/ REBOBINAR HACIA DELANTE, 10 DISPLAY LCD SINTONIZADOR + BOTÓN FUNCIONES BOTÓN SLEEP/SNOOZE BOTÓN PLAY/PAUSE, 12 BOTÓN AL SET, EQ ESCANEO FM BOTÓN RANDOM 13 BOTÓN REPEAT (REPETICIÓN) BOTÓN STOP, CONEXIÓN BT...
  • Page 56: Puerto Usb

    BOTÓN PRESET +, CARPETA + 24 COMPARTIMENTO DE PILAS BOTÓN PRESET - , CARPETA - 25 BASTIDOR ALTAVOZ I BOTÓN VOLUMEN + 26 ORIFICIOS DE MONTAJE BOTÓN VOLUMEN - ENTRADA AUDIO ALTAVOZ I 28 ENTRADA TELÉFONO 20 UNIDAD LECTORA DE CD 29 SALIDA ALTAVOZ I ALTAVOZ D 30 SALIDA ALTAVOZ D...
  • Page 57: Mando A Distancia

    MANDO A DISTANCIA Teclas de función BOTÓN STANDBY BOTÓN PLAY/PAUSE/FM SCAN BOTÓN STOP/MEM BOTÓN VOLUMEN - BOTÓN REPEAT (REPETIR) / RANDOM (ALEATORIO) / PRESET - TECLAS NUMÉRICAS BOTÓN MODE BOTÓN MUTE (SILENCIO) BOTÓN SIGUIENTE / REBOBINAR HACIA DELANTE, SINTONIZADOR + BOTÓN ATRÁS / REBOBINAR HACIA ATRÁS, SINTONIZADOR BOTÓN VOLUMEN + BOTÓN PROG/PRESET + NOTA: el mando a distancia funciona con pilas CR2025.
  • Page 58: Instalación

    INSTALACIÓN Montaje del altavoz Montar en la pared...
  • Page 59: Conexión Y Funcionamiento Con Pilas

    CONEXIÓN Y FUNCIONAMIENTO CON PILAS • Antes de conectar el aparato, desconéctelo de la toma de corriente. Altavoz derecho Altavoz izquierdo CONEXIÓN A ENCHUFE DE PARED CORRIENTE CA 230V CONTINUA (DC 5V MAX 2A) ADAPTADOR Fuente de alimentación • El aparato está diseñado para usarse con la corriente 230 V y frecuencia 50 Hz.
  • Page 60: Primeros Pasos

    PRIMEROS PASOS 1) Introducir pilas de respaldo en el aparato Retire la tapa del COMPARTIMENTO DE PILAS. 2. Introduzca 2 pilas AA (UM-3) (no incluidas en el envío) respetando la polaridad indicada. 3. Cierre la tapa del COMPARTIMENTO DE PILAS. NOTA: las pilas de respaldo sólo sirven para conservar la hora del reloj, no la alarma configurada.
  • Page 61 NOTA: asegúrese de que la pila está colocada correctamente. Una polaridad incorrecta puede dañar el aparato. Para asegurar un rendimiento óptimo y un funcionamiento duradero de las pilas, recomendamos utilizar pilas alcalinas de alta calidad. Indicaciones sobre pilas • No mezcle pilas nuevas con pilas antiguas. •...
  • Page 62: Puesta En Marcha Y Funciones

    PUESTA EN MARCHA Y FUNCIONES RADIO FM Búsqueda automática de emisoras (SCAN) Puede utilizar la función de búsqueda (sintonización automática) para buscar automáticamente emisoras de radio digital nuevas y eliminar emisoras inactivas. Mantenga pulsado el botón PLAY/PAUSE/FM SCAN (5) en el aparato o (2) en el mando a distancia durante 2 segundos para seleccionar „Scan“.
  • Page 63 Reproducir un CD Pulse el botón STANDBY (2) en el aparato o (1) en el mando a distancia para encender el aparato. 2. Pulse el botón SOURCE en el mando a distancia o el botón CD/USB para activar el modo CD. 3.
  • Page 64 • Repetir todo: Al pulsar dos veces el botón REPEAT, el display LCD muestra «REPEAT ALL». Se repetirá continuamente el disco completo. • Cancelar la función Repetición: Pulse el botón REPEAT hasta que se apague el indicador de repetición. • Reproducción aleatoria: Si pulse tres veces el botón RANDOM (ALEATORIO) (6) en el aparato o (5) en el mando a distancia, el display mostrará...
  • Page 65 4. Repita los pasos 2 a 3 para programar más pistas. Una vez finalizado el proceso, pulse el botón PLAY/PAUSE (2) en el mando a distancia para iniciar la reproducción de las pistas programadas. El aparato dispone de una función BT que puede recibir una señal a 8 metros de distancia.
  • Page 66: Usb

    El aparato dispone de un puerto USB (32) en la parte frontal. Al introducir un dispositivo USB en el aparato, pulse varias veces el botón FUNCIONES (4) en el aparato o el botón MODE (7) en el mando a distancia para seleccionar el modo USB. 2.
  • Page 67: Entrada Aux

    ENTRADA AUX Utilice un cable de conexión para conectar un reproductor de audio portátil a la ranura AUDIO IN (27). Cuando utilice un equipo de vídeo, conecte la salida de audio a este aparato y la salida de vídeo, al televisor.
  • Page 68: Función Despertador

    FUNCIÓN DESPERTADOR Configurar un despertador Esta función enciende automáticamente el aparato y despierta al usuario con el sonido de señal o la música de un CD, dispositivo USB o radio. En modo Standby, mantenga pulsado el botón AL SET (12) en el aparato durante 3 segundos.
  • Page 69 Despertar con CD, USB, radio o tono de pitido del despertador • Cuando se alcance la hora del despertador, el CD, la radio o el tono de pitido sonará durante el tiempo programado. Luego se apagará y al día siguiente volverá a sonar si no pulsa el botón SNOOZE (11). •...
  • Page 70: Limpieza Y Cuidado

    LIMPIEZA Y CUIDADO Mantenimiento de CDs Los CDs son bastante resistentes, sin embargo, pueden dañarse si se acumula mucha suciedad en su superficie. Siga las siguientes recomendaciones para disfrutar al máximo de su colección de CD y del reproductor. • No escriba en ninguna cara del disco, sobre todo, en la cara que no contiene etiquetas, ya que es la cara de lectura.
  • Page 71: Detección Y Reparación De Anomalías

    DETECCIÓN Y REPARACIÓN DE ANOMALÍAS Problema Posible causa • ¿Está el aparato cerca de un televisor u ordenador? • ¿Está la antena FM La radio emite sonidos extraños. correctamente colocada? Aleje la antena del cable de alimentación si se encuentra cerca de él.
  • Page 72 Problema Posible causa • ¿El dispositivo USB contiene archivos MP3/WMA? • ¿Está el dispositivo correctamente conectado? El dispositivo USB no se reconoce. • ¿Es un dispositivo MTP? • ¿Contiene el dispositivo sólo archivos AAC? • ¿Es un archivo WMA protegido El aparato no reproduce los por derechos de autor? archivos del USB.
  • Page 73: Retirada Del Aparato

    RETIRADA DEL APARATO Si el aparato lleva adherida la ilustración de la izquierda (el contenedor de basura tachado) entonces rige la normativa europea, directiva 2012/19/UE. Este producto no debe arrojarse a un contenedor de basura común. Infórmese sobre las leyes territoriales que regulan la recogida separada de aparatos eléctricos y electrónicos.
  • Page 75 Chère cliente, cher client, Toutes nos félicitations pour l’acquisition de ce nouvel appareil. Veuillez lire attentivement et respecter les instructions de ce mode d’emploi afin d’éviter d’éventuels dommages. Le fabricant ne saurait être tenu pour responsable des dommages dus au non- respect des consignes de sécurité...
  • Page 76: Fiche Technique

    FICHE TECHNIQUE Numéro d‘article 10033227 10033228 Alimentation électrique 220-240 V ~ 50/60 Hz Tuner : Plage de fréquences : FM 87.5 – 108 MHz Lecteur CD : Type : Single-Disc-Multiplayer-Compact-Disc-Player Lecture du signal : Balayage laser à semi-conducteur à 3 faisceaux sans contact Convertisseur N / A : Convertisseur N / A multi-bit Plage de fréquences :...
  • Page 77: Consignes De Sécurité

    CONSIGNES DE SÉCURITÉ • Ce mode d’emploi est destiné à vous familiariser avec le fonctionnement de ce produit. Conservez toujours ce manuel en lieu sûr pour pouvoir y accéder à tout moment. • À l’achat de ce produit, vous bénéficiez d’une garantie de deux ans pour les défauts si l’appareil est utilisé...
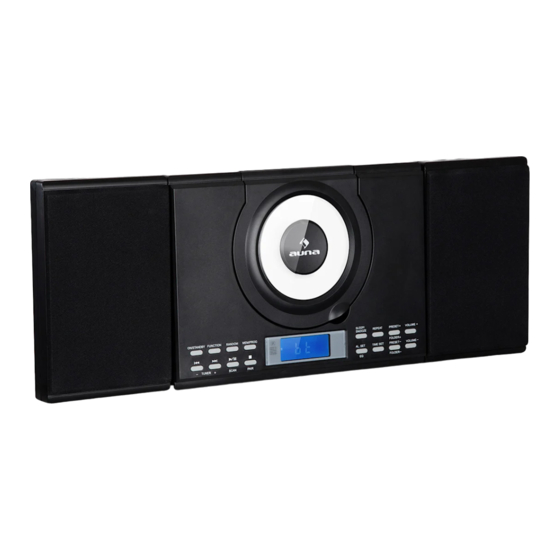
  • Page 78: Aperçu De L'appareil

    APERÇU DE L’APPAREIL...
  • Page 79: Écran Lcd

    SAUTER / RECHERCHE TOUCHE MÉMOIRE, PROG ARRIÉRE, TOUCHE TUNER - CAPTEUR DE LA TOUCHE STANDBY TÉLÉCOMMANDE SAUTER / RECHERCHE 10 ÉCRAN LCD AVANT, TOUCHE TUNER + TOUCHE SLEEP / SNOOZE TOUCHE DE FONCTION (VEILLE / ALARME SNOOZE) TOUCHE PLAY / PAUSE, SCAN 12 TOUCHE AL SET, EQ TOUCHE REPEAT TOUCHE RANDOM...
  • Page 80 TOUCHE PRESET +, 24 CACHE DE LA BATTERIE DOSSIER + CADRE DE SUPPORT DE TOUCHE PRESET, DOSSIER L’ENCEINTE L TOUCHE VOLUME + 26 TROUS D’ACCROCHAGE TOUCHE VOLUME - PRISE AUDIO-IN ENCEINTE L 28 PRISE TELEPHONE 20 LECTEUR CD 29 SORTIE D’ENCEINTE L ENCEINTE R 30 SORTIE D’ENCEINTE R CADRE DE SUPPORT DE...
  • Page 81: Télécommande

    TÉLÉCOMMANDE Fonctions des touches TOUCHE STANDBY TOUCHE PLAY / PAUSE / FM SCAN TOUCHE STOP / MEM. TOUCHE VOLUME- TOUCHE REPEAT (RÉPÉTITION) / RANDOM (ALÉATOIRE) / PRESET - TOUCHES NUMÉRIQUES TOUCHE MODE TOUCHE MUTE (FONCTION MUET) SAUT/RECHERCHE AVANT, TOUCHE TUNER + SAUT/RECHERCHE ARRIÈRE, TOUCHE TUNER - TOUCHE VOLUME + TOUCHE PROG / PRESET +...
  • Page 82: Installation

    INSTALLATION Montage des enceintes Montage mural...
  • Page 83: Branchement Sur Le Secteur Et Utilisation Sur Pile

    BRANCHEMENT SUR LE SECTEUR ET UTILISATION SUR PILE • Débranchez le cordon d’alimentation de la prise murale avant de connecter les enceintes. Enceinte droite Enceinte gauche PRISE Prise murale D’ALIMENTATION AC 230V SUR COURANT CONTINU Adaptateur AC (DC 5V MAX 2A) Sources d’alimentation •...
  • Page 84: Premiers Pas

    PREMIERS PAS 1) installation de la pile de secours dans la chaîne Retirez le cache du compartiment à piles. 2. Installez 2 x piles « AA » (UM-3) (non fournies) dans le compartiment à piles en respectant la polarité. 3. Refermez le compartiment à piles. REMARQUE : La pile de secours ne sert que pour maintenir le réglage de l’heure et ne peut garantir les réglages de l’alarme.
  • Page 85 REMARQUE : Assurez-vous que les piles sont installées correctement. Une polarité incorrecte peut endommager l’appareil. Nous recommandons l’utilisation de piles alcalines de haute qualité pour des performances optimales et une durée de vie plus longue. Entretien des piles • Ne mélangez pas des piles neuves et anciennes. •...
  • Page 86: Utilisation Et Fonctions

    UTILISATION ET FONCTIONS RADIO FM Recherche automatique des stations (SCAN) Vous pouvez utiliser la fonction de recherche automatique pour rechercher automatiquement de nouvelles stations de radio numériques et supprimer les stations inactives. Appuyez et maintenez PLAY / PAUSE / FM SCAN (5) sur l‘appareil ou (2) sur la télécommande pendant 2 secondes pour sélectionner „Scan“.
  • Page 87 Lecture d’un CD Appuyez sur la touche STANDBY   (2) de l’appareil ou de la télécommande (1) pour allumer l’appareil. 2. Appuyez sur la touche SOURCE de la télécommande ou sur la touche CD / USB pour accéder au mode CD. 3.
  • Page 88 • Répéter tous : Lorsque vous appuyez deux fois sur la touche REPEAT, l’indicateur « REPEAT ALL » s’allume sur l’écran LCD. Le disque entier joue en continu. • Quitter la fonction de répétition : Appuyez sur la touche REPEAT jusqu’à ce qu’aucune fonction de répétition ne soit affichée.
  • Page 89     2. Appuyez sur la touche AVANT  ou RETOUR (9/10) pour sélectionner le titre que vous voulez programmer. 3. Appuyez sur le bouton PROG (12) pour confirmer le titre. 4. Répétez les étapes 2 et 3 pour programmer d’autres titres. Appuyez sur la touche PLAY / PAUSE (2) de la télécommande pour lancer la lecture des titres mémorisés.
  • Page 90: Usb

    À l’avant de l’appareil se trouve un port USB (32). Lorsqu’un périphérique USB est connecté à l’appareil, appuyez plusieurs fois sur le bouton FUNCTION (4) de l’appareil ou sur le bouton MODE (7) de la télécommande pour sélectionner le mode USB. 2.
  • Page 91: Aux-In (Entrée Aux)

    AUX-IN (ENTRÉE AUX) Avec un câble de connexion, vous pouvez connecter un lecteur audio portable à la prise AUDIO IN (27). Si vous souhaitez connecter un périphérique vidéo, connectez la sortie audio à cet appareil et la sortie vidéo à un téléviseur. 2.
  • Page 92: Fonctions D'alarme

    FONCTIONS D’ALARME Réglage de l’alarme Cette fonction active automatiquement la chaîne et vous réveille avec un bip ou de la musique depuis un CD, un périphérique USB ou une radio. Si vous appuyez sur la touche AL SET (12) de l’appareil pendant trois secondes en mode veille, l’heure de l’alarme « 00:00 »...
  • Page 93 Réveil avec CD, USB, Radio ou bip sonore • Lorsque l’heure de réveil est atteinte, l’alarme du CD, de la radio ou du bip sonore retentit pendant la durée définie, puis se rallume le jour suivant - sans appuyer sur la touche SNOOZE (11). •...
  • Page 94: Nettoyage Et Entretien

    NETTOYAGE ET ENTRETIEN Entretien des CD Les CD sont relativement résistants, toutefois une surface du disque encrassée peut causer des dommages. Suivez ces indications pour profiter au maximum de votre collection de CD et de votre lecteur. • N’écrivez pas des deux côtés du disque, surtout pas du côté sans étiquette à...
  • Page 95: Identification Et Résolution Des Problèmes

    IDENTIFICATION ET RÉSOLUTION DES PROBLÈMES Problème Cause possible • L’appareil est-il près du téléviseur ou de l’ordinateur ? • L’antenne FM est-elle La radio fait des bruits inhabituels. correctement placée ? Éloignez l’antenne du cordon d’alimentation. • Le cordon d’alimentation de l’appareil est-il branché ? •...
  • Page 96 Problème Cause possible • Est-ce un fichier WMA sous La lecture ne démarre pas avec copyright ? l‘USB • Est-ce un mauvais fichier MP3 ? • L‘appareil est-il trop proche d‘un autre appareil qui génère un rayonnement électromagnétique ? Le BT est interrompu ou déformé. •...
  • Page 97: Informations Sur Le Recyclage

    INFORMATIONS SUR LE RECYCLAGE Le pictogramme ci-contre apposé sur le produit signifie que la directive européenne 2012/19/UE s‘applique (poubelle à roues barrée d’une croix). Ces produits ne peuvent être jetés dans les poubelles domestiques courantes. Renseignez-vous concernant les règles appliquées pour la collecte d’appareils électriques et électroniques.
  • Page 99 Gentile cliente, La ringraziamo per aver acquistato il dispositivo. La preghiamo di leggere attentamente le seguenti istruzioni per l’uso e di seguirle per evitare possibili danni tecnici. Non ci assumiamo alcuna responsabilità per danni scaturiti da una mancata osservazione delle avvertenze di sicurezza e da un uso improprio del dispositivo.
  • Page 100: Dati Tecnici

    DATI TECNICI Articolo numero 10033227 10033228 Alimentazione 220-240 V ~ 50/60 Hz Tuner: Intervallo di frequenza: FM 87.5 – 108 MHz Lettore CD: Tipologia: Single-Disc-Multiplayer-Compact-Disc-Player Lettura segnale: Lettura laser senza contatto con semiconduttore a 3 raggi Convertitore D/A: Convertitore D/A Multi-bit Risposte in frequenza: 20 –...
  • Page 101: Avvertenze Di Sicurezza

    AVVERTENZE DI SICUREZZA • Questo manuale serve a far prendere confidenza con il funzionamento del prodotto. Conservare con cura il manuale, in modo da poterlo consultare in ogni momento. • Con l’acquisto di questo prodotto, si ricevono 2 anni di garanzia su difetti causati da un uso corretto.
  • Page 102: Descrizione Del Dispositivo

    DESCRIZIONE DEL DISPOSITIVO...
  • Page 103 TORNARE INDIETRO/ RICERCA ALL’INDIETRO, MEMORIA, PROG TUNER - STANDBY SENSORE TELECOMANDO ANDARE AVANTI/RICERCA IN 10 DISPLAY LCD AVANTI, TUNER + FUNZIONI SLEEP/SNOOZE PLAY/PAUSA, FM SCAN 12 AL SET, EQ RANDOM 13 REPEAT (RIPETERE) STOP, CONNESSIONE BT 14 IMPOSTAZIONE ORARIA...
  • Page 104 PRESET + , CARTELLA + 24 SPORTELLO BATTERIA TELAIO DI SUPPORTO PRESET - , CARTELLA - ALTOPARLANTE L VOLUME + 26 FORI PER APPENDERLO VOLUME - AUDIO-IN ALTOPARLANTE L 28 TELEFONO (SINISTRO) 20 VANO CD 29 USCITA ALTOPARLANTE L ALTOPARLANTE R 30 USCITA ALTOPARLANTE R (DESTRO) TELAIO DI SUPPORTO...
  • Page 105: Telecomando

    TELECOMANDO Tasti funzione STANDBY PLAY/PAUSA/FM SCAN STOP/MEM VOLUME - REPEAT (RIPETERE)/RANDOM (CASUALE)/PRESET - TASTI NUMERICI MODE MUTE ANDARE AVANTI/RICERCA IN AVANTI, TUNER + TORNARE INDIETRO/RICERCA ALL’INDIETRO, TUNER - VOLUME + PROG/PRESET + NOTA: per utilizzare il telecomando è necessaria una batteria CR2025.
  • Page 106: Installazione

    INSTALLAZIONE Montaggio degli altoparlanti Montaggio a parete...
  • Page 107: Collegamento Alla Rete Elettrica Efunzionamento A Batteria

    COLLEGAMENTO ALLA RETE ELETTRICA E FUNZIONAMENTO A BATTERIA • Staccare il cavo dalla presa elettrica, prima di collegare gli altoparlanti. Altoparlante destro Altoparlante sinistro SU INGRESSO PRESA ELETTRICA A MURO CORRENTE AC 230V CONTINUA (DC 5V MAX 2A) ADATTATORE Fonti di alimentazione •...
  • Page 108: Primi Passaggi

    PRIMI PASSAGGI 1) Inserire le batterie di backup nell’impianto Rimuovere il COPERCHIO DEL VANO BATTERIE. 2. Inserire 2 x batterie AA (UM-3) (non incluse in consegna) rispettandone la polarità. 3. Chiudere il VANO BATTERIE. NOTA: le batterie di backup servono solo a mantenere l’ora e non garantiscono le impostazioni della sveglia.
  • Page 109 NOTA: assicurarsi che le batterie siano inserite correttamente. Una falsa polarità può danneggiare il dispositivo. Consigliamo l’utilizzo di batterie alcaline di qualità, in modo da ottenere le migliori prestazioni e una vita utile più lunga. Cura della batteria • Non mischiare batterie vecchie e nuove. •...
  • Page 110: Utilisation Et Fonctions

    UTILISATION ET FONCTIONS RADIO FM Sintonizzazione automatica (SCAN) È possibile utilizzare la funzione di ricerca (sintonizzazione automatica) per cercare automaticamente nuove stazioni radio digitali e rimuovere quelle inattive. Tenere premuto per 2 secondi il tasto SCAN PLAY/PAUSE/FM (5) sul dispositivo oppure sul telecomando (2) per selezionare “Scan”. Viene visualizzata la quantità...
  • Page 111 Riproduzione CD Premere STANDBY  (2) sul dispositivo o (1) sul telecomando per accendere il dispositivo. 2. Premere SOURCE sul telecomando o CD/USB per attivare la modalità 3. Tirare il vassoio del CD con un dito per aprirlo. 4. La riproduzione inizia al titolo 1, non appena il lettore ha letto il TOC. La modalità...
  • Page 112 • Interrompere la funzione di ripetizione: Premere REPEAT fino a quando scompaiono tutte le funzioni di ripetizione mostrate sul display. • Riproduzione casuale: Se si preme tre volte il tasto RANDOM (CASUALE) (6) sul dispositivo o (5) sul telecomando, sul display compare “RAND”. I titoli sul disco vengono riprodotti automaticamente in ordine casuale.
  • Page 113 Il dispositivo è dotato di funzione BT, in grado di ricevere un segnale entro 8 metri. Collegare l’impianto con un dispositivo BT per ascoltare musica: Premere STANDBY  (2) sul dispositivo o (1) sul telecomando per accendere il dispositivo. 2. Premere FUNZIONI (4) sul dispositivo o MODE (7) sul telecomando per attivare la modalità...
  • Page 114: Usb

    Sul lato frontale del dispositivo si trova un ingresso USB (32). Quando viene collegato un dispositivo USB all’impianto, premere ripetutamente FUNZIONE (4) sul dispositivo o MODE (7) sul telecomando per selezionare la modalità USB. 2. Il dispositivo mostra automaticamente la quantità totale di titoli. 3.
  • Page 115: Aux In

    AUX IN Con un cavo è possibile collegare un lettore portatile, ecc. all’ ingresso AUDIO IN (27). Se si desidera collegare un dispositivo video, collegare l’uscita audio e quella video del dispositivo a un televisore. 2. Premere STANDBY  (2) sul dispositivo o (1) sul telecomando per accendere il dispositivo.
  • Page 116: Funzioni Sveglia

    FUNZIONI SVEGLIA Impostare la sveglia Con questa funzione, l’impianto si accende automaticamente e funge da sveglia con un segnale acustico o con musica proveniente da CD, dispositivo USB o radio. Tenere premuto per tre secondi AL SET (12) sul dispositivo in modalità STANDBY e sul dispositivo compare l’ora della sveglia “00:00”.
  • Page 117 Sveglia con CD, USB, radio o segnale acustico • Quando viene raggiunta l’ora impostata per la sveglia, risuona CD, radio o segnale acustico per l’ora impostata e si reimposta automaticamente per il giorno successivo, senza premere SNOOZE (11). • La funzione SNOOZE può essere attivata manualmente quando la sveglia ha suonato premendo SNOOZE (11).
  • Page 118: Pulizia E Manutenzione

    PULIZIA E MANUTENZIONE Cura dei CD I CD sono relativamente resistenti ai danni, tuttavia la superficie sporca di un CD può causare danneggiamenti. Seguire queste linee guida per godere al massimo della collezione di CD e del lettore: • Non scrivere su entrambi i lati del disco, in particolare non sul lato senza scritte, da cui deve essere letto il segnale audio.
  • Page 119: Ricerca E Correzione Degli Errori

    RICERCA E CORREZIONE DEGLI ERRORI Problema Possibile causa • Il dispositivo è posizionato vicino a un televisore o un computer? • L’antenna FM è posizionata La radio emette rumori insoliti. correttamente? Allontanare l’antenna dal cavo di alimentazione se si trova nelle sue vicinanze.
  • Page 120 Problema Possibile causa • Ci sono file MP3/WMA sul dispositivo? • Il dispositivo è collegato Il dispositivo USB non viene correttamente? rilevato. • Si tratta di un dispositivo MTP? • Il dispositivo contiene solo file AAC? • Si tratta di un file WMA protetto da copy right? La riproduzione USB non si avvia.
  • Page 121: Smaltimento

    SMALTIMENTO Se sul prodotto è presente la figura a sinistra (il cassonetto dei rifiuti mobile sbarrato), si applica la direttiva europea 2012/19/UE. Questi prodotti non possono essere smaltiti con i rifiuti normali. Informarsi sulle disposizioni vigenti in merito alla raccolta separata di dispositivi elettrici ed elettronici. Non smaltire i vecchi dispositivi con i rifiuti domestici.

Ce manuel est également adapté pour:

1003322710033228

Table des Matières