Publicité

Les langues disponibles
  • FR

Les langues disponibles

  • FRANÇAIS, page 11

Liens rapides

Instruction Manual
Manuel d'instructions
Bedienungsanleitung
Gebruiksaanwijzing
Manual de instrucciones
Manuale d'uso
IRO320
Automatic drying and ironing machine
Machine de séchage et de repassage automatique
Automatische Trocknungs- und Bügelmaschine
Automatisch droog- en strijkapparaat
Secadora y planchadora autómatica
Asciugatrice e Stiratrice Automatica

Publicité

Table des Matières
loading

Sommaire des Matières pour weasy IRO320

  • Page 1 Instruction Manual Manuel d’instructions Bedienungsanleitung Gebruiksaanwijzing Manual de instrucciones Manuale d’uso IRO320 Automatic drying and ironing machine Machine de séchage et de repassage automatique Automatische Trocknungs- und Bügelmaschine Automatisch droog- en strijkapparaat Secadora y planchadora autómatica Asciugatrice e Stiratrice Automatica...
  • Page 2 ENGLISH Dear Customer, We are delighted that you have chosen this automatic drying and ironing machine. Before using the device for the first time, please read the instructions carefully and keep them for future reference. If the device is given to someone else, these instructions should also be handed over with it.
  • Page 3 precautions. • Children must not play with the device. • Cleaning and user maintenance may not be carried out • Children unless they are at least 8 years of age and are supervised by an adult. CAUTION: hot surfaces! The motor unit / telescopic rod will become hot during use. You should therefore not touch it during or shortly after use.
  • Page 4 Danger of Electric Shock • The device should only be connected to a properly installed socket with safety contacts. The socket must also be readily accessible after connection so that the connection to the power supply can quickly be isolated. The main voltage must match the technical data of the device.
  • Page 5 Danger of Fire • Do not use the device in rooms containing easily ignitable dust or poisonous and explosive fumes. • Do not operate the device in the vicinity of combustible materials. • Do not connect the device along with other consumables (with a high wattage) to a multiple socket in order to prevent overloading and a possible short circuit (fire).
  • Page 6: Items Supplied And Device Overview

    Items Supplied and Device Overview 1. Collar section 2. Hanger 2.a. Assembly of the hanger 3. Telescopic rod Left Right Please fasten the screw from the hole 4. Screw for adjusting the height 5. Fan 6. Mounting flange 7. Motor unit 8.
  • Page 7: Control Panel

    Control Panel 1: Temperature Indicator Light: RT means room temperature. Other temperatures can be set to 30, 40, 50, 60 or 70 Celsius degree. 2: Timer Indicator Light: You can set the operating time to 15, 30, 60, 90, 130 or 180 minutes. It will be automatically count down based on your set time.
  • Page 8 Steps 1. Set the height needed. To do this, open the screw (4), pull out the telescopic rod (3) and then close the screw (4) again If you have not already done so, pull on the nylon balloon (see the “Before Initial Use” chapter, “Assembly”...
  • Page 9 Cleaning and storage: Caution • Pull the main plug out of the plug socket and allow the device to cool down completely before doing any cleaning! • Never immerse the device, the main cable or the main plug in water or other liquids! •...
  • Page 10 Problem Possible cause / solution 1. Is the main plug inserted in the plug socket device correctly? Correct the fit of the main plug. does 2. Is the plug socket defective? Try another plug work. socket. LEDs do not 3. Check the fuse of the mains connection. light up.
  • Page 11 FRANÇAIS Cher Client, Nous sommes ravis que vous ayez choisi cette machine de séchage et de repassage automatique. Avant d'utiliser l'appareil pour la première fois, veuillez lire attentivement les instructions et les garder en lieu sûr. Si l'appareil est donné à quelqu'un d'autre, ces instructions doivent lui être remises.
  • Page 12 surveillés ou ont reçu des instructions sur la façon d'utiliser l'appareil en toute sécurité et ont compris les dangers encourus en cas de non-respect de ces règles. • Les enfants ne doivent pas jouer avec l'appareil. • Le nettoyage et la maintenance de l’appareil ne doivent pas être effectués par des enfants, sauf s’ils sont âgés d’au moins 8 ans et qu’ils sont encadrés par un adulte.
  • Page 13 Risque de choc électrique • L'appareil ne doit être branché qu'à une prise correctement installée avec des contacts de sécurité. La prise doit également être facilement accessible après son branchement afin de pouvoir la débrancher rapidement en cas d’urgence. La tension principale doit correspondre aux caractéristiques techniques de l'appareil.
  • Page 14 Risque d'incendie • N'utilisez pas l'appareil dans des pièces contenant des poussières facilement inflammables ou des fumées toxiques et explosives. • N'utilisez pas l'appareil à proximité de matériaux inflammables. • Ne branchez pas l'appareil avec d'autres (ayant une puissance élevée) à une prise multiple afin d'éviter une surcharge et un éventuel court-circuit (incendie).
  • Page 15: Éléments Fournis Et Présentation De L'appareil

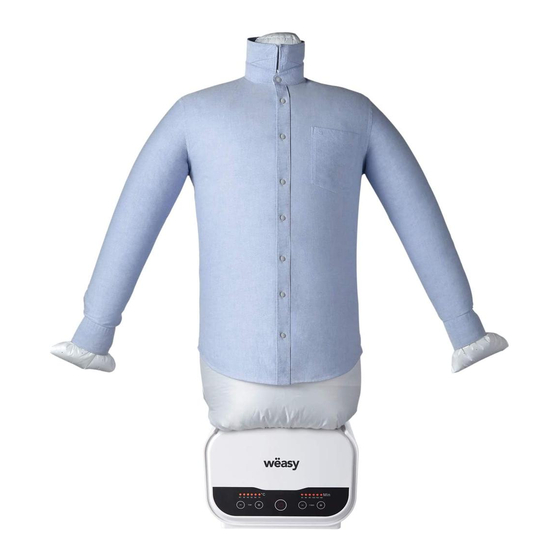
    Éléments fournis et présentation de l'appareil 1. Col 2. Cintre 2.a. Montage du cintre 3. Tige télescopique gauch Droit Veuillez visser les vis dans les trous 4. Vis pour régler la hauteur 5. Ventilateur 6. Bride de montage 7. Bloc-moteur 8.
  • Page 16: Panneau De Contrôle

    Panneau de contrôle 1. Témoin lumineux de température : RT signifie température ambiante. D'autres températures peuvent être réglées à 30, 40, 50, 60 ou 70 degrés Celsius. 2. Témoin de minuterie : vous pouvez régler la durée de fonctionnement sur 15, 30, 60, 90, 130 ou 180 minutes.
  • Page 17: Utilisation

    Utilisation : Avertissement • Placez l'appareil uniquement sur une surface stable, plane, résistante à l'humidité et à la chaleur. • Attention ! Surface chaude ! Le bloc moteur / tige télescopique devient chaud pendant l'utilisation. Vous ne devez donc pas le toucher pendant ce temps et les minutes qui suivent son arrêt.
  • Page 18: Nettoyage Et Rangement

    Astuces • L'appareil est principalement destiné au linge essoré en machine ! Si le linge lavé à la main ou non essoré doit être repassé, laissez-le d'abord sécher un peu. • Le processus de séchage / repassage prend environ 10 minutes pour une chemise essorée. Cependant, la durée peut varier en fonction du tissu et de son épaisseur Nous vous recommandons de commencer avec un temps plus court et de le prolonger si nécessaire.
  • Page 19: Environnement

    Nettoyage et rangement Si l'appareil ne fonctionne pas correctement, vérifiez si vous pouvez résoudre le problème vous-même. N'essayez pas de réparer vous-même un appareil électrique défectueux ! Problème Cause/Solution possible 1. La fiche est-elle correctement insérée dans la prise ? Corrigez L'appareil la position de la fiche dans la prise.
  • Page 20 DEUSCH Liebe/r Kunde/*In, wir freuen uns, dass Sie sich für diese automatische Trocknungs- und Bügelmaschine entschieden haben. Bevor Sie das Gerät zum ersten Mal benutzen, lesen Sie bitte die Anweisungen sorgfältig und bewahren Sie diese als künftige Referenz auf. Wenn Sie das Gerät weitergeben, müssen diese Anweisungen mitgegeben werden.
  • Page 21 SICHERHEITSANWEISUNGEN: • Dieses Gerät darf von Kindern ab 8 Jahre und Personen mit eingeschränkten physischen, sensorischen oder geistigen Fähigkeiten oder mangels Erfahrung und/oder Wissen benutzt werden, solange beaufsichtigt werden oder Anweisungen zu einer sicheren Nutzung des Gerätes erhielten und können die Gefahren, die durch Nichtbeachtung der relevanten Sicherheitsvorkehrungen entstehen...
  • Page 22: Gefahr Durch Elektrischen Schlag

    VERLETZUNGSGEFAHR • Es besteht Erstickungsgefahr durch Plastikfolie und Tüten! Halten Kinder Tiere Verpackungsmaterialien fern. • Verlegen Sie das Stromkabel immer auf solche Weise, dass dieses keine Stolpergefahr darstellt. • Das Gerät darf während der Nutzung nicht bewegt werden. GEFAHR DURCH ELEKTRISCHEN SCHLAG •...
  • Page 23 • Das Gerät darf nicht benutzt werden, wenn es fallen gelassen wurde, sichtbare Anzeichen einer Beschädigung aufweist oder eine Leckage hat. • Fassen Sie das Gerät, das Stromkabel oder den Stecker niemals mit nassen Händen an, wenn diese Komponente an der Stromversorgung angeschlossen sind. •...
  • Page 24 • Das Gerät muss ausgeschaltet werden, wenn Sie es anschließen oder vom Netz trennen. Ziehen Sie immer am Stecker, und niemals am Kabel, um das Gerät von der Stromversorgung zu trennen. • Bedecken Sie niemals die Lüftungsschlitze und setzen Sie keine Gegenstände in diese ein. •...
  • Page 25 GELIEFERTE KOMPONENTE UND GERÄTEÜBERSICHT 1. Kragenteil 2. Bügel 2.a. Baugruppe des Bügels 3. Teleskopstange Links Recht Befestigen Sie bitte die Schraube an der 4. Schraube für die Öffnung Höhenanpassung 5. Ventilator 6. Montageflansch 7. Motoreinheit 8. Bedienfeld 9.Lüftungsschlitze Nicht angezeigt: Nylon-Ballon Hauptkabel mit Hauptsteckdose Vier Gewichtsklemmen...
  • Page 26 BEDIENFELD 1: Temperatur-Lichtanzeige: RT bedeutet Raumtemperatur. Andere Temperatureinstellungen sind 30,40,50,60 oder 70 Grad Celsius. 2: Timer-Lichtanzeige: Sie können die Betriebszeit auf 15,30,60,90,130 oder 180 Minuten einstellen. Der Timer wird automatisch rückwärts zählen, ausgehend von der von Ihnen eingestellten Zeit. 3: Minus-Symbol: Einstellung für die Verringerung der Temperatur. 4: Plus-Symbol: Einstellung für die Erhöhung der Temperatur.
  • Page 27 NUTZUNG: Achtung • Platzieren Sie das Gerät nur auf einer stabilen, flachen, feuchtebeständigen und hitzebeständigen Ebene. • Achtung! Heiße Fläche! Die Motoreinheit/ die Teleskopstange werden während des Gebrauchs heiß. Deswegen dürfen diese während der Nutzung und kurz danach nicht angefasst werden. •...
  • Page 28 HINWEISE • Das Gerät ist hauptsächlich für Maschinenwäsche geeignet! Wenn per Hand gewaschene Kleidungsstücke oder nicht für die Waschmaschine geeignete Wasche gebügelt werden müssen, lassen Sie diese erst etwas trocknen. • Der Trocknungs-/ Bügelvorgang dauert ca. 10 Minuten für ein geschleudertes Hemd. Dennoch kann die Zeitdauer variiren, je nach der Stoffart und der Dicke des Stoffes.
  • Page 29: Reinigung Und Lagerung

    REINIGUNG UND LAGERUNG: Wenn das Gerät nicht ordnungsgemäß funktioniert, überprüfen Sie, ob Sie das Problem selbstständig lösen können. Versuchen Sie nich, ein defektes Gerät selber zu reparieren! Problem Mögliche Ursache / Lösung 1. Ist der Hauptstecker in der Steckdose korrekt eingesetzt? Gerät Setzen Sie den Stecker richtig ein.
  • Page 30 UMWELT ACHTUNG: Entsorgen Sie dieses Produkt nicht mit anderen Haushaltsprodukten. Dieses Produkt muss in verschiedenen Abfallgruppen entsorgt werden, Sie können sich bei örtlichen Behörden über die Stellen informieren, wo Sie dieses Produkt hinbringen könnten. Elektrische und elektronische Geräte beinhalten gefährliche Stoffe, die schädliche Auswirkungen auf die Umwelt und menschliche Gesundheit haben können und recycelt werden müssen.
  • Page 31 NEDERLANDS Geachte klant, We danken u dat u heeft gekozen voor dit automatische droog- en strijkapparaat. Voor het eerste gebruik, eerst zorgvuldig de handleiding lezen en bewaar deze voor toekomstige referentie. Als het apparaat aan iemand anders wordt gegeven, geef dan ook deze handleiding mee.
  • Page 32 moeten gebruiken en de gevaren begrijpen die verkeerd gebruik oplevert. • Kinderen mogen niet met dit apparaat spelen. • Schoonmaken en gebruikersonderhoud mag niet worden uitgevoerd door kinderen tenzij ze 8 jaar of ouder zijn en er toezicht is. LET OP: hete oppervlakken! De motorunit / telescoopbuis wordt heet tijdens gebruik.
  • Page 33 Gevaar op elektrische schok • Het apparaat mag alleen worden aangesloten op een correct aangesloten stopcontact veilige contactpunten. Het stopcontact dient goed bereikbaar te zijn na aansluiting, zodat de verbinding snel kan worden verbroken. De spanningsbron moet overeenkomen met de technische gegevens van het apparaat. Gebruik geen verlengkabels.
  • Page 34 Risico op vuur • Gebruik het apparaat niet in ruimtes met ontbrandbaar stof of met giftige en explosieve dampen. • Niet het apparaat in de buurt van brandbaar materiaal gebruiken. • Gebruik apparaat niet samen grote stroomverbruikers (met een hoge wattage) bij dezelfde groep om overbelasting (vuur) te voorkomen.
  • Page 35 Meegeleverde items en overzicht van het apparaat 1. Kraagsectie 2. Hanger 2.a Assemblage van de hanger 3. Telescopische buis Links Rech Schroef de schroef vast in het gat 4. Schroef voor de hoogte- instelling 5. Ventilator 6. Montageflens 7. Motorunit 8.
  • Page 36 Bedieningspaneel 1: Temperatuurindicator RT staat voor kamertemperatuur. Andere mogelijke temperaturen zijn 30, 40, 50, 60 of 70 graden Celsius. 2: Timerindicator U kunt de gebruikstijd instellen op 15, 30, 60, 90, 130 of 180 minuten. Er wordt automatisch afgeteld naar de door u ingestelde tijd. 3: Minusteken: Aanpassing voor verlaging van de temperatuur.
  • Page 37 Gebruik: Waarschuwing • Plaats het apparaat alleen op een droog, stevig, vocht- en hittebestendig oppervlak. • Let op! Heet oppervlak! De motorunit / telescoopbuis wordt heet tijdens gebruik. Raak deze daarom niet aan tijdens of net na gebruik. • Het is belangrijk dat u de informatie op de kledinglabels van de kleding die gedroogd moet worden volgt! •...
  • Page 38 moeten de risten worden dichtgeritst. Voor grotere maten moeten de risten aan beide zijden worden geopend. • Met knopen die ver uit elkaar zitten, kan de rij knopen licht krimpen tijdens het strijken. Hierbij wordt aangeraden om de knopenrij meteen na het persen met de hand glad te strijken. Schoonmaken en opslag: Waarschuwing •...
  • Page 39 Probleem Mogelijke oorzaak/oplossing 1. Zit de stekker correct in het stopcontact? Plaats de stekker Het apparaat werkt correct in het stopcontact. niet. LED's 2. Werkt het stopcontact niet? Probeer een ander stopcontact. branden niet. 3. Controleer of er geen zekering is gesprongen. 4.
  • Page 40: Instrucciones De Seguridad

    ESPANOL Estimado cliente, nos complace que haya adquirido esta máquina automática de secado y planchado. Antes de utilizar la máquina por primera vez, lea atentamente las instrucciones contenidas en este manual y guárdelo para consultas futuras. Si le cede la máquina a otra persona, asegúrese de entregarle también el manual de instrucciones.
  • Page 41 del aparato de manera segura y hayan entendido los peligros involucrados. • Los niños no deben jugar con el aparato. • La limpieza y el mantenimiento del aparato no deben ser realizados por niños, a menos que sean mayores de 8 años y estén bajo la supervisión de un adulto responsable.
  • Page 42 Prevenir descargas eléctricas • Siempre enchufe la máquina a un tomacorriente de pared debidamente instalado con conexión a tierra. El tomacorriente debe de estar siempre a su alcance para que pueda desconectar la máquina rápidamente en caso de emergencias. La tensión de su red eléctrica debe corresponder a la indicada en la placa de características de la máquina.
  • Page 43 Prevenir incendios • No utilice la máquina en habitaciones que contengan polvo fácilmente inflamable o vapores tóxicos y explosivos. • No opere cerca de materiales inflamables. • No conecte la máquina junto con otros aparatos de alto voltaje a un enchufe múltiple para evitar sobrecargas y un posible cortocircuito (incendio).
  • Page 44: Panel De Control

    Artículos suministrados y descripción del producto 1. Cuello 2. Percha 2.a. Montaje de la percha 3. Barra telescópica Izquierda Derecha 4. Tornillo para Apriete el tornillo correspondiente ajustar la altura 5. Ventilador 6. Brida de montaje 7. Motor 8. Panel de control 9.Ranuras de ventilación No mostrado: ü...
  • Page 45 1. LED indicador de temperatura: RT significa temperatura ambiente. Otras temperaturas se pueden establecer en 30, 40, 50, 60 o 70 grados Celsius. 2. LED indicador del temporizador: se puede configurar el tiempo de funcionamiento en 15, 30, 60, 90, 130 o 180 minutos.
  • Page 46 Pasos: 1. Establezca la altura necesaria. Para hacer esto, abra el tornillo (4), extraiga la barra telescópica (3), ajústela y luego cierre el tornillo (4) nuevamente. Si aún no lo ha hecho, adjunte el globo de nylon (consulte la sección "Instrucciones para montar la máquina"). El globo de nylon debe ubicarse inmediatamente debajo de la brida de montaje (6) para que pueda inflarse por completo.
  • Page 47 LIMPIEZA Precaución: • ¡Desconecte el enchufe del tomacorriente y permita que la máquina se enfríe por completo antes de limpiarla de cualquier manera! • ¡Nunca sumerja la máquina, el cable de alimentación o el enchufe en agua u otros líquidos! •...
  • Page 48: Medio Ambiente

    Problema Posible motivo/solución La máquina no ¿Está enchufado cable alimentación funciona. tomacorriente correctamente? Enchufe cable Los LED no se tomacorriente. iluminan. ¿El tomacorriente está defectuoso? Pruebe con otro tomacorriente. Compruebe los fusibles o disyuntores de su red eléctrica. ¿La máquina está encendida? Ajuste el temporizador (8). Ruidos inusuales 1.
  • Page 49 ITALIANO Caro cliente, Siamo lieti che abbiate scelto questa asciugatrice e stiratrice automatica. Prima di utilizzare il dispositivo per la prima volta, si prega di leggere attentamente le istruzioni e conservarle per riferimenti futuri. Se il dispositivo viene ceduto a qualcun altro, queste istruzioni devono essere consegnate con esso.
  • Page 50 conoscenza purchè siano sorvegliati o hanno ricevuto istruzioni su come utilizzare il dispositivo in modo sicuro e ne comprendano i pericoli derivanti dalla mancata osservanza delle pertinenti norme di sicurezza. • I bambini non devono giocare con il dispositivo. • La pulizia e la manutenzione utente non possono essere svolte da bambini a meno che non abbiano almeno 8 anni di età...
  • Page 51 Pericolo di scosse elettriche • Il dispositivo deve essere collegato solo ad una presa installata con contatti di sicurezza. La presa deve essere facilmente accessibile dopo il collegamento, di modo che il collegamento alla rete di alimentazione possa essere rapidamente isolato. La tensione principale deve corrispondere ai dati tecnici del dispositivo.
  • Page 52 dalla portata dei bambini sotto gli 8 anni di età. Pericolo di Incendio • Non utilizzare il dispositivo in ambienti con presenza di polveri facilmente infiammabili o vapori tossici ed esplosivi. • Non utilizzare il dispositivo in prossimità di materiali combustibili.
  • Page 53 • Non utilizzare detergenti corrosivi o abrasivi per pulire il Componenti in dotazione e Panoramica apparecchio 1. Sezione collo 2. Appendiabiti 2.a. Montaggio del gancio 3. Asta telescopica Sinistra Destr Si prega di stringere la vite nel foro 4. Vite per la regolazione dell'altezza 5.
  • Page 54: Pannello Di Controllo

    Pannello di controllo 1: Spia Temperatura: RT significa temperatura ambiente. È possible impostare su 30, 40, 50, 60 o 70 C°. 2: Spia Timer: Si può impostare il tempo di funzionamento su 15, 30, 60, 90, 130 o 180 minuti. Inizierà...
  • Page 55 Uso: Attenzione • Posizionare il dispositivo su una superficie stabile, piana e resistente all'umidità e al calore. • Attenzione! Superfici calde! Il gruppo motore/asta telescopica si scaldano durante l'uso. Non toccare queste superfici durante o subito dopo l'uso. • È fondamentale seguire le indicazioni di cura per i tessuti da asciugare! •...
  • Page 56: Pulizia E Conservazione

    la lunghezza di tempo può variare a seconda del materiale e dello spessore del materiale. Si consiglia di iniziare con un tempo più breve ed estenderlo, se necessario. • Il palloncino in nylon può essere ingrandito o rimpicciolito con l'ausilio delle cerniere. Per taglie inferiori, le cerniere devono essere chiuse.
  • Page 57 Problema Possibile causa / soluzione 1. La spina principale inserita nella presa di corrente in modo L'apparecchio corretto? Correggere la forma della spina principale. non funziona. I 2. La presa di corrente è difettosa? Provare un'altra presa di corrente. accendono. 3.

Table des Matières