Table des Matières
Publicité
Les langues disponibles
Les langues disponibles
Liens rapides
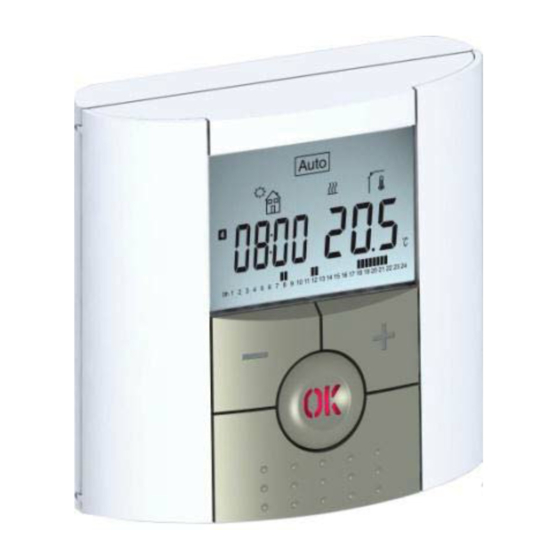
BT DP-01
IMPORTANT!
Before starting work the installer should carefully read this
Installation & Operation Manual, and make sure all
instructions contained therein are understood and observed.
- The thermostat should be mounted, operated and
maintained by specially trained personnel only. Personnel in
the course of training are only allowed to handle the product
under the supervision of an experienced fitter. Subject to
observation of the above terms, the manufacture shall
assume the liability for the equipment as provided by legal
stipulations.
- All instructions in this Installation & Operation manual
should be observed when working with the controller. Any
other application shall not comply with the regulations. The
manufacturer shall not be liable in case of incompetent use
of the control. Any modifications and amendments are not
allowed for safety reasons. The maintenance may be
performed by service shops approved by the manufacturer
only.
- The functionality of the controller depends on the model
and equipment. This installation leaflet is part of the product
and has to be obtained.
APPLICATION
- The thermostats of the "BT" series are developed to control
and manage all type of heating installations.
- The controllers have been designed for use in residential
rooms, office spaces and industrial facilities.
Verify that the installation complies with existing regulations
before operation to ensure proper use of the installation.
SAFETY INSTRUCTIONS
Before starting work disconnect power supply!
- All installation and wiring work related to the thermostat
must be carried out only when de-energized. The appliance
should be connected and commissioned by qualified
personnel only. Make sure to adhere to valid safety
regulations.
- The thermostats are neither splash- nor drip-proof.
Therefore, they must be mounted at a dry place.
- Do not interchange the connections of the sensors and the
230V connections under any circumstances! Interchanging
these connections may result in life endangering electrical
hazards or the destruction of the appliance and the
connected sensors and other appliances.
4
USER GUIDE
Digital programmable Thermostat
GUIDE D'UTILISATION
Thermostat digital programmable
GUÍA DE USUARIO
Termostato digital programable
GUIA DO UTILIZADOR
Termostato programável digital
HANDLEIDING
Digitale programmeerbare Thermostaat
INSTRUKCJA OBSŁUGI
Programowalny termostat cyfrowy
2
Table of content
1
Presentation ................................................... 7
1.1
Keyboard.......................................................... 9
1.2
Display & LED ................................................ 10
2
First Installation ........................................... 13
2.1
Batteries installation ....................................... 13
2.2
Time and Date adjustment ............................. 13
2.3
Starting .......................................................... 15
3
Working mode definition ............................. 17
3.1
Manual mode Comfort .................................. 18
3.2
Manual mode, Reduced ................................ 18
3.3
OFF mode ..................................................... 18
3.4
Automatic mode ............................................. 19
3.5
Program mode .............................................. 20
3.6
Holiday mode ................................................. 30
3.7
Timer mode ................................................... 31
4
Special function ........................................... 32
4.1
Keyboards lock Function ............................... 32
4.2
Information ..................................................... 32
5
Parameter's menu ........................................ 34
6
Technical characteristics ............................ 38
7
Troubleshooting & Solution ........................ 40
5
GB
4-41
F
43-88
ES
90-130
PT
132-173
NL
174-211
PL
212-253
3
6
Publicité
Chapitres
Table des Matières

Manuels Connexes pour Watts Industries BT DP-01


Sommaire des Matières pour Watts Industries BT DP-01
-
Page 1: Table Des Matières
Termostato programável digital 132-173 HANDLEIDING Digitale programmeerbare Thermostaat 174-211 INSTRUKCJA OBSŁUGI Programowalny termostat cyfrowy 212-253 BT DP-01 APPLICATION Table of content IMPORTANT! - The thermostats of the “BT” series are developed to control and manage all type of heating installations. ... -
Page 2: Presentation
Presentation It will be your best partner to optimize your Keyboard energy consumption and increase your comfort. - Modern design with soft touch material. - Wiring & Installation simplified. Minus Key (-) Plus Key (+) - “Easy program creation” function. - Weekly programmable by step of 30min. -
Page 3: First Installation
List order of the time and date adjustments: Starting First Installation The thermostat is now ready to works. Time and day: This section will guide you to set up your thermostat The default working mode will be automatic Adjustment of the hours, for the first time. -
Page 4: Automatic Mode
- At any time, when display is off, press on the (Ok) If you chose a Built-in program P1 to P9, Program mode key to display a few seconds the current You can only see and chose the program. temperature and time. - To restart your installation, use the navigation Morning, Evening &... -
Page 5: Holiday Mode
When step hour is set press (OK) to jump to the next step. Now you are invited to choose the type of the next You are again invited to choose the type of the next step of the program (blinking icons), step of the program (blinking icons), 2 choices will be possible: 2 choices will be possible:... -
Page 6: Timer Mode
Special function - The current setting temperature followed by the Timer mode thermostat. The Timer mode allows you to adjust, the - The ambient temperature temperature and the duration for a special time. Keyboards lock Function - If external sensor is connected: This function can be used when you stay at home The Floor temperature if it is used as floor sensor. -
Page 7: Technical Characteristics
Press (OK) key to exit installation parameter menu and Maximum load 3A in 230Vac (Free contact) Troubleshooting & Solution My BT DP-01 seems work correctly but the heating doesn’t work correctly - Check the connections. My BT DP-01 doesn’t start... -
Page 8: Presentation
Table des matières IMPORTANT! APPLICATION - Grace à leur menu d’installation et de paramétrage les Presentation ..........46 - Avant de commencer les travaux, le monteur doit lire, thermostats de la gamme « BT » vous permettront de réguler une ... -
Page 9: Clavier
Clavier Affichage et voyant Jours courant. Mode de fonctionnement (mode actif encadré). Numéro de programme ou du paramètre si “4” Rouge: Indicateur de chauffe. est affiché. Vert Clignotant: Votre validation est Touche moins (-) Touche plus (+) Menu de paramétrage. requise. -
Page 10: Démarrage
A cette étape le message “Save” ainsi que la LED Samedi et Dimanche verte clignotante devrait vous inviter à valider vos réglages par un appui sur la touche (OK). A tout moment si le rétro-éclairage de votre Vous pourrez à tout moment revenir au réglage de thermostat est éteint, vous pourrez le rallumer par l’heure et de la date par un appui de 2 secondes sur un bref appui sur la touche (OK). -
Page 11: Mode Automatique
reprendra automatiquement sa cadence au Mode Automatique Mode Programme prochain palier. Pour stopper une dérogation avant le prochain palier il vous suffit d’appuyer sur la touche ( Ce mode de fonctionnement est normalement le Numéro du programme mode idéal pour vous permettre de faire des Jour courant en cours Le pictogramme dérogation... - Page 12 Etape de journée, l’heure de retour devra être ajustée. (Température de confort Dernière étape de la journée, l’heure du coucher devra être ajustée. (Température ECO Vous êtes maintenant invité à régler l’heure de Vous devez maintenant choisir le type du prochain - La programmation se fera par pas de 30 minutes.
-
Page 13: Mode Vacances
Vous serez alors invitez à sauvegarder “SAVE” Mode Vacances votre programme en cliquant sur (OK) au jour 7 Le mode vacances vous permettra de mettre votre (Dimanche). installation de chauffage en mode Hors Gel pendant L’écran suivant accompagné de La LED verte le nombre de jours que vous souhaitez. -
Page 14: Visualisation
Visualisation - Pour sortir du menu utilisateur et revenir au menu Menu paramètres utilisateur principal déplacez vous sur le paramètre “ ” et A l’aide de cette fonction vous pourrez visualiser appuyez sur (OK). très rapidement la consigne courante ainsi que les Votre thermostat possède un menu de paramétrage températures des différentes sondes connectées pour vous permettre de modifier en fonction de vos... -
Page 15: Caractéristiques Techniques
Caractéristiques techniques Protection électrique Class II - IP30 Problèmes et solutions Receiver Output Relay 5Amps 250Vac Mon BT-DP ne s’allume pas Maximum load 3A in 230Vac (Free contact) - Vérifiez que le film de Précision de mesure Eléments sensibles: 0.1°C protection des piles est bien Précision de l’horloge Interne &... -
Page 16: Pantalla Y Led
APLICACIÓN Índice Presentación - Los termostatos de la serie "BT” están desarrollados para controlar y gestionar todo tipo de instalaciones de calefacción. Presentación ..........93 - Los controladores se han diseñado para su utilización en Teclado ............95 espacios residenciales, salas de oficinas y centros industriales. -
Page 17: Primera Instalación
Día actual de la semana 10. Función de neutralización de control activada o Primera instalación Menú del modo de funcionamiento (el modo función "ITCS" si parpadea. activo se muestra en un recuadro). 11. Tiempo o nombre del parámetro si se muestra Esta sección le guiará... -
Page 18: Definición Del Modo De Funcionamiento
Definición del modo de Modo de DESCONEXIÓN funcionamiento Modo manual Confort Utilice este modo si necesita desactivar su Modo de funcionamiento manual, la temperatura de instalación. ajuste confort se seguirá todo el tiempo. ¿Cómo modificar el modo de funcionamiento? Al pulsar las teclas (-) o (+), la temperatura de Tenga cuidado: ajuste confort comienza a parpadear y puede En este modo su instalación puede congelarse. - Page 19 - Pulse la tecla (OK) para confirmar su elección y regresar a la pantalla principal (en modo AUTO) - La creación de programas comenzará siempre Paso intermedio del día ( Temp. reducida) Si elige uno de los programas de usuario U1 a con el día 1 (Lunes).
-
Page 20: Modo Vacaciones
Una vez realizada la selección, pulse (OK) para validar y puede ajustar la hora de este paso con (-) Modifique la selección “Sí” o “no” con (-) o (+) y o (+) , valide su selección con (OK). - Si selecciona “no”, se le invitará a crear un programa para Martes (repita el método anterior para crearlo). -
Page 21: Menú De Parámetros
Información Ahora puede seleccionar un parámetro que debe ajustarse con las teclas de navegación (◄) o (►), Con esta función puede ver rápidamente todas las Si el parámetro “SenS” está fijado en “Aire”, el una vez elegido el parámetro, seleccione el valor temperaturas actuales de los sensores de sonda sensor exterior se utilizará... -
Page 22: Características Técnicas
-10° C a +50° C almacenamiento: u otros documentos De baja tensión 2006/95/CE El LED de mi BT DP-01 parpadea en rojo Rango de temperatura de normativos: EMC 2004/108/CE ajuste 5° C a 35° C en pasos de 0,5° C Confort, Reducida 10°... -
Page 23: Apresentação
- A funcionalidade do controlador depende do modelo e do - Os termostatos não resistem a salpicos nem podem ser Índice equipamento. Este folheto de instalação é parte integrante molhados. Consequentemente, têm que ser montados num do produto e tem que ser obtido. local seco. -
Page 24: Ecrã E Led
Ecrã e LED Dia actual da semana Definição ou medição de temperatura, se for Menu de modo de funcionamento (o modo apresentado “5”. Valor de parâmetro, se for activo fica enquadrado). apresentado “4”. Vermelho Fixo (quando a retro- Número de programa ou número de 10. -
Page 25: Definição Do Modo De Funcionamento
Nota: Definição do modo de Pode personalizar o seu programa como desejar; funcionamento consulte “Programa” no próximo capítulo, Modo manual, Conforto “Definição do modo de funcionamento” para Modo de funcionamento manual; a definição de Alterar o modo de funcionamento mais explicações. temperatura de conforto será... - Page 26 Se escolher um programa incorporado, P1 até - Prima a tecla (OK) para confirmar a sua escolha e regressar ao ecrã principal (no modo AUTO) Passo intermédio do dia ( temp. Apenas poderá visualizar e escolher o programa. Se escolher um programa de utilizador, U1 até Reduzida) É...
-
Page 27: Modo De Férias
Após efectuar a escolha, prima (OK) para validar. Em seguida, pode ajustar a hora deste passo com Altere a escolha, “Yes” (sim) ou “no” (não), com (-) (-) ou (+). ou (+) e valide a sua escolha com (OK). - Se seleccionar “no”, ser-lhe-á solicitado que crie um programa para Terça-feira (repita o método Prima (OK) para validar e passar ao passo descrito anteriormente para o construir.) -
Page 28: Função Especial
Informação Menu de parâmetros Com esta função pode visualizar rapidamente todas Se quiser parar a função de Temporizador as temperaturas actuais nos sensores ligados ao antes do fim, defina o período de duração em “no” O termostato tem um menu de parâmetros; para termostato (sensor de chão, externo ou exterior), com a tecla (-). -
Page 29: Características Técnicas
- Verifique o relógio. - Alle instructies in dit document dienen gevolgd te worden O LED do BT DP-01 está a piscar a vermelho - A diferença entre a temperatura bij de installatie en het gebruik van de thermostaat. Bij de Conforto e a Reduzida é... - Page 30 Controleer of de installatie voldoet aan de geldende Inhoudsopgave Introductie regelgeving om uzelf te verzekeren van een goede werking. Introductie ..........177 Toetsen ............179 VOOR UW VEILIGHEID Display & LED ..........180 Voordat u met de montage begint, verzeker u ervan dat ...
-
Page 31: Eerste Montage
Dag van de week 10. Handmatige onderbreking van programma Eerste montage Aanduiding menu (actieve menu omkaderd). ingeschakeld , of “ITCS* ” in functie indien Programma nummer of parameter nummer als knipperend. Dit hoofdstuk helpt u bij het in gebruik nemen van “4”... -
Page 32: Omschrijving Menu's
Omschrijving menu’s Handbediening Comfort De thermostaat handhaaft de door u ingestelde - Door op (Ok) te drukken, zal ook bij uitgeschakeld temperatuur. Hoe kunt u het menu kiezen? display enkele seconden de actuele tijd en Door op (-) of (+) te drukken, zal de ingestelde temperatuur weergegeven worden. - Page 33 Midden deel van de dag ( Comfort temp.) Tijdstip van terugkomst dient ingesteld te worden. Nu kunt u kiezen wat de volgende stap in het Laatste dagdeel ( Verlaagde temp.) programma moet worden(knipperend icoon), Nu kunt u het eerste tijdstip van uw programma Tijd van naar bed gaan dient ingesteld te worden.
-
Page 34: Vakantie Modus
- Indien u “no” kiest, wordt u gevraagd om een Druk ( ) als u uw aanpassingen wilt wissen. programma voor Dinsdag te maken(herhaal de U komt hierna weer terug in het hoofdmenu. Indien u het vakantie programma eerder wilt stappen hiervoor beschreven) beëindigen, stelt u met de (-) toets het resterend aantal dagen naar “no”. -
Page 35: Technische Specificaties
programma zal deze tijd gemeten worden om externe Om de opgeslagen waarde te wissen, drukt u ( invloeden te compenseren. Hierdoor kunt u bij het Als bevestiging van het wissen verschijnt “no” op de N° Af fabriek instelling & alternatieven programmeren de werkelijke tijden van display. - Page 36 ZASTOSOWANIE Thermostaat lijkt te werken, maar het wordt niet warm WAŻNE! - Termostaty z serii "BT" przeznaczone są do sterowania instalacjami grzewczymi. - Controleer de aansluiting naar de ketel. Przed rozpoczęciem prac, instalator powinien dokładnie Regulatory zostały zaprojektowane stosowania Uitgang - Controleer de voeding van de ketel.
-
Page 37: Klawiatura
Termostat BT DP-01 najlepszym partnerem do Klawiatura Wyświetlacz & LED optymalizacji zużycia energii i zwiększenia komfortu pracy. Stały kolor czerwony (przycisk jest Przycisk Przycisk plus podświetlony): Zapotrzebowanie na ciepło. - Nowoczesne wykonanie z miękkiego w dotyku minus (-) Zielony błysk:... -
Page 38: Uruchomienie
Uwaga: zawsze możesz wrócić do poprzedniej Uruchomienie Uwaga: wartości przez naciśnięcie klawisza wyjścia ( Możesz dowolnie dostosować swój program. Lista nastaw czasu i daty: Termostat jest gotowy do pracy. Aby uzyskać więcej informacji zobacz rozdział Godzina i dzień: Domyślnym trybem pracy będzie tryb automatyczny "definiowanie trybu pracy". -
Page 39: Tryb Automatyczny
Jeśli wybrałeś wbudowany program: P1 - P9, Tryb Automatyczny 3.5 Tryb Program Możesz tylko zobaczyć i wybrać program. P1: Rano, wieczór i weekend; W tym trybie termostat przestawi się na wybrany Wybrany P2: Rano, południe, wieczór i weekend; program (wbudowany lub użytkownika) zgodnie program Bieżący P3: Dzień... -
Page 40: 3.6 Tryb Urlop
Naciśnij (OK) aby zatwierdzić i przejść Kiedy godziny zostaną ustawione naciśnij (OK) aby następnego kroku. przejść do następnego kroku. Teraz zostaniesz proszony o wybór typu kolejnego etapu programu (migające ikony). Możliwe są dwie opcje wyboru: - 1 - możesz wybrać ikonę uśpienia. (Koniec dnia) - 2 - możesz też... -
Page 41: 3.7 Tryb Timera
(Wybór w zakresie od 1 do 99 dni). w domu na kilka dni, lub jeśli chcesz na określony 4. Funkcja specjalna. czas zmienić ustawiony program. - Fabryczna nastawa temperatury w tym trybie jest 4.1 Funkcja blokady klawiatury określona, ale może być zmieniona w ustawieniach - Ustaw czas obowiązywania nastawy w godzinach Użyj tej funkcji, aby zapobiec przypadkowej zmianie parametrów, patrz rozdział... -
Page 42: Charakterystyka Techniczna
Wyświetlane w menu Wersja oprogramowania - Sprawdź pojemność baterii. użytkownika Normy I homologacje: EN 60730-1 : 2003 Dioda LED na moim BT DP-01 miga na czerwono. Dokładność mierzonej 0.1°C EN 61000-6-1 : 2002 temperatury Termostat został EN 61000-6-3 : 2004... - Page 43 Annexes: BT DP-01 - wygląda że działa normalnie ale ogrzewanie nie (Built-in Program description)) działa poprawnie. - Sprawdź połączenia. Na wyjściu - Sprawdź zasilanie źródła ciepła. 0 1 2 3 4 5 6 7 8 9 10 111213141516 17 1819 20212223 - Skontaktuj się...
- Page 44 0 1 2 3 4 5 6 7 8 9 10 111213141516 17 1819 20212223 0 1 2 3 4 5 6 7 8 9 10 111213141516 17 1819 20212223 0 1 2 3 4 5 6 7 8 9 10 111213141516 17 1819 20212223 0 1 2 3 4 5 6 7 8 9 10 111213141516 17 1819 20212223 0 1 2 3 4 5 6 7 8 9 10 111213141516 17 1819 20212223 0 1 2 3 4 5 6 7 8 9 10 111213141516 17 1819 20212223...