Sharp AR-122E Mode D'emploi

Sharp AR-122E Mode D'emploi

Copieur laser numerique
Table des Matières

Publicité

Les langues disponibles
  • FR

Les langues disponibles

  • FRANÇAIS, page 139

Liens rapides

AR-122E
AR-122EN
AR-152E
AR-152EN
DIGITAL LASER COPIER
OPERATION MANUAL
DIGITALER LASERKOPIERER
BEDIENUNGSANLEITUNG
COPIEUR LASER NUMERIQUE
DIGITAAL LASER KOPIEERAPPARAAT
GEBRUIKSAANWIJZING
COPIADORA LÁSER DIGITAL
MANUAL DE INSTRUCCIONES
COPIATRICE LASER DIGITALE
MANUALE DI ISTRUZIONI
MODE D'EMPLOI

Publicité

Table des Matières
loading

Sommaire des Matières pour Sharp AR-122E

  • Page 1 AR-122E AR-122EN AR-152E AR-152EN DIGITAL LASER COPIER OPERATION MANUAL DIGITALER LASERKOPIERER BEDIENUNGSANLEITUNG COPIEUR LASER NUMERIQUE MODE D’EMPLOI DIGITAAL LASER KOPIEERAPPARAAT GEBRUIKSAANWIJZING COPIADORA LÁSER DIGITAL MANUAL DE INSTRUCCIONES COPIATRICE LASER DIGITALE MANUALE DI ISTRUZIONI...
  • Page 2 CLASS 1 LASER PRODUCT VAROITUS! LAITTEEN KÄYTTÄMINEN LASER KLASSE 1 MUULLA KUIN TÄSSÄ KÄYTTÖOHJEESSA MAINITULLA LUKOAN 1 LASERLAITE TAVALLA SAATTAA ALTISTAA KÄYTTÄJÄN KLASS 1 LASERAPPARAT TURVALLISUUSLUOKAN 1 YLITTÄVÄLLE NÄKYMÄTTÖMÄLLE LASERSÄTEILYLLE. VARNING OM APPARATEN ANVÄNDS PÅ ANNAT SÄTT ÄN I DENNA BRUKSANVISNING SPECIFICERATS, KAN ANVÄNDAREN UTSÄTTAS FÖR...
  • Page 3 CAUTIONS Cautions on using Follow the cautions below when using this unit. Warning: • The fusing area is hot. Exercise care in this area when removing misfed paper. • Do not look directly at the light source. Doing so may damage your eyes. •...
  • Page 4: Cautions On Handling

    • Adobe and Acrobat are trademarks of Adobe Systems Incorporated. • All other trademarks and copyrights are the property of their respective owners. ® As an ENERGY STAR Partner, SHARP has determined that ® this product meets the ENERGY STAR guidelines for energy efficiency.
  • Page 5: Table Des Matières

    DEVELOPER REQUIRED ...31 LOADING PAPER MAINTENANCE REQUIRED..31 PAPER........... 7 OPTIONAL EUIPMENT (AL-12PKM) LOADING THE PAPER TRAY..8 BYPASS FEED (including special SOFTWARE FOR THE SHARP paper) .......... 10 PERSONAL MFP SERIES...32 HARDWARE AND SOFTWARE MAKING COPIES REQUIREMENTS ......33 BEFORE INSTALLATION....33 COPY FLOW .......
  • Page 6: Introduction

    INTRODUCTION This chapter provides basic information for using the unit. USING THE MANUAL The operation manual contains explanations of how to operate the unit, important considerations, and maintenance procedures. To get the most out of the unit, please read the operation manual. Please keep the operation manuals in a suitable location that will allow for convenient future reference.
  • Page 7: Part Names

    PART NAMES Single bypass Photoconductive drum Toner cartridge Power switch Original table Handle Operation panel Power cord socket Front cover Fusing unit release lever Paper tray Transfer charger Side cover Charger cleaner Side cover open button Bypass paper guides Paper output tray Paper output tray extension...
  • Page 8: Operation Panel

    OPERATION PANEL Power save indicator Exposure mode selector key and Lights up when the unit is in a power indicators save mode. (p.18, p.19) Use to sequentially select the exposure Paper feed location indicators modes: AUTO, MANUAL or PHOTO. Selected mode is shown by a lit Light up to show the selected paper indicator.
  • Page 9: Loading Paper

    LOADING PAPER Follow the steps below to load paper into the tray. PAPER For best results, use only paper recommended by SHARP. Type of paper Type of media Size Weight feeding Paper tray Standard paper 56g/m 80g/m Letter Legal Invoice...
  • Page 10: Paper

    LOADING THE PAPER TRAY Raise the handle of the paper tray and pull the paper tray out until it stops. Adjust the paper guides on the paper tray to the copy paper width and length. Squeeze the lever of paper guide and slide the guide to match with the width of the paper.
  • Page 11 Gently push the paper tray back into the unit. • After loading paper, to cancel the blinking without restarting copying, press the clear ( ) key. The in the display will go out and the start ( ) indicator will light up. •...
  • Page 12: Bypass Feed (Including Special Paper)

    BYPASS FEED (including special paper) The single bypass can be used to feed standard paper, transparency film, labels, envelopes, and other special purpose paper. Paper measuring from A6 to A4 and in the weight range of 52g/m to 128g/m can be used in this tray. (For paper weighing from 104g/m to 128g/m , A4 is the maximum size.)
  • Page 13: Making Copies

    MAKING COPIES This chapter explains basic and other copying functions. The unit is equipped with a one-page memory buffer. This memory allows the unit to scan an original once only and make up to 99 copies. This feature improves workflow, reduces operation noise from the copier, and provides higher reliability by reducing wear and tear on the scanning mechanism.
  • Page 14: Connecting The Power Cord

    Do not insert paper in the single bypass when a copy job from the paper tray is in progress. This will cause a misfeed. CONNECTING THE POWER CORD If you use the unit in a country other than the country where the unit was purchased, you will need to make sure that your local power supply is compatible with your model.
  • Page 15 About the scan head The scan head lamp remains on constantly when the unit is in the ready condition (when the start ( ) indicator is illuminated). The unit adjusts the scan head lamp periodically to maintain copying quality. At this time, the scan head moves automatically.
  • Page 16: Original Placement

    ORIGINAL PLACEMENT • The original table can read up to A4 original. • Image loss 4mm can occur at the leading and trailing edges of the copies. Also image loss 4.5mm in total can occur along the other edges of the copies. •...
  • Page 17: Set The Copy Quantity

    SET THE COPY QUANTITY Set the number of copies using the two copy quantity ( ) keys when copying from the original table. • Press the clear ( ) key to clear an entry if a mistake is made. • A single copy can be made with the initial setting, i.e., when "0" is displayed.
  • Page 18: Automatic Exposure Adjustment

    Automatic exposure adjustment This automatic exposure level will remain in effect until you change it again by this procedure. The automatic exposure level can be adjusted to suit your copying needs. This level is set for copying from the original table. Press the exposure mode selector key to select the PHOTO ( ) mode.
  • Page 19: Reduction/Enlargement/Zoom

    REDUCTION/ENLARGEMENT/ZOOM Three preset reduction ratios and two enlargement ratios can be selected. The zoom function enables copy ratio selection from 25% to 400% in 1% increments. Set the original and check the paper size. Use the copy ratio selector key and/or ZOOM ( ) keys to select the desired copy ratio.
  • Page 20: Special Functions

    SPECIAL FUNCTIONS This chapter describes the special functions of this unit. Use these functions as needed. DESCRIPTION OF SPECIAL FUNCTIONS Toner save mode (page 18) Reduces toner consumption by approximately 10%. Power save modes (page 19) The unit has two power save modes of operation: preheat mode and auto power shut-off mode.
  • Page 21: User Programs

    Press and hold down the exposure mode selector key for approximately 5 seconds. The MANUAL ( ) indicator will go out and the PHOTO ( ) indicator will begin to blink. The light and dark indicator marked "5" will light up, indicating the standard toner mode is active.
  • Page 22: Displaying Total Number Of Copies

    Program Mode Parameters OFF, 1 10sec., 2 30sec. Auto clear time 60sec., 4 90sec., 5 120sec. Preheat mode 30sec., 1 60sec., 2 90sec. Auto power shut- off 2min., *1 5min., 2 15min., timer 30min., 4 60 min., 5 120min. Auto power shut- off OFF, *1 mode Resolution of AUTO...
  • Page 23: Maintenance

    This chapter describes how to replace the toner cartridge and how to clean unit. Be sure to use only genuine SHARP parts and supplies. For best copying results, be sure to use only SHARP Genuine Supplies which are designed, engineered, and tested to maximise the life and performance of SHARP copiers.
  • Page 24 Gently pull the toner cartridge Toner cartridge lock out while pressing the lock release lever release lever. • After removing the toner cartridge, do not shake it or tap on it. Doing so may cause toner to leak from the cartridge. Put the old cartridge immediately in the bag contained in the box of the new cartridge.
  • Page 25: Toner Cartridge Life

    Close the front cover and then the side cover by pressing the round projections near the side cover open button. The indicator will go out and the start ( ) indicator will light When closing the covers, be sure to close the front cover securely and then close the side cover.
  • Page 26: Cleaning The Unit

    CLEANING THE UNIT Proper care is essential in order to get clean, sharp copies. Be sure to take a few minutes to regularly clean the unit. • Before cleaning, be sure to turn the power switch off and remove the power cord from the outlet.
  • Page 27 Transfer charger If copies start becoming streaky or blotchy, the transfer charger may be dirty. Clean the charger using the following procedure. Turn the power switch off. (p.13) Open the side cover while pressing the side cover open button. Take the charger cleaner out by holding the tab. Set the charger cleaner onto the right end of the transfer charger, gently slide the cleaner to the left end, and then remove it.
  • Page 28: Troubleshooting The Unit

    TROUBLESHOOTING THE UNIT This chapter describes misfeed removal and troubleshooting. TROUBLESHOOTING If any problem occurs, check the list below before contacting your authorised service representative. Problem Possible cause Solution Page Unit plugged in? Plug the unit into a grounded outlet. Power switch on? Turn the power switch on.
  • Page 29: Status Indicators

    When the following indicators light up or blink on the operation panel or the following alphanumeric codes appear in the display, solve the problem immediately referring to both the table below and the relevant page. Be sure to use only genuine SHARP parts and supplies. Indication Cause and remedy...
  • Page 30: Misfeed Removal

    MISFEED REMOVAL When the misfeed ( ) indicator blinks or blinks in the display, the unit will stop because of a misfeed. Open the side cover, in that order. To open the side cover, see "TONER CARTRIDGE REPLACEMENT" (p.21). Check the misfeed location. Remove the misfed paper following the instructions for each location in the illustration below.
  • Page 31 A: Misfeed in the paper feed area Gently remove the misfed paper from the paper feed area as shown in the illustration. When the misfeed ( ) indicator blinks, and the misfed paper is not seen from the paper feed area, pull out the paper tray and remove the misfed paper.
  • Page 32 Gently remove the misfed paper from under the fusing unit as shown in the illustration. If the paper cannot be removed, proceed to "C: Misfeed in the transport area". The fusing unit is hot. Do not touch the fusing unit when removing misfed paper.
  • Page 33: Developer Required

    When the developer replacement required ( ) indicator lights up, the developer should be replaced. DEVELOPER REPLACEMENT SHOULD ONLY BE DONE BY AN AUTORIZED SHARP SERVICE TECHNICIAN. Contact your service centre as soon as possible. MAINTENANCE REQUIRED When maintenance ( ) indicator lights up, service by an authorised SHARP service technician is required.
  • Page 34: Optional Euipment (Al-12Pkm)

    The following term is used in this chapter. CD-ROM Means the supplied CD-ROM with the SHARP Personal MFP series software. SOFTWARE FOR THE SHARP PERSONAL MFP SERIES The supplied CD-ROM includes software for this unit.
  • Page 35: Hardware And Software Requirements

    HARDWARE AND SOFTWARE REQUIREMENTS Check the following hardware and software requirements in order to install the software. Computer type IBM PC/AT or compatible computer equipped with a USB1.1* or bi-directional parallel interface (IEEE 1284) Operating system* Windows 95, Windows 98, Windows Me, Windows NT Workstation 4.0 (ServicePack 5 or later)* , Windows 2000 Professional, Windows XP Professional*...
  • Page 36 Flow of installation Refer to the following table and then begin installation. Operating Interface Reference pages for how to install system USB/ Installing onto Windows XP (USB/parallel interface) Windows XP Parallel (p.35) Installing onto Windows 98/Me/2000 (USB interface) (p.39) Windows 98 Installing onto Windows 95/98/Me/NT4.0/2000 Parallel (Parallel interface) (p.42)
  • Page 37: Installing The Software

    INSTALLING THE SOFTWARE The following term is used in this section. Means the unit as a printer and scanner. • For this description, it is assumed that the mouse is configured for right hand operation. • To print or scan, the MFP must be in the online state. •...
  • Page 38 • If you are using the parallel interface connection, do not select the Button Manager checkbox because this feature is not supported with the parallel interface. • If the following screen appears, click the "OK" button. Review the contents in "BEFORE INSTALLATION" (p.33), and then select only appropriate the software packages to be installed.
  • Page 39 Begin installation of the Button Manager (This step will start if it was selected in step 4). After confirming the message in the "Welcome" window, click the "Next" button. Read the message in the "Please read the following information." window, and then click the "Next" button. When a message appears that lets you specify the location for the software to be installed, click the "Next"...
  • Page 40 Windows XP with the parallel interface, go to step 12. Begin installation of the scanner driver. "SHARP AR-xxxx" (where xxxx is the model name of your MFP) will appear in the "Found New Hardware Wizard" dialog box.
  • Page 41 Installing onto Windows 98/Me/2000 (USB interface) Before starting the installation, make sure the USB interface cable is not connected to the MFP. Insert the supplied CD-ROM into your CD-ROM drive. Double-click "My Computer" ( ), and then double-click the CD-ROM ( ) icon.
  • Page 42 Copying files for MFP driver installation. After confirming the message in the "Welcome" window, click the "Next" button. A dialog box appears asking you to verify that the interface cable is not connected to the MFP. Make sure that the interface cable is not connected and click the "Next"...
  • Page 43 Begin installation of the Sharpdesk (This step will start if it was selected in step 4). After confirming the message in the "Welcome to Sharpdesk installation" window, click the "Next" button. Read the message in the "Information" window, and then click the "Next"...
  • Page 44 Installing onto Windows 95/98/Me/NT4.0/2000 (Parallel interface) Before starting the installation, make sure the USB or parallel interface cable is not connected to the MFP. Insert the supplied CD-ROM into your CD-ROM drive. Double-click "My Computer" ( ), and then double-click the CD-ROM ( ) icon.
  • Page 45 Copying files for MFP driver installation and parallel interface setup (This step will start if it was selected in step 4). After confirming the message in the "Welcome" window, click the "Next" button. A dialog box appears asking you to verify that the USB or parallel interface cable is not connected to the MFP.
  • Page 46 Begin installation of the Sharpdesk (This step will start if it was selected in step 4). After confirming the message in the "Welcome to Sharpdesk installation" window, click the "Next" button. Read the message in the "Information" window, and then click the "Next"...
  • Page 47: Indicators On The Operation Panel

    INDICATORS ON THE OPERATION PANEL The ONLINE indicator and the start ( ) indicator indicate the state of the printer or scanner. SCANNER indicator ONLINE indicator Start indicator Power save indicator Start indicator Indicates the unit is ready for copying or scanning is being performed. Blinking: The indicator blinks in the following situations: •...
  • Page 48: Using The Printer Mode

    Click "Control Panel", select "Printers and Other Hardware", and then click "Printers and Faxes". On Windows 95/98/Me/NT4.0/2000, select "Settings" and click "Printers". Click the "SHARP AR-xxxx" (where xxxx is the model name of your unit) printer driver icon and from the "File" menu select "Properties".
  • Page 49 Specify the print settings including the number of copies, media type, and print quality, and then click the "Print" button to start printing. On Windows 95/98/Me/NT 4.0, click the "OK" button to start printing. For details on print settings, see the online manual or the help file for the printer driver.
  • Page 50: Using The Scanner Mode

    Click the "start" button, select "Control Panel" and click "Printers and Other Hardware", and then click "Scanners and Cameras" in the start menu. Right click the "SHARP AR-xxxx" (where xxxx is the model name of your unit) icon and click "Properties"...
  • Page 51 Repeat Step4 to set "ScanMenu SC2" through "ScanMenu SC6". Click the "Scanner events" and select "ScanMenu SC2" from the pull-down menu. Select "Button Manager (SHARP Personal MFP series)" in "Start this program" and click "Apply". Do the same for each ScanMenu through "ScanMenu SC6".
  • Page 52 Scan Parameter Setting Dialog Box After you have completed the Button Manager settings in Windows, configure the scan settings in Button Manager. To configure the scan settings in Button Manager, right click the ( ) icon in the Taskbar and select "Setting" from the menu that appears.
  • Page 53 Windows Platforms provide a mechanism for software to handle external events for a scanner device like the SHARP AR-xxxx (where xxxx is the model name of your unit) series products. This mechanism is controlled by the device manager on a device basis.
  • Page 54 Using the SCANNER key to begin scanning • Scanning is not possible during a copy job. • If the unit is used to begin a scan job during a print job, the scan job will be stored and scanning will begin when the print job is completed. Press the SCANNER ( ) key.
  • Page 55 • The method for starting the scanner driver differs depending on the type of application. Refer to the manual or the help file of your application. Using the SHARP TWAIN Place the original you wish to scan on the original table. For the procedure for placing the original, see "ORIGINAL PLACEMENT"...
  • Page 56 Select "SHARP Personal MFP series", and click the "Select" Click here button. If you use more than one scanning device, select the scanner you want to use through the application. The method for accessing the "Select Scanner" option, depends upon the application.
  • Page 57 Click the "start" button , select "Control Panel", and click "Printers and Other Hardware", and then click "Scanners and Cameras" in the start menu. Click the "SHARP AR-xxxx" (where xxxx is the model name of your unit) icon and click "Get picture" in "Imaging Tasks".
  • Page 58: How To Use The Online Manual

    CD-ROM ( ) icon. On Windows 95/98/Me/NT 4.0/2000, double-click "My Computer" ( ), and then double-click the CD-ROM ( ) icon. Double-click the "Manual" folder, double-click "English" folder, and AR-122E/AR-122EN/AR-152E/AR-152EN then double-click the "AR_122E_122EN_152E_152EN.pdf" icon. The following window will appear.
  • Page 59 ) button located at the top-right of the window. • The online manual can be printed out using Acrobat Reader. SHARP recommends printing out the sections which you refer to regularly. • Refer to "Help" of Acrobat Reader for more details on the operation and function of Acrobat Reader.
  • Page 60: Using Other Installed Drivers

    GDI printer or a Windows Printing System printer, you must change the port setting of the printer driver using the following procedure. If another printer does not operate properly when the SHARP Personal MFP series printer driver is set to "FILE" as described below, uninstall the SHARP Personal MFP series printer driver.
  • Page 61: Connecting The Interface Cable

    CONNECTING THE INTERFACE CABLE This unit includes both USB and parallel interface connectors. Interface cables for connecting the unit to your computer are not included with this unit. Please purchase the appropriate cable for your computer. Interface cable Parallel interface cable IEEE 1284-Shielded type bi-directional parallel interface cable (2 m Max.) USB interface cable Shielded twisted pair cable, high-speed transmission equivalent (2 m Max.)
  • Page 62 Connecting the parallel interface cable Obtain an IEEE1284 shielded parallel interface cable. Ensure that your computer and unit are turned off. Insert the cable into the parallel interface connector located on the rear of the unit, and fasten with clasps. Insert the other end of the cable into the interface connector of your computer.
  • Page 63: Appendix

    APPENDIX SPECIFICATIONS Model AR-122E AR-122EN AR-152E AR-152EN Type Digital laser copier, desk-top type Copy system Dry, electrostatic transfer Originals Sheets, bound documents Paper tray 250 sheets (Paper tray) 1 sheet (Single bypass) Paper output tray 100 sheets Original sizes Max. A4...
  • Page 64: Optional Equipment

    IEEE1284-compliant bi-directional parallel interface (Only for printer) Feed paper lengthwise only. As a part of our policy of continuous improvement, SHARP reserves the right to make design and specification changes for product improvement without prior notice. The performance specification figures indicated are nominal values of production units.
  • Page 65: About Supplies And Options

    When ordering supplies, please use the correct part numbers as listed below. Be sure to use only genuine SHARP parts and supplies. For best copying results, be sure to use only SHARP Genuine Supplies which are designed, engineered, and tested to maximize the life and performance of SHARP copiers.
  • Page 66: Index

    INDEX About supplies ......62, 63 Dark key ........6, 15 Acrobat Reader ......... 56 Developer replacement required Alarm indicator indicator ........6, 27, 31 - Developer replacement required Developer required......31 indicator......6, 27, 31 Display..........6 - Maintenance indicator ..6, 27, 31 Displaying total number of copies ..
  • Page 67 - Fusing area ........29 Side cover open button ....... 5 - Paper feed area......29 Single bypass ........10 - Transport area......30 Software for the SHARP Personal MFP series..........32 Specifications ........61 Name Start indicator ........ 6, 45 - Operation panel......
  • Page 68 - Button Manager......52 - USB interface cable...... 59 - Scanner and Camera Wizard ..55 Copying ..........11 - SHARP TWAIN ......53 Displaying total number of copies..20 Setting the copy quality Enlarging/reducing copies ....17 - AUTO ........... 15 Installing the software - MANUAL ........
  • Page 69: Software License

    SHARP’S Licensors and any other proprietary legends of SHARP and/or its Licensors that were on the original copy of the Software. You may also transfer all your license rights in the software, the backup copy of the Software, the related documentation and a copy of this License to another party, provided the other party reads and agrees to the terms and conditions of this License.
  • Page 70 Clause 6. A disk will be replaced when it is returned to SHARP or a SHARP authorized representative with a copy of the receipt. SHARP will have no responsibility to replace a disk damaged by accident, abuse or misapplication.
  • Page 71 ACHTUNG! Warnhinweise zum Arbeiten mit dem Gerät Beim Arbeiten mit diesem Gerät sind folgende Warnhinweise zu befolgen. Warnhinweis: • Der Fixierbereich ist heiß. Gehen Sie bei der Beseitigung eines Papierstaus in diesem Bereich besonders vorsichtig vor. • Blicken Sie nicht direkt in die Lichtquelle. Dies schadet den Augen. •...
  • Page 72 • Adobe und Acrobat sind Warenzeichen der Adobe Systems Incorporated. • Alle übrigen Warenzeichen sind Eigentum der jeweiligen Inhaber. ® As an ENERGY STAR Partner, SHARP has determined that ® this product meets the ENERGY STAR guidelines for energy efficiency.
  • Page 73 BEDIENFELD ........ 6 ENTWICKLER ERFORDERLICH 31 ERFORDERLICHE EINLEGEN VON PAPIER WARTUNGSARBEITEN ....31 PAPIER.......... 7 OPTIONALE AUSSTATTUNG (AL-12PKM) EINLEGEN IN DAS PAPIERFACH 8 SOFTWARE FÜR DIE SHARP MANUELLER EINZUG PERSONAL MFP-SERIE.....32 (Spezialpapier)......10 HARDWARE- UND KOPIEREN SOFTWAREANFORDERUNGEN33 VOR DER INSTALLATION ..33 KOPIERVORGANG.....
  • Page 74: Einleitung

    EINLEITUNG Dieses Kapitel liefert grundlegende Informationen zum Arbeiten mit dem Gerät. BENUTZUNGSHINWEISE ZUM HANDBUCH Das Bedienungshandbuch enthält Erläuterungen zum Betrieb des Geräts, wichtige Hinweise, die zu beachten sind, sowie die erforderlichen Wartungsmaßnahmen. Damit Sie das Gerät optimal nutzen können, sollten Sie das Handbuch aufmerksam lesen.
  • Page 75: Bezeichnung Der Teile

    BEZEICHNUNG DER TEILE Einzelblatteinzug Fotoleittrommel Tonerkassette Verlängerung des Vorlagenglas Papierausgabefachs Bedienfeld Netzschalter Frontabdeckung Griff Papierfach Netzkabelanschluß Seitenabdeckung Entriegelungshebel der Fixiereinheit Verriegelungstaste der Übertragungscorona Seitenabdeckung Coronareiniger Papierführungen des manuellen Einzugs Papierausgabefach...
  • Page 76 BEDIENFELD Kann verwendet werden, wenn der Wahltaste für Belichtungsmodus und Drucker-/Scanner-Erweiterungssatz Anzeige (AL-12PKM) installiert wurde. Für die Auswahl der Belichtungsarten ON LINE-Taste und -Anzeige (S.45) AUTO, MANUELL oder PHOTO. Die Kann verwendet werden, wenn der gewählte Belichtungsart wird durch ein Drucker-/Scanner-Erweiterungssatz leuchtendes Lämpchen angezeigt.
  • Page 77: Einlegen Des Papiers

    EINLEGEN DES PAPIERS Legen Sie das Papier folgendermaßen in das Fach ein. PAPIER Optimale Ergebnisse werden bei Verwendung des von SHARP empfohlenen Papiers erzielt. Art des Art des Format Gewicht Papiereinzugs Druckmediums Papierfach Standardpapier 56g/m 80g/m Letter Legal Invoice Einzelblatteinzug Standardpapier und...
  • Page 78: Einlegen In Das Papierfach

    EINLEGEN IN DAS PAPIERFACH Heben Sie den Griff des Papierfachs an, und ziehen Sie das Papierfach bis zum Anschlag heraus. Stellen Sie die Papierführungen des Papierfachs auf die Länge und Breite des Kopierpapiers ein. Drücken Sie dazu den Hebel der Papierführung , und verschieben Sie die Führung passend zur Breite des Kopierpapiers.
  • Page 79 Schieben Sie das Papierfach vorsichtig in das Gerät zurück. • Um nach dem Einlegen des Papiers das blinkende ohne Starten eines Kopiervorgangs zu löschen, drücken Sie die Rückstelltaste ). Das blinkende auf der Anzeige erlischt, und die Hinweis Startanzeige ( ) leuchtet auf.
  • Page 80: Manueller Einzug (Spezialpapier)

    MANUELLER EINZUG (Spezialpapier) Der Einzelblatteinzug kann für Standardpapier, transparente Folien, Etiketten, Briefumschläge und anderes Spezialpapier verwendet werden. In dieses Fach kann Papier im Format A6 bis A4 und mit einem Gewicht von 52 g/m bis 128 g/m eingelegt werden. (Bei Papier mit einem Gewicht von 104 g/m bis 128 g/m , darf das Format von A4 nicht überschritten werden.)
  • Page 81 KOPIEREN In diesem Kapitel werden neben den grundlegenden Funktionen noch weitere Kopierfunktionen beschrieben. Das Gerät ist mit einem Speicher für eine Seite ausgestattet. Dadurch braucht das Gerät ein Original nur einmal zu scannen und kann davon bis zu 99 Kopien erstellen. Dadurch verbessert sich der Arbeitsfluß, der Geräuschpegel des Kopierers verringert sich, und aufgrund des geringeren Verschleißes des Scannermechanismus arbeitet das Gerät zuverlässiger.
  • Page 82: Anschliessen Des Netzkabels

    Legen Sie kein Papier in den Einzelblatteinzug, wenn gerade aus dem Papierfach kopiert wird. Dies könnte einen Papierstau hervorrufen. Vorsicht ANSCHLIESSEN DES NETZKABELS Wird das Gerät in einem anderen Land eingesetzt als demjenigen, in dem es ursprünglich erworben wurde, müssen Sie überprüfen, ob Ihr Modell mit der örtlichen Netzspannung betrieben werden kann.
  • Page 83 Der Abtastkopf Die Lampe des Abtastkopfs leuchtet ständig, wenn das Gerät betriebsbereit ist (wenn die Startanzeige ( ) leuchtet). Das Gerät justiert die Abtastkopflampe von Zeit zu Zeit, um eine gleichbleibend hohe Kopierqualität zu gewährleisten. Der Abtastkopf bewegt sich dann automatisch. Das ist keine Fehlfunktion, sondern ein normaler Vorgang.
  • Page 84: Einlegen Von Originalen

    EINLEGEN VON ORIGINALEN • Das Vorlagenglas kann Originale mit einem Format von bis zu A4 einlesen. • Am oberen und unteren Rand der Kopie kann ein Streifen von max. 4 Hinweis mm unbedruckt bleiben. An den anderen Rändern der Kopie kann ein Bereich von insgesamt 4,5 mm unbedruckt bleiben.
  • Page 85: Einstellen Der Kopienanzahl

    EINSTELLEN DER KOPIENANZAHL Stellen Sie die Anzahl der Kopien über die beiden Kopienanzahl-Tasten ( ein, wenn Sie vom Vorlagenglas aus kopieren. • Drücken Sie die Rückstelltaste ( ), um eine fehlerhafte Eingabe zu löschen. • Mit der ursprünglichen Einstellung, d. h. wenn "0" angezeigt wird, Hinweis kann eine Einzelkopie erstellt werden.
  • Page 86 Automatische Belichtungseinstellung Diese automatische Belichtungsstärke bleibt so lange erhalten, bis Sie sie erneut ändern. Hinweis Die automatische Belichtungsstärke kann Ihren Kopieranforderungen gemäß eingestellt werden. Diese Belichtungsstärke ist für Kopiervorgänge vom Vorlagenglas aus eingestellt. Drücken Sie die Wahltaste für den Belichtungsmodus, um den Photo-Modus ) zu wählen.
  • Page 87: Verkleinerung/Vergrösserung/Zoom

    VERKLEINERUNG/VERGRÖSSERUNG/ZOOM Es stehen drei voreingestellte Verkleinerungs- und zwei Vergrößerungsmaßstäbe zur Auswahl. Die Zoom-Funktion ermöglicht die Einstellung des Kopiermaßstabs von 25% bis 400% in Schritten von 1%. Legen Sie das Original ein, und prüfen Sie das Papierformat. Verwenden Sie die Kopiermaßstabtaste und/oder die ZOOM- Tasten ( ), um den gewünschten Kopiermaßstab einzustellen.
  • Page 88: Sonderfunktionen

    SONDERFUNKTIONEN In diesem Kapitel werden die Sonderfunktionen des Geräts beschrieben. Verwenden Sie diese Funktionen nach Bedarf. BESCHREIBUNG DER SONDERFUNKTIONEN Tonersparbetrieb (Seite 18) Verringert den Tonerverbrauch um ca. 10%. Energiesparbetrieb (Seite 19) Das Gerät verfügt über zwei verschiedene Stromsparfunktionen: die Vorwärmphase und den automatischen Energiesparbetrieb.
  • Page 89: Bedienerprogramme

    Halten Sie die Wahltaste für den Belichtungsmodus ca. 5 Sekunden lang gedrückt. Die Manuell-Anzeige ( ) erlischt, und die Photo-Anzeige ( ) beginnt zu blinken. Zur Anzeige des normalen Tonerbetriebs leuchtet die mit "5" gekennzeichnete Hell- und Dunkel-Anzeige auf. Wenn Sie den Tonersparbetrieb aufrufen möchten, drücken Sie die Taste Hell ( ).
  • Page 90: Anzeigen Der Kopiengesamtanzahl

    Program Modus Parameter mnr. Automatische AUS, 1 10 s. 2 30 s. Rückstellzeit 60 s., 4 90 s., 5 120 s. Vorwärmphase 30 s., 1 60 s., 2 90 s. Automatische 2 min., *1 5 min., 2 15 min., Steuerung des 3 4 30 min.
  • Page 91: Wartung

    Um Kopien in bester Druckqualität zu erhalten, sollten Sie ausschließlich Originalverbrauchsmaterialien von SHARP verwenden, die entwickelt, hergestellt und geprüft wurden, um die Lebensdauer und die Leistung von Sharp-Kopierern wesentlich zu steigern. Achten Sie auf das Originaletikett auf der Tonerpackung. AUSWECHSELN DER TONERKASSETTE Wenn die Anzeige Auswechseln der Tonerkassette erforderlich ( ) aufleuchtet, muß...
  • Page 92: Tonerkassette

    Drücken Sie den Entriegelungshebel der Entriegelungsknopf Tonerkassette, und ziehen Sie die Tonerkassette gleichzeitig vorsichtig heraus. • Nach dem Entfernen der Tonerkassette dürfen Sie sie nicht mehr schütteln und auch nicht darauf klopfen. Ansonsten könnte der Toner aus der Kassette fallen. Geben Sie die alte Kassette sofort in die Hinweis Hülle, die in der Schachtel der neuen Kassette enthalten ist.
  • Page 93 Schließen Sie die Frontabdeckung und anschließend die Seitenabdeckung durch Drücken der runden Sicherungsknöpfe neben der Verriegelungstaste der Seitenabdeckung. Die Anzeige erlischt, und die Startanzeige ) leuchtet auf. Beim Schließen der Abdeckungen sollte zuerst die Frontabdeckung und Vorsicht anschließend die Seitenabdeckung sicher geschlossen werden.
  • Page 94: Reinigen Des Geräts

    REINIGEN DES GERÄTS Richtige Pflege ist unerläßlich, um stets saubere und scharfe Kopien zu erhalten. Nehmen Sie sich auf jeden Fall ein paar Minuten Zeit für die regelmäßige Reinigung des Geräts. • Vor der Reinigung muß der Netzschalter ausgeschaltet und das Netzkabel aus der Steckdose gezogen werden.
  • Page 95 Übertragungscorona Wenn die Kopien streifig oder fleckig werden, ist die Übertragungscorona möglicherweise verschmutzt. Reinigen Sie die Corona folgendermaßen. Schalten Sie den Netzschalter aus. (S.13) Öffnen Sie die Seitenabdeckung, indem Sie auf die Öffnungstaste der Seitenabdeckung drücken. Fassen Sie den Coronareiniger an der Lasche, und nehmen Sie ihn heraus.
  • Page 96: Fehlersuche Am Gerät

    FEHLERSUCHE AM GERÄT In diesem Kapitel wird die Beseitigung von Papierstau und die Fehlersuche beschrieben. FEHLERSUCHE Sollte ein Problem auftreten, überprüfen Sie zunächst die nachfolgende Liste, bevor Sie sich an Ihren autorisierten Kundendienst wenden. Problem Mögliche Ursache Lösung Seite Ist der Netzstecker des Geräts Stecken Sie den Netzstecker des Geräts in eingesteckt? eine geerdete Steckdose ein.
  • Page 97: Statusanzeigen

    Ein Papierstau ist aufgetreten. Beseitigen Sie den Papierstauanzeige Blinken Papierstau wie unter "PAPIERSTAU ENTFERNEN" beschrieben. Ständiges Ein autorisierter SHARP-Kundendienst muß Wartungsanzeige Leuchten Wartungsarbeiten durchführen. Das Gerät befindet sich in der Vorwärmphase. Drücken Sie irgendeine Taste, um die Vorwärmphase Energiesparanzeige leuchtet abzubrechen.
  • Page 98: Papierstau Entfernen

    PAPIERSTAU ENTFERNEN Wenn die Papierstauanzeige ( ) oder auf der Anzeige blinkt, stoppt das Gerät aufgrund eines Papierstaus. Öffnen Sie die Seitenabdeckung. Das Öffnen der Seitenabdeckung ist unter "AUSWECHSELN DER TONERKASSETTE" (S.21) beschrieben. Ermitteln Sie die Stelle, an der der Papierstau aufgetreten ist. Beseitigen Sie das gestaute Papier anhand der Erläuterungen in der nachfolgenden Abbildung.
  • Page 99 A: Papierstau im Papiereinzugsbereich Entfernen Sie das gestaute Papier vorsichtig aus dem Papiereinzugsbereich, wie in der Abbildung gezeigt. Wenn die Papierstauanzeige ( ) blinkt und das gestaute Papier vom Papiereinzugsbereich aus nicht gesehen werden kann, ziehen Sie das Papierfach heraus, und entfernen Sie das gestaute Papier.
  • Page 100 Entfernen Sie das gestaute Papier vorsichtig von der Unterseite der Fixiereinheit her, wie in der Abbildung gezeigt. Wenn sich das Papier nicht entfernen läßt, gehen Sie zu „C: Papierstau im Transportbereich“. Die Fixiereinheit wird extrem heiß. Berühren Sie die Fixiereinheit nicht, wenn Sie einen Papierstau Warnung beseitigen.
  • Page 101 ENTWICKLER ERFORDERLICH Wenn die Anzeige Auswechseln der Entwicklereinheit erforderlich ( ) aufleuchtet, muß die Entwicklereinheit ausgewechselt werden. DIE ENTWICKLEREINHEIT DARF NUR VON EINEM AUTORISIERTEN SHARP-KUNDENDIENSTTECHNIKER AUSGEWECHSELT WERDEN. Wenden Sie sich möglichst umgehend an Ihren Kundendienst. WARTUNG ERFORDERLICH Wenn die Wartungsanzeige ( ) aufleuchtet, muß...
  • Page 102: Software Für Die Sharp Personal Mfp-Serie

    Bildschirme etwas anders aussehen, und die Funktionen können andere Bezeichnungen haben. Folgende Begriffe werden in diesem Kapitel verwendet. CD-ROM Steht für die mitgelieferte CD-ROM mit der Software für die SHARP Personal MFP-Serie. SOFTWARE FÜR DIE SHARP PERSONAL MFP- SERIE Die mitgelieferte CD-ROM enthält Software für dieses Gerät.
  • Page 103: Hardware- Und

    HARDWARE- UND SOFTWAREANFORDERUNGEN Lesen Sie hier, welche Hardware- und Softwareanforderungen für die Installation der Software bestehen. Computertyp IBM PC/AT oder kompatibler Computer mit einer USB1.1* -Schnittstelle oder einer bidirektionalen parallelen Schnittstelle (IEEE 1284) Betriebssystem* Windows 95, Windows 98, Windows Me, Windows NT Workstation 4,0 (ServicePack 5 oder höher)* , Windows 2000 Professional, Windows XP Professional*...
  • Page 104 Installationsablauf Sehen Sie sich die folgende Tabelle an, bevor Sie mit der Installation beginnen. Betriebs- Schnittstelle Referenzseiten für die Installation system USB/ Installieren unter Windows XP (USB/parallele Windows XP Parallel Schnittstelle) (S.35) Installieren unter Windows 98/Me/2000 (USB-Schnittstelle) (S.39) Windows 98 Installieren unter Windows 95/98/Me/NT4.0/2000 Parallel (Parallele Schnittstelle) (S.42)
  • Page 105: Installieren Der Software35

    INSTALLIEREN DER SOFTWARE Folgender Begriff wird in diesem Abschnitt verwendet. Bezeichnet die Einheit aus Drucker und Scanner. • Bei dieser Beschreibung wird davon ausgegangen, daß die Maus für rechtshändigen Betrieb konfiguriert wurde. • Um drucken oder scannen zu können, muß sich der MFP im Online-Status befinden. Hinweis •...
  • Page 106 • Bei Verwendung des parallelen Schnittstellenanschlußes dürfen Sie das Kontrollkästchen Schlatflächenmanager nicht aktivieren, da dieses Merkmal von der parallelen Schnittstelle nicht unterstützt wird. Hinweis • Klicken Sie im daraufhin angezeigten Bildschirm auf die Schaltfläche "OK". Lesen Sie den Abschnitt "VOR DER INSTALLATION" (S.33), und wählen Sie dann nur die Software-Pakete aus, die installiert werden sollen.
  • Page 107 Beginnen Sie mit der Installation von Schlatflächenmanager. (Dieser Schritt wird gestartet, wenn er in Schritt 4 ausgewählt wurde.) Bestätigen Sie die Meldung im Fenster „Willkommen“, und klicken Sie dann auf die Schaltfläche „Weiter“. Lesen Sie die Meldung im Fenster „Lesen Sie bitte die folgenden Informationen.“, und klicken Sie dann auf die Schaltfläche „Weiter“.
  • Page 108 Wenn Sie unter Windows XP eine parallele Schnittstelle nutzen, gehen Sie zu Schritt 12. Beginnen Sie mit der Installation des Scannertreibers. SHARP AR-xxxx (xxxx steht dabei für den Modellnamen Ihres MFP) wird im Dialogfeld „Assitent für das Suchen neuer Hardware“ angezeigt. Wählen Sie „Software automatisch installieren (empfohlen)“, und klicken Sie auf die Schaltfläche...
  • Page 109 Installieren unter Windows 98/Me/2000 (USB-Schnittstelle) Vor der Installation vergewissern Sie sich, daß das USB-Schnittstellenkabel nicht am MFP angeschlossen ist. Legen Sie die mitgelieferte CD-ROM in das CD-ROM-Laufwerk ein. Doppelklicken Sie auf „Arbeitsplatz“ ( ), und doppelklicken Sie dann auf das Symbol CD-ROM ( Wenn während der Software-Installation eine Meldung „Neue Hardwarekomponente gefunden“...
  • Page 110 Kopieren Sie die Dateien für die Installation des MFP-Treibers. Bestätigen Sie die Meldung im Fenster „Willkommen“, und klicken Sie dann auf die Schaltfläche „Weiter“. Ein Dialogfeld fordert Sie auf, sicherzustellen, daß das Schnittstellenkabel nicht an den MFP angeschlossen ist. Vergewissern Sie sich, daß das Schnittstellenkabel nicht angeschlossen ist, und klicken Sie auf die Schaltfläche “Weiter”.
  • Page 111 Beginnen Sie mit der Installation von Sharpdesk. (Dieser Schritt wird gestartet, wenn er in Schritt 4 ausgewählt wurde.) Bestätigen Sie die Meldung im Fenster „Willkommen to Sharpdesk installation“, und klicken Sie dann auf die Schaltfläche „Weiter“. Lesen Sie die Meldung im Fenster "Informationen", und klicken Sie dann auf die Schaltfläche „Weiter“.
  • Page 112 Installieren unter Windows 95/98/Me/NT4.0/2000 (Parallele Schnittstelle) Vor der Installation vergewissern Sie sich, daß das USB-Kabel oder parallele Schnittstellenkabel nicht am MFP angeschlossen ist. Legen Sie die mitgelieferte CD-ROM in das CD-ROM-Laufwerk ein. Doppelklicken Sie auf „Arbeitsplatz“ ( ), und doppelklicken Sie dann auf das Symbol CD-ROM ( Wenn während der Software-Installation eine Meldung „Neue Hardwarekomponente gefunden“...
  • Page 113 Kopieren der Dateien für die Installation des MFP-Treibers und die Einrichtung der parallelen Schnittstelle (Dieser Schritt wird ausgeführt, wenn er in Schritt 4 ausgewählt wurde.) Bestätigen Sie die Meldung im Fenster „Willkommen“, und klicken Sie dann auf die Schaltfläche „Weiter“. Ein Dialogfeld fordert Sie auf, sicherzustellen, daß...
  • Page 114 Beginnen Sie mit der Installation von Sharpdesk. (Dieser Schritt wird gestartet, wenn er in Schritt 4 ausgewählt wurde.) Bestätigen Sie die Meldung im Fenster „Willkommen to Sharpdesk installation“, und klicken Sie dann auf die Schaltfläche „Weiter“. Lesen Sie die Meldung im Fenster "Informationen", und klicken Sie dann auf die Schaltfläche „Weiter“.
  • Page 115: Anzeigen Auf Dem Bedienfeld

    ANZEIGEN AUF DEM BEDIENFELD Die ON LINE-Anzeige und die Startanzeige ( ) zeigen den Status des Druckers oder Scanners an. SCANNER-Anzeige ONLINE-Anzeige Startanzeige Energiesparanzeige Startanzeige Leuchtet: Zeigt an, daß das Gerät kopierbereit ist oder ein Scanvorgang ausgeführt wird. Blinkt: Die Anzeige blinkt in folgenden Situationen: •...
  • Page 116: Arbeiten Im Druckermodus46

    Öffnen Sie das Dokument, das Sie drucken möchten, und wählen Sie im Menü „Datei“ der Anwendung die Option „Drucken“ aus. Vergewissern Sie sich, daß als aktueller Drucker „SHARP AR- xxxx“ (xxxx steht dabei für den Modellnamen Ihres Geräts) ausgewählt wurde. Wenn Sie eine Druckeinstellung ändern möchten, klicken Sie auf die Schaltfläche „Einstellungen“, um das...
  • Page 117 Geben Sie die Druckeinstellungen an, darunter Kopienanzahl, Medientyp und Druckqualität, und klicken Sie dann auf die Schaltfläche „Drucken“, um den Druckvorgang zu starten. Unter Windows 95/98/Me/NT 4,0 klicken Sie auf die Schaltfläche "OK", um den Druckvorgang zu starten. Einzelheiten zu den Druckeinstellungen können Sie dem Online-Handbuch oder der Hilfedatei für den Druckertreiber entnehmen.
  • Page 118: Arbeiten Im Scannermodus48

    „Systemsteuerung“ aus, und klicken Sie auf „Drucker und andere Hardware“ und dann auf „Scanner und Kamera“. Klicken Sie mit der rechten Maustaste auf das Symbol „SHARP AR-xxxx“ (xxxx steht dabei für den Modellnamen Ihres Geräts), und klicken Sie in dem daraufhin angezeigten Menü...
  • Page 119 Klicken Sie auf „Scanner Ereignisse“, und wählen Sie aus dem Pulldown-Menü die Option „ScanMenü SC2“ aus. Wählen Sie unter „Programm starten“ die Option „Schlatflächenmanager (SHARP Personal MFP-Serie)“ aus, und klicken Sie auf „Übernehmen“. Wiederholen Sie diesen Vorgang für die einzelnen ScanMenus bis hin zu „ScanMenü SC6“.
  • Page 120 Dialogfeld Scan-Parametereinstellugen Nachdem Sie unter Windows alle Einstellungen für Schlatflächenmanager vorgenommen haben, konfigurieren Sie die Scaneinstellungen unter Schlatflächenmanager. Zum Konfigurieren der Scaneinstellungen unter Schlatflächenmanager klicken Sie mit der rechten Maustaste in der Taskleiste auf das Symbol ( ), und wählen Sie im daraufhin angezeigten Menü die Option „Einstellung“...
  • Page 121 Windows Me, Windows 2000 und Windows XP. Windows Platforms liefert einen Mechanismus, mit dem die Software externe Ereignisse für ein Scannergerät wie die Produkte der Serie SHARP AR-xxxx (xxxx steht dabei für den Modellnamen des Geräts) handhaben kann. Dieser Mechanismus wird vom Geräte-Manager auf Gerätebasis gesteuert.
  • Page 122 Starten des Scanvorgangs mit der Taste SCANNER • Während eines Kopierauftrags ist kein Scanvorgang möglich. • Wenn das Gerät einen Scanauftrag starten soll, während gerade ein Druckauftrag ausgeführt wird, wird der Scanauftrag gespeichert und Hinweis beginnt erst nach Beendigung des Druckauftrags. Drücken Sie die Taste SCANNER Das Gerät geht in den Scannerbetrieb.
  • Page 123 Hinweis Anwendung ab. Informationen dazu können Sie dem Handbuch oder der Hilfedatei Ihrer Anwendung entnehmen. Verwenden von SHARP TWAIN Legen Sie das Original, das Sie scannen möchten, auf das Vorlagenglas. Wie Sie Originale richtig einlegen, ist im Abschnitt "EINLEGEN VON ORIGINALEN"...
  • Page 124 Wählen Sie „SHARP Personal MFP- Serie“ aus, und klicken Sie auf die Schaltfläche „Wählen“. Hier klicken WIA-SHARP AR-XXXX (32-32) Falls Sie mehrere Scangeräte einsetzen, wählen Sie über die Anwendung den gewünschten Scanner aus. Wie Sie genau auf die Option „Scanner auswählen“ zugreifen können, hängt von Hinweis der Anwendung ab.
  • Page 125 Sie auf „Drucker und andere SHARP AR-XX Hardware“ und dann auf „Scanner und Kameras“. Klicken Sie auf das Symbol „SHARP AR-xxxx“ (xxxx steht dabei für den Modellnamen Ihres Geräts), und klicken Sie dann unter „Bildverarbeitungsaufgaben,“ auf die Option „Bilder übertragen“.
  • Page 126: Benutzungshinweise Zum Online- Handbuch

    Symbol CD-ROM ( Unter Windows 95/98/Me/NT 4.0/2000 doppelklicken Sie auf „Arbeitsplatz“ ) und dann auf das CD-ROM-Symbol ( Doppelklicken Sie auf den Ordner „Manual“, dann auf den Ordner AR-122E/AR-122EN/AR-152E/AR-152EN „German“ und schließlich auf das Symbol „AR_122E_122EN_152E_152EN.pdf“. Das folgende Fenster wird angezeigt.
  • Page 127 Zum Schließen des Online-Handbuchs klicken Sie auf die Schaltfläche ( oben rechts im Fenster. • Das Online-Handbuch kann mit Hilfe von Acrobat Reader gedruckt werden. SHARP empfiehlt, daß Sie sich häufig benötigte Abschnitte ausdrucken. Hinweis • Weitere Informationen zur Anwendung und zu den Funktionen von Acrobat Reader finden Sie unter „Hilfe“...
  • Page 128: Verwenden Der Anderen Installierten Treiber

    „Details“), wählen Sie „LPT1“ (oder den derzeit verwendeten Port) aus, und klicken Sie dann auf die Schaltfläche "OK". Wenn Sie wieder mit der SHARP Personal MFP-Serie arbeiten möchten, führen Sie den gleichen Vorgang aus. Wählen Sie jedoch in Schritt 4 den Port aus, der verwendet werden soll (z. B. LPT1).
  • Page 129: Anschliessen Des Schnittstellenkabels

    ANSCHLIESSEN DES SCHNITTSTELLENKABELS Dieses Gerät umfaßt USB- und parallele Schnittstellenanschlüsse. Schnittstellenkabel für den Anschluss des Druckers an Ihrem Computer werden nicht mitgeliefert. Kaufen Sie bitte die entsprechenden Kabel separat. Schnittstellenkabel Paralleles Schnittstellenkabel IEEE 1284 – Abgeschirmtes bidirektionales paralleles Schnittstellenkabel (max. 2 m) USB-Schnittstellenkabel Abgeschirmtes Twisted Pair-Kabel für Hochgeschwindigkeitsübertragung (max.
  • Page 130: Anschließen Des Parallelen Schnittstellenkabels

    Anschließen des parallelen Schnittstellenkabels Bereiten Sie ein abgeschirmtes IEEE1284 Parallelschnittstellenkabel vor. Kontrollieren Sie, ob der Computer und das Gerät ausgeschaltet sind. Stecken Sie das Kabel in den parallelen Schnittstellenanschluß auf der Geräterückseite, und befestigen Sie es mit den Klammern. Schließen Sie das andere Ende des Kabels an Ihrem Computer an.
  • Page 131: Anhang

    ANHANG TECHNISCHE DATEN Modell AR-122E AR-122EN AR-152E AR-152EN Digitaler Laserkopierer, Tischgerät Kopiersystem Trockene, elektrostatische Übertragung Originale Blätter, gebundene Dokumente Papierfach 250 Blatt (Papierfach) 1 Blatt (Einzelblatteinzug) Papierausgabefach 100 Blatt Originalformate Max. A4 Originalzuführung 1 Blatt Kopierformat A6 bis A4 * Max.
  • Page 132: Optionale Ausstattung

    Schnittstelle IEEE1284-kompatible bidirektionale parallele Schnittstelle (nur für Drucker) Papier nur längs zuführen. Aufgrund fortlaufender technischer Verbesserungen behält sich SHARP das Recht vor, das Design und die Spezifikationen ohne vorherige Ankündigungen ändern zu können. Die angegebenen Leistungswerte Hinweis stellen die Nennwerte einer in Serienfertigung produzierten Einheit dar.
  • Page 133: Verbrauchsmaterial Und Optionen

    Um Kopien in bester Druckqualität zu erhalten, sollten Sie auss- chließlich Originalverbrauchsmaterialien von SHARP verwenden, die entwickelt, hergestellt und geprüft wurden, um die Lebensdauer und die Leistung von Sharp-Kopierern wesentlich zu steigern. Achten Sie auf das Originaletikett auf der Tonerpackung. Liste der Verbrauchsmaterialien...
  • Page 134 INDEX Acrobat Reader........56 Drucken...........46 Alarmanzeige - Anzeige Auswechseln der Entwicklereinheit erforderlich... 6, 27, 31 Einführung..........4 - Anzeige Auswechseln der Tonerkassette Einlegen des Papiers ........7 erforderlich....... 6, 23, 27 Einlegen in das Papierfach .......8 - Papierstauanzeige....6, 27, 28 Einlegen von Originalen ......14 - Wartungsanzeige.....
  • Page 135 - Fixierbereich ........29 Verriegelungstaste der Seitenabdeckung ..5 - Papiereinzugsbereich ......29 Verwenden der anderen installierten Treiber..58 - Transportbereich ....... 30 Verwenden von SHARP TWAIN .....53 Paralleles Schnittstellenkabel ... 58, 59 Vor der Installation ........33 Photo-Modus........... 15 Vorlagenglas ..........5 Vorwärmphase ........19...
  • Page 136 Einlegen des Originals ......14 Scannen Einlegen des Papiers - Scanner-und Kamera-Assistent..55 - Einzelblatteinzug ....... 10 - Schlatflächenmanager .......52 - Papierfach ..........7 - SHARP TWAIN........53 Einrichten von Schlatflächenmanager ..48 Vergrößern/Verkleinern von Kopien..17 Einschalten ..........12 Verwenden der anderen Einstellen der Kopienqualität installierten Treiber........58 - AUTO..........
  • Page 137: Softwarelizenz

    DIESER LIZENZVEREINBARUNG. 1. Lizenz. SHARP gewährt Ihnen das Recht, die Anwender-, Vorführ- und Systemsoftware sowie alle anderen, mit dieser Lizenz mitgelieferten Softwaredaten, die auf Diskette, CD-ROM oder einem anderen Medium enthalten sind, (als die “Software” bezeichnet) einschließlich der begleitenden Dokumentation zu benutzen. Sie sind der Eigentümer des Datenträgers, auf dem diese Software aufgezeichnet ist, doch verbleibt der Rechtstitel für die Software und die...
  • Page 138 TREFFEN DIE OBIGEN BESCHRÄNKUNGEN BZW. AUSSCHLÜSSE UNTER UMSTÄNDEN AUF SIE NICHT ZU. Auf keinen Fall kann der von SHARP zu leistende Ersatz für Schäden, Verluste und Klagegründe [weder im Rahmen eines Vertrags, noch bei einer unerlaubten Handlung (einschließlich Fahrlässigkeit) oder resultierend aus anderen Ursachen] den Betrag übersteigen, den Sie für die Software bezahlt haben.
  • Page 139: Précautions D'utilisation

    PRÉCAUTIONS Précautions d'utilisation Veuillez respecter les précautions d'utilisation de l'appareil décrites ci-après. Avertissement : • L'unité de fixation est chaude. Faites attention lorsque vous extrayez un bourrage papier. • Ne regardez pas directement la source lumineuse. Cela pourrait endommager vos yeux.
  • Page 140: Précautions De Manipulation

    • Adobe et Acrobat sont des marques de Adobe Systems Incorporated. • Tous les autres marques et copyrights appartiennent à leur propriétaire respectif. ® As an ENERGY STAR Partner, SHARP has determined that ® this product meets the ENERGY STAR guidelines for energy efficiency.
  • Page 141 CHARGEMENT DU MAGASIN PAPIER.......... 8 ÉQUIPEMENT OPTIONNEL (AL-12PKM) PLATEAU D'ALIMENTATION AUXILIAIRE LOGICIEL POUR LA SÉRIE MFP (papiers spéciaux) ....... 10 PERSONNEL SHARP ....32 CONFIGURATION MATÉRIELLE REPRODUCTION ET LOGICIELLE REQUISE ..33 AVANT L'INSTALLATION....33 PROCESSUS DE REPRODUCTION11 INSTALLATION DU LOGICIEL..35 CONNEXION DU TÉMOINS SUR LE TABLEAU DE...
  • Page 142: Introduction

    INTRODUCTION Dans ce chapitre, vous trouverez des informations générales sur l'utilisation de l'appareil. UTILISATION DU MANUEL Le Mode d'emploi explique le fonctionnement de l'appareil et les procédures de maintenance. Il contient également des remarques importantes. Pour profiter des performances de l'appareil, il est important de le lire. Gardez-le dans un endroit vous permettant de vous y référer facilement si nécessaire.
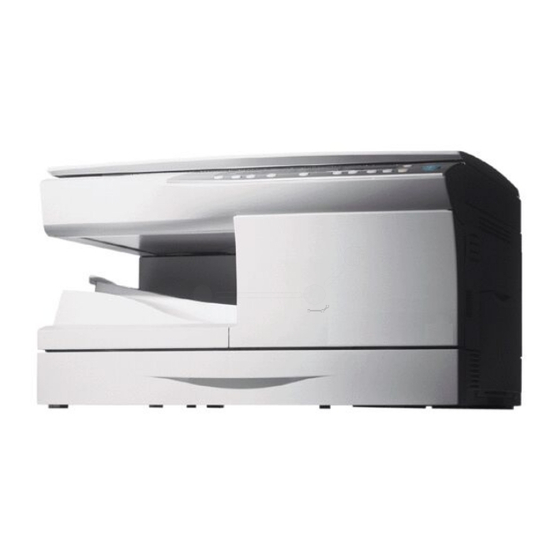
  • Page 143: Nom Des Divers Éléments

    NOMS DES DIVERS ÉLÉMENTS Plateau d'alimentation auxiliaire simple Tambour photoconducteur Cartouche de toner Extension du plateau de sortie du Vitre d'exposition papier Tableau de commandes Interrupteur d'alimentation Couvercle frontal Poignée Magasin papier Fiche du cordon d'alimentation Couvercle latéral Levier de libération de l'unité de Bouton d'ouverture du couvercle fixation latéral...
  • Page 144: Tableau De Commandes

    TABLEAU DE COMMANDES Témoin d'économie d'énergie Touche de sélection et témoins du S'allume quand l'appareil est en mode mode d'exposition d'économie d'énergie. (p.18, p.19) Utilisez cette touche pour sélectionner le mode Témoins du plateau d'alimentation d'exposition : AUTO, MANUEL ou PHOTO. Le papier témoin du mode d'exposition sélectionné...
  • Page 145: Chargement Du Papier

    CHARGEMENT DU PAPIER Suivez la procédure décrite ci-après pour charger le papier dans le magasin. PAPIER Pour des résultats optimaux, utilisez des papiers recommandés par SHARP. Type d'alimentation Type de média Format Grammage papier Magasin Papier standard 56g/m à papier...
  • Page 146: Chargement Du Magasin Papier

    CHARGEMENT DU MAGASIN PAPIER Soulevez la poignée du magasin papier et tirez ce dernier jusqu'à ce qu'il s'arrête. Ajustez les guides-papier du magasin à la largeur et à la longueur du papier. Égalisez le niveau du guide-papier faites-le glisser afin qu’il s'ajuste à la largeur du papier. Déplacez le guide-papier jusqu’à...
  • Page 147 Poussez délicatement le magasin dans l'appareil. • Pour effacer le clignotant après le chargement du papier sans effectuer de copie, appuyez sur la touche d'annulation ( ). Le disparaît de l'écran et le témoin Démarrage ( ) s'allume. Remarque • Vérifiez que le papier n'est pas déchiré, taché, plié, ni corné. •...
  • Page 148: Plateau D'alimentation Auxiliaire (Papiers Spéciaux)

    PLATEAU D'ALIMENTATION AUXILIAIRE (papiers spéciaux) Vous pouvez utiliser le plateau d'alimentation auxiliaire simple pour charger le papier standard, les transparents, les étiquettes, les enveloppes et autres papiers spéciaux. Il accepte les formats de A6 à A4 et les grammages de 52g/m à...
  • Page 149: Reproduction

    REPRODUCTION Ce chapitre explique les fonctions de base et les autres fonctions de copie. L'appareil est équipé d'une mémoire tampon d'une page. Cette mémoire permet à l'appareil de réaliser jusqu'à 99 copies d'un document numérisé une seule fois. Cette fonction améliore la gestion des flux de documents, réduit les émissions sonores du copieur et renforce la fiabilité...
  • Page 150: Connexion Du Cordon D'alimentation

    N'insérez pas de papier dans le plateau d'alimentation auxiliaire simple quand un travail de reproduction est en cours dans le magasin papier. Vous risqueriez de provoquer un blocage de papier. Attention CONNEXION DU CORDON D'ALIMENTATION Si vous utilisez l'appareil dans un autre pays que celui où vous l'avez acheté, vous devez vous assurer que l'alimentation électrique locale est compatible avec votre modèle.
  • Page 151: Modes De Mise Hors Tension

    Tête du scanner La lampe de la tête du scanner reste allumée tant que l'appareil est prêt à fonctionner (témoin Démarrage ( ) allumé). L'appareil procède au réglage de la lampe de la tête du scanner à intervalles réguliers pour maintenir la qualité de la reproduction. La tête du scanner se déplace alors automatiquement.
  • Page 152: Mise En Place Des Documents

    MISE EN PLACE DES DOCUMENTS • La vitre d'exposition peut accueillir des originaux de format allant jusqu'à A4. • Une bande technique de 4mm peut affecter les bords avant et arrière Remarque des copies. De même, une bande technique de 4,5mm (11/64") au total peut affecter les autres bords des copies.
  • Page 153: Configuration Du Nombre De Copies

    CONFIGURATION DU NOMBRE DE COPIES En cas de reproduction à partir de la vitre d'exposition, servez-vous des deux touches d'indication du nombre de copies ( ) pour définir le nombre de copies de votre choix. • Pour effacer une entrée saisie par erreur, appuyez sur la touche d'annulation ( •...
  • Page 154: Réglage Automatique De L'exposition

    Réglage automatique de l'exposition Le niveau d'exposition automatique reste actif jusqu'à ce que vous le modifiiez en appliquant cette procédure. Remarque Le niveau d’exposition automatique peut être réglé en fonction de vos besoins de reproduction. Il est défini pour les travaux de reproduction effectués depuis la vitre d'exposition.
  • Page 155: Réduction/Agrandissement/Zoom

    RÉDUCTION/AGRANDISSEMENT/ZOOM Trois taux de réduction préréglés et deux taux d'agrandissement préréglés sont mis à votre disposition. La fonction de zoom vous permet de sélectionner un taux de reproduction situé entre 25% et 400% par pas de 1%. Placez l'original et vérifiez le format de papier. Servez-vous de la touche de sélection du taux de reproduction et/ou de la touche de ZOOM ( ) pour sélectionner le taux...
  • Page 156: Fonctions Particulières

    FONCTIONS PARTICULIÈRES Ce chapitre décrit les fonctions particulières de l'appareil, que vous pourrez utiliser en cas de besoin. DESCRIPTION DES FONCTIONS PARTICULIÈRES Mode d'économie de toner (page 18) Réduit la consommation de toner de 10% environ. Modes d'économie d'énergie (page 19) Cet appareil est doté...
  • Page 157: Programmes Utilisateur

    Maintenez la touche de sélection du mode d'exposition enfoncée pendant 5 secondes environ. Le témoin MANUEL ( s'éteint, tandis que le témoin PHOTO ( commence à clignoter. Le témoin Clair et Foncé marqué "5" s’allume pour indiquer que vous vous trouvez dans le mode d’alimentation en toner standard.
  • Page 158: Affichage Du Nombre Total De Copies

    Programme Mode Paramètres N° Temps de DÉSACTIVÉ, 1 10 sec., 2 30 sec. réinitialisation 60sec., 4 90sec., 5 120sec. automatique Mode d'économie 30 sec., 1 60 sec., 2 90 sec. d'énergie Temps de coupure 2 min., *1 5 min., 2 15 min., automatique du 30 min., 4...
  • Page 159: Entretien

    ENTRETIEN Ce chapitre explique comment remplacer la cartouche de toner et nettoyer l'appareil. Veillez à n'utiliser que des pièces et fournitures SHARP d'origine Remarque Pour des résultats de copie optimaux, veillez à n'utiliser que des fournitures SHARP d'origine. Celles-ci sont conçues, développées et testées pour maximiser la durée de vie et la performance des...
  • Page 160 Retirez délicatement la Bouton de déverrouillage cartouche de toner en enfonçant le bouton de déverrouillage. • Après avoir retiré la cartouche de toner, il ne faut ni la secouer, ni la frapper. Dans le contraire, du toner pourrait s'échapper de la cartouche.
  • Page 161: Duree De Vie De La Cartouche De Toner

    Fermez le couvercle frontal, puis le couvercle latéral en appuyant sur les zones arrondies situées à côté du bouton d'ouverture du couvercle latéral. Le témoin s’éteint et le témoin Démarrage ( ) s'allume. Lors de la fermeture des couvercles, veillez à refermer correctement le Attention couvercle frontal, puis le...
  • Page 162: Nettoyage De L'appareil

    NETTOYAGE DE L'APPAREIL Un entretien adéquat est essentiel pour obtenir des copies claires et nettes. Consacrez régulièrement quelques minutes au nettoyage de l'appareil. • Avant de nettoyer l'appareil, veillez à placer l’interrupteur d’alimentation en position d’arrêt et à débrancher le cordon d’alimentation de la prise de courant Avertissement •...
  • Page 163: Chargeur De Transfert

    Chargeur de transfert Si des rayures ou des taches apparaissent sur les copies, il est possible que le chargeur de transfert soit sale. Nettoyez cet élément en suivant la procédure décrite ci-après. Mettez l'appareil hors tension. (p.13) Ouvrez le couvercle latéral en appuyant sur son bouton d'ouverture.
  • Page 164: Guide De Dépannage De L'appareil

    GUIDE DE DÉPANNAGE DE L'APPAREIL Dans ce chapitre, vous trouverez des informations sur l'extraction du papier bloqué et sur le dépannage de l'appareil. ASSISTANCE En cas de problème, consultez la liste de vérifications suivante avant de contacter votre service d'assistance agréé. Problème Cause possible Solution...
  • Page 165: Témoins D'état

    Quand les témoins suivants s'allument ou clignotent sur le tableau de commandes, ou quand les codes alphanumériques suivants s'affichent sur l'écran, résolvez le problème immédiatement en vous référant au tableau suivant et à la page correspondante. Veillez à n'utiliser que des pièces et fournitures SHARP d'origine Remarque Indication Cause et solution Page Témoin de...
  • Page 166: Blocage De Papier - Extraction

    BLOCAGE DE PAPIER - EXTRACTION Quand le témoin de blocage de papier ( ) clignote ou clignote à l'écran, l'appareil s'arrête de fonctionner en raison d'un blocage de papier. Ouvrez le couvercle latéral. Pour savoir comment ouvrir le couvercle latéral, reportez-vous à la section ."REMPLACEMENT DE LA CARTOUCHE DE TONER"...
  • Page 167: A: Blocage De Papier Dans La Zone D'alimentation Du Papier

    A: Blocage de papier dans la zone d'alimentation du papier Dégagez délicatement le papier bloqué de la zone d'alimentation du papier comme indiqué sur l'illustration. Si le témoin de blocage de papier ( ) clignote et que vous ne pouvez pas voir le papier bloqué depuis la zone d'alimentation, tirez le magasin papier et retirez le papier bloqué.
  • Page 168 Dégagez délicatement le papier bloqué en passant par-dessous l'unité de fixation comme indiqué sur l'illustration. Si vous ne parvenez pas à le dégager, reportez-vous à la section "C: Blocage de papier dans la zone de transport". L'unité de fixation est chaude. Ne la touchez pas lorsque vous extrayez une feuille Avertissement...
  • Page 169: Remplacement Du Développeur

    EFFECTUÉ UNIQUEMENT PAR UN TECHNICIEN SHARP AGRÉÉ. Contactez votre service d'assistance dès que possible. MAINTENANCE Quand le témoin de maintenance ( ) s'allume, un technicien de maintenance SHARP agréé doit procéder à l'entretien de l'appareil. Contactez votre service d'assistance dès que possible.
  • Page 170: Équipement Optionnel (Al-12Pkm)

    Le terme suivant est employé dans ce chapitre. CD-ROM Désigne le CD-ROM sur lequel est enregistré le logiciel Série MFP Personnel SHARP. LOGICIEL POUR LA SÉRIE MFP PERSONNEL SHARP Le logiciel fourni contient le logiciel requis pour le fonctionnement de l'appareil. Pilote MFP Pilote de scanner Vous permet d'utiliser la fonction scanner de l'appareil dans les applications compatibles TWAIN et WIA.
  • Page 171: Configuration Matérielle Et Logicielle Requise

    CONFIGURATION LOGICIELLE ET MATÉRIELLE REQUISE Vérifiez la configuration logicielle et matérielle requise présentée ci-dessous avant d'installer le logiciel. Type d'ordinateur Ordinateur IBM PC/AT ou compatible équipé d'une interface USB1.1* ou parallèle bi-directionnelle (IEEE 1284) Système Windows 95, Windows 98, Windows Me, Station de travail d'exploitation* Windows NT 4,0 (ServicePack 5 ou supérieur)* , Windows...
  • Page 172: Installation - Vue D'ensemble

    Installation - Vue d'ensemble Consultez le tableau suivant avant de commencer l'installation. Fonctionnement Interface Pages de référence pour l'installation Système USB/ Installation sous Windows XP (USB/interface parallèle) Windows XP Interface (p.35) parallèle Installation sous 98/Me/2000 (interface USB) (p.39) Windows 98 Interface Installation sous Windows 95/98/Me/NT4.0/2000 parallèle...
  • Page 173: Installation Du Logiciel

    INSTALLATION DU LOGICIEL Les termes suivants sont employés dans cette section. Désigne l'appareil en tant qu'imprimante et scanner. • Pour cette procédure, les fonctions du bouton droit de la souris doivent être activées. • Pour imprimer ou numériser, le MFP doit être en mode en ligne. Remarque •...
  • Page 174 • Si vous utilisez la connexion d'interface parallèle, ne cochez pas la case Gestionnaire de destinations. Cette option n'est en effet pas prise en charge par l'interface parallèle. Remarque • Si la fenêtre suivante s'affiche, cliquez sur le bouton "OK". Vérifiez le contenu de "AVANT L'INSTALLATION"...
  • Page 175 Installation du Gestionnaire de destinations (cette étape est exécutée si l'option correspondante a été sélectionnée à l'étape 4). Cliquez sur le bouton "Suivant" après avoir confirmé le message de la fenêtre "Bienvenue". Lisez le texte affiché dans la fenêtre "Veuillez lire les informations suivantes.", puis cliquez sur le bouton "Suivant".
  • Page 176 Windows XP, passez à l'étape 12. Installation du pilote de scanner L'entrée SHARP AR-xxxx (où xxxx représente le modèle de votre appareil) s'affiche dans la boîte de dialogue "Nouveau matériel trouvé". Activez l'option "Installation automatique du logiciel (recommandé)"...
  • Page 177 Installation sous Windows 98/Me/2000 (interface USB) Avant de commencer l'installation, vérifiez que le câble d'interface USB n'est pas connecté au MFP. Insérez le CD-ROM fourni dans votre lecteur de CD-ROM. Double-cliquez sur "Poste de travail" ( ), puis sur l'icône du lecteur de CD-ROM ( Si un message du type "Matériel trouvé"...
  • Page 178 Copie des fichiers d'installation du pilote MFP Cliquez sur le bouton "Suivant" après avoir confirmé le message de la fenêtre "Bienvenue". La fenêtre suivante vous demande de vérifier si le câble d'interface n'est pas connecté au MFP. Vérifiez, puis cliquez sur le bouton "Suivant".
  • Page 179 Installation de Sharpdesk (cette étape est exécutée si l'option correspondante a été sélectionnée à l'étape 4). Cliquez sur le bouton "Suivant" après avoir confirmé le message de la fenêtre "Bienvenue à l’installation de Sharpdesk". Lisez le texte affiché dans la fenêtre "Informations", puis cliquez sur le bouton "Suivant".
  • Page 180 Installation sous 95/98/Me/NT4.0/2000 (interface parallèle) Avant de commencer l'installation, vérifiez que le câble d'interface USB ou parallèle n'est pas connecté au MFP. Insérez le CD-ROM fourni dans votre lecteur de CD-ROM. Double-cliquez sur "Poste de travail" ( ), puis sur l'icône du lecteur de CD-ROM ( Si un message du type "Matériel trouvé"...
  • Page 181 Copie des fichiers d'installation du pilote MFP et de l'interface parallèle (cette étape est exécutée si l'option correspondante a été sélectionnée à l'étape 4). Cliquez sur le bouton "Suivant" après avoir confirmé le message de la fenêtre "Bienvenue". La boîte de dialogue suivante vous demande de vérifier si le câble d'interface n'est pas connecté...
  • Page 182 Installation de Sharpdesk (cette étape est exécutée si l'option correspondante a été sélectionnée à l'étape 4). Cliquez sur le bouton "Suivant" après avoir confirmé le message de la fenêtre "Bienvenue à l’installation de Sharpdesk". Lisez le texte affiché dans la fenêtre "Informations", puis cliquez sur le bouton "Suivant".
  • Page 183: Témoins Sur Le Tableau De Commandes

    TÉMOINS DU TABLEAU DE COMMANDES Les témoins ONLINE et Démarrage ( ) vous informent sur l'état de l'imprimante ou du scanner. Témoin SCANNER Témoin ON LINE Témoin Démarrage Témoin d'économie d'énergie Témoin Démarrage Allumé : Indique que l'appareil est prêt à copier ou qu'un travail de numérisation est en cours.
  • Page 184: Utilisation Du Mode Imprimante

    "Imprimantes et télécopieurs". Sous Windows 95/98/Me/NT4.0/2000, sélectionnez la commande "Paramètres" et cliquez sur "Imprimantes". Cliquez sur l'icône du pilote d'imprimante "SHARP AR-xxxx" (où xxxx représente le modèle de votre appareil) et sélectionnez la commande "Propriétés" du menu "Fichier".
  • Page 185 Définissez les paramètres d'impression, notamment le nombre de copies, le type de média et la qualité d'impression, puis cliquez sur le bouton "Imprimer" pour lancer l'impression. Sous Windows 95/98/Me/NT 4,0, cliquez sur le bouton "OK" pour lancer l'impression. Pour de plus amples informations sur les paramètres d'impression, reportez-vous au manuel en ligne ou au fichier d'aide du pilote d'imprimante.
  • Page 186: Utilisation Du Mode Scanner

    "Panneau de configuration/Imprimantes et autre matériel", puis cliquez sur "Scanners et appareils photo" . Cliquez avec le bouton droit de la souris sur l'icône "SHARP AR-xxxx" (où xxxx représente le modèle de votre appareil) et sélectionnez la commande "Propriétés" dans le menu contextuel.
  • Page 187 Cliquez sur le bouton "Sélectionner un événement" et sélectionnez l'entrée "ScanMenu SC2" dans le menu déroulant. Sélectionnez ensuite "Gestionnaire de destinations (Série MFP Personnel SHARP" dans la liste "Démarrer" et cliquez sur "Appliquer". Répétez la procédure pour définir chaque ScanMenu, jusqu'à "ScanMenu SC6".
  • Page 188 Boîte de dialogue de configuration des paramètres de numérisation Après avoir configuré le Gestionnaire de destinations sous Windows, définissez les paramètres de numérisation dans le Gestionnaire de destinations. Pour ce faire, cliquez avec le bouton droit de la souris sur l'icône ( ), située dans la barre des tâches, et sélectionnez la commande "Configuration"...
  • Page 189 Les plate-formes Windows offrent aux logiciels un mécanisme leur permettant de prendre en charge les événements extérieurs pour un périphérique de numérisation tel que les modèles SHARP AR-xxxx (où xxxx représente le modèle de votre appareil). Ce mécanisme est contrôlé par le Gestionnaire de périphériques. Les applications prenant en charge les événements émanant d'un scanner/appareil...
  • Page 190 Utilisation de la touche SCANNER pour lancer la numérisation • Il n'est pas possible d'effectuer une numérisation pendant un travail de reproduction. • Si vous utilisez l'appareil pour lancer un travail de numérisation alors Remarque qu'une impression est en cours, le travail de numérisation est enregistré et exécuté...
  • Page 191 • La procédure d'ouverture du pilote de scanner varie selon le type Remarque d'application. Reportez-vous au manuel ou au fichier d'aide de votre application. Utilisation de SHARP TWAIN Placez le document que vous voulez numériser sur la vitre d'exposition. Pour savoir comment mettre le document en place, reportez-vous à la section "MISE EN PLACE DES DOCUMENTS"...
  • Page 192 Sélectionnez "Série MFP Personnel SHARP", puis cliquez sur le bouton Cliquez ici "Sélectionner". WIA-SHARP AR-XXXX X.X (32-32) Si plusieurs périphériques de numérisation sont installés sur votre ordinateur, sélectionnez le scanner que vous voulez utiliser. L'accès à l'option de sélection du scanner varie selon Remarque l'application.
  • Page 193 "Panneau de configuration/Imprimantes et autre matériel", puis cliquez sur "Scanners et appareils photo" . Cliquez sur l'icône "SHARP AR-xxxx" (où xxxx représente le modèle de votre appareil), puis sur "Obtenir les photos" à la rubrique "Acquisition d’images".
  • Page 194: Utilisation Du Manuel En Ligne

    CD-ROM ( Sous Windows 95/98/Me/NT 4.0/2000, double-cliquez sur "Poste de travail" ), puis sur l'icône du lecteur de CD-ROM ( Double-cliquez sur les dossiers "Manual" et "French", puis sur l'icône "AR_122E_122EN_152E_152EN.pdf". AR-122E/AR-122EN/AR-152E/AR-152EN La fenêtre suivante s'affiche. Manuel en ligne Démarrage...
  • Page 195: Installation De Acrobat Reader

    ), situé dans le coin supérieur droit de la fenêtre. • Vous pouvez imprimer le manuel en ligne dans Acrobat Reader. SHARP vous recommande d'imprimer les sections que vous consultez régulièrement. Remarque • Pour de plus amples informations sur le fonctionnement et les fonctions de Acrobat Reader, consultez l'aide du programme.
  • Page 196: Utilisation Des Autres Pilotes Installés

    "Détails" sous Windows 95/98/Me), sélectionnez l'entrée "LPT1" (ou le port en cours) et cliquez sur le bouton "OK". Pour utiliser de nouveau le modèle Série MFP Personnel SHARP, répétez la procédure, mais sélectionnez le port (par exemple, LPT1) à l'étape 4.
  • Page 197: Connexion Du Câble D'interface

    CONNEXION DU CÂBLE D'INTERFACE L'appareil est équipé de connecteurs d'interface USB et parallèle. Les câbles d'interface pour le raccordement de l'appareil à un ordinateur ne sont pas fournis avec cet appareil. Se munir par ailleurs des câbles nécessaires pour l'ordinateur. Câble d'interface Câble d'interface parallèle Câble d'interface parallèle bi-directionnel blindé...
  • Page 198: Connexion Du Câble D'interface Parallèle

    Connexion du câble d'interface parallèle Préparez un câble d'interface parallèle blindé IEEE1284. Vérifier que l'ordinateur et l'appareil sont hors tension. Branchez le câble sur le connecteur d'interface parallèle, situé à l'arrière de l'appareil, et fixez-le avec des agrafes. Insérez l'autre extrémité du câble dans le connecteur d'interface de votre ordinateur.
  • Page 199: Annexes

    ANNEXES SPÉCIFICATIONS Modèle AR-122E AR-122EN AR-152E AR-152EN Type Copieur laser numérique de bureau Système de copie Transfert électrostatique à sec Originaux Feuilles, documents reliés 250 feuilles (magasin papier) 1 feuille (Plateau d'alimentation Magasin papier auxiliaire simple) Plateau de sortie du papier...
  • Page 200: Équipement Optionnel

    (uniquement pour l'imprimante) Introduisez le papier dans le sens de la longueur uniquement. Dans le droit fil de notre philosophie d'amélioration permanente, SHARP se réserve le droit de modifier sans préavis la conception et les caractéristiques pour amélioration. Les chiffres de performances Remarque indiqués sont des valeurs nominales d'unités de production.
  • Page 201: Fournitures Et Options

    FOURNITURES ET OPTIONS Lors de vos commandes de fournitures, veuillez utiliser les numéros de référence corrects indiqués ci-dessous. Veillez à n'utiliser que des pièces et fournitures SHARP d'origine Attention Pour des résultats de copie optimaux, veillez à n'utiliser que des fournitures SHARP d'origine.
  • Page 202: Index

    ........5, 29 Chargement du magasin papier ..8 Logiciel pour la série MFP Personnel Chargement du papier......7 SHARP ..........32 Chargeur de transfert ....5, 25 Configuration matérielle et logicielle requise..........33 Magasin papier........ 5, 8 Connexion du câble d'interface...
  • Page 203 Utilisation du manuel en ligne ... 56 Spécifications ........61 Utilisation du mode imprimante ..46 Utilisation du mode scanner ....48 Utilisation du pilote SHARP TWAIN .. 53 Tableau de commandes ...... 5 Témoin Clair et Foncé ....6, 15 Vitre d'exposition ......... 5 Témoin d'alarme...
  • Page 204 - Button Manager......52 Configuration du mode d'économie de - Scanner and Camera Wizard ..55 toner ..........18 - SHARP TWAIN ......53 Configuration du nombre de copies .. 15 Ouverture du pilote d'imprimante ..46 Configuration du programme Remplacement de la utilisateur ...........
  • Page 205: Licence D'utilisation Du Logiciel

    4. Respect de la loi sur l'exportation. Vous vous engagez à ce que le Logiciel et toute autre donnée technique reçue de SHARP, ainsi que les produits en découlant directement, ne soient pas exportés hors des Etats-Unis à moins que la législation et la réglementation des Etats-Unis ne l’autorisent.
  • Page 206 Logiciel et sa documentation sont fournis “TELS QUELS” et sans garantie d’aucune sorte, et SHARP et le ou les concédants de licence de SHARP (pour les clauses 7 et 8, SHARP et le ou les concédants de Licence de SHARP seront collectivement désignés par “SHARP”) DENIENT EXPRESSEMENT TOUTE GARANTIE, EXPRESSE OU IMPLICITE, Y COMPRIS, SANS LIMITATION, LES GARANTIES IMPLICITES DE QUALITE LOYALE ET MARCHANDE ET D’ADAPTATION A UN...
  • Page 207 WAARSCHUWINGEN Attentie bij het gebruik Volg de attenties op bij de toepassing van dit apparaat. Waarschuwing: • Het gebied van de heater is heet. Wees voorzichtig in dit gebied bij het verwijderen van vastgelopen papier. • Kijk niet direct in een lichtbron. Anders kunt u uw ogen beschadigen. •...
  • Page 208: Informatie Over Handelsmerken

    • Adobe en Acrobat zijn handelsmerken van Adobe Systems Incorporated. • Alle andere handelsmerken en copyrights zijn het eigendom van de respectievelijke eigenaars. ® As an ENERGY STAR Partner, SHARP has determined that ® this product meets the ENERGY STAR guidelines for energy efficiency.
  • Page 209 ONTWIKKELAAR VEREIST ..31 BEDIENINGSPANEEL ....6 ONDERHOUD VEREIST .....31 HET LADNE VAN KOPIEERPAPIER OPTIONELE ACCESSOIRES (AL-12PKM) PAPIER.......... 7 SOFTWARE VOOR DE SHARP HET LADEN VAN DE PAPIERLADE 8 PERSONAL MFP SERIE .....32 HANDINVOER (inclusief speciaal HARDWARE EN SOFTWARE papier).......... 10 EISEN ..........33...
  • Page 210: Introductie

    INTRODUCTIE Dit hoofdstuk bevat basisinformatie voor de toepassing van het apparaat. HET GEBRUIK VAN DE HANDBOEKEN De gebruiksaanwijzing bevat toelichtingen over de bediening van het apparaat, belangrijke overwegingen en onderhoudsprocedures. Om het apparaat optimaal te kunnen gebruiken, dient u de gebruiksaanwijzing zorgvuldig door te lezen. Bewaar de gebruiksaanwijzingen op een geschikte plaats binnen handbereik om deze te allen tijde te kunnen raadplegen.
  • Page 211: Namen Van De Onderdelen

    NAMEN VAN DE ONDERDELEN Handinvoer voor afzonderlijke bladen Fotogeleidende drum Tonerpatroon Aan-/uitschakelaar Glasplaat Handgreep Bedieningspaneel Netsnoer contactdoos Frontdeksel Ontgrendelingshefboom heater- Papierlade eenheid Zijklep Corona-eenheid Opentoets voor zijklep Reiniger voor corona-bedrading Handinvoer papiergeleiders Papier uitvoerlade Verlengstuk papier uitvoerlade...
  • Page 212: Bedieningspaneel

    BEDIENINGSPANEEL ONLINE toets en indicatie (p.45) Belichtingsmodus selectietoets en - Kan worden gebruikt wanneer de Printer/ indicaties Scanner expansiekit (AL-12PKM) Wordt gebruikt om achtereenvolgens de volgende geïnstalleerd is. belichtingsmodi te selecteren: AUTO, MANUEEL Stroomspaarstand indicatie of FOTO. De geselecteerde modus wordt door (p.15) een brandende indicatie aangeduid.
  • Page 213: Het Ladne Van Kopieerpapier

    HET LADNE VAN KOPIEERPAPIER Volg de onderstaande stappen op om papier te laden. PAPIER Voor de beste resultaten alleen SHARP papier gebruiken. Soort Soort papier Formaat Gewicht papiertoevoer Papierlade Standaardpapier 56g/m 80g/m Brief Zakenbrief Rekening Handinvoer Standaard papier en 52g/m...
  • Page 214: Het Laden Van De Papierlade

    HET LADEN VAN DE PAPIERLADE Til het handvat van de papierlade omhoog en trek de papierlade zo ver mogelijk naar buiten. Stel de papiergeleiders van de papierlade in op de breedte en lengte van het kopieerpapier. Knijp de hefboom van de papiergeleider in en pas de geleider aan de breedte van het papier aan.
  • Page 215 Schuif de papierlade weer voorzichtig in het apparaat. • Na het laden van het papier kunt u de knipperende annuleren zonder het kopiëren opnieuw te starten, druk op de wis ( ) toets. De in het display gaat uit en de bedrijfsklaar ( ) indicatie gaat Opmerking branden.
  • Page 216: Handinvoer (Inclusief Speciaal Papier)

    HANDINVOER (inclusief speciaal papier) De handinvoer voor afzonderlijke bladen kan worden gebruikt voor het invoeren van standaardpapier, transparante folie, etiketten, enveloppen en ander speciaal papier. Papier met een formaat van A6 tot A4 en met een gewicht tussen 52g/m tot 128g/ kan in deze lade worden gebruikt.
  • Page 217: Het Maken Van Kopieen

    HET MAKEN VAN KOPIEEN Dit hoofdstuk beschrijft de basisfuncties en andere kopieerfuncties Het apparaat is uitgerust met een geheugen voor 1 pagina. Door dit geheugen is het mogelijk een origineel 1 x te scannen en tot 99kopieën te maken. Deze eigenschap verbetert de werkstroom, reduceert het geluid van de kopieermachine en zorgt voor meer betrouwbaarheid door de slijtage van het scanmechanisme te reduceren.
  • Page 218: Aansluiten Van Het Netsnoer12

    Voer geen papier in de handinvoer voorafzonderlijke bladen wanneer er een kopieerbewerking vanuit de papierlade wordt uitgevoerd. Hierdoor kunnen papierstoringen ontstaan. Attentie AANSLUITEN VAN HET NETSNOER Wanneer u het apparaat in een ander land gebruikt als waar hij werd gekocht, dient u te controleren of de plaatselijke netspanning overeenkomt met uw model.
  • Page 219 De scankop De scankop lamp blijft constant aan wanneer het apparaat in de bedrijfsklare positie staat (wanneer de bedrijfsklaar indicatie verlicht is). Het apparaat stelt de scankop lamp af en toe in om de kopieerkwaliteit te behouden. Op dat moment beweegt de scankop automatisch. Dit is normaal en betekent geen storing van het apparaat.
  • Page 220: Originelen

    HET PLAATSEN VAN DE ORIGINELEN • De glasplaat kan originelen tot een grootte van A4 lezen. • Er kan beeldverlies van 4 mm optreden aan de boven- en onderzijde van de kopieën. Er kan ook een beeldverlies van 4,5 mm in totaal Opmerking optreden aan de andere randen van de kopieën.
  • Page 221: Instellen Van De Kopieerhoeveelheid

    INSTELLEN VAN DE KOPIEERHOEVEELHEID Stel het aantal kopieën in m.b.v. de twee kopieerhoeveelheid ( ) toetsen wanneer u van de glasplaat kopieert. • Druk op de wis ( ) toets om een fouteve invoer te wissen. • Er kan een afzonderlijke kopie worden gemaakt met de oorspronkelijke instelling, bijv.
  • Page 222 Automatische belichtingsafstelling Dit automatische belichtingsniveau blijft effectief tot u het opnieuw door middel van deze procedure wijzigt. Opmerking Het automatische belichtingsniveau kan worden aangepast aan uw persoonlijke kopieerwensen. Dit niveau wordt ingesteld om van de glasplaat te kopiëren. Druk op de belichtingsfunctie selectietoets om de FOTO ( ) modus te selecteren.
  • Page 223: Verkleinen/Vergroten/Zoom

    VERKLEINEN/VERGROTEN/ZOOM Er kunnen drie vooraf ingestelde verkleiningspecentages en twee vergrotingspercentages worden ingesteld. De zoomfunctie maakt de selectie van het kopieerpercentage in stappen van 1% tussen 25% en 400% mogelijk. Plaats het origineel en controleer het formaat van het kopieerpapier. Gebruik de kopieerpercentage selectietoets en/of ZOOM ( ) toetsen om het gewenste kopieerpercentage te selecteren.
  • Page 224: Speciale Functies

    SPECIALE FUNCTIES In dit hoofdstuk worden de speciale functies van het apparaat beschreven. Gebruik deze functies indien u wilt. BESCHRIJVING VAN DE SPECIALE FUNCTIES Toner-spaar-functie (pagina 18) Reduceert het tonerverbruik met ca. 10% Stroomspaarfuncties (pagina 19) Het apparaat heeft twee stroomspaarfuncties: voorverwarm-functie en automatische stroom-uitschakel-functie.
  • Page 225: Gebruikersprogramma's

    Houd de belichtingsfunctie selectietoets ongeveer 5 seconden lang ingedrukt.. De HANDMATIGE ( ) indicatie gat uit en de FOTO ( indicatie begint te knipperen. De licht- en donkerindicatie met de markering "5" zal gaan branden, om aan te geven dat de standaard tonerfuntie actief is.
  • Page 226: Weergeven Van Totaal Aantal Kopieen

    Programma Modus Parameters Automatische UIT, 1 10sec., 2 30sec. wistijd 60sec., 4 90sec., 5 120sec. Voorverwarm 30sec., 1 60sec., 2 90sec. functie Automatische stroom- 2min., *1 5min., 2 15min., uitschakelstand 3 4 30min. 4 60 min. 5 120min. timer Automatische stroom- UIT, *1 uitschakelstand...
  • Page 227: Onderhoud

    Gebruik alleen originele SHARP onderdelen en voorraden. Opmerking Voor de beste resultaten alleen originele SHARP producten gebruiken die werden getest, ontworpen en geconstrueerd om de levensduur en het prestatievermogen van SHARP kopieerapparaten te optimaliseren. Let op het “Genuine supplies” etiket op de verpakking van de toner.
  • Page 228 Trek de tonerpatroon er Vergrendelings-/ontgrendelingstoets voorzichtig uit terwijl u op de vergrendelings/ ontgrendelingshefboom drukt. • Na het verwijderen van de tonerpatroon mag u deze niet meer schudden of erop kloppen. Anders kan er toner uit de patroon lekken. Doe de oude patroon direct in het zakje dat in de doos van de nieuwe Opmerking patroon zit.
  • Page 229: Levensduur Tonerpatroon

    Sluit het frontdeksel en vervolgens de zijklep door op de ronde uitsteeksels bij de opentoetsen voor de zijkleppen te drukken. De indicatie gaat uit en de bedrijfsklaar ( ) indicatie gaat branden. Bij het sluiten van de deksel dient u eerst het frontdeksel zorgvuldig te sluiten en Attentie vervolgens de zijkleppen.
  • Page 230: Het Reinigen Van Het Apparaat

    HET REINIGEN VAN HET APPARAAT Een behoorlijk onderhoud is eesentieel voor zuivere, scherpe kopieën Neem een paar minuten de tijd om uw apparaat regelmatig te reinigen. • Voor het reinigen, dient u de aan-/uitschakelaar uit te zetten en de stekker uit het stopcontact te trekken. •...
  • Page 231 Coronadraad Wanneer de kopieën strepen of vlekken krijgen is de coronadraad waarschijnlijk verontreinigd. Reinig deze op de volgende manier. Zet de aan-/uitschakelaar uit. (p.13) Open de zijklep terwijl u op de zijklep opentoets drukt. Verwijder de reiniger voor de coronadraad door deze aan de strip vast te houden.
  • Page 232: Opsporen Van Fouten In Het Apparaat

    OPSPOREN VAN FOUTEN IN HET APPARAAT In dit hoofdstuk wordt het vehelpen van papierstoringen alsmede het opsporen van fouten beschreven. OPSPOREN VAN FOUTEN Indien er een probleem optreedt, dient u de onderstaande lijst te controleren voordat u contact opneemt met onze erkende servicevertegenwoordiging. Pag- Probleem Mogelijke oorzaak...
  • Page 233: Status Indicaties

    Wanneer de volgende indicaties op het bedieningspaneel of de volgende alfanumerieke codes in het display verschijnen, dient u dit probleem onmiddellijk op te lossen met behulp van de tabel en de betreffende pagina. Gebruik alleen originele SHARP onderdelen en voorraden. Opmerking Indication...
  • Page 234: Papierstoring Verhelpen

    PAPIERSTORING VERHELPEN Wanneer de papierstoring ( ) indicatie knippert of in het display knippert, stopt het apparaat vanwege een papierstoring. Open de zijklep in deze volgorde. Voor het openen van de zijklep, zie"TONERPATROON VERVANGEN" (p.21) . Controleer de plaats waar het papier is vastgelopen. Verwijder het vastgelopen papier volgens de aanwijzingen voor elke locatie in de onderstaande afbeelding.
  • Page 235 A: Papierstoring in het invoergedeelte Verwijder het vastgelopen papier voorzichtig uit het invoergedeelte zoals in de afbeelding wordt getoond. Wanneer de papierstoring indicatie in het display knippert en het vastgelopen papier niet kan worden gezien vanuit het invoergedeelte, trekt u de papierlade eruit en verwijdert u het verkeerd ingevoerde papier.
  • Page 236 Verwijder het vastgelopen papier voorzichtig van onder de heater- eenheid zoals in de afbeelding wordt getoond. Wanneer het papier niet verwijderd kan worden gaat u verder naar “C: Papierstoring in het transportheatergedeelte”. Het gebied van de heater is heet. Raak de heatereenheid niet aan bij het verwijderen Waarschuwing van vastgelopen papier.
  • Page 237: Ontwikkelaar Vereist

    ALLEEN DOOR EEN ERKENDE SHARP SERVICEMONTEUR WORDEN UITGEVOERD. Neem zo snel mogelijk contact op met uw servicecentrum. ONDERHOUD VEREIST Wanneer de onderhouds ( ) indicatie gaat branden, is er service door een erkende SHARP servicemonteur vereist. Neem zo snel mogelijk contact op met uw servicecentrum.
  • Page 238: Optionele Accessoires (Al-12Pkm)

    De volgende begrippen worden in dit hoofdstuk gebruikt. CD-ROM Betekent de meegeleverde CD-ROM bij de SHARP Personal MFP serie software. SOFTWARE VOOR DE SHARP PERSONAL MFP SERIE De meegeleverde CD-ROM bevat software voor dit apparaat.
  • Page 239: Hardware En Software Eisen

    HARDWARE EN SOFTWARE EISEN Check de volgende hardware en software eisen voor het installeren van de software. Computer type IBM PC/AT of compatibele computer uitgerust met een USB1.1* of bi-directioneel parallel interface (IEEE 1284) Bedrijfssysteem* Windows 95, Windows 98, Windows Me, Windows NT Workstation 4.0 (ServicePack 5 of later)* , Windows 2000 Professional, Windows XP Professional*...
  • Page 240 Is er al een andere GDI printerbesturing of Windows Printing System printerbesturing geïnstalleerd? Zo ja, dient u de instelling van de printerpoort te wijzigen. Voor het wijzigen van de instelling voor de printerpoort, zie "HET Attentie GEBRUIK VAN ANDERE GEINSTALLEERDE BESTURINGEN" (p.58). Installatieschema Zie de volgende tabel en begin met daarna met de installatie.
  • Page 241: Het Installeren Van De Software

    HET INSTALLEREN VAN DE SOFTWARE De volgende begrippen worden in deze paragraaf gebruikt. Duid het apparaat als printer en scanner aan. • In deze beschrijving wordt er van uitgegaan dat de muis voor de bediening met de rechterhand is geconstrueerd. •...
  • Page 242 • Indien u de parallelle interfaceverbinding gebruikt, mag u de Button Manager checkbox niet selecteren, omdat deze functie niet door de parallelle interface wordt ondersteund. Opmerking • Indien het volgende scherm verschijnt, klik dan op de "OK" toets. Bekijk de inhoud van "VOOR DE INSTALLATIE" (p.33), en selecteert vervolgens alleen de softwarepakketten die u wilt installeren.
  • Page 243 Begin met de installatie van de Button Manager (Deze stap zal starten wanneer deze in stap 4 werd geselecteerd). Na het bevestigen van de melding in het "Welkom" venster, klikt u op de "Volgende" toets. Lees de melding in het venster "Lesen ie bitte die folgenden Informationen."...
  • Page 244 Windows XP met de parallelle interface gebruikt, gaat u naar stap 12. Begin de installatie van de scannerbesturing. SHARP AR-xxxx (xxxx is de modelnaam van uw MFP) verschijnt in de dialoogbox "Wizard Nieuwe hardware gevonden". Selecteer "De software automatisch installeren (aanbevolen)" en klik op de "Volgende"...
  • Page 245 Het installeren op Windows 98/Me/2000 (USB interface) Voor het starten van de installatie dient u te controleren of de USB interfacekabel niet aangesloten is op de MFP. Steek de meegeleverde CD-ROM in uw CD-ROM loopwerk. Dubbelklik op "Deze Computer" ( ), en dubbelklik vervolgens op het CD-ROM ( ) icoon.
  • Page 246 Het kopiëren van bestanden voor de installatie van de MFP besturing. Na het bevestigen van de melding in het "Welkom" venster, klikt u op de "Volgende" toets. Er verschijnt een dialoogbox die u vraagt om te controleren of het interfacekabel niet aan de MFP is aangesloten. Controleer of het interfacekabel niet aangesloten is en klik op de "Volgende"...
  • Page 247 Begin met de installatie van Sharpdesk (Deze stap zal starten wanneer deze in stap 4 werd geselecteerd). Na het bevestigen van het venster "Welkom bij het installatieprogramma van Sharpdesk", klikt u op de "Volgende" toets. Lees de melding in het "Informatie" venster en klik op de "Volgende"...
  • Page 248 De installatie op Windows 95/98/Me/NT4.0/2000 (Parallel interface) Voor het starten van de installatie dient u te controleren of de USB of parallelle interfacekabel niet aangesloten is op de MFP. Steek de meegeleverde CD-ROM in uw CD-ROM loopwerk. Dubbelklik op "Deze Computer" ( ), en dubbelklik vervolgens op het CD-ROM ( ) icoon.
  • Page 249 Het kopieren van bestanden voor de installatie van de MFP besturing en de parallelle interface (Deze stap begint als deze in stap 4 geselecteerd was). Na het bevestigen van de melding in het "Welkom" venster, klikt u op de "Volgende" toets. Er verschijnt een dialoogbox die u vraagt om te controleren of de USB of het parallelle interfacekabel niet aan het apparaat is aangesloten.
  • Page 250 Begin met de installatie van Sharpdesk (Deze stap zal starten wanneer deze in stap 4 werd geselecteerd). Na het bevestigen van het venster "Welkom bij het installatieprogramma van Sharpdesk", klikt u op de "Volgende" toets. Lees de melding in het "Informatie" venster en klik op de "Volgende"...
  • Page 251: Indicaties Op Het Bedieningspaneel

    INDICATIES OP HET BEDIENINGSPANEEL De ON LINE indicatie en de bedrijfsklaar ( ) indicatie geven de status van de printer of scanner aan. SCANNER indicatie ON LINE indicatie Bedrijfsklaar indicatie Stroomspaarstand indicati Start indicatie Aan: Geeft aan dat het apparaat klaar is voor het kopiëren of dat er wordt gescand.
  • Page 252: Het Gebruik Van De Printerfunctie

    Open het document dat u wilt printen en selecteer "Afdrukken" uit het "Bestand" menu van de applicatie. Controleer of "SHARP AR-xxxx" ( xxxx is de modelnaam van uw apparaat) als actuele printer is geselecteerd. Indien u een printinstelling wilt wijzigen, klikt u op de "Voorkeurinstellingen"...
  • Page 253 Leg de printinstellingen vast inclusief het aantal kopieën, het soort papier en de printkwaliteit,en klik vervolgens op de "Afdrukken" toets o het printen te starten. In Windows 95/98/Me/NT 4.0, klikt u op de "OK" toets om het printen te staten. Voor details over de printinstellingen, zie het online handboek of het helpbestand voor de printerbesturing.
  • Page 254: Het Gebruik Van De Scanfunctie

    Klik op de "start" toets, selecteer "Bedieningspaneel", klik op "Printers en andere hardware", en klik vervolgens op "Scanners en Camera’s" in het startmenu. Klik met de rechter muistoets op "SHARP AR-xxxx" (xxxx is de modelnaam van uw apparaat) icoon en selecteer "Eigenschappen" in het weergegeven menu.
  • Page 255 Selecteer "AR-xxxx" ("xxxx" is de modelnaam van uw apparaat) en klik op de "Eigenschappen" toets. In Windows Me klikt u met de rechter muistoets op "SHARP AR-xxxx" (xxxx is de modelnaam van uw apparaat) icoon en selecteert u "Eigenschappen" in het weergegeven menu.
  • Page 256 Dialoogbox voor de scanparameter-instellingen Nadat u klaar bent met het maken van de Button Manager instellingen in Windows, configureert u de scannerinstellingen in de Button Manager. Om de scannerinstellingen in de Button Manager te configureren, klik u met de rechter muistoets op de ( ) icoon in de takenbalk en selecteert u "Instelling"...
  • Page 257 Windows 98, Windows Me, Windows 2000 en Windows XP. Windows Platforms biedt een mechanisme aan waarmee software externe gebeurtenossen kan uitvoeren voor een scanner zoals de SHARP AR-xxxx (xxxx is de modelnaam van uw apparaat). Dit mechanisme wordt geregeld door de apparaatmanager op basis van een apparaat.
  • Page 258 Het gebruik van de SCANNER toets om het scannen te beginnen. • Het scannen is tijdens een kopieerproces niet mogelijk. • Wanneer het apparaat wordt gebruikt om een scanbewerking te starten tijdens het printen, wordt de scanbewerking opgeslagen en begint zodra Opmerking het printen voltooid is.
  • Page 259 Zie de gebruiksaanwijzing of het helpbestand van uw Opmerking applicatie. Het gebruik van de SHARP TWAIN Plaats het origineel dat u wilt scannen op de glasplaat. Voor de procedure voor het plaatsen van het origineel, zie "HET PLAATSEN VAN DE ORIGINELEN" (p.14).
  • Page 260 Selecteer "SHARP Personal MFP serie", en klik op de "Selecteren" Hier klikken toets. WIA-SHARP AR-XXXX X.X (32-32) Indien u meer dan een scanapparaat gebruikt, dient u de scanner die u wilt gebruiken via de applicatie te selecteren. De methode voor het bereiken van de "Selecteer Scanner" optie is Opmerking afhankelijk van de applicatie.
  • Page 261 "Bedieningspaneel", klik op "Printers en andere hardware", en klik vervolgens op "Scanners en Camera’s" in het startmenu. Klik op "SHARP AR-xxxx" (xxxx is de modelnaam van uw apparaat) icoon en klik op "Foto's laden" in "Afbeeldingstaken". De "Scanner en Camera’s Wizard"...
  • Page 262: Het Gebruik Van Het Online Handboek

    In Windows 95/98/Me/NT 4.0/2000, dubbelklikt u op "Deze Computer" ( en vervolgens dubbelklikt u op het CD-ROM ( ) icoon. Dubbelklik op de "Manual" ordner, dubbelklik op de "Dutch" ordner en vervolgens dubbelklikt u op de AR-122E/122EN/152E/152EN "AR_122E_122EN_152E_152EN.pdf" icoon. Het volgende venster verschijnt. Online handboek...
  • Page 263 ) toets rechts boven in het venster. • Het online handboek kan met de Acrobat Reader woden geprint. SHARP adviseert u de gedeelten die u vaak gebruikt, te printen. • Zie de "Help" van de Acrobat Reader voor nadere details over de Opmerking werking en functie van de Acrobat Reader.
  • Page 264: Het Gebruik Van Andere Geinstalleerde Besturingen

    "Eigenschappen" venster, selecteer "LPT1" (of de actueel gebruikte poort), en klik vervolgens op de "OK" toets. Om de SHARP Personal MFP serie opnieuw te gebruiken voert u dezelfde procedure uit maar selecteert u de poort die u wilt gebruiken (bijvoorbeeld, LPT1) in stap 4.
  • Page 265: Het Aansluiten Van De Interfacekabel

    HET AANSLUITEN VAN DE INTERFACEKABEL Dit apparaat heeft zowel aansluitingen voor een USB een een parallel interface. De interfacekabels voor het aansluiten van het apparaat op uw computer zijn niet inbegrepen. Koop het passende kabel voor uw computer. Interfacekabel Parallel interfacekabel IEEE 1284-afgeschermd bi-directionaal parallel interfacekabel (2 m.
  • Page 266 Het aansluiten van het parallelle interfacekabel Schaf een overeenkomstig IEEE1284 afgeschermd parallel interfacekabel aan. Controleer of uw computer en het apparaat uitgeschakeld zijn. Steek de kabel in de parallelle interface aansluiting aan de achterkant van het apparaat. Steek het andere uiteinde van de kabel in de interfaceaansluiting van uw computer.
  • Page 267: Appendix

    APPENDIX SPECIFICATIES Model AR-122E AR-122EN AR-152E AR-152EN Type Digitale laser kopieermachine, desktop type Kopieersysteem Droge elektrostatische transfer Originelen Bladen, gebonden documenten Papierlade 250 bladen (papierlade) 1 bladen (handinvoer) Papier uitvoerlade 100 bladen Origineel formaat Max. A4 Toevoer originelen 1 bladen...
  • Page 268: Optionele Accessoires

    (alleen voor printer) Voed het papier alleen in de lengterichting. Als onderdeel van ons streven naar continue verbetering van onze producten, behoudt SHARP het recht voor wijzigingen in ontwerp en technische gegevens aan te brengen zonder aankondiging vooraf. De Opmerking vermelde gegevens over het vermogen zijn nominale waarden van productieapparaten.
  • Page 269: Voorraden En Optionele Onderdelen

    Gebruik alleen originele SHARP onderdelen en voorraden. Opmerking Voor de beste resultaten alleen originele SHARP poducten gebruiken die werden getest, ontworpen en geconstrueerd om de levensduur en het prestatievermogen van SHARP kopieerapparaten te optimaliseren. Let op het “Genuine supplies” etiket op de verpakking van de toner.
  • Page 270: Register

    Avändning a andra installerade online manual ........56 drivrutiner ..........58 Hur man använder scannerläget ..48 Avbryta kopiering ........47 Hur man använder SHARP TWAIN..53 Avstängning ........13 Hur man använder utskriftsläget ..46 Hur man gör utskrifter......46 Hur man kopierar........ 11 Bilaga ..........61...
  • Page 271 Påfyllning av papper ......7 programvara........33 Påsättning .......... 12 Kvantitetsknapp......6, 15, 19 Placering av original ......14 Programvara för SHARP personal MFP-serien ......... 32 Larmindikator - Indikator för byte av trumma 6, 27, 31 - Indikator för byte av RENGÖRING ........
  • Page 272 Scanning - Knaphanteraren ......32 - Guiden Skanner och Kamarar..55 - MFP-drivrutin .........32 - Knaphanteraren ......52 - Sharpdesk........32 - SHARP TWAIN ......53 Inställning av användarprogrammet..19 Tillkoppling.......... 12 Inställning av antalet kopior....15 Utskrift ..........46 Inställning av Knaphanteraren ....48 Visning av totala antalet kopior...
  • Page 273: Software Licentie

    ROM geheugen of op einige andere media (“de software”) en hiermee verband houdende ocumentatie worden door SHARP onder licentie aan u geleverd. U bent de eigenaar van de diskette waarop de software staat geregistreerd, echter SHARP en/of SHARP's licentiehouders behouden het eigendomsrecht op de software en de hiermee verband houdende documentatie.
  • Page 274 De software en de hiermee verband houdende documentatie worden “ALS ZONDAIG” en zonder garantie van enigerlei aard geleverd en SHARP en SHARP’s licentiehouder(s) (voor het doel van de bepalingen 7 en 8, zullen SHARP en SHARP's licentiehouder(s) collectief worden aangeduid als "SHARP") WIJZEN...
  • Page 275: Precauciones De Utilización

    PRECAUCIONES Precauciones de utilización Siga las medidas de precaución indicadas a continuación para el uso de esta unidad. Advertencia: • El zona de fusión está caliente. Tenga cuidado en esta zona cuando retire el papel atascado. • No mire directamente hacia la fuente de luz. Podría sufrir daños en los ojos. •...
  • Page 276 • Adobe y Acrobat son marcas registradas de Adobe Systems Incorporated. • Las restantes marcas registradas y copyrights son propiedad de sus respectivos propietarios. ® As an ENERGY STAR Partner, SHARP has determined that ® this product meets the ENERGY STAR guidelines for energy efficiency.
  • Page 277 NECESITA MANTENIMIENTO ..31 CARGA DEL PAPEL EQUIPO OPCIONAL (AL-12PKM) PAPEL ........... 7 CARGA DE LA BANDEJA DEL SOFTWARE PARA EL MULTI- FUNCIONAL PERSONAL SHARP . 32 PAPEL ........... 8 ALIMENTACIÓN BYPASS (papeles REQUISITOS DE HARDWARE Y SOFTWARE.........33 especiales)........10 ANTES DE LA INSTALACIÓN..33 REALIZACIÓN DE COPIAS...
  • Page 278: Introducción

    INTRODUCCIÓN Este capítulo proporciona información básica para el uso de la unidad. UTILIZACIÓN DEL MANUAL El manual de instrucciones contiene las explicaciones del modo de funcionamiento de la unidad, consideraciones importantes y procedimientos de mantenimiento. Para conseguir el máximo rendimiento de la unidad, debe leer detenidamente el manual de operaciones.
  • Page 279: Denominación De Los Componentes

    DENOMINACIÓN DE LOS COMPONENTES Bandeja de alimentación simple en "bypass" Tambor de fotoconducción Cartucho de tóner Extensión de la bandeja de salida Mesa de originales de papel Panel de mando Conmutador de alimentación Cubierta frontal Mango Bandeja del papel Toma del cable de alimentación Cubierta lateral Palanca de liberación de la unidad Botón de apertura de la cubierta...
  • Page 280: Panel De Mando

    PANEL DE MANDO Indicador de Ahorro de Energía Tecla selectora e indicadores del Se ilumina cuando la unidad se Modo de Exposición encuentra en el modo de ahorro de Utilícela para seleccionar, de forma secuencial, energía. (p.18, p.19) los modos de exposición: AUTO, MANUAL o Indicadores de localización de la FOTO.
  • Page 281: Carga Del Papel

    CARGA DEL PAPEL Siga los pasos que se enumeran a continuación para cargar el papel en la bandeja. PAPEL Para obtener los mejores resultados, utilice exclusivamente el papel recomendado por SHARP. Tipo de alimentación Tipo de producto Tamaño Gramaje del papel Bandeja del Papel estándar...
  • Page 282: Carga De La Bandeja Del Papel

    CARGA DE LA BANDEJA DEL PAPEL Levante el asidero de la bandeja del papel y tire de dicha bandeja hasta que se detenga. Ajuste las guías del papel en la bandeja a lo largo y ancho del papel. Comprima la palanca de la guía del papel y deslice la guía para ajustarla a la anchura del papel.
  • Page 283 Empuje suavemente la bandeja del papel hacia el interior de la unidad. • Tras cargar el papel, para cancelar el indicador parpadeante reiniciar el copiado, pulse la ( ) tecla clear. La del visor se apagará y el indicador start ( ) se iluminará.
  • Page 284: Alimentación Bypass (Papeles Especiales)

    ALIMENTACIÓN BYPASS (papeles especiales) La bandeja de alimentación simple en "bypass" se puede utilizar para papel estándar, película para transparentes, etiquetas, sobres y otros papeles para fines especiales. En esta bandeja se pueden utilizar papeles con medidas desde A6 a A4 y en el margen de peso de 52g/m a 128g/m (Para papeles con pesos desde 104g/...
  • Page 285: Realización De Copias

    REALIZACIÓN DE COPIAS En este capítulo se explican las funciones básicas y otras funciones de copiado. La unidad está equipada con un registro de memoria de una página. Esta memoria permite que la unidad explore el original sólo una vez y realice hasta 99 copias. Esta característica mejora el flujo de trabajo, reduce el ruido de funcionamiento de la copiadora, y proporciona mayor fiabilidad, reduciendo el desgaste del mecanismo del escáner.
  • Page 286: Conexión Del Cable De Alimentación

    No inserte papel en la bandeja de alimentación simple en "bypass" cuando esté en progreso un trabajo de copiado procedente de la bandeja de papel. Esto provocaría un atasco. Precaución CONEXIÓN DEL CABLE DE ALIMENTACIÓN Si utiliza la unidad en un país diferente al país en el que se ha realizado la compra, deberá...
  • Page 287 Acerca de la cabeza de escaneo La luz de la cabeza de escaneo permanece constantemente activa cuando la unidad está preparada (cuando el indicador start ( ) está iluminado). La unidad ajusta la luz de la cabeza de escaneo periódicamente, para mantener la calidad del copiado.
  • Page 288: Colocación De Originales

    COLOCACIÓN DE ORIGINALES • La mesa de originales puede leer originales hasta A4. • Puede producirse una pérdida de imagen de 4mm en los bordes frontal y posterior de las copias. Asimismo, puede producirse una Nota pérdida de imagen de 4,5mm en total a lo largo de los otros bordes de las copias.
  • Page 289: Ajuste De La Cantidad De Copias

    AJUSTE DE LA CANTIDAD DE COPIAS Fije el número de copias, usando las dos teclas de cantidad de copias ( cuando se copia desde la mesa de originales . • Pulse la tecla clear ( ) para borrar una entrada en la que se ha cometido un error.
  • Page 290 Ajuste de la exposición automática Este nivel de exposición automática permanecerá en efecto hasta que Ud. lo modifique de nuevo, por este mismo procedimiento. Nota El nivel de exposición automática puede ajustarse para que se adapte a sus necesidades de copiado. Este nivel se fija para el copiado desde la mesa de originales. Pulse la tecla selectora del modo de exposición para seleccionar el modo FOTO (...
  • Page 291: Reducción / Ampliación / Zoom

    REDUCCIÓN / AMPLIACIÓN / ZOOM Pueden seleccionarse tres relaciones prefijadas de reducción y dos de ampliación. La función de zoom permite la selección de la relación de copia entre el 25% y el 400%, en incrementos del 1%. Coloque el original y compruebe las dimensiones del papel. Utilice la tecla selectora de la relación de copia y/o las teclas de ZOOM ( ) para seleccionar la relación de copia...
  • Page 292: Funciones Especiales

    FUNCIONES ESPECIALES En este capítulo se describen las funciones especiales de esta unidad. Utilice estas funciones según necesidades. DESCRIPCIÓN DE LAS FUNCIONES ESPECIALES Modo de ahorro de tóner (pagina 18) Se reduce el consumo de tóner en aproximadamente un 10%. Modos de ahorro de energía (pagina 19) La unidad posee dos modos de funcionamiento con ahorro de energía: modo de precalentamiento y modo de desconmutación automática de la corriente.
  • Page 293: Programas De Usuario

    Pulse y mantenga la tecla de selección del modo de exposición durante 5 segundos aproximadamente. El indicador de modo MANUAL ( ) se apagará y el indicador FOTO ( ) comenzará a parpadear. El indicador de exposición marcado "5" se encenderá, indicando que el modo de tóner estándar permanece activo.
  • Page 294: Indicación Del Número Total De Copias

    Nº Modo Parámetros Programa Tiempo de borrado OFF, 1 10 seg., 2 30 seg. automático 60 seg., 4 90 seg., 5 120 seg. Modo de 30 seg., 1 60 seg., 2 90 seg. precalentamiento Modo de desconmutación 2 min., *1 5 min., 2 15 min., temporal de la...
  • Page 295: Mantenimiento

    Consumibles Originales SHARP, que han sido diseñados, desarrollados y comprobados para prolongar al máximo la vida útil y la eficacia de las copiadoras SHARP. Busque la etiqueta Genuine Supplies en el embalaje del tóner. SUSTITUCIÓN DEL CARTUCHO DE TÓNER Cuando es necesario sustituir el cartucho de tóner(...
  • Page 296 Extraiga con cuidado el Botón de fijación / liberación cartucho de tóner presionando la palanca que libera el cierre. • Después de retirar el cartucho de tóner, no lo agite ni lo golpee. Si lo hiciera, podría salir el tóner del cartucho. Ponga el cartucho usado inmediatamente en la bolsa que contiene la caja del nuevo cartucho.
  • Page 297: Vida Útil Del Cartucho De Tóner

    Cierre la cubierta frontal y luego la cubierta lateral presionando los salientes redondos situados al lado del botón de apertura de la cubierta lateral. El indicador se apagará y el indicador de inicio ( ) se encenderá. Al cerrar las cubiertas, asegúrese de que cierra firmemente la cubierta Precaución...
  • Page 298: Limpieza De La Unidad

    LIMPIEZA DE LA UNIDAD Son esenciales unos cuidados adecuados para mantener las copias limpias y nítidas. Tómese unos minutos para limpiar la unidad con regularidad. • Antes de proceder a la limpieza, asegúrese de desconectar la alimentación y desenchufar el cable de la toma de corriente. •...
  • Page 299 Cargador de transferencia Si las copias comienzan a aparecer con rayas o borrosas, el cargador de transferencia podría estar sucio. Límpielo utilizando el procedimiento siguiente. Desactive la alimentación. (p.13) Abra la cubierta lateral mientras presiona el botón de apertura de la cubierta lateral. Saque el limpiador del cargador sosteniéndolo por la lengüeta.
  • Page 300: Localización De Problemas De La Unidad

    LOCALIZACIÓN DE PROBLEMAS DE LA UNIDAD En este capítulo se describe la eliminación del atasco y la resolución de problemas. LOCALIZACIÓN DE PROBLEMAS Si surge algún problema, compruebe la lista que se presenta a continuación antes de ponerse en contacto con su representante del servicio autorizado. Problema Causa posible Solución...
  • Page 301: Indicadores De Estado

    Cuando los indicadores siguientes se iluminan o parpadean en el panel de mando o aparecen los siguientes códigos alfanuméricos en la pantalla de visualización, solucione inmediatamente el problema consultando tanto la tabla siguiente como la página relevante. Asegúrese de utilizar exclusivamente piezas y consumibles originales SHARP. Nota Indicación Causa y solución...
  • Page 302: Eliminación De Atascos

    ELIMINACIÓN DE ATASCOS Cuando el indicador de atascos ( ) parpadea o parpadea en la pantalla de visualización, la unidad se detendrá a causa de un atasco. Abra la cubierta lateral, en ese orden. Para abrir la cubierta lateral, consulte "SUSTITUCIÓN DEL CARTUCHO DE TÓNER"...
  • Page 303 A: Atasco en la zona de alimentación del papel Retire con cuidado el papel de la zona donde se encuentra atascado como se muestra en la ilustración. Cuando parpadea el indicador de atascos ( ), y no se puede ver el papel atascado desde la zona de alimentación, tire de la bandeja y extráigalo.
  • Page 304: C: Atasco En La Zona De Transporte

    Retire con cuidado el papel situado bajo la unidad de fusión como se muestra en la ilustración. Si no se puede retirar, proceda hasta "C: Atasco en la zona de transporte". La unidad de fusión está caliente. No toque dicha unidad de fusión al retirar el Advertencia papel atascado.
  • Page 305: Necesita Revelador

    Contacte con su centro de servicios tan pronto como le sea posible. NECESITA MANTENIMIENTO Cuando se enciende el indicador de mantenimiento ( ), son necesarios los servicios de un técnico autorizado de SHARP. Contacte con su centro de servicio tan pronto como le sea posible.
  • Page 306: Equipo Opcional (Al-12Pkm)

    CD-ROM Alude al CD-ROM suministrado con el software del Multi-Funcional Personal SHARP. SOFTWARE PARA EL MULTI-FUNCIONAL PERSONAL SHARP El CD-ROM suministrado incluye el software de esta unidad. Driver MFP driver de Escáner Le permite hacer funcionar la función de escaneo de esta unidad con una aplicación que soporte TWAIN y otra que soporte WIA.
  • Page 307: Requisitos De Hardware Ysoftware

    REQUISITOS DE HARDWARE Y SOFTWARE Para instalar el software, verifique los siguientes requisitos de hardware y software. Tipo de ordenador IBM PC/AT u ordenador compatible equipado con un USB1.1* interfaz paralelo bi-direccional (IEEE 1284) Sistema Windows 95, Windows 98, Windows Me, Windows NT Operativo* Workstation 4.0 (ServicePack 5 o superior)* , Windows 2000...
  • Page 308 Diagrama de flujo de la instalación Consulte la tabla siguiente y comience a continuación la instalación. Funcionamiento Interfaz Páginas de referencia sobre cómo instalar Sistema USB / Instalación sobre Windows XP (interfaz USB / paralelo) Windows XP Paralelo (p.35) Instalación sobre Windows 98/Me/2000 (interfaz USB) (p.39) Windows 98 Instalación sobre Windows 95/98/Me/NT4.0/2000...
  • Page 309: Instalación Del Software

    INSTALACIÓN DEL SOFTWARE En esta sección se emplea el siguiente término. Indica que la unidad opera como impresora y como escáner. • Para esta descripción se asume que el ratón está configurado para su manejo con la mano derecha. • Para imprimir o escanear, el MFP debe estar en estado de "en línea". Nota •...
  • Page 310 • Si Ud. está utilizando la conexión con interfaz paralelo, no seleccione la casilla del Gestor de Botones, puesto que esta prestación no está soportada por la interfaz paralelo. Nota • Si aparece la pantalla siguiente, haga clic en el botón "Aceptar". Revise los contenidos de "ANTES DE LA INSTALACIÓN"...
  • Page 311 Comience la instalación del Gestor de Botones (este paso se iniciará si fue seleccionado en el paso 4). Tras la confirmación del mensaje de la ventana "Bienvenido", haga clic en el botón "Siguiente". Lea el mensage de la ventana "Lea la siguiente información." y a continuación haga clic en el botón "Siguiente".
  • Page 312 Windows XP con la interfaz en paralelo, vaya al paso 12. Comience la instalación del driver de escáner. SHARP AR-xxxx (donde xxxx es el nombre del modelo de su MFP) aparecerá en el cuadro de diálogo "Asistente para hardware nuevo encontrado".
  • Page 313 Instalación sobre Windows 98/Me/2000 (interfaz USB) Antes de comenzar la instalación, asegúrese de que el cable de interfaz USB no está conectado al MFP. Introduzca el CD-ROM suministrado en su unidad de CD-ROM. Haga doble clic en "Mi PC" ( ), y a continuación doble clic en el icono CD-ROM ( Cuando, durante la instalación del software, aparece alguno de los...
  • Page 314 Copiado de archivos para la instalación del driver MFP. Tras la confirmación del mensaje de la ventana "Bienvenido", haga clic en el botón "Siguiente". Aparece un cuadro de diálogo que le pide verifique que el cable de interfaz no está conectado al MFP. Asegúrese de que el cable de interfaz no está...
  • Page 315 Comience la instalación de Sharpdesk (este paso se iniciará si fue seleccionado en el paso 4). Tras la confirmación del mensaje de la ventana "Bienvenido a la instalación de Sharpdesk", haga clic en el botón "Siguiente". Lea el mensaje de la ventana "Información" y, a continuación, haga clic en el botón "Siguiente".
  • Page 316 Instalación sobre Windows 95/98/Me/NT4.0/2000 (Interfaz paralelo) Antes de comenzar la instalación, asegúrese de que el cable de interfaz USB o el paralelo no están conectados al MFP. Introduzca el CD-ROM suministrado en su unidad de CD-ROM. Haga doble clic en "Mi PC" ( ), y a continuación doble clic en el icono CD-ROM ( Cuando, durante la instalación del software, aparece alguno de los...
  • Page 317 Copiado de archivos para la instalación del driver MFP y configuración de la interfaz paralelo (Este paso se iniciará si fue seleccionado en el paso 4). Tras la confirmación del mensaje de la ventana "Bienvenido", haga clic en el botón "Siguiente". Aparece un cuadro de diálogo que le pide la verificación de que el cable de interfaz USB o el paralelo no están conectados a la unidad.
  • Page 318 Comience la instalación de Sharpdesk (este paso se iniciará si fue seleccionado en el paso 4). Tras la confirmación del mensaje de la ventana "Bienvenido a la instalación de Sharpdesk", haga clic en el botón "Siguiente". Lea el mensaje de la ventana "Información" y, a continuación, haga clic en el botón "Siguiente".
  • Page 319: Indicadores Del Panel De Mando

    INDICADORES DEL PANEL DE MANDO El indicador ONLINE y el indicador Start ( ) indican el estado de la impresora o del escáner. Indicador del escáner Indicador ON LINE Indicador start (inicio) Indicator de ahorro energético Indicador start Activo: Indica que la unidad está preparada para copiar o que se está realizando el escaneo.
  • Page 320: Utilización Del Modo Impresora

    Otro Hardware", y luego haga clic en "Impresoras y Faxes". En Windows 95/98/Me/NT4.0/2000, seleccione "Configuración" y haga clic en "Impresoras". Haga clic sobre el icono del driver de impresora "SHARP AR- xxxx" (donde xxxx es el nombre del modelo de su unidad) y desde el menú "Archivo" seleccione "Propiedades".
  • Page 321 Especifique la configuración de la impresión, incluyendo número de copias, tipo de producto y calidad de impresión, y a continuación haga clic en el botón "Imprimir" para iniciar la impresión. En Windows 95/98/Me/NT 4.0, haga clic en el botón "Aceptar" para iniciar la impresión.
  • Page 322: Utilización Del Modo Escáner

    Haga clic sobre el botón "Seleccionar un suceso" y seleccione "Menú de escaneosSC2" en el menú desplegable. Seleccione "Gestor de Botones (Multi- Funcional Personal SHARP) en "Iniciar este programa" y haga clic sobre "Aplicar". Haga lo mismo para cada ScanMenu a través del "Menú de escaneosSC6".
  • Page 323 "Menú de escaneosSC6". Haga clic sobre " Sucesos de escáner " y seleccione "Menú de escaneosSC2" en el menú desplegable. Seleccione "Gestor de Botones (Multi-Funcional Personal SHARP) en "Iniciar este programa" y haga clic sobre "Aplicar" Haga lo mismo para cada ScanMenu a través del "Menú...
  • Page 324 Cuadro de Diálogo de Configuración de los Parámetros de Escaneo Después de haber completado la configuración en Windows, realice la configuración del escáner en el Gestor de Botones. Para configurar la configuración del escaneo en el Gestor de Botones, haga clic con el botón derecho del ratón sobre el icono ( ) en la Barra de tareas y seleccione "Ajuste"...
  • Page 325 Windows 98, Windows Me, Windows 2000 y Windows XP. Las plataformas Windows proporcionan un mecanismo de software para manejar sucesos externos para un dispositivo del escáner como el SHARP AR-xxxx (donde xxxx es el nombre del modelo de su unidad) El gestor de dispositivos controla el mecanismo según el dispositivo de que se trate.
  • Page 326 Utilización de la tecla SCANNER para iniciar el escaneo • No es posible el escaneo durante un trabajo de copiado. • Si se utiliza la unidad para iniciar un trabajo de escaneo durante un trabajo de impresión, el trabajo de escaneo se guardará y el escaneo Nota comenzará...
  • Page 327 • El método para iniciar el driver de impresora difiere según el tipo de aplicación. Consulte el manual o el archivo de ayuda de su aplicación. Nota Utilización del SHARP TWAIN Coloque el original que desea escanear sobre la mesa de originales.
  • Page 328 Seleccione "Multi-Funcional Personal SHARP", y haga clic sobre Haga clic aquí el botón "Seleccionar". WIA-SHARP AR-XXXX X.X (32-32) Si Ud. utiliza más de un dispositivo de escaneo, seleccione el escáner que desea utilizar en la aplicación. El método de acceso a la opción "Selección del Escáner" depende de la Nota aplicación.
  • Page 329 "Impresoras y Otro Hardware", luego haga clic en "Escáneres y Cámaras" en el menú de inicio. Haga clic sobre el icono "SHARP AR-xxxx" (donde xxxx es el nombre del modelo de su unidad) y sobre "Obtener imágenes" en "Tareas de Imaging".
  • Page 330: Cómo Utilizar El Manual En Línea

    ) y, a continuación, haga doble clic en el icono del CD-ROM ( Haga doble clic en la carpeta "Manual", haga doble clic en la carpeta "Spanish", y luego en el AR-122E/AR-122EN/AR-152E/AR-152EN icono "AR_122E_122EN_152E_152EN.pdf". Aparecerá la siguiente pantalla. Manual en Línea...
  • Page 331 ) localizado en la parte superior derecha de la pantalla. • El manual en línea puede imprimirse utilizando Acrobat Reader. SHARP le recomienda imprimir las secciones que Ud. consulte habitualmente. Nota • Consulte la "Ayuda" de Acrobat Reader para obtener más información acerca del manejo y funciones de Acrobat Reader.
  • Page 332: Uso De Otros Drivers Instalados

    Windows, debe Ud. modificar la configuración del puerto en el driver de impresora, empleando el siguiente procedimiento: Si otra impresora no funciona correctamente cuando el driver de impresora Multi-Funcional Personal SHARP se fija en "Archivo", como se describe a continuación, desinstale el driver de impresora Multi- Nota Funcional Personal SHARP.
  • Page 333: Conexión Del Cable De Interfaz

    CONEXIÓN DEL CABLE DE INTERFAZ Esta unidad incluye conectores para interfaz USB y paralelo. Los cables de interfaz para la conexión de la unidad a su ordenador no se incluyen con esta unidad. Le rogamos adquiera el cable apropiado para su ordenador. Cable de interfaz Cable de interfaz paralelo Cable de tipo apantallado para interfaz bi-direccional paralelo según la norma IEEE...
  • Page 334 Conexión del cable de interfaz paralelo Consiga un cable apantallado para interfaz paralelo de la Norma IEEE1284. Asegúrese de que su ordenador y la unidad estén apagadas. Inserte el cable en el conector de interfaz paralelo, localizado en la parte posterior de la unidad y sujételo con sus pinzas.
  • Page 335: Apéndice

    APÉNDICE ESPECIFICACIONES Modelo AR-122E AR-122EN AR-152E AR-152EN Tipo Copiadora láser digital de tipo sobremesa Sistema de copiado Transferencia electrostática en seco Originales Hojas sueltas, documentos encuadernados 250 hojas (Bandeja de papel) 1 hoja (Bandeja de Bandeja de papel alimentación simple en bypass)
  • Page 336: Equipo Opcional

    IEEE1284 (Sólo para impresora) Introduzca papel exclusivamente en sentido longitudinal Como parte de nuestra política de superación continua, SHARP se reserva el derecho a realizar cambios de diseño y características, para la mejora del producto, sin necesidad de avisar con anterioridad. Las Nota cifras de las características de rendimiento indicadas son valores...
  • Page 337: Acerca De Los Consumibles Ysus Opciones

    Consumibles Originales SHARP, que han sido diseñados, desarrollados y comprobados para prolongar al máximo la vida útil y la eficacia de las copiadoras SHARP. Busque la etiqueta Genuine Supplies en el embalaje del tóner. Lista de consumibles Consumible Número de...
  • Page 338: Índice

    ÍNDICE Driver de Escáner......32 Driver MFP Abrir el driver de impresora ....46 - Driver de Escáner......32 Acerca de los consumibles....63 - Driver de impresora...... 32 Acrobat Reader ......... 56 - Ventana de Estado Ajuste automático de la exposición ... 16 de la Impresión......
  • Page 339 Uso de otros drivers instalados ..58 Utilización del manual ......4 Necesita revelador ......31 Utilización del modo escáner .... 48 Nombre Utilización del modo impresora ..46 - Denominación de los componentes5 Utilización de SHARP TWAIN ... 53 - Panel de mando ......6...
  • Page 340 - Button Manager......52 - MANUAL ........15 - Scanner and Camera Wizard ..55 Ajuste de la cantidad de copias..15 - SHARP TWAIN ......53 Almacenamiento de la unidad ..... 1 Impresión........... 46 Ampliación / reducción de copias ..17 Indicación del número...
  • Page 341: Licencia Del Software

    (ROM) o en algún otro medio (el "Software") y toda la documentación relacionada le han sido entregados por SHARP bajo esta Licencia. Usted es el dueño del disco donde está grabado el Software pero SHARP o los dueños de la Licencia de SHARP mantienen la propiedad sobre el Software y la documentación relacionada.
  • Page 342 SHARP sólo se hace responsable por el cambio del disco cuando no cumple con la garantía limitada de SHARP y que ha sido devuelto a SHARP o a un representante autorizado de SHARP con una copia del recibo. SHARP no se hace responsable por daños en caso de accidente, abuso o mal uso del disco.
  • Page 343: Avvertenze

    AVVERTENZE Precauzioni d'uso Mentre si utilizza l'unità attenersi a quando indicato di seguito. Attenzione: • L’unità di fusione è surriscaldata. Fare attenzione mentre si estrae la carta inceppata. • Non fissare con gli occhi la sorgente di luce del modulo scanner. E’ pericoloso per gli occhi. •...
  • Page 344 • Adobe e Acrobat sono marchi registrati di Adobe Systems Incorporated. • Tutti gli altri marchi registrati e copyright sono di proprietà dei loro rispettivi proprietari. ® As an ENERGY STAR Partner, SHARP has determined that ® this product meets the ENERGY STAR guidelines for energy efficiency.
  • Page 345 SVILUPPATORE ......31 RICHIESTA DI MANUTENZIONE31 CARTA........... 7 CARICAMENTO DEL VASSOIO DI ACCESSORI OPZIONALI (AL-12PKM) ALIMENTAZIONE DELLA CARTA 8 ALIMENTAZIONE DI BYPASS SOFTWARE PER SHARP (carta speciale) ......10 PERSONAL MFP SERIE .....32 REQUISITI HARDWARE E ESECUZIONE DI COPIE SOFTWARE.........33 OPERAZIONI PRELIMINARI SEQUENZA DELLA COPIATURA11 ALL'INSTALLAZIONE ....33...
  • Page 346: Introduzione

    INTRODUZIONE In questa sezione vengono fornite le informazioni di base per l'uso dell'unità. CONSULTAZIONE DEL MANUALE Il manuale di istruzioni riporta le indicazioni per l'uso dell'unità, le procedure di manutenzione e importanti avvertenze. Per utilizzare l'unità in modo ottimale, è importante leggere il manuale di istruzioni.
  • Page 347: Nome Dei Componenti

    NOME DEI COMPONENTI Vassoio di bypass singolo Cilindro fotoconduttore Cartuccia del toner Interruttore di alimentazione Lastra di esposizione Maniglia Pannello operativo Presa cordone di alimentazione Pannello di copertura anteriore Leva di sbloccaggio dell'unità fusore Vassoio della carta Corona di trasferimento Copertura laterale Dispositivo di pulitura corona di Pulsante di apertura pannello di...
  • Page 348: Pannello Operativo

    PANNELLO OPERATIVO Tasto e indicatore SCANNER Tasto di selezione Modo esposizione (p.45, p.52) e indicatori Utilizzabile quando è installato il Kit di Utilizzati per selezionare in modo Espansione Stampante/Scanner (AL- progressivo i modi di esposizione: 12PKM). AUTO, MANUALE o FOTO. Il modo Tasto e indicatore ONLINE (p.45) selezionato è...
  • Page 349: Caricamento Della Carta

    CARICAMENTO DELLA CARTA Per caricare la carta nel vassoio attenersi alle seguenti indicazioni. CARTA Per ottenere sempre risultati ottimali, usare carta raccomandata da SHARP. Tipo di alimentatore Tipo di supporto Formato Peso carta Vassoio di Carta standard 56g/m alimentazione 80g/m...
  • Page 350: Caricamento Del Vassoio Di Alimentazione Della Carta

    CARICAMENTO DEL VASSOIO DI ALIMENTAZIONE DELLA CARTA Sollevare la maniglia del vassoio di alimentazione e tirarlo fino a quando non si blocca. Regolare i guidacarta del vassoio di alimentazione secondo la larghezza e la lunghezza della carta per copie. Premere la levetta del guidacarta e far scorrere la guida fino ad ottenre una corrispondenza con la larghezza della carta.
  • Page 351 Spingere con cautela il vassoio della carta nell'unità. • Dopo il caricamento della carta, per annullare l'indicatore lampeggiante senza dover riavviare il processo di copiatura, premere il tasto tasto Cancella ( ). L'indicatore sparirà dal Nota display mentre si accenderà l'indicatore ( •...
  • Page 352: Alimentazione Di Bypass (Carta Speciale)

    ALIMENTAZIONE DI BYPASS (carta speciale) Il vassoio singolo di bypass può essere usato per caricare carta standard, trasparenti, etichette, buste e altre carte per applicazioni speciali. Questo vassoio può supportare carta di formato da A6 a A4 e con grammatura da 52g/m a 128g/m (Per la carta con grammatura da 104g/m a 128g/m...
  • Page 353: Esecuzione Di Copie

    ESECUZIONE DI COPIE Questo capitolo descrive le funzioni di copia a partire da quelle di base L'unità è dotata di un buffer di memoria di una pagina. Questa memoria consente all'unità di effettuare la scansione dell'originale una sola volta e di realizzare fino a 99 copie. Questa caratteristica migliora il flusso di lavoro, riduce il rumore proveniente dalla copiatrice e offre una maggiore affidabilità...
  • Page 354: Collegamento Del Cavo

    Non inserire la carta nel vassoio di bypass singolo mentre è in corso una copia alimentata dal vassoio della carta. Si possono verificare inceppamenti di carta. Attenzione COLLEGAMENTO DEL CAVO D'ALIMENTAZIONE Se l'unità viene utilizzata in un paese diverso da quello dell'acquisto, assicurarsi che l'alimentazione di rete sia compatibile con il modello.
  • Page 355 Informazioni sulla testina di scansione La spia della testina di scansione rimane continuamente accesa quando l’unità si trova nella condizione di pronto (quando l’indicatore Start ( ) è illuminato). L'unità regola periodicamente la spia della testina di scansione per mantenere costante la qualità...
  • Page 356: Collocazione Dell'originale

    COLLOCAZIONE DELL'ORIGINALE • La lastra di esposizione può leggere originali fino al formato A4. • Una perdita di immagine di 4mm può verificarsi sui bordi di entrata e di uscita delle copie. Una perdita globale di immagine di 4.5mm può Nota verificarsi anche lungo gli altri bordi delle copie.
  • Page 357: Impostare Il Numero Di Copie

    IMPOSTARE IL NUMERO DI COPIE Quando si esegue la copiatura dalla lastra di esposizione, impostare il numero di copie utilizzando i due tasti Numero di copie ( • Premere il tasto Cancella ( ) per annullare un inserimento errato. • E' possibile eseguire una singola copia con l'impostazione predefinita ad esempio quando è...
  • Page 358 Regolazione automatica dell'esposizione Questo livello di esposizione automatica rimane valido finché non viene modificato nuovamente utilizzando questa procedura. Nota Il livello di esposizione automatica può essere regolato in base alle esigenze. Questo livello è preimpostato per la copia dalla lastra d'esposizione. Premere il tasto di selezione Modo esposizione per selezionare il modo Fotografia (...
  • Page 359: Riduzione/Ingrandimento/Zoom

    RIDUZIONE/INGRANDIMENTO/ZOOM E' possibile scegliere tra tre rapporti di riduzione e due rapporti di ingrandimento. La funzione Zoom permette di scegliere il rapporto di copia da 25% a 400% in incrementi dell'1%. Collocare l'originale e controllare il formato della carta Utilizzare il tasto di selezione rapporto di copia e/o i tasti ZOOM ) per selezionare il rapporto di copia desiderato.
  • Page 360: Funzioni Speciali

    FUNZIONI SPECIALI In questa sezione vengono descritte le funzioni speciali dell'unità. Utilizzare le funzioni speciali in base alle necessità. DESCRIZIONE DELLE FUNZIONI SPECIALI Modo Risparmio toner (pagina 18) Riduce il consumo del 10% circa Modo Risparmio energia (pagina 19) L'unità dispone di due modi di funzionamento risparmio energia: Modo Preriscaldamento e Modo Auto spegnimento.
  • Page 361: Programmi Utente

    Tenere premuto il tasto di selezione Modo esposizione per circa 5 secondi. L'indicatore MANUALE ( ) si spegne mentre l'indicatore FOTO ( ) inizia a lampeggiare. L'indicatore di chiaro-scuro, contrassegnato da "5", si accende per segnalare l'attivazione del modo Toner standard. Per entrare in modo Risparmio toner, premere il tasto Chiaro ( L'indicatore di chiaro-scuro,...
  • Page 362: Visualizzazione Del Numero Totale Di Copie

    Numero Modo Parametri programma Tempo di auto OFF, 1 10sec., 2 30sec. azzeramento 60sec., 4 90sec., 5 120sec. Modo 30sec., 1 60sec., 2 90sec. Preriscaldamento Timer Auto 2min., *1 5min., 2 15min., spegnimento 30min., 4 60 min., 5 120min. Modo auto OFF, *1 spegnimento Risoluzione modo...
  • Page 363: Manutenzione

    Per ottenere i migliori risultati di copiatura, assicurarsi di utilizzare solo consumabili originali SHARP, appositamente studiati e testati per ottimizzare la vita utile e le prestazioni delle copiatrici SHARP. I consumabili originali Sharp sono identificati dall'etichetta originale presente sulla confezione del toner.
  • Page 364 Estrarre con cautela la Pulsante cartuccia del toner premendo la di sbloccaggio leva di sbloccaggio. • Evitare di agitare e di percuotere la cartuccia del toner dopo averla rimossa perché ciò potrebbe causare la fuoriuscita del toner. Chiudere immediatamente la vecchia cartuccia nel sacchetto Nota contenuto nella confezione di quella nuova.
  • Page 365: Vita Utile Della Cartuccia Del Toner

    Chiudere il pannello frontale e poi quello laterale, esercitando una leggera pressione sulle sporgenze arrotondate situate in corrispondenza del pulsante di apertura del pannello laterale. L'indicatore si spegne e, contemporaneamente si accende l'indicatore di Start Quando si chiudono i pannelli di copertura, per primo bloccare saldamente Attenzione il pannello frontale e in un...
  • Page 366: Pulizia Dell'unità

    PULIZIA DELL'UNITÀ La cura dell'unità è essenziale per ottenere copie pulite e nitide. E' necessario dedicare qualche minuto del proprio tempo per pulire con regolarità la macchina. • Prima di pulire l'unità, assicurarsi di posizionare l'interruttore di alimentazione su OFF e di togliere il cordone di alimentazione dalla presa.
  • Page 367 Corona di trasferimento Se le copie cominciano a diventare macchiate o imbrattate, è possibile che la corona di trasferimeno sia sporca. Pulire la corona effettuando le operazioni di seguito indicate. Spegnere l'interruttore principale. (p.13) Aprire il pannello laterale premendo il relativo pulsante di apertura.
  • Page 368: Risoluzione Dei Problemi

    RISOLUZIONE DEI PROBLEMI In questa sezione viene descritto come eliminare un inceppamento della carta e come individuare e risolvere alcuni problemi che si possono verificare usando l'unità. RISOLUZIONE DEI PROBLEMI In caso di problemi, verificare le condizioni elencate nella seguente tabella prima di contattare il centro d'assistenza autorizzato.
  • Page 369: Indicatori Di Stato

    Quando i seguenti indicatori sono accesi o lampeggiano sul pannello operativo o i seguenti codici numerici appaiono sul display, è necessario risolvere immediatamente il problema facendo riferimento alla tabella sotto riportata e alla pagina corrispondente. Utilizzare solo componenti e materiali di consumo originali SHARP. Nota Indicazione Causa e rimedio...
  • Page 370: Eliminazione Di Inceppamenti

    ELIMINAZIONE DI INCEPPAMENTI Quando l'indicatore di inceppamento ( ) lampeggia o lampeggia nel display, l'unità si arresterà a causa di un inceppamento. Aprire il pannello laterale, nella sequenza indicata. Per aprire il pannello laterale, vedere "SOSTITUZIONE DELLA CARTUCCIA DEL TONER" (p.21). Individuare il punto in cui si è...
  • Page 371 A: Inceppamento nella zona dell'alimentazione della carta Rimuovere con cautela la carta inceppata dalla zona dell'alimentazione, come indicato in figura. Quando l'indicatore di inceppamento lampeggia e la carta inceppata non è visibile dalla zona d'alimentazione, estrarre il vassoio della carta e rimuovere la carta inceppata. Se ciò non fosse possibile, vedere il punto "B: Inceppamento nella zona del fusore".
  • Page 372 Togliere con cautela la carta inceppata da sotto il fusore come indicato nella figura. Se non si riesce a toglierla, passare alla procedura "C: Inceppamento nella zona di trasporto". Il fusore è sovrariscaldato. Non toccare il fusore quando si estrae la carta inceppata. Avvertenza Ciò...
  • Page 373: Richiesta Sostituzione Sviluppatore

    SVILUPPATORE DOVREBBE ESSERE EFFETTUATA SOLO DA UN TECNICO D'ASSISTENZA AUTORIZZATO SHARP. Contattare il centro d'assistenza il più presto possibile. RICHIESTA DI MANUTENZIONE Quando si accende l'indicatore di manutenzione ( ), è necessaria l'assistenza di un tecnico autorizzato SHARP. Contattare il centro d'assistenza il più presto possibile.
  • Page 374: Accessori Opzionali (Al-12Pkm)

    In questo capitolo vengono utilizzati i seguenti termini. CD-ROM Indica il CD-ROM fornito in dotazione con il software per SHARP Personal MFP serie. SOFTWARE PER SHARP PERSONAL MFP SERIE Il CD-ROM fornito include il software per questa unità.
  • Page 375: Requisiti Hardware Esoftware

    REQUISITI HARDWARE E SOFTWARE Per poter installare il software verificare la disponibilità dei seguenti requisiti hardware e software. Tipo di computer Computer IBM PC/AT o compatibile, dotato di una interfaccia USB1.1* o una interfaccia parallela bidirezionale (IEEE 1284) Sistema operativo* Windows 95, Windows 98, Windows Me, Windows NT Workstation 4.0 (ServicePack 5 o superiore)* , Windows 2000 Professional, Windows XP...
  • Page 376: Sequenza Di Installazione

    Sequenza di installazione Seguire le istruzioni riportate in tabella e iniziare l’installazione. Funzionamento Interfaccia Pagine di riferimento sull'installazione dell'unità Sistema USB/ Installazione in Windows XP (inerfaccia USB/parallela) Windows XP parallela (p.35) Installazione in Windows 98/Me/2000 (interfaccia USB) (p.39) Windows 98 Installazione in Windows 95/98/Me/NT4.0/2000 Parallela (interfaccia parallela) (p.42)
  • Page 377: Installazione Del Software

    INSTALLAZIONE DEL SOFTWARE In questa sezione viene utilizzata i seguent termini. Indica l'unità con funzione di stampante e scanner. • Per la seguente descrizione si presume che il mouse sia configurato per essere usato con la mano destra. • Per eseguire scansioni o stampe, lo stato dell'MFP deve essere "in linea". •...
  • Page 378 • Se si sta utilizzando la connessione con interfaccia parallela, non selezionare la casella di controllo di Gestione pulsanti poiché, in questo caso, la funzione non è supportata. • Se appare la videata seguente, fare clic sul pulsante "OK". Controllare l'elenco "OPERAZIONI PRELIMINARI ALL'INSTALLAZIONE"...
  • Page 379 Iniziare l'installazione di Gestione pulsanti (l'installazione viene avviata solo se è stata selezionata al passo 4). Dopo aver confermato il messaggio nella finestra "Benvenuti", fare clic sul pulsante "Avanti". Leggere il messaggio nella finestra "Leggere attentamente le seguenti informazioni" , quindi fare clic sul pulsante "Avanti". Quando appare un messaggio che chiede all'utente di specificare la cartella di destinazione del software da installare, fare clic sul pulsante "Avanti".
  • Page 380 12. Iniziare l'installazione del driver dello scanner. Nella casella di dialogo "Procedura guidata installazione nuovo hardware" appare SHARP AR-xxxx (dove xxxx è il nome del modello della MFP). Selezionare "Installa il software automaticamente (scelta consigliata)" e fare clic sul pulsante "Successiva".
  • Page 381 Installazione in Windows 98/Me/2000 (interfaccia USB) Prima di iniziare l'installazione, assicurarsi che il cavo USB non sia collegato all'MFP. Inserire il CD-ROM fornito con l'unità nell'unità CD-ROM. Fare doppio clic su "Risorse del computer" ( ), quindi fare doppio clic sull'icona CD-ROM ( Se durante l'installazione del software appare il messaggio "Rilevato nuovo hardware"...
  • Page 382 Copiatura dei file per l'installazione del driver MFP. Dopo aver confermato il messaggio nella finestra "Benvenuti", fare clic sul pulsante "Avanti". Appare un'altra videata. Assicurarsi che il cavo interfaccia parallela non sia collegato all'MFP e fare clic su "Successiva". Fare clic sul pulsante "Avanti" nella finestra di dialogo dove vengono indicati i file da copiare per l'installazione del driver MFP.
  • Page 383 Inziare l'installazione di Sharpdesk (questa operazione è valida se è stata selezionata al passo 4). Dopo la conferma del messaggio nella finestra "Benvenuti nell'installazione di Sharpdesk", fare clic sul pulsante "Avanti". Leggere il messaggio nella finestra "Informazione" e quindi fare clic sul pulsante "Avanti".
  • Page 384 Installazione di Windows 95/98/Me/NT4.0/2000 (interfaccia parallela) Prima di iniziare l'installazione, assicurarsi che il cavo USB o il cavo parallelo non siano collegati all'MFP. Inserire il CD-ROM fornito con l'unità nell'unità CD-ROM. Fare doppio clic su "Risorse del computer" ( ), quindi fare doppio clic sull'icona CD-ROM ( Se durante l'installazione del software appare il messaggio "Rilevato nuovo hardware"...
  • Page 385 Copia dei file per l'installazione del driver dell'MFP e la configurazione dell'interfaccia parallela (Questa operazione è valida se è stata selezionata al passo 4). Dopo aver confermato il messaggio nella finestra "Benvenuti", fare clic sul pulsante "Avanti". Appare una finestra di dialogo in cui viene chiesto all'utente di verificare che il cavo USB o il cavo di interfaccia parallelo non sia collegato all'MFP.
  • Page 386 Inziare l'installazione di Sharpdesk (questa operazione è valida se è stata selezionata al passo 4). Dopo la conferma del messaggio nella finestra "Benvenuti nell'installazione di Sharpdesk", fare clic sul pulsante "Avanti". Leggere il messaggio nella finestra "Informazione" e quindi fare clic sul pulsante "Avanti".
  • Page 387: Indicatori Del Pannello Operativo

    INDICATORI DEL PANNELLO OPERATIVO L’indicatore ONLINE e l’indicatore Avvio ( ) segnalano lo stato della stampante o dello scanner. Indicatore SCANNER Indicatore ONLINE Indicatore Start Indicatore del risparmio Indicatore Avvio Acceso: Indica che l'unità è pronta per eseguire la stampa o la scansione Lampeggiante:L'indicatore lampeggia nei seguenti casi: •Quando un processo di stampa viene interrotto.
  • Page 388: Uso Del Modo Stampante

    "Stampanti e fax". In Windows 95/98/Me/NT4.0/2000 selezionare "Impostazioni" e quindi "Stampanti". Fare clic sull’icona del driver di stampa "SHARP AR-xxxx" (xxxx è il nome del modello dell’unità) e, dal menu "File", selezionare "Proprietà". In Windows NT 4.0, selezionare "Personalizzazioni documento"...
  • Page 389 Specificare le impostazioni di stampa incluso il numero di copie, il tipo di supporto, la qualità di stampa, quindi fare clic sul pulsante "Stampa" per iniziare la stampa. In Windows 95/98/Me/NT 4.0, fare clic sul pulsante "OK" per iniziare la stampa.
  • Page 390: Uso Del Modo Scanner

    "Stampanti e altre periferiche", quindi selezionare "Scanner e fotocamere digitali" nel menu di avvio. Fare clic sull'icona "SHARP AR-xxxx" (dove xxxx è il nome del modello dell'unità), selezionare "Proprietà" nel menu visualizzato. Nella finestra "Proprietà" fare clic sulla scheda "Eventi".
  • Page 391 Ripetere il punto 4 per impostare da "Menu SC2" fino a "Menu SC6". Fare clic sul pulsante "Eventi Scanner" e selezionare "Menu SC2" dal menu a tendina. Selezionare "Gestione pulsanti (SHARP Personal MFP serie)" in "Avvia il programma" e fare clic su "Applica". Fare lo stesso per ogni Menu fino a "Menu SC6".
  • Page 392 Finestra di dialogo impostazione parametri di scansione Dopo aver completato le impostazioni di Gestione pulsanti in Windows, configurare le impostazioni di scansione in Gestione pulsanti. Per configurare le impostazioni di scansione in Gestione pulsanti, fare clic sull'icona ( nella barra delle applicazioni e selezionare "Impostazione" dal menu visualizzato.
  • Page 393 Windows Me, Windows 2000 e Windows XP. Le piattaforme Windows prevedono un meccanismo, per il software, di gestione degli eventi esterni da uno scanner, come i prodotti della serie SHARP AR-xxxx (dove xxxx è il nome del modello dell'unità). Questo meccanismo è controllato dalla gestione periferiche in base alla periferica.
  • Page 394 Uso del tasto SCANNER per iniziare la scansione • Durante la copiatura non è possibile eseguire scansioni. • Se si effettua una scansione durante un processo di stampa, la scansione verrà memorizzata e sarà eseguita al termine del processo di stampa. Premere il tasto SCANNER L'unità...
  • Page 395 • Il metodo per avviare il driver dello scanner varia in funzione del tipo di applicazione. Leggere il manuale o il file di help dell'applicazione in Nota uso. Uso di SHARP TWAIN Posizionare l’originale che si desidera scansire sulla lastra di esposizione. Per la procedura di posizionamento dell'originale, vedere "COLLOCAZIONE DELL'ORIGINALE"...
  • Page 396 Selezionare "SHARP Personal MFP serie" e fare clic sul pulsante Fare clic qui "Seleziona". WIA-SHARP AR-XXXX 1.0 (32-32) Se si utilizza più di un dispositivo di scansione, selezionare lo scanner prescelto nell'applicazione. La procedura per accedere all'opzione "Seleziona scanner" dipende dall'applicazione. Per...
  • Page 397 "Stampanti e altre periferiche", quindi fare clic su SHARP AR "Scanners and Cameras" nel menu di avvio. Fare clic sull'icona "SHARP AR- xxxx" (dove xxxx è il nome del modello dell'unità) e fare clic su "Copia immagini" in "Operazioni immagini".
  • Page 398: Come Utilizzare Il Manuale In Linea

    In Windows 95/98/Me/NT 4.0/2000, fare doppio clic su "Risorse del computer" ( ), fare doppio clic sull'icona CD-ROM ( Fare doppio clic sulla cartella "Manual", fare doppio clic sulla AR-122E/AR-122EN/AR-152E/AR-152EN cartella "Italian" e quindi fare doppio clic sull'icona "AR_122E_122En_152E_152EN.pdf". Appare la seguente finestra.
  • Page 399 ) in alto a destra della finestra. • E' possibile stampare il Manuale in linea utilizzando Acrobat Reader. SHARP consiglia di stampare le sezioni a cui si fa riferimento più di frequente. Nota • Leggere le informazioni contenute nel menu "Help" di Acrobat Reader per maggiori dettagli sul suo funzionamento.
  • Page 400: Uso Con Altri Driver Installati

    Se una stampante di altro tipo non funziona in modo soddisfacente quando in "FILE" (come descritto di seguito) è impostato il driver di stampa della SHARP Personal MFP serie, disinstallare il driver di Nota stampa della SHARP Personal MFP serie. Per la disinstallazione leggere il Manuale in linea.
  • Page 401: Collegamento Del Cavo Di Interfaccia

    COLLEGAMENTO DEL CAVO DI INTERFACCIA L'unità viene fornita di connettori sia per interfaccia parallela che USB. I cavi di interfaccia per collegare l'unità al computer non sono forniti con l'unità. Acquistare il cavo adatto al vostro computer. Cavo di interfaccia Cavo di interfaccia parallela Cavo di interfaccia parallela IEEE 1284 bidirezionale schermato (2 m Max.) Cavo di interfaccia...
  • Page 402 Collegamento del cavo di interfaccia parallela Realizzazione cavo di interfaccia parallela, schermato, conforme a IEEE1284. Assicurarsi che l'interruttore di alimentazione dell'unità e del computer siano in posizione OFF. Inserire il cavo nel connettore dell'interfaccia parallela posto sul pannello posteriore dell'unità e bloccare con i fermagli Inserire l'altro capo del cavo nel connettore di interfaccia del computer.
  • Page 403: Appendice

    APPENDICE SPECIFICHE Modello AR-122E AR-122EN AR-152E AR-152EN Tipo Copiatrice digitale al laser, versione da tavolo Sistema di copia Trasferimento a secco, elettrostatico Originali Fogli, documenti rilegati Vassoio della carta 250 fogli (Vassoio della carta) 1 foglio (Bypass singolo) Vassoio uscita carta...
  • Page 404: Accessori Opzionali

    IEEE1284 (Solo per stampante) Inserire la carta solo dal lato lungo. In base alla sua politica di continuo sviluppo, SHARP si riserva il diritto di apportare, senza preavviso, modifiche costruttive e di design. Le caratteristiche sopra indicate devono essere intese come valori nominali Nota di produzione.
  • Page 405: Info Sui Materiali Di Consumo Esui Componenti Opzionali

    Per ottenere i migliori risultati di copiatura, assicurarsi di utilizzare solo parti di consumo originali SHARP, specificamente progettate e testate per ottimizzare la vita utile e le prestazioni delle copiatrici SHARP. I consumabili originali Sharp si distinguono dall'etichetta originale presente sulla confezione del toner.
  • Page 406: Indice

    INDICE Eliminazione di inceppamenti Accessori opzionali......32 - Zona del fusore ......29 Acrobat Reader ......... 57 - Zona dell'alimentazione della carta . 29 Alimentazione di bypass....10 - Zona di trasporto ......30 Alimentazione off ....... 13 Eseguire copie........11 Alimentazione on .......
  • Page 407 Interruttore di alimentazione ..5, 12 Sequenza copiatura ......11 Introduzione......... 4 Sequenza operazioni di installazione 36 Sharpdesk ......... 31 Software per SHARP Personal MFP serie32 Lastra di esposizione......5 Sostituzione cartuccia toner ..6, 23, 27 Leva di sbloccaggio dell’unità fusore5, 29 Specifiche.......... 32 Supporto vassoio di uscita della carta.
  • Page 408 - Procedure guidata Scanner e - Cavo interfaccia parallela ..... 60 fotocamere digitali ......55 - Cavo interfaccia USB ....59 - SHARP TWAIN ......53 Copiatura ........... 11 Sostituzione della cartuccia del toner 21 Impostazione del modo risparmio toner.. 18 Spegnimento ........
  • Page 409: Licenza Software

    Vi vengono ceduti in licenza da SHARP. Voi siete i proprietari del dischetto su cui il Software è stato registrato ma SHARP e/o i licenziatari SHARP conservano il diritto di possesso del Software e della documentazione ad esso attinente. Questa Licenza Vi consente di usare il Software su uno o più...
  • Page 410 6. Garanzia limitata riguardo i supporti. SHARP garantisce che i dischetti su cui il Software è stato registrato sono esenti da difetti di materiale e di fabbricazione se impiegati in normali condizioni e per un periodo di novanta (90) giorni dalla data d'acquisto, come attestato da una copia della ricevuta d'acquisto.
  • Page 411 The CE mark logo label is affixed on an equipment in case that the directives described in the above sentence are applicable to the product. (This sentence is not applicable in any country where the above directives are not required.) Das CE-Label wird nur dann auf einem Gerät, einer Einrichtung oder Anlage aufgebracht, wenn die in dem vorstehenden Satz beschriebenen Richtlinien auf das Produkt anwendbar sind.
  • Page 412 SHARP CORPORATION Printed in France TINSZ0770TSZZ...

Ce manuel est également adapté pour:

Ar-122enAr-152eAr-152en

Table des Matières