Table des Matières
Publicité
Liens rapides
Publicité
Table des Matières

Manuels Connexes pour Nikon AT-10


Sommaire des Matières pour Nikon AT-10
- Page 3 Transparency Unit Durchlichteinheit Adaptateur pour transparents User’s Manual Bedienungsanleitung Mode d’emploi Nikon Transparency Unit User’s Manual...
- Page 4 • Reproduction of copyright works such as books, music, pictures, woodcut printings, maps, drawings, movies and photographs is prohibited except for personal, family or similar limited usage. Nikon Transparency Unit User’s Manual...
-
Page 5: Wichtige Hinweise
Wichtige Hinweise Attention • Kein Teil des Handbuchs darf ohne • Aucune reproduction totale ou partielle de schriftliche Genehmigung der NIKON ce manuel n’est autorisée sans accord CORPORATION reproduziert werden. préalable. • Änderungen im Inhalt des Handbuchs • Les informations contenues dans ce manuel bleiben vorbehalten. - Page 6 2 Accessories supplied with the scanner. Using other signal cables may exceed the limits of the class B Part 15 of FCC Rules. Dieses Gerät entspricht den Bestimmungen der EG-Direktive 87/308/EEC zur Störungsunterdrückung. Lärmemission kleiner 70 dBA Nikon Transparency Unit User’s Manual...
-
Page 7: Réglementation
EG-Direktive 87/308/EEC zur répondant pas aux exigences de la Classe B, Störungsunterdrückung. Lärmemission kleiner Section 15 du Réglement FCC. 70 dBA Dieses Gerät entspricht den Bestimmungen der EG-Direktive 87/308/EEC zur Störungsunterdrückung. Lärmemission kleiner 70 dBA Nikon Transparency Unit User’s Manual... - Page 8 This class B digital apparatus meets all requirements of the Canadian Interference Causing Equipment Regulations. ATTENTION Cet appareil numérique de la class B respecte toutes les exigences du Règlement sur le matériel brouilleur du Canada. Nikon Transparency Unit User’s Manual...
- Page 9 Cet appareil numérique de la class B respecte Vorschrift für Funkstörungserzeugung. toutes les exigences du Règlement sur le matériel brouilleur du Canada. ATTENTION Cet appareil numérique de la class B respecte toutes les exigences du Règlement sur le matériel brouilleur du Canada. Nikon Transparency Unit User’s Manual...
- Page 10 Unlock the Optical Assembly ....4 Lock the Optical Assembly ..... 4 3. Installing the Transparency Unit ............6 4. Using the Transparency Unit .. 10 5. Basic Maintenance ....12 6. Specifications ......14 viii Nikon Transparency Unit User’s Manual...
-
Page 11: Table Des Matières
4. Hinweise für den Gebrauch der 4. Utilisation de l’adaptateur pour Durchlichteinheit ......11 transparents......... 11 5. Grundlegende Hinweise für die 5. Maintenance de base ....13 Wartung ........13 6. Caractéristiques ...... 14 6. Technische Daten ....14 Nikon Transparency Unit User’s Manual... - Page 12 Nikon Transparency Unit User’s Manual...
- Page 13 Transparency Unit Durchlichteinheit Adaptateur pour transparents Nikon Transparency Unit User’s Manual...
-
Page 14: Accessories
1. Introduction Thank you for purchasing your Nikon trans- parency unit. This manual describes the steps from unpacking to setting up the transparency unit and connect- ing it to your scanner. Please read this manual thoroughly to ensure proper operation of the unit. -
Page 15: Einleitung
Scanner und der Durchlichteinheit entnehmen ScanTouch équipé de l’adaptateur pour Sie bitte dem Handbuch zur Software. transparents, veuillez consulter le mode d’emploi du logiciel Nikon. Wir hoffen, daß Ihnen dieses Handbuch eine wertvolle Arbeitshilfe sein wird. 2. Vor Inbetriebnahme 2. Déballage Während des Transportes ist die optische... - Page 16 Entriegelt Step 4 Déverrouillé Turn the scanner off again. The optical assembly should be in the Home Position. To lock the optical assembly, move the plastic slider until the mark points to the Locked symbol. Nikon Transparency Unit User’s Manual...
-
Page 17: Entriegeln Der Optischen Einheit
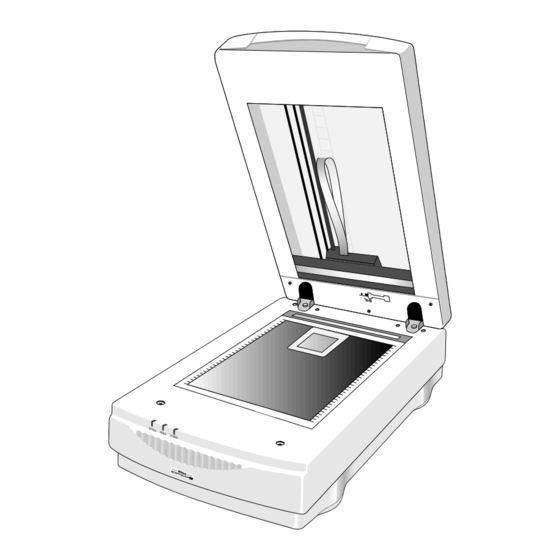
Pour verrouiller le bloc optique dans cette position, déplacez le curseur de verrouillage du Bewegen Sie den Plastikschieber auf das bloc optique en face du repère “Verrouillé”. Symbol “Verriegelt” (Locked), um die optische Einheit zu arretieren. Nikon Transparency Unit User’s Manual... - Page 18 3. Installing the AT-10 3. Installing the Transparency Unit Step 1 Turn your scanner off, and unplug the power cord. Step 2 Remove the document cover by lifting it up from the scanner to separate the guide posts from their receptacles.
-
Page 19: Installation Der Durchlichteinheit
3. Installing the AT-10 3. Installation der 3. Installation de Durchlichteinheit l’adaptateur pour transparents Schritt 1 Schalten Sie den Scanner aus und ziehen Sie Étape 1 den Netzstecker heraus. Éteignez votre scanner, et débranchez le cordon Schritt 2 de la prise secteur. - Page 20 3. Installing the AT-10 Step 6 Plug the 25-pin connector cable into the OPTION port on the rear of your scanner. Step 7 Firmly tighten the screws and/or clips on both sides of the connector. This ensures that the connector will not pull out of its port.
- Page 21 4. Using the AT-10 Schritt 6 Étape 6 Stecken Sie das 25-Pin Kabel in den OPTION Connectez le cordon équipé du connecteur 25 Port auf der Rückseite des Scanners. broches à la prise “Option” située à l’arrière du scanner. Schritt 7 Étape 7...
- Page 22 4. Using the AT-10 4. Using the Transparency Unit Step 1 Turn on the scanner. The Power, Ready and Option indicators should light. Step 2 Raise the transparency unit and place a transparency on the scanner's document setting glass. Make sure that the transparency is placed within the area bordered by the green rulers.
-
Page 23: Hinweise Für Den Gebrauch Der
(petits et grands Sie einen Vorlagenhalter verwenden. Hierdurch formats). Un cache permet de manipuler une vermeiden Sie Fingerabdrücke und Kratzer auf diapositive sans risquer d’y déposer des dem Dia. empreintes digitales, ou d’y faire des rayures. Nikon Transparency Unit User’s Manual... -
Page 24: Basic Maintenance
Do not leave transparencies on the glass platten of the scanner for excessive periods of time. The warmth of the scanner and transparency unit lamps may cause them to deteriorate. [a] Calibration Area [b] Scanning Area Nikon Transparency Unit User’s Manual... -
Page 25: Grundlegende Hinweise Für Die Wartung
Die Wärme des Scanners und der excessivement longues, la chaleur dégagée Lampe der Durchlichteinheit können der par la source de lumière pourrait les altérer. Vorlage schaden. [a] Zone de calibrage [a] Kalibrierungsbereich [b] Zone d’analyse [b] Scanbereich Nikon Transparency Unit User’s Manual... - Page 26 6. Specifications Scanning System: Moving Light Source Interface: 24M Cable Operating Environment: Operating Temperature: AT-10: 50°F to 104°F (10°C to 40°C) AT-20: 50°F to 95°F (10°C to 35°C) Storage Temperature: 14°F to 140°F (-10°C to 60°C) Relative Humidity: AT-10: 20% to 80%...
-
Page 27: Technische Daten
Interface: 24M Kabel Interface: cordon 24M Betriebsbedingungen: Environnement: Betriebstemperatur: Température d’utilisation: AT-10: 10° - 40°C AT-10: 10°C à 40°C AT-20: 10° - 35°C AT-20: 10°C à 35°C Lagertemperatur: Température de stockage: -10° - 60°C -10°C à 60°C Relative Luftfeuchtigkeit: Humidité... -
Page 28: Ec Declaration Of Conformity
EC DECLARATION OF CONFORMITY Name: Nikon UK Limited Address: Nikon House, 380 Richmond Road, Kingston, Surrey KT2 5PR, UK declare that the product Product Name: Transparency Unit AT-10, AT-20 Manufacturer’s Name: Nikon Corporation Manufacturer’s Address: Fuji Bldg., 2-3, Marunouchi 3-chome, Chiyoda-ku, Tokyo 100, Japan...