T-Fal Actibread Manuel D'utilisation
Table des Matières
Les langues disponibles
Les langues disponibles
Liens rapides
Table des Matières

Sommaire des Matières pour T-Fal Actibread
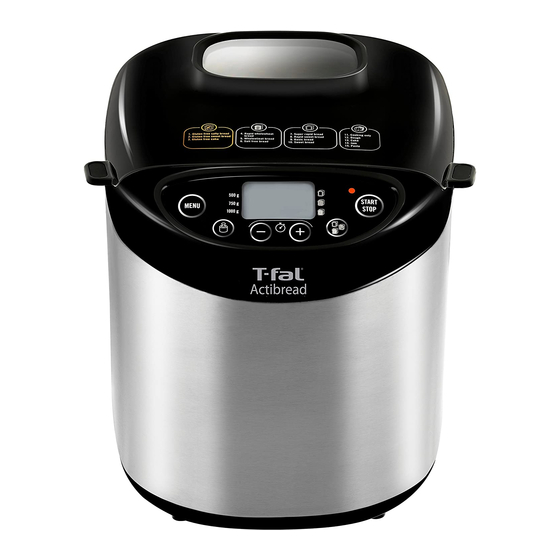
- Page 1 Actibread www.t-falusa.com - www.t-fal.ca...
-
Page 4: Précautions Importantes
PRÉCAUTIONS IMPORTANTES Lorsque vous utilisez des appareils électriques, veillez à prendre quelques précautions élémentaires en matière de sécurité et en particulier les suivantes : 1. Lisez entièrement ce mode d’emploi. 2. Ne touchez pas aux surfaces chaudes. Utilisez les poignées ou les boutons. 3. -
Page 5: Pour Usage Domestique Uniquement
2. Il est possible d’utiliser une rallonge électrique, avec vigilance. 3. Si vous utilisez une rallonge : a) veillez à ce que le calibre indiqué sur le cordon soit au moins aussi élevé que les caractéristiques élec- triques indiquées sur l’appareil, et b) le cordon et sa rallonge doivent être placés de façon à... -
Page 6: Conseils Pratiques
DESCRIPTION 1 - couvercle avec hublot 3 - cuve à pain 2 - panneau de commande 4 - mélangeur a - écran de visualisation 5 - gobelet gradué b - bouton départ/arrêt 6 - cuillère à thé/cuillère à table c - options de poids de la pâte 7 - crochet pour retirer le mélangeur d - touches de réglage du départ différé... -
Page 7: Utilisation
Utilisation • La préparation du pain est très sensible aux conditions de température et d’humidité. En cas de forte chaleur, il est conseillé d’utiliser des liquides plus frais qu’à l’accoutumée. De même, en cas de froid, il est possible qu’il soit nécessaire de faire tiédir l’eau ou le lait (sans jamais dépasser 95°F). • Il est aussi parfois utile de vérifier l’état de la pâte au cours du second pétrissage : elle doit former une boule homogène qui se décolle bien des parois de la cuve : - s’il reste de la farine non incorporée à la pâte, il faut ajouter un peu plus d’eau;... -
Page 8: Avant La Première Utilisation
AVANT LA PREMIÈRE UTILISATION • Enlevez tous les emballages, autocollants ou accessoires divers à l’intérieur comme à l’extérieur de l’appareil - A. • Nettoyez toutes les pièces et l’appareil avec un linge humide. MISE EN MARCHE • Déroulez entièrement le cordon et branchez-le sur une prise électrique reliée à la terre. • Une légère odeur peut se dégager lors de la première utilisation. • Retirez la cuve à pain en soulevant la poignée et en la faisant tourner dans le sens inverse des aiguilles d’une montre. Insérez ensuite le mélangeur - B - C. • Ajoutez les ingrédients dans la cuve dans l’ordre préconisé. Assurez-vous que tous les ingrédients sont pesés avec exactitude - D - E. • Introduisez la cuve à pain. En tenant la cuve par la poignée, insérez-la légèrement de côté sur l’arbre d’entraînement (vous devrez l’incliner légèrement sur un côté pour ce faire) et tournez-la dans le sens des aiguilles d’une montre pour la bloquer - F- G. -
Page 9: Utilisation De Votre Machine À Pain
UTILISATION DE VOTRE MACHINE À PAIN Pour chaque programme, l’écran indique un réglage par défaut. Vous devrez donc sélectionner manuellement les réglages souhaités. Sélection d’un programme Le choix d’un programme déclenche une suite d’étapes qui se déroulent automatiquement les unes après les autres. -
Page 10: Sélection Du Poids Du Pain
6. Pain sans sel. Le pain est un des aliments qui fournit le plus grand apport quotidien en sel. La diminution de la consommation de sel permet de réduire les risques cardiovasculaires. 7. Pain super rapide. Le programme 7 est spécifique à la recette du Pain super rapide. Les pains réalisés à partir d’un programme rapide ont une texture plus dense que les pains des autres programmes. -
Page 11: Les Cycles
Départ / Arrêt Appuyez sur la touche pour mettre l’appareil en marche. Le décompte du temps commence. Pour arrêter le programme ou annuler la programmation différée, appuyez sur la touche durant 3 secondes. LES CYCLES Un tableau (voir en fin de notice) vous indique la décomposition des différents cycles suivant le programme choisi. - Page 12 PROGRAMME DIFFÉRÉ Vous pouvez programmer l’appareil jusqu’à 15 h à l’avance afin d’avoir votre préparation prête à l’heure que vous aurez choisie. Cette fonction ne peut pas être utilisée avec les programmes 1, 2, 3, 7, 11, 12, 13, 14, 15. Cette étape suit la sélection du programme, du degré...
-
Page 13: Les Ingrédients
LES INGRÉDIENTS Farine sans gluten. Il existe un grand nombre de farines «non panifiables» (ne contenant pas de gluten). Les plus connues sont les farines de sarrasin, de riz (blanc et brun), de quinoa, de maïs, de châtaigne et de sorgho. Afin d’essayer de recréer l’élasticité du gluten, il est indispensable de mélanger plusieurs types de farines non panifiables entre elles et d’ajouter des agents épaississants. Agents épaississants. -
Page 14: Nettoyage Et Entretien
Sucre. Privilégiez le sucre blanc, la cassonade ou le miel. N’utilisez pas de sucre en morceaux. Le sucre nourrit la levure, donne un pain plus sucré et améliore le grillage de la croûte. Le sucre ne peut pas être remplacé par des édulcorants artificiels car la levure ne pourra pas réagir. -
Page 15: Les Recettes
LES RECETTES Pour chacune des recettes, ajoutez les ingrédients dans l’ordre précis indiqué. Suivant la recette choisie et le programme correspondant, vous pouvez vous reporter au tableau récapitulatif des temps de préparation (voir en fin de notice) et suivre le déroulement des différents cycles. c.t. - Page 16 PROG. 9 - PAIN FRANÇAIS PROG. 12 - PÂTES LEVÉES Pain français Pâte à pizza 1 lb 1,5 lb croustillant à l’ail 1 lb 1,5 lb Eau ²⁄ ³ tasse 1 tasse 1 ¹⁄ ³ tasse Eau ²⁄ ³ tasse 1 tasse 1 ¹⁄ ³ tasse Huile d’olive 1 C.T.
-
Page 17: Guide De Dépannage Pour Améliorer Vos Recettes
GUIDE DE DÉPANNAGE POUR AMÉLIORER VOS RECETTES GUIDE DE DÉPANNAGE TECHNIQUE PROBLEMES CAUSES - SOLUTIONS Le mélangeur reste coincé • Laisser tremper avant de le retirer. dans la cuve. • E O1 apparaît et clignote sur l’écran, la machine émet un bip: la machine est Après appui sur , rien ne trop chaude. Attendre 1 heure entre 2 cyles. se passe. - Page 32 TABLE OF CYCLES - TABLEAU DES CYCLES PROG. WEIGHT BROWNING TOTAL PREPARING THE DOUGH COOKING KEEP WARM EXTRA (Kneading-Rest-Rising) TIME POIDS GRILLAGE TEMPS PRÉPARATION DE LA PÂTE CUISSON MAINTIEN AU (Pétrissage-Repos-Levée) TOTAL CHAUD (lbs) 2:01 1:06 0:55 1:00 1:45 2:15 1.15 1:00 1:00...
- Page 33 PROG. WEIGHT BROWNING TOTAL PREPARING THE DOUGH COOKING KEEP WARM EXTRA (Kneading-Rest-Rising) TIME POIDS GRILLAGE TEMPS PRÉPARATION DE LA PÂTE CUISSON MAINTIEN AU (Pétrissage-Repos-Levée) TOTAL CHAUD (lbs) 0:10 0:10 1:10 1:10 1:20 1:20 0:56 2:10 0:25 1:45 1:00 1:50 1:05 0:15 0:50 0:15...
- Page 36 INTERNATIONAL GUARANTEE: COUNTRY LIST ﺍﻟﺟﺯﺍﺋﺭ HRVATSKA (0)41 28 18 53 01 30 15 294 ALGERIA CROATIA ČESKÁ 0800-122-2732 731 010 111 ARGENTINA REPUBLIK CZECH REPUBLIC DANMARK ՀԱՅԱՍՏԱՆ (010) 55-76-07 44 663 155 DENMARK ARMENIA EESTI 02 97487944 668 1286 AUSTRALIA ESTONIA ﻣﺻﺭ...
- Page 38 I N T E R N A T I O N A L G U A R A N T E E Date of purchase: ....../ Date d’achat / Fecha de compra / Data da compra / Data d’acquisto / Kaufdatum / Aankoopdatum / Købsdato / Inköpsdatum / Kjøpsdato / Ostopäivä...
- Page 40 Ce produit est réparable par TEFAL/T-FAL*, pendant et après la période de garantie. TEFAL s’efforce de conserver le plus de pièces possibles pour la réparation de vos produits pendant une durée moyenne de 5 à 7 ans, après la dernière date de fabrication. Les accessoires, consommables et autres pièces remplaçables directement par l’utilisateur, peuvent être achetés, s’ils sont disponibles localement, tel que décrit sur le site internet www.t-fal.ca La Garantie Ce produit est garanti par TEFAL/T-FAL contre tout défaut de fabrication ou de matériau, pendant la période de garantie à...
- Page 41 4 - 17 18 - 31 Ref. NC00127175 - 10/2014 www.t-falusa.com - www.t-fal.ca...